MillerCoors Distributors Quick Start Guide · MillerCoors Distributors Quick Start Guide 2/20/2013...
20
MillerCoors Distributors Quick Start Guide 2/20/2013 MillerCoors Distributor QUICK START GUIDE v59.docx PROPERTY OF PARK CITY GROUP. MAY NOT BE REPRODUCED WITHOUT PERMISSION. 1 MillerCoors Distributors Quick Start Guide This document is a quick guide to working with your products, costs, and Vendor Managed Pricing (VMP) connection with Walmart. Use the table of contents below to choose the appropriate task: Manage your Item Catalog................................................................................................ 2 Add MillerCoors Items....................................................................................................... 3 Run a Cost Report ............................................................................................................ 7 Change your Base Costs (front-line costs) ....................................................................... 8 Request Distributor Store VMP Reports ......................................................................... 10 One Item - Multiple Stores ....................................................................................................... 10 One Store - Multiple Items ....................................................................................................... 11 Understanding the online Display ............................................................................................ 12 Add a Lock-In PTR (store cost override) ......................................................................... 15 Swap UPC Authorizations............................................................................................... 17 Manage Item Order Numbers ......................................................................................... 19 Need assistance or have a question? ............................................................................. 20
Transcript of MillerCoors Distributors Quick Start Guide · MillerCoors Distributors Quick Start Guide 2/20/2013...
MillerCoors Distributors Quick Start Guide
2/20/2013 MillerCoors Distributor QUICK START GUIDE v59.docx PROPERTY OF PARK CITY GROUP. MAY NOT BE REPRODUCED WITHOUT PERMISSION.
1
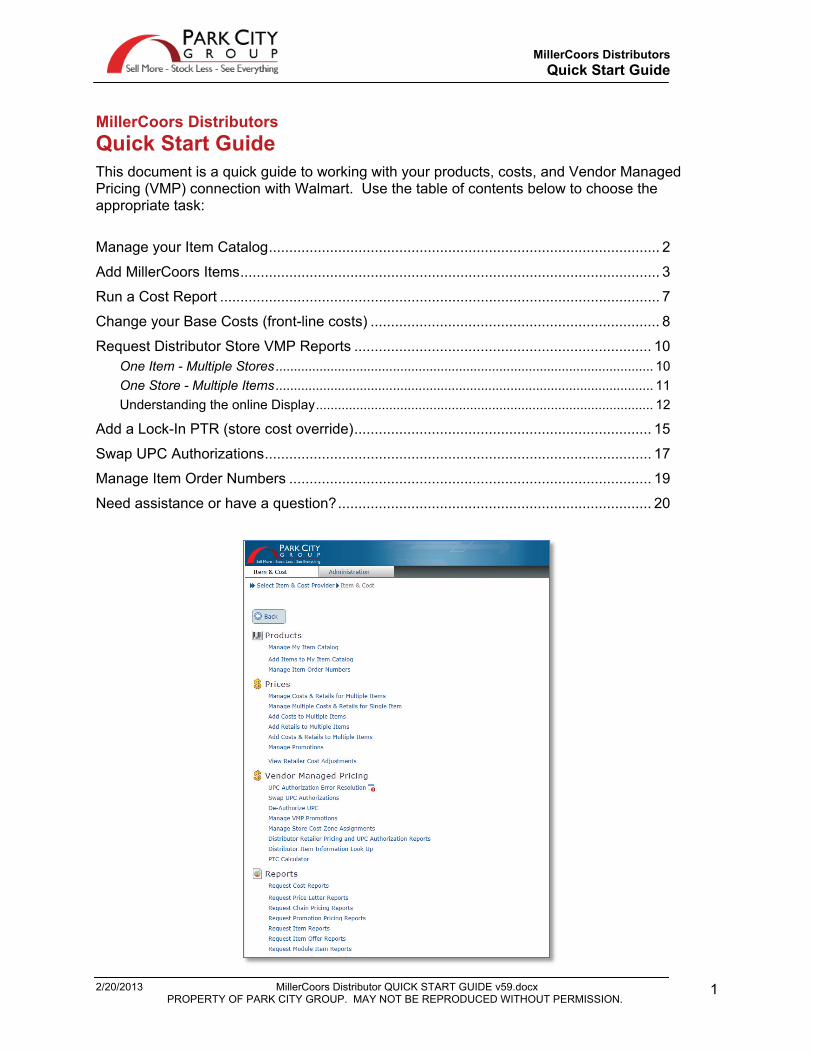
MillerCoors Distributors Quick Start Guide This document is a quick guide to working with your products, costs, and Vendor Managed Pricing (VMP) connection with Walmart. Use the table of contents below to choose the appropriate task:
Manage your Item Catalog ................................................................................................ 2
Add MillerCoors Items ....................................................................................................... 3
Run a Cost Report ............................................................................................................ 7
Change your Base Costs (front-line costs) ....................................................................... 8
Request Distributor Store VMP Reports ......................................................................... 10 One Item - Multiple Stores ....................................................................................................... 10 One Store - Multiple Items ....................................................................................................... 11 Understanding the online Display ............................................................................................ 12
Add a Lock-In PTR (store cost override) ......................................................................... 15
Swap UPC Authorizations ............................................................................................... 17
Manage Item Order Numbers ......................................................................................... 19
Need assistance or have a question? ............................................................................. 20
MillerCoors Distributors Quick Start Guide
2/20/2013 MillerCoors Distributor QUICK START GUIDE v59.docx PROPERTY OF PARK CITY GROUP. MAY NOT BE REPRODUCED WITHOUT PERMISSION.
2
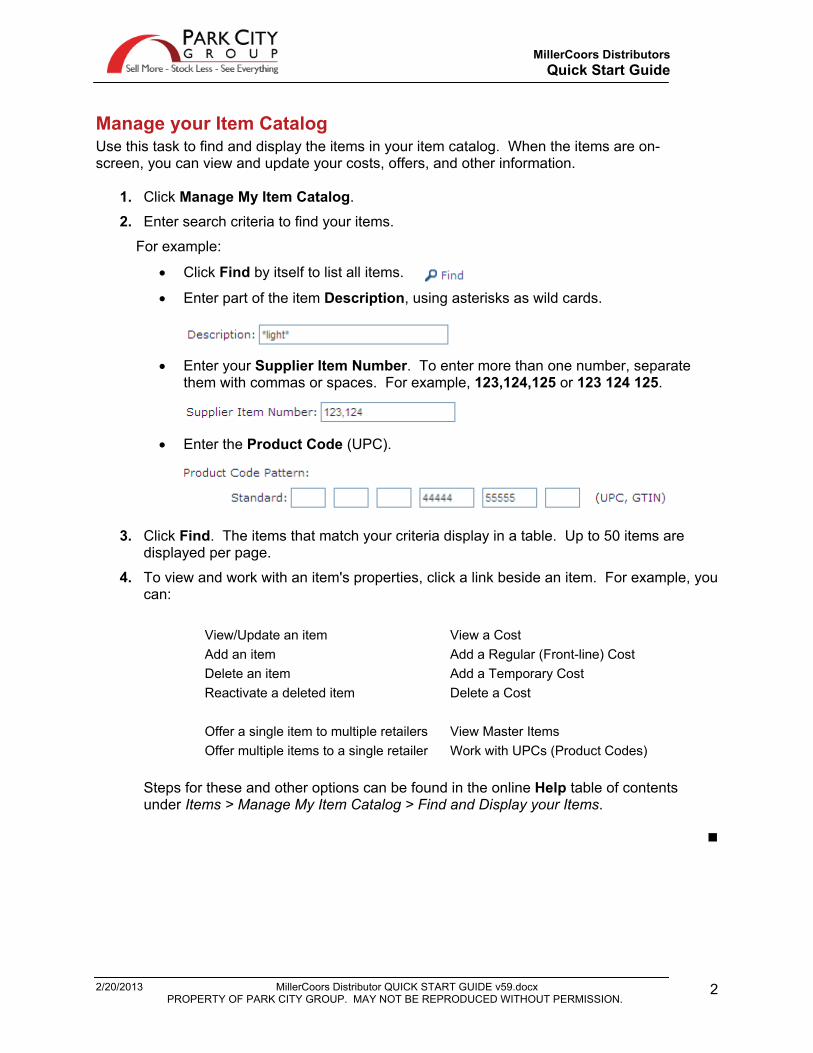
Manage your Item Catalog Use this task to find and display the items in your item catalog. When the items are on-screen, you can view and update your costs, offers, and other information.
1. Click Manage My Item Catalog.
2. Enter search criteria to find your items.
For example:
• Click Find by itself to list all items.
• Enter part of the item Description, using asterisks as wild cards.
• Enter your Supplier Item Number. To enter more than one number, separate
them with commas or spaces. For example, 123,124,125 or 123 124 125.
• Enter the Product Code (UPC).
3. Click Find. The items that match your criteria display in a table. Up to 50 items are displayed per page.
4. To view and work with an item's properties, click a link beside an item. For example, you can:
View/Update an item Add an item Delete an item Reactivate a deleted item Offer a single item to multiple retailers Offer multiple items to a single retailer
View a Cost Add a Regular (Front-line) Cost Add a Temporary Cost Delete a Cost View Master Items Work with UPCs (Product Codes)
Steps for these and other options can be found in the online Help table of contents under Items > Manage My Item Catalog > Find and Display your Items.
MillerCoors Distributors Quick Start Guide
2/20/2013 MillerCoors Distributor QUICK START GUIDE v59.docx PROPERTY OF PARK CITY GROUP. MAY NOT BE REPRODUCED WITHOUT PERMISSION.
3
Add MillerCoors Items Park City Group has developed a quick and easy way to add MillerCoors items using Master Items. These master items contain the correct UPC, pack/inner pack, and other information you need to successfully add an item. All you need to do is enter your item numbers and add your costs.
Note: The Units per Pack, Packs per Case, and other "quantity" attributes cannot be changed. Restrictions also apply to Product Codes (UPCs). This is necessary to ensure correct data is reported to MillerCoors and Walmart.
Follow these steps: A. Select the item to add B. Enter your item number C. Add costs to the item D. Offer the item and save E. Run a Cost Report to verify the information
A. Select the item to add
1. Click Add Items to my Item Catalog.*
2. Enter search criteria to locate the item.
It's not necessary to enter criteria in all fields. For most distributors, just searching on the Product Code or Brand and Packaging can provide enough information to find the item.
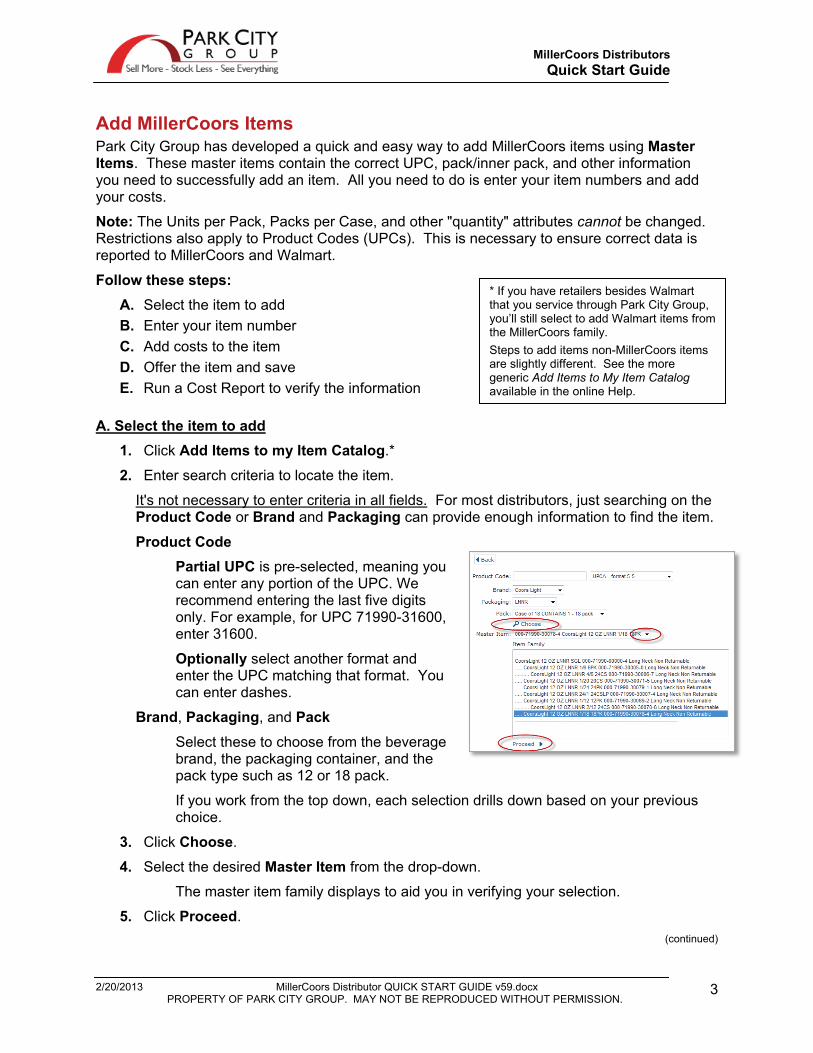
Product Code Partial UPC is pre-selected, meaning you can enter any portion of the UPC. We recommend entering the last five digits only. For example, for UPC 71990-31600, enter 31600.
Optionally select another format and enter the UPC matching that format. You can enter dashes.
Brand, Packaging, and Pack
Select these to choose from the beverage brand, the packaging container, and the pack type such as 12 or 18 pack.
If you work from the top down, each selection drills down based on your previous choice.
3. Click Choose.
4. Select the desired Master Item from the drop-down.
The master item family displays to aid you in verifying your selection.
5. Click Proceed. (continued)
* If you have retailers besides Walmart that you service through Park City Group, you’ll still select to add Walmart items from the MillerCoors family. Steps to add items non-MillerCoors items are slightly different. See the more generic Add Items to My Item Catalog available in the online Help.
MillerCoors Distributors Quick Start Guide
2/20/2013 MillerCoors Distributor QUICK START GUIDE v59.docx PROPERTY OF PARK CITY GROUP. MAY NOT BE REPRODUCED WITHOUT PERMISSION.
4
Add MillerCoors Items (continued)
B. Enter your Item Number
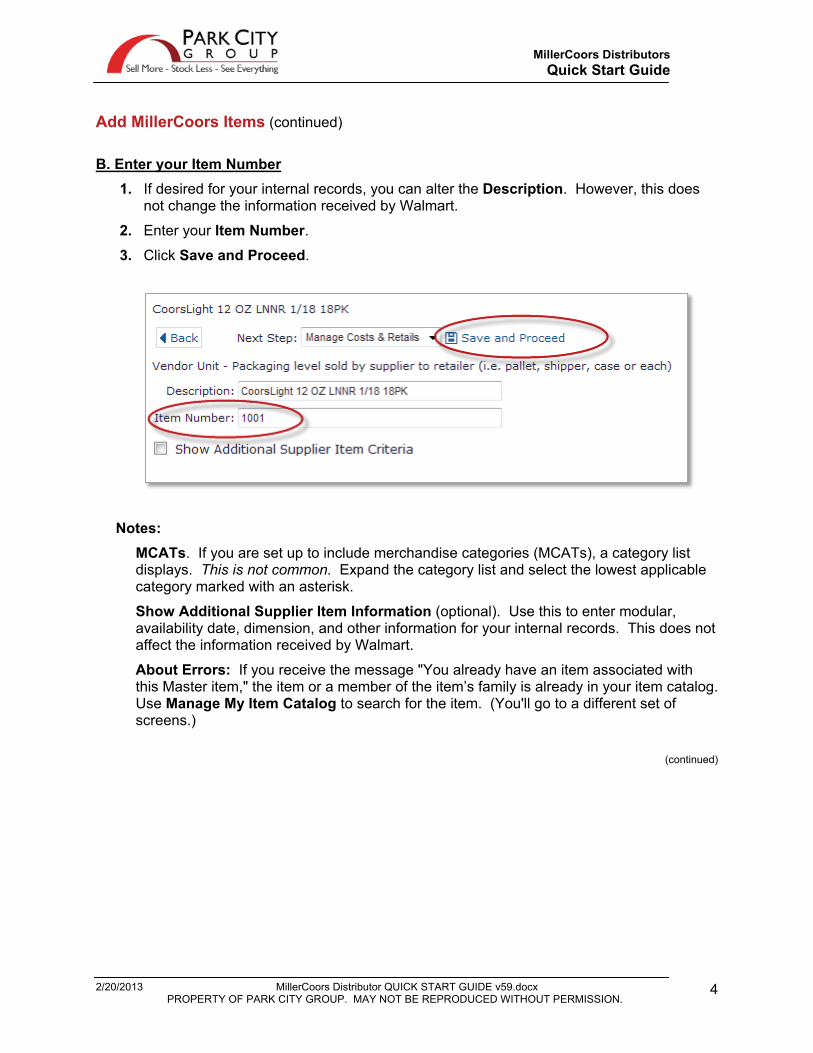
1. If desired for your internal records, you can alter the Description. However, this does not change the information received by Walmart.
2. Enter your Item Number. 3. Click Save and Proceed.
Notes: MCATs. If you are set up to include merchandise categories (MCATs), a category list displays. This is not common. Expand the category list and select the lowest applicable category marked with an asterisk.
Show Additional Supplier Item Information (optional). Use this to enter modular, availability date, dimension, and other information for your internal records. This does not affect the information received by Walmart.
About Errors: If you receive the message "You already have an item associated with this Master item," the item or a member of the item’s family is already in your item catalog. Use Manage My Item Catalog to search for the item. (You'll go to a different set of screens.)
(continued)
MillerCoors Distributors Quick Start Guide
2/20/2013 MillerCoors Distributor QUICK START GUIDE v59.docx PROPERTY OF PARK CITY GROUP. MAY NOT BE REPRODUCED WITHOUT PERMISSION.
5
Add MillerCoors Items (continued)
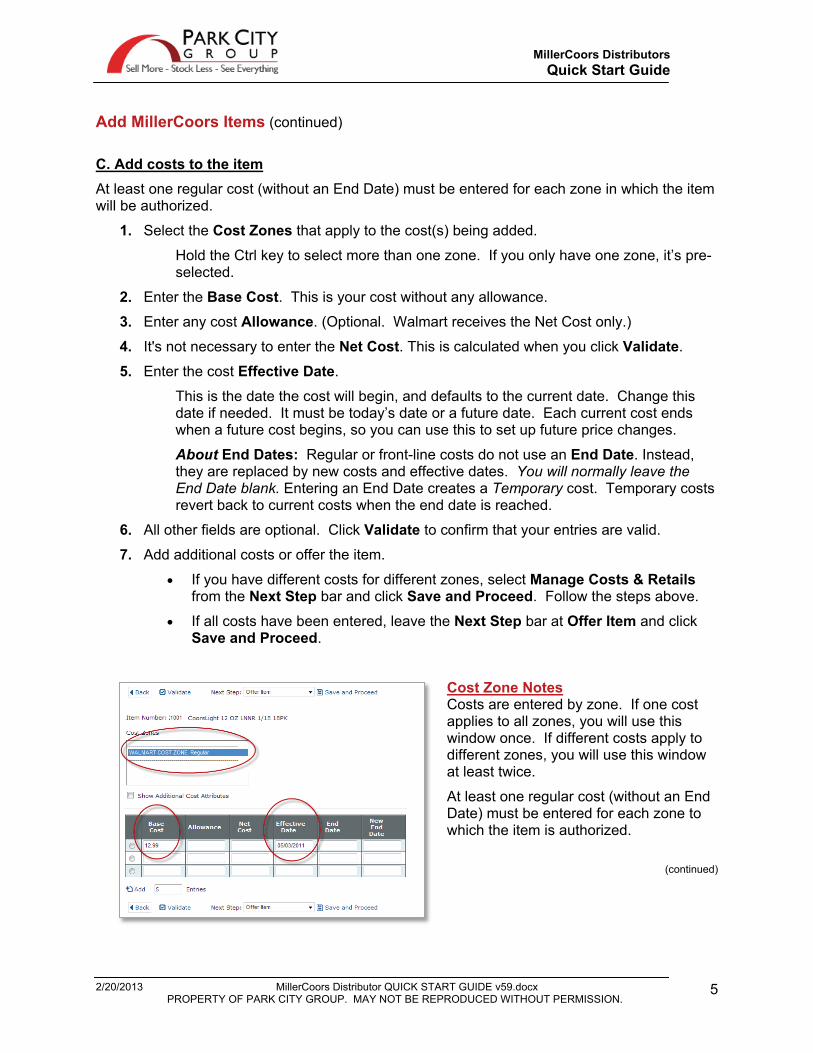
C. Add costs to the item At least one regular cost (without an End Date) must be entered for each zone in which the item will be authorized.
1. Select the Cost Zones that apply to the cost(s) being added.
Hold the Ctrl key to select more than one zone. If you only have one zone, it’s pre-selected.
2. Enter the Base Cost. This is your cost without any allowance.
3. Enter any cost Allowance. (Optional. Walmart receives the Net Cost only.)
4. It's not necessary to enter the Net Cost. This is calculated when you click Validate.
5. Enter the cost Effective Date.
This is the date the cost will begin, and defaults to the current date. Change this date if needed. It must be today’s date or a future date. Each current cost ends when a future cost begins, so you can use this to set up future price changes. About End Dates: Regular or front-line costs do not use an End Date. Instead, they are replaced by new costs and effective dates. You will normally leave the End Date blank. Entering an End Date creates a Temporary cost. Temporary costs revert back to current costs when the end date is reached.
6. All other fields are optional. Click Validate to confirm that your entries are valid.
7. Add additional costs or offer the item.
• If you have different costs for different zones, select Manage Costs & Retails from the Next Step bar and click Save and Proceed. Follow the steps above.
• If all costs have been entered, leave the Next Step bar at Offer Item and click Save and Proceed.
Cost Zone Notes Costs are entered by zone. If one cost applies to all zones, you will use this window once. If different costs apply to different zones, you will use this window at least twice.
At least one regular cost (without an End Date) must be entered for each zone to which the item is authorized.
(continued)
MillerCoors Distributors Quick Start Guide
2/20/2013 MillerCoors Distributor QUICK START GUIDE v59.docx PROPERTY OF PARK CITY GROUP. MAY NOT BE REPRODUCED WITHOUT PERMISSION.
6
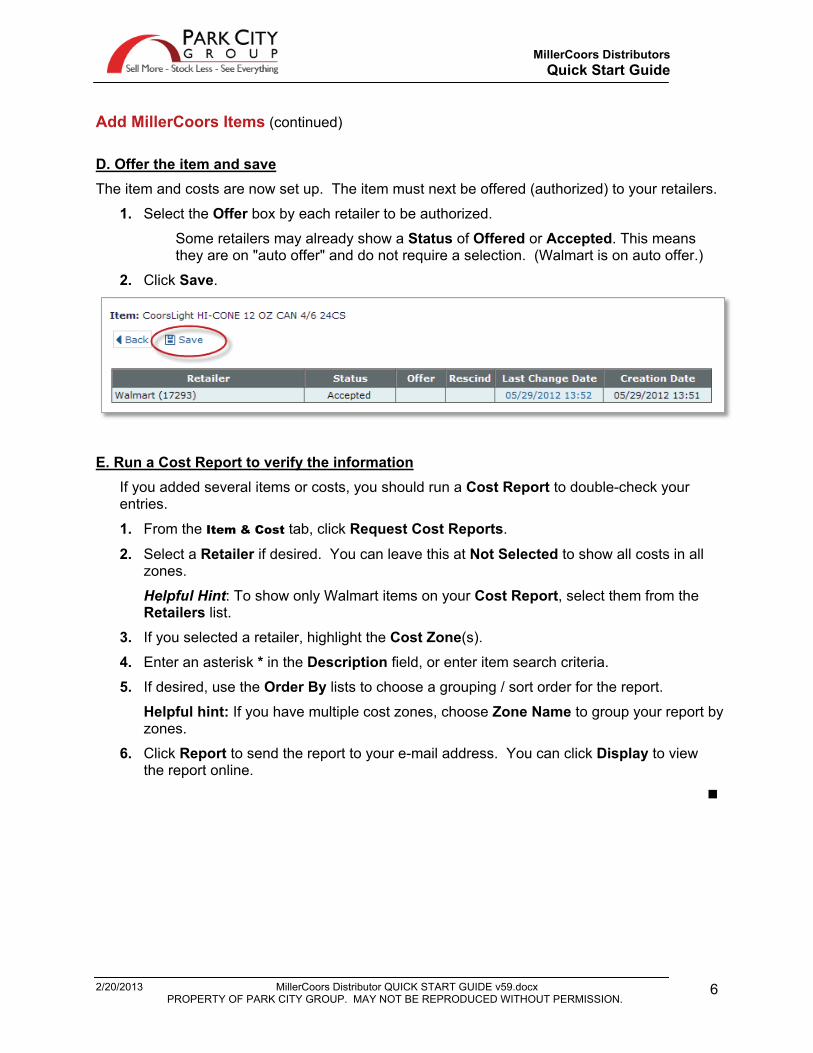
Add MillerCoors Items (continued) D. Offer the item and save The item and costs are now set up. The item must next be offered (authorized) to your retailers.
1. Select the Offer box by each retailer to be authorized.
Some retailers may already show a Status of Offered or Accepted. This means they are on "auto offer" and do not require a selection. (Walmart is on auto offer.)
2. Click Save.
E. Run a Cost Report to verify the information
If you added several items or costs, you should run a Cost Report to double-check your entries.
1. From the Item & Cost tab, click Request Cost Reports.
2. Select a Retailer if desired. You can leave this at Not Selected to show all costs in all zones.
Helpful Hint: To show only Walmart items on your Cost Report, select them from the Retailers list.
3. If you selected a retailer, highlight the Cost Zone(s).
4. Enter an asterisk * in the Description field, or enter item search criteria.
5. If desired, use the Order By lists to choose a grouping / sort order for the report.
Helpful hint: If you have multiple cost zones, choose Zone Name to group your report by zones.
6. Click Report to send the report to your e-mail address. You can click Display to view the report online.
MillerCoors Distributors Quick Start Guide
2/20/2013 MillerCoors Distributor QUICK START GUIDE v59.docx PROPERTY OF PARK CITY GROUP. MAY NOT BE REPRODUCED WITHOUT PERMISSION.
7
Run a Cost Report A Cost Report lists the items and costs associated with specific cost zones. This is the quickest method for verifying your pricing and promotions.
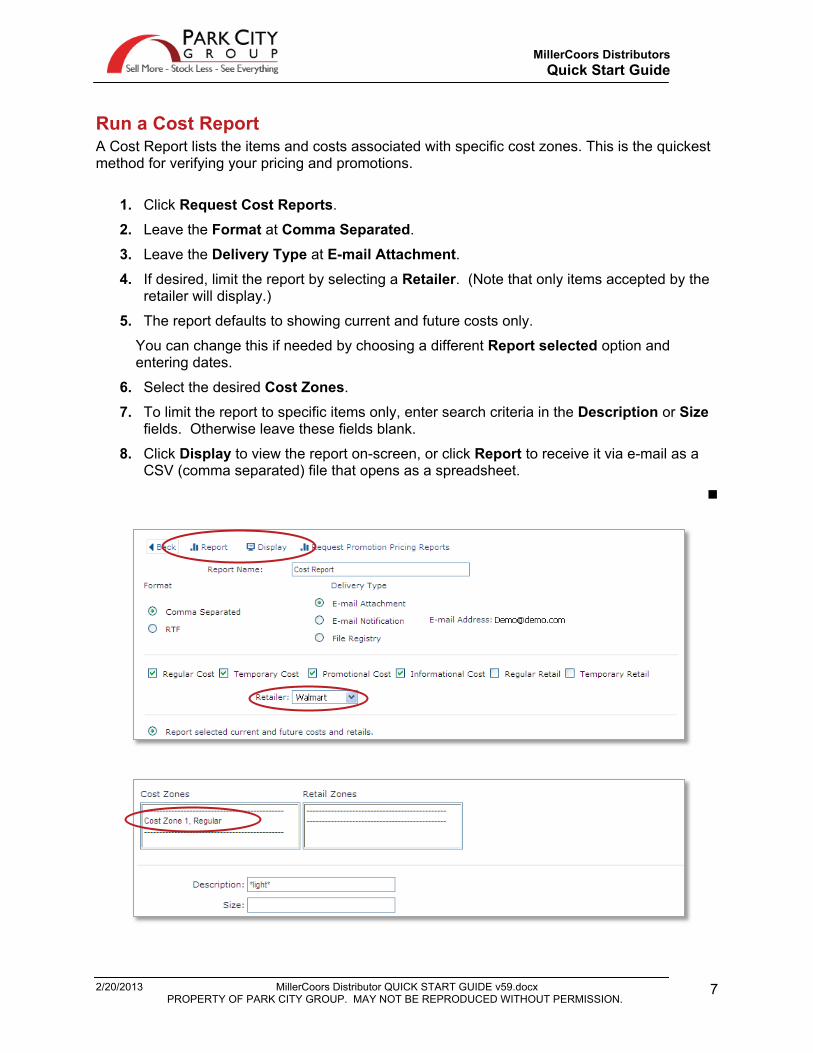
1. Click Request Cost Reports.
2. Leave the Format at Comma Separated.
3. Leave the Delivery Type at E-mail Attachment. 4. If desired, limit the report by selecting a Retailer. (Note that only items accepted by the
retailer will display.)
5. The report defaults to showing current and future costs only.
You can change this if needed by choosing a different Report selected option and entering dates.
6. Select the desired Cost Zones.
7. To limit the report to specific items only, enter search criteria in the Description or Size fields. Otherwise leave these fields blank.
8. Click Display to view the report on-screen, or click Report to receive it via e-mail as a CSV (comma separated) file that opens as a spreadsheet.
MillerCoors Distributors Quick Start Guide
2/20/2013 MillerCoors Distributor QUICK START GUIDE v59.docx PROPERTY OF PARK CITY GROUP. MAY NOT BE REPRODUCED WITHOUT PERMISSION.
8
Change your Base Costs (front-line costs) Your regular or everyday costs are changed by adding new costs. Old costs are replaced on the dates new costs become effective. This task guides you through the process of adding new costs. Because these are quick steps, only the most common fields are listed.
Important: Each item must have at least one Regular cost in each cost zone to which it is authorized. A Regular cost is one without an End Date, and is replaced when a new Regular cost is added
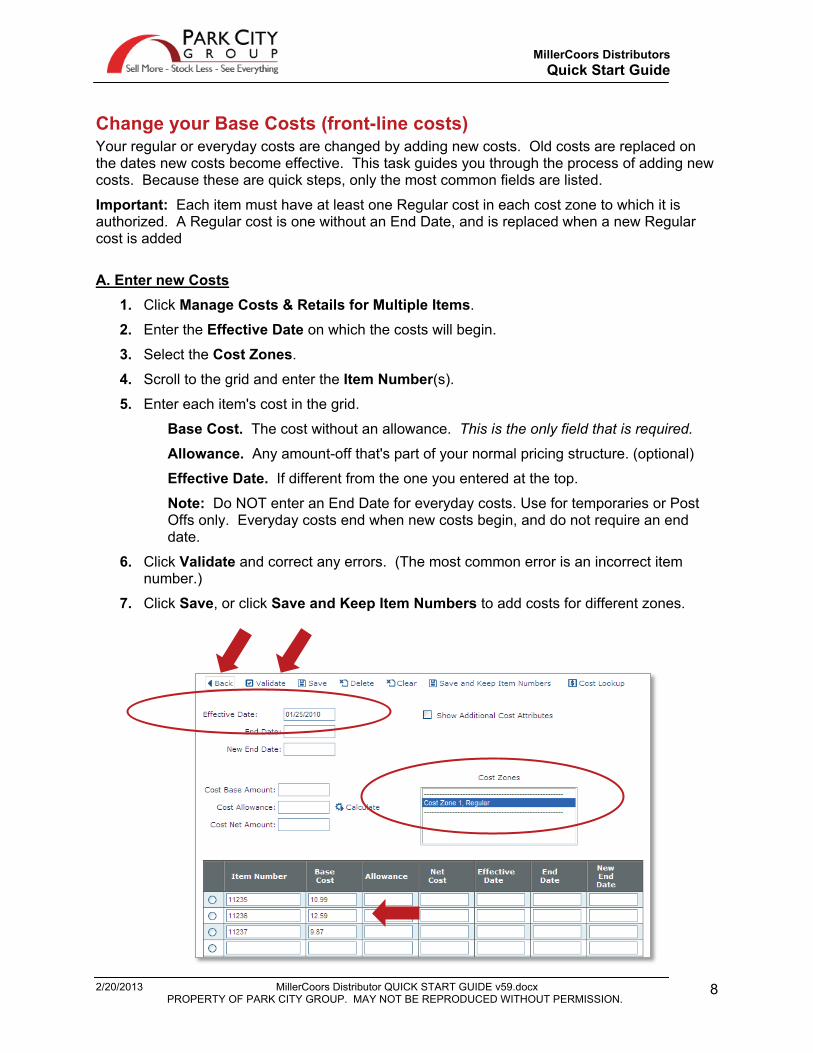
A. Enter new Costs
1. Click Manage Costs & Retails for Multiple Items.
2. Enter the Effective Date on which the costs will begin.
3. Select the Cost Zones.
4. Scroll to the grid and enter the Item Number(s).
5. Enter each item's cost in the grid.
Base Cost. The cost without an allowance. This is the only field that is required.
Allowance. Any amount-off that's part of your normal pricing structure. (optional)
Effective Date. If different from the one you entered at the top.
Note: Do NOT enter an End Date for everyday costs. Use for temporaries or Post Offs only. Everyday costs end when new costs begin, and do not require an end date.
6. Click Validate and correct any errors. (The most common error is an incorrect item number.)
7. Click Save, or click Save and Keep Item Numbers to add costs for different zones.
MillerCoors Distributors Quick Start Guide
2/20/2013 MillerCoors Distributor QUICK START GUIDE v59.docx PROPERTY OF PARK CITY GROUP. MAY NOT BE REPRODUCED WITHOUT PERMISSION.
9
Change your Base Costs (front-line costs) (continued)
B. Run a Cost Report to verify the information
1. From the Item & Cost tab, click Request Cost Reports.
2. Select a Retailer if desired. You can leave this at Not Selected to show all costs in all zones.
3. If you selected a retailer, highlight the Cost Zone(s).
4. Enter an asterisk * in the Description field.
5. If desired, use the Order By lists to choose a grouping / sort order for the report.
6. Click Report to send the report to your e-mail address. You can click Display to review the report online.
Optional – Cost Lookup Use Cost Lookup to view the current and future costs already in place for an item.
1. Adjust the Effective Date as needed. Cost Lookup displays costs on or after that date.
2. Enter the Item Number in the grid and select the Cost Zone.
3. Select the radio link to the left of the Item Number. 4. Click Cost Lookup.
5. The cost that is current on the Effective Date you entered displays in yellow.
6. If you want to re-use some of the information that's listed in the Cost Lookup screen, select the cost and click Apply. You can then adjust what's needed for the change.
Optional – Delete a Cost The Delete link at the top allows you to remove one or more costs that were entered incorrectly, or for which plans have changed. Only future costs (not yet in effect) can be deleted.
Item, cost, and other information must be entered exactly as it was when the cost was first set up. Applying a Cost Lookup is the easiest method for doing this, and is described below. However, you can enter the information manually.
1. Enter the Effective Date and Item Number. Select the applicable Cost Zone(s).
2. Enter the cost information, OR select the item, click Cost Lookup, select the cost, and click Apply.
3. Repeat as needed for each item cost to delete. (You can delete multiple costs using this method.)
4. Delete the costs:
• To delete a single cost, select the item and click Delete.
• To delete costs for every item entered, do not select any items. Just click Delete.
MillerCoors Distributors Quick Start Guide
2/20/2013 MillerCoors Distributor QUICK START GUIDE v59.docx PROPERTY OF PARK CITY GROUP. MAY NOT BE REPRODUCED WITHOUT PERMISSION.
10
Request Distributor Store VMP Reports These reports list your costs for authorized items in selected stores. They include the effective costs (Price to Retailer – PTR) and retail selling price (Price to Consumer – PTC) of each item. It also displays the authorization status that determines if pricing will be sent to Walmart, such as Retailer Authorized, in Error, and Pending Approval or Pending Processing.
Two reports are available. One Item - Multiple Stores, One Store - Multiple Items
Notes: • Search criteria fields change based on both your previous selections and on where items
are authorized. For example, if a brand is chosen as criteria, the packaging and pack configurations update to show options for that brand only. If you choose an item authorized in only one state, the store search criteria will only allow you to search by that state.
• Distributor Store VMP Reports are available only to distributors engaged in Vendor Managed Pricing (VMP). Otherwise, the button will not display.
One Item - Multiple Stores 1. Click Request Distributor Store VMP Reports.
2. Select a report Type of One Item - Multiple Stores.
3. Enter criteria to locate the item using any or all fields.
Note: If a choice is made in one field, the other fields update to match. For example, if a Brand is selected, the Packaging list provides choices only for that Brand.
UPC - Enter the UPC without dashes, then select the UPC format. For example, a 10-digit UPC is UPCA format 5-5.
Brand - Select the brand.
Packaging - Select the container, such as Keg or Can.
Pack Configuration - Select how the item is bundled.
4. Click Choose. If a drop-down list displays, select the desired item.
5. Select the stores using any or all fields. Only stores to which the item is authorized can be chosen. For example:
Retailer Store Numbers - Enter the numbers or copy and paste them in the box.
Store City - Enter part of the city, using asterisks as wild cards.
6. Click Find to display the available stores.
7. Select from the Available stores and click the right arrow.
8. Click Display to review the results online, or click Report to receive the results via e-mail. Use the sample report column descriptions found in the Online Help as a guide to the on-screen display.
If you click Display, you can click the Store name to view details in the Distributor Item Information Lookup screen.
MillerCoors Distributors Quick Start Guide
2/20/2013 MillerCoors Distributor QUICK START GUIDE v59.docx PROPERTY OF PARK CITY GROUP. MAY NOT BE REPRODUCED WITHOUT PERMISSION.
11
Request Distributor Store VMP Reports (continued)
One Store - Multiple Items 1. Click Request Distributor Store VMP Reports.
2. Select a report Type of One Store - Multiple Items.
3. Enter criteria to find the store using any or all fields. For example:
Retailer Store Number - Enter the number or copy and paste in the box.
Store City - Enter part of the city, using asterisks as wild cards.
4. Click Choose to display the store. If a drop-down list displays, select from the Reported Store list.
5. All items authorized to the store display in the Available list. Select the items and click the right arrow.
Note: If desired, you can enter search criteria to narrow the item list. The list will update automatically.
If a choice is made in one field, the other fields update to match. For example, if a Brand is selected, the Packaging list provides choices only for that Brand.
Brand - Select the brand.
Packaging - Select the container, such as Keg or Can.
Pack Configuration - Select how the item is bundled.
6. Click Display to review the results online, or click Report to receive the results via e-mail. Use the sample report column descriptions found in the Online Help as a guide to the on-screen display.
If you click Display, you can click the Store name to view details in the Distributor Item Information Lookup screen.
MillerCoors Distributors Quick Start Guide
2/20/2013 MillerCoors Distributor QUICK START GUIDE v59.docx PROPERTY OF PARK CITY GROUP. MAY NOT BE REPRODUCED WITHOUT PERMISSION.
12
Request Distributor Store VMP Reports (continued)
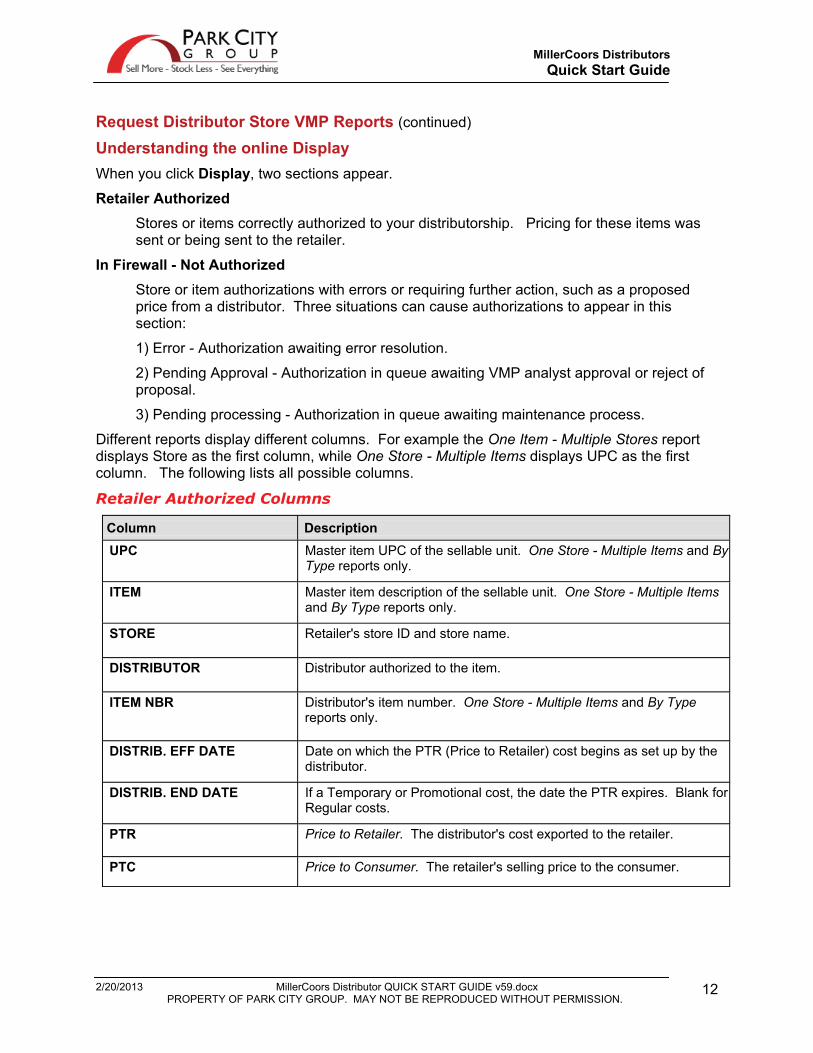
Understanding the online Display When you click Display, two sections appear.
Retailer Authorized Stores or items correctly authorized to your distributorship. Pricing for these items was sent or being sent to the retailer.
In Firewall - Not Authorized Store or item authorizations with errors or requiring further action, such as a proposed price from a distributor. Three situations can cause authorizations to appear in this section:
1) Error - Authorization awaiting error resolution.
2) Pending Approval - Authorization in queue awaiting VMP analyst approval or reject of proposal.
3) Pending processing - Authorization in queue awaiting maintenance process.
Different reports display different columns. For example the One Item - Multiple Stores report displays Store as the first column, while One Store - Multiple Items displays UPC as the first column. The following lists all possible columns.
Retailer Authorized Columns
Column Description
UPC Master item UPC of the sellable unit. One Store - Multiple Items and By Type reports only.
ITEM Master item description of the sellable unit. One Store - Multiple Items and By Type reports only.
STORE Retailer's store ID and store name.
DISTRIBUTOR Distributor authorized to the item.
ITEM NBR Distributor's item number. One Store - Multiple Items and By Type reports only.
DISTRIB. EFF DATE Date on which the PTR (Price to Retailer) cost begins as set up by the distributor.
DISTRIB. END DATE If a Temporary or Promotional cost, the date the PTR expires. Blank for Regular costs.
PTR Price to Retailer. The distributor's cost exported to the retailer.
PTC Price to Consumer. The retailer's selling price to the consumer.
MillerCoors Distributors Quick Start Guide
2/20/2013 MillerCoors Distributor QUICK START GUIDE v59.docx PROPERTY OF PARK CITY GROUP. MAY NOT BE REPRODUCED WITHOUT PERMISSION.
13
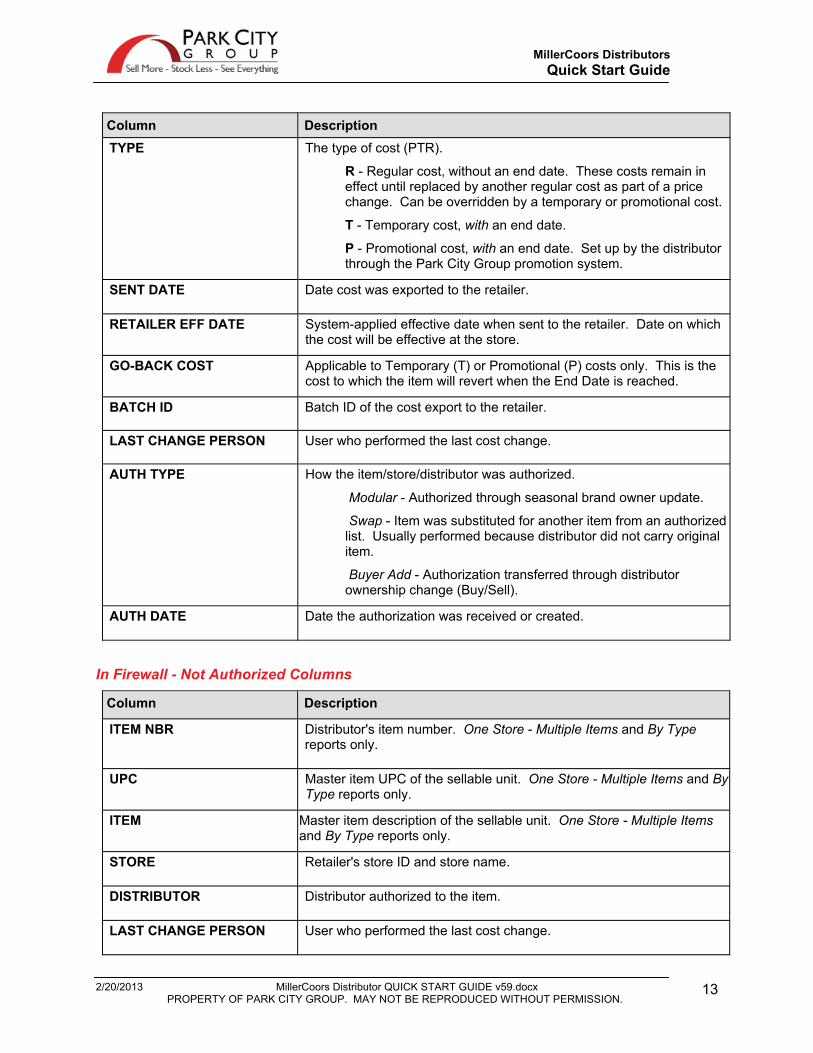
Column Description
TYPE The type of cost (PTR).
R - Regular cost, without an end date. These costs remain in effect until replaced by another regular cost as part of a price change. Can be overridden by a temporary or promotional cost.
T - Temporary cost, with an end date.
P - Promotional cost, with an end date. Set up by the distributor through the Park City Group promotion system.
SENT DATE Date cost was exported to the retailer.
RETAILER EFF DATE System-applied effective date when sent to the retailer. Date on which the cost will be effective at the store.
GO-BACK COST Applicable to Temporary (T) or Promotional (P) costs only. This is the cost to which the item will revert when the End Date is reached.
BATCH ID Batch ID of the cost export to the retailer.
LAST CHANGE PERSON User who performed the last cost change.
AUTH TYPE How the item/store/distributor was authorized.
Modular - Authorized through seasonal brand owner update.
Swap - Item was substituted for another item from an authorized list. Usually performed because distributor did not carry original item.
Buyer Add - Authorization transferred through distributor ownership change (Buy/Sell).
AUTH DATE Date the authorization was received or created.
In Firewall - Not Authorized Columns
Column Description
ITEM NBR Distributor's item number. One Store - Multiple Items and By Type reports only.
UPC Master item UPC of the sellable unit. One Store - Multiple Items and By Type reports only.
ITEM Master item description of the sellable unit. One Store - Multiple Items and By Type reports only.
STORE Retailer's store ID and store name.
DISTRIBUTOR Distributor authorized to the item.
LAST CHANGE PERSON User who performed the last cost change.
MillerCoors Distributors Quick Start Guide
2/20/2013 MillerCoors Distributor QUICK START GUIDE v59.docx PROPERTY OF PARK CITY GROUP. MAY NOT BE REPRODUCED WITHOUT PERMISSION.
14
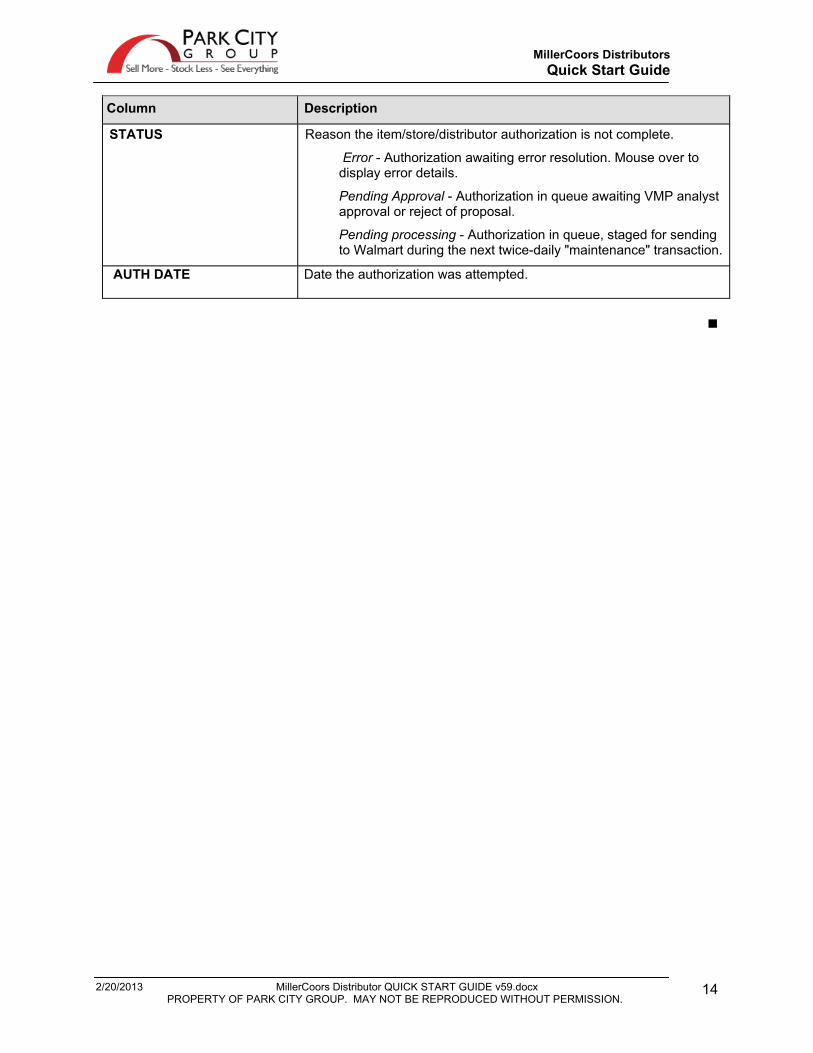
Column Description
STATUS Reason the item/store/distributor authorization is not complete.
Error - Authorization awaiting error resolution. Mouse over to display error details.
Pending Approval - Authorization in queue awaiting VMP analyst approval or reject of proposal.
Pending processing - Authorization in queue, staged for sending to Walmart during the next twice-daily "maintenance" transaction.
AUTH DATE Date the authorization was attempted.
MillerCoors Distributors Quick Start Guide
2/20/2013 MillerCoors Distributor QUICK START GUIDE v59.docx PROPERTY OF PARK CITY GROUP. MAY NOT BE REPRODUCED WITHOUT PERMISSION.
15
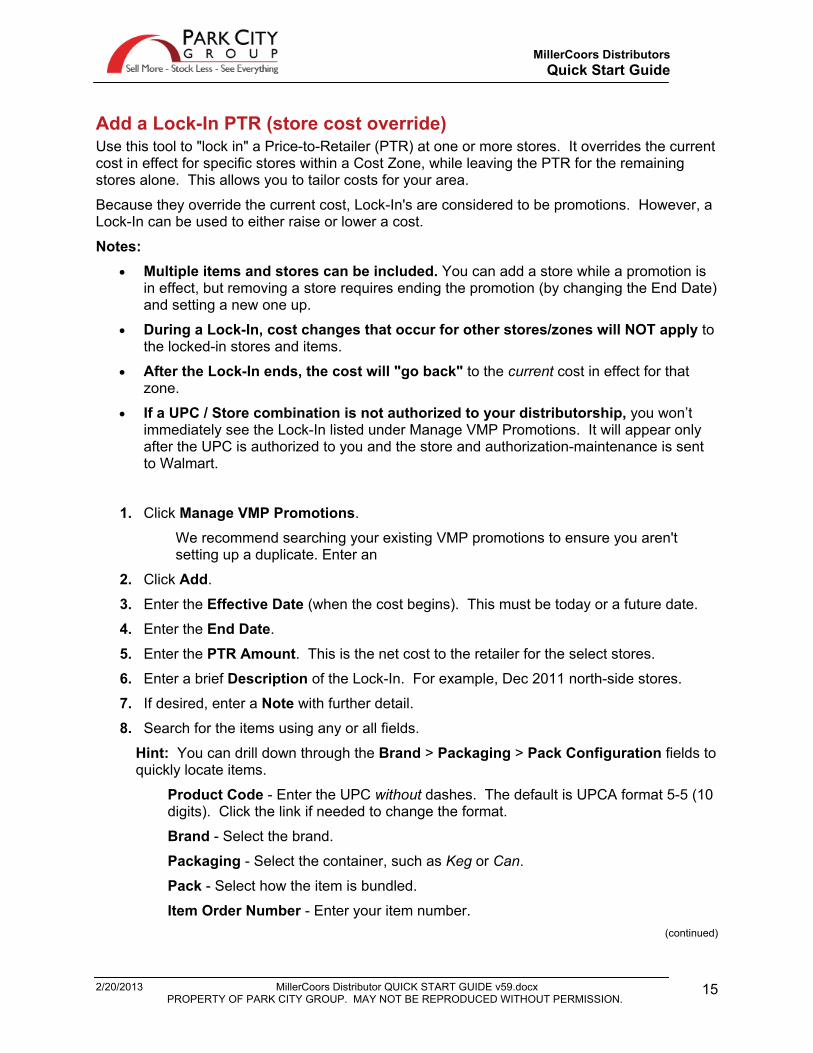
Add a Lock-In PTR (store cost override) Use this tool to "lock in" a Price-to-Retailer (PTR) at one or more stores. It overrides the current cost in effect for specific stores within a Cost Zone, while leaving the PTR for the remaining stores alone. This allows you to tailor costs for your area.
Because they override the current cost, Lock-In's are considered to be promotions. However, a Lock-In can be used to either raise or lower a cost.
Notes: • Multiple items and stores can be included. You can add a store while a promotion is
in effect, but removing a store requires ending the promotion (by changing the End Date) and setting a new one up.
• During a Lock-In, cost changes that occur for other stores/zones will NOT apply to the locked-in stores and items.
• After the Lock-In ends, the cost will "go back" to the current cost in effect for that zone.
• If a UPC / Store combination is not authorized to your distributorship, you won’t immediately see the Lock-In listed under Manage VMP Promotions. It will appear only after the UPC is authorized to you and the store and authorization-maintenance is sent to Walmart.
1. Click Manage VMP Promotions.
We recommend searching your existing VMP promotions to ensure you aren't setting up a duplicate. Enter an
2. Click Add.
3. Enter the Effective Date (when the cost begins). This must be today or a future date.
4. Enter the End Date.
5. Enter the PTR Amount. This is the net cost to the retailer for the select stores.
6. Enter a brief Description of the Lock-In. For example, Dec 2011 north-side stores.
7. If desired, enter a Note with further detail.
8. Search for the items using any or all fields.
Hint: You can drill down through the Brand > Packaging > Pack Configuration fields to quickly locate items.
Product Code - Enter the UPC without dashes. The default is UPCA format 5-5 (10 digits). Click the link if needed to change the format.
Brand - Select the brand.
Packaging - Select the container, such as Keg or Can.
Pack - Select how the item is bundled.
Item Order Number - Enter your item number. (continued)
MillerCoors Distributors Quick Start Guide
2/20/2013 MillerCoors Distributor QUICK START GUIDE v59.docx PROPERTY OF PARK CITY GROUP. MAY NOT BE REPRODUCED WITHOUT PERMISSION.
16
Add a Lock-In PTR (store cost override) (continued)
9. Click Find.
10. Select the Items and Stores by moving them from the Available sections to the Chosen sections. Only stores authorized to your distributorship display.
11. Click Save and Proceed.
About Overlapping Promotions (VMP only) If overlapping promotions exist (one or more dates fall within the range for the same item / stores), these display as a warning, and do not prevent the promotion from occurring.
Business rules are in place that determine which promotional price takes precedence. For nested promotions, where one falls within the date range of another, the inner promotion prices take precedence during that effective period.
• If desired, click an overlapping promotion to review the details.
• If overlapping promotions can be ignored, click Yes to complete the save or click No to change the details of this promotion.
MillerCoors Distributors Quick Start Guide
2/20/2013 MillerCoors Distributor QUICK START GUIDE v59.docx PROPERTY OF PARK CITY GROUP. MAY NOT BE REPRODUCED WITHOUT PERMISSION.
17
Swap UPC Authorizations On occasion your distributorship may not carry an item authorized to a store, but does carry a similar item that can serve as a substitute. Use the steps below to "swap" an authorized item for a substitute item. Swaps can be made at the distributor's discretion, but are limited to "like" items.
For example, a 24-pack can placement might be swapped for 30- or 36-pack cans, and vice versa. And 18-pack bottles might be swapped for 20- or 24-pack bottles.
Notes:
• If a swap should apply to more than one store, you can do it all at once using this screen.
• Replacement items are chosen from a pre-authorized substitution list.
• Only items not already authorized for your distributorship/store can be selected. (You cannot swap for an item you already sell in the store; it must be a different item.)
• Swaps made before 11 AM CT will be effective the next day. After that time, substitutions will be effective within no later than 48 hours.
• If no replacement is available, you can send a de-authorize request to the MillerCoors Walmart Team. These are submitted as "proposals," and must be approved before taking effect.
Follow these steps:
A. Find and choose the Items B. Find and select the Store(s)
A. Find and choose the Items
1. Click Swap UPC Authorizations.
2. Enter a Reason for the swap, up to 60 characters. For example, "Do not carry this item."
3. Enter search criteria to locate the Original Item.
Note: If a choice is made in one field, the other fields update to match. For example, if a Brand is selected, the Packaging list provides choices only for that Brand.
UPC - Enter the UPC without dashes. The default is UPCA format 5-5 (10 digits). Click the link if needed to change the format.
Brand - Select the brand.
Packaging - Select the container, such as Keg or Can.
Pack - Select how the item is bundled.
Item Order Number - Your item number. (continued)
MillerCoors Distributors Quick Start Guide
2/20/2013 MillerCoors Distributor QUICK START GUIDE v59.docx PROPERTY OF PARK CITY GROUP. MAY NOT BE REPRODUCED WITHOUT PERMISSION.
18
Swap UPC Authorizations (continued)
4. Click Choose beside Original Item.
If more than one item displays in the drop-down, select the desired item.
5. Select the New Item from the drop-down list. These items are from an approved substitution list, and are confirmed eligible to serve as replacements.
B. Find and select the Store(s 1. Locate the stores using any or all fields. Only stores to which the original item is
authorized and the swap item is not will display.
Retailer Store Numbers - Enter the numbers or copy and paste them in the box.
Store City - Enter part of the city, using asterisks as wild cards.
Store State - Search by state.
Store Region - Search by retailer store region.
2. Click Find to display the stores.
3. Select from the Available stores and click the right arrow.
4. Click Save or click Save and Keep Stores to swap different items for the same store list.
MillerCoors Distributors Quick Start Guide
2/20/2013 MillerCoors Distributor QUICK START GUIDE v59.docx PROPERTY OF PARK CITY GROUP. MAY NOT BE REPRODUCED WITHOUT PERMISSION.
19
Manage Item Order Numbers Use this screen to update the item numbers in your catalog. This allows you to make updates for business-ownership changes, to reuse old item numbers from discontinued items, and to replace system-generated numbers.
Important Notes: • After making changes on the current screen, click Validate and Save before continuing
to the next page (screen) of items. Otherwise you will lose your updates.
• If you are unsure about an item, click the Item UPC drill-down on the right to display the Master Item. (Supplier items not linked to Master Items will not have a drill down.)
Follow these steps: 1. Click Manage Item Order Numbers.
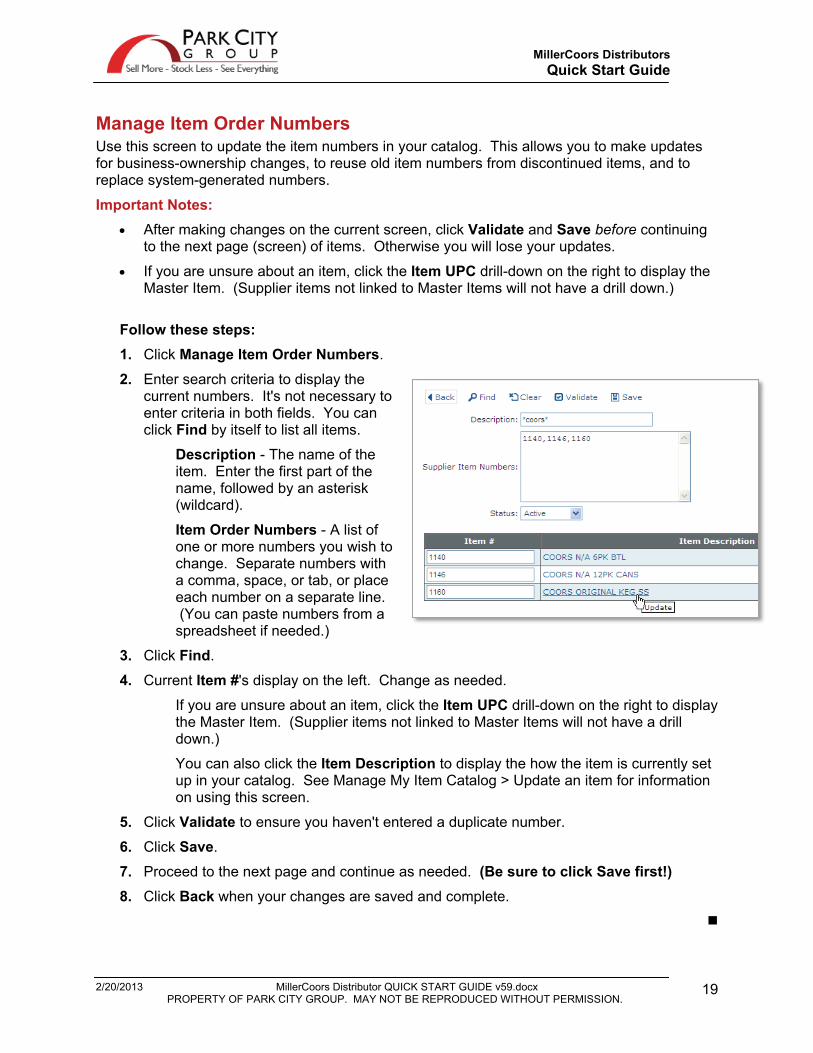
2. Enter search criteria to display the current numbers. It's not necessary to enter criteria in both fields. You can click Find by itself to list all items.
Description - The name of the item. Enter the first part of the name, followed by an asterisk (wildcard).
Item Order Numbers - A list of one or more numbers you wish to change. Separate numbers with a comma, space, or tab, or place each number on a separate line. (You can paste numbers from a spreadsheet if needed.)
3. Click Find.
4. Current Item #'s display on the left. Change as needed.
If you are unsure about an item, click the Item UPC drill-down on the right to display the Master Item. (Supplier items not linked to Master Items will not have a drill down.)
You can also click the Item Description to display the how the item is currently set up in your catalog. See Manage My Item Catalog > Update an item for information on using this screen.
5. Click Validate to ensure you haven't entered a duplicate number.
6. Click Save.
7. Proceed to the next page and continue as needed. (Be sure to click Save first!) 8. Click Back when your changes are saved and complete.
MillerCoors Distributors Quick Start Guide
2/20/2013 MillerCoors Distributor QUICK START GUIDE v59.docx PROPERTY OF PARK CITY GROUP. MAY NOT BE REPRODUCED WITHOUT PERMISSION.
20
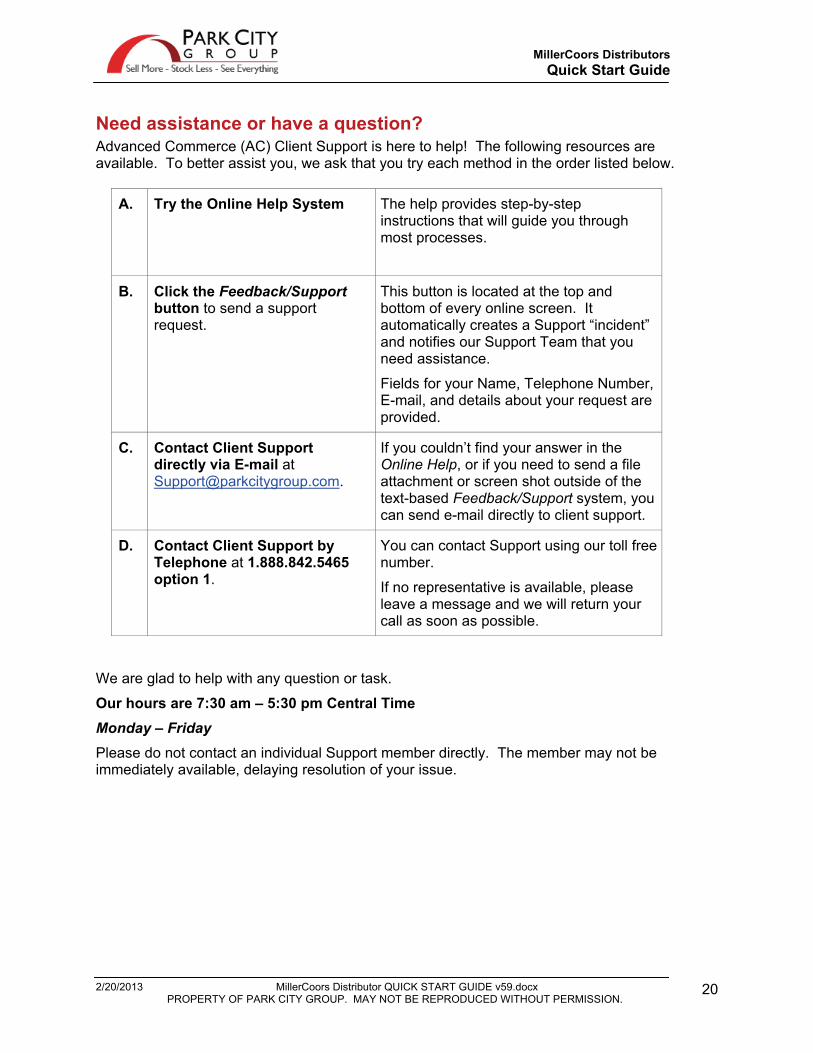
Need assistance or have a question? Advanced Commerce (AC) Client Support is here to help! The following resources are available. To better assist you, we ask that you try each method in the order listed below.
A. Try the Online Help System The help provides step-by-step instructions that will guide you through most processes.
B. Click the Feedback/Support button to send a support request.
This button is located at the top and bottom of every online screen. It automatically creates a Support “incident” and notifies our Support Team that you need assistance.
Fields for your Name, Telephone Number, E-mail, and details about your request are provided.
C. Contact Client Support directly via E-mail at [email protected].
If you couldn’t find your answer in the Online Help, or if you need to send a file attachment or screen shot outside of the text-based Feedback/Support system, you can send e-mail directly to client support.
D. Contact Client Support by Telephone at 1.888.842.5465 option 1.
You can contact Support using our toll free number.
If no representative is available, please leave a message and we will return your call as soon as possible.
We are glad to help with any question or task.
Our hours are 7:30 am – 5:30 pm Central Time Monday – Friday Please do not contact an individual Support member directly. The member may not be immediately available, delaying resolution of your issue.