Microsoft PowerPoint 2007 Beginning Topicstraining/guides/PowerPoint_I.doc · Web view Apple Mac:...
18
Microsoft PowerPoint 2007: Beginning Topics Course Outline & Guide 1. MICROSOFT POWERPOINT 2007 – OVERVIEW..............................1 2. THE NEW OFFICE 2007 INTERFACE.....................................2 3. CREATING AND SAVING PRESENTATIONS.................................3 4. VISUAL AIDS....................................................... 4 5. SLIDE DESIGN...................................................... 5 6. TITLE SLIDE....................................................... 6 7. PRESENTATION OUTLINE..............................................6 8. UNDO AND REDO..................................................... 7 9. SLIDE WITH TEXT AND IMAGE.........................................7 10. SLIDE CONSISTENCY.................................................8 11. SLIDE WITH MULTIMEDIA.............................................9 12. SLIDE WITH CHART/GRAPH...........................................10 13. PREVIEW YOUR SLIDESHOW...........................................11 14. SLIDE TRANSITION.................................................12 15. OBJECT ANIMATION.................................................12 16. SAVING AS A SLIDESHOW............................................13 17. OPEN FLOOR FOR Q&A...............................................13 18. Next week - Word II – Intermediate Topics........................13 1. Microsoft PowerPoint 2007 – Overview a. What is it? PowerPoint 2007 is the latest and greatest visual presentation application from Microsoft. It is one of the many software programs that make up MS Office 2007 which is available only for the Windows PC operating system. It is used for creating slideshows for presentations b. Previous versions: 1 | Page
Transcript of Microsoft PowerPoint 2007 Beginning Topicstraining/guides/PowerPoint_I.doc · Web view Apple Mac:...
Microsoft PowerPoint 2007: Beginning TopicsCourse Outline & Guide
1. MICROSOFT POWERPOINT 2007 – OVERVIEW...............................................................................1
2. THE NEW OFFICE 2007 INTERFACE.................................................................................................2
3. CREATING AND SAVING PRESENTATIONS......................................................................................3
4. VISUAL AIDS................................................................................................................................. 4
5. SLIDE DESIGN................................................................................................................................ 5
6. TITLE SLIDE................................................................................................................................... 6
7. PRESENTATION OUTLINE.............................................................................................................. 6
8. UNDO AND REDO......................................................................................................................... 7
9. SLIDE WITH TEXT AND IMAGE....................................................................................................... 7
10. SLIDE CONSISTENCY...................................................................................................................... 8
11. SLIDE WITH MULTIMEDIA............................................................................................................. 9
12. SLIDE WITH CHART/GRAPH......................................................................................................... 10
13. PREVIEW YOUR SLIDESHOW....................................................................................................... 11
14. SLIDE TRANSITION...................................................................................................................... 12
15. OBJECT ANIMATION.................................................................................................................... 12
16. SAVING AS A SLIDESHOW............................................................................................................ 13
17. OPEN FLOOR FOR Q&A............................................................................................................... 13
18. Next week - Word II – Intermediate Topics........................................................................................13
1. Microsoft PowerPoint 2007 – Overviewa. What is it?
PowerPoint 2007 is the latest and greatest visual presentation application from Microsoft. It is one of the many software programs that make up MS Office 2007 which is available only for the Windows PC operating system. It is used for creating slideshows for presentations
b. Previous versions:i. Windows PC: Office 2003 – is compatible with 2007 if the updated
compatibility package is downloaded and installedhttp://office.microsoft.com/en-us/products/HA101686761033.aspx
ii. Apple Mac: Office 2004 – still the latest version (2007 is not available for the Mac) and has no compatibility with the Windows PC 2007 version. However, if a file that is created using
1 | P a g e
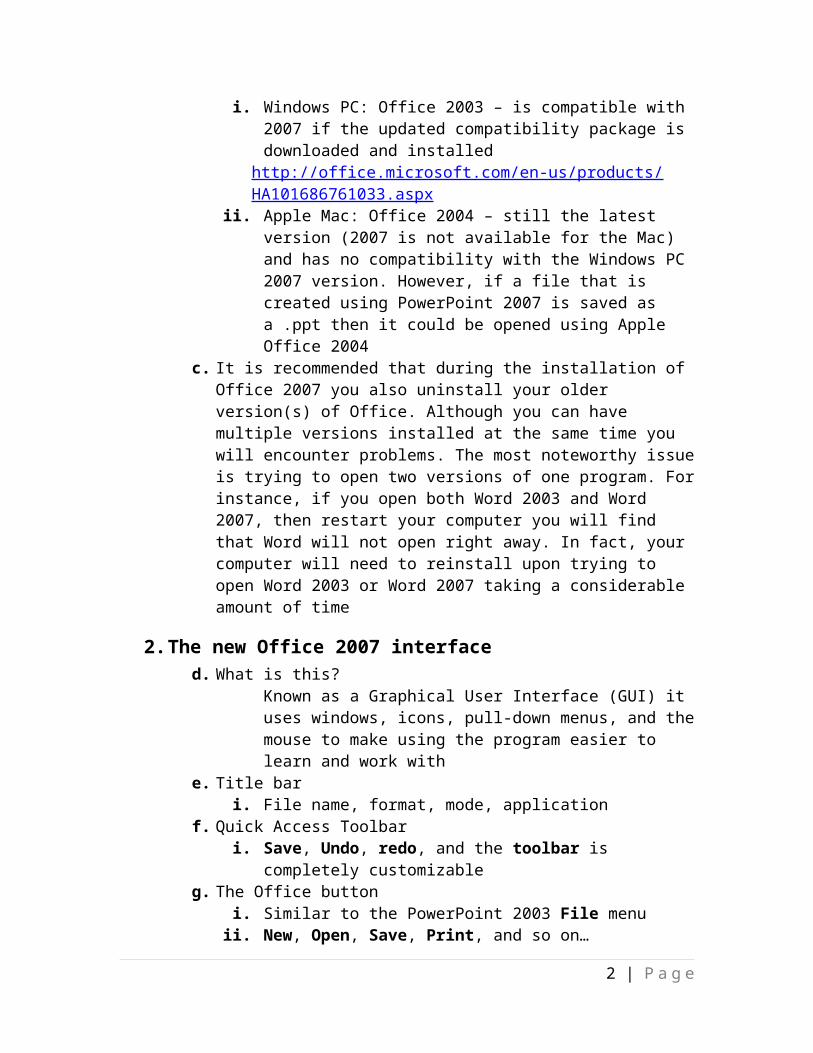
PowerPoint 2007 is saved as a .ppt then it could be opened using Apple Office 2004
c. It is recommended that during the installation of Office 2007 you also uninstall your older version(s) of Office. Although you can have multiple versions installed at the same time you will encounter problems. The most noteworthy issue is trying to open two versions of one program. For instance, if you open both Word 2003 and Word 2007, then restart your computer you will find that Word will not open right away. In fact, your computer will need to reinstall upon trying to open Word 2003 or Word 2007 taking a considerable amount of time
2. The new Office 2007 interfacea. What is this?
Known as a Graphical User Interface (GUI) it uses windows, icons, pull-down menus, and the mouse to make using the program easier to learn and work with
b. Title bari. File name, format, mode, application
c. Quick Access Toolbari. Save, Undo, redo, and the toolbar is completely customizable
d. The Office buttoni. Similar to the PowerPoint 2003 File menuii. New, Open, Save, Print, and so on…
1. Those with arrows have additional commands you can choose
iii. Buttons in bottom right1. PowerPoint Options2. Exit PowerPoint
e. The PowerPoint Ribboni. Biggest interface change from previous versionsii. Home, Insert, Design, Animations, and so on...
iii. The Ribbon is context sensitive1. It may change depending on what you do
iv. Each Tab has a number of groups1. When you hover your mouse pointer over a group item a
tool tip will typically appearv. In the bottom right of most group panels you’ll find a little
diagonal arrow1. Hover to discover shortcut2. Click to launch a new window for more options and
choices within that groupvi. The Help button (circle w/ a question mark inside) is located
above and to the right of the Ribbon1. Once selected a new PowerPoint Help window appears
2 | P a g e

a. Help Categoriesi. Select any Topic under Browse PowerPoint
Help to find more helpful Subtopicsb. Help Search
i. Click inside the textbox, type a topic, and click Search
2. You can also navigate and find other helpful options (like Home and Print) on the toolbar located near the top of the Help window
vii. Keyboard shortcuts1. The Alt key turns on all visible shortcuts (numbers and
letters)2. Next, press the keyboard key with the letter or number
that represents what you want3. Then you’ll see that the groups within that choice now
have shortcuts showing so you can choose the specific option within
4. The Alt key turns off all visible shortcuts as wellviii. Minimize/Maximize the Ribbon
1. Right-click on any tab or tab group and select Minimize the Ribbon
3. Creating and Saving presentationsa. What is this?
Presentations can be created using blank or advanced templates. They need to be saved if you want to work with them again
b. When opening PowerPoint 2007 it automatically starts with a new presentation (slideshow)
c. To close the file, select Office Button > Closed. Creating a new presentation
i. Select Office Button > Newii. In the top middle of the new window under Blank and recent click
Blank Presentation and then select the Create button in the bottom right of the window
e. Saving a presentationi. Try to save your files when you begin to prevent the possibility of
losing your presentation later due to some random computer failure
ii. To save a presentation, select Office Button > Save or Save As1. This time, simply choose Save2. Select My Documents as the location to save
a. This is the default location to saveb. This is the best choice to save all of your files as it is
easy to back up this folder
3 | P a g e

c. You can also make folders within the My Documents folder for better organization
3. Give the file a name, mypresentation4. In the Save as type: textbox, PowerPoint Presentaion will
save as a PowerPoint 2007 file (.pptx) and is not compatible with older versions unless the compatibility package was installed on the computer that tries to open the file
iii. Note: For future file saving use the keyboard shortcut to save: Ctrl+S
iv. To save as an older file format1. Select Office Button > Save As > PowerPoint 97-2003
a. This will save as a .pptb. Click save
2. In the Title bar it now shows the file is a .ppt and you are working in the Compatibility Mode
a. This means that you will not have the new PowerPoint 2007 specific features
b. This also means your PowerPoint 97-2003 file is compatible with the older versions of PowerPoint
v. Close this file, create a new PowerPoint 2007 file and save as a yourname.pptx
4. Visual aidsa. What are these?
Visual aids help you with creating and editing your presentations. They help with the layout and design and better ways to view the slide and the objects within
b. Viewsi. Can be found on the Ribbon and the Status Bar (bottom right)
1. On the Ribbon, select the View tab > in the Presentation Views group
2. Normal a. This is should be your primary working viewb. What you see is what it will look like when you
view the slideshowc. Slides and Outline column
i. Thumbnail version of slidesii. Outline of the slide content, slide by slide
d. Notesi. Speaker notes window pane
3. Slide Sorter a. Ideal for previewing the flow of your slidesb. Used to easily rearrange your slides
4 | P a g e

4. Notes Pagea. A larger view for your notes
5. Slide Showa. Starts the presentation and shows the slides in full
screen view6. Master Views
a. A way to create and modify a master templateb. These will be covered in the PowerPoint II class
c. Zoomi. Default: zoom fits to screenii. Zoom Slider
1. Bottom right corneriii. View Tab
1. Zoom groupa. Zoom gives you the % of zoom optionb. Fit to Window fits the slide in the slide pane
iv. Easiest way to zoom Ctrl + [your mouse scroll]
5. Slide designa. What is this?
A set of unified design elements that provides a look for your document by using color, fonts, and graphics
b. Setup the dimensions and orientationi. On the Ribbon, select the Design tab > in the Page Setup group >
click Page Setup1. In the Page Setup window you can set the slide
dimensions, the number to begin with, orientation, and even the orientation for the notes, handouts, and outline
2. In the Slides sized for: drop-down menu choose, On-screen show (4:3)
3. Under Orientation set the slides to Landscapes and notes, handouts, and outline to Portrait
ii. Click the OK buttonc. Choose a slide theme
i. Themes change the look and feel of the show as they use consistent colors, graphics, and text properties
ii. On the Ribbon, select the Design tab > in the Themes group > hover over any slide design thumbnail (you’ll see the design change in the main slide) > click on the Metro theme
d. Choose a color schemei. Colors carry a meaning and feeling in the presentation. Try to
choose a color scheme that matches not only the colors that may already exist in what you are presenting but also those that help carry the message
5 | P a g e

ii. On the Ribbon, select the Design tab > in the Themes group > click on Colors (drop down menu)
1. Choose a color scheme2. To create your own select Create New Theme Colors...
e. Choose a fonti. Fonts also carry a meaning and feeling in the presentation. Try to
be consistent with your font choice by using one throughout. If you use two then be sure the fonts are complimentary
ii. On the Ribbon, select the Design tab > in the Themes group > click on Fonts (drop down menu)
1. Click on a theme fontf. Choose a background
i. On the Ribbon, select the Design tab > in the Background group > click on Background Styles (drop down menu)
1. Choose a backgroundii. To hide background graphics, check the box next to
Hide Background Graphics
6. Title slidea. What is this?
A title slide is usually the first slide of a presentation. The title and subtitle and sometimes the authors name are included
b. Working with texti. In the textbox prompting you to, “click to add subtitle” click
inside the box and type [your name]ii. To resize the textbox, move your mouse pointer to one of the
corners or sides of the box on the sizing handle, click and dragiii. To move the textbox, move your mouse pointer into the border of
the textbox (not on a sizing handle), click and dragiv. In the textbox prompting you to, “click to add title” click inside
the box and type the misspelled combination of WEB DESGINc. Spell check
A way for you to check and potentially correct your spelling mistakes
i. Click inside the textbox that has your nameii. The red jagged underline under DESGIN indicates that MS Word
identified the word as a misspellingiii. A Quick fix
1. Move your mouse pointer into DESGIN and right-click2. From the list of word options in the menu, select DESIGN
7. Presentation outlinea. What is this?
6 | P a g e

An outline is a great way to let your audience know what is covered in your presentation. Often the outline slide includes a bulleted list of the main topics
b. Create a new slidei. On the Ribbon, select the Home tab > in the Slides group > click
on New Slide (drop down menu)ii. From the drop down menu select, Title and Content
iii. In the textbox that has, “Click to add title” click inside and type: Outline
c. Create a bulleted listi. Click inside the text that reads, “Click to add text” of the textbox
in the middle areaii. Type a line of text and then tap the Enter (return) key on your
keyboard (bullets will automatically be created): Needs Assessment Web Site Objectives Strategy and Plan Design and Develop Evaluation Instruments
d. Edit a bulleted listi. Select the list (bulleted text)ii. On the Ribbon, select the Home tab > in the Paragraph group >
click on Bullets (drop down arrow to the right)iii. Roll your mouse pointer over the different bullets in the drop
down menuiv. Choose any one from the list
8. Undo and Redoa. What are these?
Commands that allow you to correct mistakes by moving backward or forward in time
b. To regain the bullets you just hadi. Use this keyboard shortcut to go back in time
1. Ctrl+Zii. If you go back to far, then try this keyboard shortcut to go forward
1. Ctrl+Y
9. Slide with text and imagea. What is this?
A slide that allows for text (usually a bulleted list) and an image. By using the preformatted layouts you can create a consistent looking presentation
b. Create a new slide
7 | P a g e
i. On the Ribbon, select the Home tab > in the Slides group > click on New Slide (drop down menu)
ii. From the drop down menu select, Two Contentiii. In the textbox that has, “Click to add title” click inside and type:
Needs Assessmentc. Create a bulleted list
i. Click inside the text that reads, “Click to add text” of the left textbox
ii. Type: Usually skipped The way things are The way they should be Client needs Customer Needs Baseline
d. Insert cliparti. In the right box that reads, “Click to add text” hover your mouse
pointer over the images on the insideii. Click on the one that reads “Clip Art” (in a pop up tool tip)
1. A Clip Art column now appears to the right of your screen2. In the Search For: text box type, puzzle3. Click the Go button4. A number of image results will appear below5. To input one into your slide, simply click on it
e. Edit your clip arti. Move clip art
1. Click once on the image to select it2. Move your mouse pointer inside the image, click, and drag
ii. Resize clip art1. Click once on the image to select it2. Move your mouse pointer to one of the corner sizing
handles, click, and dragiii. Close the Clip Art window
10. Slide consistencya. What is this?
When creating a slideshow you want to make sure the colors, fonts, images, and positions of objects remain consistent
b. In the Slides column on the left of your screen, select the second slide (outline)
i. Notice how the title and the text are in different positions than in the third slide. The size of the font is also different.
c. Create a new slidei. First, select the second slide
8 | P a g e

1. New slides appear directly after the selected slideii. On the Ribbon, select the Home tab > in the Slides group > click
on New Slide (drop down menu)iii. From the drop down menu select, Two Content
d. Copy and pasteThis is an option for you to cut, copy, and paste selections of text and other objects in you document
i. Select the second slide using the Slides column on the leftii. Copy text
1. Select the text, Outline in the title2. Use the keyboard shortcut, Ctrl+C
iii. Paste text1. Select the new slide (third slide) in the Slides column on
the left2. Click once inside the textbox that reads, Click to add title3. Use the keyboard shortcut, Ctrl+V4. You should now see Outline appear in the textbox
e. Class challengei. Have the class copy and paste the bulleted list from the second
slide to the new (third) slide, into the left main text box that reads, Click to add text
f. Delete a slidei. Select the old Outline slide (second slide)ii. Tap the Delete key on your keyboard
11. Slide with multimediaa. What is this?
A slide using multimedia includes movie or sound files. These files can be played when the slide appears or when clicked
b. Create a new slidei. Select the third slide (your last slide)ii. On the Ribbon, select the Home tab > in the Slides group > click
on New Slide (drop down menu)iii. From the drop down menu select, Two Contentiv. In the textbox that has, “Click to add title” click inside and type:
Web Site Objectivesc. Create a bulleted list
i. Click inside the text that reads, “Click to add text” of the right textbox in the middle area
ii. Type: Meet needs Modern design Latest technology Ease of use
9 | P a g e
Room for growth d. Insert movie/sound file
i. In the left middle box that reads, “Click to add text” hover your mouse pointer over the images on the inside
ii. Click on the one that reads “Insert Media Clip” (in a pop up text box)
1. An Insert Movie window now appears2. Look in Desktop > Course Folder > PowerPoint I3. Select the webObjectives.mov file4. Click the OK button
iii. A new window appears that reads, How do you want the movie to start in the slideshow?
1. Automatically means the movie will play once the slide opens
2. When clicked means you have the control to open the movie whenever you are ready by clicking on it in the slide during your presentation
3. Choose When Clickede. Move and resize your movie
i. Move the movie1. Click once on the movie to select it2. Move your mouse pointer inside the movie, click and drag
ii. Resize the movie1. Click once on the movie to select it
iii. Move your mouse pointer to one of the corner sizing handles, click and drag
12. Slide with chart/grapha. What is this?
A slide which displays an interactive Microsoft Excel chart/graph. The chart is created and edited in Excel while using PowerPoint
b. Create a new slidei. Select the forth slide (your last slide)ii. On the Ribbon, select the Home tab > in the Slides group > click
on New Slide (drop down menu)iii. From the drop down menu select, Comparisoniv. In the textbox that has, “Click to add title” click inside and type:
Strategy and Planc. Create a chart comparison
i. Click inside the small textbox that reads, “Click to add text” on the left just above the large content textbox in the middle of the slide
1. Type: Past product availability
10 | P a g e
ii. Click inside the small textbox that reads, “Click to add text” on the right just above the large content textbox in the middle of the slide
1. Type: Future product availabilityd. Insert a chart/graph
i. In the left main content textbox click on the icon that reads Insert Chart when you hover your mouse over it
ii. A new Insert Chart window appears1. Select the Pie chart2. Click on the OK button
iii. A new Excel spreadsheet window appears1. Type the following into the spreadsheet
2000-2006Baseballs 20Bats 15Shoes 10DVD's 5
2. Close Excele. Class challenge
i. Have the class insert a chart in the right content textboxii. Afterwards, show how it is done and input a pie chart using the
following:2007-->
Baseballs 10Bats 10Shoes 10DVD's 10
f. Save the file
13. Preview your slideshowa. What is this?
A way to view the visual presentation as your audience will see itb. Preview the show
i. On the Ribbon, select the View tab > in the Presentation Views group > Click Slide Show
ii. The first slide will open and fill the entire screeniii. Navigate the show
1. To advanced to the next slide, use the right arrow key on your keyboard
2. To go back use your left arrow key3. To leave the show altogether use the Esc key
11 | P a g e

14. Slide transitiona. What is this?
This is a special effect used to change from one slide into the nextb. Use a transition
i. Select the first slide using the Slides columnii. On the Ribbon, select the Animations tab > in the Transition to
This Slide group > Use the down arrow for More transition choices > Hover and then click one of the rectangular transition thumbnails (they show the type of transition in the shape)
iii. In the Slides column, just to the left of the slide 1 thumbnail you will now see a slide transition icon
c. Apply to all slidesi. On the Ribbon, select the Animations tab > in the Transition to
This Slide group > click Apply to Allii. All slide thumbnails now have the transition icon to the left
d. Discuss other options like transition speed and sounde. Preview the Slideshow
i. Try using the keyboard shortcut F5
15. Object animationa. What is this?
Often objects like textboxes, photos, charts, and so on in your presentation could be enhanced by animating them. It is particularly helpful to give a presentation with an animated bulleted list
b. Animatei. Title
1. Select the second slide2. Click once inside the slide’s title, Outline3. On the Ribbon, select the Animations tab > in the
Animations group > click Custom Animation4. In the new Custom Animation column to the right
a. Click the Add Effect, select Entrance > More Effectsi. In the Add Entrance Effect window select
any animationii. Click the OK button
b. Under Modify: you can change any available options for that animation
5. To delete this effect, right click on the effect as it appears in the large box below Modify: and choose Remove
6. To bring it back, use the keyboard shortcut, Ctrl+Zii. Bulleted List
1. Click once inside the slide’s bulleted list
12 | P a g e

2. Add an effect following the same procedure3. Modify the options for the effect if you want to4. Notice that the effect applies to the entire list
c. Challenge the class to animate slides 1 & 3d. Preview the slideshowe. Save the file
16. Saving as a slideshowa. What is this?
When you are ready to present do not open your .pptx. Instead there is a better way to open straight into the slideshow without having to go into edit mode
b. Save as a .pptxi. Always save your file as a .pptx first. This will preserve the file in a
state that you can open again and edit like todayc. Save as a .ppsx
i. Select Office Button > Save As > PowerPoint Show1. In the Save As window save the file in the same location as
your .pptx2. Save as yourname.ppsx3. For compatibility with older PowerPoint versions you could
save the file as a .ppsd. Close PowerPoint and tryout your new presentation
17. Open floor for Q&A
18. Next week - PowerPoint II – Intermediate Topicsa. Speed up your work, slide master, create your own slide design, footer,
tables, design concepts, comments, SmartArt, buttons, presentation pointer options, notes, and handouts
13 | P a g e