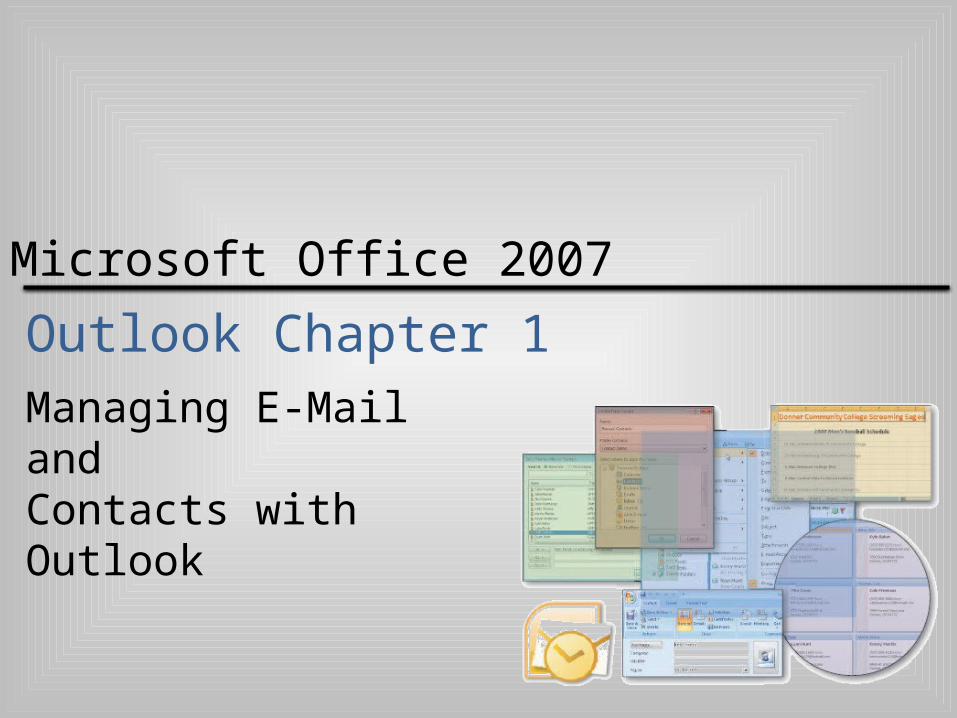
Microsoft Office 2007 Outlook Chapter 1 Managing E-Mail and Contacts with Outlook.
84
Microsoft Office 2007 Outlook Chapter 1 Managing E-Mail and Contacts with Outlook
-
Upload
stephanie-charles -
Category
Documents
-
view
245 -
download
1
Transcript of Microsoft Office 2007 Outlook Chapter 1 Managing E-Mail and Contacts with Outlook.
Microsoft Office 2007
Outlook Chapter 1Managing E-Mail andContacts with Outlook
Microsoft Office 2007: Introductory Concepts and Techniques - Windows Vista Edition 2
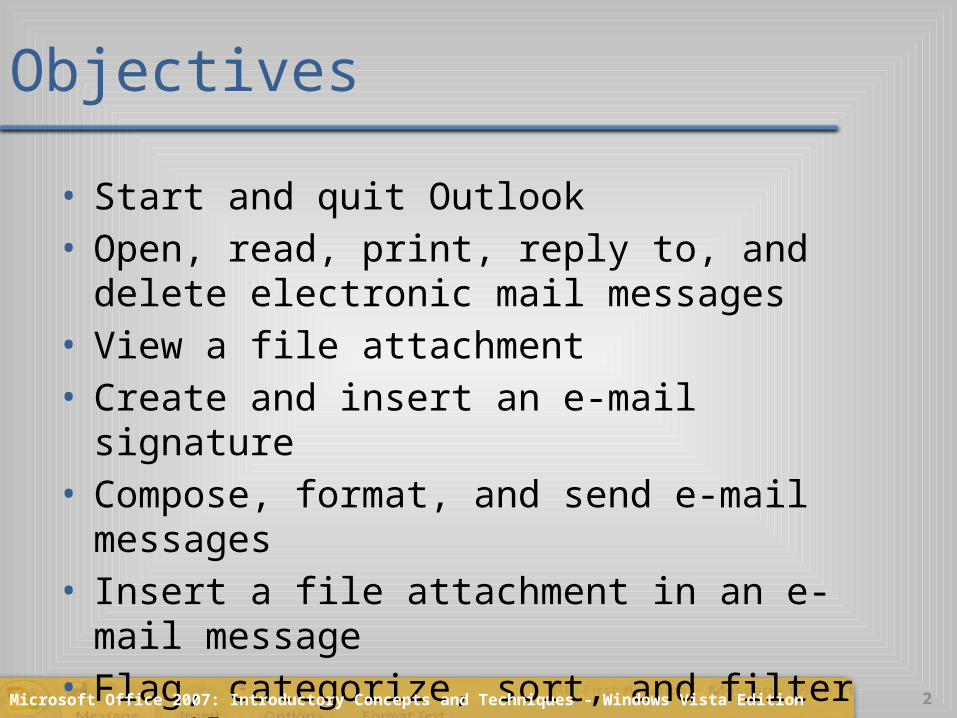
Objectives
• Start and quit Outlook• Open, read, print, reply to, and delete electronic mail
messages• View a file attachment• Create and insert an e-mail signature• Compose, format, and send e-mail messages• Insert a file attachment in an e-mail message• Flag, categorize, sort, and filter e-mail messages

Microsoft Office 2007: Introductory Concepts and Techniques - Windows Vista Edition 3
Objectives
• Set e-mail importance, sensitivity, and delivery options
• Create a personal folder• Create and print a contact list• Use the Find a Contact feature• Organize the contact list• Track activities of a contact• Use Outlook’s Help

Microsoft Office 2007: Introductory Concepts and Techniques - Windows Vista Edition 4
Plan Ahead
• Choose the words for the Subject line• Ensure that the content of the message is
appropriate for the recipient• Choose the words for the text• Identify how to format various elements of
the text• Alert the recipient when sending large file
attachments

Microsoft Office 2007: Introductory Concepts and Techniques - Windows Vista Edition 5
Starting and Customizing Outlook
• Click the Start button on the Windows Vista taskbar to display the Start menu
• Click All Programs at the bottom of the left pane on the Start menu to display the All Programs list
• Click Microsoft Office on the All Programs submenu to display the Microsoft Office submenu
• Click Microsoft Office in the All Programs list to display the Microsoft Office list
• Click Microsoft Office Outlook 2007 to start Outlook. If necessary, click the Mail button in the Navigation Pane and then click the Inbox folder in the Mail Folders pane to display the Inbox message pane
• If the Inbox – Microsoft Office Outlook window is not maximized, click the Maximize button next to the Close button on its title bar to maximize the window
• Drag the right border of the Inbox message pane to the right so that the Inbox message pane and the Reading pane have the same width

Microsoft Office 2007: Introductory Concepts and Techniques - Windows Vista Edition 6
Starting and Customizing Outlook
Microsoft Office 2007: Introductory Concepts and Techniques - Windows Vista Edition 7
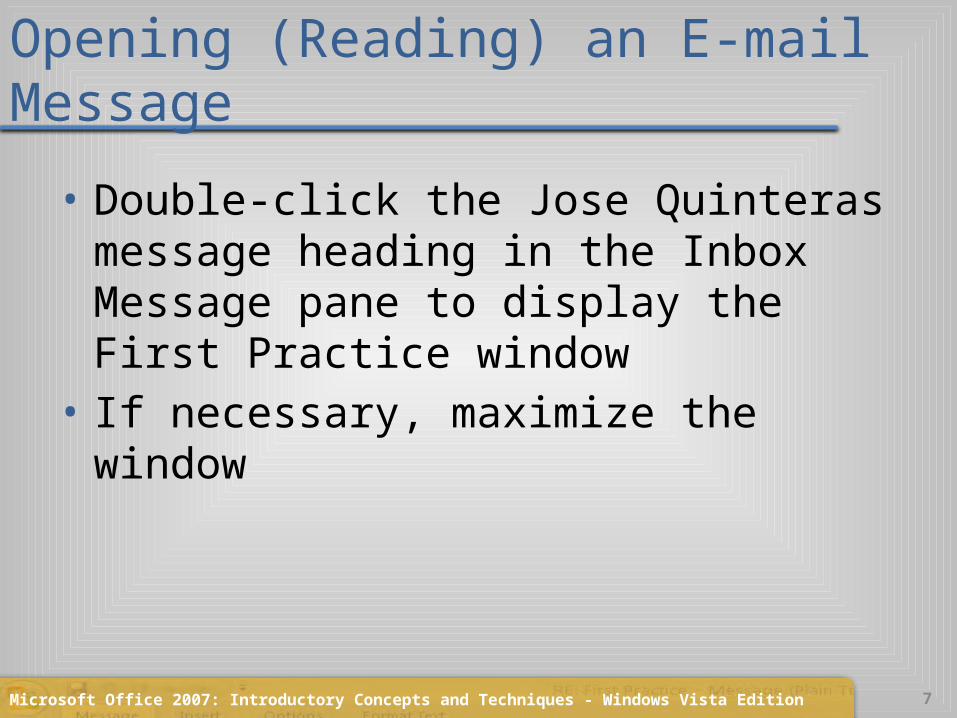
Opening (Reading) an E-mail Message
• Double-click the Jose Quinteras message heading in the Inbox Message pane to display the First Practice window
• If necessary, maximize the window

Microsoft Office 2007: Introductory Concepts and Techniques - Windows Vista Edition 8
Opening (Reading) an E-mail Message
Microsoft Office 2007: Introductory Concepts and Techniques - Windows Vista Edition 9
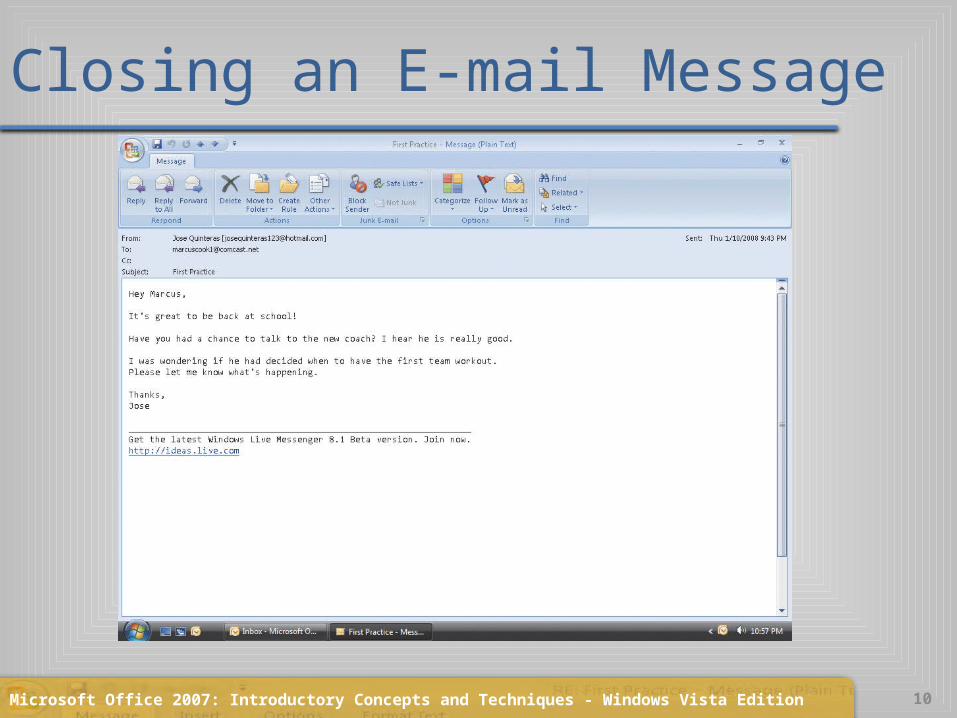
Closing an E-mail Message
• Click the Close button on the title bar to close the Message window
Microsoft Office 2007: Introductory Concepts and Techniques - Windows Vista Edition 10
Closing an E-mail Message

Microsoft Office 2007: Introductory Concepts and Techniques - Windows Vista Edition 11
Printing an E-mail Message
• Point to the Print button on the Standard toolbar
• Click the Print button to print the message

Microsoft Office 2007: Introductory Concepts and Techniques - Windows Vista Edition 12
Printing an E-mail Message

Microsoft Office 2007: Introductory Concepts and Techniques - Windows Vista Edition 13
Replying to an E-mail Message
• If necessary, click the Jose Quinteras message heading in the message pane
• Click the Reply button on the Standard toolbar to open the RE: First Practice – Message window
• When Outlook displays the Message window for the reply, if necessary, double-click the title bar to maximize the window
• Type the e-mail reply• Click the Send button to send the message and
return to the Inbox window

Microsoft Office 2007: Introductory Concepts and Techniques - Windows Vista Edition 14
Replying to an E-mail Message
Microsoft Office 2007: Introductory Concepts and Techniques - Windows Vista Edition 15
Changing Message Formats
• With a new Message window active, click the Options tab
• Click the appropriate command (Plain Text, HTML, or Rich Text) in the Format group

Microsoft Office 2007: Introductory Concepts and Techniques - Windows Vista Edition 16
Changing Message Formats
Microsoft Office 2007: Introductory Concepts and Techniques - Windows Vista Edition 17
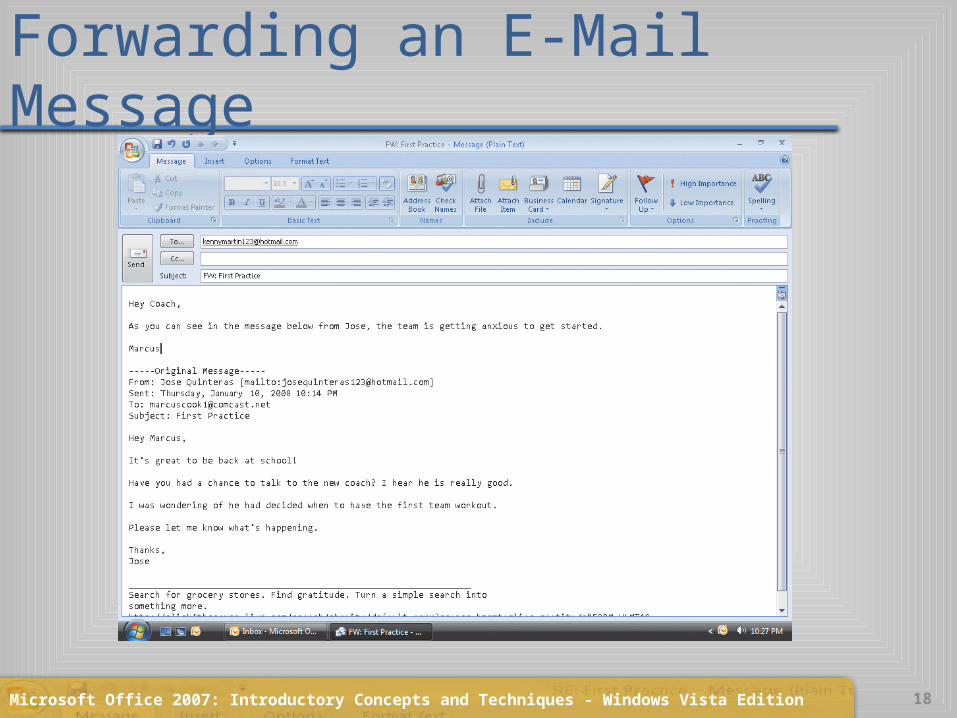
Forwarding an E-Mail Message
• With the Inbox window active, click the Jose Quinteras message header in the message pane
• Click the Forward button on the Standard toolbar• When Outlook displays the Message window for the
forwarded message, type [email protected] in the To text box as the recipient’s e-mail address. (If you are stepping through this task, use an actual e-mail address in the To text box)
• Enter the forwarding message in the message body• Click the Send button to forward the original message along
with the new message to Kenny
Microsoft Office 2007: Introductory Concepts and Techniques - Windows Vista Edition 18
Forwarding an E-Mail Message
Microsoft Office 2007: Introductory Concepts and Techniques - Windows Vista Edition 19
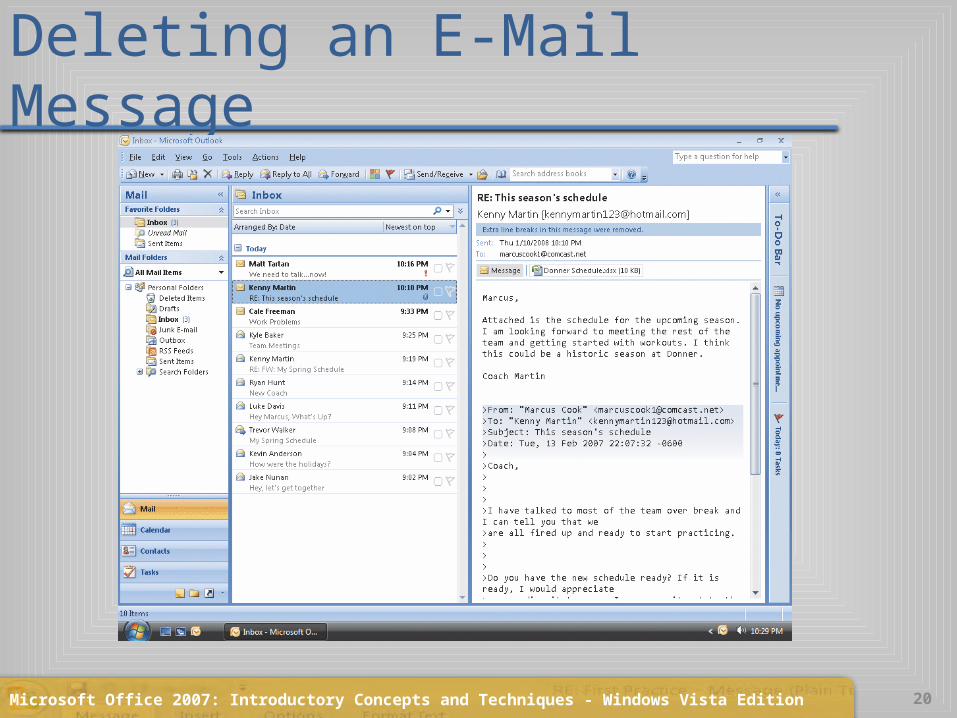
Deleting an E-Mail Message
• With the Inbox window active, click the Jose Quinteras message heading in the message pane to select the message
• Click the Delete button on the Standard toolbar to remove the message from your Inbox
Microsoft Office 2007: Introductory Concepts and Techniques - Windows Vista Edition 20
Deleting an E-Mail Message
Microsoft Office 2007: Introductory Concepts and Techniques - Windows Vista Edition 21
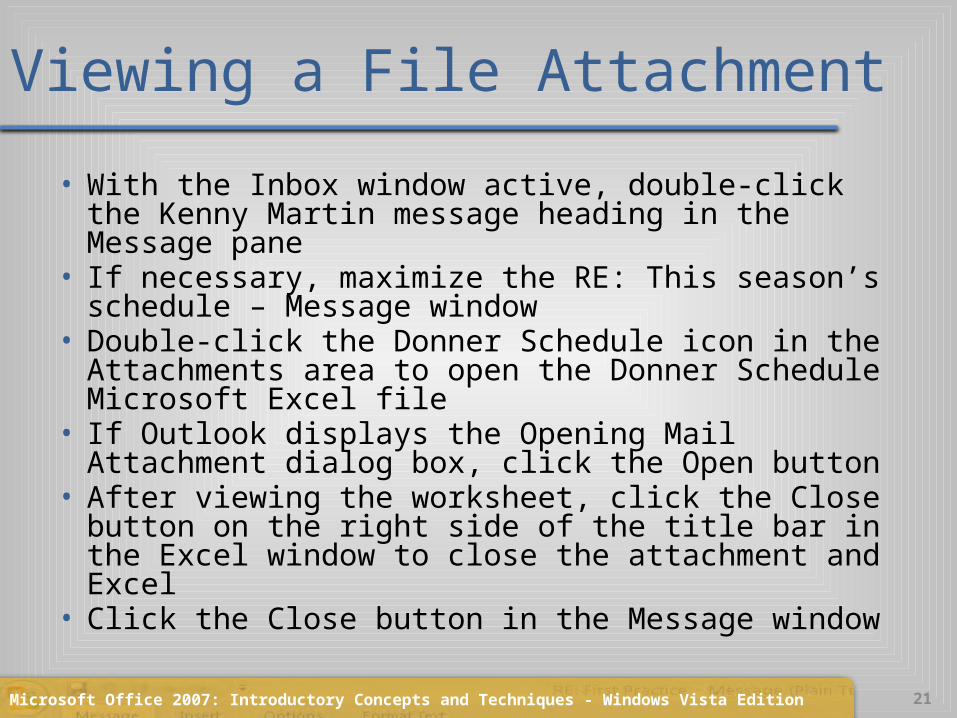
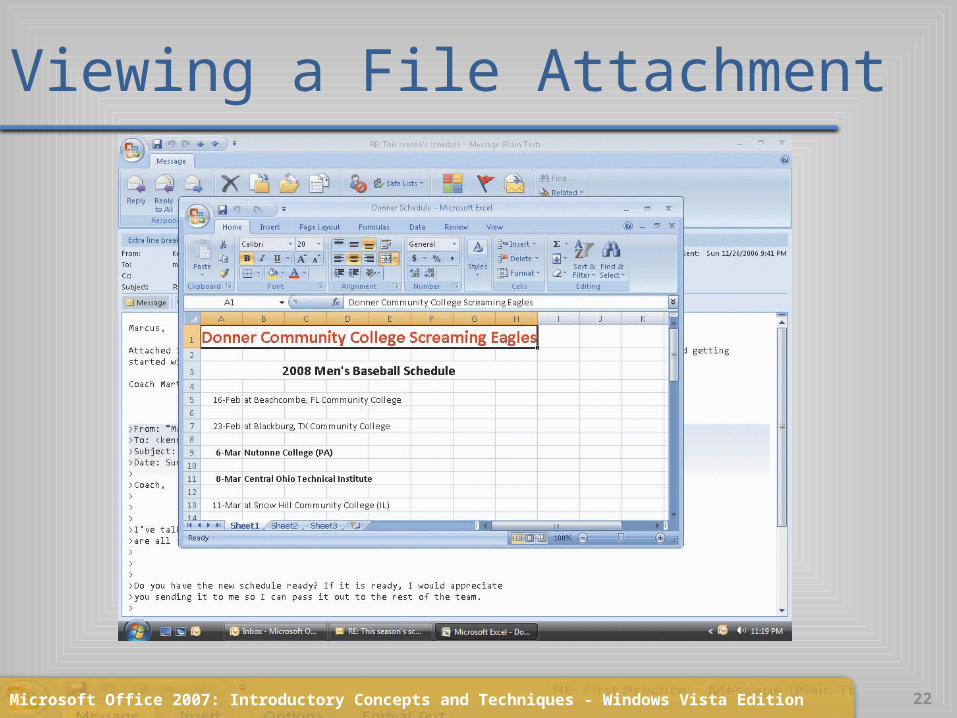
Viewing a File Attachment
• With the Inbox window active, double-click the Kenny Martin message heading in the Message pane
• If necessary, maximize the RE: This season’s schedule – Message window
• Double-click the Donner Schedule icon in the Attachments area to open the Donner Schedule Microsoft Excel file
• If Outlook displays the Opening Mail Attachment dialog box, click the Open button
• After viewing the worksheet, click the Close button on the right side of the title bar in the Excel window to close the attachment and Excel
• Click the Close button in the Message window
Microsoft Office 2007: Introductory Concepts and Techniques - Windows Vista Edition 22
Viewing a File Attachment

Microsoft Office 2007: Introductory Concepts and Techniques - Windows Vista Edition 23
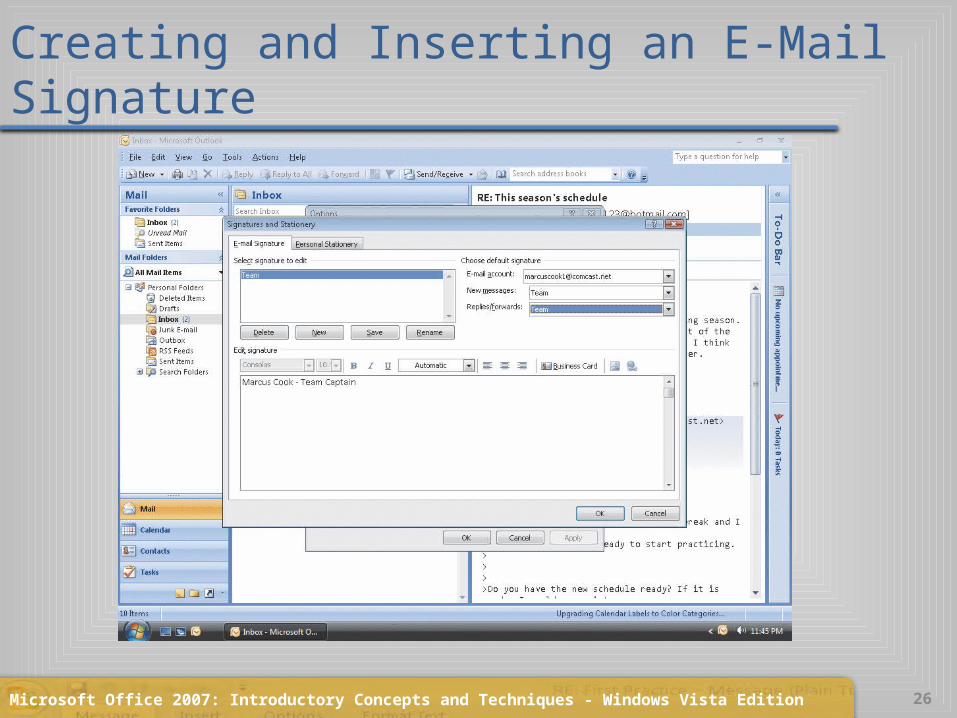
Creating and Inserting an E-Mail Signature
• With the Inbox window active, click Tools on the menu bar to display the Tools menu
• Click Options on the Tools menu to display the Options dialog box
• Click the Mail Format tab to display the Mail Format sheet
• Click the Signatures button to display the Signatures and Stationery dialog box
• Click the New button to display the New Signature dialog box
Microsoft Office 2007: Introductory Concepts and Techniques - Windows Vista Edition 24
Creating and Inserting an E-Mail Signature
• When Outlook displays the New Signature dialog box, type Team in the ‘Type a name for this signature’ text box
• Click the OK button• Click in the Edit signature area of the Signatures and
Stationery dialog box and type Marcus Cook – Team Captain as the signature
• In the Choose default signature area of the Signatures and Stationery dialog box, select the appropriate e-mail account (if you are stepping through this project, ask your instructor for the appropriate e-mail account)
Microsoft Office 2007: Introductory Concepts and Techniques - Windows Vista Edition 25
Creating and Inserting an E-Mail Signature
• If necessary, select Team in the New messages box and the Replies/forwards box to select it as the default signature
• Click the OK button to close the Signatures and Stationery dialog box. Click OK in the Options dialog box to close the dialog box
Microsoft Office 2007: Introductory Concepts and Techniques - Windows Vista Edition 26
Creating and Inserting an E-Mail Signature

Microsoft Office 2007: Introductory Concepts and Techniques - Windows Vista Edition 27
Composing an E-Mail Message
• With the Inbox window active, point to the New Mail Message button on the Standard toolbar
• Click the New Mail Message button to open the Untitled – Message window
• Type kennymartin123@ hotmail.com in the To text box, click the Subject text box, and then type Draft Practice Schedule in the Subject text box
• Press the TAB key to move the insertion point into the message body area
• Type the e-mail message

Microsoft Office 2007: Introductory Concepts and Techniques - Windows Vista Edition 28
Composing an E-Mail Message

Microsoft Office 2007: Introductory Concepts and Techniques - Windows Vista Edition 29
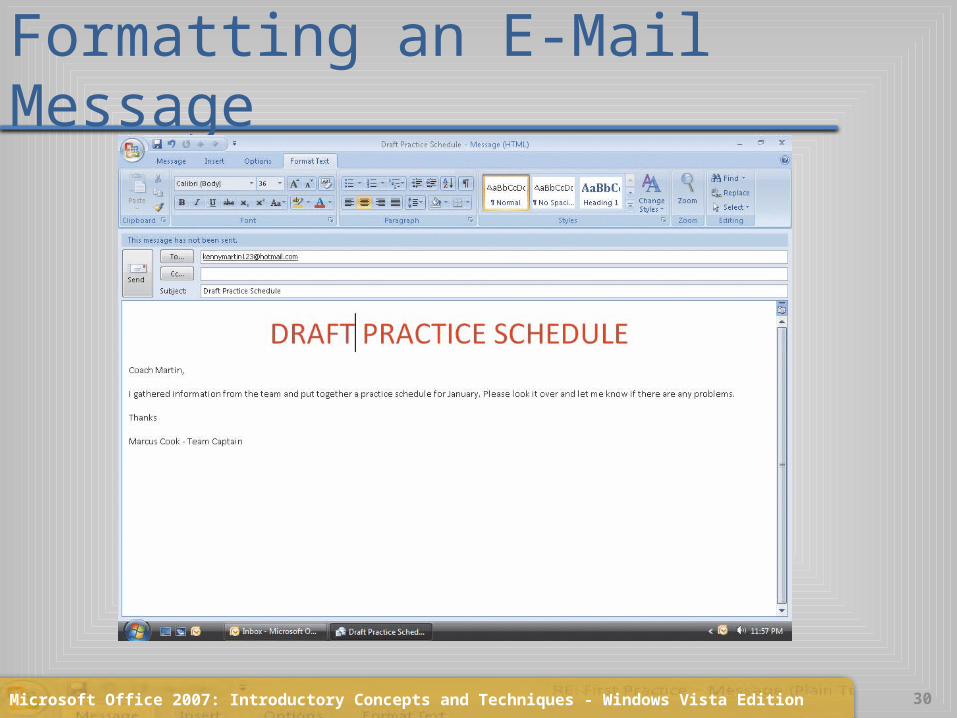
Formatting an E-Mail Message
• Highlight the text, DRAFT PRACTICE SCHEDULE, in the message body and then click the Format Text tab
• Click the Center button in the Paragraph group on the Format Text tab to center the selected text
• Click the Font Color button in the Font group on the Format Text tab to change the color of the selected text to red
• Click the Font Size box arrow in the Font group on the Format Text tab to display the Font Size list
• Scroll down the Font Size list, click 36, and then click the selected text to remove the selection
Microsoft Office 2007: Introductory Concepts and Techniques - Windows Vista Edition 30
Formatting an E-Mail Message
Microsoft Office 2007: Introductory Concepts and Techniques - Windows Vista Edition 31
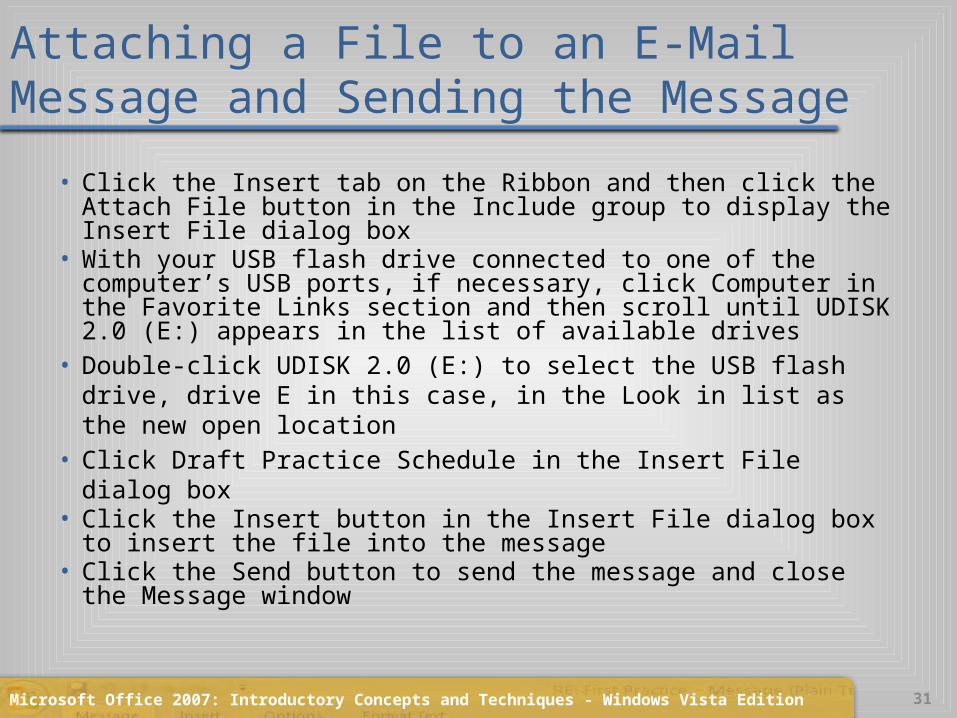
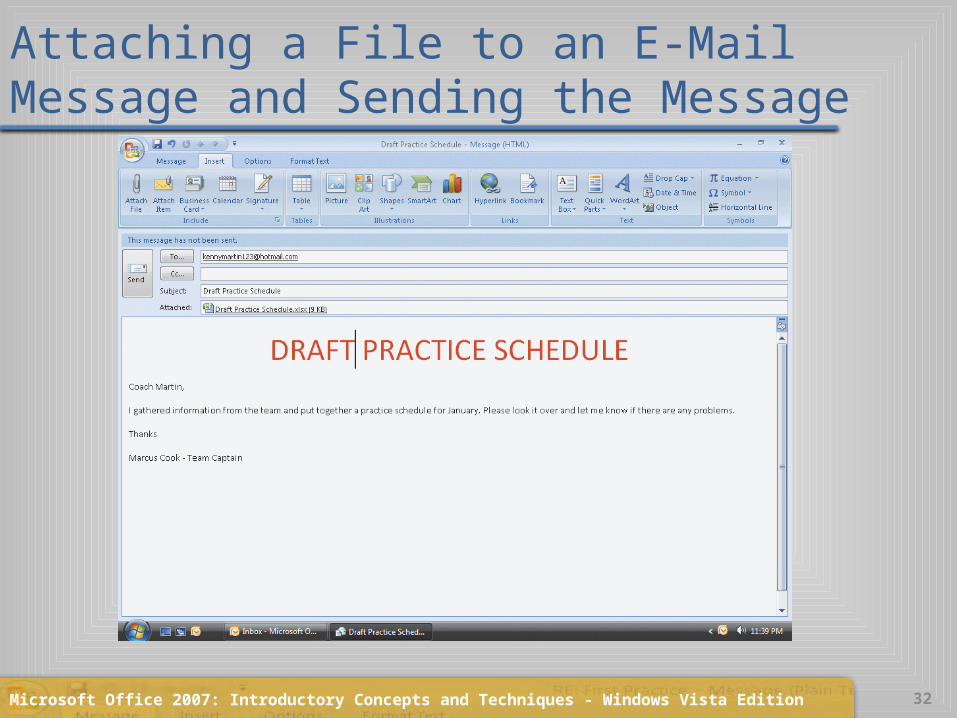
Attaching a File to an E-Mail Message and Sending the Message
• Click the Insert tab on the Ribbon and then click the Attach File button in the Include group to display the Insert File dialog box
• With your USB flash drive connected to one of the computer’s USB ports, if necessary, click Computer in the Favorite Links section and then scroll until UDISK 2.0 (E:) appears in the list of available drives
• Double-click UDISK 2.0 (E:) to select the USB flash drive, drive E in this case, in the Look in list as the new open location
• Click Draft Practice Schedule in the Insert File dialog box• Click the Insert button in the Insert File dialog box to insert the
file into the message• Click the Send button to send the message and close the
Message window
Microsoft Office 2007: Introductory Concepts and Techniques - Windows Vista Edition 32
Attaching a File to an E-Mail Message and Sending the Message

Microsoft Office 2007: Introductory Concepts and Techniques - Windows Vista Edition 33
Categorizing E-Mail Messages
• With the Inbox window active, right-click the Kenny Martin message heading to display the message shortcut menu.
• Point to Categorize to display the Categories submenu
• Click the Red Category command on the Categories submenu. If the Rename Category dialog box appears, click No.
• Repeat Steps 1 and 2 to categorize the remaining messages in the message pane

Microsoft Office 2007: Introductory Concepts and Techniques - Windows Vista Edition 34
Categorizing E-Mail Messages

Microsoft Office 2007: Introductory Concepts and Techniques - Windows Vista Edition 35
Flagging E-Mail Messages
• With the Inbox window active, right-click the Kenny Martin message heading to display the message shortcut menu
• Point to Follow Up to display the Follow Up submenu• Click the Today command on the Follow Up submenu
to assign a Follow Up flag with today as the due date.• Repeat Steps 1 and 2 to add Follow Up flags to the
remaining messages in the message pane • Select different flags as necessary

Microsoft Office 2007: Introductory Concepts and Techniques - Windows Vista Edition 36
Flagging E-Mail Messages

Microsoft Office 2007: Introductory Concepts and Techniques - Windows Vista Edition 37
Sorting E-Mail Messages by Category Color
• With the Inbox window active, click View on the menu bar to open the View menu. Point to Arrange By to display the Arrange By submenu
• Click Categories on the Arrange By submenu to sort the messages by Category
• Return to the previous view by repeating Step 1 and then clicking Date on the Arrange By submenu

Microsoft Office 2007: Introductory Concepts and Techniques - Windows Vista Edition 38
Sorting E-Mail Messages by Category Color

Microsoft Office 2007: Introductory Concepts and Techniques - Windows Vista Edition 39
Creating and Applying a View Filter
• With the Inbox window active, click View on the menu bar
• Point to Arrange By on the View menu and then click Custom on the Arrange By submenu to display the Customize View: Messages dialog box
• Click the Filter button to display the Filter dialog box.• Click the From text box• Type Kenny Martin in the From text box to
specify that only e-mail messages from Kenny Martin are to appear
Microsoft Office 2007: Introductory Concepts and Techniques - Windows Vista Edition 40
Creating and Applying a View Filter
• Click the OK button in the Filter dialog box and the Customize View: Message dialog box to close both boxes and apply the view filter
• Repeat Steps 1 and 2 to display the Filter dialog box• Click the Clear All button in the Filter dialog box to
remove the view filter• Close the Filter and Customize View: Message dialog
boxes by clicking the OK button in each dialog box

Microsoft Office 2007: Introductory Concepts and Techniques - Windows Vista Edition 41
Creating and Applying a View Filter
Microsoft Office 2007: Introductory Concepts and Techniques - Windows Vista Edition 42
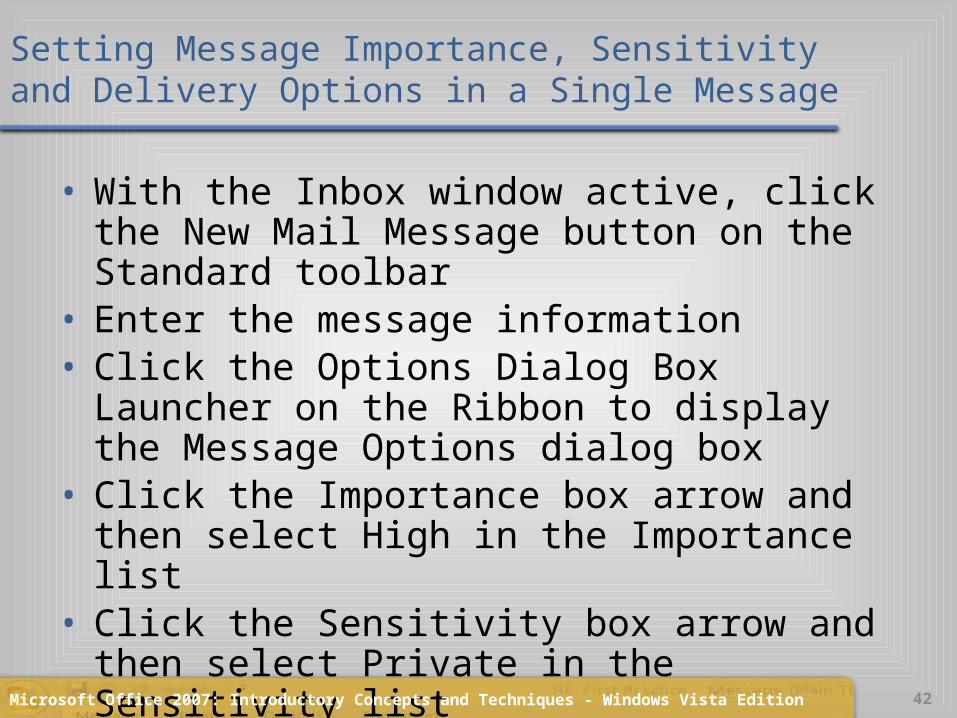
Setting Message Importance, Sensitivity and Delivery Options in a Single Message
• With the Inbox window active, click the New Mail Message button on the Standard toolbar
• Enter the message information• Click the Options Dialog Box Launcher on the Ribbon
to display the Message Options dialog box• Click the Importance box arrow and then select High
in the Importance list• Click the Sensitivity box arrow and then select Private
in the Sensitivity list

Microsoft Office 2007: Introductory Concepts and Techniques - Windows Vista Edition 43
Setting Message Importance, Sensitivity and Delivery Options in a Single Message
• Click the ‘Do not deliver before‘ check box in the Delivery options area to select it
• Select January 14, 2008 in the calendar and 12:00 PM as the time in the respective delivery boxes
• Click the Close button to close the dialog box
• Click the Send button to send the message

Microsoft Office 2007: Introductory Concepts and Techniques - Windows Vista Edition 44
Setting Message Importance, Sensitivity and Delivery Options in a Single Message

Microsoft Office 2007: Introductory Concepts and Techniques - Windows Vista Edition 45
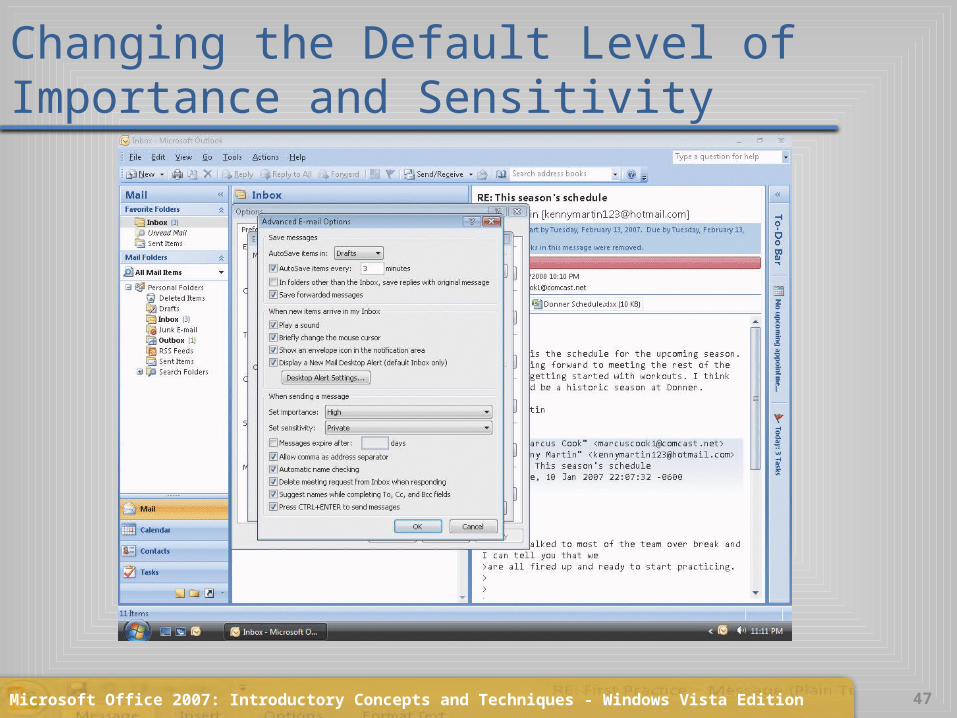
Changing the Default Level of Importance and Sensitivity
• With the Inbox window active, click Tools on the menu bar and then click Options on the Tools menu to display the Options dialog box
• In the Preferences sheet, click the E-mail Options button to display the E-mail Options dialog box
• Click the Advanced E-mail Options button to open the Advanced E-mail Options dialog box
• Click the Set importance box arrow to display the importance options
• Select High in the Set importance list

Microsoft Office 2007: Introductory Concepts and Techniques - Windows Vista Edition 46
Changing the Default Level of Importance and Sensitivity
• Click the Set sensitivity box arrow to display the sensitivity options
• Select Private in the Set sensitivity list• Click the OK button in all three open dialog
boxes to close them and return to the Inbox window
Microsoft Office 2007: Introductory Concepts and Techniques - Windows Vista Edition 47
Changing the Default Level of Importance and Sensitivity

Microsoft Office 2007: Introductory Concepts and Techniques - Windows Vista Edition 48
Creating a Personal Folder
• Click the Contacts button in the Navigation Pane to open the Contacts window
• When Outlook displays the Contacts window, right-click Contacts in the My Contacts pane to display the Contacts shortcut menu
• Click New Folder on the Contacts shortcut menu to display the Create New Folder dialog box. Type Marcus' Contacts in the Name text box
• If necessary, select Contact Items in the Folder contains list
• Click Contacts in the Select where to place the folder list

Microsoft Office 2007: Introductory Concepts and Techniques - Windows Vista Edition 49
Creating a Personal Folder
• Click the OK button to close the Create New Folder dialog box
• In the Contacts window, click Marcus’ Contacts in the My Contacts list

Microsoft Office 2007: Introductory Concepts and Techniques - Windows Vista Edition 50
Creating a Personal Folder

Microsoft Office 2007: Introductory Concepts and Techniques - Windows Vista Edition 51
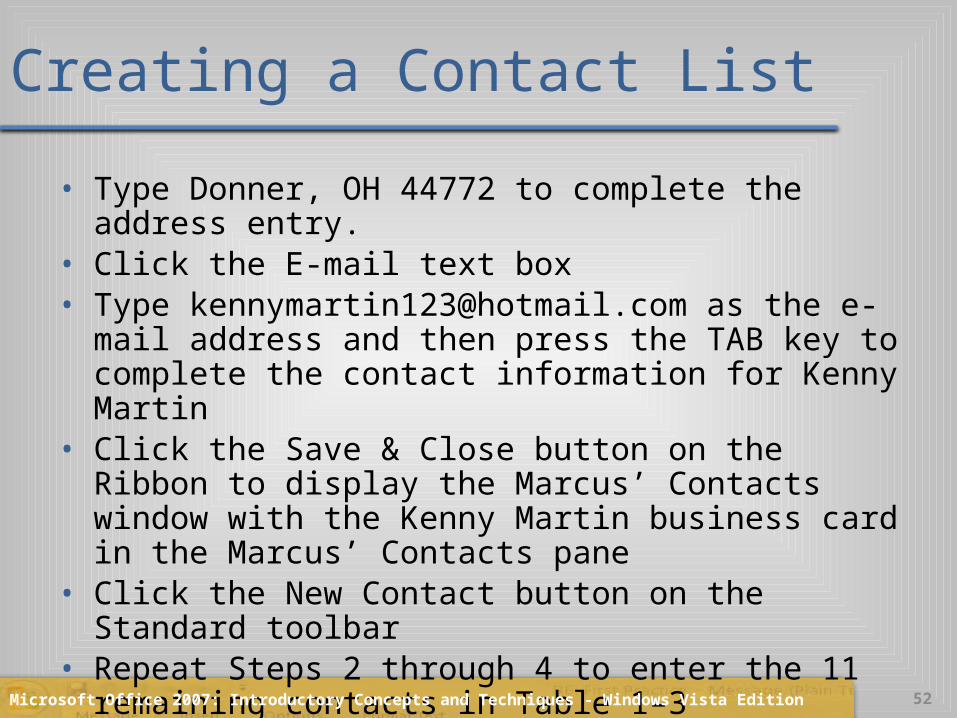
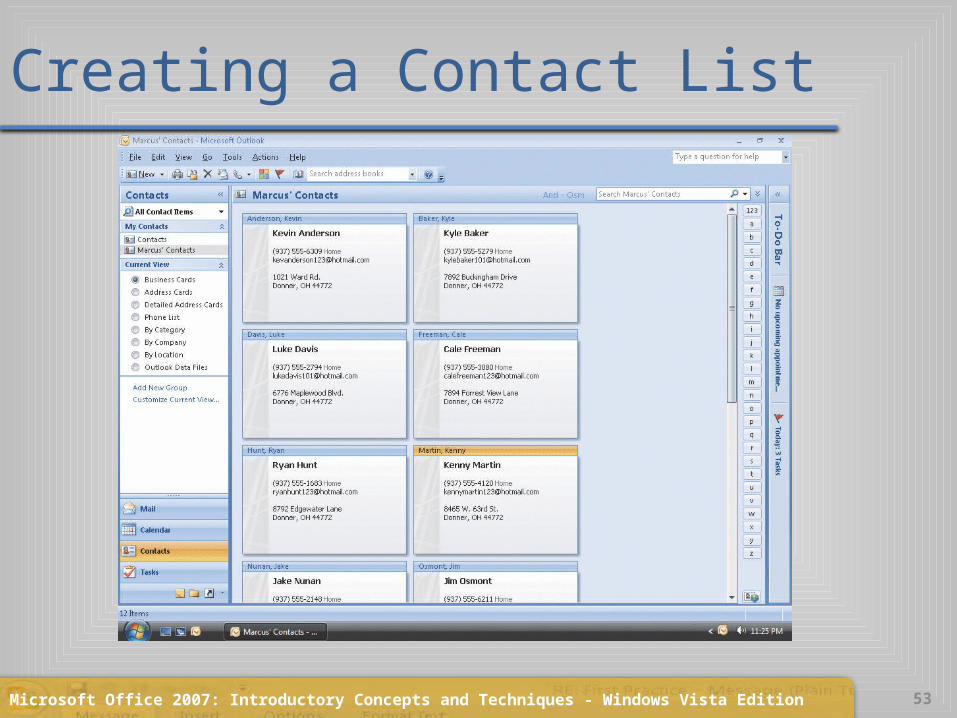
Creating a Contact List
• With the Contacts window active and Marcus’ Contacts folder selected, click the New Contact button on the Standard toolbar to open the Untitled- Contact window. If necessary, maximize the window
• Type Kenny Martin in the Full Name text box • Click the Home text box in the Phone numbers area• Type 9375554120 as the home telephone number• Click the Addresses box arrow and select Home• Click the text box in the Addresses area, type 8465 W. 63rd St. and then press the ENTER key
Microsoft Office 2007: Introductory Concepts and Techniques - Windows Vista Edition 52
Creating a Contact List
• Type Donner, OH 44772 to complete the address entry.• Click the E-mail text box• Type [email protected] as the e-mail
address and then press the TAB key to complete the contact information for Kenny Martin
• Click the Save & Close button on the Ribbon to display the Marcus’ Contacts window with the Kenny Martin business card in the Marcus’ Contacts pane
• Click the New Contact button on the Standard toolbar• Repeat Steps 2 through 4 to enter the 11 remaining contacts
in Table 1–3
Microsoft Office 2007: Introductory Concepts and Techniques - Windows Vista Edition 53
Creating a Contact List
Microsoft Office 2007: Introductory Concepts and Techniques - Windows Vista Edition 54
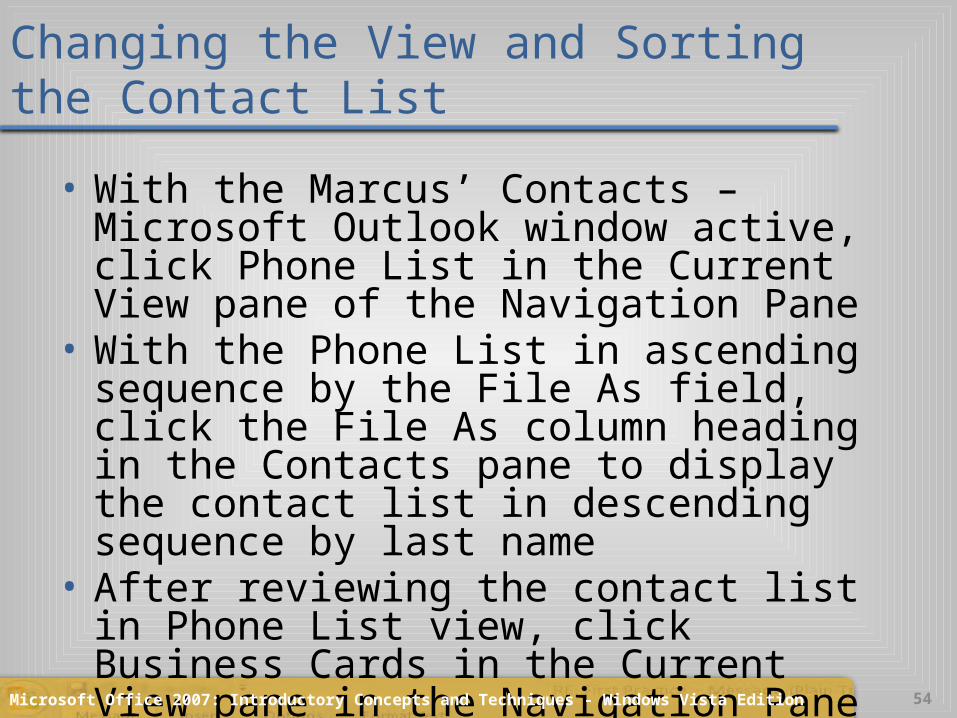
Changing the View and Sorting the Contact List
• With the Marcus’ Contacts – Microsoft Outlook window active, click Phone List in the Current View pane of the Navigation Pane
• With the Phone List in ascending sequence by the File As field, click the File As column heading in the Contacts pane to display the contact list in descending sequence by last name
• After reviewing the contact list in Phone List view, click Business Cards in the Current View pane in the Navigation Pane to return to Business Cards view

Microsoft Office 2007: Introductory Concepts and Techniques - Windows Vista Edition 55
Changing the View and Sorting the Contact List

Microsoft Office 2007: Introductory Concepts and Techniques - Windows Vista Edition 56
Finding a Contact
• Click the Find a Contact box on the Standard toolbar
• Type shu in the text box• Press the ENTER key to start the search
process• Outlook opens the Kelly Shurpa – Contact
window• Click the Close button to return to Business
Card view

Microsoft Office 2007: Introductory Concepts and Techniques - Windows Vista Edition 57
Finding a Contact

Microsoft Office 2007: Introductory Concepts and Techniques - Windows Vista Edition 58
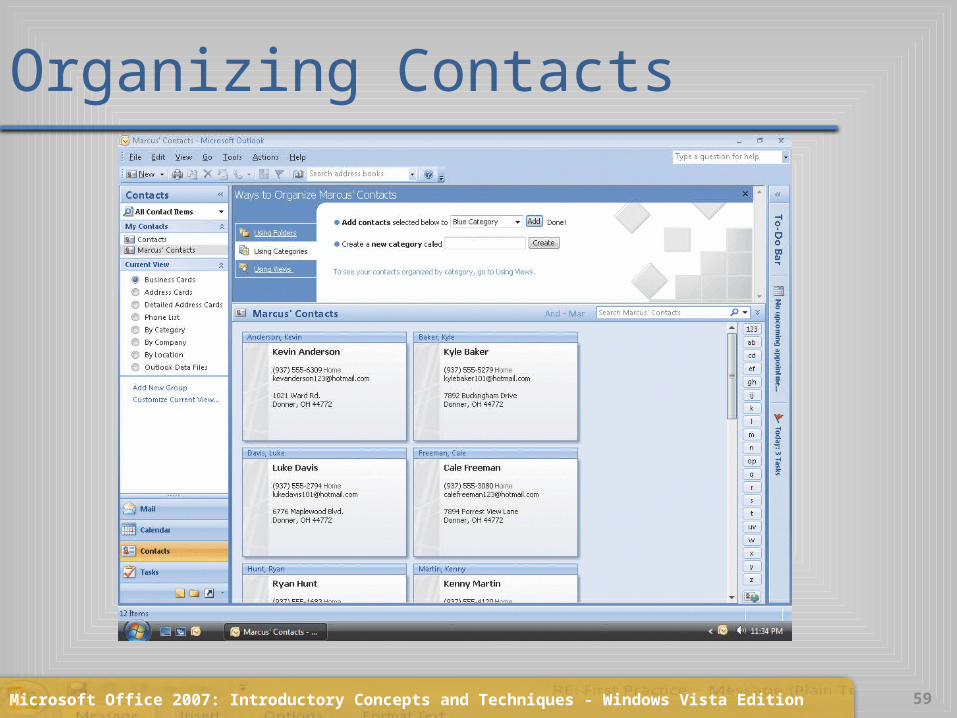
Organizing Contacts
• Click Tools on the menu bar and then click Organize on the Tools menu
• Click the name bar of the Kevin Anderson contact record• Hold down the CTRL key and then click the name bars of Cale
Freeman and Ryan Hunt• Release the CTRL key• Click the ‘Add contacts selected below to’ box arrow to display a
list of categories• Click Blue Category in the list• Click the Add button to add the selected records to the Blue
Category• Click the Close button in the Ways to Organize Marcus’ Contacts
dialog box to close it
Microsoft Office 2007: Introductory Concepts and Techniques - Windows Vista Edition 59
Organizing Contacts

Microsoft Office 2007: Introductory Concepts and Techniques - Windows Vista Edition 60
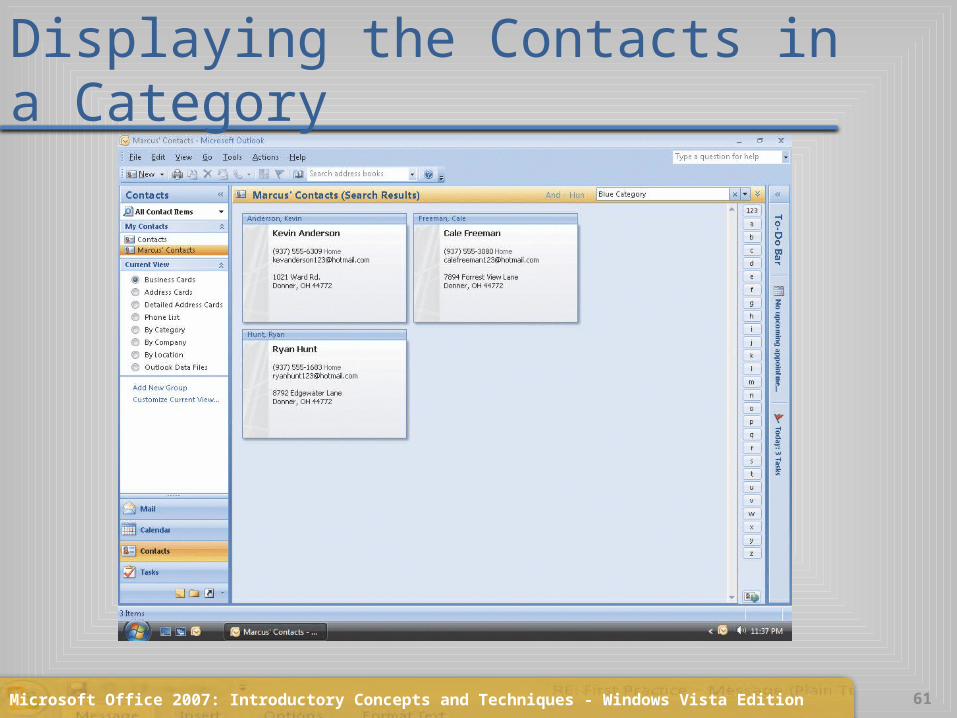
Displaying the Contacts in a Category
• With the Contacts window active, click Tools on the menu bar and then point to Instant Search to display the Instant Search submenu
• Click Instant Search on the Instant Search submenu
• Type Blue Category in the Instant Search text box and then press the ENTER key to display the three contacts that belong to the Blue Category
• After viewing the contacts in the Blue Category, click the Clear Search button to return to the full Contacts window
Microsoft Office 2007: Introductory Concepts and Techniques - Windows Vista Edition 61
Displaying the Contacts in a Category

Microsoft Office 2007: Introductory Concepts and Techniques - Windows Vista Edition 62
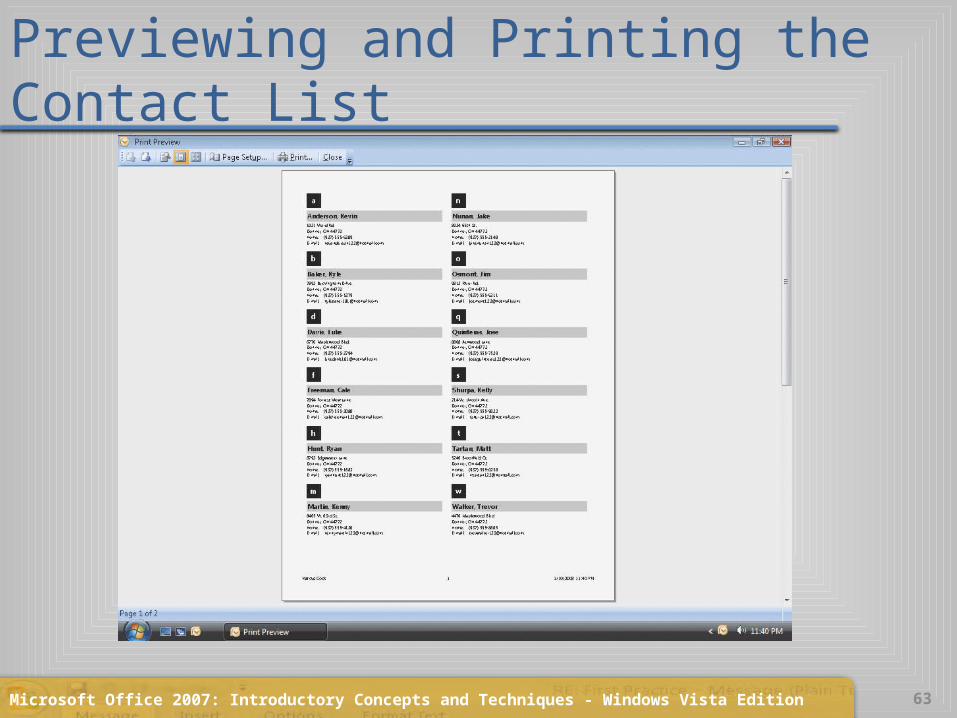
Previewing and Printing the Contact List
• With the Contacts window active, click the Print button on the Standard toolbar to display the Print dialog box
• Click the Preview button to display a preview of the printout
• After viewing the preview of the printed contacts list, click the Close button
• If the preview is acceptable, ready the printer• Click the Print button on the Standard toolbar• When Outlook displays the Print dialog box,
click the OK button
Microsoft Office 2007: Introductory Concepts and Techniques - Windows Vista Edition 63
Previewing and Printing the Contact List
Microsoft Office 2007: Introductory Concepts and Techniques - Windows Vista Edition 64
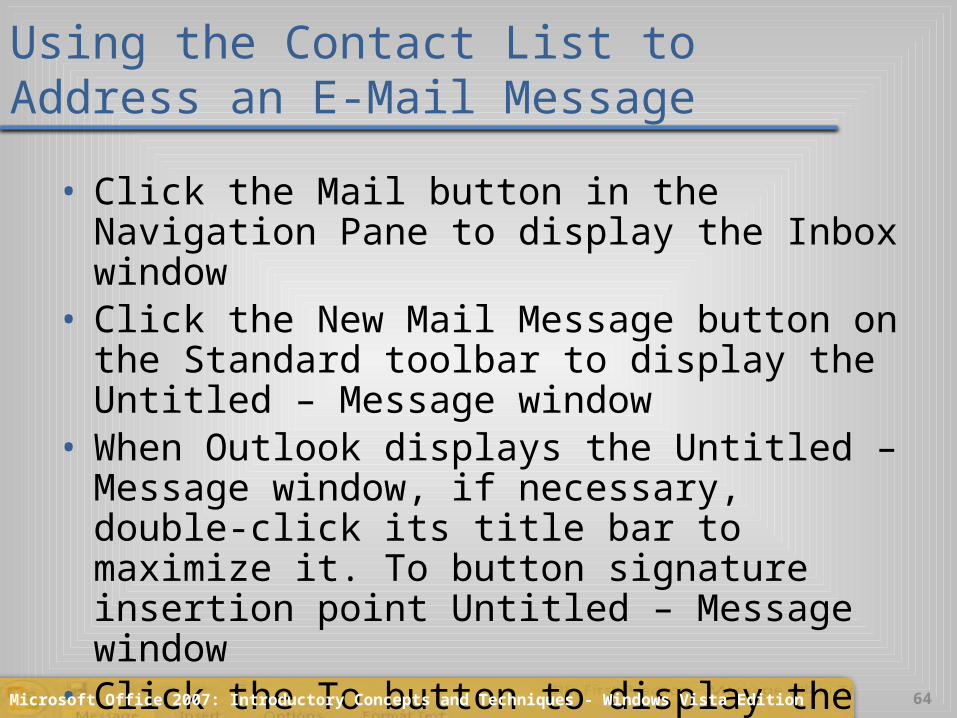
Using the Contact List to Address an E-Mail Message
• Click the Mail button in the Navigation Pane to display the Inbox window
• Click the New Mail Message button on the Standard toolbar to display the Untitled – Message window
• When Outlook displays the Untitled – Message window, if necessary, double-click its title bar to maximize it. To button signature insertion point Untitled – Message window
• Click the To button to display the Select Names dialog box
• Click the Address Book box arrow
Microsoft Office 2007: Introductory Concepts and Techniques - Windows Vista Edition 65
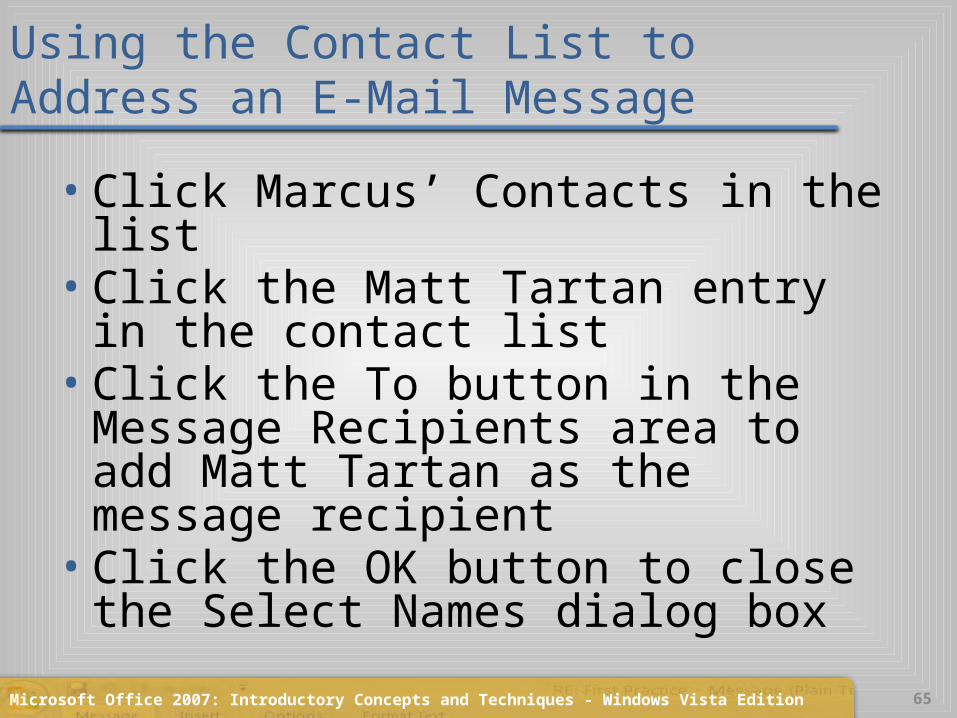
Using the Contact List to Address an E-Mail Message
• Click Marcus’ Contacts in the list• Click the Matt Tartan entry in the contact
list• Click the To button in the Message
Recipients area to add Matt Tartan as the message recipient
• Click the OK button to close the Select Names dialog box

Microsoft Office 2007: Introductory Concepts and Techniques - Windows Vista Edition 66
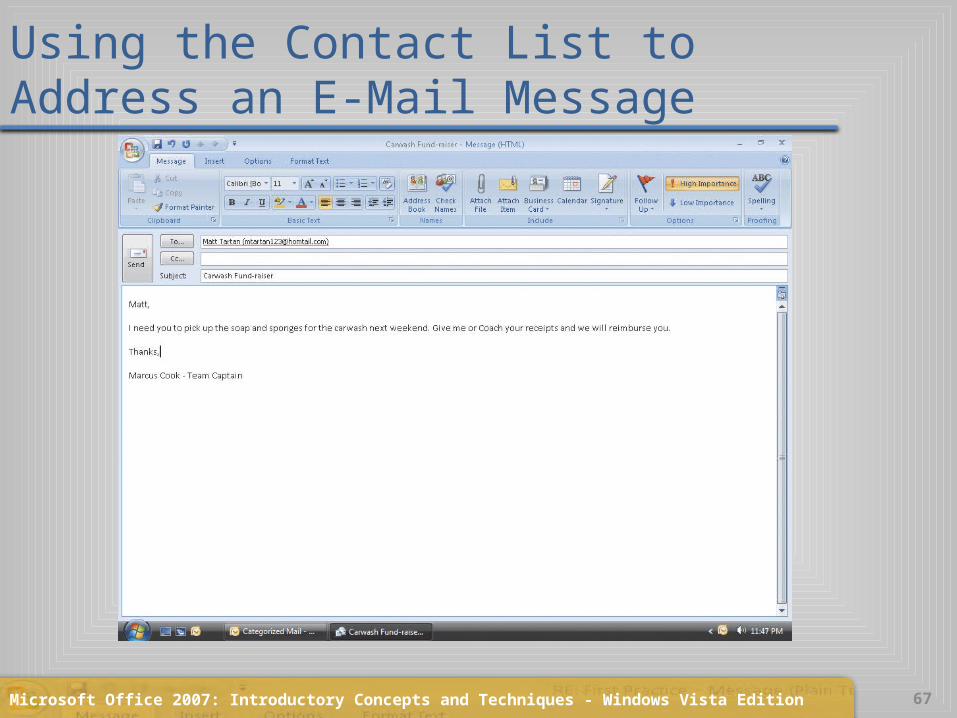
Using the Contact List to Address an E-Mail Message• Click the Subject text box and then type Carwash Fund-raiser as the entry
• Press the TAB key to move the cursor to the message area
• Type the message• Click the Send button to send the message
and close the Message window
Microsoft Office 2007: Introductory Concepts and Techniques - Windows Vista Edition 67
Using the Contact List to Address an E-Mail Message
Microsoft Office 2007: Introductory Concepts and Techniques - Windows Vista Edition 68
Creating a Distribution List
• With the Contacts window active, click the New Contact button arrow on the Standard toolbar to display the New Contact menu
• Click Distribution List to display the Untitled – Distribution List window. Type Chemistry Lab Group in the Name text box, and then click the Select Members button on the Ribbon to display the Select Members dialog box
• Click the Address Book box arrow and click Marcus’ Contacts• Select Jake Nunan and then click the Members button to add Jake
to the Chemistry Lab Group distribution list• Add Kyle Baker and Trevor Walker to the list in the same manner• Click the OK button to close the Select Members dialog box and
display the Chemistry Lab Group – Distribution List window showing the members of the Chemistry Lab Group distribution list

Microsoft Office 2007: Introductory Concepts and Techniques - Windows Vista Edition 69
Creating a Distribution List
• Click the Save & Close command on the Ribbon to close the Chemistry Lab Group – Distribution List window and activate the Contacts window
• Click the Address Book button on the Standard toolbar to display the Address Book dialog box
• Select Marcus’ Contacts in the Address Book list to display the contact list, which now includes the Chemistry Lab Group distribution list
• Click the Close button to close the Address Book window

Microsoft Office 2007: Introductory Concepts and Techniques - Windows Vista Edition 70
Creating a Distribution List
Microsoft Office 2007: Introductory Concepts and Techniques - Windows Vista Edition 71
Saving a Contact List as a Text File and Displaying it in WordPad
• Connect the USB flash drive containing the Data Files for Students to one of the computer’s USB ports
• With the Contacts window active, click the name bar of the first contact in the contact list
• Press CTRL+A to select all the contacts• Click File on the menu bar to display the File menu• Click Save As on the File menu to display the Save As
dialog box
Microsoft Office 2007: Introductory Concepts and Techniques - Windows Vista Edition 72
Saving a Contact List as a Text File and Displaying it in WordPad
• Connect the USB flash drive containing the Data Files for Students to one of the computer’s USB ports
• With the Contacts window active, click the name bar of the first contact in the contact list
• Press CTRL+A to select all the contacts• Click File on the menu bar to display the File menu• Click Save As on the File menu to display the Save As dialog box• If the Navigation Pane is not displayed in the Save As dialog box,
click the Browse Folders button to expand the dialog box• If a Folders list is displayed below the Folders button, click the
Folders button to remove the Folders list

Microsoft Office 2007: Introductory Concepts and Techniques - Windows Vista Edition 73
Saving a Contact List as a Text File and Displaying it in WordPad
• Connect the USB flash drive containing the Data Files for Students to one of the computer’s USB ports
• With the Contacts window active, click the name bar of the first contact in the contact list
• Press CTRL+A to select all the contacts• Click File on the menu bar to display the File menu• Click Save As on the File menu to display the Save As
dialog box
Microsoft Office 2007: Introductory Concepts and Techniques - Windows Vista Edition 74
Saving a Contact List as a Text File and Displaying it in WordPad
• Type Marcus‘ Contacts in the File name text box.
• If necessary, select Text Only in the Save as type box• Click the Save in box arrow and then select UDISK 2.0
(E:). (Your USB flash drive may have a different name and letter)
• Click the Save button in the Save As dialog box• Click the Start button on the Windows taskbar, point
to All Programs on the Start menu, point to Accessories on the All Programs submenu, and then click WordPad on the Accessories submenu to open the Wordpad text editor

Microsoft Office 2007: Introductory Concepts and Techniques - Windows Vista Edition 75
Saving a Contact List as a Text File and Displaying it in WordPad
• When WordPad starts, click the Maximize button on the title bar, click File on the menu bar, and then click Open
• When WordPad displays the Open dialog box, click the Files of type box arrow, select All Files, click the Look in box arrow, and then click UDISK 2.0 (E:) (your USB flash drive may have a different name and letter) in the Look in list
• If necessary, scroll until UDISK 2.0 (E:) appears in the list of available drives, and then double-click UDISK 2.0 (E:) in the Computer list to select the USB flash drive, Drive E in this case, as the new save location.
• Double-click Marcus’ Contacts to display Marcus’ Contacts as a text file
• After viewing the text file, click the WordPad Close button

Microsoft Office 2007: Introductory Concepts and Techniques - Windows Vista Edition 76
Saving a Contact List as a Text File and Displaying it in WordPad

Microsoft Office 2007: Introductory Concepts and Techniques - Windows Vista Edition 77
Tracking Activities for a Contact
• With the Contacts window active, double-click the Kenny Martin contact heading
• Click the Activities command on the Ribbon to display the Activities sheet showing a list of items related to Kenny Martin
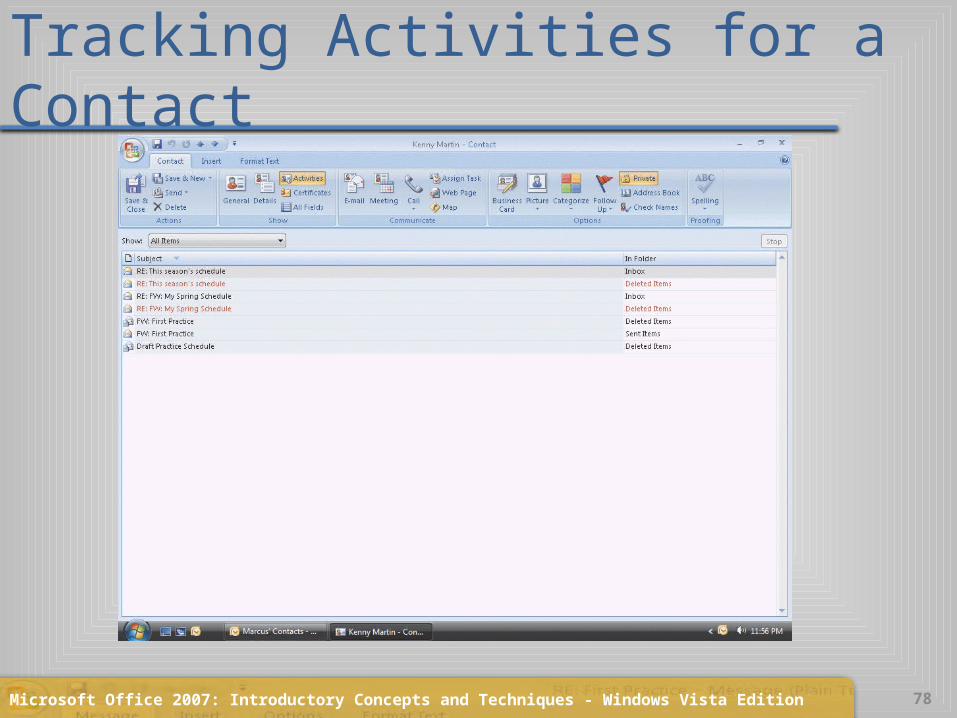
Microsoft Office 2007: Introductory Concepts and Techniques - Windows Vista Edition 78
Tracking Activities for a Contact

Microsoft Office 2007: Introductory Concepts and Techniques - Windows Vista Edition 79
Searching for Outlook Help
• Click the Microsoft Office Outlook Help button on the Standard toolbar to open the Outlook Help window
• Type format text in the ‘Type words to search for’ text box at the top of the Outlook Help window
• Press the ENTER key to display the search results• Click the Maximize button on the Outlook Help window title
bar to maximize the Help window• Click the Apply bold, italic, or underline formatting to text link
to display information regarding formatting text• Click the Close button on the Outlook Help window title bar to
close the Outlook Help window and redisplay the Contacts window

Microsoft Office 2007: Introductory Concepts and Techniques - Windows Vista Edition 80
Searching for Outlook Help
Microsoft Office 2007: Introductory Concepts and Techniques - Windows Vista Edition 81
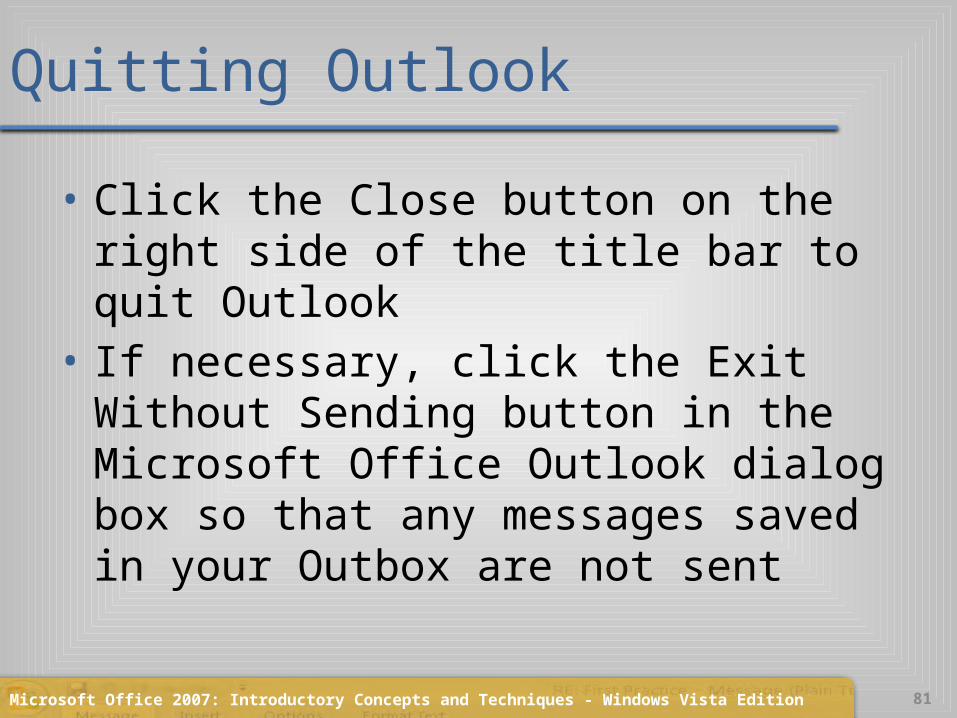
Quitting Outlook
• Click the Close button on the right side of the title bar to quit Outlook
• If necessary, click the Exit Without Sending button in the Microsoft Office Outlook dialog box so that any messages saved in your Outbox are not sent

Microsoft Office 2007: Introductory Concepts and Techniques - Windows Vista Edition 82
Summary
• Start and quit Outlook• Open, read, print, reply to, and delete electronic mail
messages• View a file attachment• Create and insert an e-mail signature• Compose, format, and send e-mail messages• Insert a file attachment in an e-mail message• Flag, categorize, sort, and filter e-mail messages

Microsoft Office 2007: Introductory Concepts and Techniques - Windows Vista Edition 83
Summary
• Set e-mail importance, sensitivity, and delivery options
• Create a personal folder• Create and print a contact list• Use the Find a Contact feature• Organize the contact list• Track activities of a contact• Use Outlook’s Help

Microsoft Office 2007
Outlook Chapter 1 Complete