Microsoft Certificate Services 2008 R2 Windowsdocshare01.docshare.tips/files/19294/192944680.pdf ·...
23
nCipher modules Integration Guide for Microsoft Active Directory Certificate Services • Windows Server 2008 R2 Enterprise
Transcript of Microsoft Certificate Services 2008 R2 Windowsdocshare01.docshare.tips/files/19294/192944680.pdf ·...
nCipher modules Integration Guide for Microsoft Active Directory Certificate Services
• Windows Server 2008 R2 Enterprise
Thales nCipher modules
Integration Guide for Microsoft Windows Server 2008 R2 Active Directory Certificate Services 2
Version: 1.2
Date: 16 Sep 2010
Copyright 2010 nCipher Corporation Ltd. All rights reserved.
These installation instructions are intended to provide step-by-step instructions for installing nCipher software with third-party software. These instructions do not cover all situations and are intended as a supplement to the nCipher documentation provided with nCipher products.
Disclaimer: nCipher Corporation Ltd disclaims all liabilities regarding third-party products and only provides warranties and liabilities with its own products as addressed in the Terms and Conditions for Sale. nCipher is a registered trademark of nCipher Corporation Limited. Any other trademarks referenced in this document are the property of the respective trademark owners.

Thales nCipher modules
Integration Guide for Microsoft Windows Server 2008 R2 Active Directory Certificate Services 3
Contents
1. Introduction 4
2. Supported nCipher functionality 5
3. Requirements 5
4. Procedures 6
5. Installing the HSM 6
6. Installing the nCipher support software and creating the security world 7
7. Setting up AD CS 7 7.1. Installing and configuring AD CS 7 7.2. Displaying of windows by services 9 7.3. Verifying the CA service has started successfully 9
8. Configuring auto-enrollment Group Policy for a domain 10
9. Configuring the nCipher HSM with Certificate Services 10 9.1. Configuring Certificate Services with a new Key 10 9.2. Configuring Certificate Services using an existing private key 11 9.3. Configuring Certificate Enrolment to use CA templates 11
10. Upgrading from a legacy operating system to Windows Server 2008 R2 14
11. Setting up clustering 15
12. Setting up key use counting 16 12.1. Key use counter overview 16 12.2. Key use counter increments 16 12.3. Installing Certificate Services with key use counting 17
13. CA Backup and Restore 18 13.1. Back up and migrate an existing certificate and its associated private key 18 13.2. Back up and migrate an existing private key 20
14. Uninstalling AD CS 22
15. Addresses 23
Thales nCipher modules
Integration Guide for Microsoft Windows Server 2008 R2 Active Directory Certificate Services 4
1. Introduction
The nCipher Hardware Security Module (HSM) integrates with Microsoft Windows Server 2008 R2 Active Directory Certificate Services (AD CS) to provide full key life-cycle key management with FIPS certified hardware and to reduce the cryptographic load on the host server CPU.
The benefits of using an HSM with AD CS include:
• Secure storage of the private key.
• FIPS 140-2 level 3 validated hardware.
• Improved server performance through offloading of cryptographic processing when high throughput is required.
• Full life cycle management of the keys.
• Failover support where multiple HSMs are available.
This document explains how to set up and configure AD CS with an HSM. The instructions in this document have been thoroughly tested and provide a straightforward integration process. There may be other untested ways to achieve interoperability.
This document may not cover every step in the process of setting up all the software. This document assumes that you have read your HSM documentation and that you are familiar with the documentation and setup process for AD CS. For more information about installing the AD CS, refer to the Microsoft documentation.
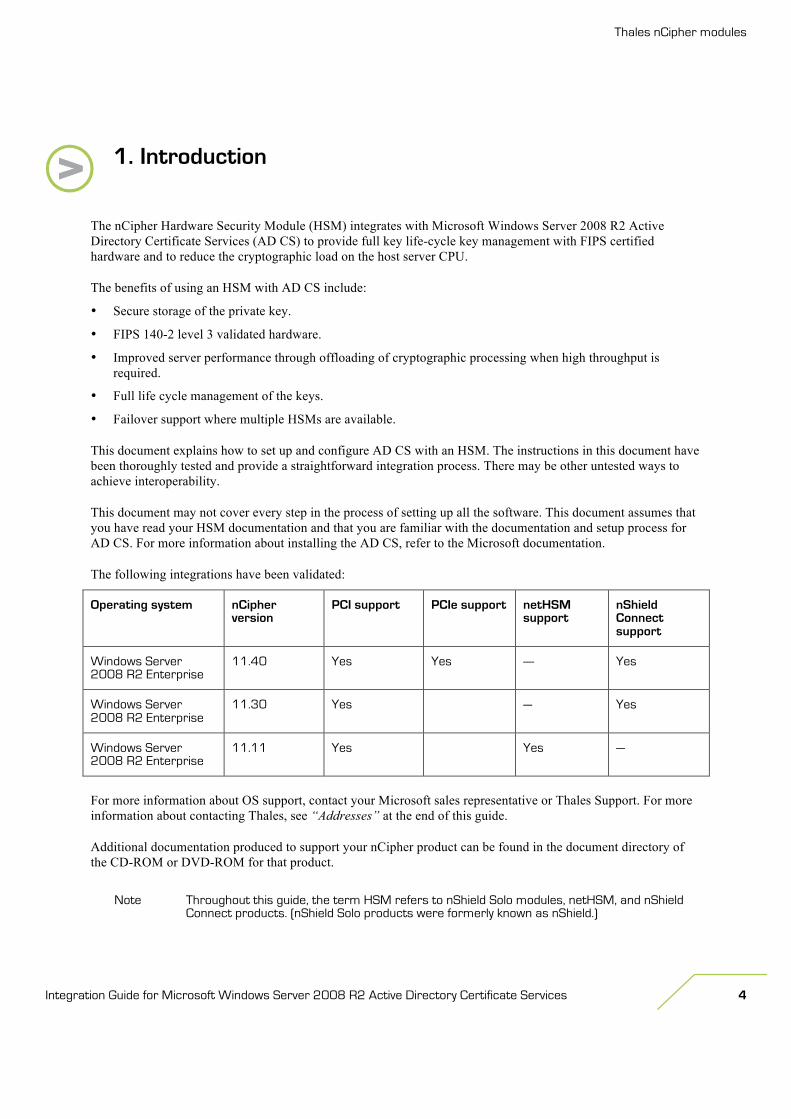
The following integrations have been validated:
Operating system nCipher version
PCI support PCIe support netHSM support
nShield Connect support
Windows Server 2008 R2 Enterprise
11.40 Yes Yes ---- Yes
Windows Server 2008 R2 Enterprise
11.30 Yes — Yes
Windows Server 2008 R2 Enterprise
11.11 Yes Yes —
For more information about OS support, contact your Microsoft sales representative or Thales Support. For more information about contacting Thales, see “Addresses” at the end of this guide.
Additional documentation produced to support your nCipher product can be found in the document directory of the CD-ROM or DVD-ROM for that product.
Note Throughout this guide, the term HSM refers to nShield Solo modules, netHSM, and nShield Connect products. (nShield Solo products were formerly known as nShield.)
Thales nCipher modules
Integration Guide for Microsoft Windows Server 2008 R2 Active Directory Certificate Services 5
2. Supported nCipher functionality
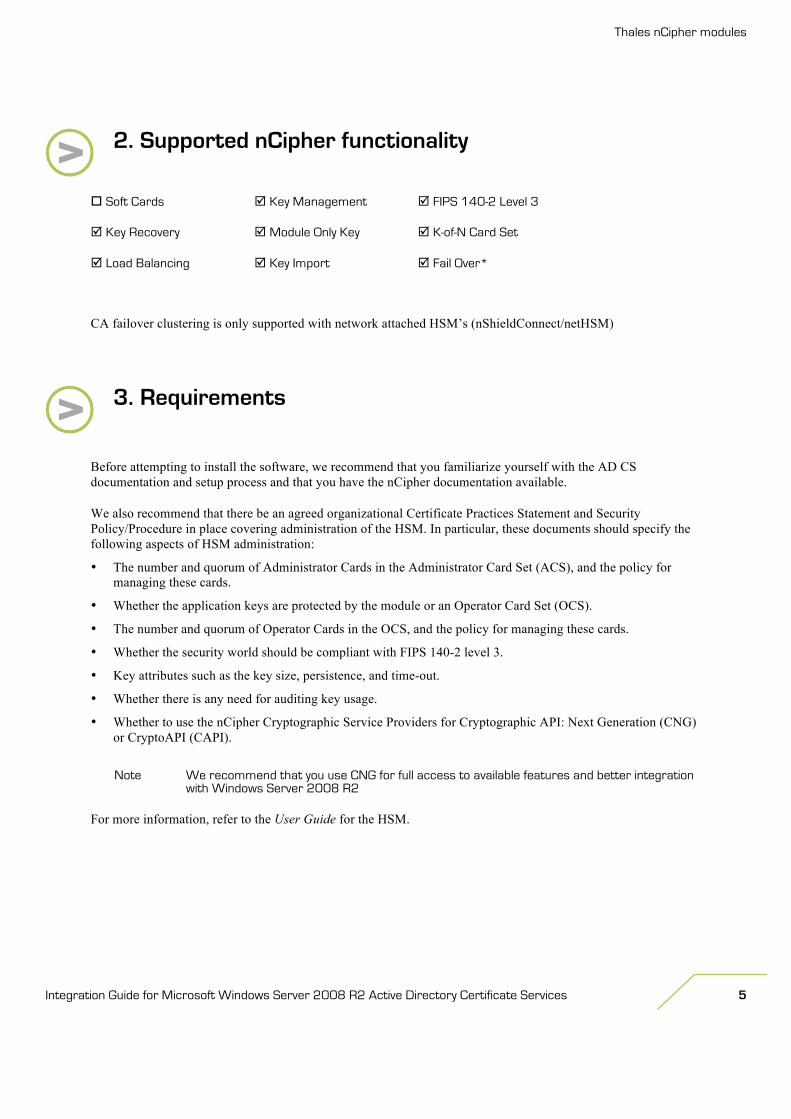
Soft Cards Key Management FIPS 140-2 Level 3
Key Recovery Module Only Key K-of-N Card Set
Load Balancing Key Import Fail Over*
CA failover clustering is only supported with network attached HSM’s (nShieldConnect/netHSM)
3. Requirements
Before attempting to install the software, we recommend that you familiarize yourself with the AD CS documentation and setup process and that you have the nCipher documentation available.
We also recommend that there be an agreed organizational Certificate Practices Statement and Security Policy/Procedure in place covering administration of the HSM. In particular, these documents should specify the following aspects of HSM administration:
• The number and quorum of Administrator Cards in the Administrator Card Set (ACS), and the policy for managing these cards.
• Whether the application keys are protected by the module or an Operator Card Set (OCS).
• The number and quorum of Operator Cards in the OCS, and the policy for managing these cards.
• Whether the security world should be compliant with FIPS 140-2 level 3.
• Key attributes such as the key size, persistence, and time-out.
• Whether there is any need for auditing key usage.
• Whether to use the nCipher Cryptographic Service Providers for Cryptographic API: Next Generation (CNG) or CryptoAPI (CAPI).
Note We recommend that you use CNG for full access to available features and better integration with Windows Server 2008 R2
For more information, refer to the User Guide for the HSM.
Thales nCipher modules
Integration Guide for Microsoft Windows Server 2008 R2 Active Directory Certificate Services 6
4. Procedures
To set up and configure the AD CS with an HSM:
1. Install the HSM.
2. Install the nCipher Support Software, and configure the Security World.
3. Install AD CS.
In addition, this guide describes the following procedures:
• Configuring auto-enrollment Group Policy for a domain.
• Configuring the nCipher HSM with Certificate Services.
• Upgrading from Microsoft Windows Server 2008 to Windows Server 2008 R2.
• Setting up clustering.
• Setting up key use counting.
• Backing up and restoring the CA.
• Uninstalling ADCS.
All these procedures are described in the following sections.
5. Installing the HSM
Install the HSM using the instructions in the Hardware Installation Guide for the HSM. We recommend that you install the HSM before configuring the nCipher software and before installing and configuring AD CS.
Thales nCipher modules
Integration Guide for Microsoft Windows Server 2008 R2 Active Directory Certificate Services 7
6. Installing the nCipher support software and creating the security world
To install the nCipher software and create the security world:
1. Install the latest version of the nCipher support software as described in the User Guide for the HSM.
2. Initialize a security world as described in the User Guide for the HSM.
Note You can also use the CSP Install Wizard or the CNG Configuration Wizard to create a Security World for nShield PCI HSMs. For nShield Connect modules and netHSMs, we recommend that you use the front panel user interface to create the Security World.
3. Register the Cryptographic Service Providers that you intend to use.
Note For CAPI on 64-bit Windows, both 32-bit and 64-bit CSP Install Wizards are available. If you intend to use the nCipher CAPI CSPs from both 32-bit and 64-bit applications, or if you are unsure, run both wizards. The CNG Configuration Wizard registers the nCipher CNG Providers for use by both 32-bit and 64-bit applications where relevant. For detailed information on registering the nCipher CAPI CSPs or CNG Providers, the User Guide for the HSM.
7. Setting up AD CS
7.1. Installing and configuring AD CS
Note If you intend to enable key use counting, read “Setting up key use counting” before proceeding.
To install and configure Microsoft Active Directory Certificate Services:
1. Select Start > Administrative Tools > Server Manager.
The Add Roles Wizard appears.
2. Right-click Roles (on the left), and select Add Roles.
The Select Server Roles window appears.
3. In the central panel, select Active Directory Certificate Services and click Next.
The Select Role Services window appears.
4. Ensure that Certification Authority is selected.
Thales nCipher modules
Integration Guide for Microsoft Windows Server 2008 R2 Active Directory Certificate Services 8
5. To be able to submit certificate requests using a Web interface, ensure that Certification Authority Web Enrollment is selected.
6. Click Next.
The Specify Setup Type window appears.
7. Select the appropriate Certification Authority (CA) setup type for your requirements:
• Enterprise.
• Standalone.
Note If your machine is not a member of an Active Directory domain, only Standalone is available.
8. Click Next.
The Specify CA Type window appears.
9. Select the type of CA for your requirements:
• Root.
• Subordinate.
Note If your CA is to be the only CA, select Root. If you want to use multiple CAs, select Root or Subordinate according to where in the hierarchy this CA is to appear.
10. Click Next.
The Set Up Private Key window appears.
11. Select the private key setup appropriate for your requirements:
• For a typical installation, select Create a new private key.
• If you have special requirements, such as Key Use counting, or if you are migrating from a previous CA, select Use existing private key.
12. Click Next.
The Configure Cryptography for CA window appears.
13. If you have chosen to create a new private key, select a key algorithm and provider.
14. Select Allow administrator interaction when the private key is accessed by the CA. Otherwise, you will not be prompted for authorization if necessary.
15. As prompted, enter a name for the CA.
16. As prompted, enter a certificate validity period.
17. Verify that the installation settings are correct, and click Install.
Thales nCipher modules
Integration Guide for Microsoft Windows Server 2008 R2 Active Directory Certificate Services 9
After installing AD CS, you must register nFast Server as a dependency of the CA service to ensure that the nCipher CNG or CAPI CSPs are available for use before the CA starts up by running the command:
ncsvcdep -a certsvsc
By default, the ncsvcdep.exe nCipher utility is installed in the %NFAST_HOME%\bin directory.
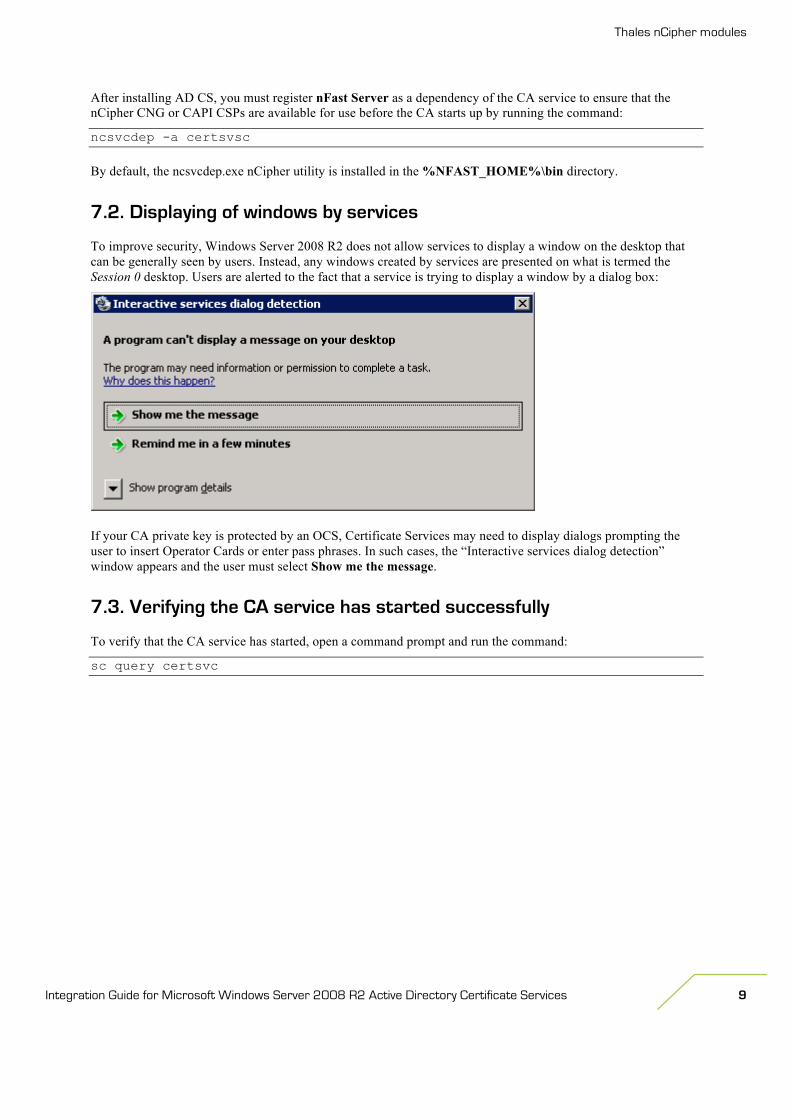
7.2. Displaying of windows by services
To improve security, Windows Server 2008 R2 does not allow services to display a window on the desktop that can be generally seen by users. Instead, any windows created by services are presented on what is termed the Session 0 desktop. Users are alerted to the fact that a service is trying to display a window by a dialog box:
If your CA private key is protected by an OCS, Certificate Services may need to display dialogs prompting the user to insert Operator Cards or enter pass phrases. In such cases, the “Interactive services dialog detection” window appears and the user must select Show me the message.
7.3. Verifying the CA service has started successfully
To verify that the CA service has started, open a command prompt and run the command:
sc query certsvc

Thales nCipher modules
Integration Guide for Microsoft Windows Server 2008 R2 Active Directory Certificate Services 10
8. Configuring auto-enrollment Group Policy for a domain
To complete the integration scenarios, you must configure auto-enrollment as a group policy:
1. On the domain controller, select Start > Administrative Tools > Group Policy Manager.
2. Double-click Group Policy Objects in the forest and domain containing the Default Domain Policy Group Policy object (GPO) that you want to edit.
3. Right-click the Default Domain Policy GPO, and then click Edit.
4. In the Group Policy Management Console (GPMC), select User Configuration > Policies > Windows Settings > Security Settings > Public Key Policies.
5. Double-click Certificate Services Client - Auto-Enrollment.
6. In Configuration Model, select Enabled to enable auto-enrollment.
7. Click OK to accept your changes.
9. Configuring the nCipher HSM with Certificate Services
9.1. Configuring Certificate Services with a new Key
To install the Certificate Server using the nCipher HSM Key Storage Provider (KSP):
1. Install and configure the nCipher HSM hardware and software, as described in sections 5 and 6.
2. Install Microsoft Active Directory Certificate Services and a CA, as described in section 7.1, with the following settings:
• In the Set Up Private Key window, select Create a new private key.
• In the Configure Cryptography for CA window, select the appropriate nCipher algorithm and hash algorithm.
Thales nCipher modules
Integration Guide for Microsoft Windows Server 2008 R2 Active Directory Certificate Services 11
9.2. Configuring Certificate Services using an existing private key
To install the Certificate Server using the nCipher HSM KSP with an existing HSM private key:
1. Install and configure the nCipher HSM hardware and software, as described in sections 5 and 6.
2. Install Microsoft Active Directory Certificate Services and a CA, as described in section 7.1, with the following settings:
• In the Set Up Private Key window, select Use existing private key and Select an existing private key on this computer.
• In the Select Existing Key window, click Edit.
• In the Edit Search Criteria window, select the CSP that contains the created key. Delete the contents of the field CA common name, and click Search. The search results should find the existing private key. Select the key and click Next
• Select the appropriate hash algorithm.
3. Verify that the CA service has successfully started, as described in section 7.3.
4. Verify the CA key by running the command:
certutil -verifykeys
9.3. Configuring Certificate Enrolment to use CA templates
To integrate the CA certificate enrolment functionality with an nCipher HSM generated CA private key:
1. Install and configure the nCipher HSM hardware and software, as described in sections 5 and 6.
2. Install Microsoft Active Directory Certificate Services and a CA, as described in section 7.1.
3. Verify that the CA service has successfully started, as described in section 7.3.
4. Verify the CA key by running the command:
certutil -verifykeys
5. Create a CA template that uses the nCipher HSM KSP:
a. Run certtmpl.msc.
b. In the right-hand pane, right-click the Administrator template, and select Duplicate Template.
c. Select Windows Server 2008 Enterprise, and click OK.
The properties window opens, showing the General tab.
d. In the General tab, in Template display name, type a name for the template.
e. In the Request Handling tab:
• In Purpose, select Signature.
• Click Yes to confirm changes to the certificate purpose.
• Deselect Allow private key to be exported.

Thales nCipher modules
Integration Guide for Microsoft Windows Server 2008 R2 Active Directory Certificate Services 12
f. In the Cryptography tab:
• Select Requests must use one of the following providers.
• In Providers, select nCipher Security World Key Storage Provider only; no other provider must be selected.
• In Algorithm Name, select an ECC algorithm.
• In Request Hash, select a hash type.
g. In the Subject Name tab:
• Deselect Include e-mail name in subject name.
• Deselect E-mail name.
h. Click OK to save the template settings.
6. Run certsrv.msc.
7. In the left-hand pane, double click the CA name.
8. Right-click the Certificate Template node, and select New > Certificate Template to Issue.
9. Select the template you just created, and click OK.
10. Request a certificate based on the template:
• Run certmgr.msc.
• In the left-hand pane, right-click the Personal node, and select All Tasks > Request New Certificate.
• Click Next to pass through the first two windows.
• Select the template that you created, and click Enroll.
The nCipher Key Storage Provider window appears.
• Click Next.
• Select the type of protection you want to use, and click Next.
• If OCS is selected, select the OCS from the card sets pane, and click Finish.
• If passphrase authentication is enabled, a prompt for passphrase will be given.
11. Verify that the certificate is enrolled successfully.
The enrollment wizard shows if the certificate enrollment was successful or failed. Use the Details button to check the key information.

Thales nCipher modules
Integration Guide for Microsoft Windows Server 2008 R2 Active Directory Certificate Services 13
Thales nCipher modules
Integration Guide for Microsoft Windows Server 2008 R2 Active Directory Certificate Services 14
10. Upgrading from a legacy operating system to Windows Server 2008 R2
To upgrade from Windows Server 2003 SP2 Enterprise 64bit or Windows Server 2008 SP2 64bit to Windows Server 2008 R2:
1. Backup the %NFAST_KMDATA%\local
2. Uninstall the nCipher support software.
3. Upgrade the operating system to Windows Server 2008 R2.
4. Install the nCipher support software and verify it is functioning correctly.
5. Uninstall the existing CA (which will not be able to start after the upgrade) and restart the machine when prompted.
6. Install Microsoft Active Directory Certificate Services and a CA, as described in section 7.1, with the following settings:
• In the Set Up Private Key window, select Use existing private key and Select an existing private key on this computer.
• In the Select Existing Key window, click Edit.
• In the Edit Search Criteria window, select the CSP that contains the created key. Delete the contents of the field CA common name, and click Search. The search results should find the existing private key. Select the key and click Next
• Select the appropriate hash algorithm.
7. Verify that the nCipher HSM hardware and software is functioning correctly.
8. Verify the Certificate Enrollment against the upgraded Certificate Server.
Thales nCipher modules
Integration Guide for Microsoft Windows Server 2008 R2 Active Directory Certificate Services 15
11. Setting up clustering
Microsoft Windows Server 2008 R2 Enterprise supports the use of clustering for AD CS. For more information on CA Cluster Configuration, see: http://technet.microsoft.com/en-us/library/cc742517.aspx.
To set up clustering:
1. Install and configure the HSM, using the instructions in the Hardware Installation Guide and User Guide for the HSM:
• Configure the HSM with machines which Certificate Services are configured for Failover Cluster.
• Create the security world using the nCipher CNG wizard.
• Share the security world with the Failover Cluster. Ensure that the security world is accessible to all the nodes at any point of time.
The Cluster service requires shared storage. The networked HSM ensures strong protection of the CA key material and represents a shared key store. The active node can always connect to the network HSM regardless of which physical node the cluster runs on.
2. Configure the iSCSI Shared Storage Device on Windows Server 2008 R2:
• Ensure that Persistent Reservation is enabled for the iSCSI target device.
• Using iSCSI initiators from the cluster, ensure that you can connect to the targets successfully. iSCSI initiators are initialized on the failover cluster from Start > Programs > Administrative Tools > iSCSI Initiator.
3. Create and configure the Cluster with the CA.
Clustering is supported for AD CS only. You can only configure AD CS to use a two-node cluster.

Thales nCipher modules
Integration Guide for Microsoft Windows Server 2008 R2 Active Directory Certificate Services 16
12. Setting up key use counting
Setting up key use counting is optional; the procedure described in this section does not apply to most setups. If you do not follow the procedure described in the section, key use counting is not installed. You cannot add key use counting to a key retrospectively. If you require key use counting, follow the procedure described in this section.
12.1. Key use counter overview
The key use counter is used to audit usage of the CA signing key; it maintains a count of how many times the key has been used. We recommend the key use counter for use principally with a root CA that undergoes a low volume of signings in which the count can be logged immediately before servicing a signature request and after the signature request has been serviced. This ensures that any illicit use of the CA is revealed through discrepancies in the counter log.
You also need to consider the following information about the key use counter:
• The counter resides in the NVRAM of the HSM.
• The counter is a 64-bit integer counter associated with a single private key.
• The counter is started at zero.
• If the maximum count is reached, the counter restarts at zero.
• The counter can exist only on one HSM. If more than one HSM is attached to the server, you must choose which HSM stores the counter.
• If the module firmware is upgraded, the counter value is lost.
• If the CA startup event in the Security log wrongly reports a usage count of zero for the signing key, see http://support.microsoft.com/kb/951721.
12.2. Key use counter increments
The key use counter increments depend on the type of CA (such as offline or online issuing) and the cryptographic operations that are executed by the CA to service a certificate signature request (CSR). The key counter is incremented by values that range from zero to three. The CA audit logs record the key use count whenever CA is started or stopped.
Thales nCipher modules
Integration Guide for Microsoft Windows Server 2008 R2 Active Directory Certificate Services 17
12.3. Installing Certificate Services with key use counting
To install Certificate Services with key use counting:
1. If it is not already present on your system installation, create the file %SystemRoot%\capolicy.inf (where %SystemRoot% is the system environment variable for the Windows installation folder, by default C:\WINDOWS\capolicy.inf) with the following content:
[Version] Signature="$Windows NT$" [certsrv_server] EnableKeyCounting=True
Note You must create the capolicy.inf file before Certificate Services is installed.
2. Install the CA using the HSM KSP.
3. Enable auditing for CA startup and shutdown.
4. Enable auditing for the CA service, by using the command:
certutil -setreg ca\auditfilter 1
5. Restart the CA service to pick up the changes, by using the commands:
net stop certsrv
net start certsrv
6. Run Eventvwr.exe.
7. Select Windows Logs > Security.
8. Filter for event ID 4881 (CA startup event) or event ID 4880.
9. Verify the CA startup event shows the PrivateKeyUsageCount property with a corresponding value. Make a note of this value.
10. Restart the Certificate Server, by using the commands:
net stop certsrv
net start certsrv
11. Verify that the event viewer contains a new CA startup event (event ID 4881).
12. Verify that the PrivateKeyUsageCount property value has not changed.
Thales nCipher modules
Integration Guide for Microsoft Windows Server 2008 R2 Active Directory Certificate Services 18
13. CA Backup and Restore
The most common scenario related to backup and restore for a CA and HSM is backup and migrate. This procedure describes backing up the CA/HSM data on an existing server and then migration of the CA/HSM to a new server.
13.1. Back up and migrate an existing certificate and its associated private key
This procedure has been successfully tested in the following configurations:
• Windows Server 2003 SP2 Enterprise 64-bit (CAPI) to Windows Server 2008 R2 Enterprise (CNG)
• Windows Server 2008 SP2 Enterprise 64-bit (CNG) to Windows Server 2008 R2 Enterprise (CNG)
• Windows Server 2008 R2 Enterprise (CNG) to Windows Server 2008 R2 Enterprise (CNG) (RSA and ECDSA key types)
To back up the CA and HSM data on the existing server (machine #1), and then migrate the CA and HSM onto a new server (machine #2):
1. Export the certificate on machine #1:
• Run mmc.
• In the console, select File > Add/Remove Snap-in.
• Select the Certificates – Current User snapin.
• Navigate to the directory Trusted Root Certificates > Certificates.
• Right-click on the CA certificate, and click Export.
• Click Next.
• Select Base-64 encoded X.509 (.CER), and click Next.
• Specify the path and file name for saving the certificate, and click Next.
• Click Finish.
• Click OK to close the export success message.
2. Back up the contents of the nCipher security world data, which is found in C:\ProgramData\nCipher\Key Management Data\local.
3. Copy the backed up nCipher security world data to C:\ProgramData\nCipher\Key Management Data\local on machine #2.
4. Load the security world onto the HSM on machine #2, by running the command:
new-world -l
For more information, refer to the User Guide for the HSM.

Thales nCipher modules
Integration Guide for Microsoft Windows Server 2008 R2 Active Directory Certificate Services 19
5. On machine #2, run the CNG Configuration Wizard. If selecting operator card set protection, do not check ‘always use the wizard when creating or importing keys’.
6. Copy and then install the X.509 certificate into the local user Trusted Root CA Store on machine #2:
• Right-click on the certificate, and click Install.
• Click Next.
• Select Place all certificates in the following store, and click Browse.
• Select Trusted Root Certification Authorities, and click OK.
• Click Next.
• Click Finish.
• Click OK to close the import success message.
7. If you wish to import your existing CAPI key into CNG, first run the CNG Configuration Wizard, then identify the nCipher key file name that corresponds to the signing key in the named CAPI container, by running the following command:
csputils –m –d –n <CAPI-CONTAINER-NAME>
Note If you are unsure of the CAPI container name, run: csputils –l –m
This command produces output of the form: Detailed report for container ID #00c1deb83de30a7015e15e8e9e763742fc3e1d48 Filename: key_mscapi_container- 00c1deb83de30a7015e15e8e9e763742fc3e1d48 Container name: SAMPLE-CAPI-CONTAINER-CA Container is a machine container. CSP DLL name: ncsp.dll Filename for signature key is key_mscapi_eea3d453a94b8890f5fc4c2e920c93813ee6d5ee Key was generated by the CSP Key hash: eea3d453a94b8890f5fc4c2e920c93813ee6d5ee Key is recoverable. Key is cardset protected. Cardset name: SampleCardset Sharing parameters: 1 of 1 shares required. Cardset hash: 22f94c0d459594b230da3255af46d7446af81d42 Cardset is non-persistent. No key exchange key. Detailed report for container ID #736289b47d43712053edb23bfe0cae4085d2a2e7
The key hash from this output is required by cngimport:
cngimport --import --machine-key --key= eea3d453a94b8890f5fc4c2e920c93813ee6d5ee --appname=mscapi NEWCNG-KEY-NAME
Confirm that the key has been imported successfully by running the command:
cnglist --list-keys

Thales nCipher modules
Integration Guide for Microsoft Windows Server 2008 R2 Active Directory Certificate Services 20
Note If the private key is protected by an OCS with passphrase, you must do the following:
i) Set the NFAST_NFKM_TOKENSFILE environment variable.
Open a console with administrator privileges and run:
set NFAST_NFKM_TOKENSFILE=<absolute path to file>
Note: there must be no white space in the specified path and filename. E.g., c:\preload\tokensfile
ii) Run the preload command in the same console:
preload -m1 -c <cardset name> pause
iii) Open another console with administrator privileges and run the following command again:
set NFAST_NFKM_TOKENSFILE=<absolute path to file>
8. Install the certificate into my store, by running the following command from the console.
certutil -addstore my <certificate name>
A success message should appear.
9. Run certutil -repairstore with the certificate serial number. To find the certificate serial number, open the certificate. In the Details tab, click Serial number. The serial number is shown below, and can then be copied using [CTRL] + [C]. In the administrator command prompt, run the command:
certutil -f -repairstore -csp "nCipher Security World Key Storage Provider" my "<certificate serial number>"
A success message should appear.
10. From the command prompt, run:
servermanager.msc
The server manager console will now appear. Server manager must be opened this way, opening it through Windows will result in the certificate not being displayed in the CA configuration wizard.
11. Install Microsoft Active Directory Certificate Services and a CA, as described in section 7.1, with the following settings:
• In the Set Up Private Key window, select Use existing private key > Select a certificate and use its associated private key.
• In Certificates, the imported certificate is shown. Select the certificate and click Next.
12. Continue with the CA installation setup and click Install.
13. When the CA installation is complete, navigate to the Server Manager and check that the CA installation has completed successfully and that the CA has no unexpected errors.
13.2. Back up and migrate an existing private key
To back up the CA and HSM data on the original server (machine #1), and then migrate the CA/HSM on a new server (machine #2):
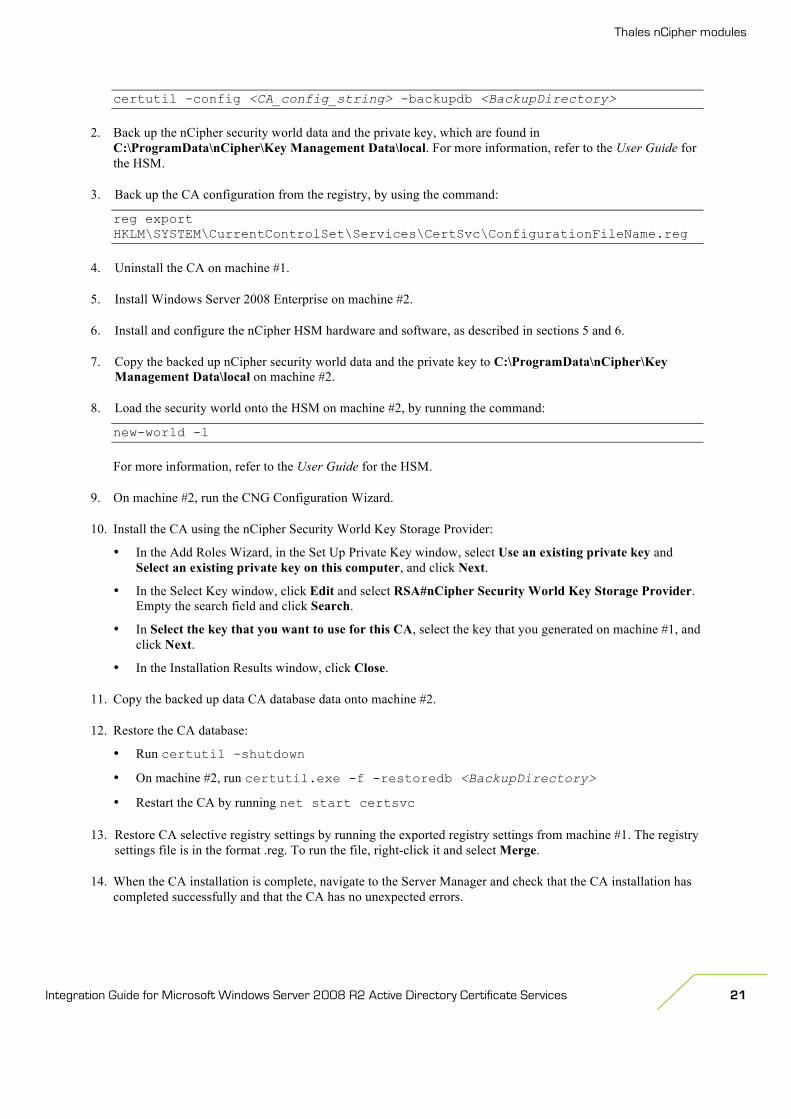
1. Back up the CD database, by using the command:
Thales nCipher modules
Integration Guide for Microsoft Windows Server 2008 R2 Active Directory Certificate Services 21
certutil -config <CA_config_string> -backupdb <BackupDirectory>
2. Back up the nCipher security world data and the private key, which are found in C:\ProgramData\nCipher\Key Management Data\local. For more information, refer to the User Guide for the HSM.
3. Back up the CA configuration from the registry, by using the command:
reg export HKLM\SYSTEM\CurrentControlSet\Services\CertSvc\ConfigurationFileName.reg
4. Uninstall the CA on machine #1.
5. Install Windows Server 2008 Enterprise on machine #2.
6. Install and configure the nCipher HSM hardware and software, as described in sections 5 and 6.
7. Copy the backed up nCipher security world data and the private key to C:\ProgramData\nCipher\Key Management Data\local on machine #2.
8. Load the security world onto the HSM on machine #2, by running the command:
new-world -l
For more information, refer to the User Guide for the HSM.
9. On machine #2, run the CNG Configuration Wizard.
10. Install the CA using the nCipher Security World Key Storage Provider:
• In the Add Roles Wizard, in the Set Up Private Key window, select Use an existing private key and Select an existing private key on this computer, and click Next.
• In the Select Key window, click Edit and select RSA#nCipher Security World Key Storage Provider. Empty the search field and click Search.
• In Select the key that you want to use for this CA, select the key that you generated on machine #1, and click Next.
• In the Installation Results window, click Close.
11. Copy the backed up data CA database data onto machine #2.
12. Restore the CA database:
• Run certutil -shutdown
• On machine #2, run certutil.exe -f -restoredb <BackupDirectory>
• Restart the CA by running net start certsvc
13. Restore CA selective registry settings by running the exported registry settings from machine #1. The registry settings file is in the format .reg. To run the file, right-click it and select Merge.
14. When the CA installation is complete, navigate to the Server Manager and check that the CA installation has completed successfully and that the CA has no unexpected errors.
Thales nCipher modules
Integration Guide for Microsoft Windows Server 2008 R2 Active Directory Certificate Services 22
14. Uninstalling AD CS
To uninstall ADCS:
1. Open Server Manager.
2. Select Roles > Remove Roles.
The Remove Roles Wizard opens.
3. Click Next.
4. Deselect Active Directory Certificate Services, and click Next.
5. Restart the machine when prompted.
Thales nCipher modules
Integration Guide for Microsoft Windows Server 2008 R2 Active Directory Certificate Services 23
15. Addresses
Americas 2200 North Commerce Parkway Suite 200 Weston Florida 33326 USA
Tel: +1 888 744 4976 or + 1 954 888 6200
Asia Pacific Units 2205-06 22/F Vicwood Plaza 199 Des Voeux Road Central Hong Kong PRC
Tel: + 852 2815 8633
Australia 103-105 Northbourne Avenue Turner ACT 2601 Australia
Tel: +61 2 6120 5148
Europe, Middle East, Africa Meadow View House Long Crendon Aylesbury Buckinghamshire HP18 9EQ UK
Tel: + 44 (0)1844 201800
Internet addresses
Web site: www.thalesgroup.com/iss
Support: http://iss.thalesgroup.com/en/Support.aspx
Online documentation: http://iss.thalesgroup.com/Resources.aspx
International sales offices: http://iss.thalesgroup.com/en/Company/Contact%20Us.aspx


![Microsoft Certificate Services 2008 R2 Windows[1]](https://static.fdocuments.in/doc/165x107/55cf9a52550346d033a13c18/microsoft-certificate-services-2008-r2-windows1.jpg)