Metal Casting Dr. D. B. Karunakar Department of …textofvideo.nptel.ac.in/112107083/lec7.pdf ·...
28
Metal Casting Dr. D. B. Karunakar Department of Mechanical and Industrial Engineering Indian Institute of Technology, Roorkee Module - 02 Sand Casting Process Lecture – 03 Moulding Sands and Design-II Welcome back friends. In the previous lecture, we have seen the moulding sands and their design. (Refer Slide Time: 00:41) We have seen that the different types of the moulding sands. We see in the green sand and we also see the core sand and the next, the dry sand, loam sand, facing sand, backing sand and finally, the parting sand. We have seen the importance of these different sands, we have seen in the previous class. Next, we have also seen that, green sand is the most important sand in the sand moulding. What is this green sand? Green sand means, the sand which contains the moisture. When the moisture is present, we call it as the green sand.
-
Upload
trinhkhanh -
Category
Documents
-
view
213 -
download
0
Transcript of Metal Casting Dr. D. B. Karunakar Department of …textofvideo.nptel.ac.in/112107083/lec7.pdf ·...

Metal CastingDr. D. B. Karunakar
Department of Mechanical and Industrial EngineeringIndian Institute of Technology, Roorkee
Module - 02Sand Casting Process
Lecture – 03 Moulding Sands and Design-II
Welcome back friends. In the previous lecture, we have seen the moulding sands and
their design.
(Refer Slide Time: 00:41)
We have seen that the different types of the moulding sands. We see in the green sand
and we also see the core sand and the next, the dry sand, loam sand, facing sand, backing
sand and finally, the parting sand. We have seen the importance of these different sands,
we have seen in the previous class.
Next, we have also seen that, green sand is the most important sand in the sand
moulding. What is this green sand? Green sand means, the sand which contains the
moisture. When the moisture is present, we call it as the green sand.

(Refer Slide Time: 01:18)
So, we have also seen that, this is the general composition of the green sand. The green
sand contains the base sand; the base sand could be silica sand, zircon sand, chromite
sand or the olivine sand and it is present up to say 85 to 90 percent and the next
ingredient of the green sand is the binder. It is also known as the clay, it presents from 6
to 11 percent. Next one, the green sand also contains the additives and these additives are
present from 2 to 8 percent. Finally, the water is present from 2 to 5 percent.
Now, these are the ingredients which we mix from our side. But, after we make the
mould after we pour the molten metal, what happens? The molten metal comes in contact
with the sand. Now, the clay with that we are adding are the binder, part of this binder
becomes inactive, when its temperature is raised above 500 degree centigrade or 600
degree centigrade. Then, though it is physically present, it loses all its properties, binding
properties it loses. In such a case, we call it as the dead clay.
So, that is how the dead clay also becomes a component of the green sand, again this
sand we will be reusing. So, part of the clay has become dead. Before we make the
further moulds, we have to add the new clay and again in that new clay part of that will
become dead clay and like this dead clay keeps on increasing as we keep on using it
again and again. So, that is how we have seen that.
(Refer Slide Time: 03:13)
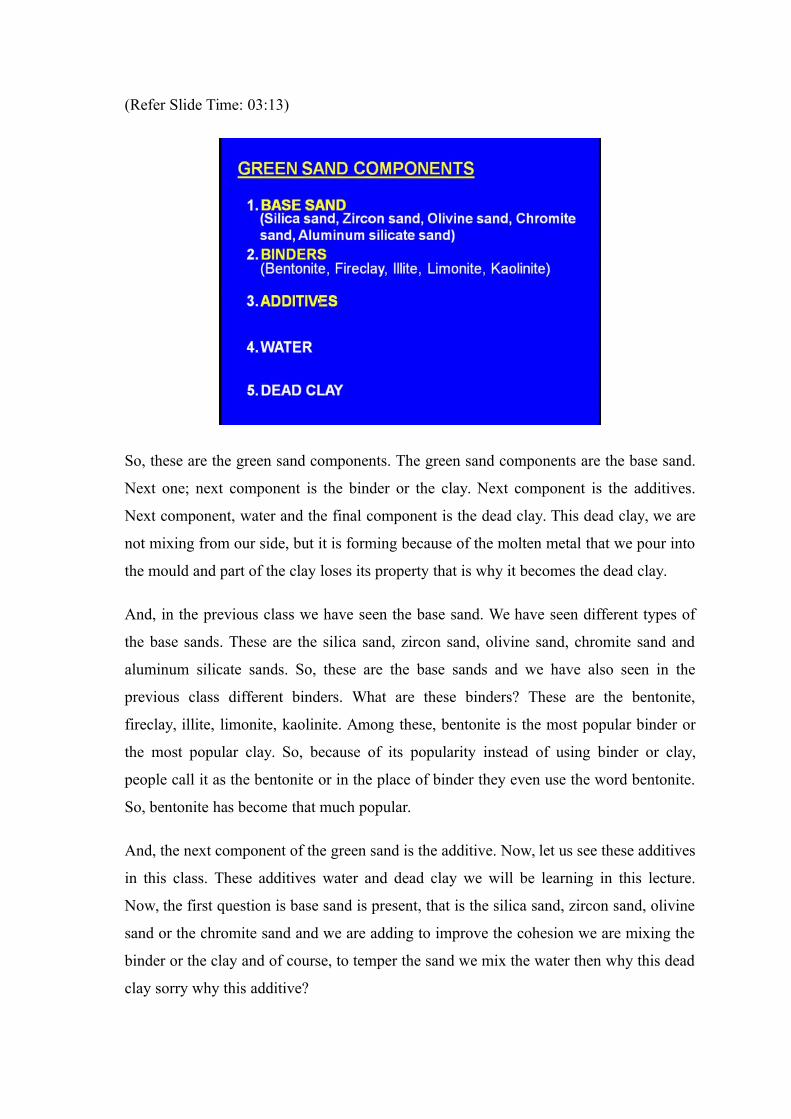
So, these are the green sand components. The green sand components are the base sand.
Next one; next component is the binder or the clay. Next component is the additives.
Next component, water and the final component is the dead clay. This dead clay, we are
not mixing from our side, but it is forming because of the molten metal that we pour into
the mould and part of the clay loses its property that is why it becomes the dead clay.
And, in the previous class we have seen the base sand. We have seen different types of
the base sands. These are the silica sand, zircon sand, olivine sand, chromite sand and
aluminum silicate sands. So, these are the base sands and we have also seen in the
previous class different binders. What are these binders? These are the bentonite,
fireclay, illite, limonite, kaolinite. Among these, bentonite is the most popular binder or
the most popular clay. So, because of its popularity instead of using binder or clay,
people call it as the bentonite or in the place of binder they even use the word bentonite.
So, bentonite has become that much popular.
And, the next component of the green sand is the additive. Now, let us see these additives
in this class. These additives water and dead clay we will be learning in this lecture.
Now, the first question is base sand is present, that is the silica sand, zircon sand, olivine
sand or the chromite sand and we are adding to improve the cohesion we are mixing the
binder or the clay and of course, to temper the sand we mix the water then why this dead
clay sorry why this additive?

(Refer Slide Time: 05:15)
Why we are mixing additive? To prevent the burn-on defects; Yes, when we pour the
molten metal into the mould, the molten metal is at an elevated temperature, may be for
the non-ferrous alloys it is about to 700 to 800 degree centigrade, the pouring
temperature, whereas, for the ferrous alloys the pouring temperature is between say 1600
to 1800 degree centigrade. At such high temperature the molten metal may burn the
surface of the mould cavity. In such a case what happens the sand burns. Once the sand
burns, even the surface of this solidified casting, burns. That is how we get the burn-on
defects. So, this problem has to be tackled. So, to minimize this burn on defects we mix
the additives.
Next one, to develop a smooth surface on the casting; for that purposes also we add the
additives. Now, remember that in the sand moulding, the sand mould is made up of sand.
What about this surface of the cavity? It is composed of the sand grains and these sand
grains will have some irregularities and into these irregularities, if we pour the molten
metal, what will happen? Molten metal solidifies accordingly and even on this solidified
casting these regularities will be there and finally, we get a rough casting. So, to
minimize this roughness on the solidified casting, we mix the additives, to develop a
smooth surface on the casting.
Next one, to prevent metal penetration defects, what is this? Now, again the mould is
made up of the sand grains. Sometimes the sand grains will be little larger. The
neighboring sand grains let us consider that are present on the surface of the cavity, now
what happens on the neighboring of grains there will be a small clearance will be there.
Now into this small clearance the molten metal flows and forms the penetration defects
and finally, it will be forming some kind of fins and unwanted projections on the casting
which we do not want. So, this is known as the penetration defects. So, to minimize the
penetration defect, we mix the additives.
Next one, what is the next purpose - To prevent the oxidation of the metal from the
mould atmosphere. Now we pour the molten metal into the mould, the molten metal is at
a very high temperature and the oxygen is present in the mould. Oxygen is around the
mould. This oxygen will readily and quickly come and react with the molten metal and
forms and develop result into the oxidation. Once this oxidation takes place the casting
loses all it is properties and strength. So, at any cost we have to reduce the oxidation that
is why we mix the additives.
(Refer Slide Time: 08:43)
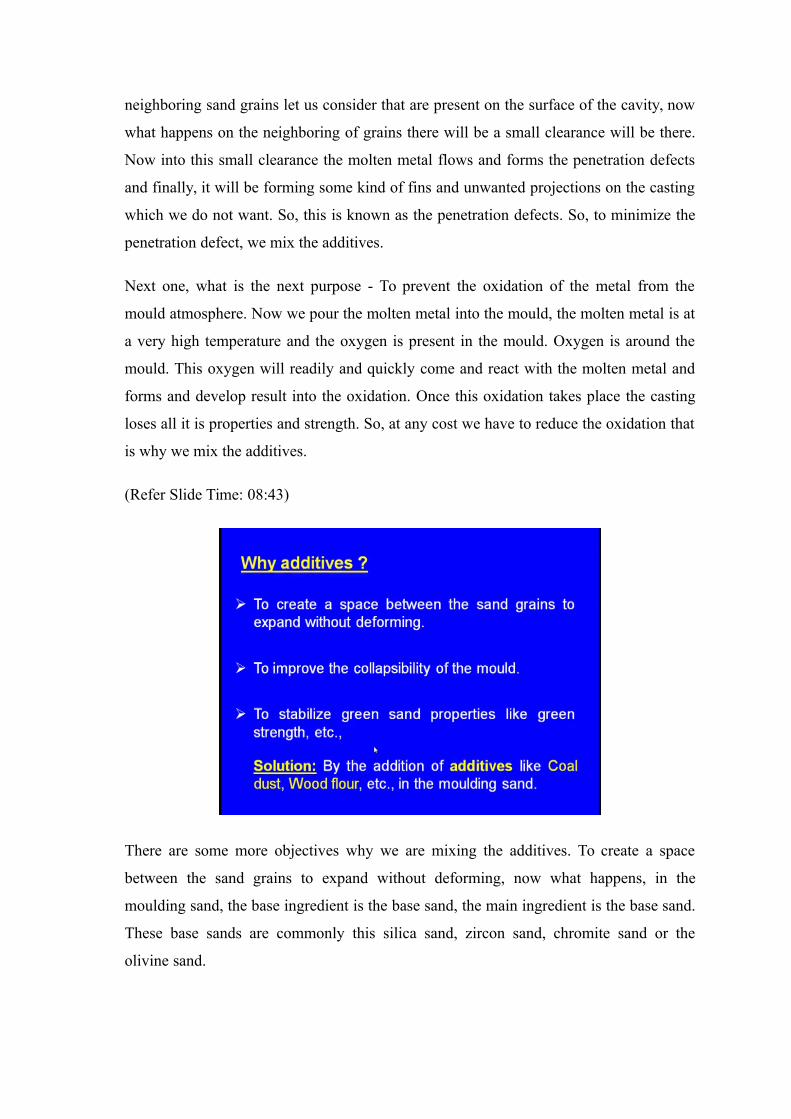
There are some more objectives why we are mixing the additives. To create a space
between the sand grains to expand without deforming, now what happens, in the
moulding sand, the base ingredient is the base sand, the main ingredient is the base sand.
These base sands are commonly this silica sand, zircon sand, chromite sand or the
olivine sand.
So, these are the sand grains and when we tightly compact the sand around the pattern
and we withdraw the pattern. Now, what happens, the sand grains are close to each other
and into this mould when we pour the molten metal what happens? Each sand grains will
be expanding. Now, when each sand grain is expanding they will be expanding and
because they are close to each other, there is no provision for the free expansion. Then
what will happen, the mould deformation takes place. When the mould deformation takes
place or the mould enlargement takes place that happens casting cannot observe that kind
of development, that kind of expansion, the castings cannot observe. The casting has
already solidified. In such a case, a crack will form on the casting.
So, that is the adverse effect of the expansion of the sand grains. Why this is happening,
because, there is no space between the adjacent to sand grains. So, we mix the additives,
now what happens between the neighboring the grains this additive will come and create
a space between the neighboring sand grains. So, when these neighboring sand grains are
expanding this additive is a soft one, so, as they expand the additives enable them to
expand and see that no mould deformation takes place. That is why we add the additive.
Next one, to improve the collapsibility of the mould: Now, we add the what are the
ingredients of the moulding sand we add the base sand like the silica sand, like zircon
sand or the chromite sand. Then we add the clay, moisture and additives of course. Now,
what happens after the solidification we break the sand and we want to take the casting
outside. Again this sand will be taken and it will be tempered with water and again
another mould will be made with the same moulding sand. The problem comes after the
solidification when we want to break the sand, sometimes it becomes very hard. This
breaking of the sand is known as the knockout.
Now, if it is too hard to break the sand then it requires hard efforts, laborious efforts and
that increases the cost of the labor that increases the cost of production that increases the
more time. So, at any cost we have to see that the mould is not too hard after the casting
has solidified. It should be easily collapsible, it should be easily breakable. What to do
that is why we add the additives. There is another purpose why we mix the additives; to
stabilize green sand properties like green strength, dry strength, dry compression strength
and so on. So, when we add these additives, these kinds of properties will be enhanced.

So, how to achieve these? By the addition of additives like coal dust, wood flour etcetera
in the moulding sand. When we mix the additives like coal dust, wood flour and starch
and so on, whatever problems we have discussed the earlier will be minimized. So, that
is the purpose of the mixing additives.
(Refer Slide Time: 13:00)
Now, let us see the common additives used in the green sand. One is the coal dust, next
one is the dextrin, next one is the pitch and finally, the wood flour. Let us see all these
additives one by one.
(Refer Slide Time: 13:19)

First, let us see the coal dust. Coal dust is a fine powder which is created by the crushing,
grinding or pulverizing of coal. So, this is the coal dust which is obtained by pulverizing
the coal, you can see, after the coal is pulverized, it looks like this.
So, this is the coal dust. So, this coal dust is added to the moulding sand along with the
base sand and the clay.
(Refer Slide Time: 13:49)
What does coal dust do? What happens when we mix the coal dust with the moulding
sand.
Coal dust acts as a lustrous carbon film on the surface of the mould cavity. As a result a
good surface finish is obtained on the casting. Just now we have seen that one of the
problems is we use the sand grains and the neighboring sand grains will be projected
upwards, because of that there will be a rough texture on the surface of the cavity. Now,
when we mix the coal dust with the moulding sand this coal dust acts like a lustrous
carbon film, now you can see this is the moulding sand. So, these are all the sand grains,
of course, through this way we pour the molten metal and now this is the cavity, surface,
internal surface.
Now, because we have mixed the coal dust, see it has made lustrous carbon film here,
you see, into this cavity on which there is the lustrous carbon film, when we pour the
molten metal what happens, the irregular surface texture of the sand grains will be no

more dominating, because, there is a lustrous carbon film because of that the molten
metal comes in contact with this lustrous carbon film and solidifies within that film and
we get a smooth casting.
So, that is the best benefit when we add the coal dust to the moulding sand and we get
the very good surface finish.
(Refer Slide Time: 15:39)
There are more things which this coal dust can do for us. Coal dust increases the strength
of the mould by making a coating around the sand grains. Now you see these are all the
sand grains; this coal dust is forming a thin layer around all the sand grains. Because of
that the strength of the sand grains is increasing that is another advantage which we can
get by mixing the coal dust to the moulding sand.
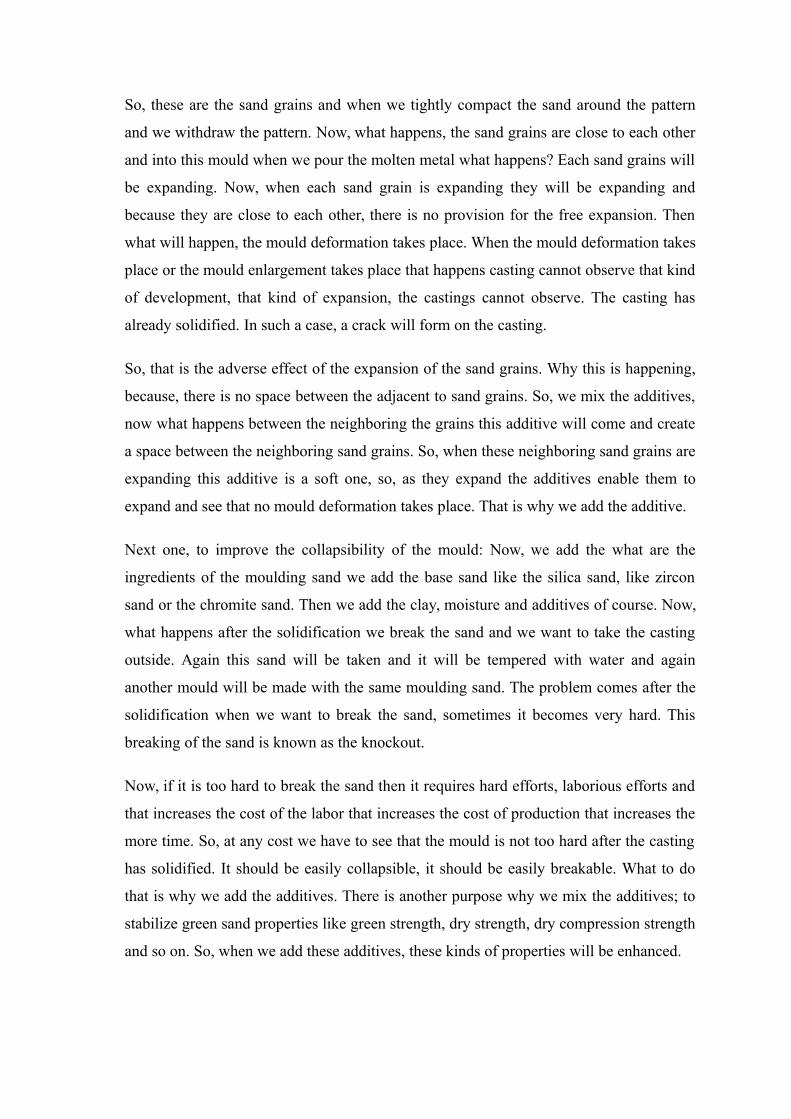
(Refer Slide Time: 16:11)
Now, this is another advantage. So, what happens, coal dust produces carbon monoxide
and it develops a gas cushion. This prevents metal penetration into the sand grains. Just
now we have seen that these are the sand grains in the mould, compacted mould and see
this side we have pour the molten metal and the molten metal is coming in this direction
means from right side to left side it is a trying to come inside.
Now, see now you can notice there is a clearance between the neighboring sand grains.
Here, you can see some clearance is there and here you can see some clearance is there
and here you can see some clearance is there between the neighboring sand grains and
this molten metal is ready to penetrate into these clearances. In such a case, we get the
penetration defects, unnecessary fins on the solidified casting which we do not want and
if we have to remove them, it takes a lot of time and that result in the increased
production.
So, which we do not want, now how to minimize this penetration? When we mix this
coal dust, this coal dust contains carbon and this carbon immediately it reacts with
oxygen and forms the carbon monoxide and this one side the molten metal is coming
from right side to left side which wants to penetrate into the sand grains, but, here you
can see this is the carbon monoxide. This carbon monoxide is pushing the molten metal
from left side to right side. Ultimately, the molten metal cannot penetrate into the
clearance between the sand grains. That is how the metal penetration will be minimized.

So, this is another benefit which we obtain by mixing the coal dust with the moulding
sand.
There is another benefit which we can get by mixing the coal dust with the moulding
sand. Coal dust produces carbon monoxide and prevents oxidation of the metal. Just now
we have seen that carbon monoxide is produced and this carbon monoxide pushes the
molten metal which is trying to penetrate into the sand grains. That is not the only thing
which this carbon monoxide does; it prevents the oxidation of the metal.
Now, this is the liquid metal and this is the mould and this is the mould cavity surface.
This molten metal can come and it may react with the oxygen which is present in the
surroundings, but now carbon monoxide is there. This carbon monoxide causes the
reduction, it’s a reducing agent, it would not allow oxidation to take place. So, no
oxidation takes place because of the development of carbon monoxide. So, this is another
benefit which we can get by mixing the coal dust with the moulding sand. The oxidation
of the molten metal will be minimized.
(Refer Slide Time: 19:32)
So, we have seen, among the additives we have studied about the coal dust and it is
important, what say benefits we have seen.
(Refer Slide Time: 19:45)
Next, let us see the dextrin. What is dextrin? It is an organic additive obtained by the
hydrolysis of starch. Dextrin improves the moulding sand properties such as dry
compression strength and erosion resistance of mould surface.
The sand generally it contains the compression strength in the green state means when
the moisture is present it contains the required compression strength, but the moment we
pour the molten metal, all this moisture will be evaporating and it goes out, then the
moulding sand becomes dry. In such a state some sands may not contain or may not
develop the compression strength, but when we add the dextrin even after the moisture is
completely dried out, the sand will continue to possess the dry compression strength.
Next one, by adding the dextrin we also make the sand to develop erosion resistance of
the mould surface, because of the presence of the dextrin it has a resistance against the
erosion. As the molten metal is flowing into the cavity, it is possible that the mould
cavity may erode some sand particles, because of the addition of the dextrin, this erosion
of the sand particles will come down. So, that is the, these are the benefits that we can
obtain by mixing dextrin which is another addictive along with the moulding sand.
(Refer Slide Time: 21:14)
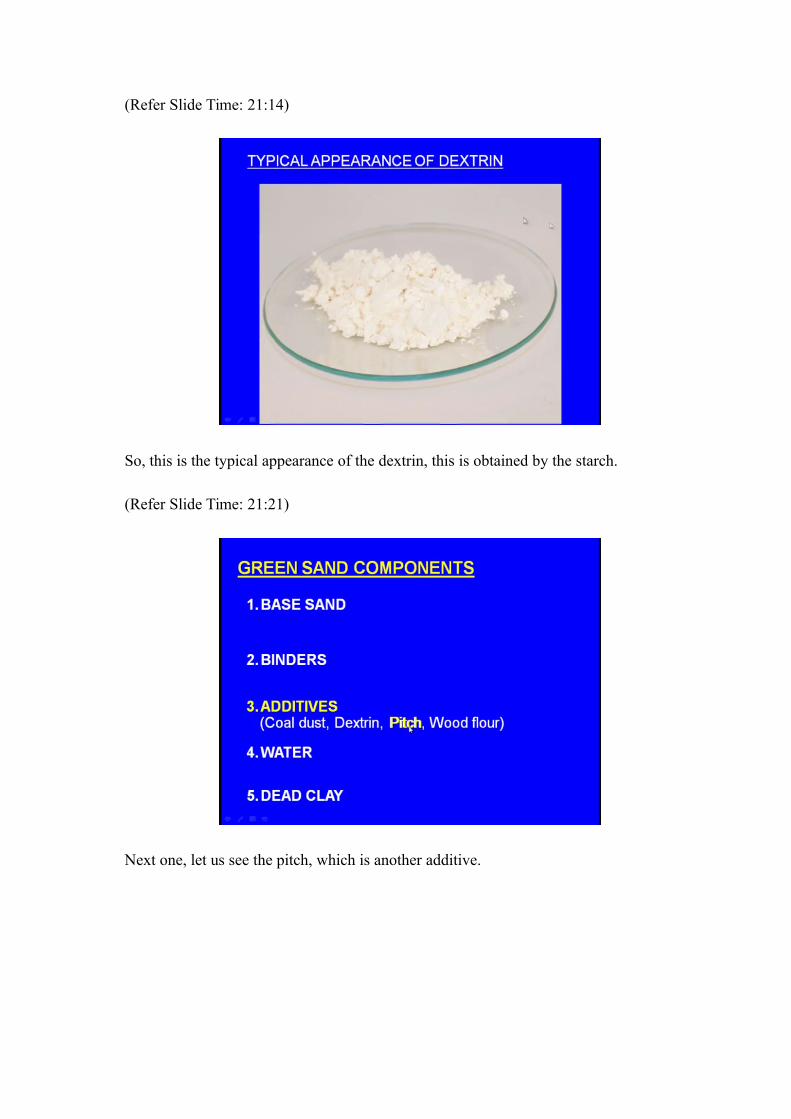
So, this is the typical appearance of the dextrin, this is obtained by the starch.
(Refer Slide Time: 21:21)
Next one, let us see the pitch, which is another additive.

(Refer Slide Time: 21:29)
It is a distilled form of the soft coal. It can be added from 0.02 percent to 2 percent in the
mould and also in the core sands. It enhances hot strengths, surface finish and mould
surfaces. Again this is the hot strength, just now we have seen that by the addition of the
starch what happens by the addition of the dextrin, the dry compression strength is
improved.
Now, after some time what happens, the sand becomes not only dry, but it becomes hot
because the molten metal is in touch with the mould surface for a long time. So, no
doubt, in the beginning itself it has become dry, now it has become hot means its
temperature has gone up. In such a case, it is possible that the moulding sand may not
possess the strength in a hot state, but by adding an additive like pitch we can see that the
moulding sand possess the hot strength even at the hot state, even at the elevated
temperature and also it enables to get a good surface finish on the mould surfaces. So,
that is the importance and benefit that we can obtain by mixing pitch along with the
moulding sand.
(Refer Slide Time: 23:06)
.
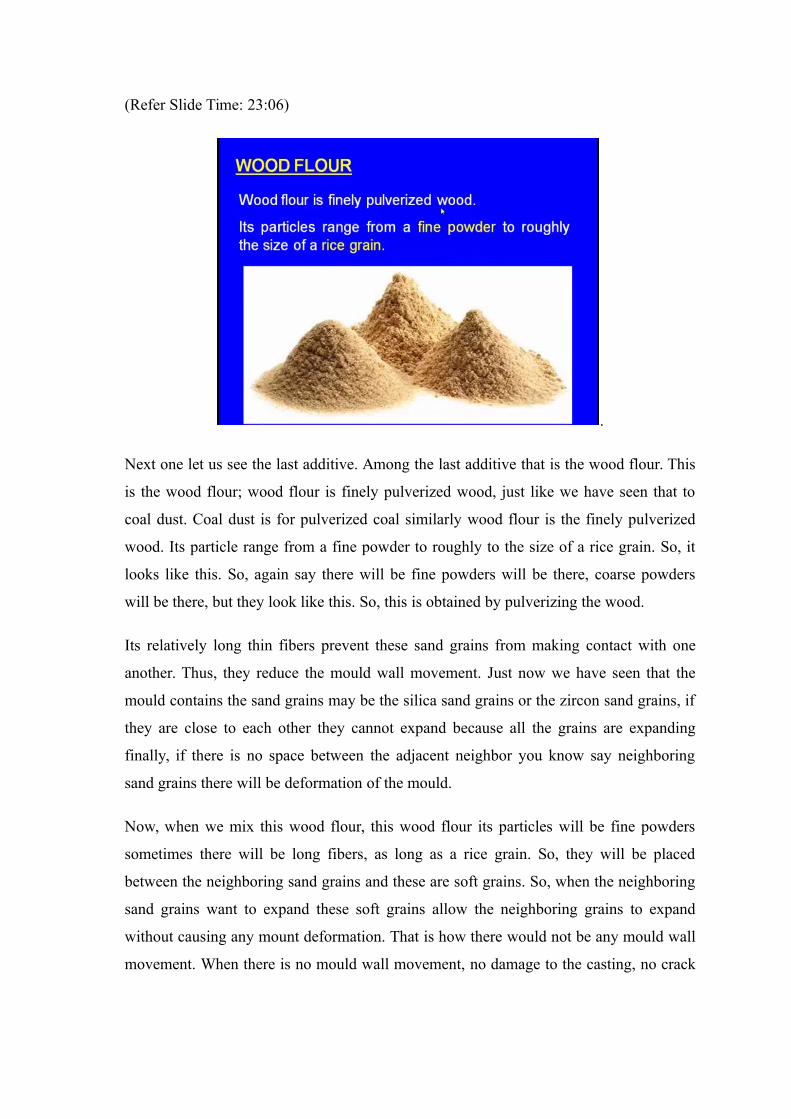
Next one let us see the last additive. Among the last additive that is the wood flour. This
is the wood flour; wood flour is finely pulverized wood, just like we have seen that to
coal dust. Coal dust is for pulverized coal similarly wood flour is the finely pulverized
wood. Its particle range from a fine powder to roughly to the size of a rice grain. So, it
looks like this. So, again say there will be fine powders will be there, coarse powders
will be there, but they look like this. So, this is obtained by pulverizing the wood.
Its relatively long thin fibers prevent these sand grains from making contact with one
another. Thus, they reduce the mould wall movement. Just now we have seen that the
mould contains the sand grains may be the silica sand grains or the zircon sand grains, if
they are close to each other they cannot expand because all the grains are expanding
finally, if there is no space between the adjacent neighbor you know say neighboring
sand grains there will be deformation of the mould.
Now, when we mix this wood flour, this wood flour its particles will be fine powders
sometimes there will be long fibers, as long as a rice grain. So, they will be placed
between the neighboring sand grains and these are soft grains. So, when the neighboring
sand grains want to expand these soft grains allow the neighboring grains to expand
without causing any mount deformation. That is how there would not be any mould wall
movement. When there is no mould wall movement, no damage to the casting, no crack

on the casting. So, that is the important benefit that we can obtain by adding the wood
flour to the moulding sand.
(Refer Slide Time: 24:55)
Next one, it can be added from 0.05 percent to 2 percent in the mould and also in the
core sands. It increases the collapsibility of the mould and the core sands. Just some time
back we have seen in some cases it is very difficult to break the sand. After the casting is
solidified we have to break the sand. This is known as knockout. Sometimes it becomes,
more efforts, it requires a more labor now what happens when we add this wood flour
because this wood flour is very soft it enables easy breaking of the mould after the
solidification is over.
So, it increases the collapsibility of the mould and also the cores and also it improves the
flowability. Flowability means its ability to flow around the pattern during the
compaction process. So, these are the different benefits that we can obtain by adding
wood flour in the moulding sand.
So far we have seen these are the sand what say green sand components. We have studied
the base sand, we have studied the binders, just now we have completed the additives.
(Refer Slide Time: 26:27)
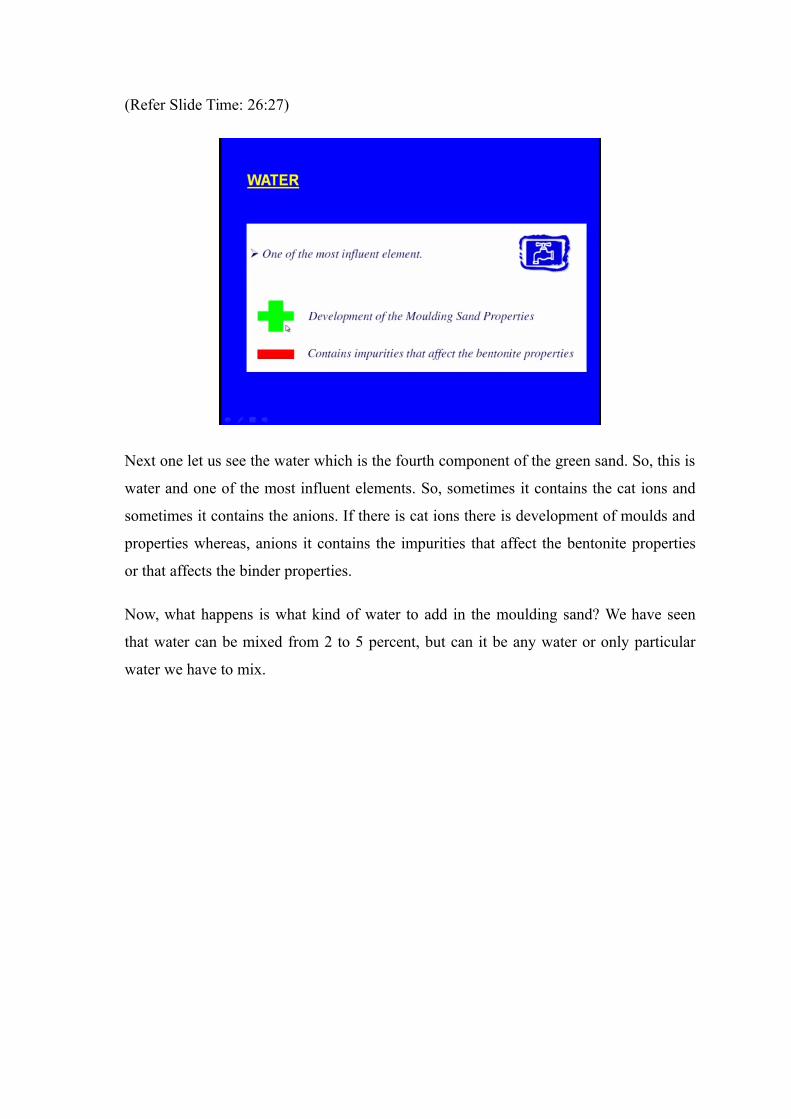
Next one let us see the water which is the fourth component of the green sand. So, this is
water and one of the most influent elements. So, sometimes it contains the cat ions and
sometimes it contains the anions. If there is cat ions there is development of moulds and
properties whereas, anions it contains the impurities that affect the bentonite properties
or that affects the binder properties.
Now, what happens is what kind of water to add in the moulding sand? We have seen
that water can be mixed from 2 to 5 percent, but can it be any water or only particular
water we have to mix.

(Refer Slide Time: 27:01)
There is a reason, we have to add the normal water not the salty water, because salt
deactivates the bentonite’s electrostatic bond properties. You can see this is the case
when normal water is added without means no salt is present in that, now say this in the
bentonite there is sodium ions are there. The sodium ions they will be improving the
electrostatic bond property of the bentonite.
Now, let us see the next case, this is the polluted water. Let us assume there is some salt
is present say for example, some sodium chloride, now what happens, we can see sodium
ion is there and sodium sorry here is the chlorine ion which comes because of the
impurity. This chlorine and sodium have got the highest affinity and because of that they
come close to each other, they make a bond, ultimately the electrostatic bond property of
the bentonite comes down. That is why; salty water or polluted water decreases the
electrostatic bond property of the moulding sand not the clay. So, we have learnt about
the water, also we have seen what kind of water to add and we have seen that we should
not use the polluted water and we should not use the salty water.
Next one, the dead clay. So, this dead clay is not added deliberately from our side. We
never add dead clay. We add only the right clay or the live clay we add, but what happens
during the process of pouring, part of the active clay becomes the dead clay because it
loses it is properties, but still it is physically present. So, this is known as the dead clay.
So, this becomes the last component or the fifth component of the green sand.

(Refer Slide Time: 29:11)
What is this dead clay? The part of the bentonite or the clay heated above 500 degree
centigrade loses it is the structural water and settles itself on the sand grains. It loses all
its properties. This bentonite losses permanently its properties and becomes a dead clay.
Once it loses permanently all its properties, but it is physically present then it is known
as the dead clay whereas, the clay which has not lost its properties is known as the active
clay that active clay only we add as the binder.
Next one at each sand circulation, a part of the sand grains is coated by this dead clay.
This is known as oolitisation process. Dead clay reduces the expansion of the green sand
and permits to fix a part of the free water in the mould. So, this is the dead clay and here
we can see high utilization and low utilization.

(Refer Slide Time: 30:30)
So, this is the green sand formula. We can see here, we can see the silica sand or we can
say this is the base sand plus dead clay will be there. Next one, active clay will be there
then there will be additives will be there plus water. Now, how can we say 100 percent
the total green sand is this one, this is the what say a silicon dioxide or the silica sand or
the any base sand plus DC. DC means dead clay and next component is the active clay
and there is another component that is the LOI Loss on Ignition. Some sand or some clay
is burnt and it is lost, so this is the loss on ignition. So, that is also countable finally, here
is the moisture.
(Refer Slide Time: 31:22)

Proportions of green sand for cast iron: So, how to make the green sand for cast irons?
So, base sand is present from 75 to 85 percent. Active binders or the binder which we
add freshly or the active clay is from 6 to 10 percent. Next one, dead clay, this we are not
adding that comes by automatically, that is generated during the process of pouring and
re moulding, it is generated. It is between 5 to 8 percent. Next one, loss on ignition, this
also not from our side, it is generated or developed. This is from 3 to 5 percent. Finally,
the moisture is 2 to 4 percent. So, this is the proportion of green sand for the cast iron
castings.
Next one, proportion of green sand for steel castings. The base sand is from 75 to 85
percent. Active binder or the binder or the clay or the fresh clay is 8 to 12 percent. Dead
clay is from 6 to 9 percent, loss on ignition LOI it is from 2 to 3 percent. Finally, the
moisture is 2 to 4 percent sorry the loss on ignition is 2 to 3 percent.
Next one, metal to sand ratio: until now we have seen how to prepare the green sand?
What are the ingredients of the moulding sand? We have seen, what are the components
of the green sand, we have seen. What are the different clays we have seen, what are the
different binders? What are the different additives? What are the benefits that we can
obtain by mixing the additives to the moulding sand we have seen and we have seen the
importance of the moisture and the concept of the dead clay we have seen.
Now, the next question is metal to sand ratio the moulding sand or the green sand is
ready, maybe you are going to make a casting of 10 kgs. For 10 kgs how much sand is to
be used say again the quantity or the consumption of the green sand must be optimized.
It will not be too much. If you use too much more than required it is a loss to the
industry.

(Refer Slide Time: 33:49)
So, let us see the optimum metal to sand ratio for. This is the typical metal to sand ratios
for ferrous castings. Metal to sand ratio is 1 is to 9 means if we are making a casting of
weight 1 kg we have to use 9 kgs of green sand. Similarly, for non-ferrous castings, the
metal to sand ratio is 1 is to 5 means if we are making a casting of weight 1 kg we have
to use 5 kgs of moulding sand. Now this is the mixing of the green sand.
(Refer Slide Time: 34:31)
So, how to prepare this green sand? We have seen that the ingredients of the moulding
sands are the base sand, the binder, additives and the moisture, how to prepare them? So,

we have to put all these ingredients in the right proportion into a Sand Muller. So, this is
known as the Sand Muller. You can see here there are 2 rollers are there, here is one
roller and here is one roller and there will be 2 blades will be there, here is one blade and
here is one blade. So, the all these ingredients will be dumped inside and this will be
rotating maybe for about 15 minutes and after that say all these ingredients are nurtured
thoroughly and we get a very good mixture of this green sand.
So, this is achieved by putting the ingredients to a Sand Muller which rolls and stirs the
sand. Now, this process is known as mulling. After the mulling is over, each sand grain is
coated with the clay; each sand grain is coated with additives and moisture, so they are
that much nourished and mixed.
(Refer Slide Time: 35:34)
Next one, it can be continuous and batch-type Muller. Sometimes in some industries this
sand mixing is continuous, they keep loading and at the same time at the bottom they
used to keep unload and this process goes on or sometimes it can be done in a batch
wise. Production maybe whenever there is a requirement these ingredients can be kept
inside the Muller and they can be mixed and that sand can be taken and after sometime
again it can be operated. So, this can be operated in your batch type and also
continuously.

(Refer Slide Time: 36:08)
And, you can see this is bigger Muller, you can see inside. So, this is here with the door
is opened and here we can see there are so many blades are there. So, this is a larger
Muller, Sand Muller.
(Refer Slide Time: 36:23)
And, this is the green sand preparation system for a large scale industry. They look like
this.

(Refer Slide Time: 36:37)
Now, once this sand is prepared, if it is small industry, it is carried manually, but in large
scale industries, this will be carried automatically by the conveyors. There will be
pneumatic sand conveyors will be there. So, this is a pneumatics sand conveyor. Through
this conveyor the sand will be taken from the moulding shop to the or the sand shop to
the moulding shop and these are all the storage systems.
(Refer Slide Time: 37:04)
So, this is the circulation of the system in a sand casting process and here we can see this
is the preparation of the moulding sand. So, we are mixing the base sand and the binder,

additives and the water are mixed here and here we are mixing. This mixed green sand is
going to the mould shop and here of course, parallely we also make the core; remember,
core means an object which is kept inside the mould to create some hollow cavities
inside the castings.
So, here a core is made. So, this core is also made and the moulding is done and inside
the mould the core is kept. Now, it is the pouring. We do the pouring. And after sometime
the poured metal solidifies and we will be breaking the sand. So, this is known as
shakeout or knockout. There will be some sand loss will be there and the gas emission
will be there here, we can see and burning out of the clay and sea coal means that is the
additive, burning of the binder and additive will be there. Then sand losses will be there,
then we take the casting outside.
Now, this sand will be again going to the sand preparation shop where it will be again
tempered with the water, again it will be remixed. The problem is, it may contain some
unwanted metallic objects inside the sand; maybe, the penetrated metals or sometimes
we use the chills. These chills or some other components, metallic components or hard
sand lumps may be present inside, they have to pass through the screening here and there
would be a magnetic separator will be there. So, when the sand is; sand which we obtain
from the shakeout when it is passing again going to the sand shop, it has to pass through
the magnetic separator. If there are any unwanted metallic objects are there in the sand,
they will be absorbed; they will be caught by the magnetic separator.
Next, there will be screening to screen the very hard sand lumps. Finally, it will be
cooled down, again, it will go to the sand preparation shop and this is the there is another
system parallely; dust extraction system will be there. So, when you break the sand,
when we do the shakeout or the knockout lot of dust will be arising.
So, there has to be a system to tap, collect the dust. So, this is the dust extraction system.
Again, the sand continues to circulate in the same cycle. In between, these people add the
clay or the binder, because part of the clay becomes the dead clay.

(Refer Slide Time: 40:12)
So, remember, this is the typical sand balanced diagram for the green sand. So,
remember always there is a sand loss, for example, let us consider a small case. This is
the moulding shop and this is the core shop and say for example, here a 900 tons of
moulding sand is prepared on a particular session and here for making the cores 100 tons
of core sand is prepared. Now, mould is made. After the mould is made, there will be
knockout. Knockout means after the casting is solidified, we break the sand and take the
casting outside. This process is known as knockout. Now again it is going to the mill
room and you can see we are not getting the 100 percent sand. By the time, we see it
comes to the again moulding shop; it is only 95 percent of sand we are getting. There
will be sand loss will be there.
So, waste is 5 percent and again we have to add the new sand. Generally, about 5 percent
of new sand is added and along with that a proportionate amount of the binder or the clay
is also added, again when you are making the or when we are re-tempering the moulding
sand. So, remember always there is a sand loss in the circulation system.
Friends, with this we are concluding this. We have learnt about the moulding sand design
and we have seen that the moulding sand contains the certain ingredients. The moulding
sand mainly contains the base sand. This base sand can be silica sand or chromite sand or
zircon sand or the olivine sand. So, these are the popular base sands. So, this base sand is

the main ingredient of the green sand. Next one, we add the binder. This binder we add to
develop the cohesion between the sand grains.
So, among the binders bentonite is the popular binder and the third ingredient is the
additive. Additive is mixed for obtaining several benefits to reduce the metal penetration
or to reduce the oxidation or to reduce the mould wall movement, to improve the
collapsibility of the sand after the solidification is over, or to get a fine surface finish or a
lustrous finish on the mould coating we add the additives.
Next, we add the moisture. And, we have seen that the moisture should not be
contaminated moisture, it should be free from the salts. If there are salts are present what
happens, these salts react with the sodium which is present in the bentonite and they
reduce the binding action of the bentonite and we have also seen that we every time
when we add the clay, part of the clay becomes dead clay, after it comes in contact with
the molten metal. This is known as the dead clay. So, every time we have to compensate
this. So, we have to add little more clay every time when we reuse this. So, this is all
about the green sand design.
Thank you.