MAXIMIZATION AND DESIRABLE DUTY ASSIGNMENT TOOL …
97
MAXIMIZATION AND DESIRABLE DUTY ASSIGNMENT TOOL (MDAT) CLERK DIVISION CLINT BURELSON, DIRECTOR LAMONT BROOKS, ASSISTANT DIRECTOR LYNN PALLAS-BARBER, ASSISTANT DIRECTOR Updated September 2017 – Administrator: Lamont Brooks 1 Mark Dimondstein, President
Transcript of MAXIMIZATION AND DESIRABLE DUTY ASSIGNMENT TOOL …

MAXIMIZATION AND
DESIRABLE DUTY ASSIGNMENT TOOL
(MDAT)CLERK DIVISION
CLINT BURELSON, DIRECTORLAMONT BROOKS, ASSISTANT DIRECTOR
LYNN PALLAS-BARBER, ASSISTANT DIRECTOR
Updated September 2017 – Administrator: Lamont Brooks1
Mark Dimondstein, President
2
3
4

5

6

7
8

9

10

11

12

UTILIZING DATA TABLES AND BAR CHARTSCREATED FROM ETC EVERYTHING REPORT
CSV FORMAT CLOCK RINGS
MAXIMIZATIONDESIRABLE DUTY ASSIGNMENTS
IDENTIFY DUTY ASSIGNMENTS-ARTICLE 37.4.DIMPROPER REVERSIONS
IMPROPER ABOLISHMENTSNEWLY CREATED DUTY ASSIGNMENTS
REPOSTINGSIMPROPER EXCESSING
ARTICLE 12 RETREAT RIGHTS13
Mark Dimondstein, President

14
Getting Started: Obtain the proper files
Mark Dimondstein, President

15
Mark Dimondstein, President

16
Mark Dimondstein, President

17
Mark Dimondstein, President

Download these two examples, with instructions for CSV conversions.
• http://apwumembers.apwu.org/bqnet/images/RFITACRingsv1Basic.pdf
• http://apwumembers.apwu.org/bqnet/images/RFITACRingsv2Advance.pdf
18
Mark Dimondstein, President

19

20
When requesting files from USPS, you may have to make separate requests depending on the size of the files. NOTE: Program currently accepts files of 15 MegaBytes(MB).
21
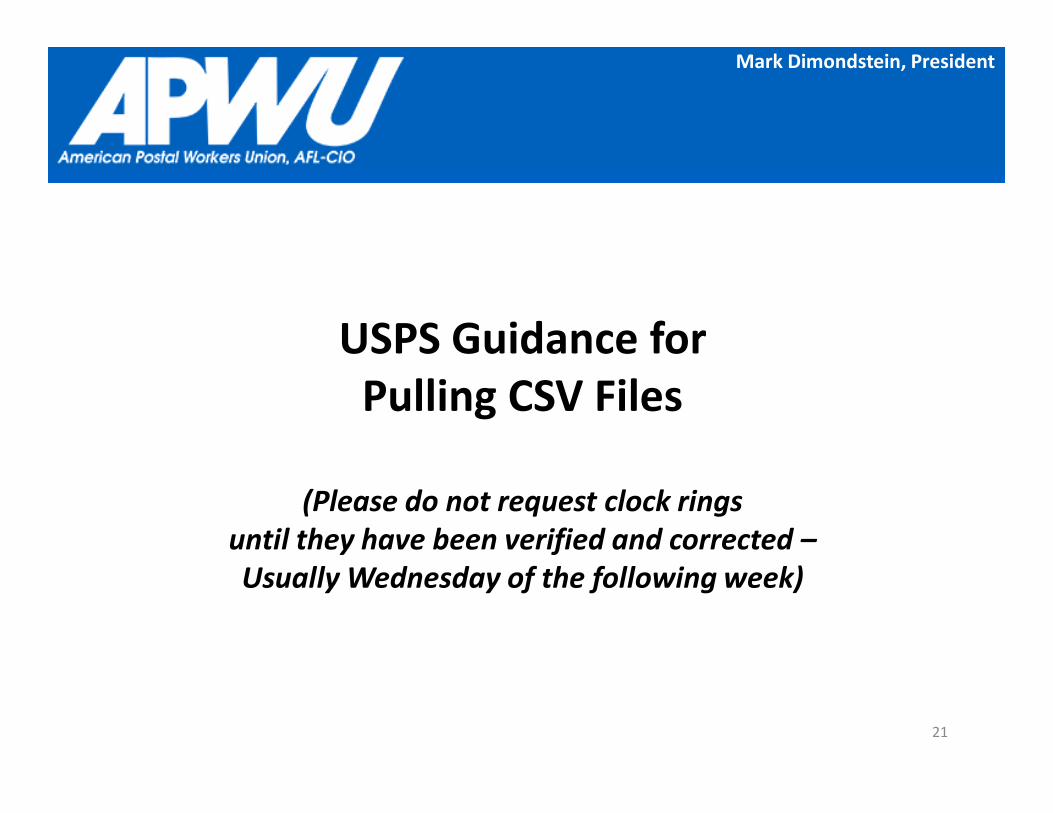
USPS Guidance for Pulling CSV Files
(Please do not request clock rings until they have been verified and corrected –Usually Wednesday of the following week)
Mark Dimondstein, President

22

23

24

25
Updating Officer Profiles before accessing MDAT
Mark Dimondstein, President
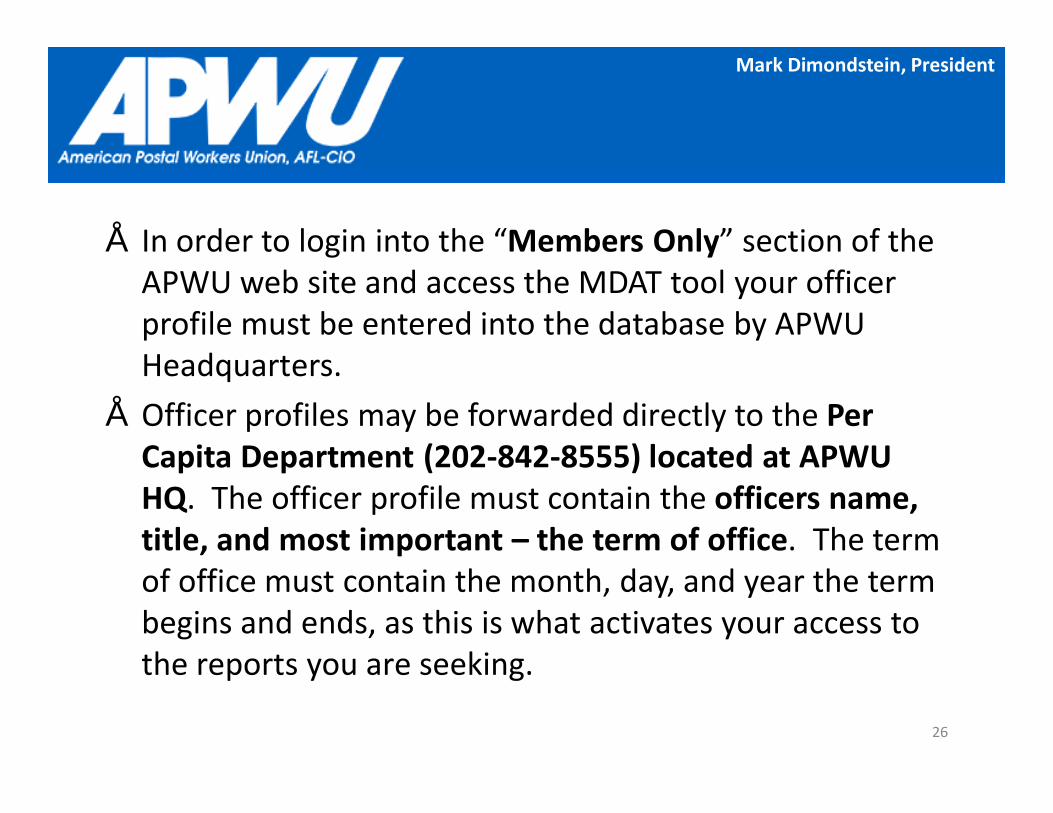
• In order to login into the “Members Only” section of the APWU web site and access the MDAT tool your officer profile must be entered into the database by APWU Headquarters.
• Officer profiles may be forwarded directly to the Per Capita Department (202-842-8555) located at APWU HQ. The officer profile must contain the officers name, title, and most important – the term of office. The term of office must contain the month, day, and year the term begins and ends, as this is what activates your access to the reports you are seeking.
26
Mark Dimondstein, President
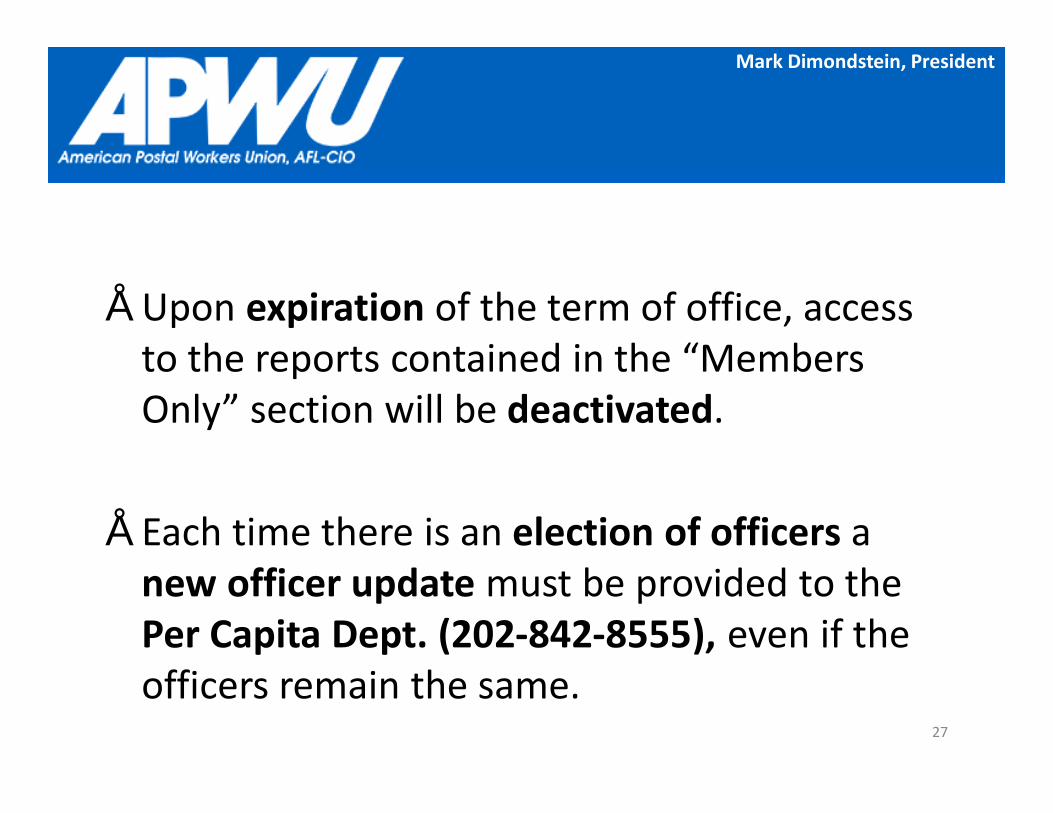
• Upon expiration of the term of office, access to the reports contained in the “Members Only” section will be deactivated.
• Each time there is an election of officers a new officer update must be provided to the Per Capita Dept. (202-842-8555), even if the officers remain the same.
27
Mark Dimondstein, President

28
Accessing the MDAT Program via
APWU Members Only
Mark Dimondstein, President

29
-Place cursor on “Members Only”
-Select “My Local & Personal Info
-This will take you to the login screen.
• Hover cursor on "Members Only” until drop-down menu appears • Select "My Local & Personal Info"

30
Mark Dimondstein, President

31
• If Retired, enter 6 digit APWU membership number printed on your membership card into the Login field.
• For those employed by the postal service enter your Employee identification number into the Login field
• Your password is your last name followed by the last 4 digits of your SSN.
• If you have previously logged on to the “Members Only” section and changed your password use the password you selected.
• Place your cursor on Max Duty Assignment Tool, MDAT and click. It is located in the blue box on the left side of the screen.
Mark Dimondstein, President

All Presidents with access to the MDAT program will need to agree to the terms and conditions set forth within the Use Agreement prior to using the program.
32
Mark Dimondstein, President

Navigating the
MDAT Program
33
Mark Dimondstein, President

34
Home: First Page where you select to upload new files or continue working with currently uploaded files.
File Uploads: Page where you can browse and select the files on your computer to upload.
Report Setup: Page where you can select the names of individuals for whom you would like create reports.
Log Out: Logs you out of the Program.
Admin Access: Allows Local/State President to assign up to 3 additional designated users.
The links located at the top of the page can be used to move back to the previous pages.
Documents: Downloadable PowerPoint tutorial document.

35
How to use the “Documents” tab of MDAT

36
Documents are broken up into three (3) sections:
• Mission Statement
• Troubleshooting
• MDAT Grievance Assistance
37
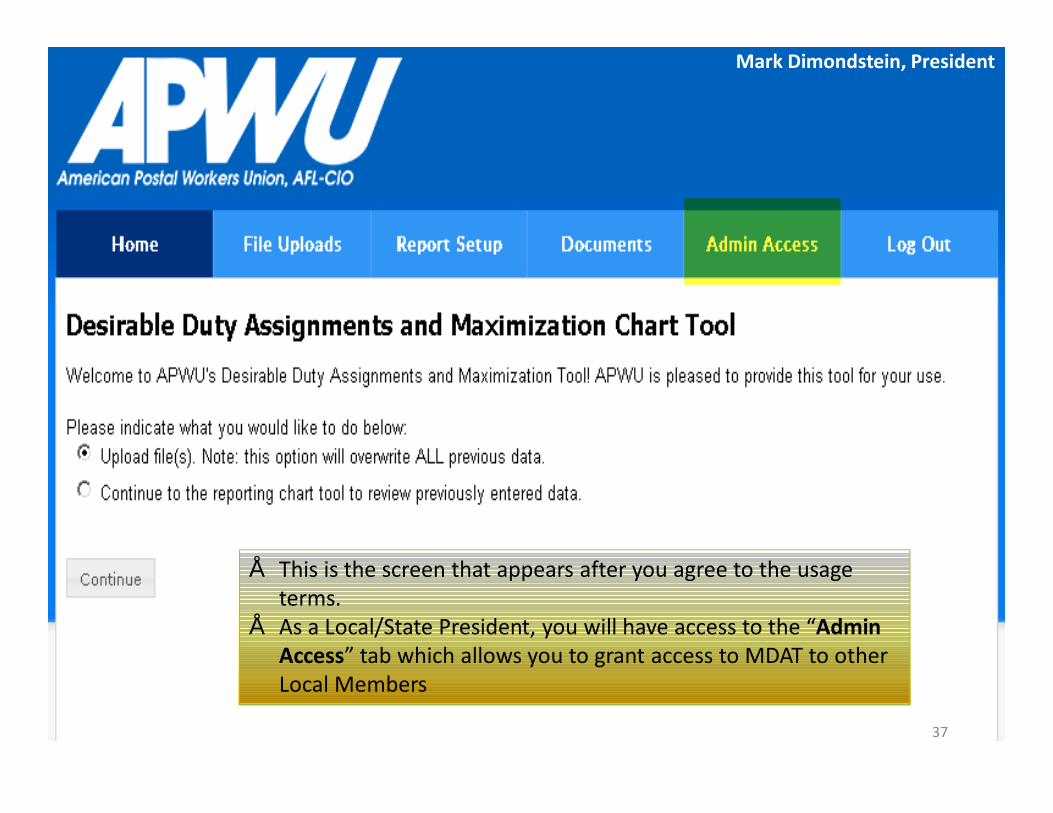
• This is the screen that appears after you agree to the usage terms.
• As a Local/State President, you will have access to the “Admin Access” tab which allows you to grant access to MDAT to other Local Members
Mark Dimondstein, President

Expanding Access to Additional designated
users(Maximum of 3)
38
Mark Dimondstein, President

39
There are two options for selecting designated users.
Mark Dimondstein, President

40
Option 1: Search by Employee ID
Note: Click on “Add” Button to select the name that appears in the Search Result.
Mark Dimondstein, President

41
Note: Click on “+” Button to select the name that you wish to select.
Option 2: Search by Name
Mark Dimondstein, President

42
Access Term Dates can be adjusted by selecting “Edit” at the end of each record.
Mark Dimondstein, President

43
• Option 1: Upload File(s). Use this option if this is your first using the Desirable Duty and Maximization Chart Tool OR if you would like to start over with ALL NEW Data Files.
• Option 2: CONTINUE where you left off from another session. Previously uploaded data will be available.
Mark Dimondstein, President

Selecting Files to
Upload
44
Mark Dimondstein, President

In this scenario, you currently have NO FILES uploaded that the program can use for reporting.
Click on “Select Files” at the bottom of the window to search your computer for the files you wish to select for uploading to the program.
NOTE: “Uploading new files will overwrite any data which you were working with previously.” 45
Mark Dimondstein, President

You can select just 1 (one) or many files to introduce into the program at the same time. The maximum total file size for all files combined is 15 MB.
Note: Selecting multiple files and/or files larger than 5MB will increase the expected wait time for the program to process the data and create reports. Speed also depends on the type of internet connection you are using (i.e. Broadband, Cable, DSL) and/or the time of day (i.e. during times when a high volume of Locals might be trying to access the program at the same time). 46
Mark Dimondstein, President
Note:Do NOT select Traditional Full-Time Regular Employee Files in MDAT.
You CAN add Traditional Full-Time Regular OVERTIME hours manually from the PDF clock rings.

47
Mark Dimondstein, President

In this example…
Two (2) files have been selected. You are only able to select one file for each “Browse” option. You can add additional rows for files to upload by clicking on “More Files”.
Click on “Done” when you have finished selecting the desired files. (NOTE: Maximum total file size for all files combined is 15 MB). 48
Mark Dimondstein, President

After selecting your files, you will have an opportunity to review the selected files before uploading. You can “Remove” any files that you do not wish to upload.
When you are ready to continue, click on the “Upload” button located at the bottom of the screen.
49
Mark Dimondstein, President

After you click on “Upload”, you’ll be provided with an upload status message like this while your files are being uploaded. (NOTE: Maximum total file size for all files combined is 15 MB).
Note: Selecting multiple files and/or files larger than 5MB will increase the expected wait time for the program to process the data and create reports. Speed also depends on the type of internet connection you are using (i.e. Broadband, Cable, DSL) and/or the time of day (i.e. during times when a high volume of Locals might be trying to access the program at the same time).
50
Mark Dimondstein, President

Upon completion of the upload process, you will be presented with a summary of the files that were successfully uploaded.
Note: In the event a file DID NOT upload properly, you will see a “Failure” notification with details. (See Next Slide for an Example of a failed upload).
51
Mark Dimondstein, President
Troubleshooting File Uploads
52
Mark Dimondstein, President

53
If your file does not follow the proper layout, you will see a “Failure” notification. You can correct this by clicking on the “Return to Upload” to try and upload a file that is in the correct format.
Mark Dimondstein, President
54
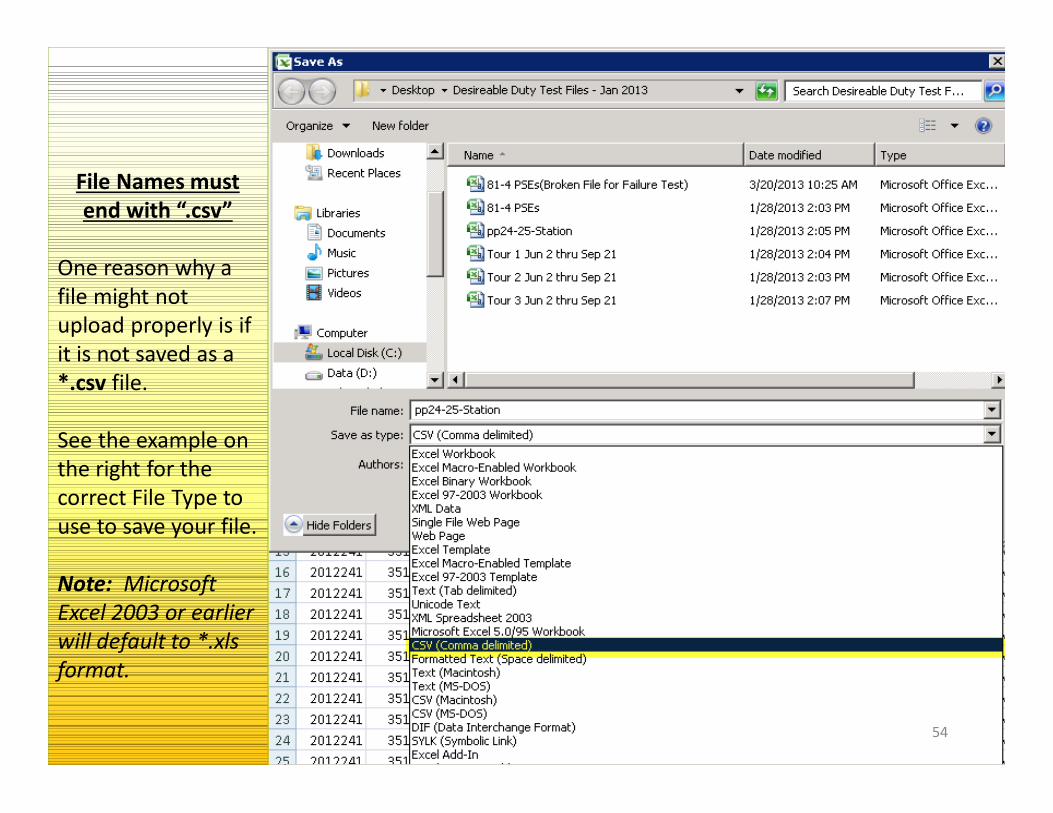
File Names must end with “.csv”
One reason why a file might not upload properly is if it is not saved as a *.csv file.
See the example on the right for the correct File Type to use to save your file.
Note: Microsoft Excel 2003 or earlier will default to *.xlsformat.

Choosing which Employees to include in
your Report
55
Mark Dimondstein, President

Now that you have successfully uploaded your files, you are ready to choose the employees you wish to include in your report.
Click on the “Continue” button in order to access the “Report Options” section of the program.
56
Mark Dimondstein, President

You have two options for selecting data….
Option 1: Date Range - Select Date Ranges that EXIST within the uploaded files. Make sure the Begin and End Dates include FULLPay Period Weeks.
Option 2: ALL Dates – This option will include all possible dates that exist in the uploaded files. 57
Mark Dimondstein, President

Dates can be entered manually or by selecting the date from the pop-out calendar. You can also manually type the date.
58
Mark Dimondstein, President

Limitation of Employee Selection
(Max of 10 Selections)
59
Mark Dimondstein, President

60
Option 1: Enter EIDs –This option assumes you know the EID’s of the individuals you wish to include.
Option 2**: Search by Name – This option allows you to enter full or partial names.
Option 3: Manually Enter Tac Rings– This option allows you to enter information of employees and time entries NOT already included in the uploaded files.
Option 4: Select from List – This option allows you to select the desired employee from a list of available names, in alphabetical order.
Preferred Method is “Select from List”. (This prevents complications due to typos in EID entry).
Limit of 10 Employees Max.
Mark Dimondstein, President

Option 1:Select from List
61
Mark Dimondstein, President

62
Clicking on the “Select from List” button will bring up an Employee Listing window that displays a list of all the available names, in alphabetical order.
Click on the “+” button to the right of the EID of the individual you wish to include in your report.
Mark Dimondstein, President

Option 2: Selecting Names by
Entering EIDs
63
Mark Dimondstein, President

64
These EID’s exist in one of the uploaded files.
These EIDs will have to be entered exactly as they exist in the original file, in order for the program to pull their Pay Period records into the reports.

This is the pop-up window that appears when you select the option to Enter EID’s.
Clicking on the “+” symbol adds the entered EID to the “Currently Selected Employees” section located at the bottom of the page.
Click on “Continue” when you are done searching for EIDs.
Note: The entered EID MUST already exist in one of the uploaded files.
65

66
In this example, two EIDs have already been added to the “Currently Selected Employees” section, located at the bottom of the page.
EID’s are added by entering the EID and then clicking on the “+” button to the right.
Click “Continue” when you are done entering EIDs.
NOTE: You will receive an error message if the EID is not known to the system.

Option 3: Searching by Name
67
Mark Dimondstein, President

68
This is the pop-window that appears when you select the option to Search by Name.
Type the first letter of the last name or the whole last name, then click on “Search” to show results.
Select the names you want to add by clicking on the “+” icon under the Select Column.
Note: Only names in the uploaded files will show in the Search Results.
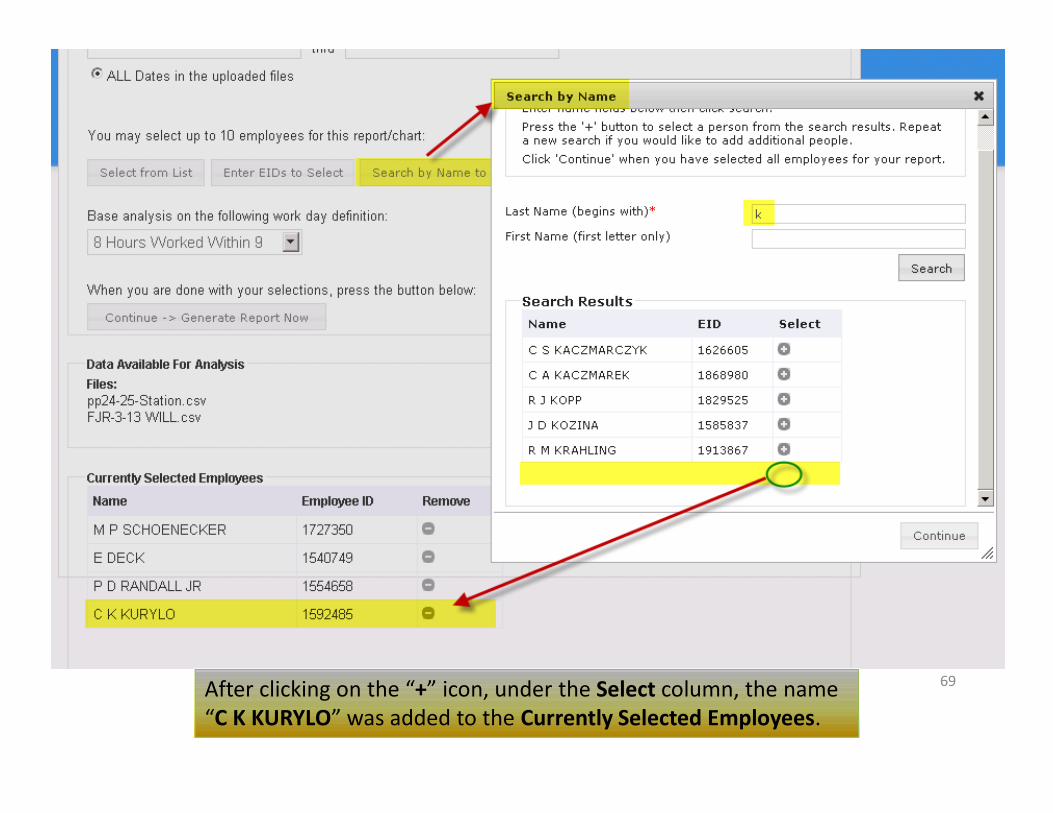
69After clicking on the “+” icon, under the Select column, the name “C K KURYLO” was added to the Currently Selected Employees.

Option 4: Manually Entering TAC
Rings Info
70
Mark Dimondstein, President
71
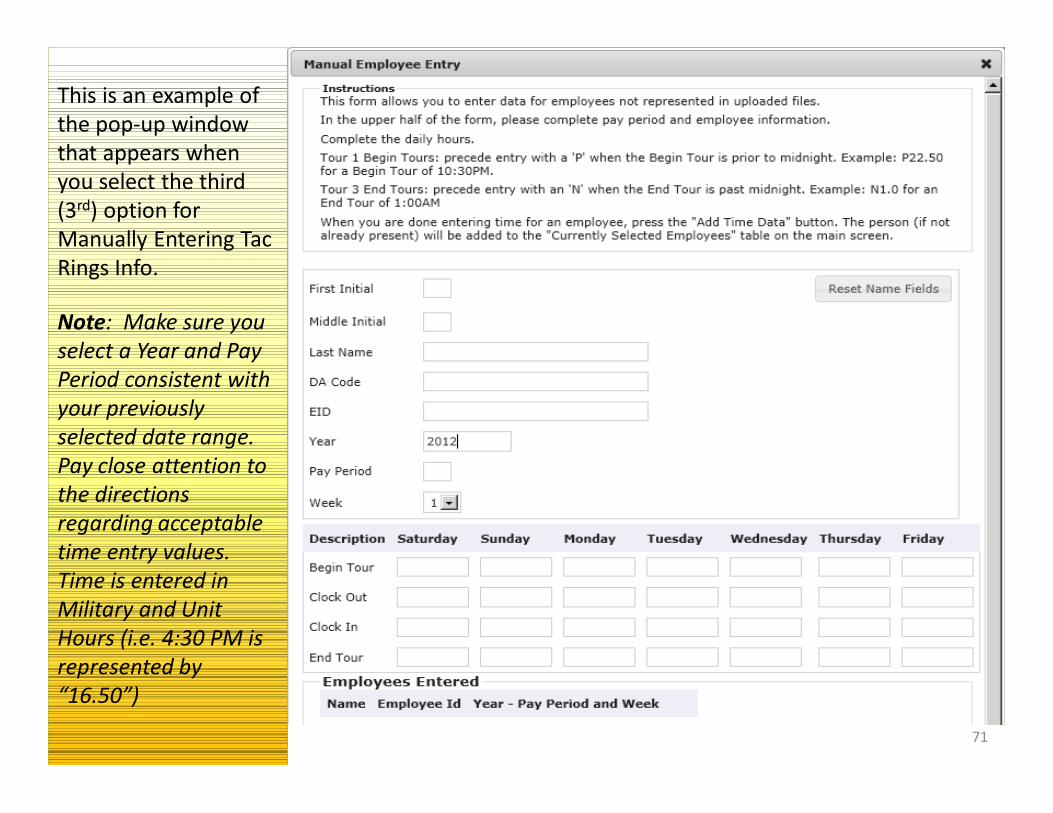
This is an example of the pop-up window that appears when you select the third (3rd) option for Manually Entering TacRings Info.
Note: Make sure you select a Year and Pay Period consistent with your previously selected date range. Pay close attention to the directions regarding acceptable time entry values. Time is entered in Military and Unit Hours (i.e. 4:30 PM is represented by “16.50”)

72
- Example of properly entered data.- Click on “Add Time Data” at the bottom of the window when finished entering time.

73
- Notice that after selecting “Add Time Data”, the newly entered information gets added to the Employees Entered section located at the bottom of the window. - There are 4 options for managing entered time entries.
- “Edit”: Allows you to edit a specific Pay Period time entry for an Employee- “Delete”” Allows you to delete a specific Pay Period time entry for an Employee- “Minus” Symbol: Removes ALL Pay Period Entries for an Employee. - “Plus” Symbol: Use this to Add this employee, and associated Pay Period time entries to the
“Currently Selected Employees” list located on the main “Report Setup Tab”.

The program currently allows for a maximum of 10 selected names. You will receive notification upon reaching this limit and the ability to add more names will be disabled. 74

The options to “Enter EIDs” or “Search by Name” are disabled once the limit has been reached.
75

76
Important:
Pay close attention to the Confirmation Window that appears when clicking on the Minus (-) symbol. This should ONLY be used if you wish to start over for a specific employee.
If you are just trying to remove a single Pay Period and Week, use the “delete” option.

77
Important:
The MDAT program warns you if you are attempting to enter overlapping time entries for a specific employee’s Pay Period and Week.

Preparing and Running Table and Chart Reports
78
Mark Dimondstein, President

79
You may choose to report upon five types of Workdays.
- 8 Hours Worked Within 9
- 8 Hours Worked Within 10
- 8 Hours Worked Within 12
- 10 Hours Worked Within 11
- 10 Hours Worked Within 12
The type of workday you choose will affect the way that “Overtime” is displayed on the Maximization Bar Chart.
IMPORTANT NOTE: Please limit lunches to 1 Hour for BEST results.
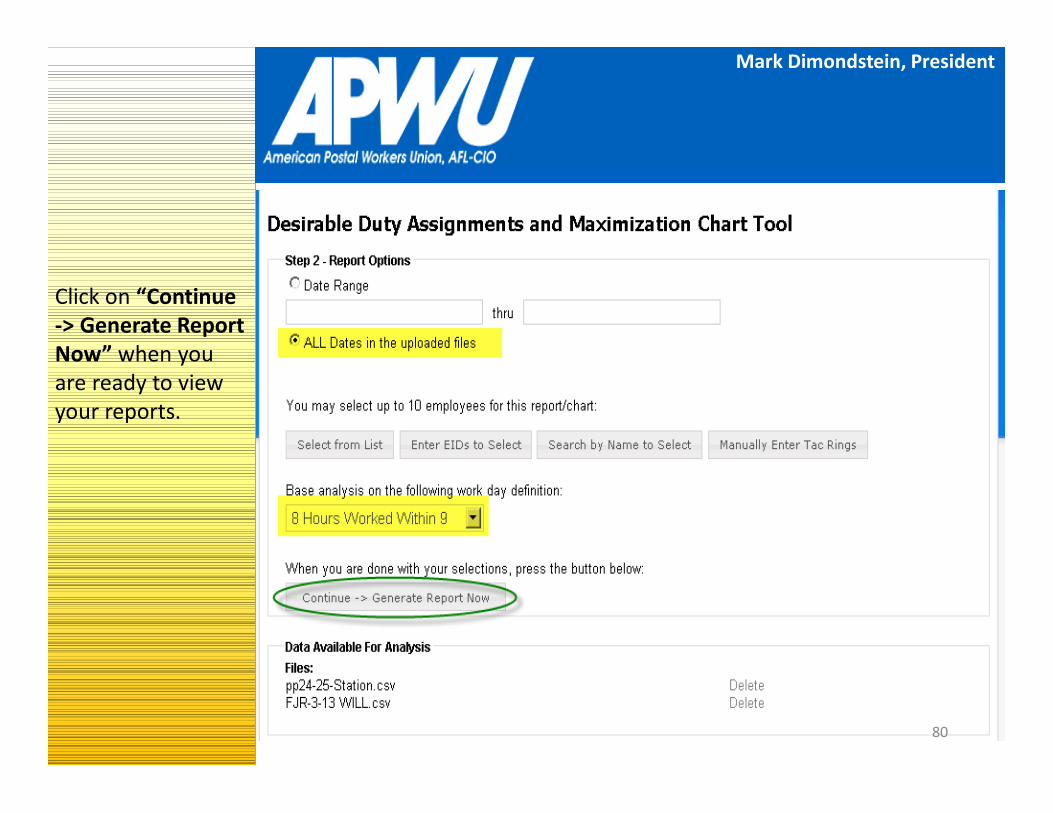
Click on “Continue -> Generate Report Now” when you are ready to view your reports.
80
Mark Dimondstein, President

There are 3 types of reports you can view.
You can save each report to your computer or view them directly.
81
Mark Dimondstein, President

A pop-up window may appear when you select “Save”. Click on “Save” on the new window to bring up another window that will allow you to choose where you would like to save the report. 82
Mark Dimondstein, President

Please Be Patient.
The program will begin to review and report upon thousands of rows of data.
Note: Depending on the uploaded file size and number of selected names, the reports may take anywhere from a few seconds to several minutes to generate. Pay attention to the “Loading” bar, usually located on the bottom of your browser. 83
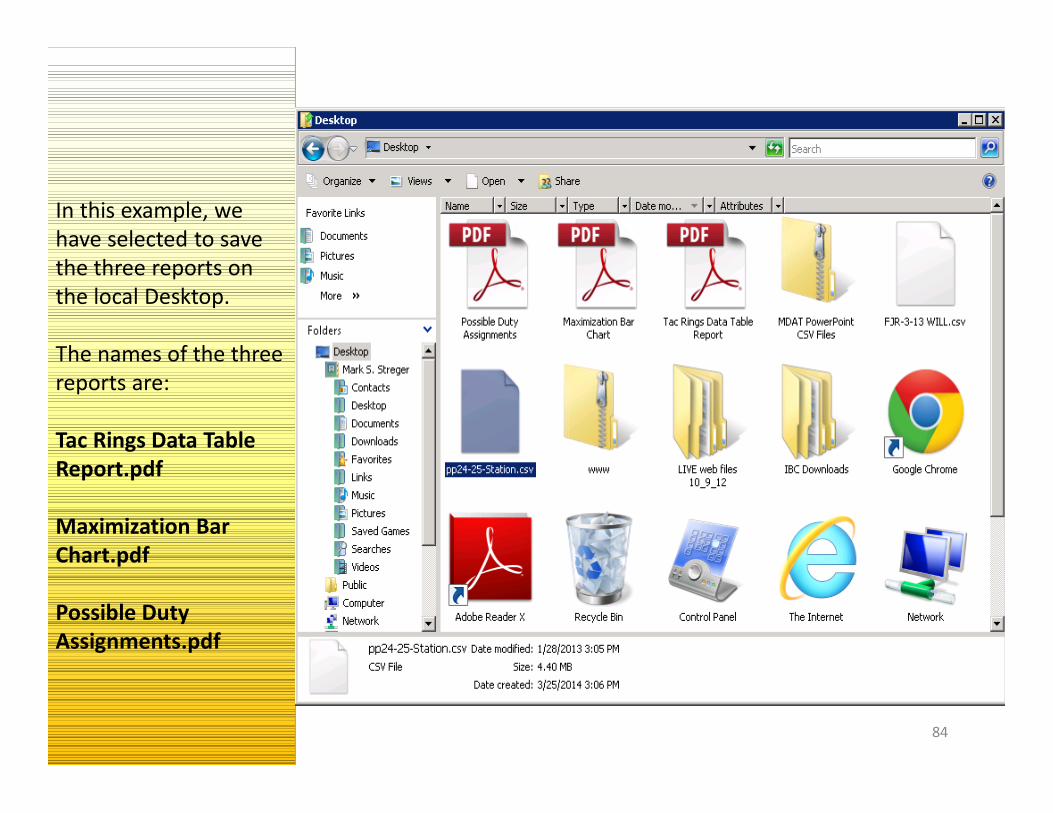
In this example, we have selected to save the three reports on the local Desktop.
The names of the three reports are:
Tac Rings Data Table Report.pdf
Maximization BarChart.pdf
Possible Duty Assignments.pdf
84
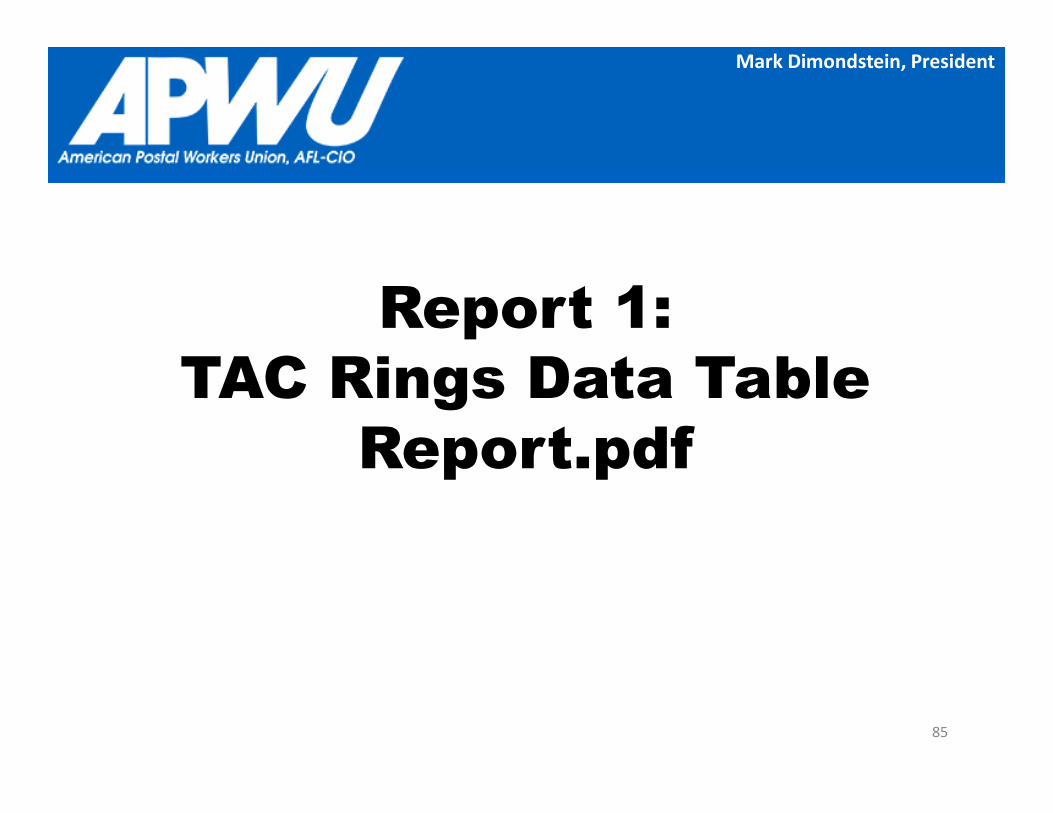
Report 1: TAC Rings Data Table
Report.pdf
85
Mark Dimondstein, President

86

87

Report 2: Maximization Bar
Chart.pdf
88
Mark Dimondstein, President

89
Bar Color Codes:
Green = Full Shift Leave Blue = Normal Time Red = Overtime
*Denotes a Manual Employee Entry
Note: Partial Day Leave is not graphed

90

91

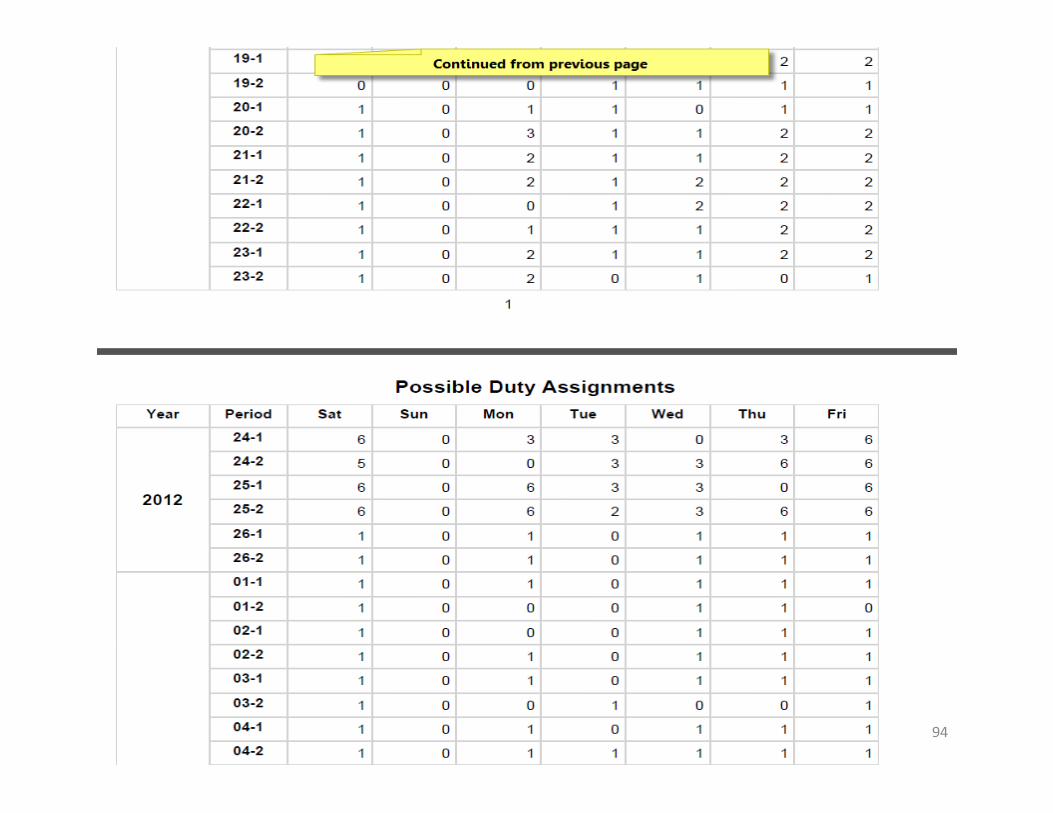
Report 3: Possible Duty
Assignments.pdfNOTE: Recommend using a max of five (5) employees at a time when running this
report.
.
92
Mark Dimondstein, President

93
94

95

Analyzing Possible Duty Assignment from Reports
• Note: This is only a minimum representation of the number of jobs available. Pay particular attention to Holiday weeks, same day overtime, NTFT duty assignment of less than 8 hours a day and partial day leave, which are not currently factored into the possible duty assignments.
• Manually entering overtime from Full Time Regular Employees, you will need to review the PDF file and extract the specific overtime hours and enter these hours MANUALLY, via OPTION 4: Manually Entering Tac Rings
96

• Please read the MDAT User's Guide in its entirety located in the "Documents" section of the MDAT homepage.• -------------------------------------• Contact:• Clerk NBA Field Office•• For MDAT Assistance for grievance assistance and assistance on completing the Request for Information, call
202-842-4220 for telephone number to your respective NBA office.• -----------------------------------• APWU Local/State Presidents can contact APWU Per Capita for MDAT Password Assistance at 202-842-8555.• ---------------------------------• Contact:• Lamont Brooks• MDAT Coordinator• Assistant Director• Clerk Division•• For MDAT software programming issues. Access to software could occasionally be disabled due to routine
server maintenance on the website. Please check back at least 24 hours later before contacting Lamont Brooks.
97
Mark Dimondstein, President