Massage Recliner User Guide - Celebrity Furniture · This Massage Recliner User Guide should be...
8
How to assemble and get the best out of your new Massage Recliner Made in the UK Massage Recliner User Guide
Transcript of Massage Recliner User Guide - Celebrity Furniture · This Massage Recliner User Guide should be...

How to assemble and get
the best out of your new
Massage Recliner
Made in the UK
Massage Recliner
User Guide
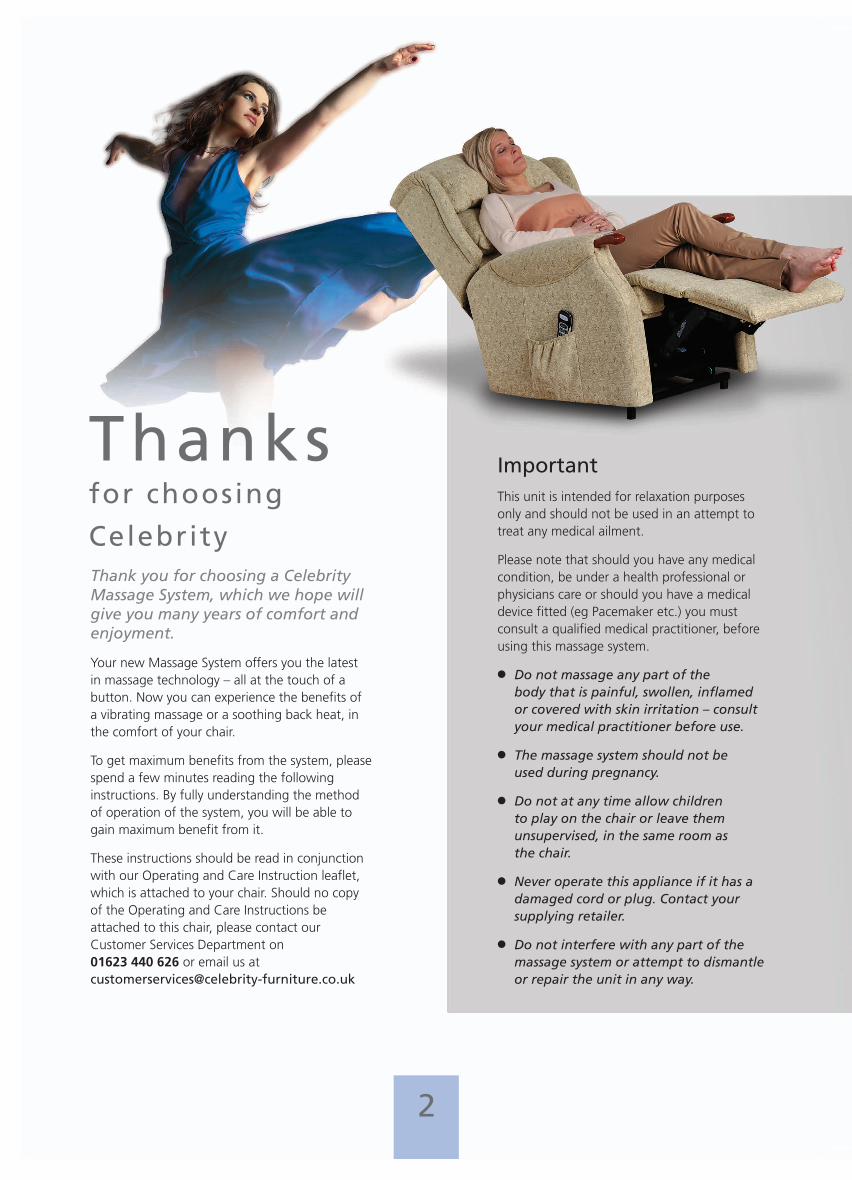
Thanksfor choosing
Celebrity Thank you for choosing a CelebrityMassage System, which we hope willgive you many years of comfort andenjoyment.
Your new Massage System offers you the latest in massage technology – all at the touch of a button. Now you can experience the benefits of a vibrating massage or a soothing back heat, inthe comfort of your chair.
To get maximum benefits from the system, pleasespend a few minutes reading the following instructions. By fully understanding the method of operation of the system, you will be able togain maximum benefit from it.
These instructions should be read in conjunctionwith our Operating and Care Instruction leaflet,which is attached to your chair. Should no copy of the Operating and Care Instructions be attached to this chair, please contact our Customer Services Department on 01623 440 626 or email us at [email protected]
2
ImportantThis unit is intended for relaxation purposesonly and should not be used in an attempt totreat any medical ailment.
Please note that should you have any medicalcondition, be under a health professional orphysicians care or should you have a medicaldevice fitted (eg Pacemaker etc.) you must consult a qualified medical practitioner, beforeusing this massage system.
l Do not massage any part of the body that is painful, swollen, inflamed or covered with skin irritation – consultyour medical practitioner before use.
l The massage system should not be used during pregnancy.
l Do not at any time allow children to play on the chair or leave them unsupervised, in the same room as the chair.
l Never operate this appliance if it has adamaged cord or plug. Contact your supplying retailer.
l Do not interfere with any part of themassage system or attempt to dismantleor repair the unit in any way.
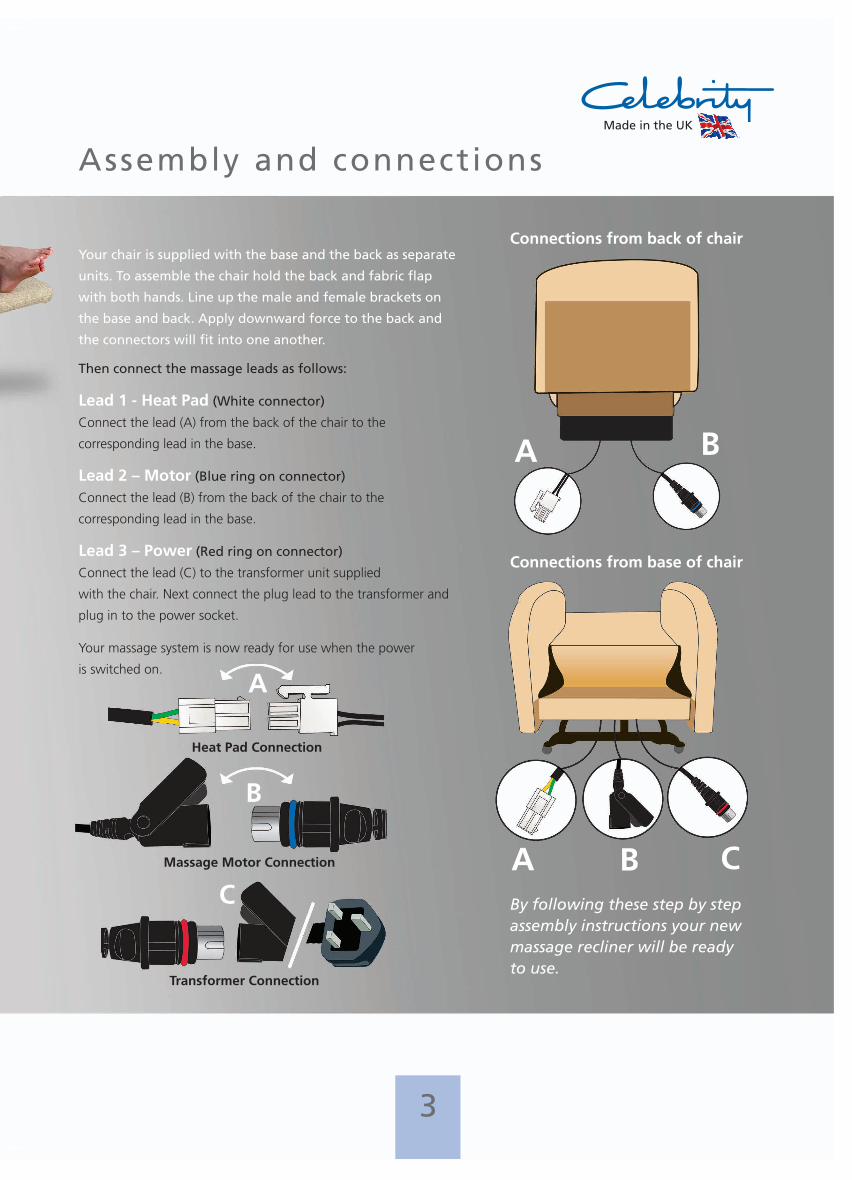
Assembly and connectionsMade in the UK
3
Your chair is supplied with the base and the back as separate
units. To assemble the chair hold the back and fabric flap
with both hands. Line up the male and female brackets on
the base and back. Apply downward force to the back and
the connectors will fit into one another.
Then connect the massage leads as follows:
Lead 1 - Heat Pad (White connector)
Connect the lead (A) from the back of the chair to the
corresponding lead in the base.
Lead 2 – Motor (Blue ring on connector)Connect the lead (B) from the back of the chair to the
corresponding lead in the base.
Lead 3 – Power (Red ring on connector)Connect the lead (C) to the transformer unit supplied
with the chair. Next connect the plug lead to the transformer and
plug in to the power socket.
Your massage system is now ready for use when the power
is switched on.
By following these step by stepassembly instructions your newmassage recliner will be readyto use.
Connections from back of chair
Connections from base of chair
A B C
A
B
C
Heat Pad Connection
Massage Motor Connection
Transformer Connection
A B
Helpful Information
First UseWe recommend that the unit be used only for afew minutes initially, to allow your body to getused to the massage sensation. Gradually increase the length of time you use the massagefunction, over the first few periods of use. Shouldyou experience any adverse reactions, stop usingimmediately and consult your medical practitioner.
Personal Use OnlyThe unit is designed and guaranteed for personal,home use only.Do not use for any commercial purpose, as thiswill invalidate the guarantee.
General InformationNOISE: As with any motorised system which usesvibration to activate the motion, there will be anamount of noise and vibration. This is particularlyprevalent around the upper back area, where theears are more sensitive to any noise and vibrationfrom the motors situated in the back of the chair.
Additionally, noise may be emitted from thefootrest, when no leg pressure is applied and thefootrest is in the closed position. This is due to thefact that for safety reasons (to reduce the risk ofpossible damage from entrapment betweenfootrest and chair) the reclining mechanism
situated under the chair, features a sprung-loadedfootrest. The springs in the footrest may transmit a vibration noise, until the weight of the legs reduces the amount of vibration transmitted to thesprings. Further vibration may be caused by someof the metal action mechanism parts vibrating against each other and causing a noise.
ServiceNever attempt to repair or service this unit yourself.Should you have any service requirements, alwayscontact your supplying retailer, in the first instance.
GuaranteeYour Massage System is fully guaranteed for 12months from the date of purchase, providing that it has been used in accordance with our OperatingInstructions.
This guarantee covers any failure of the system due to manufacturing defects within this period,providing the chair has been used for domestic useonly. Any use of the chair for commercial purposesinvalidates the guarantee.
Please note that this guarantee does not cover anyinstances of misuse of or damage to the chair.
4

Made in the UK
Your Chair ExplainedThe picture below shows all 5-massage zones, plus the heat padthat is contained in your massage chair.
The section on pages 6 and 7 explains how your handset will give you the best results from your massage system.
Please Note:
Zone 1: Upper Back
Zone 2: Lower Back
Heat Pad
Zone 3: Upper Thigh
Zone 4: Lower Thigh
Zone 5:Calf Region
Please note that anyone with a medical device (e.g. pacemaker) or medical condition must consult with their doctor/healthcare professional before purchasing a massage system.
5

Your Massage Handset Explained
1: PowerThis button switches the massage systemon or off. Depress the button to switch on(please note that the handset buttons willilluminate and the display will confirm thatthe massage system is active). To switch off,depress the button again.
The massage system is programmed toallow 15 minutes of continual use, beforeautomatically switching itself off.
Please note, when left inactive, the LCD illumination will switch off after 30 seconds, but will leave the functional buttons selected illuminated, until the system automatically switches itself off after 15 minutes.
When the massage system is switched off,the handset retains the last settings in itsmemory. When switched back on, the massage will automatically start with thelast used settings.
Please note: the power button is designedto illuminate at all times (even when therest of the handset is not illuminated) toshow that the massage system has beensuccessfully connected to the power supply.
To get the best results from your Massage System, it is essentialthat you first understand the functions of the handset. Please takea little time to fully acquaint yourself with these functions andthen adjust the speed and intensity of the massage, to suit yourown requirements.
2: Zone Selection Control
1: Power
3: PreProgrammedFunctions
4: Intensity
5: Speed
6: Heat
6
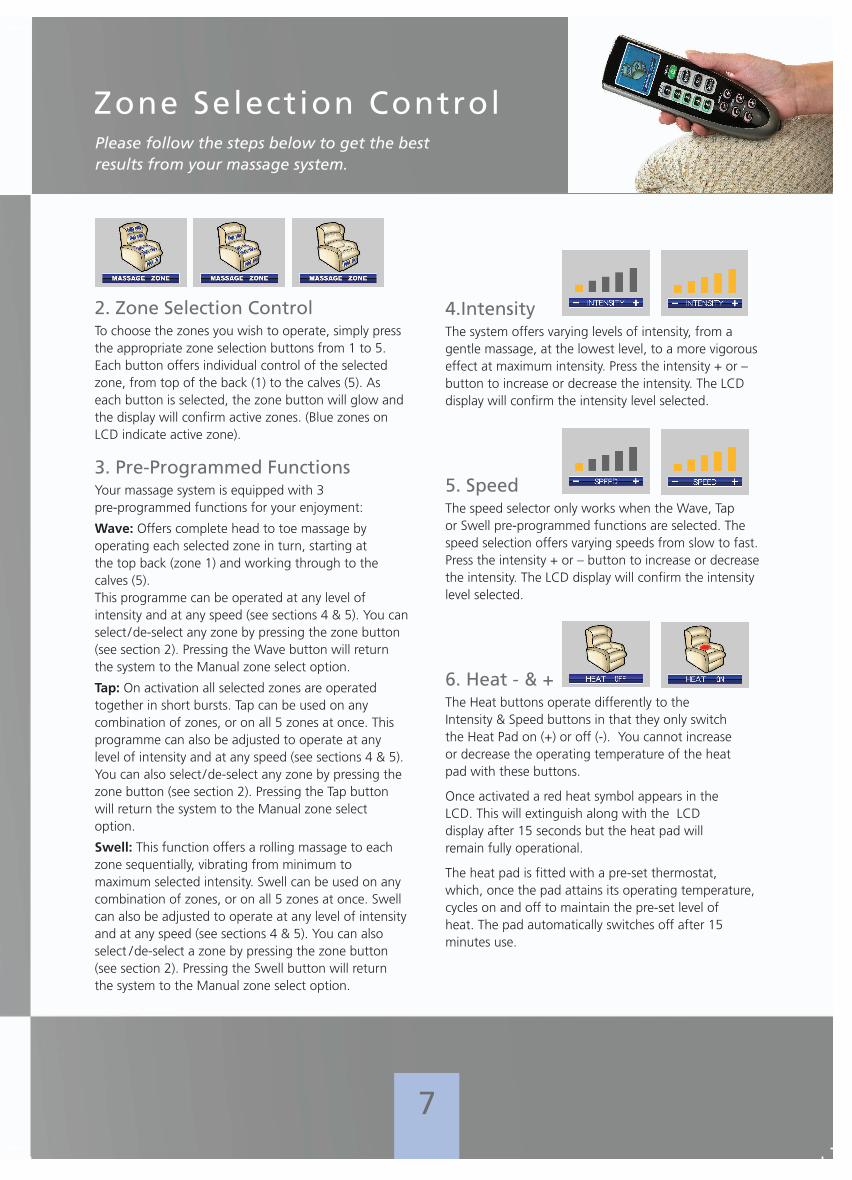
Zone Selection ControlPlease follow the steps below to get the best results from your massage system.
2. Zone Selection ControlTo choose the zones you wish to operate, simply pressthe appropriate zone selection buttons from 1 to 5.Each button offers individual control of the selectedzone, from top of the back (1) to the calves (5). Aseach button is selected, the zone button will glow andthe display will confirm active zones. (Blue zones onLCD indicate active zone).
3. Pre-Programmed FunctionsYour massage system is equipped with 3 pre-programmed functions for your enjoyment:
Wave: Offers complete head to toe massage by operating each selected zone in turn, starting at the top back (zone 1) and working through to thecalves (5).This programme can be operated at any level of intensity and at any speed (see sections 4 & 5). You can select /de-select any zone by pressing the zone button(see section 2). Pressing the Wave button will returnthe system to the Manual zone select option.
Tap: On activation all selected zones are operated together in short bursts. Tap can be used on any combination of zones, or on all 5 zones at once. Thisprogramme can also be adjusted to operate at anylevel of intensity and at any speed (see sections 4 & 5).You can also select /de-select any zone by pressing thezone button (see section 2). Pressing the Tap buttonwill return the system to the Manual zone select option.
Swell: This function offers a rolling massage to eachzone sequentially, vibrating from minimum to maximum selected intensity. Swell can be used on anycombination of zones, or on all 5 zones at once. Swellcan also be adjusted to operate at any level of intensityand at any speed (see sections 4 & 5). You can also select /de-select a zone by pressing the zone button(see section 2). Pressing the Swell button will return the system to the Manual zone select option.
4.IntensityThe system offers varying levels of intensity, from agentle massage, at the lowest level, to a more vigorouseffect at maximum intensity. Press the intensity + or –button to increase or decrease the intensity. The LCDdisplay will confirm the intensity level selected.
5. SpeedThe speed selector only works when the Wave, Tap or Swell pre-programmed functions are selected. Thespeed selection offers varying speeds from slow to fast.Press the intensity + or – button to increase or decreasethe intensity. The LCD display will confirm the intensitylevel selected.
6. Heat - & +The Heat buttons operate differently to the Intensity & Speed buttons in that they only switch the Heat Pad on (+) or off (-). You cannot increase or decrease the operating temperature of the heat pad with these buttons.
Once activated a red heat symbol appears in the LCD. This will extinguish along with the LCD display after 15 seconds but the heat pad will remain fully operational.
The heat pad is fitted with a pre-set thermostat, which, once the pad attains its operating temperature,cycles on and off to maintain the pre-set level of heat. The pad automatically switches off after 15 minutes use.
7

This Massage Recliner
User Guide should be read
in conjunction with
Celebrity’s recliner
Operating and Care
Instructions booklet and
should be kept for future
reference.
www. ce l eb r i t y - f u rn i tu re . co .uk
Made in the UK
Celebrity Motion Furniture Limited.Common Road, Huthwaite, Notts. NG17 2JY. Tel No: 01623 440 626 / Fax No: 01623 444 889