Mail. Overview Introduction Composing Sending an Attachment Viewing Downloading an Attachment...
28
Mail
-
date post
19-Dec-2015 -
Category
Documents
-
view
221 -
download
0
Transcript of Mail. Overview Introduction Composing Sending an Attachment Viewing Downloading an Attachment...

OverviewOverview
• Introduction • Composing • Sending an Attachment• Viewing• Downloading an Attachment• Replying• Deleting

Intr
od
uct
ion
Intr
od
uct
ion
This is the mail icon. Mail is used for communicating between your peers and the instructor.
It is NOT like an outside mail provider such as, yahoo.com, hotmail.com, or hawaii.edu, you can only send messages (and attachments) to your fellow students in the course.

Loca
ting
Loca
ting
Mai l
Mail is typically in the “Communication Tools” section of the course, click to enter.
Mail is typically in the “Communication Tools” section of the course, click to enter.
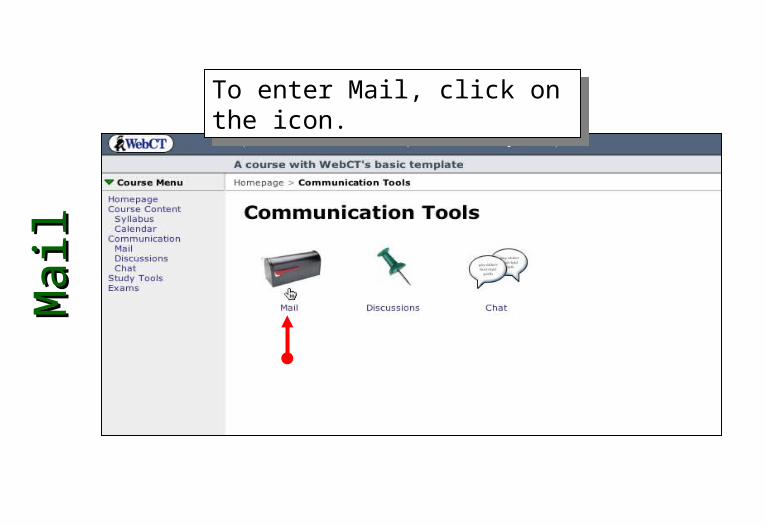
To enter Mail, click on the icon.To enter Mail, click on the icon.

Overv
iew
Overv
iew
Mail has default folders and various features to control or add things to them.
Mail has default folders and various features to control or add things to them.
To compose a Mail message, click “Compose Message”
To compose a Mail message, click “Compose Message”
Com
pose
Mes s
ag
eC
om
pose
Mess
ag
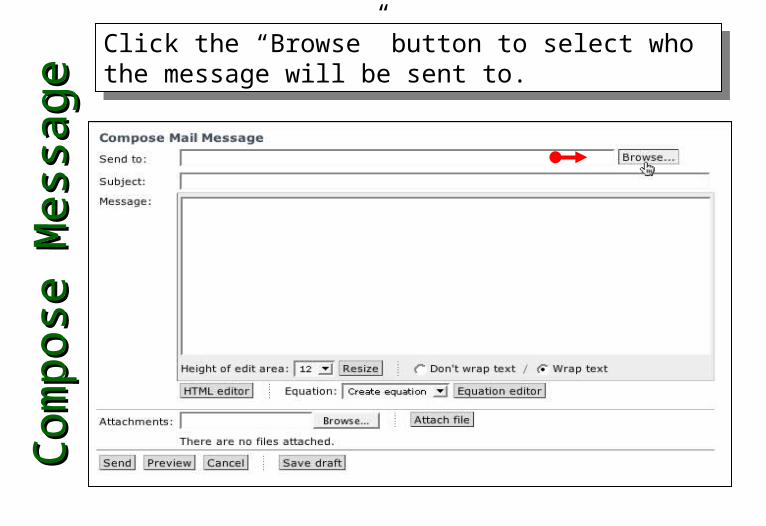
e Click the “Browse” button to select who the message will be sent to.
Click the “Browse” button to select who the message will be sent to.
Com
pose
Mess
ag
eC
om
pose
Mess
ag
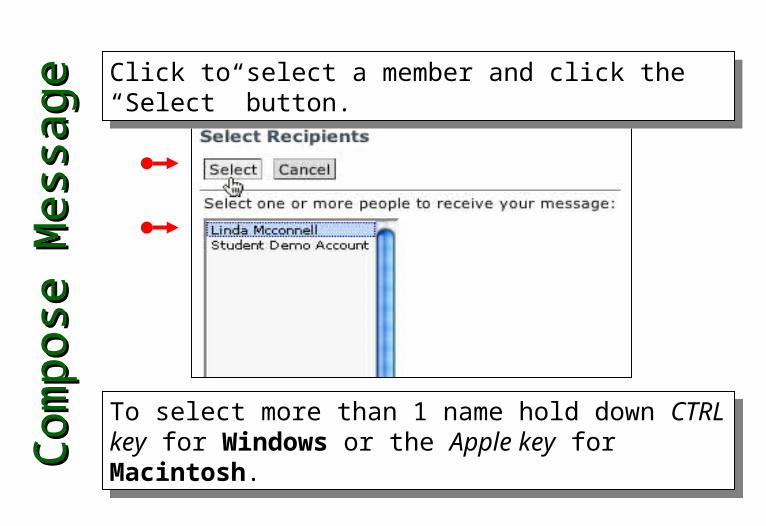
e Click to select a member and click the “Select” button.Click to select a member and click the “Select” button.
To select more than 1 name hold down CTRL key for Windows or the Apple key for Macintosh.
To select more than 1 name hold down CTRL key for Windows or the Apple key for Macintosh.

Com
pose
Mess
ag
eC
om
pose
Mess
ag
e In the “Subject” section click and type in a title.In the “Subject” section click and type in a title.

Com
pose
Mess
ag
eC
om
pose
Mess
ag
e In the “Message” section click and type in your mail message.
In the “Message” section click and type in your mail message.

HTM
L Ed
itor
HTM
L Ed
itor
Choose the button for “HTML editor” for fancier message formatting such as font color, bullets, etc.
Choose the button for “HTML editor” for fancier message formatting such as font color, bullets, etc.
HTM
L Ed
itor
HTM
L Ed
itor
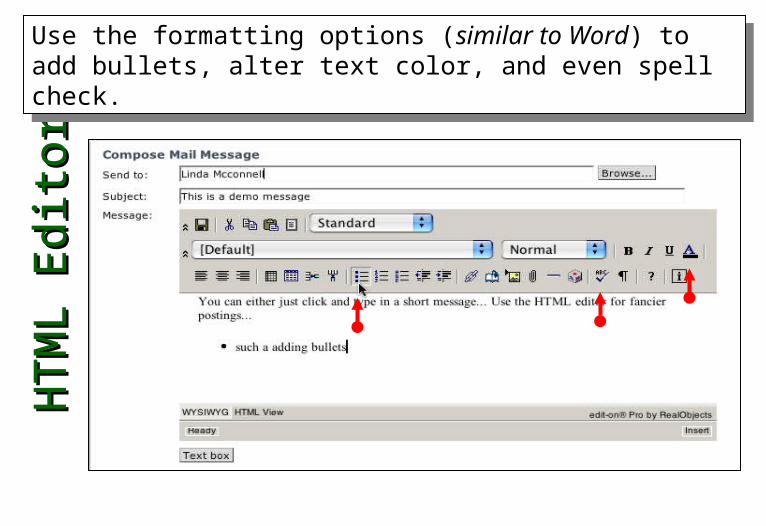
Use the formatting options (similar to Word) to add bullets, alter text color, and even spell check.
Use the formatting options (similar to Word) to add bullets, alter text color, and even spell check.
HTM
L Ed
itor
HTM
L Ed
itor
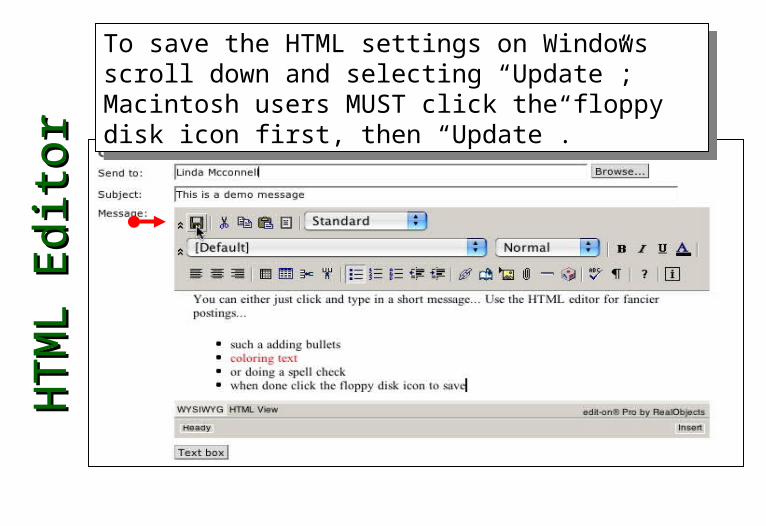
To save the HTML settings on Windows scroll down and selecting “Update”; Macintosh users MUST click the floppy disk icon first, then “Update”.
To save the HTML settings on Windows scroll down and selecting “Update”; Macintosh users MUST click the floppy disk icon first, then “Update”.

Savin
g A
ttach
ment
Savin
g A
ttach
ment Sometimes you may need to send a document as an
attachment. To do this save the document file as Rich Text by selecting “File”, then “Save as”, using the pull down menu for “Format” choose Rich Text Format.
Sometimes you may need to send a document as an attachment. To do this save the document file as Rich Text by selecting “File”, then “Save as”, using the pull down menu for “Format” choose Rich Text Format.
Send
ing
an
Send
ing
an
Att
ach
ment
Att
ach
ment
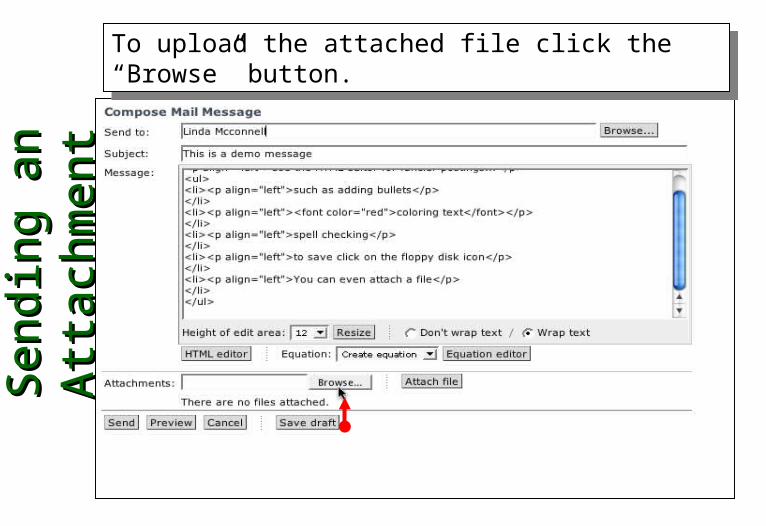
To upload the attached file click the “Browse” button.To upload the attached file click the “Browse” button.

Savin
g A
ttach
ment
Savin
g A
ttach
ment Sometimes you may need to send a document as an
attachment. To do this save the document file as Rich Text by selecting “File”, then “Save as”, using the pull down menu for “Format” choose Rich Text Format.
Sometimes you may need to send a document as an attachment. To do this save the document file as Rich Text by selecting “File”, then “Save as”, using the pull down menu for “Format” choose Rich Text Format.
Send
ing
an
Send
ing
an
Att
ach
ment
Att
ach
ment
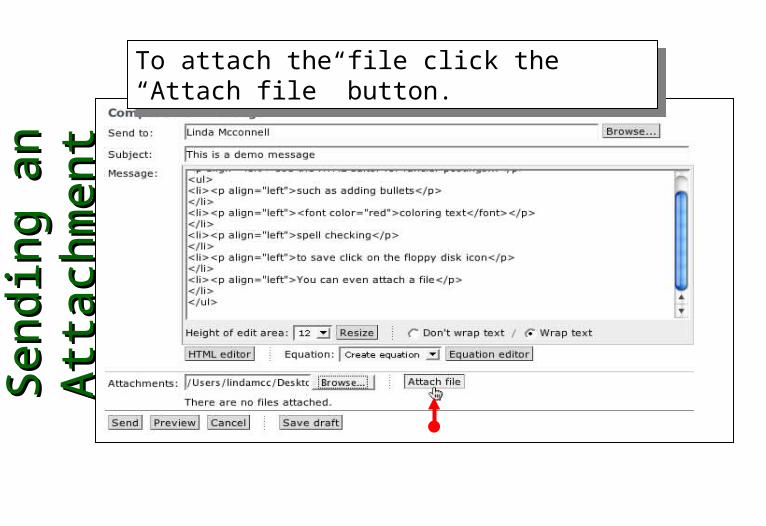
To attach the file click the “Attach file” button.To attach the file click the “Attach file” button.
Pre
vie
w
Pre
vie
w
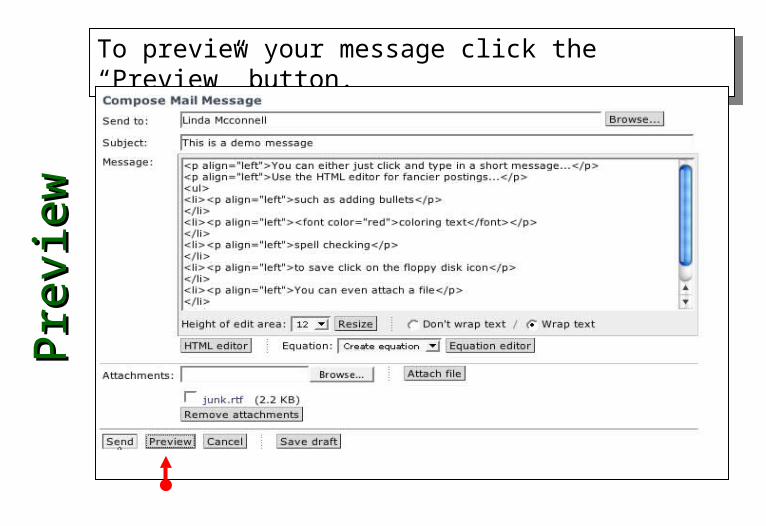
To preview your message click the “Preview” button.To preview your message click the “Preview” button.

Pre
vie
wPre
vie
wClick “Close” to exit.Click “Close” to exit.

Send
Send
To send click the “Send” button.To send click the “Send” button.

Vie
win
gV
iew
ing
WebCT indicates new Mail with green marks, click the icon to enter.
WebCT indicates new Mail with green marks, click the icon to enter.

Vie
win
gV
iew
ing
To view unread messages click the link for “inbox”.To view unread messages click the link for “inbox”.

Vie
win
gV
iew
ing
To view a message click the message title.To view a message click the message title.
Sometimes a green triangle will need to be selected prior to accessing the link to the message title.
Sometimes a green triangle will need to be selected prior to accessing the link to the message title.
Dow
nlo
ad
ing
Dow
nlo
ad
ing
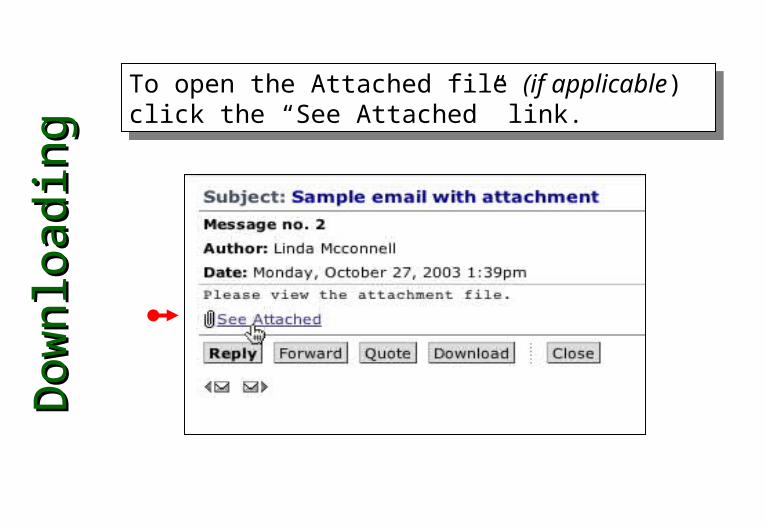
To open the Attached file (if applicable) click the “See Attached” link.
To open the Attached file (if applicable) click the “See Attached” link.

Dow
nlo
ad
ing
Dow
nlo
ad
ing
Select the radio button next to the attached file name and click the “Download” button.
Select the radio button next to the attached file name and click the “Download” button.
Choose a location on your computer to save and then open the file via a word application.
Choose a location on your computer to save and then open the file via a word application.
Rep
lyin
gR
ep
lyin
gTo reply to the message click “Reply” OR “Forward” to forward to an external mail service (need to input mail address when prompted).
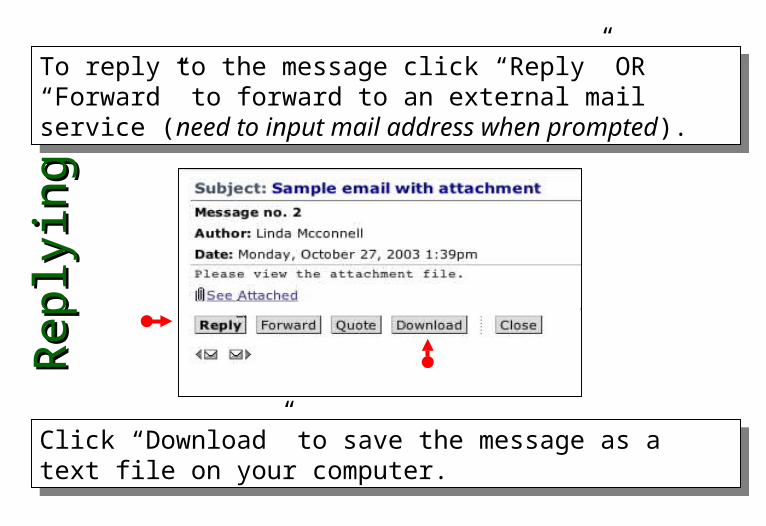
To reply to the message click “Reply” OR “Forward” to forward to an external mail service (need to input mail address when prompted).
Click “Download” to save the message as a text file on your computer.
Click “Download” to save the message as a text file on your computer.
Dele
ting
Dele
ting
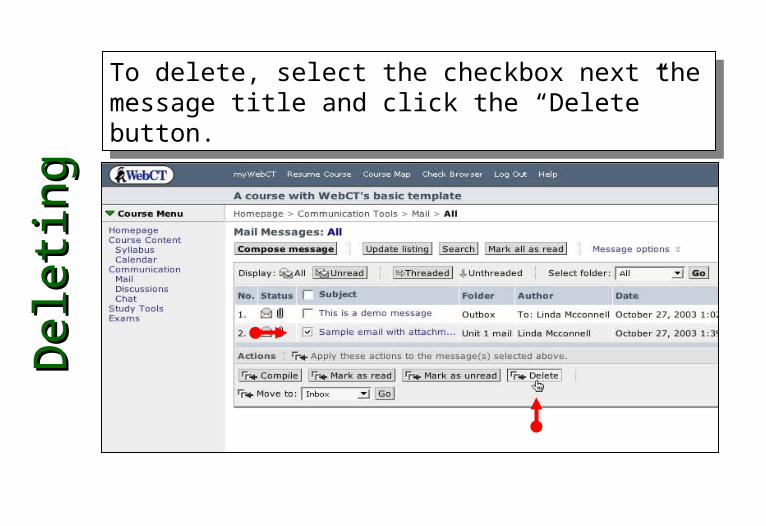
To delete, select the checkbox next the message title and click the “Delete” button.
To delete, select the checkbox next the message title and click the “Delete” button.
RefresherRefresher
• Introduction • Composing • Sending an Attachment• Viewing• Downloading an Attachment• Replying• Deleting