Mac OS X Anja Philipp 03.02.04 MAC OS X Anja Philipp 03.02.2004.
Upload
alec-nievesCategory
view
67download
3description
Mac OS OrientationMacBooks, iMacs
April, 2010Room 18
Name: …………………………………………………………………………………………………….
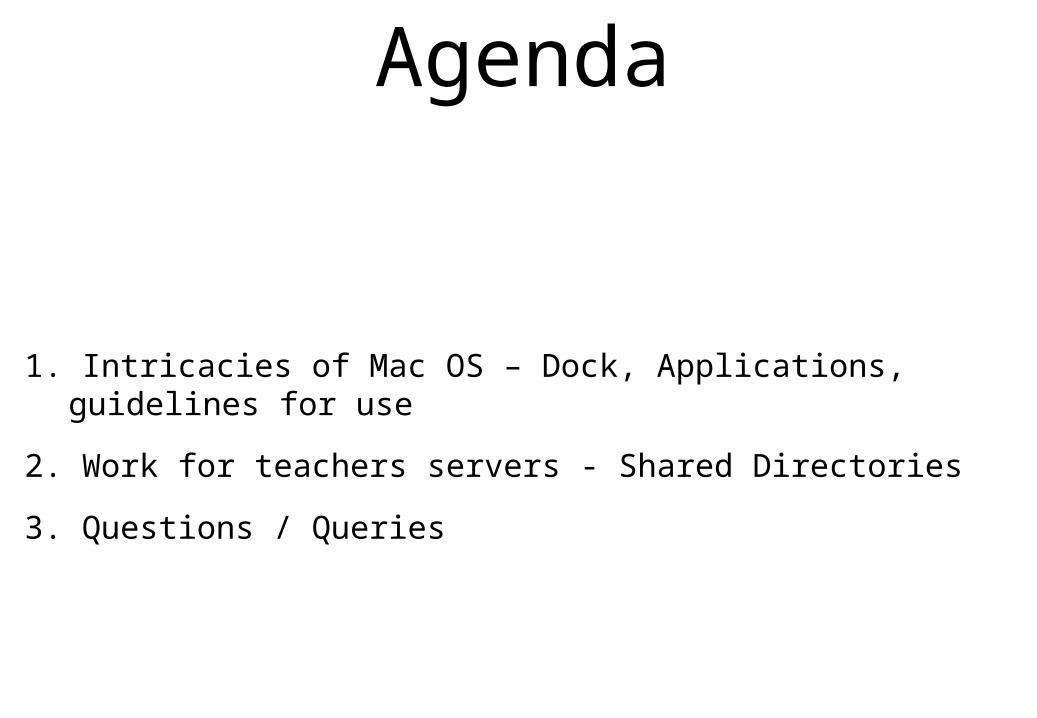
Agenda
1. Intricacies of Mac OS – Dock, Applications, guidelines for use
2. Work for teachers servers - Shared Directories
3. Questions / Queries
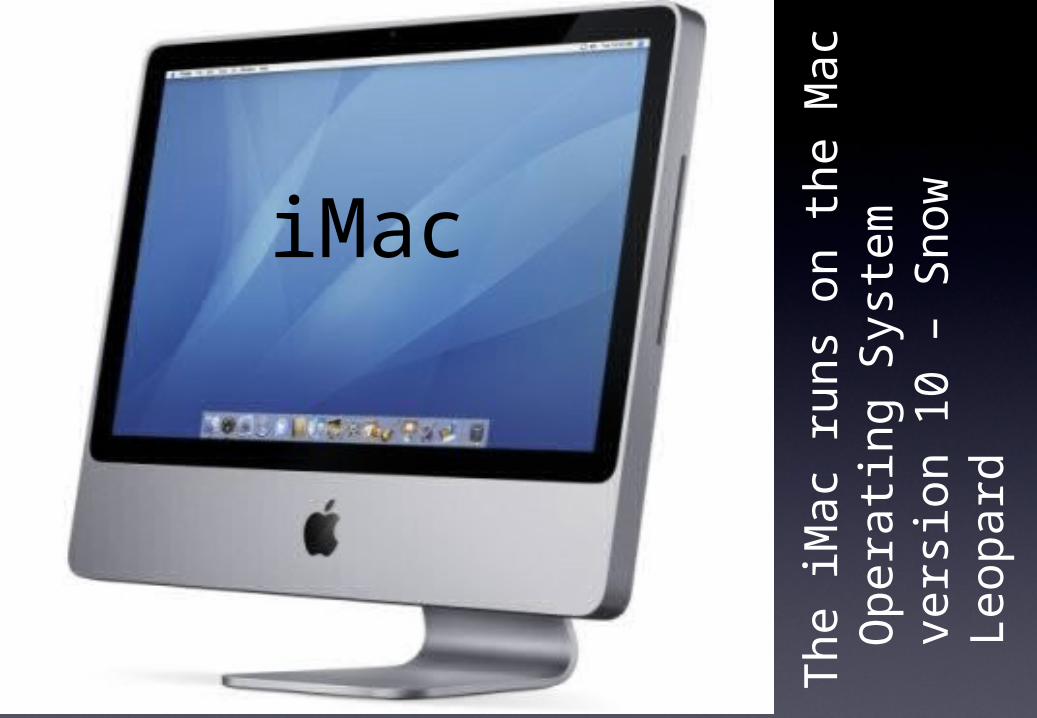
iMac
Th
e iM
ac
run
s on
th
e M
ac
Opera
tin
g S
yst
em
vers
ion
1
0 –
Sn
ow
Leop
ard
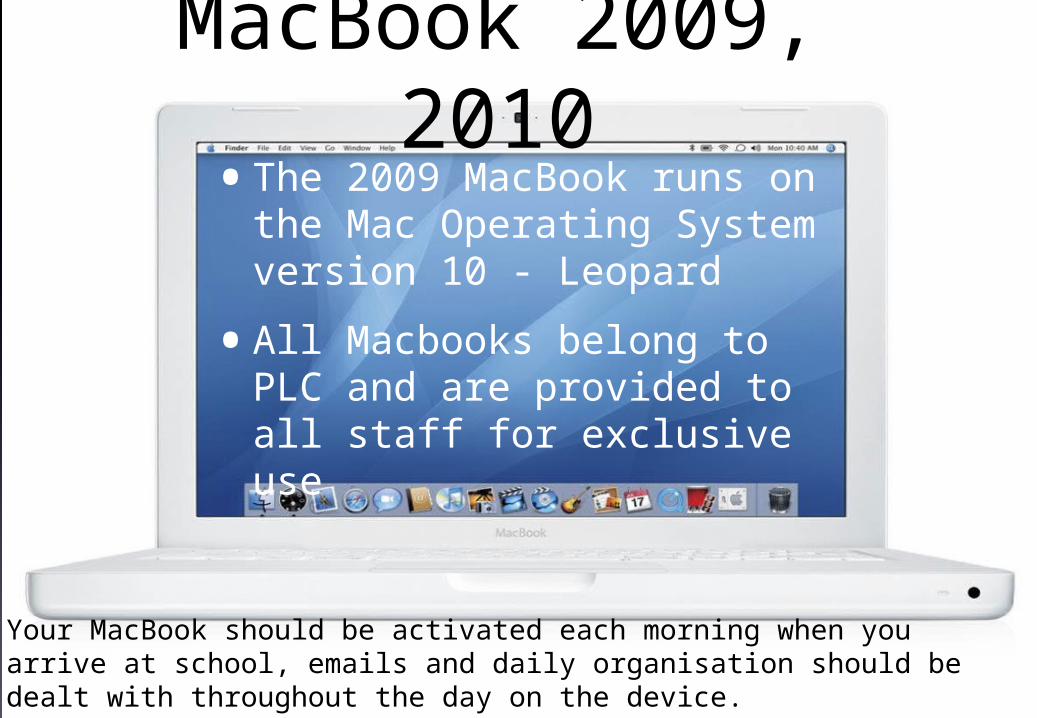
MacBook 2009, 2010
•The 2009 MacBook runs on the Mac Operating System version 10 - Leopard
•All Macbooks belong to PLC and are provided to all staff for exclusive use
Your MacBook should be activated each morning when you arrive at school, emails and daily organisation should be dealt with throughout the day on the device.
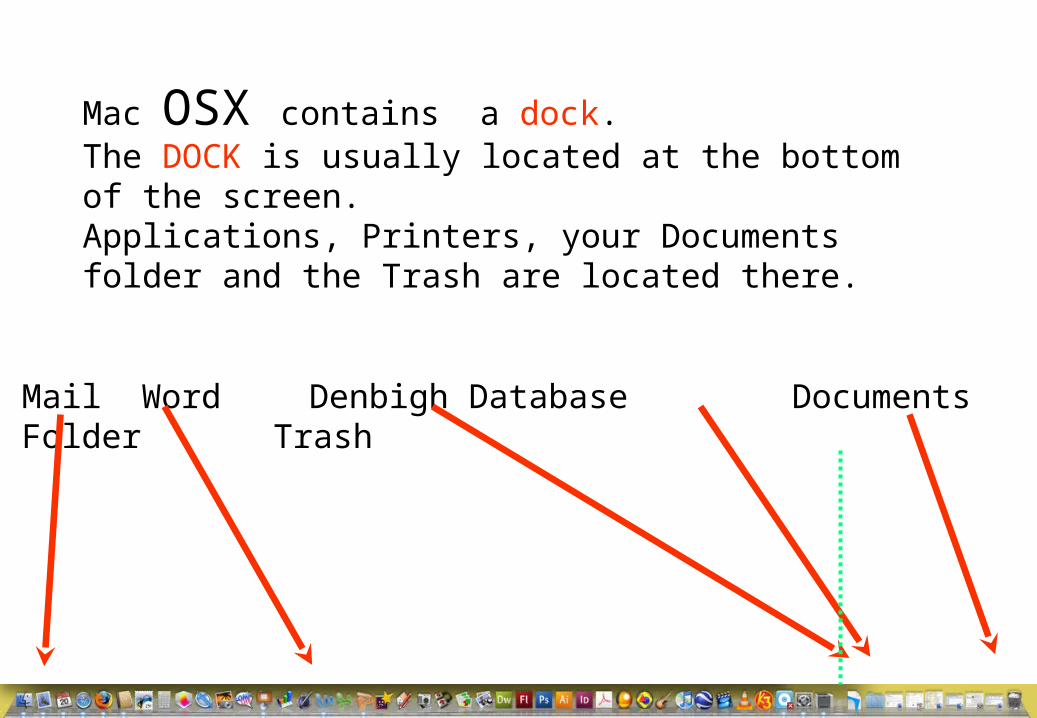
Mac OSX contains a dock. The DOCK is usually located at the bottom of the screen.Applications, Printers, your Documents folder and the Trash are located there.
Mail Word Denbigh Database Documents Folder Trash
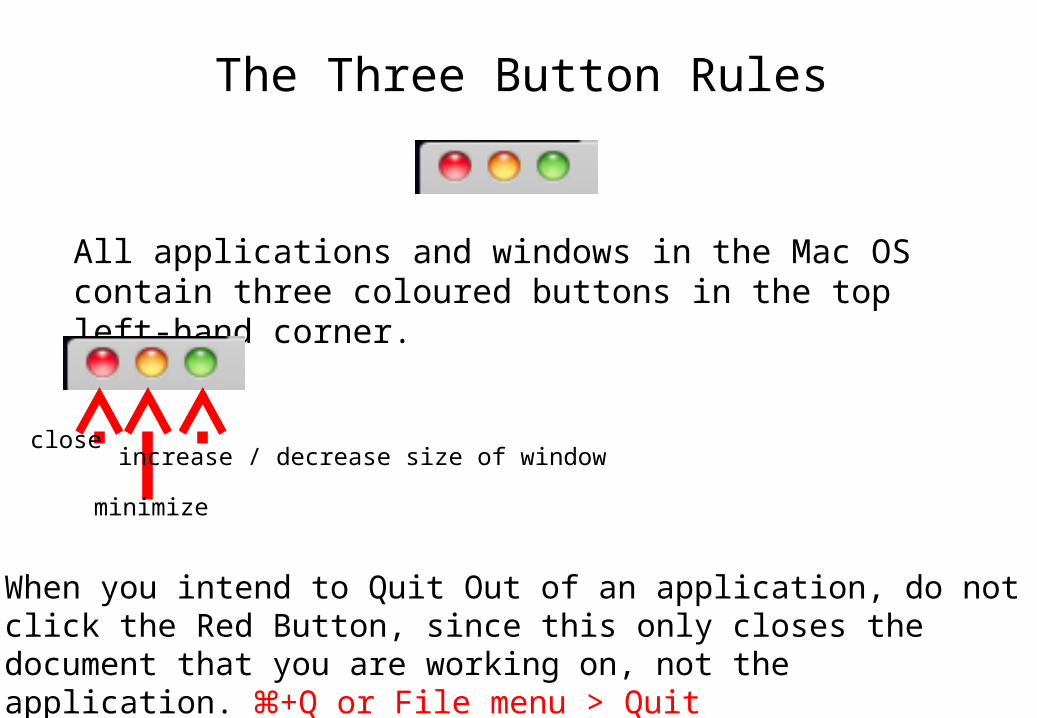
The Three Button Rules
All applications and windows in the Mac OS contain three coloured buttons in the top left-hand corner.
close
minimize
increase / decrease size of window
When you intend to Quit Out of an application, do not click the Red Button, since this only closes the document that you are working on, not the application. ⌘+Q or File menu > Quit
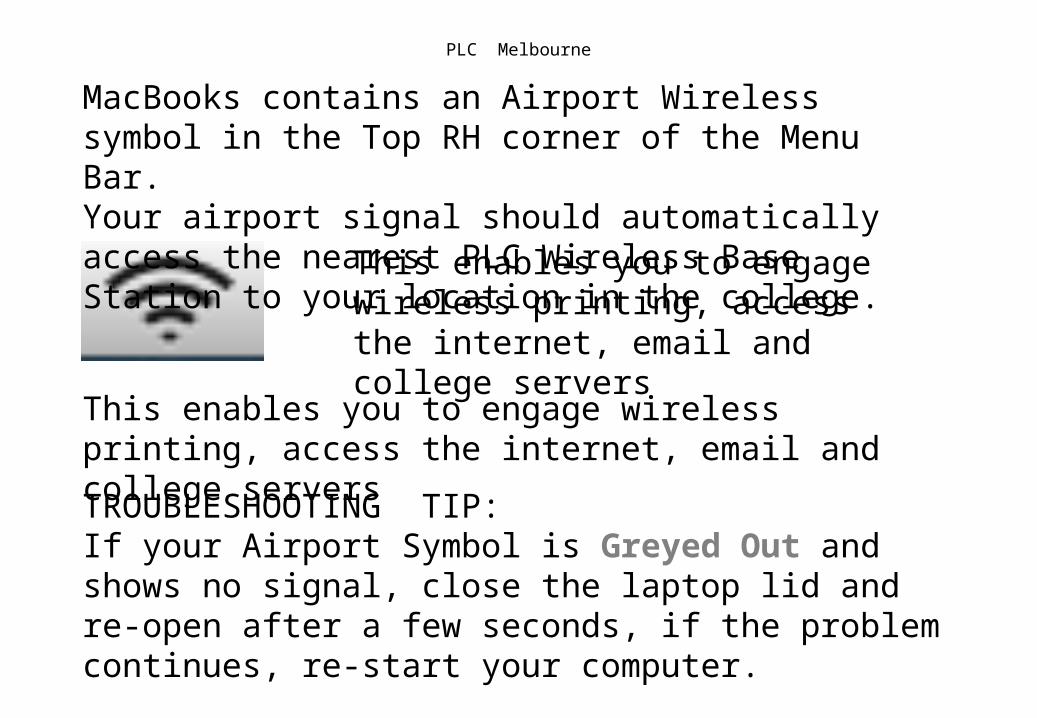
PLC Melbourne
MacBooks contains an Airport Wireless symbol in the Top RH corner of the Menu Bar.Your airport signal should automatically access the nearest PLC Wireless Base Station to your location in the college.
This enables you to engage wireless printing, access the internet, email and college servers
This enables you to engage wireless printing, access the internet, email and college servers
TROUBLESHOOTING TIP:If your Airport Symbol is Greyed Out and shows no signal, close the laptop lid and re-open after a few seconds, if the problem continues, re-start your computer.
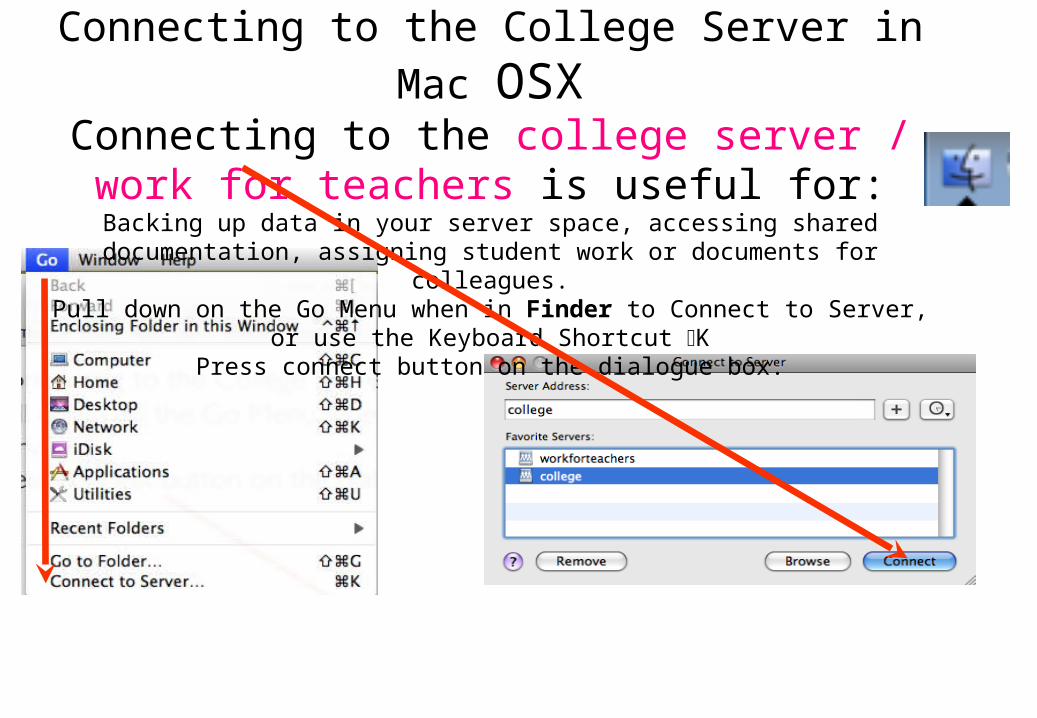
Connecting to the College Server in Mac OSX
Connecting to the college server / work for teachers is useful for:
Backing up data in your server space, accessing shared documentation, assigning student work or documents for colleagues.
Pull down on the Go Menu when in Finder to Connect to Server, or use the Keyboard Shortcut ⌘K
Press connect button on the dialogue box.
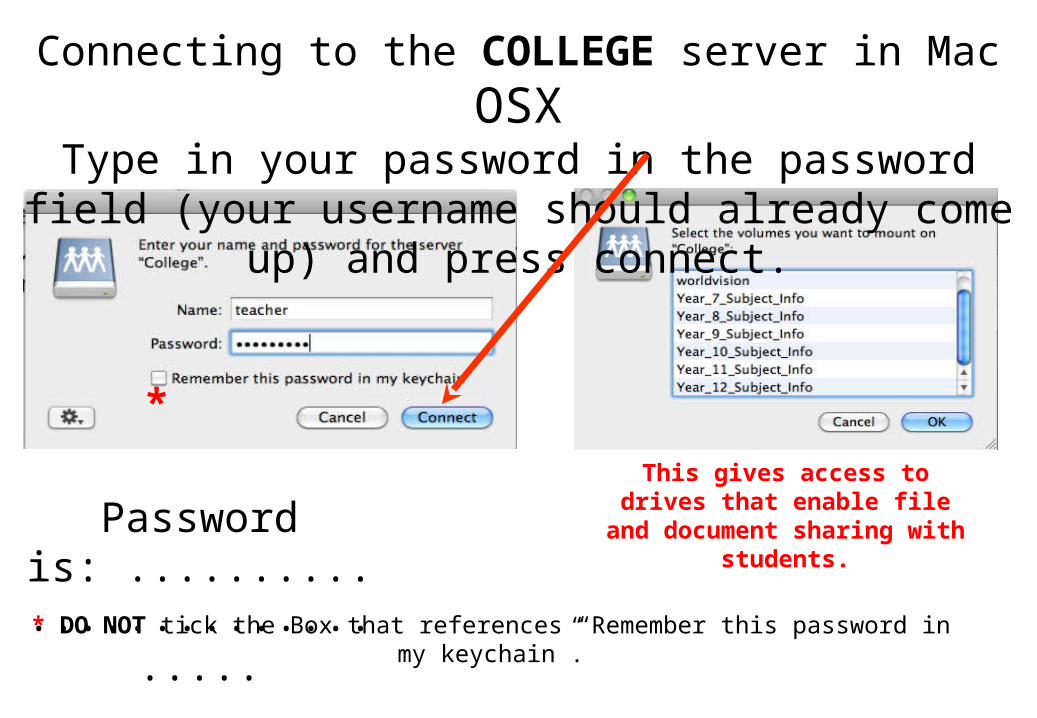
Connecting to the COLLEGE server in Mac OSXType in your password in the password field
(your username should already come up) and press connect.
* DO NOT tick the Box that references “Remember this password in my keychain”.
*
This gives access to drives that enable file and
document sharing with students.
Password is: ......................
.......
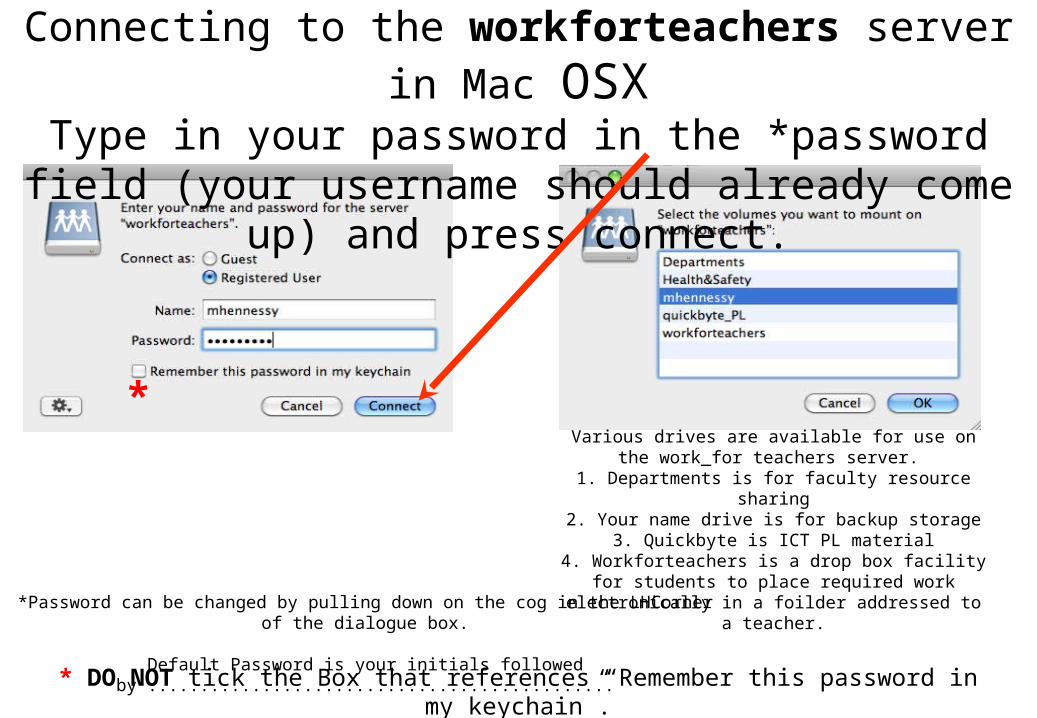
Connecting to the workforteachers server in Mac OSX
Type in your password in the *password field (your username should already come up) and
press connect.
* DO NOT tick the Box that references “Remember this password in my keychain”.
*
*Password can be changed by pulling down on the cog in the LHCorner of the dialogue box.
Default Password is your initials followed by .............................................
Various drives are available for use on the work_for teachers server.
1. Departments is for faculty resource sharing2. Your name drive is for backup storage
3. Quickbyte is ICT PL material4. Workforteachers is a drop box facility for
students to place required work electronically in a foilder addressed to a teacher.
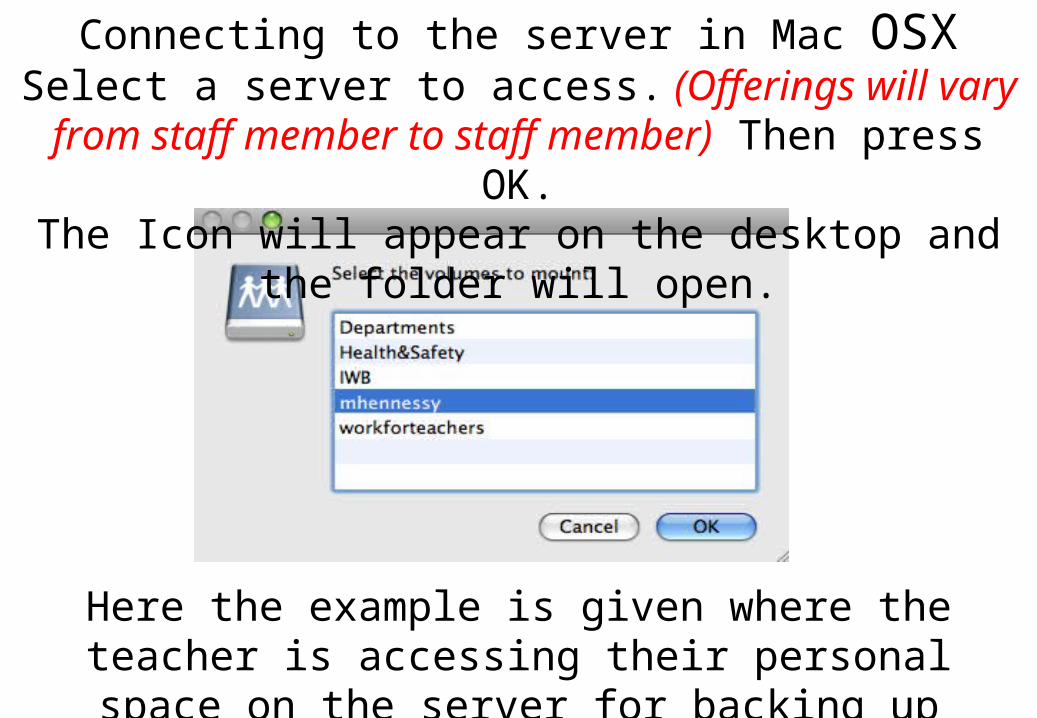
Connecting to the server in Mac OSXSelect a server to access. (Offerings will vary
from staff member to staff member) Then press OK.
The Icon will appear on the desktop and the folder will open.
Here the example is given where the teacher is accessing their personal space on the
server for backing up documentation from their MacBook
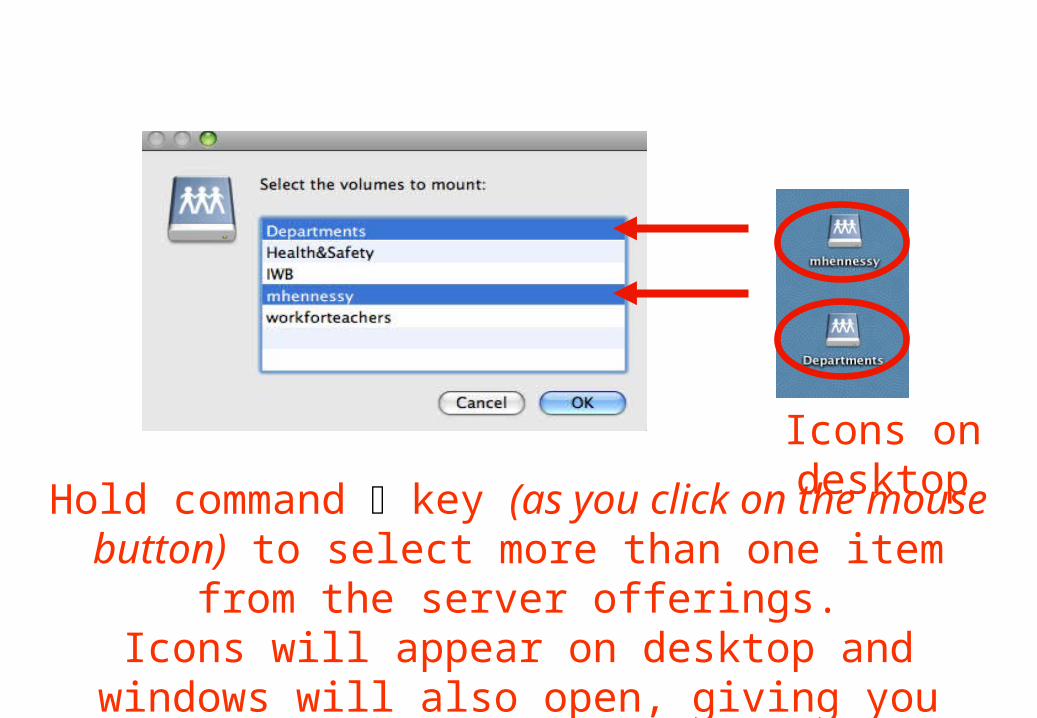
Icons on desktopHold command ⌘ key (as you click on the
mouse button) to select more than one item from the server offerings.
Icons will appear on desktop and windows will also open, giving you direct access.
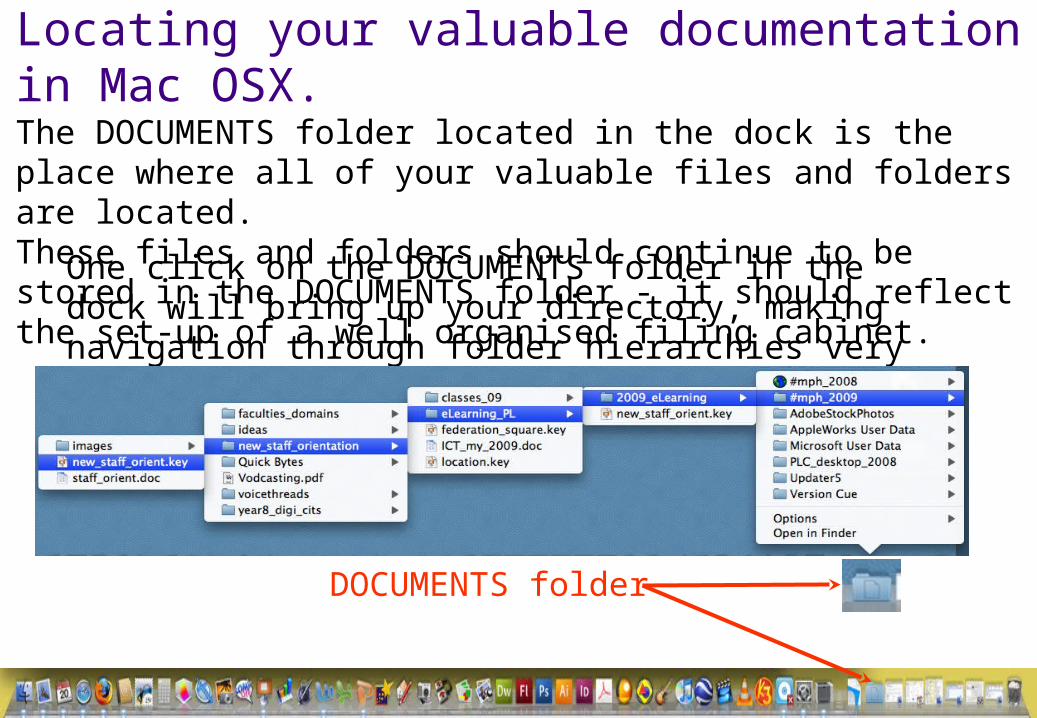
Locating your valuable documentation in Mac OSX.The DOCUMENTS folder located in the dock is the place where all of your valuable files and folders are located.These files and folders should continue to be stored in the DOCUMENTS folder - it should reflect the set-up of a well organised filing cabinet.
One click on the DOCUMENTS folder in the dock will bring up your directory, making navigation through folder hierarchies very simple.
DOCUMENTS folder
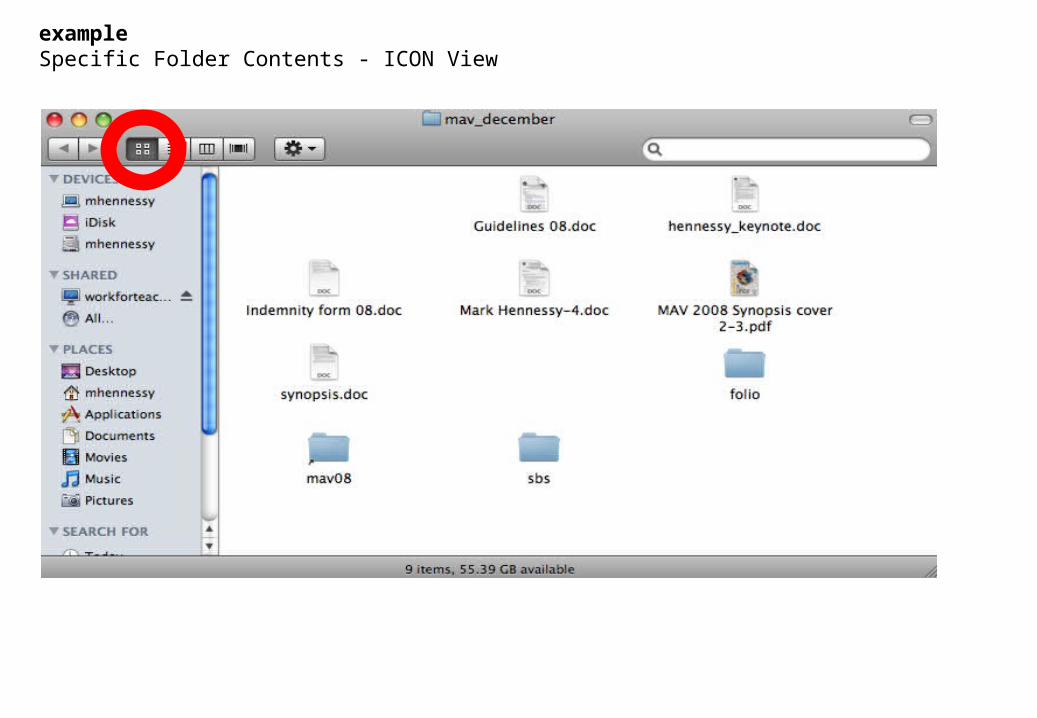
exampleSpecific Folder Contents - ICON View
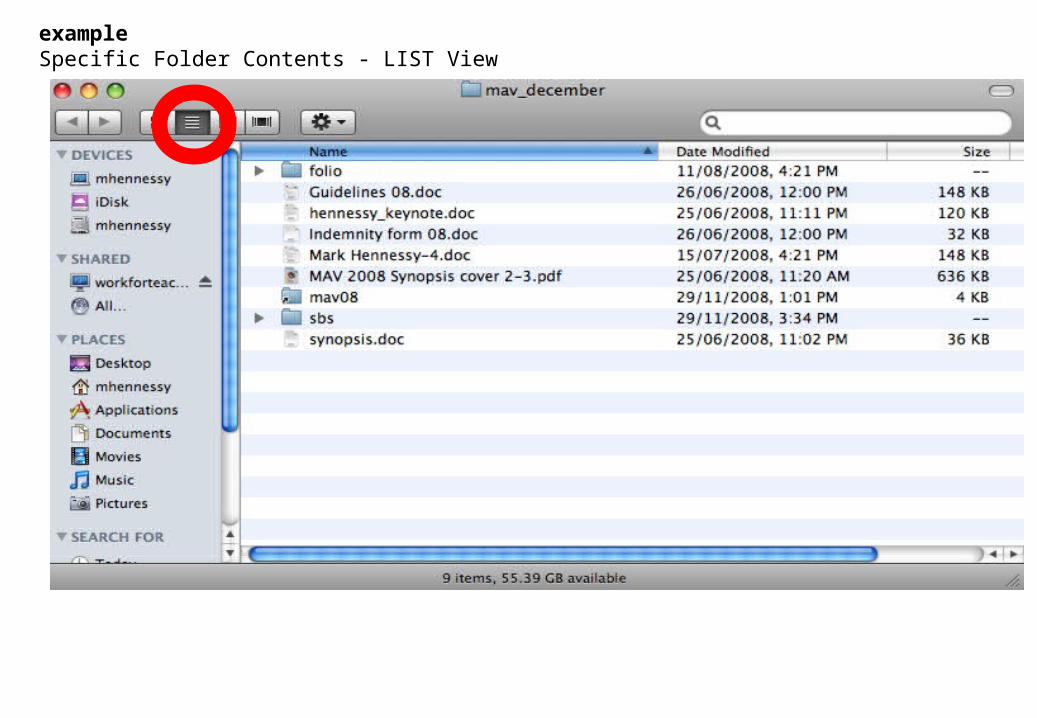
exampleSpecific Folder Contents - LIST View
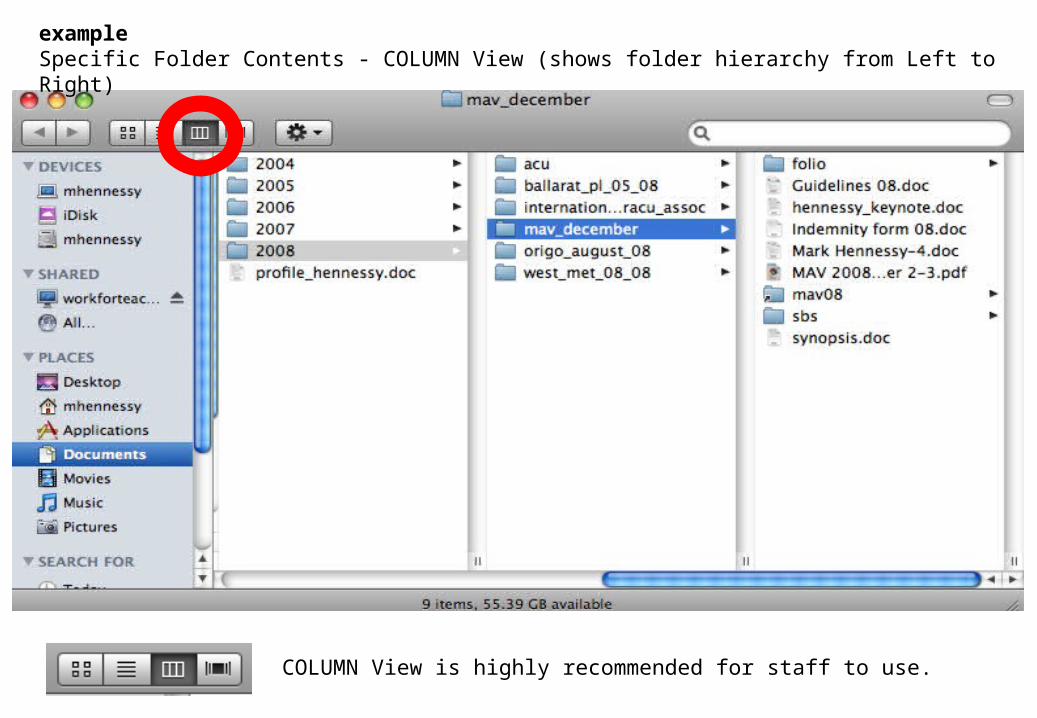
exampleSpecific Folder Contents - COLUMN View (shows folder hierarchy from Left to Right)
COLUMN View is highly recommended for staff to use.
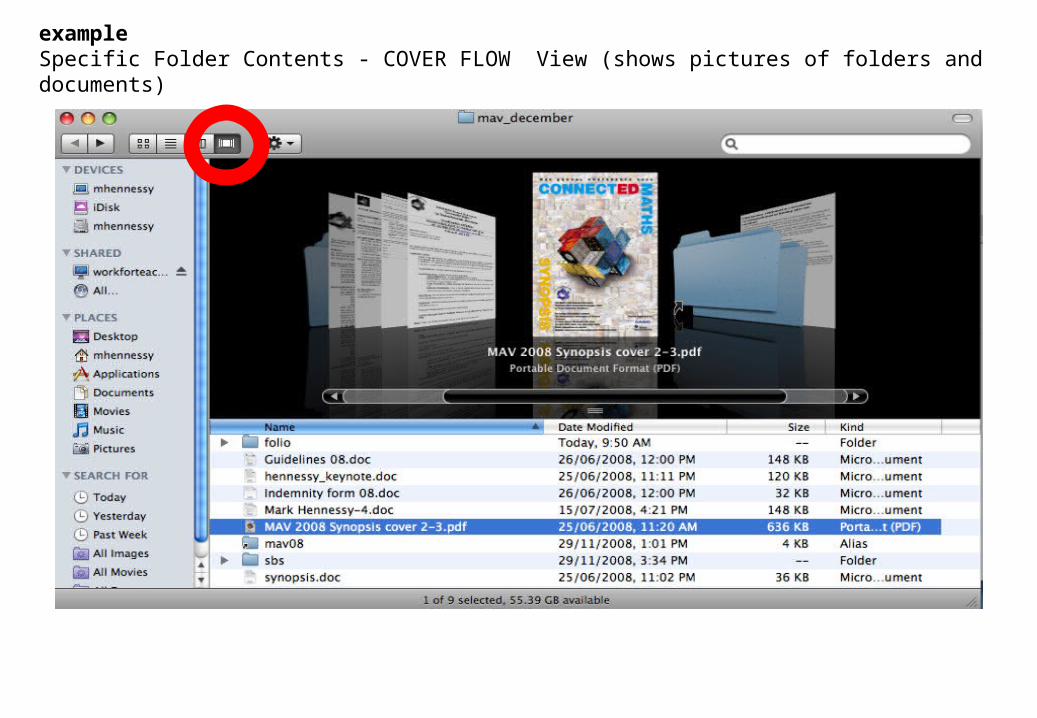
exampleSpecific Folder Contents - COVER FLOW View (shows pictures of folders and documents)
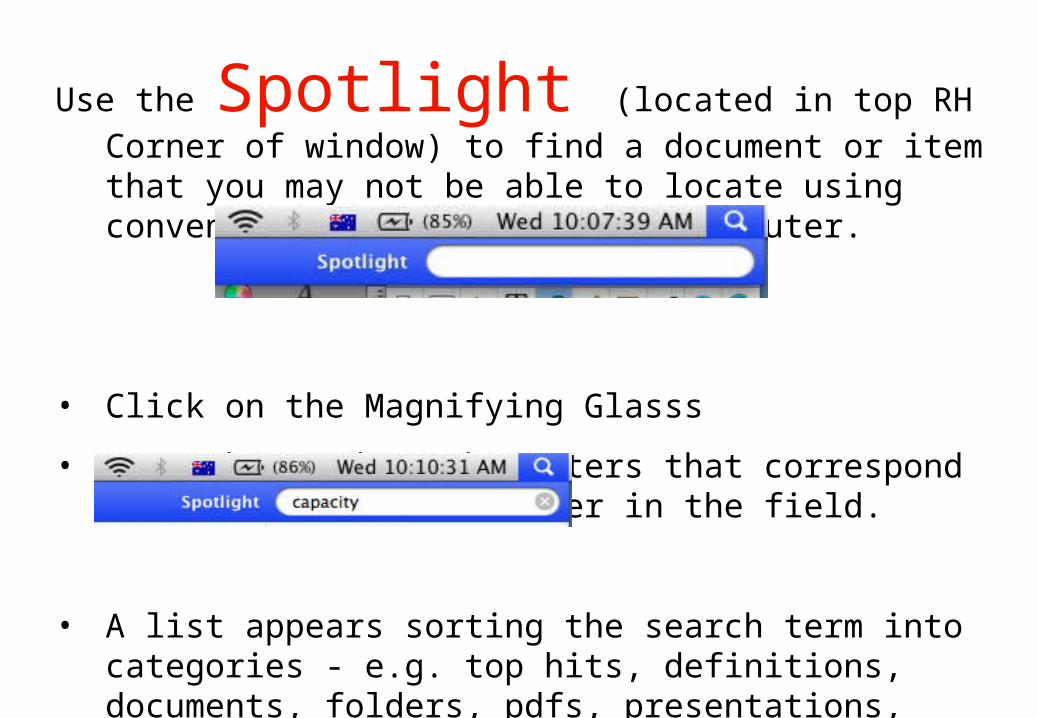
Use the Spotlight (located in top RH Corner of window) to find a document or item that you may not be able to locate using conventional methods on your computer.
• Click on the Magnifying Glasss
• Type the word or characters that correspond to the document or folder in the field.
• A list appears sorting the search term into categories - e.g. top hits, definitions, documents, folders, pdfs, presentations, images etc. If you see the item in the list, simply click on it to open and locate. If not, press, Show All, for a more comprehensive search.
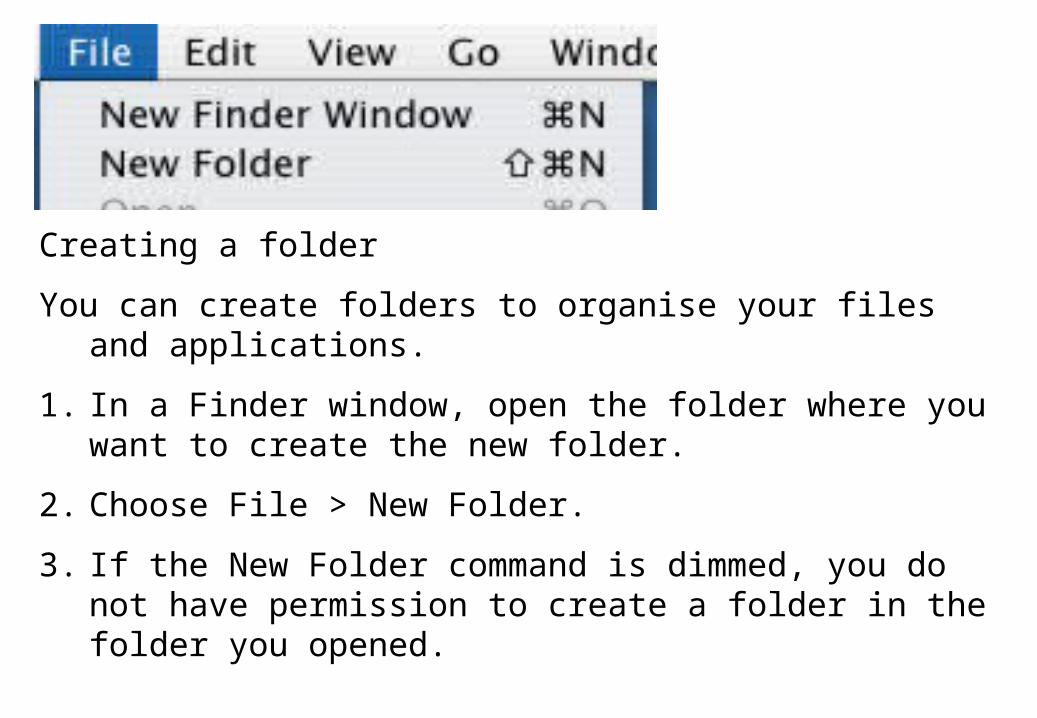
Creating a folder
You can create folders to organise your files and applications.
1. In a Finder window, open the folder where you want to create the new folder.
2. Choose File > New Folder.
3. If the New Folder command is dimmed, you do not have permission to create a folder in the folder you opened.
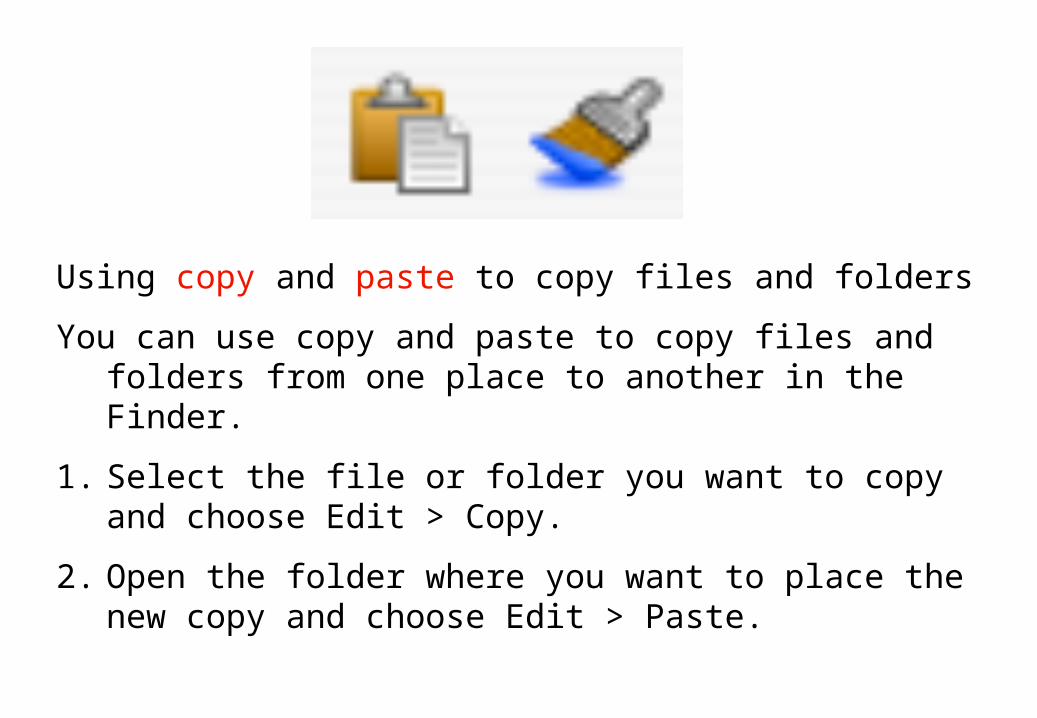
Using copy and paste to copy files and folders
You can use copy and paste to copy files and folders from one place to another in the Finder.
1. Select the file or folder you want to copy and choose Edit > Copy.
2. Open the folder where you want to place the new copy and choose Edit > Paste.
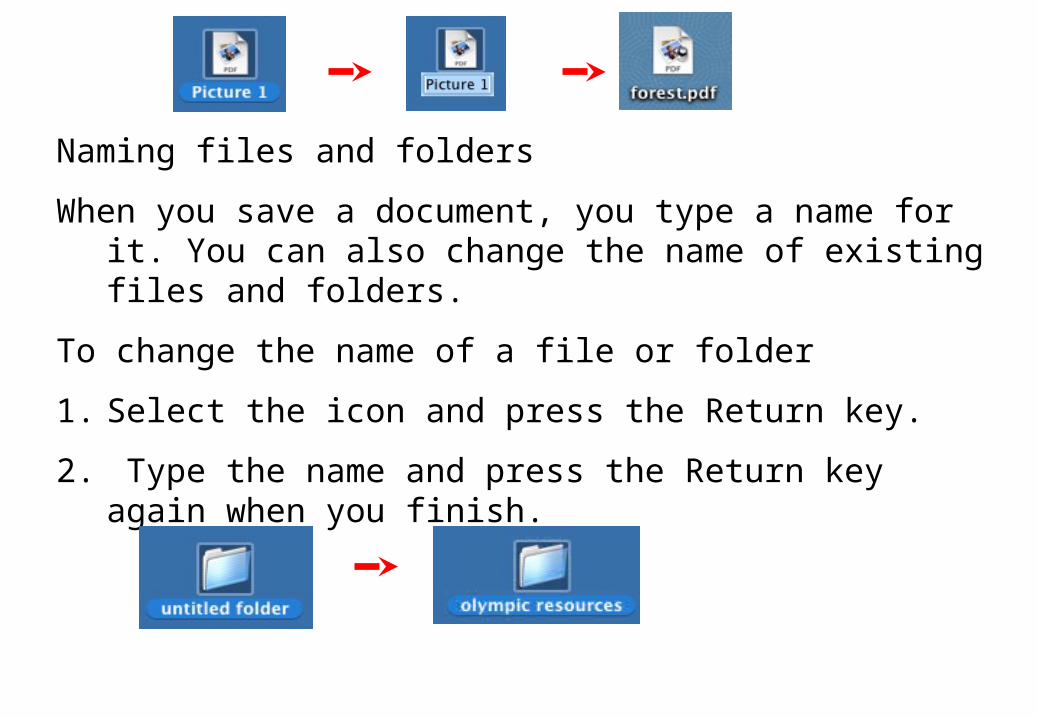
Naming files and folders
When you save a document, you type a name for it. You can also change the name of existing files and folders.
To change the name of a file or folder
1. Select the icon and press the Return key.
2. Type the name and press the Return key again when you finish.
17
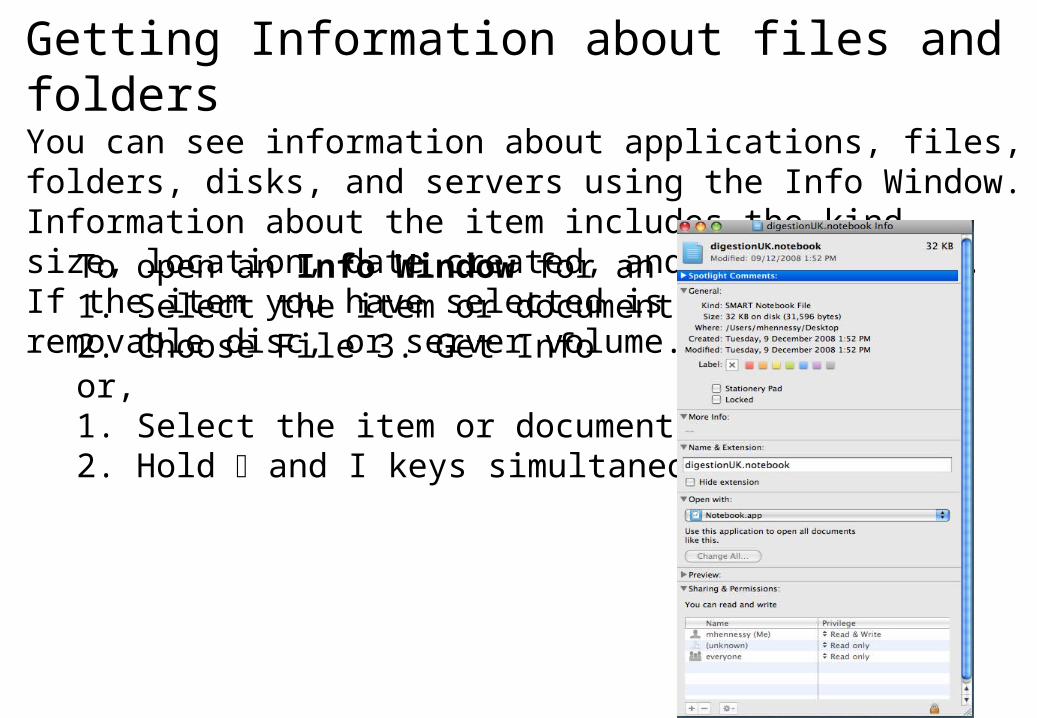
Getting Information about files and foldersYou can see information about applications, files, folders, disks, and servers using the Info Window. Information about the item includes the kind, size, location, date created, and date modified. If the item you have selected is a hard disk, removable disc, or server volume.
To open an Info Window for an item: 1. Select the item or document 2. Choose File 3. Get Info or, 1. Select the item or document 2. Hold ⌘ and I keys simultaneously.
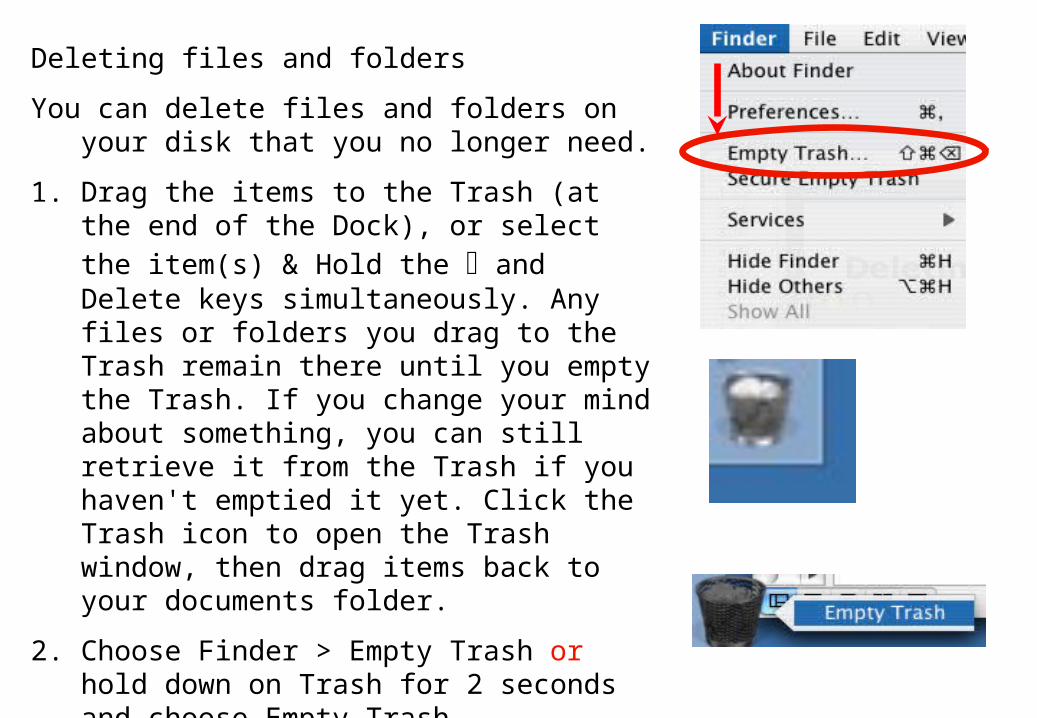
Deleting files and folders
You can delete files and folders on your disk that you no longer need.
1. Drag the items to the Trash (at the end of the Dock), or select the item(s) & Hold the ⌘ and Delete keys simultaneously. Any files or folders you drag to the Trash remain there until you empty the Trash. If you change your mind about something, you can still retrieve it from the Trash if you haven't emptied it yet. Click the Trash icon to open the Trash window, then drag items back to your documents folder.
2. Choose Finder > Empty Trash or hold down on Trash for 2 seconds and choose Empty Trash.
Remember, getting rid of documents / folders is a two-step process.
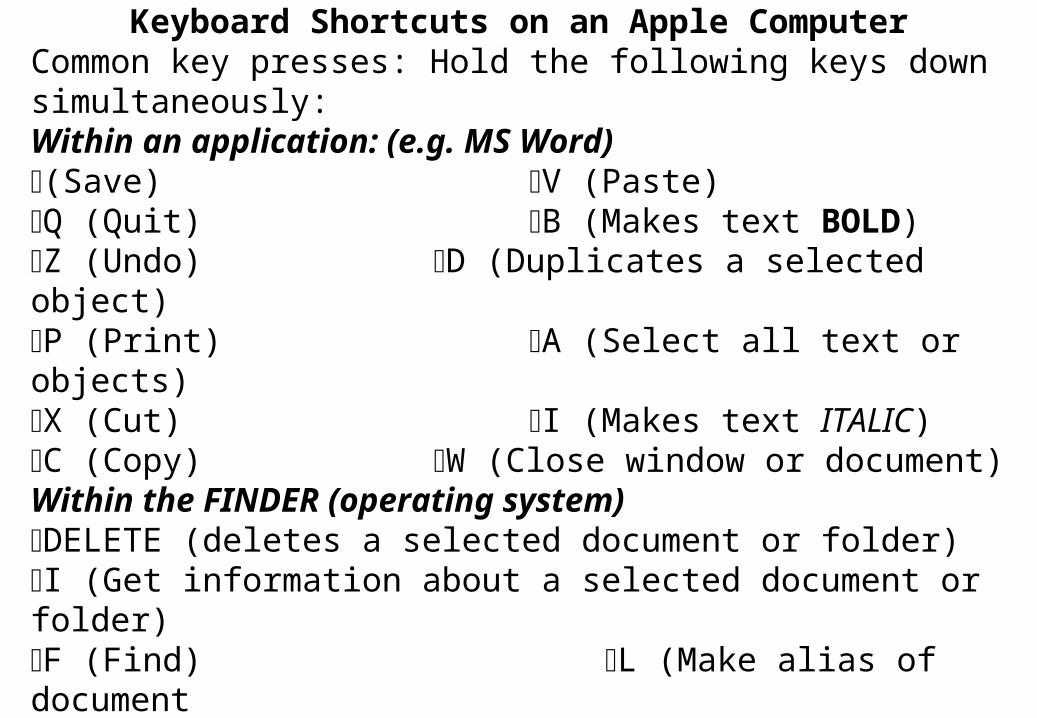
Keyboard Shortcuts on an Apple ComputerCommon key presses: Hold the following keys down simultaneously:Within an application: (e.g. MS Word)⌘(Save) ⌘V (Paste)⌘Q (Quit) ⌘B (Makes text BOLD)⌘Z (Undo) ⌘D (Duplicates a selected object)⌘P (Print) ⌘A (Select all text or objects) ⌘X (Cut) ⌘I (Makes text ITALIC)⌘C (Copy) ⌘W (Close window or document)Within the FINDER (operating system)⌘DELETE (deletes a selected document or folder)⌘I (Get information about a selected document or folder)⌘F (Find) ⌘L (Make alias of document⌘K (Connect to Server) or folder)⌘⇑? (Access Help) ⇑=Shift Key ⌘E (Eject a Server or CD from⌘⇑N (Create new folder) desktop)⌘W (Close window)
20
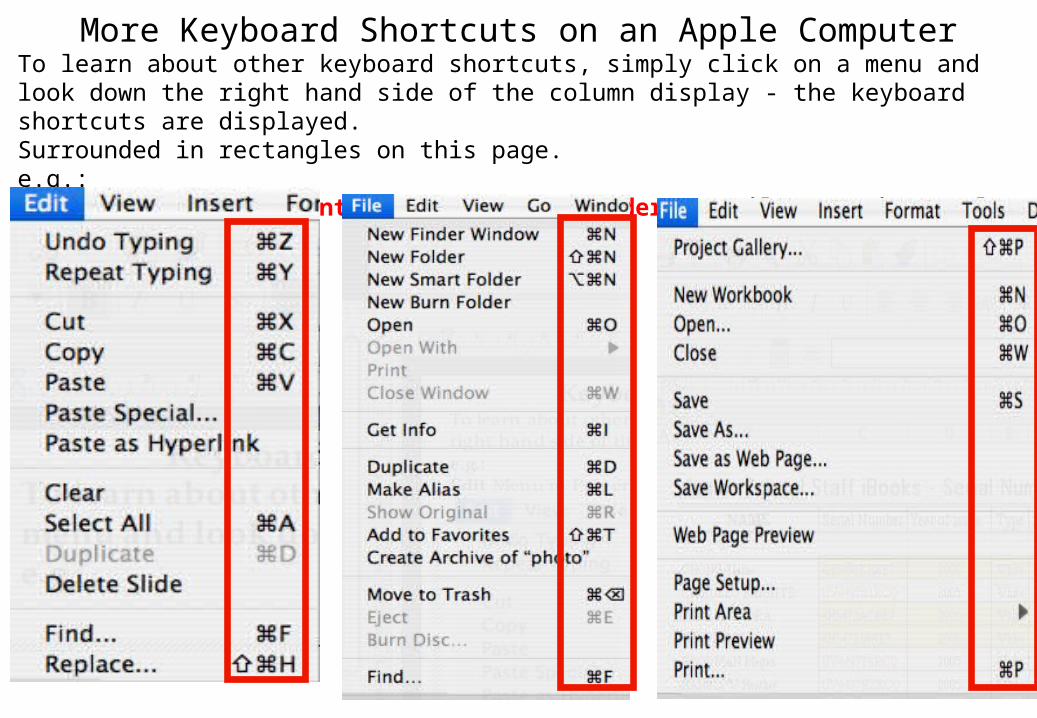
More Keyboard Shortcuts on an Apple ComputerTo learn about other keyboard shortcuts, simply click on a menu and look down the right hand side of the column display - the keyboard shortcuts are displayed.Surrounded in rectangles on this page.e.g.: Edit Menu in PowerPoint File Menu in Finder File Menu in Excel

Saving Files in AppleWorks, Word, PowerPoint or Excel (and other applications)
Maximize the Save As dialogue Box
If the Save As dialogue box is not maximized, then you cannot see where you are saving to
Click the down arrow to Maximize

Saving Files in productivity software (e.g. Word, PowerPoint or Excel + other applications)
• A Maximized Save As dialogue Box. GOLDEN RULE: Work from Left to Right to save in the correct location. Do this before pressing the SAVE button.
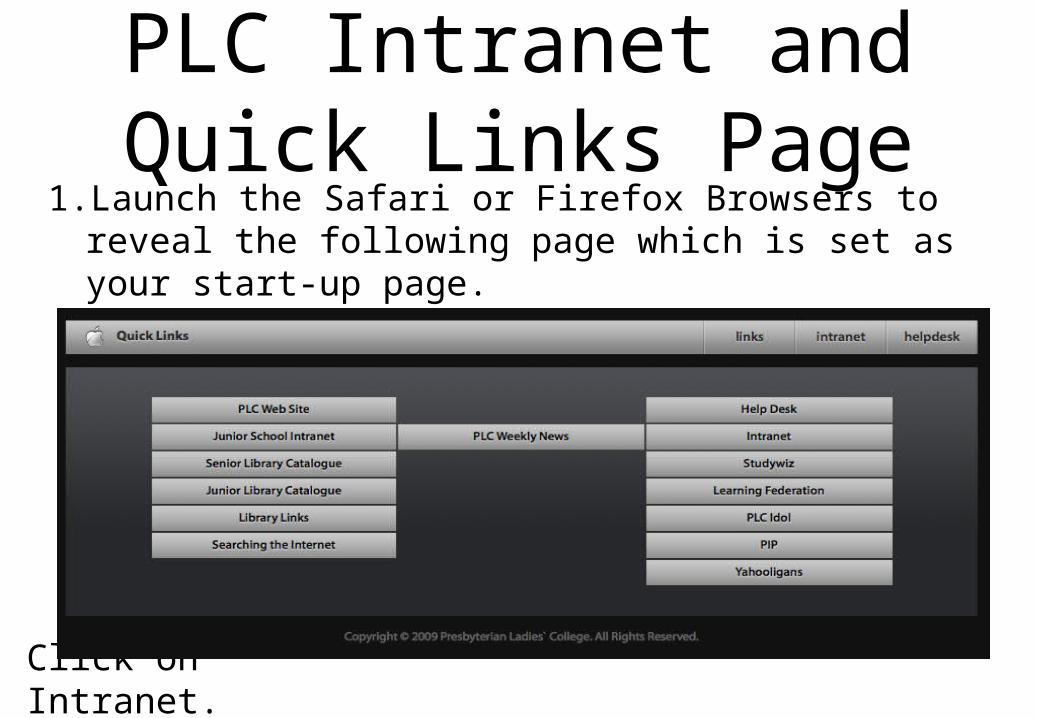
PLC Intranet and Quick Links Page
1.Launch the Safari or Firefox Browsers to reveal the following page which is set as your start-up page.
Click on Intranet.
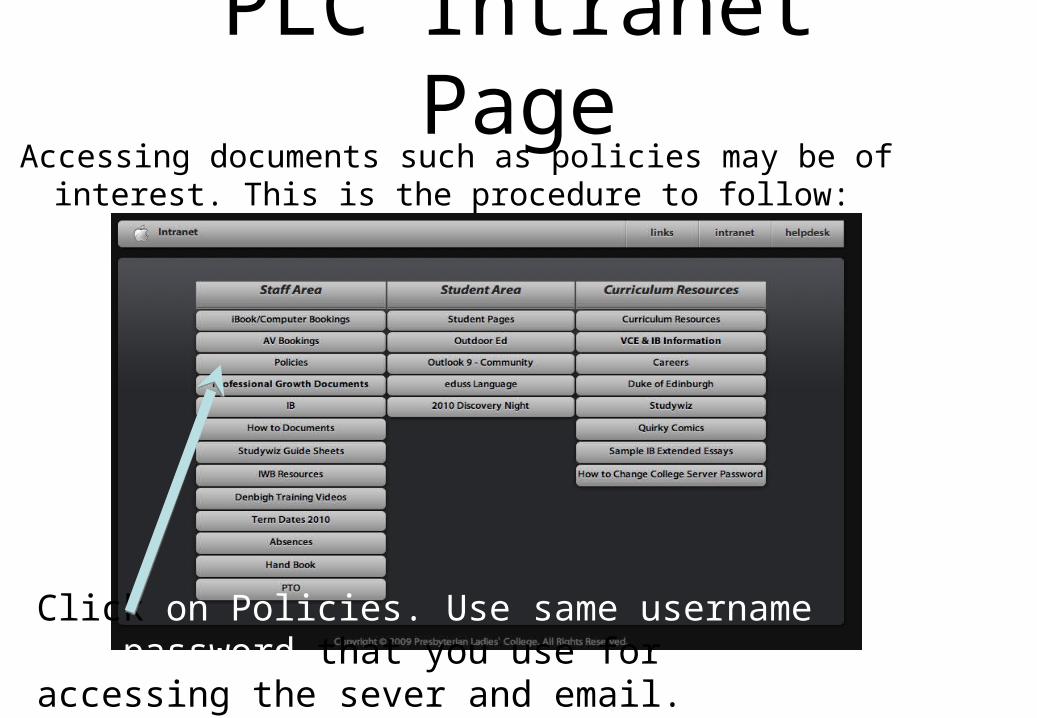
PLC Intranet PageAccessing documents such as policies may be of
interest. This is the procedure to follow:
Click on Policies. Use same username and password that you use for accessing the sever and email.
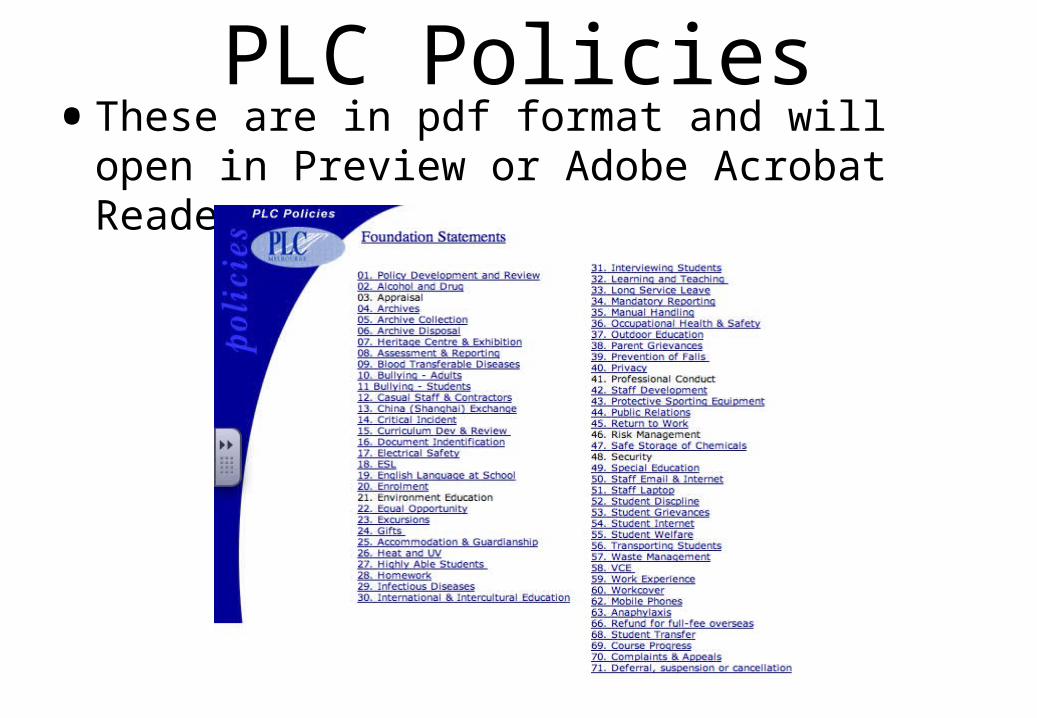
PLC Policies•These are in pdf format and will open in
Preview or Adobe Acrobat Reader.
Thank - you!Mark Hennessy - Staff eLearning
Phone ext: 164
Room 20
Questions / Queries?
The purpose of life is to discover your gift. The meaning of life comes with giving your gift away. David Viscott