M275 - Web Development using PHP and...
57
M275 Arab Open University Faculty of computer Studies M275 - Web Development using PHP and MySQL 1
-
Upload
phungquynh -
Category
Documents
-
view
225 -
download
5
Transcript of M275 - Web Development using PHP and...

M275
Arab Open University
Faculty of computer Studies
M275 - Web Development
using PHP and MySQL
1

When you present plain text within a Web page, you are
often faced with the problem that newlines are not displayed,
and your text runs together into a featureless blob. The nl2br()
function is a convenience method that converts every newline
into an HTML break. So
$string = “one line\n”;
$string .= “another line\n”;
$string .= “a third for luck\n”;
echo nl2br($string); this will print
one line<br />
another line<br />
a third for luck<br />
Wrapping Text with wordwrap() and
nl2br()
2

explode() will break up a string into an array, which you
can then store, sort, or examine as you want. The explode()
function requires two arguments:
the delimiter string that you want to use to break up the
source string and the source string itself.
The following fragment breaks up a date and stores the
result in an array:
$start_date = “2003-08-12”;
$date_array = explode(“-”, $start_date);
// $date[0] == “2003”
// $date[1] == “08”
// $date[2] == “12”
Breaking Strings into Arrays with explode()
3
Using Date and
Time Functions in
PHP
4

PHP’s time() function gives you all the information
that you need about the current date and time.
It requires no arguments and returns an integer.
echo time();
// sample output: 1060751270
//this represents August 12th, 2003 at 10:07PM
Getting the Date with time()
5

getdate() optionally accepts a timestamp and
returns an associative array containing
information about the date.
If you omit the timestamp, getdate() works
with the current timestamp as returned by
time().
Converting a Timestamp with getdate()
6

TABLE 8.3 The Associative Array Returned by
getdate()
Converting a Timestamp with getdate()
7
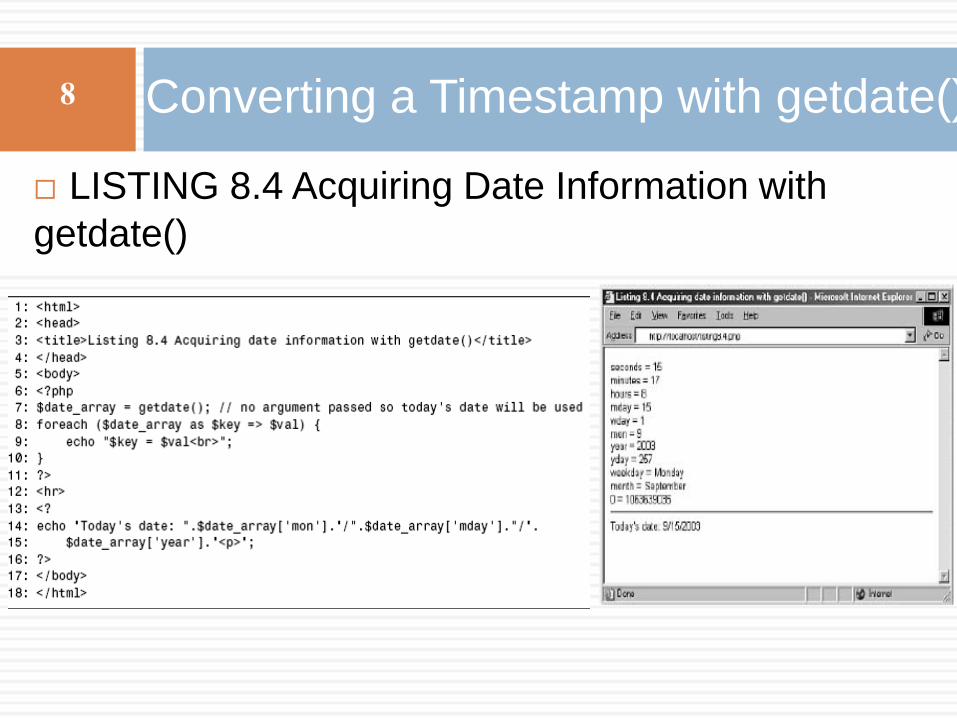
LISTING 8.4 Acquiring Date Information with
getdate()
Converting a Timestamp with getdate()
8

The date() function returns a formatted string
that represents a date.
You can exercise an enormous amount of
control over the format that date() returns with
a string argument that you must pass to it.
In addition to the format string, date()
optionally
accepts a timestamp.
Converting a Timestamp with date()
9

Some Format Codes
for Use with date()
Converting a Timestamp with getdate()
10
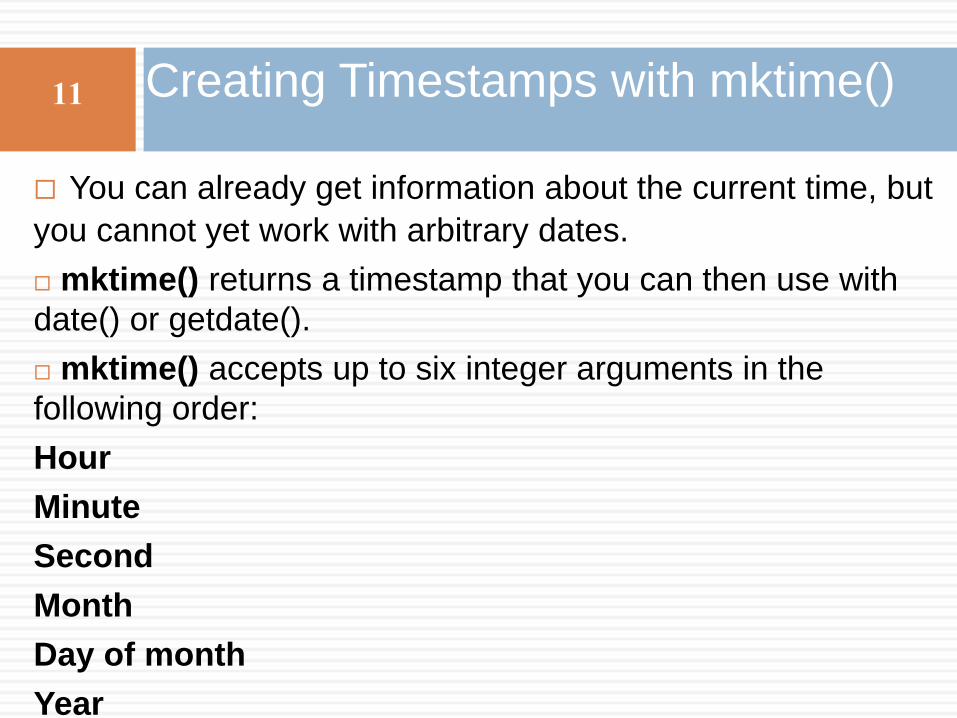
You can already get information about the current time, but
you cannot yet work with arbitrary dates.
mktime() returns a timestamp that you can then use with
date() or getdate().
mktime() accepts up to six integer arguments in the
following order:
Hour
Minute
Second
Month
Day of month
Year
Creating Timestamps with mktime()
11
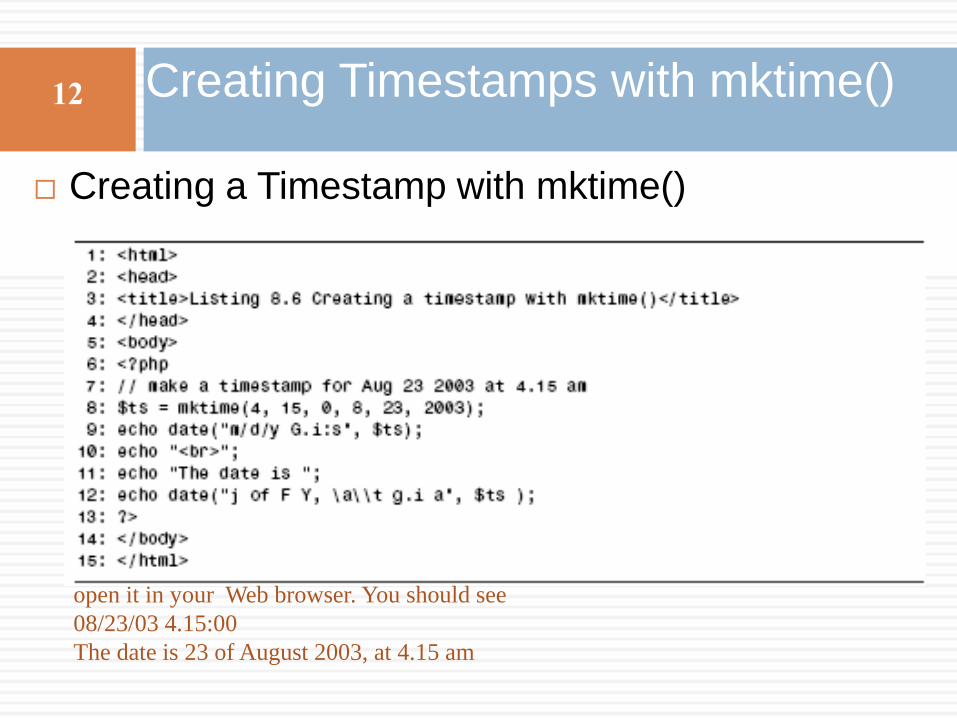
Creating a Timestamp with mktime()
Creating Timestamps with mktime()
12
open it in your Web browser. You should see
08/23/03 4.15:00
The date is 23 of August 2003, at 4.15 am
Activities
Activities
1. Create a feedback form that accepts a user’s full name and an email address. Use case conversion functions to capitalize the first letter of each name the user submits and print the result back to the browser. Check that the user’s email address contains the @ symbol and print a warning otherwise.
2. Create an array of doubles and integers. Loop through the array, converting each element to a floating-point number with a precision of 2. Right-align
the output within a field of 20 characters.
13

Working with
Forms
14

you will learn
. How to access information from form fields
. How to work with form elements that allow multiple selections
. How to create a single document that contains both an HTML form and the PHP code that handles its submission
. How to save state with hidden fields
. How to redirect the user to a new page
. How to build HTML forms and PHP code that send mail
. How to build HTML forms that upload files and how to write the PHP code to handle them
15

Creating a Simple Input Form
For now, let’s keep our HTML separate from our PHP code. Listing 9.1 builds a simple
HTML form. A Simple HTML Form
1: <html>
2: <head>
3: <title>Listing 9.1 A simple HTML form</title>
4: </head>
5: <body>
6: <form action=”listing9.2.php” method=”POST”>
7: <p><strong>Name:</strong><br>
8. <input type=”text” name=”user”></p>
9: <p><strong>Address:</strong><br>
10. <textarea name=”address” rows=”5” cols=”40”></textarea></p>
11: <p><input type=”submit” value=”send”></p>
12: </form>
13: </body>
14: </html>
16
Creating a Simple Input Form
Put these lines into a text file called listing9.1.html,
and place that file in your Web server document root. This listing defines a form that contains a text field with the name “user” on line 8, a text area with the name “address” on line 10, and a submit button on line 12.
The FORM element’s ACTION argument points to a
file called listing9.2.php, which processes the form information.
The method of this form is POST, so the variables are stored in the $_POST superglobal.
17

Creating a Simple Input Form
Listing 9.2 creates the code that receives our users’ input.
Reading Input from a Form
1: <html>
2: <head>
3: <title>Listing 9.2 Reading input from a form </title>
4: </head>
5: <body>
6: <?php
7: echo “<p>Welcome <b>$_POST[user]</b></p>”;
8: echo “<p>Your address is:<br><b>$_POST[address]</b></p>”;
9: ?>
10: </body>
11: </html>
18
Creating a Simple Input Form
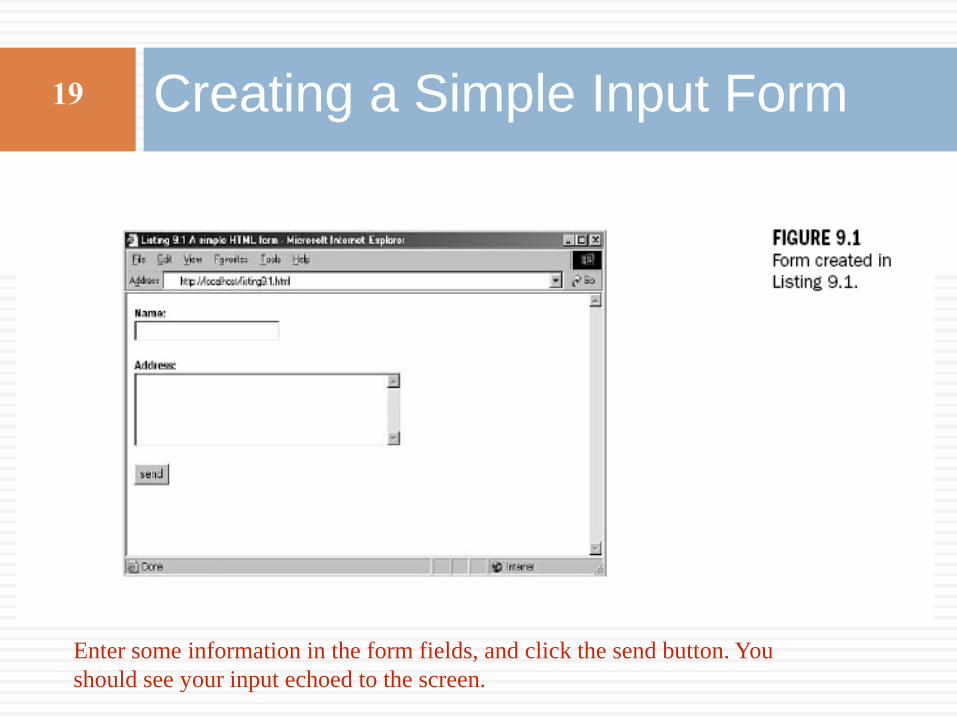
Enter some information in the form fields, and click the send button. You
should see your input echoed to the screen.
19

Accessing Form Input with User-Defined
Arrays
The previous example showed how to gather information from HTML elements that submit a single value per element name. This leaves us with a problem when working with SELECT elements, when it possible for the user to choose one or more items.
If we name the SELECT element with a plain name, like so
<select name=”products” multiple>
The script that receives this data has access to only a single value corresponding to this name.
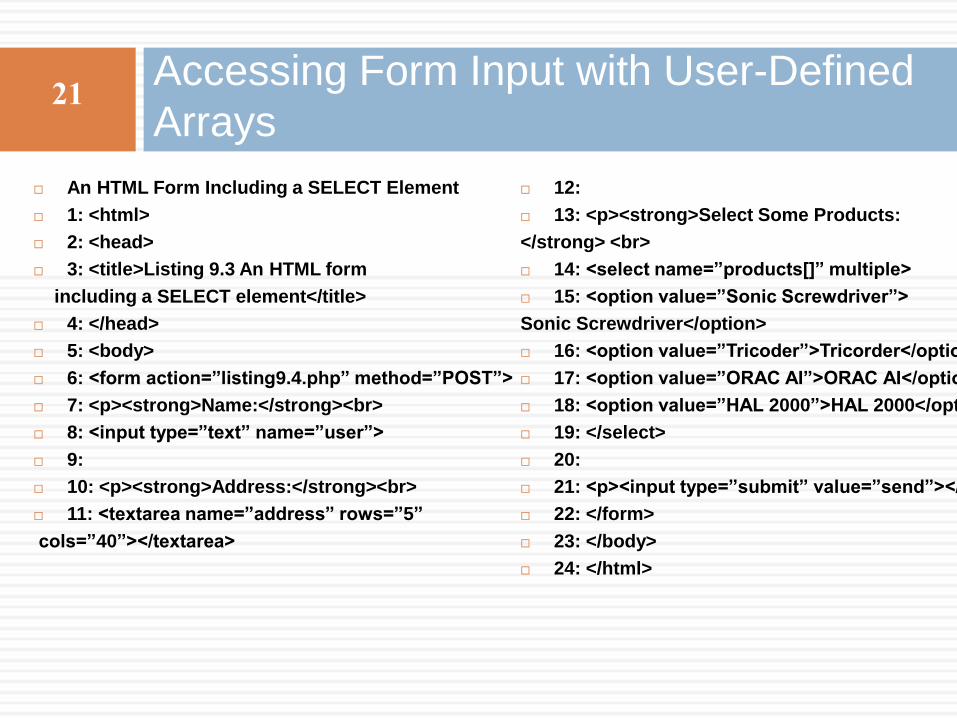
We can change this behavior by renaming an element of this kind so that its name ends with an empty set of square brackets. We do this in Listing 9.3.
20
Accessing Form Input with User-Defined
Arrays
An HTML Form Including a SELECT Element
1: <html>
2: <head>
3: <title>Listing 9.3 An HTML form
including a SELECT element</title>
4: </head>
5: <body>
6: <form action=”listing9.4.php” method=”POST”>
7: <p><strong>Name:</strong><br>
8: <input type=”text” name=”user”>
9:
10: <p><strong>Address:</strong><br>
11: <textarea name=”address” rows=”5”
cols=”40”></textarea>
12:
13: <p><strong>Select Some Products:
</strong> <br>
14: <select name=”products[]” multiple>
15: <option value=”Sonic Screwdriver”>
Sonic Screwdriver</option>
16: <option value=”Tricoder”>Tricorder</option>
17: <option value=”ORAC AI”>ORAC AI</option>
18: <option value=”HAL 2000”>HAL 2000</option>
19: </select>
20:
21: <p><input type=”submit” value=”send”></p>
22: </form>
23: </body>
24: </html>
21
Accessing Form Input with User-Defined
Arrays
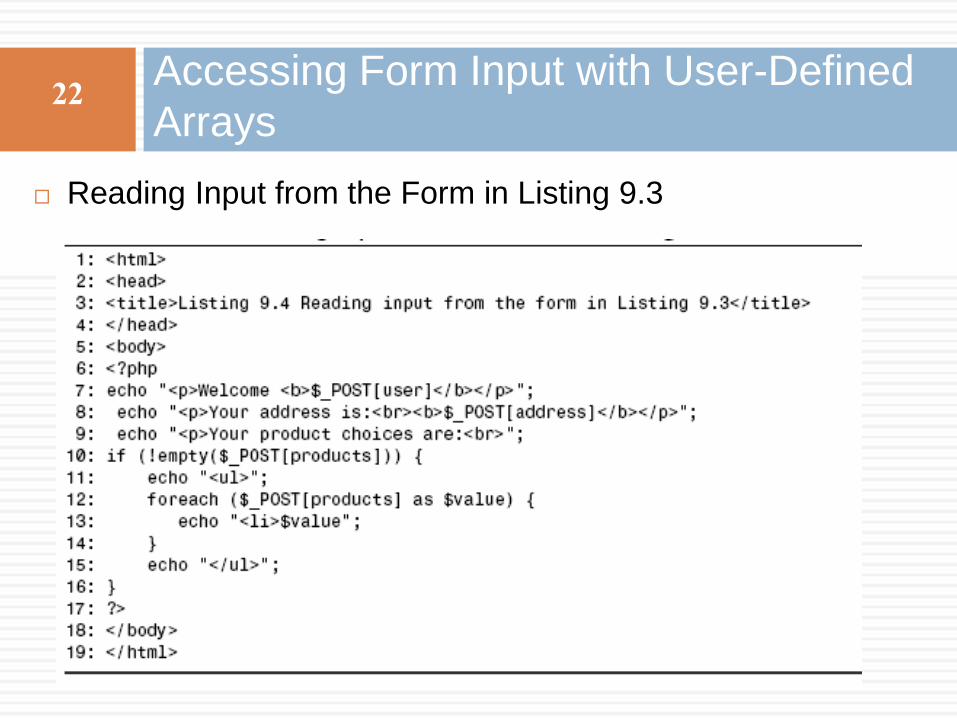
Reading Input from the Form in Listing 9.3
22

Accessing Form Input with User-Defined
Arrays
Put these lines into a text file called listing9.4.php, and place that file in your Web server document root. Now access the form in Listing 9.3 with your Web browser and fill out the fields. Figure 9.2 shows an example.
23

Combining HTML
and PHP Code on
a Single Page
24

HTML & PHP
For the following examples, imagine that we’re
creating a site that teaches basic math to
preschool children, and have been asked to
create a script that takes a number from form
input and tells the user whether it’s larger or
smaller than a predefined integer.
25

HTML & PHP
Listing 9.5 creates the HTML. For this example, we need only a single text field, but even so, we’ll include a little PHP.
An HTML Form That Calls Itself
1: <html>
2: <head>
3: <title>Listing 9.5 An HTML form that calls itself</title>
4: </head>
5: <body>
6: <form action=”<?php echo $_SERVER[PHP_SELF] ?>” method=”POST”>
7: <p><strong>Type your guess here:</strong> <input type=”text” name=”guess”></p>
8: <p><input type=”submit” value=”submit your guess”></p>
9: </form>
10: </body>
11: </html>
26
HTML & PHP
we will begin now to build up the PHP element of the page.
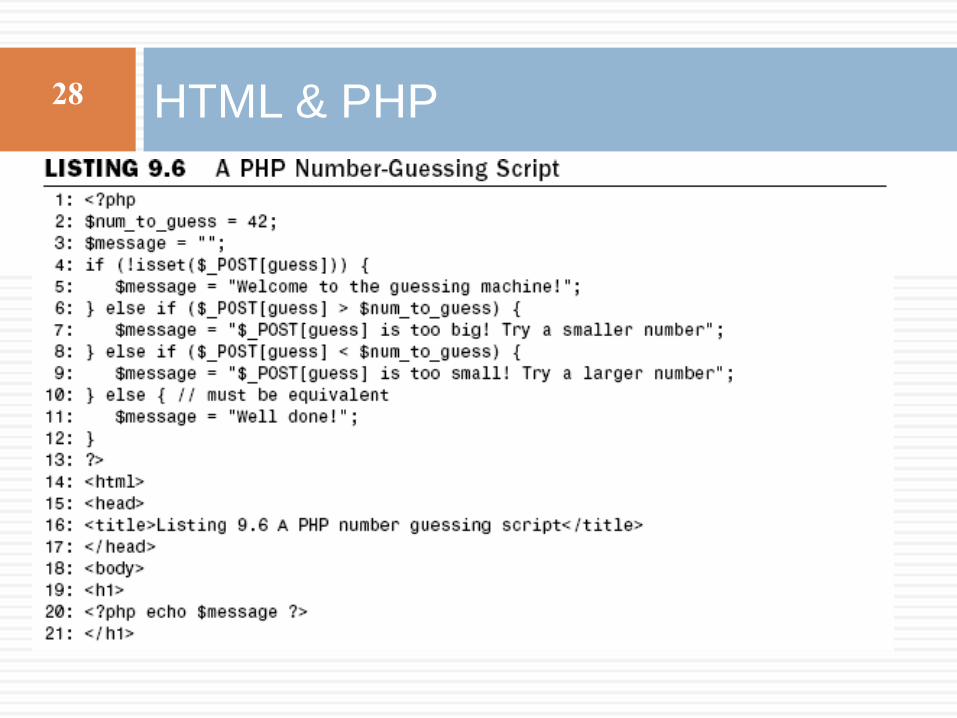
First, we must define the number that the user guesses. In a fully working version, we’d probably randomly generate this number, but for now, we keep it simple. We assign 42 to the $num_to_guess variable on line 2. Next, we must determine whether the form has been submitted; otherwise, we’d attempt to assess variables that aren’t yet made available.
We can test for submission by testing for the existence of the variable $_POST[guess], which is made available if your script has been sent a guess parameter.
If $_POST[guess] isn’t present, we can safely assume that the user arrived at the page without submitting a form. If the value is present, we can test the value it contains. The test for the presence of the $_POST[guess] variable takes place on line 4.
27
HTML & PHP 28
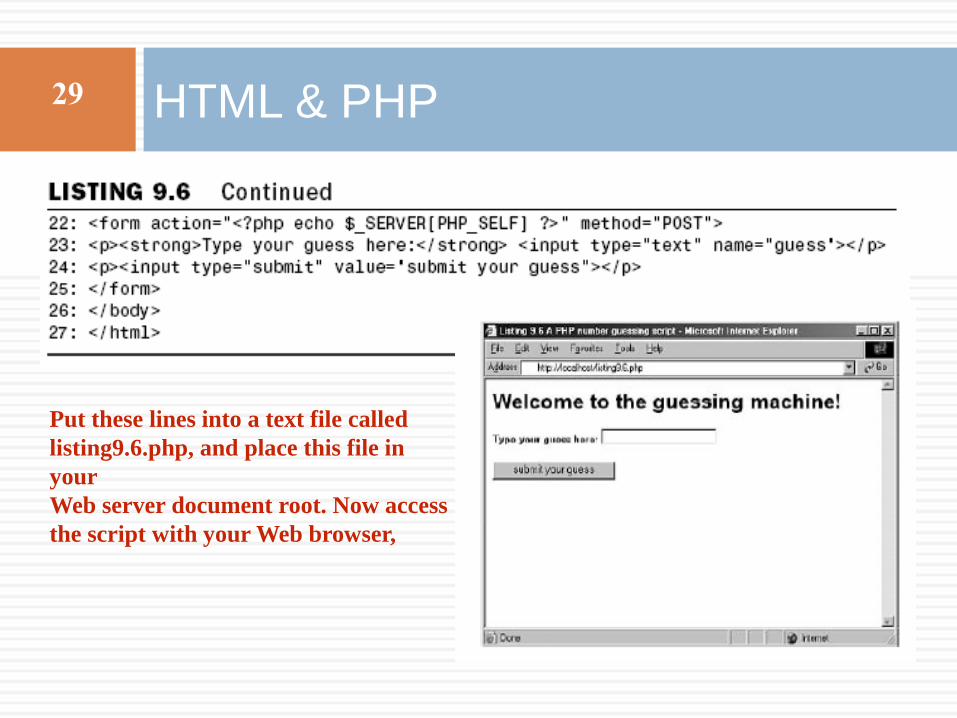
HTML & PHP
Put these lines into a text file called
listing9.6.php, and place this file in
your
Web server document root. Now access
the script with your Web browser,
29

Using Hidden Fields to Save State
The script in Listing 9.6 has no way of knowing
how many guesses a user has made, but we
can use a hidden field to keep track of this.
A hidden field behaves exactly the same as a
text field, except that the user cannot see it
unless he views the HTML source of the
document that contains it. Listing 9.7 adds a
hidden field to the number-guessing script and
some PHP to work with it.
30

Using Hidden Fields to Save State
The hidden field on line 28 is
given the name “num_tries”.
We also use PHP to
write its value. While we’re at
it, we do the same for the
guess field on line 27 so
that the user can always see his
last guess. This technique is
useful for scripts that
parse user input. If we reject a
form submission for some
reason, we can at least
allow our user to edit his
previous query.
31

Using Hidden Fields to Save State
Within the main PHP code, we use a ternary operator
to increment the $num_tries variable. If the $num_tries variable is set, we add one to it and reassign this incremented value; otherwise, we initialize $num_tries to 0.
Within the body of the HTML, we can now report to the user how many guesses he’s made.
Put these lines into a text file called listing9.7.php, and place that file in your Web server document root. Access the form a few times with your Web browser,
and try to guess the number (pretend you don’t already know it).
32

Redirecting the User
Our simple script still has one major drawback. The
form is reloaded whether or not the user guesses
correctly. The fact that the HTML is hard-coded makes
it difficult to avoid writing the entire page. We can,
however, redirect the user to a congratulations
page, thereby sidestepping the issue altogether.
When a server script communicates with a client, it
must first send some headers that provide information
about the document to follow. PHP usually handles
this for you automatically, but you can choose to send
your own header lines with PHP’s header() function.
33

Redirecting the User
To call the header() function, you must be sure that
absolutely no output has been sent to the browser. The first time content is sent to the browser, PHP sends out headers and it’s too late for you to send your own. Any output from your document, even a line break or a space outside of your script tags, causes headers to be sent.
If you intend to use the header() function in a script, you must make certain that nothing precedes the PHP code that contains the function call.
You should also check any libraries that you might be using.
Listing 9.8 shows typical headers sent to the browser by PHP, beginning with line 3, in response to the request in line 1.
34

Redirecting the User
35

Redirecting the User
36
The else clause of our if
statement on line 11 now
causes the browser to
request
congrats.html. We ensure
that all output from the
current page is aborted with
the exit statement on line
13, which immediately ends
execution and output,
whether HTML or PHP.

Sending Mail on
Form Submission
37
System Configuration for the mail()
Function
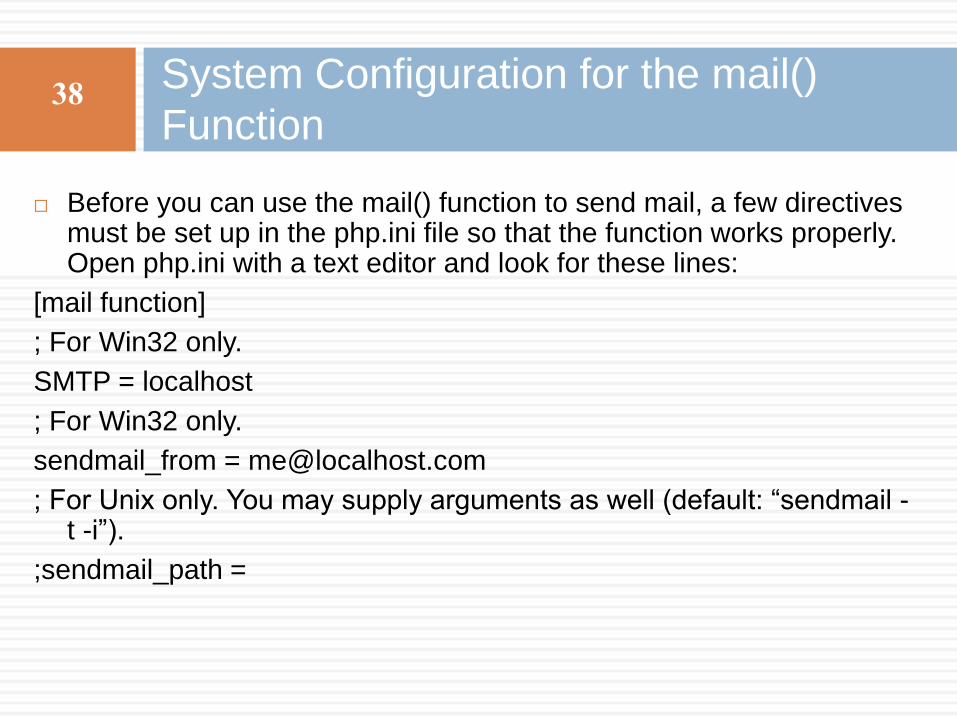
Before you can use the mail() function to send mail, a few directives
must be set up in the php.ini file so that the function works properly. Open php.ini with a text editor and look for these lines:
[mail function]
; For Win32 only.
SMTP = localhost
; For Win32 only.
sendmail_from = [email protected]
; For Unix only. You may supply arguments as well (default: “sendmail -t -i”).
;sendmail_path =
38

If you’re using Windows as your Web server platform, the first two directives apply to you. For the mail() function to send mail, it must be able to access a valid outgoing mail server. If you plan to use the outgoing mail server of your ISP (in the following example, we use EarthLink), the entry in php.ini should look like this:
SMTP = mail.earthlink.net
The second configuration directive is sendmail_from, which is the email address used in the From header of the outgoing email. It can be overwritten in the mail script itself, but normally operates as the default value. For example:
sendmail_from = [email protected]
A good rule of thumb for Windows users is that whatever outgoing mail server you’ve set up in your email client on that machine, you should also use as the value of SMTP in php.ini.
System Configuration for the mail()
Function
39
If your Web server is running on a Linux/Unix platform, you use the sendmail functionality of that particular machine. In this case, only the last directive applies to you: sendmail_path.
The default is sendmail -t -i, but if sendmail is in an odd place or if you need to specify different arguments, feel free to do so, as in the following example, which does not use real values:
sendmail_path = /opt/sendmail -odd –arguments
After making any changes to php.ini on any platform, you must restart the Web server process for the changes to take effect.
System Configuration for the mail()
Function
40

Creating the Form 41

Creating the Form 42
Put these lines into a text file called listing9.10.html, and place this file in your
Web server document root. Now access the script with your Web browser, and you
should see something like Figure 9.5.

Sending the Simple Feedback Form
43

Sending the Simple Feedback Form
44
The mail() function takes four
parameters: the recipient, the
subject, the message, and any
additional mail headers. The order
of these parameters is shown in line
21, and your script is complete after
you close up your PHP block and
your HTML elements in lines 22–
24.
Put these lines into a text file called
listing9.11.php, and place that file
in your Web server document root.
Use your Web browser and go back
to the form, enter some information,
and click the submission button.
You should see something like
Figure 9.6 in your browser.

Information about the uploaded file becomes available to you in the $_FILES
superglobal, which is indexed by the name of the upload field (or fields) in the form. The corresponding value for each of these keys is an associative array.
These fields are described in Table 9.1, using fileupload as the name of the form field used for the upload.
Working with File Uploads
45

Creating the File Upload Form
46

Creating the File Upload Script
47

48
Working with
User Sessions

Working with User Sessions
49
In this chapter, you will learn
. What session variables are and how they work
. How to start or resume a session
. How to store variables in a session
. How to destroy a session
. How to unset session variables
Session Function Overview
50
•Session functions provide a unique identifier to a user, which can
then be used to store and acquire information linked to that ID.
When a visitor accesses a session enabled page, she is either
allocated a new identifier or re-associated with one that was already
established in a previous access. Any variables that have been
associated with the session will become available to your code
through the $_SESSION superglobal.
•When you use sessions, cookies are used by default to store the
session identifier, but you can ensure success for all clients by
encoding the session ID into all links in your session-enabled pages.
•Session state is usually stored in a temporary file, although you can
implement
•database storage using a function called
session_set_save_handler().
Starting a Session
51
•To work with a session, you need to explicitly start or
resume that session unless you have changed your php.ini
configuration file.
•By default, sessions do not start automatically.
• If you want to start a session this way, you will have to
find the following line in your php.ini file and change the
value from 0 to 1 (and restart the Web server):
session.auto_start = 0

Starting a Session
52
Sessions remain current as long as the Web browser is active. When the user
restarts the browser, the cookie is no longer stored. You can change this behavior
by altering the session.cookie_lifetime setting in your php.ini file. The default
value is 0, but you can set an expiry period in seconds.

Working with Session Variables
53
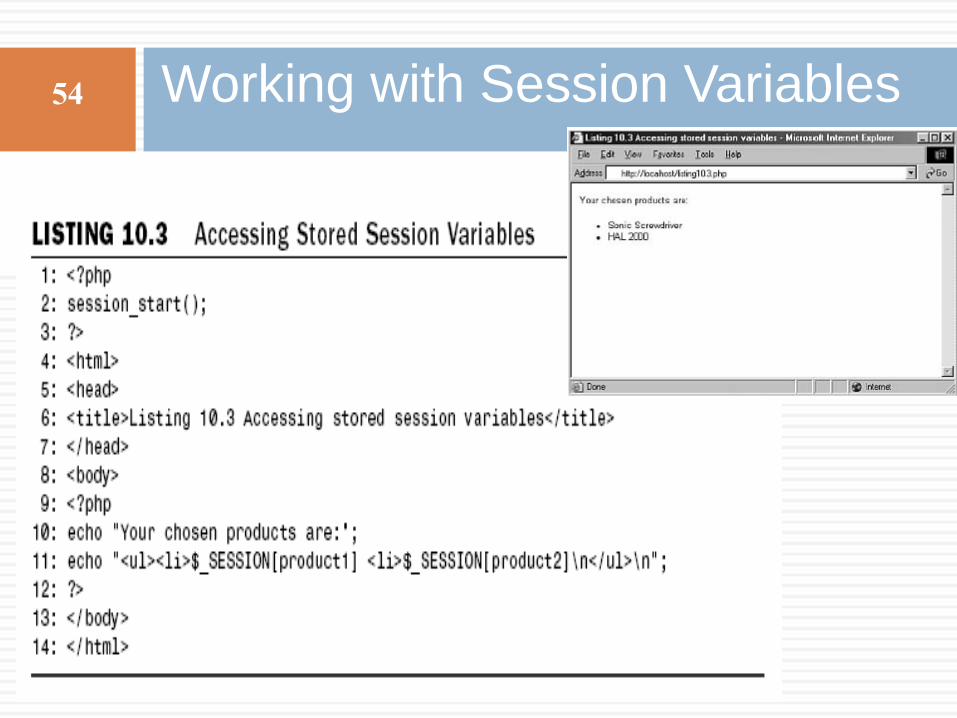
Accessing a unique session identifier in each of your PHP
documents is only the start of session functionality. When a session
is started, you can store any number of variables in the $_SESSION
superglobal and then access them on any sessionenabled page.
Working with Session Variables
54

Passing Session IDs in the Query String
55
PHP makes a name/value pair available in a constant
named SID if a cookie value for a session ID cannot be
found. You can add this string to any HTML links in
session-enabled pages:
<a href=”anotherpage.html?<?php echo SID;
?>”>Another page</a>
It will reach the browser as
<a
href=”anotherpage.html?PHPSESSID=08ecedf79fe
34561fa82591401a01da1”>Another
page</a>

Destroying Sessions and Unsetting
Variables
56
•You can use session_destroy() to end a session,
erasing all session variables.
•The session_destroy() function requires no
arguments.
• You should have an established session for this
function to work as expected. The following code
fragment resumes a session and abruptly destroys
it:
session_start();
session_destroy();

Destroying Sessions and Unsetting
Variables
57
• The session_destroy() function does not instantly destroy registered variables,
however. They remain accessible to the script in which session_destroy() is called
(until it is reloaded).
• The following code fragment resumes or initiates a session and registers a
variable called test, which we set to 5. Destroying the session does not destroy the
registered variable.
session_start();
$_SESSION[test] = 5;
session_destroy();
print $_SESSION[test]; // prints 5
• To remove all registered variables from a session, you simply unset the variable:
session_start();
$_SESSION[test] = 5;
session_destroy();
unset($_SESSION[test]);
print $_SESSION[test]; // prints nothing.