
Louisiana Commercial Vegetable - LSU AgCenter · 4 Artichokes Botanical Family: Asteraceae...
72
1 Louisiana Production Recommendations Commercial Vegetable
-
Upload
nguyenkien -
Category
Documents
-
view
214 -
download
0
Transcript of Louisiana Commercial Vegetable - LSU AgCenter · 4 Artichokes Botanical Family: Asteraceae...
1
Louisiana
Production Recommendations
Commercial Vegetable
2
Table of ContentsArtichokes ............................................................................................................4Asparagus ............................................................................................................5Beets .....................................................................................................................7Beans, Butter (Lima) – Bush and Pole...............................................................8Beans, Snap – Bush and Pole .............................................................................9Broccoli .............................................................................................................10Cabbage .............................................................................................................12Cabbage, Chinese ..............................................................................................13Cantaloupes and Honeydews ..........................................................................14Carrots ..............................................................................................................17Cauliflower ........................................................................................................18Corn, Sweet ......................................................................................................19Cucumbers ........................................................................................................21Eggplants ...........................................................................................................23Garlic .................................................................................................................25Greens (Collard, Kale, Mustard, Turnip) .........................................................27Lettuce and Endive ..........................................................................................29Okra ...................................................................................................................31Onions (Bulb and Green) ................................................................................32Parsley ................................................................................................................35Peas, English and Edible Pea Pods (Green, Snow, Sugar Snap, Sweet) .........36Peas, Southern (Black-eyed, Cream, Crowder, Purple Hull) ........................37 Mechanical Harvest Southern Peas for Fresh Market .............................39Peppers, Bell .....................................................................................................40Peppers, Hot and Other Peppers ....................................................................43Potatoes, Irish ...................................................................................................46Potatoes, Sweet ................................................................................................48Pumpkins ..........................................................................................................50Shallots ..............................................................................................................52Spinach ..............................................................................................................53Squash (Acorn, Butternut, Yellow, Zucchini) ...................................................55 Strawberries .....................................................................................................58Tomatoes ..........................................................................................................62Watermelons ....................................................................................................66Watermelons, Triploid .....................................................................................69
No endorsement is intended for products mentioned, nor is criticism meant for products not mentioned.
3
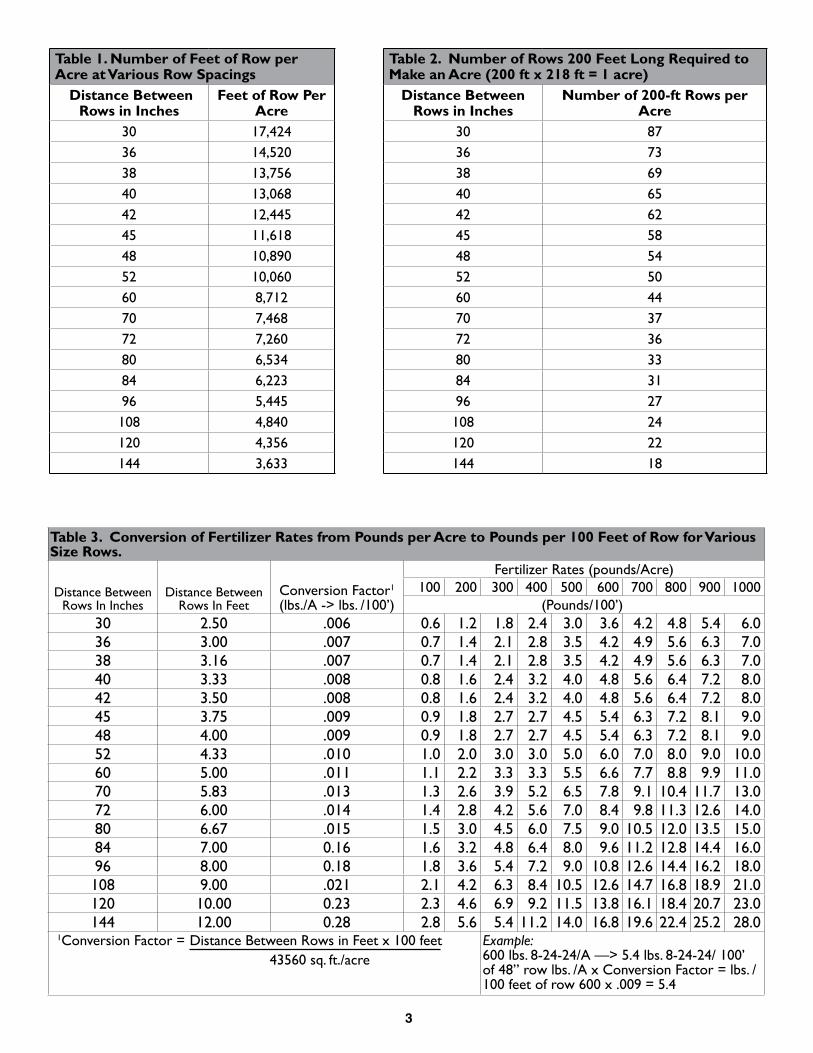
Table 1. Number of Feet of Row per Acre at Various Row Spacings
Distance Between Rows in Inches
Feet of Row Per Acre
30 17,42436 14,52038 13,75640 13,06842 12,44545 11,61848 10,89052 10,06060 8,71270 7,46872 7,26080 6,53484 6,22396 5,445108 4,840120 4,356144 3,633
Table 2. Number of Rows 200 Feet Long Required to Make an Acre (200 ft x 218 ft = 1 acre)
Distance Between Rows in Inches
Number of 200-ft Rows per Acre
30 8736 7338 6940 6542 6245 5848 5452 5060 4470 3772 3680 3384 3196 27108 24120 22144 18
Table 3. Conversion of Fertilizer Rates from Pounds per Acre to Pounds per 100 Feet of Row for Various Size Rows.
Distance BetweenRows In Inches
Distance BetweenRows In Feet
Conversion Factor1
(lbs./A -> lbs. /100’)
Fertilizer Rates (pounds/Acre)100 200 300 400 500 600 700 800 900 1000
(Pounds/100’)30 2.50 .006 0.6 1.2 1.8 2.4 3.0 3.6 4.2 4.8 5.4 6.036 3.00 .007 0.7 1.4 2.1 2.8 3.5 4.2 4.9 5.6 6.3 7.038 3.16 .007 0.7 1.4 2.1 2.8 3.5 4.2 4.9 5.6 6.3 7.040 3.33 .008 0.8 1.6 2.4 3.2 4.0 4.8 5.6 6.4 7.2 8.042 3.50 .008 0.8 1.6 2.4 3.2 4.0 4.8 5.6 6.4 7.2 8.045 3.75 .009 0.9 1.8 2.7 2.7 4.5 5.4 6.3 7.2 8.1 9.048 4.00 .009 0.9 1.8 2.7 2.7 4.5 5.4 6.3 7.2 8.1 9.052 4.33 .010 1.0 2.0 3.0 3.0 5.0 6.0 7.0 8.0 9.0 10.060 5.00 .011 1.1 2.2 3.3 3.3 5.5 6.6 7.7 8.8 9.9 11.070 5.83 .013 1.3 2.6 3.9 5.2 6.5 7.8 9.1 10.4 11.7 13.072 6.00 .014 1.4 2.8 4.2 5.6 7.0 8.4 9.8 11.3 12.6 14.080 6.67 .015 1.5 3.0 4.5 6.0 7.5 9.0 10.5 12.0 13.5 15.084 7.00 0.16 1.6 3.2 4.8 6.4 8.0 9.6 11.2 12.8 14.4 16.096 8.00 0.18 1.8 3.6 5.4 7.2 9.0 10.8 12.6 14.4 16.2 18.0108 9.00 .021 2.1 4.2 6.3 8.4 10.5 12.6 14.7 16.8 18.9 21.0120 10.00 0.23 2.3 4.6 6.9 9.2 11.5 13.8 16.1 18.4 20.7 23.0144 12.00 0.28 2.8 5.6 5.4 11.2 14.0 16.8 19.6 22.4 25.2 28.0
1Conversion Factor = Distance Between Rows in Feet x 100 feet 43560 sq. ft./acre
Example: 600 lbs. 8-24-24/A —> 5.4 lbs. 8-24-24/ 100’ of 48” row lbs. /A x Conversion Factor = lbs. / 100 feet of row 600 x .009 = 5.4
4
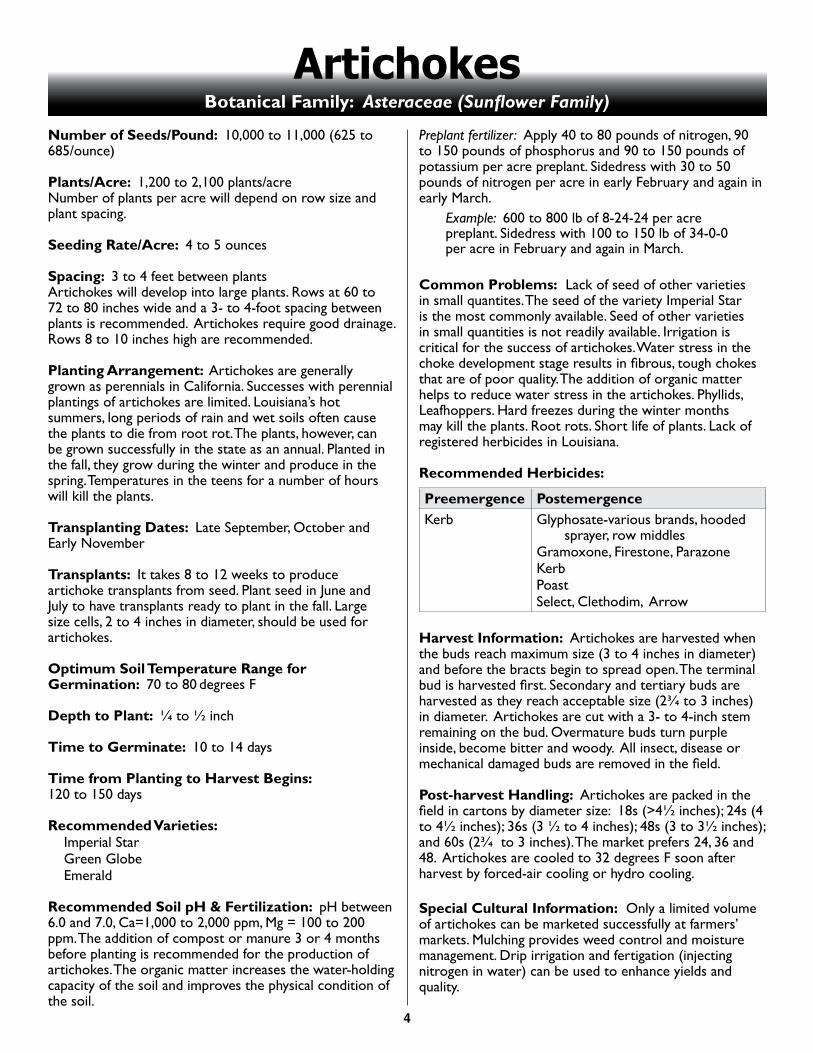
ArtichokesBotanical Family: Asteraceae (Sunflower Family)
Number of Seeds/Pound: 10,000 to 11,000 (625 to 685/ounce)
Plants/Acre: 1,200 to 2,100 plants/acreNumber of plants per acre will depend on row size and plant spacing. Seeding Rate/Acre: 4 to 5 ounces Spacing: 3 to 4 feet between plants Artichokes will develop into large plants. Rows at 60 to 72 to 80 inches wide and a 3- to 4-foot spacing between plants is recommended. Artichokes require good drainage. Rows 8 to 10 inches high are recommended.
Planting Arrangement: Artichokes are generally grown as perennials in California. Successes with perennial plantings of artichokes are limited. Louisiana’s hot summers, long periods of rain and wet soils often cause the plants to die from root rot. The plants, however, can be grown successfully in the state as an annual. Planted in the fall, they grow during the winter and produce in the spring. Temperatures in the teens for a number of hours will kill the plants.
Transplanting Dates: Late September, October and Early November
Transplants: It takes 8 to 12 weeks to produce artichoke transplants from seed. Plant seed in June and July to have transplants ready to plant in the fall. Large size cells, 2 to 4 inches in diameter, should be used for artichokes.
Optimum Soil Temperature Range for Germination: 70 to 80 degrees F
Depth to Plant: ¼ to ½ inch
Time to Germinate: 10 to 14 days
Time from Planting to Harvest Begins: 120 to 150 days
Recommended Varieties:Imperial StarGreen GlobeEmerald
Recommended Soil pH & Fertilization: pH between 6.0 and 7.0, Ca=1,000 to 2,000 ppm, Mg = 100 to 200 ppm. The addition of compost or manure 3 or 4 months before planting is recommended for the production of artichokes. The organic matter increases the water-holding capacity of the soil and improves the physical condition of the soil.
Preplant fertilizer: Apply 40 to 80 pounds of nitrogen, 90 to 150 pounds of phosphorus and 90 to 150 pounds of potassium per acre preplant. Sidedress with 30 to 50 pounds of nitrogen per acre in early February and again in early March.
Example: 600 to 800 lb of 8-24-24 per acre preplant. Sidedress with 100 to 150 lb of 34-0-0 per acre in February and again in March.
Common Problems: Lack of seed of other varieties in small quantites. The seed of the variety Imperial Star is the most commonly available. Seed of other varieties in small quantities is not readily available. Irrigation is critical for the success of artichokes. Water stress in the choke development stage results in fibrous, tough chokes that are of poor quality. The addition of organic matter helps to reduce water stress in the artichokes. Phyllids, Leafhoppers. Hard freezes during the winter months may kill the plants. Root rots. Short life of plants. Lack of registered herbicides in Louisiana.
Recommended Herbicides:
Preemergence PostemergenceKerb Glyphosate-various brands, hooded
sprayer, row middlesGramoxone, Firestone, ParazoneKerbPoastSelect, Clethodim, Arrow
Harvest Information: Artichokes are harvested when the buds reach maximum size (3 to 4 inches in diameter) and before the bracts begin to spread open. The terminal bud is harvested first. Secondary and tertiary buds are harvested as they reach acceptable size (2¾ to 3 inches) in diameter. Artichokes are cut with a 3- to 4-inch stem remaining on the bud. Overmature buds turn purple inside, become bitter and woody. All insect, disease or mechanical damaged buds are removed in the field.
Post-harvest Handling: Artichokes are packed in the field in cartons by diameter size: 18s (>4½ inches); 24s (4 to 4½ inches); 36s (3 ½ to 4 inches); 48s (3 to 3½ inches); and 60s (2¾ to 3 inches). The market prefers 24, 36 and 48. Artichokes are cooled to 32 degrees F soon after harvest by forced-air cooling or hydro cooling.
Special Cultural Information: Only a limited volume of artichokes can be marketed successfully at farmers’ markets. Mulching provides weed control and moisture management. Drip irrigation and fertigation (injecting nitrogen in water) can be used to enhance yields and quality.
5
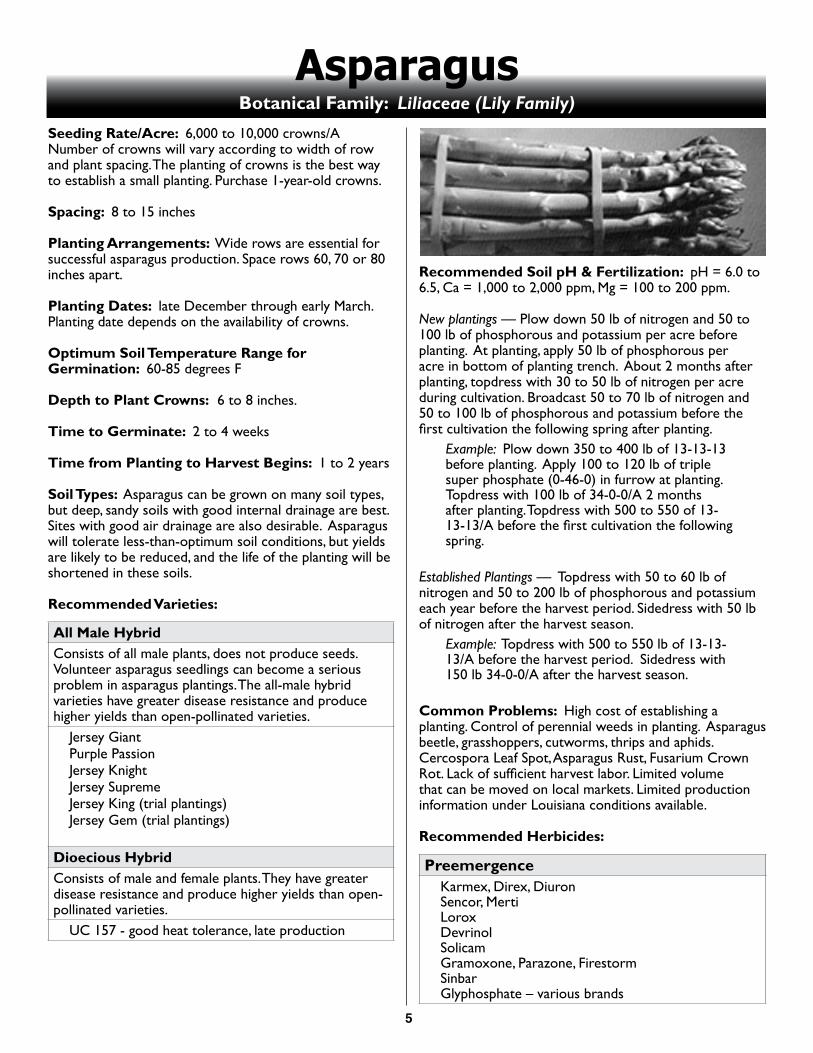
AsparagusBotanical Family: Liliaceae (Lily Family)
Seeding Rate/Acre: 6,000 to 10,000 crowns/ANumber of crowns will vary according to width of row and plant spacing. The planting of crowns is the best way to establish a small planting. Purchase 1-year-old crowns.
Spacing: 8 to 15 inches
Planting Arrangements: Wide rows are essential for successful asparagus production. Space rows 60, 70 or 80 inches apart.
Planting Dates: late December through early March. Planting date depends on the availability of crowns.
Optimum Soil Temperature Range for Germination: 60-85 degrees F
Depth to Plant Crowns: 6 to 8 inches.
Time to Germinate: 2 to 4 weeks
Time from Planting to Harvest Begins: 1 to 2 years
Soil Types: Asparagus can be grown on many soil types, but deep, sandy soils with good internal drainage are best. Sites with good air drainage are also desirable. Asparagus will tolerate less-than-optimum soil conditions, but yields are likely to be reduced, and the life of the planting will be shortened in these soils.
Recommended Varieties:
All Male HybridConsists of all male plants, does not produce seeds. Volunteer asparagus seedlings can become a serious problem in asparagus plantings. The all-male hybrid varieties have greater disease resistance and produce higher yields than open-pollinated varieties.
Jersey GiantPurple PassionJersey KnightJersey Supreme Jersey King (trial plantings)Jersey Gem (trial plantings)
Dioecious Hybrid Consists of male and female plants. They have greater disease resistance and produce higher yields than open-pollinated varieties.
UC 157 - good heat tolerance, late production
Recommended Soil pH & Fertilization: pH = 6.0 to 6.5, Ca = 1,000 to 2,000 ppm, Mg = 100 to 200 ppm.
New plantings — Plow down 50 lb of nitrogen and 50 to 100 lb of phosphorous and potassium per acre before planting. At planting, apply 50 lb of phosphorous per acre in bottom of planting trench. About 2 months after planting, topdress with 30 to 50 lb of nitrogen per acre during cultivation. Broadcast 50 to 70 lb of nitrogen and 50 to 100 lb of phosphorous and potassium before the first cultivation the following spring after planting.
Example: Plow down 350 to 400 lb of 13-13-13 before planting. Apply 100 to 120 lb of triple super phosphate (0-46-0) in furrow at planting. Topdress with 100 lb of 34-0-0/A 2 months after planting. Topdress with 500 to 550 of 13-13-13/A before the first cultivation the following spring.
Established Plantings — Topdress with 50 to 60 lb of nitrogen and 50 to 200 lb of phosphorous and potassium each year before the harvest period. Sidedress with 50 lb of nitrogen after the harvest season.
Example: Topdress with 500 to 550 lb of 13-13-13/A before the harvest period. Sidedress with 150 lb 34-0-0/A after the harvest season.
Common Problems: High cost of establishing a planting. Control of perennial weeds in planting. Asparagus beetle, grasshoppers, cutworms, thrips and aphids. Cercospora Leaf Spot, Asparagus Rust, Fusarium Crown Rot. Lack of sufficient harvest labor. Limited volume that can be moved on local markets. Limited production information under Louisiana conditions available.
Recommended Herbicides:
PreemergenceKarmex, Direx, DiuronSencor, MertiLoroxDevrinolSolicamGramoxone, Parazone, FirestormSinbar Glyphosphate – various brands
6
PostemergenceGlyphosphate – various brandsFusilade DXPoastKarmex, Direx, Diuron2-4D AmineDevrinolLoroxGramoxone, Firestone, ParazoneBanvelClethodim SelectSandea
Harvest Information: Under good growing conditions, a brief harvest period of 3 to 4 weeks (8 spears/crown) is possible the first year after planting the crowns and a 6-week harvest period in the second year. In succeeding years, the harvest season can be extended to 6 to 8 weeks. Stop harvesting anytime that more than 40 percent of the spears are smaller than a pencil (three-eighths inch in diameter). Asparagus spears emerge in 3 to 4 flushes during the cutting season. Harvest will be from late February to late April. Approximately two-thirds of the production will be harvested during the first half of the harvest season. Spears are snapped when they are 6 to 10 inches tall. Always harvest spears when the heads are tight before the tips start to “fern out.” Snapping is faster and less expensive than cutting spears below the soil surface. Daily harvests are necessary during warm weather, and a harvest sequence of two or three times per week is used in cool weather. Two to four worker-hours/A for each picking are required to harvest an acre. Regular irrigation during the cutting period will enhance harvest. Good yields are 2,000-2,500 lb/A.
Post-harvest Handling: Asparagus loses quality rapidly once it is harvested. Protect harvested spears from the sun and move to cold storage. Remove field heat by hydrocooling or forced-air cooling. Asparagus can be stored for 2 to 3 weeks at 32 to 36 degrees F and 95 percent relative humidity. Asparagus should be washed. All spears that are crooked or that have open heads, broken tips or damage should be discarded. USDA grades for asparagus are U.S.
No. 1 (stalk diameter not less than ½ inch) and U.S. No. 2 (stalk diameter not less than 5/16 inch). There is no minimum stalk length specified in the grades. Stalk length in each container should be uniform. Stalk length may be stated in connection with the grade as U.S. No. 1 at a 8½ inch minimum. Grades also differ in color. Asparagus is packed in 15-, 16½ - and 30-lb wooden pyramid containers. For maximum shelf life, stand asparagus butt end down in 1 inch of water in cold storage.
Special Cultural Information: Elimination of troublesome perennial weeds on the site before planting is necessary for a successful asparagus planting. Compost and/or animal manures should be applied to the site before planting to increase the organic matter content of the soil. Several cover crops should be grown on the site before planting. Good soil preparation is essential to be successful in establishing an asparagus planting. Transplants can be used to establish plantings. The production of transplants involves a considerable amount of time and effort. The objective during the first two years after planting asparagus is to develop maximum fern growth to build an extensive storage root system. Information on the commercial production of asparagus in Louisiana is limited. Yield depends on the amount of food materials stored in the root system from the previous season’s fern growth. Harvesting asparagus for too long a period weakens the plant and reduces the time available for fern growth.
References:• Curwen, D. and others. 1989. Commercial Vegetable
Production in Wisconsin. University of Wisconsin Extension Bull. No. A3422.
• McCraw, D. and J.E. Motes. 1989. Fertilizing Commercial Vegetables. OSU Extension Facts No. 6000. Oklahoma State Cooperative Extension Service.
• J.E. Motes and D. McCraw. 1989. Weed Control in Vegetables. OSU Extension Facts. No. 6008. Oklahoma State Cooperative Extension Service.
• J.E. Motes. 1989. Personal Communications. • Sandsted, R.F., D.A. Wilcox, T.A. Zittes and A.A. Muka.
Asparagus Info. Bull. 202. A Cornell Cooperative Extension Publication.
7
BeetsBotanical Family: Chenopodiaceae (Goosefoot Family)
Number of Seeds/Pound: 24,000-26,000 (1,600/ounce)
Seeding Rate/Acre: 10-15 pounds: Seeding rate will depend on row size and number of drills per row.
Spacing: 2 to 3 inches apart, (4-6 plants per foot). Beets are generally planted thickly (12-18 seeds per foot) and thinned. Precision seeding helps to get the correct spacing. Correctly spaced beets will reach marketable size sooner than closely spaced beets.
Planting Arrangement: Beets should be grown on double-drill (spaced 10-12 inches apart) to obtain high yields. The use of a scatter shoe on a planter will help to space out the seed. Planting Dates: •Fall Crop — Plant late August-early October for
harvest in late November to January •Spring Crop — Plant in November-early January for
harvest in late February to April
Optimum Soil Temperature Range for Germination: 50 to 85 degrees F
Depth to Plant Seed: ½ to ¾ inch
Time to germinate: 7-14 days
Time from Planting to Harvest Begin: 70-90 days
Recommended Varieties:
Hybrid Open pollinatedChariot Centurion SoloRed AceScarlet Supreme
Detroit Dark Red Ruby Queen
Recommend Soil pH & Fertilization: pH 6.0-7.0, Ca 1500 -2000 ppm, Mg 100-300 ppm. Apply 30 to 50 lb of nitrogen preplant and 90 to 150 lb of phosphorus and potassium. Sidedress with 30 to 50 lb of nitrogen/A 3 to 4 weeks after planting when the plants are 4 to 6 inches tall.
Example: Apply 350-400 lb of 8-24-24/A preplant. Sidedress with 150 lb of 34-0-0/A 3 to 4 weeks after planting when the plants are 4 to 6 inches tall.
Beets are heavy users of boron. Boron deficiency can occur on soils with either low pH or extremely high pH soils or on soils recently limed. Boron deficiency beets
have a large water-soaked brown area near the center of the root. The plants are stunted and dwarf with smaller than normal variegated leaves (yellow to purplish-red blotches). Boron can be applied as a foliar spray by using Solubor (1-1½ pound per 100 gal) or Borax (2 to 5 lb per 100 gal). Make 2 or 3 applications 7 to 10 days apart starting 2 to 3 weeks after planting.
Common Problems: Beets planted in cool weather take a long time to reach marketable size. Failure to get early stands because of high temperatures. Planting too thickly. Pointed, misshapen roots due to dry weather. Sources of good-quality seed. Stress will cause white rings in beets. Downy Mildew, Damping off, Alternaria and Cercospora. Worms, Mole Crickets, Vegetable Weevil, Cutworms, Wireworms, Web Worms, Cucumber Beetles, Flea Beetle, Aphids and Leafminers.
Weed Control
Recommended Herbicides:
Preemergence PostemergenceRo NeetPyramin
PoastSelect, Arrow, ClethodimGlyphosate – various brands, row middles, hooded sprayer Aim – row middles, hooded sprayer Stinger Spin-aid
Harvest Information: Beets are hand-pulled once they reach 1½ inches in diameter. Beets are sold in the local market by the bunch, with 4 to 8 beets in a bunch. For the shipping market, beets can be packed 12-24 bunches in a wooden wire bound box or carton and top iced. Beets roots can be topped and trimmed and packed in 25 or 50 lb plastic bags. A single-drill field should produce 500 to 600 dozen bunches per acre, and a double-drilled precision-seeded field will produce 600 to 700 dozen bunches. Beets can be harvested from a planting for 4 or 5 weeks.
Post-Harvest Handling — Beets with tops can be kept for 10 to 14 days at 32 degrees F for and 90 to 95 percent relatively humidity. Commonly shipped with top ice to maintain freshness. Topped beet roots can be stored for 4 to 6 months at 32 degrees. USDA grades for bunched beets are U.S. No 1 and U.S. No 2 grade. The grade is based on external appearance. Minimum diameter for beet roots is 1½ inch. At least 3 beets of uniform size make a bunch, and a bunch must weight at least 1 lb. The tops are full length or not less than 6 inches tall.
8
Special Cultural Information: Louisiana vegetable growers produce beets for local retail sales at farmers markets and roadside stands in the fall, winter and spring. Growers make several small plantings of beets at different times from late August to early January. This provides a consistent supply of beets for sale from late November through April.
One of the main problems is sowing the seed too thickly. This can be overcome by the use of a precision planter set to obtain the desired spacing. The use of a scatter shoe on conventional planters will also help to obtain the desired spacing. Keeping the seed in a freezer until right before planting will enhance germination.
Beans, Butter (lima beans)Botanical Family: Fabaceae (Pea Family)
Number of Seeds/Pound: 1,120 (70/ounce)
Seeding Rate/Acre: 40 to 60 lb depending on row spacing and seed size.
Spacing: • Bush beans hand harvest — 3 to 6 inches or 2 to 4
plants/foot• Bush beans machine harvest — 1½ to 2 inches or 6
to 8 plants/foot• Pole butter beans — 6 to 12 inches; 4 to 5 plants per
hill
Planting Dates: Begin after danger of frost is over and soil temperatures are above 65 degrees F for several days. Plantings can be made throughout the spring and summer until about mid-August. Yields may be low during summer plantings because high temperature and drought stress interfere with pollination and fruit. South Louisiana: mid March-early August North Louisiana: early April-late August
Optimum Soil Temperature Range for Germination: 65 to 85 degrees F
Depth to Plant Seed: 1 to 2 inches
Time to Germinate: 7 to 14 days
Time from Planting to Harvest Begins: 65 to 75 days depending on variety and the time of planting.
Approximate Time from Pollination to Market: 10 to 14 days
Recommended Varieties:
Bush VarietiesHenderson’s Bush (white seed)Early Thorogreen, Cangreen (green seed)Nemagreen (green seed; nematode resistant)Jackson Wonder (speckled seed; more susceptible
diseases)Bridgeton (green seed)
Pole VarietiesFlorida Speckled (speckled seed)Christmas Pole (speckled seed)King of the GardenWillow Leaf
Recommended Soil pH & Fertilization: pH 5.8 to 6.5, Ca = 1,000 to 1,500 ppm, Mg = 150 to 130 ppm. Preplant apply 30 lb/A nitrogen, 60 to 120 lb/A phosphorous and potassium. Overfertilization with nitrogen is possible, especially on the more fertile soils with high organic matter.
Example: 300 to 400 lb 8-24-24/A
Common Problems: Stink bugs, thrips, aphids, seedling diseases, foliage diseases, pod diseases, anthracnose, cucumber beetles, mites, leafhoppers, Mexican bean beetle, armyworms, whiteflies, overheating after harvest if not cooled, nematodes on sandy soils, inadequate harvest labor. Low yields of summer plantings caused by reduced pod set from high temperatures and drought stress. Lower yields in machine-picked butter beans. Rough handling of seed greatly reduces germination.
Recommended Herbicides:
Preemergence PostemergenceTrifluralin – various brandsDual, StalwartLasso, PartnerProwl, Pendimax, PentagonSandeaPursuitCommand
Basagran (early postemergence) SandeaGlyphosphate – various brands – hooded sprayerAim – hooded sprayer
9
Harvest Information: Butter beans are packed in mesh sacks, bushel hampers, wire-bound bushel crates and 1-1/9 bushel cardboard cartons. A bushel weighs from 32 to 35 lb. Mechanical harvesters available for lima beans. Crop will have to be hand harvested about 2 to 4 times. Approximately 100 to 200 worker-hours required to hand harvest an acre of butter beans. It requires 1 to 1½ hours to pick a bushel of butter beans. A good yield is 100 to 150 bushels/A hand-harvested and 50 to 75 bushels/A if machine-harvested. Jackson Wonder (speckled bean) will yield approximately one-third more machine-harvested than green- or white-seeded varieties.
Postharvest Handling: Butter beans require removal of field heat soon after harvest by forced air cooling or hydrocooling. Stored at 32 to 40 degrees F and 90 percent relative humidity. Stack butter beans in cooler to allow for air circulation. USDA grades of butter beans are U.S. No. 1 and U.S. No. 2. Grades are primarily based on external appearance. A U.S. combination grade is made up of a mixture of U.S. No. 1 and U.S. No. 2.
Special Cultural Information: Lima beans are excellent crops for the local market. Mechanical pea shellers will encourage sales. Allowing the beans to set out overnight to dry down will increase the shellout percentage. Justification of mechanical harvester can be spread over a spring and fall snap bean, butter beans and southern peas crop. Determine type of bean buyers want before planting (white seeds, green seeds or speckled). Growers are encouraged to check with local seed stores for preferred varieties in the area. Pole butter beans generally bring a premium price in local markets. They also offer the advantage of an extended harvest season. To reduce the labor cost in staking, a wire can be stretched 5 to 6 feet above the ground down the center of every other row. Poles or a trellis material can then be laid from the rows on either side of the wire. Pole butter beans can also be planted next to a fence. Butter beans are subject to fertilizer burn. Fertilizer should be placed in a band well below the seed (4 to 6 inches) and to the side of the drill (3 to 4 inches) or broadcast before planting.
Beans, SnapBotanical Family: Fabaceae (Pea Family)
Number of Seeds/Pound: 1,600 (100/ounce)
Seeding Rate/Acre: Bush beans 40 to 90 lb depending on variety and row spacing. Pole beans 20 to 30 lb/A.
Spacing: • Bush beans hand harvest — 2 to 3 inches, 4 to 6
plants/foot.• Bush beans mechanical harvest — 1 to 2 inches, 8 to
10 plants/foot.• Pole beans — 6 to 12 inches; 4 to 5 plants per hill.
Planting Dates: First planting in spring made about the time of the last average frost date. Fall plantings should begin about mid-August and extend through early September. • South Louisiana Spring Crop: early March to late May Fall Crop: mid-August to mid-September • North Louisiana Spring Crop: late March to mid-May Fall Crop: mid-August to mid-September
Optimum Soil Temperature Range for Germination: 60 to 85 degrees F.
Depth to Plant Seed: ¾ to 1½ inches
Time to Germinate: 7 to 14 days
Time from Planting to Harvest Begins: 50 to 55 days, bush varieties; 60 to 66 days, pole varieties
Approximate Time from Pollination to Market: 7 to 14 days
Recommended Varieties:
Bush Varieties Pole VarietiesBush Blue Lake 274 ProviderStrikeBroncoHialeah
Roma IIFestinaLynxStormAmbra
Blue LakeMcCaslinKentucky WonderRattlesnakeLouisiana Purple Pod
Recommended Soil pH & Fertilization: pH 5.5 to 6.8, Ca= 1,000 to 1,500 ppm, Mg = 150 to 300 ppm. Apply 30 lb/A of nitrogen, 60 to 120 lb/A of phosphorous and potassium preplant. Many growers sidedress hand-picked snap beans before bloom with 30 lb nitrogen per acre. This provides a longer harvest season. Sidedressing should be avoided for machine-picked beans.
Example: 300 to 400 lb 8-24-24/A. Sidedress with 100 lb 34-0-0/A or 100 to 200 lb of CaNO3/A 2 to 3 weeks after emergence.
10
Common Problems: Several leaf and pod diseases (rusts, white mold, aerial blight), seedling diseases (root rots), leaf miners, bean beetle, mites, thrips, aphids, cucumber beetle, Mexican bean beetle, whiteflies, worms and stink bugs. Fruit set during hot weather. Plantings made in late May and June will be blooming while temperatures are too hot for good pollination and good fruit set. Several diseases can be carried over on the seed that is saved by growers. Snap bean pods set during hot weather will be very fibrous.
Recommended Herbicides:
Preemergence PostemergenceTrifluralin – various
brandsDual, StalwartProwl, Pendimax,
PentagonCommandPursuit
BasagranPoastReflexSandeaPursuitAim – row middles, hooded
sprayerGlyphosphate – various brands, hooded sprayer
Harvest Information: Beans are packed in 28- to 30-lb cardboard bushel boxes, wire-bound crates or 1-1/9 bushel hampers. Good Yield – 150 to 250 bushels. Bush beans are hand harvested, 2 to 3 times; 100 to 150 worker-hours required to harvest an acre of snap beans. Mechanical harvesters available for both fresh and processing beans. Pole beans are hand harvested on a 5- to 7-day schedule, 7 to 10 times.
Postharvest Handling: Beans should be cooled by forced air or hydrocooling soon after harvest. Store at 40 to 45 degrees F and 90 to 95 percent relative humidity and in an area with good air circulation; will keep for 7 to 10 days. Good-quality snap beans should have long, straight pods, be well-colored and free from blemishes or decay. Beans should snap easily when bent. The USDA grades of beans are U.S. Fancy, U.S. No. 1, U.S. Combination and U.S. No. 2. Differences between grades are based primarily on external appearance.
Special Cultural Information: Snap beans can be grown for the local fresh market, shipping market and processing. Justification of mechanical harvester can be spread over a spring and fall snap bean, butter beans and southern peas crop. Higher plant populations (8 to 10 beans/foot) will help to increase yields on mechanical harvest beans. Snap beans are generally sidedressed in the southern part of the state and not sidedressed in other areas. Varieties differ in their response to nitrogen sidedressing. Pole beans generally bring a premium price in local markets. They also offer the advantage of an extended harvest season. To reduce the labor cost in staking, a wire can be stretched 5 to 6 feet above the ground down the center of every other row. Poles or a trellis material can then be laid from the rows on either side of the wire. Pole beans can also be planted next to a fence. Beans are highly subject to fertilizer burn. Fertilizer should be placed in a band well below the seed (4 to 6 inches) and to the side of the drill (3 to 4 inches) or broadcast before bedding.
BroccoliBotanical Family: Brassicaeae (Mustard Family)
Number of Seeds/pound: 144,000 (9,000/ounce)
Seeding Rate/Acre: • 1 to 2 lb, 150,000 to 300,000 seeds/A direct-seeded
and thinned • ¾ to 1½ lb precision-seeded • 8,000 to 10,000 seeds/A – single-drill transplants• 16, 000 – 20,000 seeds/A – double-drill transplants• 2 ounces seeds/10,000 transplants
Spacing: 9 to 18 inches Broccoli should be double-drilled (10 to 12 inches apart) for higher yields. Head size controlled by spacing, 6- to 9-inch spacing will make heads 3 to 4 inches in diameter, and 12 to 18 inches will make heads 8 to 12+ inches in diameter.
Planting Dates:Fall Production – to mature in mid-October to December
• Direct-Seed – mid-July to mid-September• Transplant – August to early September
Spring Production – to mature March to early June• Direct-Seed – November to December• Transplant – January to February
Attention needs to be given to variety selection for the spring crop. Recommended spring varieties will produce good solid heads in warm weather. Plantings made from mid-September to January run the risk of being damaged by hard freezes.
11
Transplants: To produce bare-rooted broccoli transplants for the fall, growers will generally sow the seed thickly in the field. Plants are then pulled and transplanted to the field. It generally requires 5 to 6 weeks to produce transplants from seed. Broccoli transplants are generally grown in hot beds or greenhouses for late winter and early spring transplanting. It requires 20 to 30 worker-hours to transplant an acre.
Optimum Soil Temperature Range for Germination: 45 to 95 degrees F
Depth to Plant Seed: ¼ to 1 inch
Time to Germinate: 7 to 14 days
Time from Planting to Harvest Begins: • 60 to 80 days for transplants • 70 to 90 days for direct-seeding
Recommended Varieties:
Fall and Early Winter ProductionPackman, Everest, Gypsy – earlyPremium Crop – medium-lateArcadia, Diplomat, Patriot – lateGreen Magic, Patron – medium
Spring ProductionPackman – early
Recommended Soil pH & Fertilization: pH 6.0 to 6.8, Ca = 1,500 to 2,000 ppm, Mg = 150 to 300 ppm. Apply 40 to 50 lb of nitrogen and 120 to 150 lb of phosphorous and potassium preplant. On double-drills, each drill should have its own band of fertilizer placed 3 to 4 inches below and 2 to 3 inches to side of each drill or broadcast before bedding. Sidedress broccoli three times with 40 to 50 lb of nitrogen per acre. Apply the first sidedressing 3 to 4 weeks after planting or when largest leaves are 2 to 4 inches across, the second 7 to 10 days after the first and the third 7 to 10 days after the second.
Example: 500 to 600 lb of 8-24-24/A plus sidedress with 120 to 150 lb of 34-0-0/A three times.
Broccoli is a heavy user of boron. Boron-deficient broccoli usually has a hollow stem and a dark discoloration on florets. Boron deficiency can occur on soils with low pH, extremely high pH or on soils recently limed. Boron can be applied as a foliar spray by using Solubor (1 to 1½ lb/100 gal) or Borax (2 to 5 lb/100 gal). Make two or three applications 7 to 10 days apart starting 3 to 4 weeks after planting.
Common Problems: Bacterial soft rot on mature heads readily occurs during rainy weather and during warm weather and heavy dews. Diamondback moth, loopers, aphids and ants. Rotate classes of insecticides to avoid the development of resistance to insecticides by the
diamondback moth. Brown bud is a physiological disorder frequently seen when temperatures are high. Sensitive to low soil pH. Boron and molybdenum deficiency. Failure to precool properly. Availability and cost of ice for packing.
Recommended Herbicides:
Preemergence PostemergenceTrifluralin – various brands (direct seed and transplant)Goal (transplant)
PoastSelect, Arrow, ClethodimAim – row middles, hooded sprayerGlyphosphate – various brands, Hooded sprayer
Harvest Information: The market determines the size of heads to harvest. The fresh market wants a 3- to 4-inch diameter head that weighs 1/3 to 1/4 lb with a 6- to 7-inch stem. The heads are bunched 2 to 4 heads to a bundle with a wide rubber band or twist tie. The use of a mechanical broccoli buncher will speed the banding and trimming process. Local markets want large heads 8 to 12 inches in diameter that weigh 1 to 2 lb with an 8- to 10-inch stem. Good yields are 300 to 400 boxes per acre. Processing requires a 4- to 8-inch diameter head with a 6-inch stem. Good yields are 8,000 to 10,000 lb/A. Broccoli is generally harvested 2 to 4 times, with most of the yield coming in the second harvest. Generally 25 to 30 worker-hours are required to harvest an acre of broccoli. The use of a harvest aid increases the efficiency of harvesting broccoli. Eight to 10 worker-hours are required to pack 300 boxes of broccoli.
Postharvest Handling: Broccoli should be hydrocooled as soon as possible after harvest and iced when boxed. Storage life is 10 to 14 days at temperatures of 32 to 34 degrees F at 90 to 95 percent relative humidity. Fresh market broccoli is packed 14 to 18 bunches in a double-waxed cardboard carton with a weight of 20 to 23 lb. Broccoli florets are packed in a 9 to 12-lb cardboard box holding three to four plastic mesh bags. Precut spears are loosely packed in 20-lb cardboard boxes. Good-quality broccoli should have a fresh, light green slender stalk no longer than 6 to 7 inches and of consistent thickness. Bud clusters should be compact and dark green. USDA grades of broccoli are: U.S. Fancy – stalk diameter not less than 2½ inches and 6 to 8½ inches long; U.S. No. 1 and U.S. No. 2. Grades are based primarily on external appearance. Diameter of heads and length of shoots may be specified in connection with grade.
Special Cultural Information: High plant populations, proper fertilization and irrigation are critical to obtain high yields. Timely applications of proper insecticides are necessary for insect control. Sprayers need to be calibrated to provide 50 to 100 gallons of water per acre at 60+ psi. Each row needs three hollow cane nozzles arranged to spray the underside of the foliage. Spray water pH needs to be adjusted to the 6.0 to 7.0 level for adequate pesticide tank life.
12
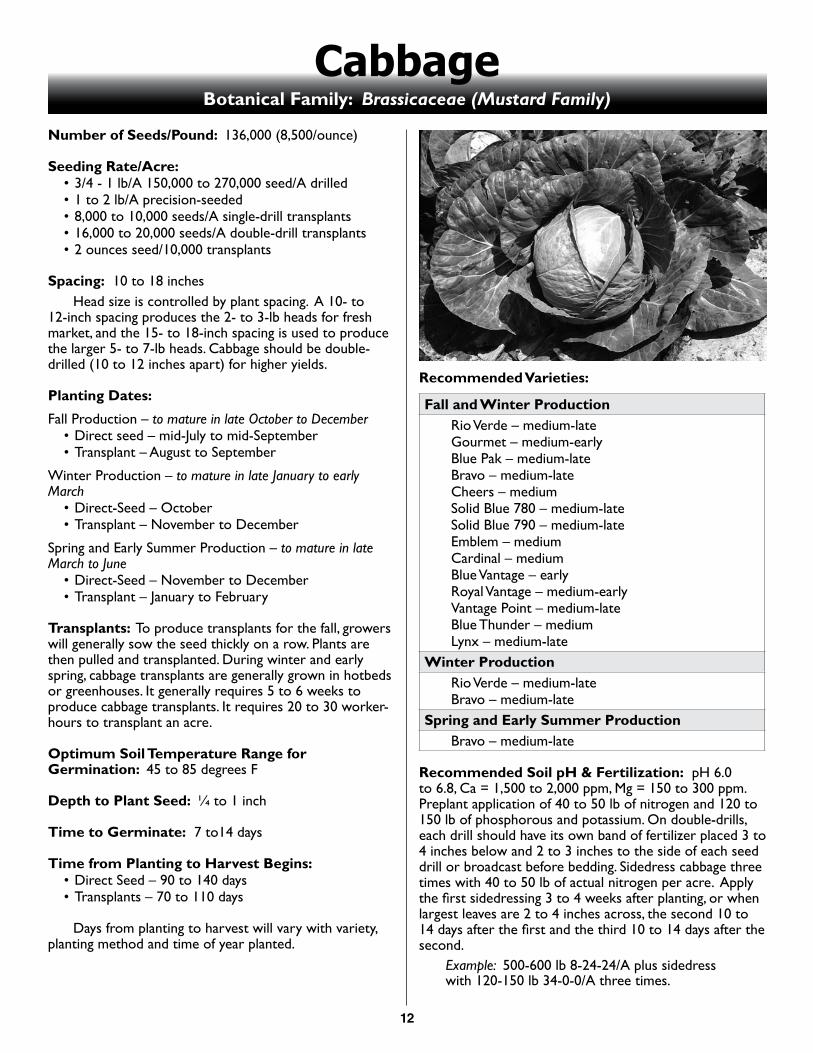
CabbageBotanical Family: Brassicaceae (Mustard Family)
Number of Seeds/Pound: 136,000 (8,500/ounce)
Seeding Rate/Acre: • 3/4 - 1 lb/A 150,000 to 270,000 seed/A drilled• 1 to 2 lb/A precision-seeded• 8,000 to 10,000 seeds/A single-drill transplants• 16,000 to 20,000 seeds/A double-drill transplants• 2 ounces seed/10,000 transplants
Spacing: 10 to 18 inches Head size is controlled by plant spacing. A 10- to 12-inch spacing produces the 2- to 3-lb heads for fresh market, and the 15- to 18-inch spacing is used to produce the larger 5- to 7-lb heads. Cabbage should be double-drilled (10 to 12 inches apart) for higher yields.
Planting Dates:
Fall Production – to mature in late October to December• Direct seed – mid-July to mid-September• Transplant – August to September
Winter Production – to mature in late January to early March
• Direct-Seed – October • Transplant – November to December
Spring and Early Summer Production – to mature in late March to June
• Direct-Seed – November to December• Transplant – January to February
Transplants: To produce transplants for the fall, growers will generally sow the seed thickly on a row. Plants are then pulled and transplanted. During winter and early spring, cabbage transplants are generally grown in hotbeds or greenhouses. It generally requires 5 to 6 weeks to produce cabbage transplants. It requires 20 to 30 worker-hours to transplant an acre.
Optimum Soil Temperature Range for Germination: 45 to 85 degrees F
Depth to Plant Seed: ¼ to 1 inch
Time to Germinate: 7 to14 days
Time from Planting to Harvest Begins:• Direct Seed – 90 to 140 days• Transplants – 70 to 110 days
Days from planting to harvest will vary with variety, planting method and time of year planted.
Recommended Varieties:
Fall and Winter Production Rio Verde – medium-late Gourmet – medium-early Blue Pak – medium-late Bravo – medium-late Cheers – medium Solid Blue 780 – medium-late Solid Blue 790 – medium-late Emblem – medium Cardinal – medium Blue Vantage – early Royal Vantage – medium-early Vantage Point – medium-late Blue Thunder – medium Lynx – medium-late
Winter Production Rio Verde – medium-late Bravo – medium-late
Spring and Early Summer Production Bravo – medium-late
Recommended Soil pH & Fertilization: pH 6.0 to 6.8, Ca = 1,500 to 2,000 ppm, Mg = 150 to 300 ppm. Preplant application of 40 to 50 lb of nitrogen and 120 to 150 lb of phosphorous and potassium. On double-drills, each drill should have its own band of fertilizer placed 3 to 4 inches below and 2 to 3 inches to the side of each seed drill or broadcast before bedding. Sidedress cabbage three times with 40 to 50 lb of actual nitrogen per acre. Apply the first sidedressing 3 to 4 weeks after planting, or when largest leaves are 2 to 4 inches across, the second 10 to 14 days after the first and the third 10 to 14 days after the second.
Example: 500-600 lb 8-24-24/A plus sidedress with 120-150 lb 34-0-0/A three times.
13
Red cabbage varieties require higher nitrogen rates to obtain the required head size and weight. Increase nitrogen to 50 to 60 lb per sidedressing (150 to 180 lb 34-0-0/A). A fourth sidedressing 10 to 14 days after the third is also recommended.
Common Problems: Alternaria Leaf Spot, black rot, downy mildew, seedling rots, tip burn (calcium deficiency), ants, mole crickets, cucumber beetle, diamondback moth, cabbage looper, aphids, low soil pH, hard freezes, bolting. Rotate classes of insecticides to avoid the development of resistance to insecticides by the diamond back moth. Variable planting depth. Failure to obtain stands from direct seeding in hot weather. Low yields caused by low plant populations. High cost of stand establishment caused by use of transplanting.
Recommended Herbicides:
Preemergence PostemergenceTrifluralin – various
brands (direct seed or pretransplant)
Goal (pretransplant)Command (direct seed
or pretransplant)
PoastSelect, Arrow, ClethodimStinger Aim – row middles, hooded
sprayerGlyphosate – various brands
Harvest Information: Harvest cabbage when the heads are firm. A mature head will not yield when pressed with the thumb. The edge of the top leaf on a mature head will curl back slightly. Growers generally wait until a few heads
crack before harvesting. A field is normally harvested two to four times. Many hybrids will mature fully uniformly with 60 to 75 percent of heads ready to harvest at one time. It generally requires 25 to 50 worker-hours to harvest an acre of cabbage. Good yields 500 to 800 sacks/A, 20,000 to 40,000 lb/A. Cabbage is packed in 50-lb mesh sacks or cardboard boxes. Packing labor is 10 to 20 hours per acre. The fresh market requires a 2- to 3-lb head with count of 18 to 24 heads per sack.
Postharvest Handling: Good-quality cabbage should be firm, well-formed, fairly smooth with even-colored, compact leaves. Cabbage should be stored at 32 degrees F and at 90 to 95 percent humidity. USDA grades of cabbage are U.S. No. 1 and U.S. Commercial. Grades are based on external appearance. Size may be specified in the grade: small – less than 2 lb/head; medium – 2½ to 3 lb; large – more than 3 lb.
Special Cultural Information: High plant population, proper fertilization and irrigation are critical to obtain high yields. Timely applications of the proper insecticides are necessary for insect control. To prevent black rot problems, grow black rot-resistant varieties and use black rot-free seed and plants. Sprayers need to be calibrated to provide 50-100 gallons of water per acre at 60+ psi of pressure. Each row of cabbage needs three hollow cane nozzles arranged to spray the underside of foliage. Spray water pH needs to be adjusted to the 6.0 to 7.0 level for adequate pesticide tank life.
Cabbage, ChineseBotanical Family: Brassicaceae (Mustard Family)
Approximate Number of Seeds/Pound: 152,000 (9,500/ounce)
Seeding Rate/Acre: • 1 to 2 lb/A – direct-seeded; 150,000 to 300,000
seeds/A• 1 lb/A – precision-seeded• 2 oz seed/10,000 transplants• 8,000 to 10,000 seeds/A single-drill transplant• 16,000 to 20,000 seeds/A double-drill transplants
Spacing: 12-15 inches Spacing on the row will control head size. Chinese cabbage should be double-drilled to increase yields.
Planting Dates:• Fall Production: mid-August to mid-October• Spring Production: mid-January to February
Optimum Soil Temperature Range for Germination: 45-85 degrees F
Depth to Plant Seed: ¼ - ½ inch
Time to Germinate: 2-6 days
Time from Planting to Harvest Begins:• Transplants – 50-60 days• Direct-Seeded – 70-80 days
Recommended Varieties:• Napa or Wong bok types – barrel-shaped head,
typically short and broad.• China Express• China Pride• Michihli types – long, tapering heads• Michihli• Michihli Jade Pagoda• Monument Hybrid• Pak Choi – Nonheading form of Chinese cabbage
with thick, white leaf stalks and smooth, dark green round leaf blades.
• Joi Choi• Mei Qing Choi
14
Recommended Soil pH & Fertilization: pH 5.6 to 6.8, Ca = 1,000 to 2,000 ppm, Mg = 100 to 200 ppm. Preplant fertilizer - apply 30 to 50 lb of nitrogen and 90 to 150 lb of phosphorous and potassium per acre 7 to 10 days before planting.
Example: 400 to 500 lb of 8-24-24/A.
Sidedress with 30 to 50 lb of nitrogen per acre 3 to 4 weeks after planting. Two additional sidedressings 7 to 10 days apart are beneficial in obtaining high yields.
Example: 100 to 150 lb of 34-0-0/A
Common Problems: Chinese cabbage is sensitive to acid soils. Bolting will occur if plants are exposed to prolonged periods of 40 degrees F or long days (15-hour days for a month). Bolting depends on the variety and season. Chinese cabbage is easily damaged by temperatures below 30 degrees F. Diamondback moth, loopers, aphids, yellow margined leaf beetle. Rotate classes of insecticides to avoid the development of resistance to insecticides by the diamondback moth. Downy mildew, powdery mildew, bacterial soft rot, alternaria leaf spot. Pepper spot is a physiological disorder. It appears as small, dark circular spots on the white midribs of the leaves. The cause and cure of pepper spot are unknown. The symptoms are aggravated by storage.
Recommended Herbicides:
PreemergenceDacthal
PostemergencePoastSelect, Arrow, ClethodimGlyphosphate – various brands- hooded sprayer, row
middles
Harvest Information: Chinese cabbage is ready to harvest when the heads are fully developed and firm. Chinese cabbage is harvested by cutting the heads near the soil line. Leave several (three to five) outer leaves or wrapper leaves to provide protection during shipping. Chinese cabbage is packed in 1-1/9 bushel crates weighing 50 to 53 lb. Several other types of wire-bound crates or cartons are also used. Pack Chinese cabbage in an upright position to prevent misshaping. Good yields – 500 to 700 boxes/A.
Postharvest Handling: Store Chinese cabbage at 34 to 36 degrees F with high relative humidity (95 to 100 percent). Storage life is 1 to 2 months.
Special Cultural Information: There is a market preference for Napa or Michihli types depending on ethnic origin. Check with potential buyers for preferences. Sprayers need to be calibrated to provide 50 to 100 gallons of water per acre at 60+ psi. Each row needs three hollow cane nozzles arranged to spray the underside the foliage. Spray water pH needs to be adjusted to the 5.5 to 6.5 level for adequate pesticide tank life.
References: • Vavrina, C.S. 1989. Specialty Crops: Chinese Cabbage
and Related Oriental Crops. Coop. Extension Service, Univ. of Ga. Coll. of Ag. Cir. 809.
Cantaloupes and HoneydewsBotanical Family: Cucurbitaceae (Gourd Family)
Approximate Number of Seeds/Pound: 18,000 to 19,200 (1,100 to 1,200/ounce)
Seeding Rate/Acre: Varies with row width and planting arrangement.
• 1 to 2 lb/A 18,000 to 37,000 seeds/A – conventional-seeded
• 1 lb/A – precision-seeded 40-inch rows 1:1 skip-row 12- to 18-inch spacing
• 5,000 to 7,000 seeds/A transplants; 1 lb seed/10,000 transplants
Precision-seeding or transplants of hybrids is recommended because of high cost of seed.
Spacing: • 8-12 inches if irrigated• 24 inches if not irrigated
Planting Arrangement: On rows wider than 40 inches, generally every row is planted. A 1:1 skip-row planting arrangement (every other row is planted) seems to be the most successful row arrangement for 40-inch rows. The skip-row is worked to the planted row to form an 80-inch bed when the vines begin to run. Plastic mulch on wide rows are necessary to prevent fruit from sitting in water during ripening.
15
Planting Dates: Plant after danger of frost is over.• South Louisiana – mid-March to early August• North Louisiana – late March to July
A planting interval of 2 to 3 weeks will help to maintain a consistent supply for marketing.
Transplants: Transplants are often used for cantaloupes because of the high cost of hybrid seed. Using transplants also enhances earliness. Start transplants no more than 3 to 4 weeks before the anticipated planting dates. When transplants are grown for more than 4 weeks in the greenhouse, they tend to become stunted, hard to handle and may fail to recover from transplanting. Use a 1-inch plastic cell pack container to produce cantaloupe transplants.
Optimum Soil Temperature Range for Germination: 75 to 95 degrees F
Depth to Plant Seed: ½ to 1 inch
Time to Germinate: 5 to 7 days
Time from Planting to Harvest Begins: Varies with varieties and time of planting, 60 to 90 days.
Approximate Time from Pollination to Market: 30 to 45 days
Recommended Varieties:
CantaloupesWestern Eastern
Primo (79 days)Super 45 (80 days)Cimarron (81 days)
Ambrosia (88 days)Athena (80 days)Aphrodite (72 days)
HoneydewsEarli-Dew (85 days)
Plastic Mulch: Plastic mulch and drip irrigation are especially beneficial when growing cantaloupes. The mulch reduces the amount of fruit rots. It also controls weeds and increases the soil temperatures, promoting early fruit production. The correct use of drip irrigation will help produce high yields of good-quality cantaloupes. White plastic should be used instead of black plastic when planting after May 1. The white plastic is cooler. Black plastic is often sprayed with 1:2 or 1:3 mixtures of white latex paint and water. Cantaloupes can be grown in a field with plastic mulch and drip irrigation left from another crop.
Drip Irrigation: The correct use of drip irrigation provides an ideal soil moisture level for plant growth. The irrigation interval depends on the rate of water evaporation, temperature, the stage of plant development and the flow rate of the drip tube. The irrigation interval starts out short and increases as the plant develops and the temperature increases.
The demand for water is greatest during the fruit setting and fruit sizing stage. It is important for the soil to be at the ideal soil moisture level during this time to obtain high yields of high-quality fruit. Growers who are using drip irrigation for the first time are encouraged to water by a set schedule. Within time, the growers will be able to fine-tune the irrigation schedule to their fields. Growers must check their fields every 2 or 3 days to determine if the time intervals for irrigation need to be increased or decreased. The soil in the root zone (6 to 8 inches deep) should be moist and form a loose ball when squeezed in the hand. The soil should never be saturated. Water should not run out from under the plastic into the middle of the row.
Fertigation: Sidedressing can also be done by injecting the fertilizer through the drip lines by using an injection device. This method is known as fertigation. Generally, growers apply some of the nitrogen fertilizer preplant (20 to 30 lb of N/A) and inject the sidedressing nitrogen in equal increments from bloom and fruit set (3 to 4 weeks after planting) and continue for 6 to 8 weeks to harvest. The nitrogen fertilizer is injected into the system at a rate of 1 to 1½ lb of N/A per day or 7 to 10½ lb of N/A per week.
Example: 300 to 400 lb of 8-24-24/A preplant. Fertigate at first fruit set (3 to 4 weeks after planting) and continue for 6 to 8 weeks. Inject 40 to 65 lb of CaNO3 or 50 to 80 lb of KNO3 per acre per week. The greenhouse grade of CaNO3 or KNO3 is easier to dissolve and inject.
Recommended Soil pH & Fertilization: pH 5.8 to 7.0, Ca = 1,000 to 2,000 ppm; Mg = 100 to 200 ppm. Preplant application of 30 to 40 lb of nitrogen and 90 to 120 lb of phosphorous and potassium per acre. Sidedress with 30 lb of N when the vines begin to run (2-3 weeks after planting). Some cantaloupe growers sidedress with a complete fertilizer such as 13-13-13 at 300 lb/A. They feel that the extra phosphorous and potassium improve quality.
Example: 400 to 500 lb 8-24-24/A plus sidedress with 100 lb of 34-0-0/A or 300 lb of 13-13-13/A.
16
Pollination Requirements: Bees are required for pollination. You should have one to three strong beehives per acre. Apply all insecticides late in afternoon or early evening after the bees have left the field. Place beehives close to field as cantaloupes begin to bloom.
Common Problems: Downy mildew, powdery mildew, gummy stem blight, fruit rots, bacterial wilt, thrips, squash bugs, cucumber beetles, melon and pickle worms, and mites. A scouting and spraying program to control foliage diseases and insects is essential for successful cantaloupe production. The use of fungicides on a 7- to 10-day schedule will help to minimize losses from diseases. Low quality fruit is caused by many factors. Foliage diseases are the main cause of poor quality fruit. Cloudy weather and high rainfall during maturity will result in a low sugar content of fruit. Extended periods of rainy weather during the harvest will cause fruit to rot. Sunburn is also a common problem where foliage diseases have reduced the foliage. Honeydews require a considerably longer time to mature than cantaloupes. Fungicide applications are important to maintain healthy foliage.
Recommended Herbicides:Preemergence PostemergenceCurbitStrategyCommandSandea
PoastSelect, Arrow, ClethodimLay byTrifluralin - various brandsCurbitAim – Hooded sprayers, row
middlesGlyphosate – various brands –
hooded sprayers, row middles
Harvest Information: For best quality, cantaloupes should be harvested at the ¾- to full-slip stage. Cantaloupes are picked at the ¼-slip and ½-slip stage for commercial shipping. A field of cantaloupes is generally harvested 3 to 4 weeks for local market sales and 2 to 3 weeks for a shipping market. For a shipping market, cantaloupes should be harvested every other day during the first week of harvest and every day during the second week. For local
market sales, an every-other-day harvest schedule is usually sufficient. Generally 50 to 60 worker-hours are required to harvest an acre of cantaloupes, and 30 to 35 worker-hours are required to pack 250 cartons. A yield of 250-300 1/2 crate (carton) per acre is considered a good yield for the shipping market, and 20, 000 to 25,000 lb per acre (5,000 to 6,000 fruit) is a good local market yield. Honeydew melons are harvested when the skin of the melon starts turning yellow and a slight yielding occurs on the blossom end when pressure is applied. The vine does not slip from the fruit as in cantaloupes. Generally, the fruit is cut from the vines. Honeydews are packed in a two-thirds carton, 30 to 34 lb, with counts of 4 to 10; 4 and 6 are the predominant counts.
Postharvest Handling: Field heat should be removed immediately after harvest to prolong shelf life. Hydrocooling or forced-air cooling is used to remove the initial field heat. Cantaloupes should be held at 38 to 40 degrees F with 80 to 90 percent relative humidity. When harvested at the ¾- to full-slip stage, cantaloupes can be held 15 days in the proper storage conditions. Cantaloupes generate ethylene gas. They should be isolated from leafy vegetables and dairy products. Cantaloupe odor will penetrate other foods and will absorb other refrigerator odors. Cantaloupes should be stored away from other foods whenever possible. Cantaloupes are packed in a 38 to 42-lb 1/2 crate (carton) with counts of 9, 12, 15, 18 and 23. Cantaloupes are also packed in 1,000 pound bins by count. Fifteen and 18 counts are the most common. Grades of cantaloupes are U.S. Fancy, U.S. No. 1, U.S. Commercial and U.S. No. 2. The differences between grades are based primarily on external appearance.
Special Cultural Information: It is important to apply pesticides with sufficient water for good coverage. At full vine growth 75 to 100 gal/A are required, and 20 to 40 gal/A are sufficient from seeding to lay by. The use of plastic mulch, transplants, drip irrigation and row covers may help to increase earliness and increase yield. Irrigation is also a must for successful production.
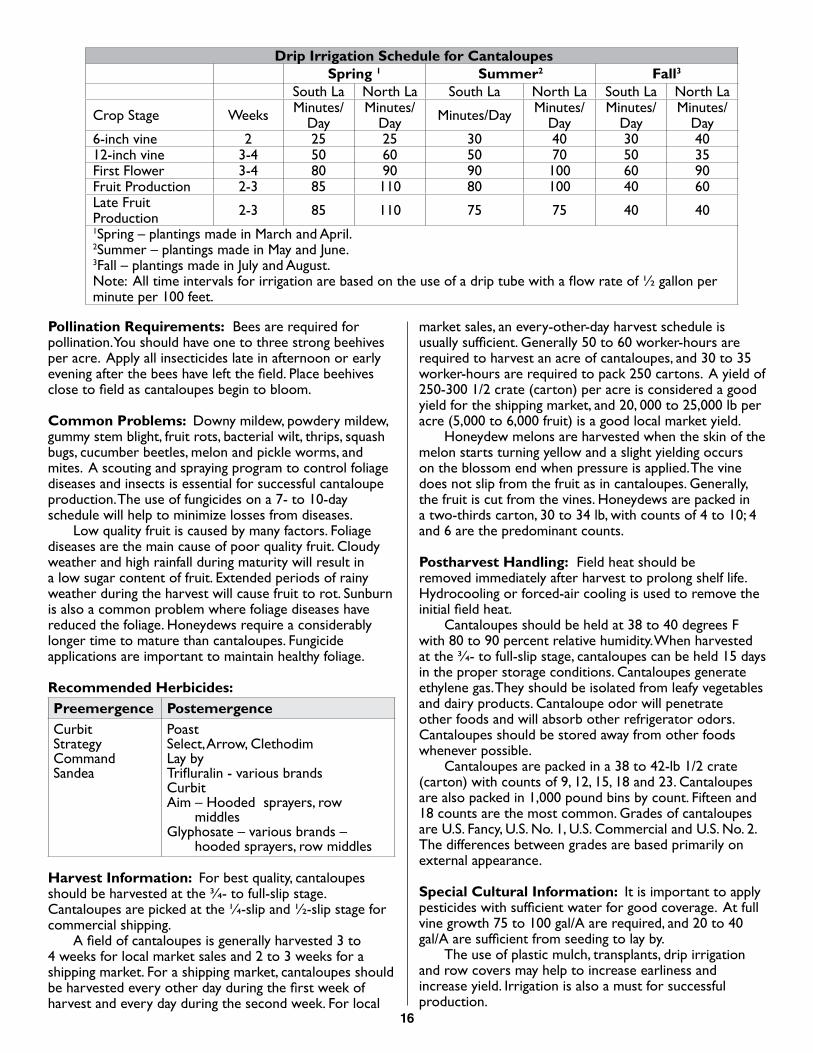
Drip Irrigation Schedule for CantaloupesSpring 1 Summer2 Fall3
South La North La South La North La South La North La
Crop Stage Weeks Minutes/ Day
Minutes/ Day Minutes/Day Minutes/
DayMinutes/
DayMinutes/
Day6-inch vine 2 25 25 30 40 30 4012-inch vine 3-4 50 60 50 70 50 35First Flower 3-4 80 90 90 100 60 90Fruit Production 2-3 85 110 80 100 40 60Late Fruit Production 2-3 85 110 75 75 40 401Spring – plantings made in March and April.2Summer – plantings made in May and June.3Fall – plantings made in July and August.Note: All time intervals for irrigation are based on the use of a drip tube with a flow rate of ½ gallon per minute per 100 feet.
17
CarrotsBotanical Family: Apiaceae (Carrot Family)
Approximate Number of Seeds/Pound: 368,000 (23,000/ounce)
Seeding Rate/Acre: Varies with row arrangement, spacing and type of planter used; 1 to 3 lb conventional planter single-drill; 1 to 2 lb precision-seeder double-drill.
Spacing: 1 to 2 inches. Carrots should be grown on double-drills (spaced 10 to 12 inches apart) to obtain higher yields. The use of a coulter or scatter shoe to obtain multiple rows (2 or 3 rows) per seed drill will help to increase plant populations and yields.
Planting Dates: • Fall and Winter Crop – mid-August to mid-October• Spring Crop – November to February
Optimum Soil Temperature Range for Germination: 45 to 85 degrees F
Depth to Plant Seed: ½ to ¼ inch
Time to Germinate: 7 to 14 days
Time from Planting to Harvest Begins: 70 to 75 days
Recommended Varieties:
Open Pollinated Hybrid VarietiesDanvers 126 Choctaw
ApacheEnterpriseMaverick
Recommended Soil pH & Fertilization: pH 5.5 Ca = 1,000 to 1,500 ppm, Mg = 100 to 200 ppm. Preplant application of 30 to 50 lb of nitrogen, 90 to 150 lb of phosphorous and potassium. Sidedress with 30 to 50 nitrogen 3 to 4 weeks after planting and again in 3 weeks after first sidedressing.
Example: Preplant 400 to 500 lb 8-24-24 acre plus 100 lb of 34-0-0 per acre as a sidedress 3 to 4 weeks after planting and again in 3 weeks after first sidedressing.
Common Problems: Difficulty in obtaining a stand during hot weather and on soils that readily crust. Planting too thickly often will result in small, poorly shaped roots. Nematodes can ruin the appearance of carrots. Poor color development in carrots is caused by high temperatures during later stages of root development. The hybrid varieties seem to produce roots with better color.
Considerable effort and time are required to wash carrots, especially when grown on heavy soils. Vegetable weevil can cause problems.
Recommended Herbicides:
Preemergence PostemergenceTrifluralin – various brands Varsol, Stoddard Solvent
LoroxFusiladeSencor, MetriSelect, Arrow, ClethodimPoastRow MiddlesGlyphosate – Aim –
hooded sprayer
Harvest Information: Carrots are ready to harvest when they reach an acceptable size. They are generally hand pulled, washed and tied in bunches (12 to 14 carrots per bunch; 1 to 1½ lb/bunch) with tops for local market sales. Carrots are also trimmed and bagged in 1-, 2- and 3-lb plastic bags or 50 and 25 lb sacks. Good yields are 200 to 300 cwt/A. Louisiana yields 100 to 200 cwt/A.
Postharvest Handling: Store carrots bunched with tops at 32 degrees F at 90 to 95 percent relative humidity for 10 to 14 days. Store topped carrots at 32 degrees F at 90 to 95 percent relative humidity for 4 to 5 months.
USDA Grades of carrots are:• U.S. No. 1 Jumbo: 1 to 2½ inches x >5 inches• U.S. Extra No. 1 or U.S. No. 1: ¾ to 1½ inches x >5
inches• U.S. No. 2: 1 to 3 inches x >3 inches
Good-quality carrots should be well-shaped with firm, smooth exteriors. Color should be vibrant orange to orange red. Bunched carrots should have bright, fresh, moist, green tops.
Special Cultural Information: Direct-seeding with a precision seeder will help eliminate the need for thinning and encourage good root shape. Soil should be thrown up near the tops of roots to prevent top greening. Mechanical harvester available. Deformed roots caused by soil compaction. A carrot shank or narrow subsoiler, ½ to ¾ inch wide and passed 10 to 12 inches deep, 2 or 3 inches to the side of the drill, 3 or 4 weeks after planting will reduce soil compaction and encourage good length and shape development. Sufficient herbicides labeled for excellent weed control.
18
CauliflowerBotanical Family: Brassicaceae (Mustard Family)
Number of Seeds/Pound: 160,000 (10,000/ounce)
Seeding Rate/Acre: • 1 to 2 lb 160,000 to 32,000 seeds/A drilled • 3 to 4 ounces precision-seeded• 8,800 to 10,000 seeds/A transplants/single-drill• 2 ounces seed/10,000 transplants
Spacing: 12 to 20 inches Cauliflower should be grown single-drill to obtain acceptable curd size.
Planting Dates:Transplant
• Fall Production – August to September• Spring Production – late January to February
To produce transplants for the fall, growers will generally sow the seeds thickly in the field. Plants are then pulled and transplanted. During the winter, transplants are generally grown in hotbeds or greenhouses. It generally requires 5 to 6 weeks to produce cauliflower transplants. Twenty to 30 worker-hours are required to transplant an acre of cauliflower.
Optimum Soil Temperature Range for Germination: 45 to 85 degrees F
Depth to Plant Seed: ¼ to ½ inch
Time to Germinate: 7 to 10 days
Time from Planting to Harvest Begins: Transplants 55 to 90 days; direct-seeded 75 to 120 days.
Recommended Varieties:
Hybrid VarietiesSnow Crown (48 days)Majestic (50 days)Candid Charm (65 days)Incline (76 days)Wentworth (73 days)Cumberland (76 days)Symphony (75 days)
Recommended Soil pH & Fertilization: pH 6.0 to 6.8, Ca = 1,500 to 2,000 ppm, Mg 150 to 300 ppm. For transplanted cauliflower, apply preplant 90 to 120 lb/A of nitrogen; 90 to 150 lb/A of phosphorous and potassium. Many growers do not sidedress cauliflower and apply all the nitrogen preplant. They feel that sidedressing results in loosely formed heads. Example: 700 to 800 lb 13-13-13/A preplant. Sidedress cauliflower twice with an additional 30 to 40 lb nitrogen about 3 to 4 weeks after transplanting or when large leaves are 2 to 3 inches across. An additional sidedressing 1 to 2 weeks later may be beneficial in obtaining large heads.
Example: 500 to 600 lb 8-24-24/A preplant; sidedress with about 100 lb 34-0-0/A 3 to 4 weeks after planting and again 2 to 3 weeks later.
Cauliflower is a heavy user of molybdenum. Molybdenum deficiency in cauliflower usually has distorted narrow leaves with small open loose curds. Molybdenum deficiency can occur on acid soils. Molybdenum can be applied as a foliar spray by using sodium molybdate (¼ to ½ lb/100 gal). Make 2 or 3 applications 7 to 10 days apart starting 3 to 4 weeks after planting.
Common Problems: Loopers, stink bugs, cucumber beetles, diamondback moth and other caterpillars, downy mildew, soft rot, boron and molybdenum deficiencies. Rotate classes of insecticides to avoid the development of resistance to insecticides by the diamondback moth. Buttoning results from stress in early phase of production, such as drought or fertilizer deficiency. Ricey or loose heads are caused by fog and warm weather near harvest. Hard freezes. Cauliflower is very responsive to temperature fluctuations. Success with cauliflower is variable. Mice and rats can damage cauliflower heads, especially during blanching. Expense of hybrid seed.
Recommended Herbicides:
PreemergenceDacthal (direct seed or transplant)Trifluralin – various brands (direct seed or Transplant)Goal (transplants only)
19
PostemergencePoastAim – row middles hooded sprayerGlyphosate – various brands – hooded sprayer, row
middles Harvest Information: Hybrid varieties will cut 60 to 70 percent on first cutting; two or three passes across the field may be necessary to complete harvest; 30 to 40 worker-hours are required for harvest and 10 to 20 hours for packing 300 to 350 boxes of cauliflower. Packed in 25- to 30-lb cartons holding counts of 9, 12 and 16 trimmed heads. Heads are cello wrapped. Good yields – 300 to 400 boxes/acre.
Postharvest Handling: Cauliflower can be held at 32 degrees F at 90 to 95 percent relative humidity for 2 to 3 weeks. Good-quality cauliflower should have a creamy white curd, with bright green, fresh-looking leaves. Grades of cauliflower are U.S. No. 1 and U. S. Commercial with a minimum diameter of both grades being 4 inches. Differences in grade are based on external appearance.
Special Cultural Information: Keep cauliflower growing vigorously. Don’t allow plants to be stressed or buttoning may occur. Blanching or wrapping leaves over curd when about 1 to 2 inches in diameter is necessary to produce the desired white curd. Blanching labor 15 to 20 worker-hours per acre. Several trips over the field are required for blanching. Hybrid varieties require two or three trips, and open-pollinated varieties require four to five trips. The use of different color strings or rubber bands on each day of tying will help to speed the harvest procedure. The blanching process can be accomplished by simply laying several large leaves from base of plant over the small curds. These leaves are blown off by hard winds. Plantings will need to be walked several times to replace blown off leaves. Probably more successful in establishing a stand from transplanting than from direct-seeding. Demand for cauliflower is high before the Thanksgiving and Christmas holidays. Sprayers need to be calibrated to provide 50 to 100 gallons of water per acre at 60+ psi. Each row needs three hollow cane nozzles arranged to spray the underside of the foliage. Spray water pH needs to be adjusted to the 5.5 to 6.5 level for adequate pesticide tank life.
Corn, SweetBotanical Family: Poaceae (Grass family)
Number of Seeds/Pound:• Standard Varieties – 1,800 to 2,900
(112 to 180/ounce)• Super Sweet Varieties – 3,300 to 4,500
(206 to 281/ounce)
Seeding Rate/Acre:• Standard Varieties – 8-10 lb/A• Super Sweet Varieties – 6 to 8 lb/A; 12,000 to
18,000 seeds/A
Spacing: 8 to 10 inches
Planting Dates:Spring and Summer Crop
• South Louisiana – late Feb. to April• North Louisiana – March to early May
Fall Crops – mature in late September to early November.• Large fall plantings of sweet corn are not
recommended in Louisiana because of the high insect pressure at that time.
• South Louisiana – July to mid-September• North Louisiana – July to mid-August
Adequate soil moisture is necessary to obtain good stands of sweet corn. Plantings should be made on 2- to
3-week intervals to provide a consistent supply for the market.
Optimum Soil Temperature Range for Germination: 60 to 95 degrees F
Depth to Plant Seed: ¾ to 1½ inch
Time to Germinate: 7 to 10 days
Time from Planting to Harvest Begins: 65 to 90 days Days from planting to harvest vary with varieties and time of year planted. Early varieties require 65 to 70 days to mature; medium varieties, 75 to 80 days; late varieties, 85 to 90 days. Sweet corn planted in the fall requires considerably less time to mature than the same variety planted in the spring because of high temperatures. Medium variety: 75 to 80 days in the spring and summer; 65 to 70 days in the fall.
Approximate Time from Pollination to Market: • From 50 percent silking: Fresh Market – 18 to 23 days
20
Recommended Varieties:
Standard VarietiesYellow Merit - mediumWhite Silver Queen - lateBicolor Funk’s G90 – medium late
Super Sweet Varieties (high sugar content)Yellow Supersweet Brand Variety #7210
GSS0969White How Sweet It Is – medium
WSS 0987 – mediumSummer Sweet 8101R – mediumIce Queen – medium
Bicolor BSS0982BSS0977
Sugary Enhanced Varieties (highsugarwithtraditionalcornflavorandcreamytexture.Similarto standard varieties in seed germination and early plant vigor)
Yellow Miracle – lateIncredible – late
White Silverado – mediumArgent – medium
Bicolor Ambrosia – mediumDelectable – medium latePrecious Gem – medium
The super sweet varieties should be isolated from other types of sweet corn varieties and field corn. Cross-pollination with other types of corn will result in reduced sugar content. Isolation can be accomplished by planting the super sweets 200 to 300 feet away from other types of corn. It can also be accomplished by planting on different dates and by using varieties with different number of days to maturity. A minimum of 14 days should pass between the planting dates or maturity dates to prevent significant cross-pollination. The sugary enhanced varieties do not need to be isolated from other types of corn like the super sweets; however, isolation is encouraged to maximize quality.
Recommended Soil pH & Fertilization: pH 5.5 to 6.5, Ca = 1,000 to 1,500 ppm, Mg = 150 to 250 ppm; 50 to 80 lb of nitrogen and 120 to 150 lb of phosphorous and potassium preplant per acre. Sidedress when plants are 12 inches tall with 40 to 50 lb of nitrogen per acre and again when plants are 24 inches.
Example: 600 to 650 lb of 8-24-24 or 10-20-20 preplant. Sidedress with 200 lb of 34-0-0/A at 12 inches tall and again when plants are 24 inches.
High rates of nitrogen 150 to 200 lb of total N/A are necessary for large ear size in sweet corn.
Pollination Requirement: Plant at least three rows of sweet corn side by side. This will ensure that sufficient pollination will occur to obtain well-filled ears.
Common Problems: Corn earworms, armyworms, stink bugs, wireworms, grubs, mole crickets, rough-headed cornstalk beetle, and soil insects damaging stands. Raccoons, birds, mice, rats. Inadequate plant populations for high yields. Lack of proper post-harvest facilities to maintain quality and access shipping markets. Small ear size caused by inadequate nitrogen.
Recommended Herbicides:
Preemergence PostemergenceBicepAtrazine – various brandsMicro-techDual, StalwartBullet, LariatOutlookGuardsman, Leadoff
BasagranBicepAtrazine – various brandsSandea Callisto
Harvest Information: Sweet corn is ready to be harvested when the silks turn brown to black. Sweet corn is generally harvested twice at 3- to 4-day intervals. With the right cultural practices and timing, most ears can be harvested at one time. Mechanical harvesters are available for sweet corn. Harvesting – 20 to 25 worker-hours/A; packing – 10 to 15 worker-hours/A.
Postharvest Handling: To maintain quality, the field heat from sweet corn needs to be removed as soon as possible after harvest. This is generally accomplished by hydrocooling, using slush ice or by topping with ice. Sweet corn can be stored for 4 to 8 days at 31 to 33 degrees F at 90 to 95 percent relative humidity. Sweet corn is packed in 45- to 50-lb wire-bound crates with counts of 48, 54, 60 or 66 ears per crate. An average count is 55. The USDA grades of sweet corn are U.S. Fancy (ears not clipped and cob no shorter than 6 inches), U.S. No. 1 (ears clipped properly and cob 6 to 5 inches long) and U.S. No. 2 (ears clipped properly and cob not less than 4 inches). For local sales, 4 to 5 dozen ears of sweet corn are packed in 50-lb mesh sacks (onion). Good yields – 1,000 to 1,200 dozen ears/A, 200 to 250 crates/A – only obtainable when correct plant populations and cultural practices are used. Average yields in Louisiana are 600 to 700 dozen ears/A.
Special Cultural Information: Vacuum planters are necessary to obtain single seed placement of sweet corn. Sweet corn seed varies in size and shape. Plate planters do not do a good job of single seed placement. It is difficult to obtain uniform 9- to 10-inch spacing with plate planters. A 2-day spray schedule starting when silks first appear until silks wilt and turn brown (8-10 sprays) is necessary to ensure worm-free corn. Sweet corn is generally grown for local sales. The correct post-harvest handling equipment, good insect control and irrigation are necessary to get into the shipping of sweet corn. Proper irrigation is necessary to ensure filling the tip of the ears. Mechanical harvest available for sweet corn.
21
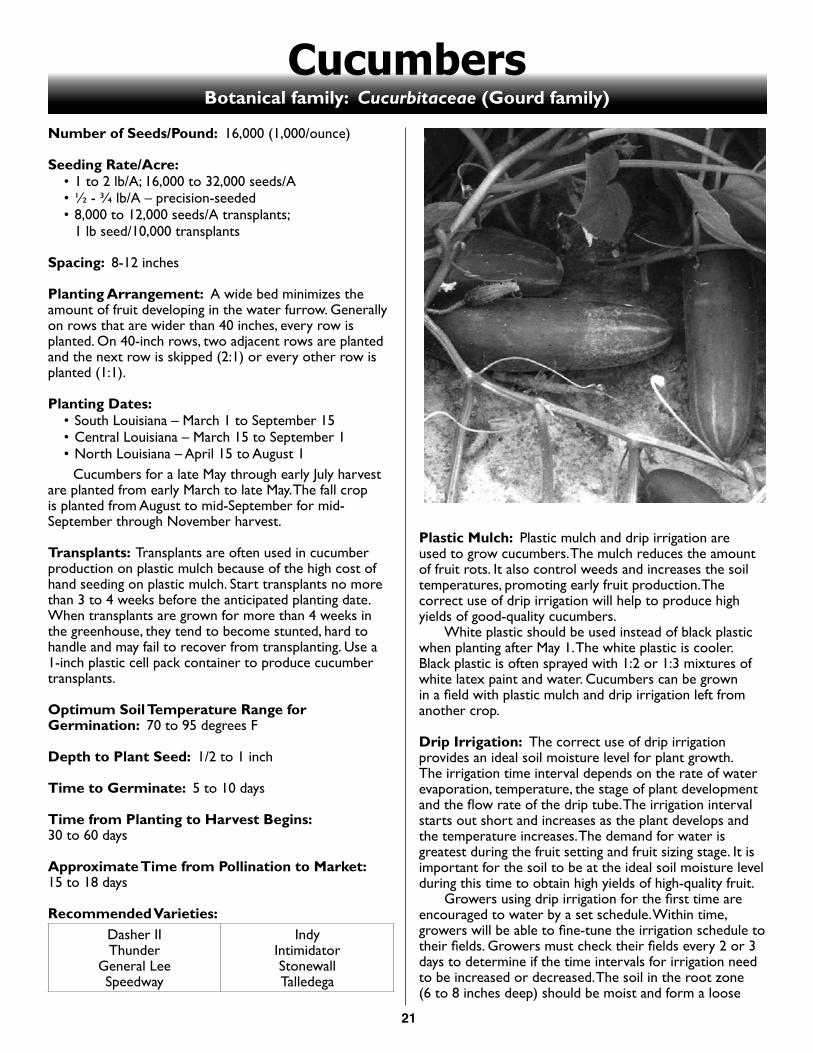
CucumbersBotanical family: Cucurbitaceae (Gourd family)
Number of Seeds/Pound: 16,000 (1,000/ounce)
Seeding Rate/Acre: • 1 to 2 lb/A; 16,000 to 32,000 seeds/A• ½ - ¾ lb/A – precision-seeded• 8,000 to 12,000 seeds/A transplants;
1 lb seed/10,000 transplants
Spacing: 8-12 inches
Planting Arrangement: A wide bed minimizes the amount of fruit developing in the water furrow. Generally on rows that are wider than 40 inches, every row is planted. On 40-inch rows, two adjacent rows are planted and the next row is skipped (2:1) or every other row is planted (1:1).
Planting Dates:• South Louisiana – March 1 to September 15• Central Louisiana – March 15 to September 1• North Louisiana – April 15 to August 1
Cucumbers for a late May through early July harvest are planted from early March to late May. The fall crop is planted from August to mid-September for mid-September through November harvest.
Transplants: Transplants are often used in cucumber production on plastic mulch because of the high cost of hand seeding on plastic mulch. Start transplants no more than 3 to 4 weeks before the anticipated planting date. When transplants are grown for more than 4 weeks in the greenhouse, they tend to become stunted, hard to handle and may fail to recover from transplanting. Use a 1-inch plastic cell pack container to produce cucumber transplants.
Optimum Soil Temperature Range for Germination: 70 to 95 degrees F
Depth to Plant Seed: 1/2 to 1 inch
Time to Germinate: 5 to 10 days
Time from Planting to Harvest Begins: 30 to 60 days
Approximate Time from Pollination to Market: 15 to 18 days
Recommended Varieties:Dasher II Thunder
General Lee Speedway
IndyIntimidatorStonewallTalledega
Plastic Mulch: Plastic mulch and drip irrigation are used to grow cucumbers. The mulch reduces the amount of fruit rots. It also control weeds and increases the soil temperatures, promoting early fruit production. The correct use of drip irrigation will help to produce high yields of good-quality cucumbers. White plastic should be used instead of black plastic when planting after May 1. The white plastic is cooler. Black plastic is often sprayed with 1:2 or 1:3 mixtures of white latex paint and water. Cucumbers can be grown in a field with plastic mulch and drip irrigation left from another crop.
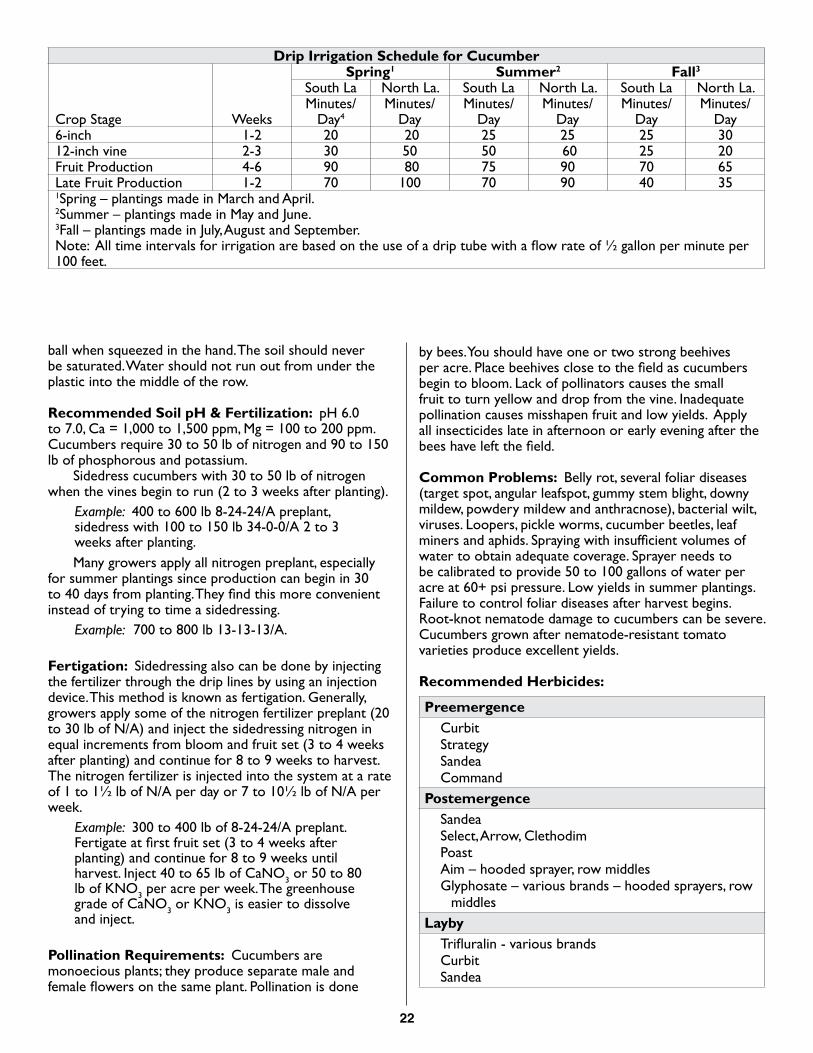
Drip Irrigation: The correct use of drip irrigation provides an ideal soil moisture level for plant growth. The irrigation time interval depends on the rate of water evaporation, temperature, the stage of plant development and the flow rate of the drip tube. The irrigation interval starts out short and increases as the plant develops and the temperature increases. The demand for water is greatest during the fruit setting and fruit sizing stage. It is important for the soil to be at the ideal soil moisture level during this time to obtain high yields of high-quality fruit. Growers using drip irrigation for the first time are encouraged to water by a set schedule. Within time, growers will be able to fine-tune the irrigation schedule to their fields. Growers must check their fields every 2 or 3 days to determine if the time intervals for irrigation need to be increased or decreased. The soil in the root zone (6 to 8 inches deep) should be moist and form a loose
22
ball when squeezed in the hand. The soil should never be saturated. Water should not run out from under the plastic into the middle of the row.
Recommended Soil pH & Fertilization: pH 6.0 to 7.0, Ca = 1,000 to 1,500 ppm, Mg = 100 to 200 ppm. Cucumbers require 30 to 50 lb of nitrogen and 90 to 150 lb of phosphorous and potassium. Sidedress cucumbers with 30 to 50 lb of nitrogen when the vines begin to run (2 to 3 weeks after planting).
Example: 400 to 600 lb 8-24-24/A preplant, sidedress with 100 to 150 lb 34-0-0/A 2 to 3 weeks after planting.
Many growers apply all nitrogen preplant, especially for summer plantings since production can begin in 30 to 40 days from planting. They find this more convenient instead of trying to time a sidedressing.
Example: 700 to 800 lb 13-13-13/A.
Fertigation: Sidedressing also can be done by injecting the fertilizer through the drip lines by using an injection device. This method is known as fertigation. Generally, growers apply some of the nitrogen fertilizer preplant (20 to 30 lb of N/A) and inject the sidedressing nitrogen in equal increments from bloom and fruit set (3 to 4 weeks after planting) and continue for 8 to 9 weeks to harvest. The nitrogen fertilizer is injected into the system at a rate of 1 to 1½ lb of N/A per day or 7 to 10½ lb of N/A per week.
Example: 300 to 400 lb of 8-24-24/A preplant. Fertigate at first fruit set (3 to 4 weeks after planting) and continue for 8 to 9 weeks until harvest. Inject 40 to 65 lb of CaNO3 or 50 to 80 lb of KNO3 per acre per week. The greenhouse grade of CaNO3 or KNO3 is easier to dissolve and inject.
Pollination Requirements: Cucumbers are monoecious plants; they produce separate male and female flowers on the same plant. Pollination is done
by bees. You should have one or two strong beehives per acre. Place beehives close to the field as cucumbers begin to bloom. Lack of pollinators causes the small fruit to turn yellow and drop from the vine. Inadequate pollination causes misshapen fruit and low yields. Apply all insecticides late in afternoon or early evening after the bees have left the field.
Common Problems: Belly rot, several foliar diseases (target spot, angular leafspot, gummy stem blight, downy mildew, powdery mildew and anthracnose), bacterial wilt, viruses. Loopers, pickle worms, cucumber beetles, leaf miners and aphids. Spraying with insufficient volumes of water to obtain adequate coverage. Sprayer needs to be calibrated to provide 50 to 100 gallons of water per acre at 60+ psi pressure. Low yields in summer plantings. Failure to control foliar diseases after harvest begins. Root-knot nematode damage to cucumbers can be severe. Cucumbers grown after nematode-resistant tomato varieties produce excellent yields.
Recommended Herbicides:
PreemergenceCurbit Strategy SandeaCommand
PostemergenceSandeaSelect, Arrow, ClethodimPoastAim – hooded sprayer, row middlesGlyphosate – various brands – hooded sprayers, row
middlesLayby
Trifluralin - various brandsCurbitSandea
Drip Irrigation Schedule for Cucumber
Crop Stage Weeks
Spring1 Summer2 Fall3South La North La. South La North La. South La North La.Minutes/
Day4Minutes/
DayMinutes/
DayMinutes/
DayMinutes/
DayMinutes/
Day6-inch 1-2 20 20 25 25 25 3012-inch vine 2-3 30 50 50 60 25 20Fruit Production 4-6 90 80 75 90 70 65Late Fruit Production 1-2 70 100 70 90 40 351Spring – plantings made in March and April. 2Summer – plantings made in May and June.3Fall – plantings made in July, August and September.Note: All time intervals for irrigation are based on the use of a drip tube with a flow rate of ½ gallon per minute per 100 feet.
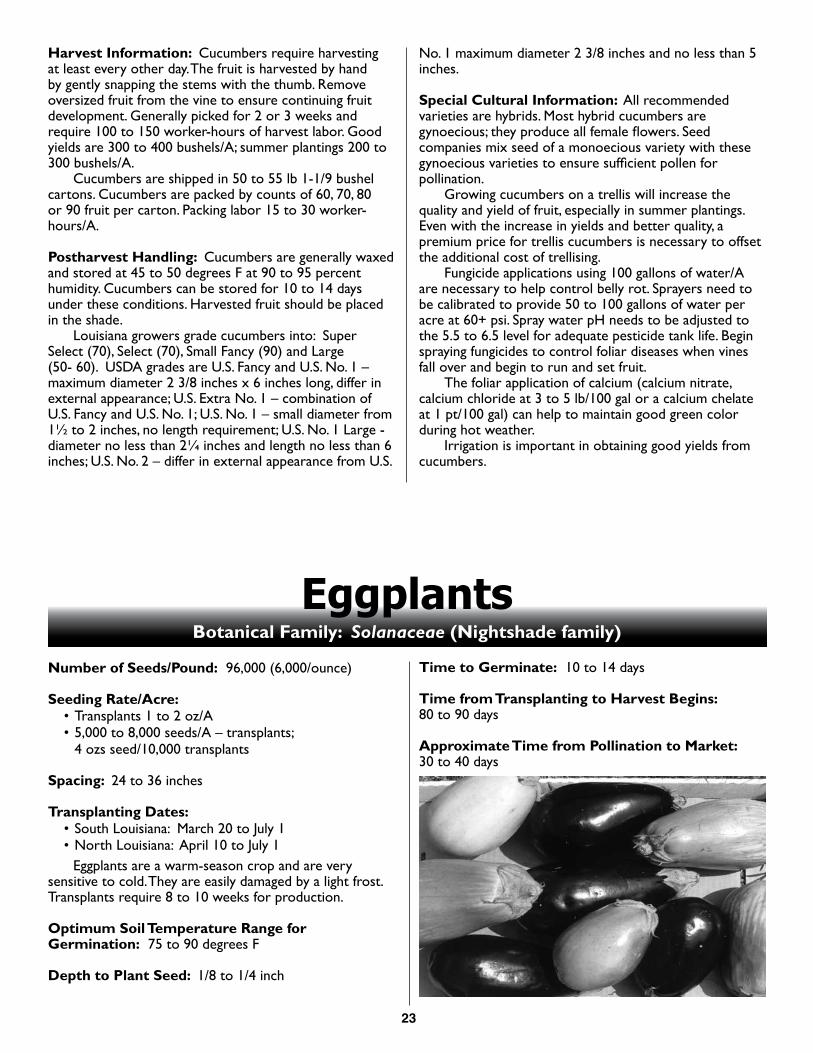
23
Harvest Information: Cucumbers require harvesting at least every other day. The fruit is harvested by hand by gently snapping the stems with the thumb. Remove oversized fruit from the vine to ensure continuing fruit development. Generally picked for 2 or 3 weeks and require 100 to 150 worker-hours of harvest labor. Good yields are 300 to 400 bushels/A; summer plantings 200 to 300 bushels/A. Cucumbers are shipped in 50 to 55 lb 1-1/9 bushel cartons. Cucumbers are packed by counts of 60, 70, 80 or 90 fruit per carton. Packing labor 15 to 30 worker-hours/A.
Postharvest Handling: Cucumbers are generally waxed and stored at 45 to 50 degrees F at 90 to 95 percent humidity. Cucumbers can be stored for 10 to 14 days under these conditions. Harvested fruit should be placed in the shade. Louisiana growers grade cucumbers into: Super Select (70), Select (70), Small Fancy (90) and Large (50- 60). USDA grades are U.S. Fancy and U.S. No. 1 – maximum diameter 2 3/8 inches x 6 inches long, differ in external appearance; U.S. Extra No. 1 – combination of U.S. Fancy and U.S. No. 1; U.S. No. 1 – small diameter from 1½ to 2 inches, no length requirement; U.S. No. 1 Large - diameter no less than 2¼ inches and length no less than 6 inches; U.S. No. 2 – differ in external appearance from U.S.
No. 1 maximum diameter 2 3/8 inches and no less than 5 inches.
Special Cultural Information: All recommended varieties are hybrids. Most hybrid cucumbers are gynoecious; they produce all female flowers. Seed companies mix seed of a monoecious variety with these gynoecious varieties to ensure sufficient pollen for pollination. Growing cucumbers on a trellis will increase the quality and yield of fruit, especially in summer plantings. Even with the increase in yields and better quality, a premium price for trellis cucumbers is necessary to offset the additional cost of trellising. Fungicide applications using 100 gallons of water/A are necessary to help control belly rot. Sprayers need to be calibrated to provide 50 to 100 gallons of water per acre at 60+ psi. Spray water pH needs to be adjusted to the 5.5 to 6.5 level for adequate pesticide tank life. Begin spraying fungicides to control foliar diseases when vines fall over and begin to run and set fruit. The foliar application of calcium (calcium nitrate, calcium chloride at 3 to 5 lb/100 gal or a calcium chelate at 1 pt/100 gal) can help to maintain good green color during hot weather. Irrigation is important in obtaining good yields from cucumbers.
EggplantsBotanical Family: Solanaceae (Nightshade family)
Number of Seeds/Pound: 96,000 (6,000/ounce)
Seeding Rate/Acre: • Transplants 1 to 2 oz/A• 5,000 to 8,000 seeds/A – transplants;
4 ozs seed/10,000 transplants
Spacing: 24 to 36 inches
Transplanting Dates:• South Louisiana: March 20 to July 1• North Louisiana: April 10 to July 1
Eggplants are a warm-season crop and are very sensitive to cold. They are easily damaged by a light frost. Transplants require 8 to 10 weeks for production.
Optimum Soil Temperature Range for Germination: 75 to 90 degrees F
Depth to Plant Seed: 1/8 to 1/4 inch
Time to Germinate: 10 to 14 days
Time from Transplanting to Harvest Begins: 80 to 90 days
Approximate Time from Pollination to Market: 30 to 40 days
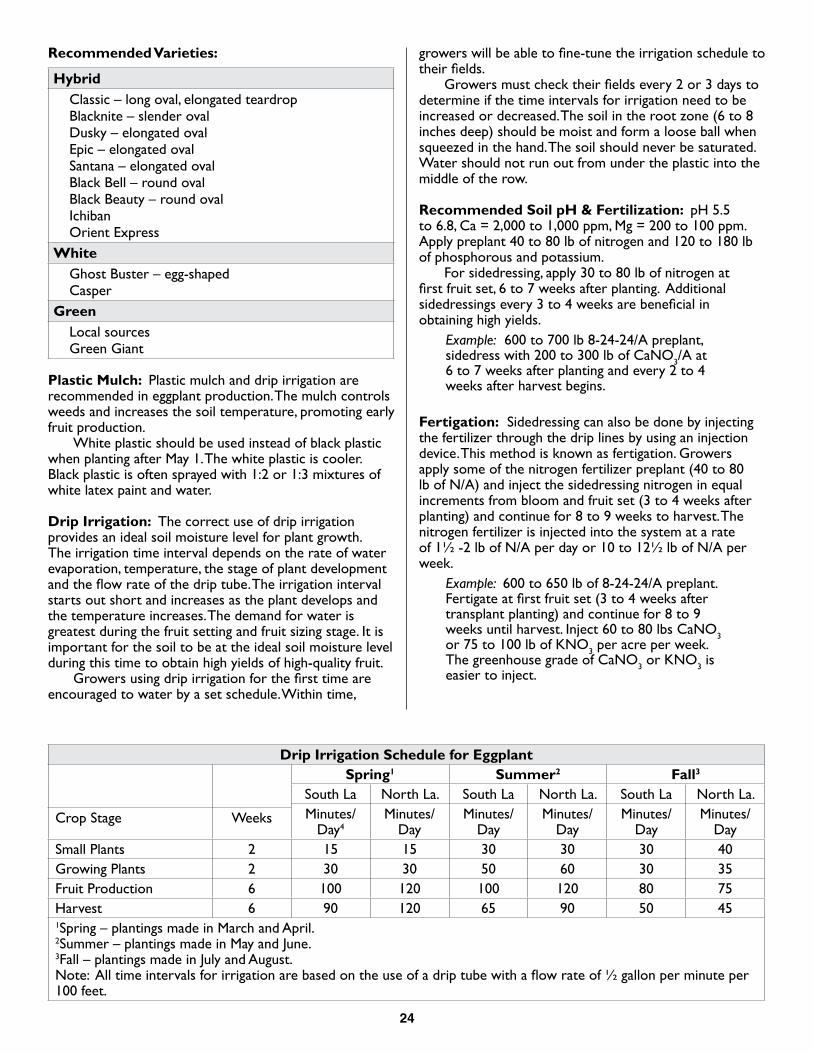
24
Recommended Varieties:
HybridClassic – long oval, elongated teardropBlacknite – slender ovalDusky – elongated ovalEpic – elongated ovalSantana – elongated ovalBlack Bell – round ovalBlack Beauty – round ovalIchiban Orient Express
WhiteGhost Buster – egg-shapedCasper
GreenLocal sourcesGreen Giant
Plastic Mulch: Plastic mulch and drip irrigation are recommended in eggplant production. The mulch controls weeds and increases the soil temperature, promoting early fruit production. White plastic should be used instead of black plastic when planting after May 1. The white plastic is cooler. Black plastic is often sprayed with 1:2 or 1:3 mixtures of white latex paint and water.
Drip Irrigation: The correct use of drip irrigation provides an ideal soil moisture level for plant growth. The irrigation time interval depends on the rate of water evaporation, temperature, the stage of plant development and the flow rate of the drip tube. The irrigation interval starts out short and increases as the plant develops and the temperature increases. The demand for water is greatest during the fruit setting and fruit sizing stage. It is important for the soil to be at the ideal soil moisture level during this time to obtain high yields of high-quality fruit. Growers using drip irrigation for the first time are encouraged to water by a set schedule. Within time,
growers will be able to fine-tune the irrigation schedule to their fields. Growers must check their fields every 2 or 3 days to determine if the time intervals for irrigation need to be increased or decreased. The soil in the root zone (6 to 8 inches deep) should be moist and form a loose ball when squeezed in the hand. The soil should never be saturated. Water should not run out from under the plastic into the middle of the row.
Recommended Soil pH & Fertilization: pH 5.5 to 6.8, Ca = 2,000 to 1,000 ppm, Mg = 200 to 100 ppm. Apply preplant 40 to 80 lb of nitrogen and 120 to 180 lb of phosphorous and potassium. For sidedressing, apply 30 to 80 lb of nitrogen at first fruit set, 6 to 7 weeks after planting. Additional sidedressings every 3 to 4 weeks are beneficial in obtaining high yields.
Example: 600 to 700 lb 8-24-24/A preplant, sidedress with 200 to 300 lb of CaNO3/A at 6 to 7 weeks after planting and every 2 to 4 weeks after harvest begins.
Fertigation: Sidedressing can also be done by injecting the fertilizer through the drip lines by using an injection device. This method is known as fertigation. Growers apply some of the nitrogen fertilizer preplant (40 to 80 lb of N/A) and inject the sidedressing nitrogen in equal increments from bloom and fruit set (3 to 4 weeks after planting) and continue for 8 to 9 weeks to harvest. The nitrogen fertilizer is injected into the system at a rate of 1½ -2 lb of N/A per day or 10 to 12½ lb of N/A per week.
Example: 600 to 650 lb of 8-24-24/A preplant. Fertigate at first fruit set (3 to 4 weeks after transplant planting) and continue for 8 to 9 weeks until harvest. Inject 60 to 80 lbs CaNO3 or 75 to 100 lb of KNO3 per acre per week. The greenhouse grade of CaNO3 or KNO3 is easier to inject.
Drip Irrigation Schedule for EggplantSpring1 Summer2 Fall3
South La North La. South La North La. South La North La.Minutes/
Day4Minutes/
DayMinutes/
DayMinutes/
DayMinutes/
DayMinutes/
DayCrop Stage Weeks
Small Plants 2 15 15 30 30 30 40Growing Plants 2 30 30 50 60 30 35Fruit Production 6 100 120 100 120 80 75Harvest 6 90 120 65 90 50 451Spring – plantings made in March and April.2Summer – plantings made in May and June.3Fall – plantings made in July and August.Note: All time intervals for irrigation are based on the use of a drip tube with a flow rate of ½ gallon per minute per 100 feet.
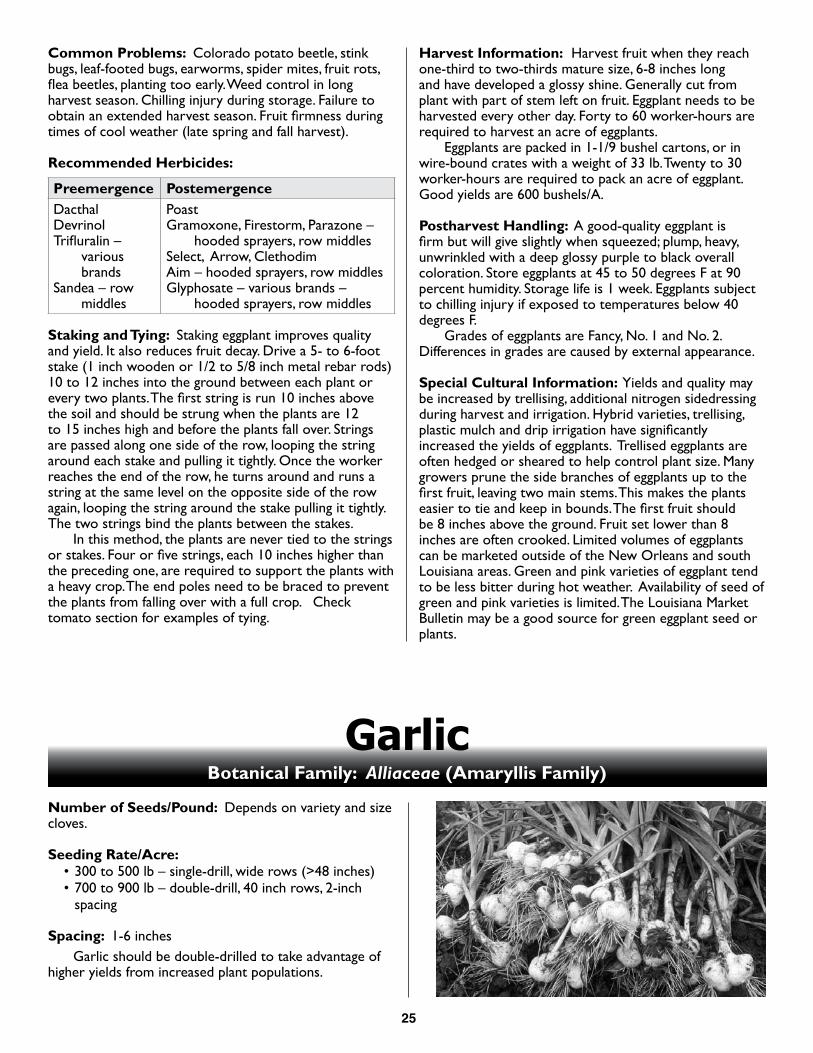
25
Common Problems: Colorado potato beetle, stink bugs, leaf-footed bugs, earworms, spider mites, fruit rots, flea beetles, planting too early. Weed control in long harvest season. Chilling injury during storage. Failure to obtain an extended harvest season. Fruit firmness during times of cool weather (late spring and fall harvest).
Recommended Herbicides:
Preemergence PostemergenceDacthalDevrinolTrifluralin –
various brands
Sandea – row middles
Poast Gramoxone, Firestorm, Parazone –
hooded sprayers, row middlesSelect, Arrow, ClethodimAim – hooded sprayers, row middlesGlyphosate – various brands –
hooded sprayers, row middles Staking and Tying: Staking eggplant improves quality and yield. It also reduces fruit decay. Drive a 5- to 6-foot stake (1 inch wooden or 1/2 to 5/8 inch metal rebar rods) 10 to 12 inches into the ground between each plant or every two plants. The first string is run 10 inches above the soil and should be strung when the plants are 12 to 15 inches high and before the plants fall over. Strings are passed along one side of the row, looping the string around each stake and pulling it tightly. Once the worker reaches the end of the row, he turns around and runs a string at the same level on the opposite side of the row again, looping the string around the stake pulling it tightly. The two strings bind the plants between the stakes. In this method, the plants are never tied to the strings or stakes. Four or five strings, each 10 inches higher than the preceding one, are required to support the plants with a heavy crop. The end poles need to be braced to prevent the plants from falling over with a full crop. Check tomato section for examples of tying.
Harvest Information: Harvest fruit when they reach one-third to two-thirds mature size, 6-8 inches long and have developed a glossy shine. Generally cut from plant with part of stem left on fruit. Eggplant needs to be harvested every other day. Forty to 60 worker-hours are required to harvest an acre of eggplants. Eggplants are packed in 1-1/9 bushel cartons, or in wire-bound crates with a weight of 33 lb. Twenty to 30 worker-hours are required to pack an acre of eggplant. Good yields are 600 bushels/A.
Postharvest Handling: A good-quality eggplant is firm but will give slightly when squeezed; plump, heavy, unwrinkled with a deep glossy purple to black overall coloration. Store eggplants at 45 to 50 degrees F at 90 percent humidity. Storage life is 1 week. Eggplants subject to chilling injury if exposed to temperatures below 40 degrees F. Grades of eggplants are Fancy, No. 1 and No. 2. Differences in grades are caused by external appearance.
Special Cultural Information: Yields and quality may be increased by trellising, additional nitrogen sidedressing during harvest and irrigation. Hybrid varieties, trellising, plastic mulch and drip irrigation have significantly increased the yields of eggplants. Trellised eggplants are often hedged or sheared to help control plant size. Many growers prune the side branches of eggplants up to the first fruit, leaving two main stems. This makes the plants easier to tie and keep in bounds. The first fruit should be 8 inches above the ground. Fruit set lower than 8 inches are often crooked. Limited volumes of eggplants can be marketed outside of the New Orleans and south Louisiana areas. Green and pink varieties of eggplant tend to be less bitter during hot weather. Availability of seed of green and pink varieties is limited. The Louisiana Market Bulletin may be a good source for green eggplant seed or plants.
GarlicBotanical Family: Alliaceae (Amaryllis Family)
Number of Seeds/Pound: Depends on variety and size cloves.
Seeding Rate/Acre: • 300 to 500 lb – single-drill, wide rows (>48 inches)• 700 to 900 lb – double-drill, 40 inch rows, 2-inch
spacing
Spacing: 1-6 inches Garlic should be double-drilled to take advantage of higher yields from increased plant populations.

26
Planting Dates: September to late November
Depth to Plant Seed: 2 to 4 inches. The cloves must not be so deep that the soil will interfere with the swelling of the bulbs, nor so shallow that rain and birds will dislodge them. All the cloves should be placed vertically to make bulbs with straight necks.
Time to Germinate: 10 to 14 days
Time from Planting to Harvest Begins: 210 to 230 days
Recommended Varieties:
Tahiti or Elephant garlic
large, dark cloves, mild flavor, large, light green leaves
Creole medium size, white cloves, broad, dark green leaves, moderate storage ability
Italiansmall, pink cloves, strong flavor, narrow, light green leaves, good storage ability
Recommended Soil pH & Fertilization: pH 5.8 to 6.2, Ca = 1,000 to 1,500 ppm, Mg = 100 to 200 ppm. Preplant applications of 50 to 100 lb of nitrogen plus 100 to 150 lb of phosphorous and potassium per acre. Sidedress with 30 to 50 lb of nitrogen/A when plants are up (3 to 4 weeks after planting). Sidedress in mid-February and again in early March.
Example: 600 to 750 lb of 13-13-13/A applied preplant plus 100 lb of 34-0-0/A 3 to 4 weeks after the plants are up and again in February or March.
Common Problems: Salt marsh caterpillar, thrips, downy mildew, purple blotch, pink root. Weed control. Availability and high cost of seed. Inadequate storage and drying facilities. Sunburn if left exposed to the sun for too long during harvest. Excessive handling during harvest and cleaning greatly adds to the harvest cost. Sprouting – the sheath binding the stem splits, which allows for lots of little stems or shoots to develop. This results in bulbs that have a large collection of tops with cloves not enclosed in a sheath. It is believed to be a physiological problem related to stress. Researchers think it could be caused by unusual weather patterns or by applying nitrogen fertilizer too late in the season.
Recommended Herbicides:
PreemergenceDacthal Prowl, Pendimax, PendimethalinOutlookGoal, Galligan
PostemergenceBuctril, MoxyFusiladePoastProwl, Pendimax, Pentagon, PendimethalinGoal, GalliganSelect, Arrow, ClethodimAim – hooded sprayer, row middlesGlyphosate – various brands, hooded sprayers, row
middles
Harvest Information: Garlic is ready to harvest when the tops turn yellow. This generally occurs from mid-April to May. Passing a lifter blade under the garlic when it starts to turn encourages the drying process and facilitates pulling. The bulbs are hand-pulled and allowed to dry for several days. Place the tops on top of the bulbs to protect them from sunburning. Off barring the row also helps the pulling process. After drying, the outer loose portions of the sheath are removed and the roots are trimmed about ½ inch to the bulb. Bulbs of similar sizes with stems can be braided or plaited into strings (20 to 25 bulbs/string). The stem of bulbs for loose garlic sales is generally trimmed 1 inch above the bulb. Cleaning and trimming require considerable amount of handling.
Postharvest Handling: Store garlic at 60 to 70 degrees F and less than 60 percent relative humidity. Cloves sprout quickly at temperatures near 40 degrees F. Garlic can be sized by passing the bulbs over a sloping, slotted table with 1½-inch openings between the slots. Fresh market loose garlic is packed in mesh sacks or 30-lb cartons. Remove all diseased, damaged or loose bulbs before packing. The USDA grades for garlic are U.S. No. 1 – good external appearance and a minimum diameter of each bulb not less than 1½ inches.
Special Cultural Information: The Louisiana Market Bulletin is a good source for garlic seed. The market for loose fresh garlic is somewhat limited. Plaiting into strings and selling garlic for seed is the more successful marketing approach for garlic. Weed control can be a serious problem because of the long time garlic is in the field and weather conditions encountered. Early weed control is needed to be successful in controlling weeds. It is a very expensive crop to grow because of the high cost of seed, harvest and cleaning. The returns on garlic can be quite high. Garlic must be exposed to temperatures between 32 to 50 degrees F for 2 months before the long daylight hours that induce bulbing.
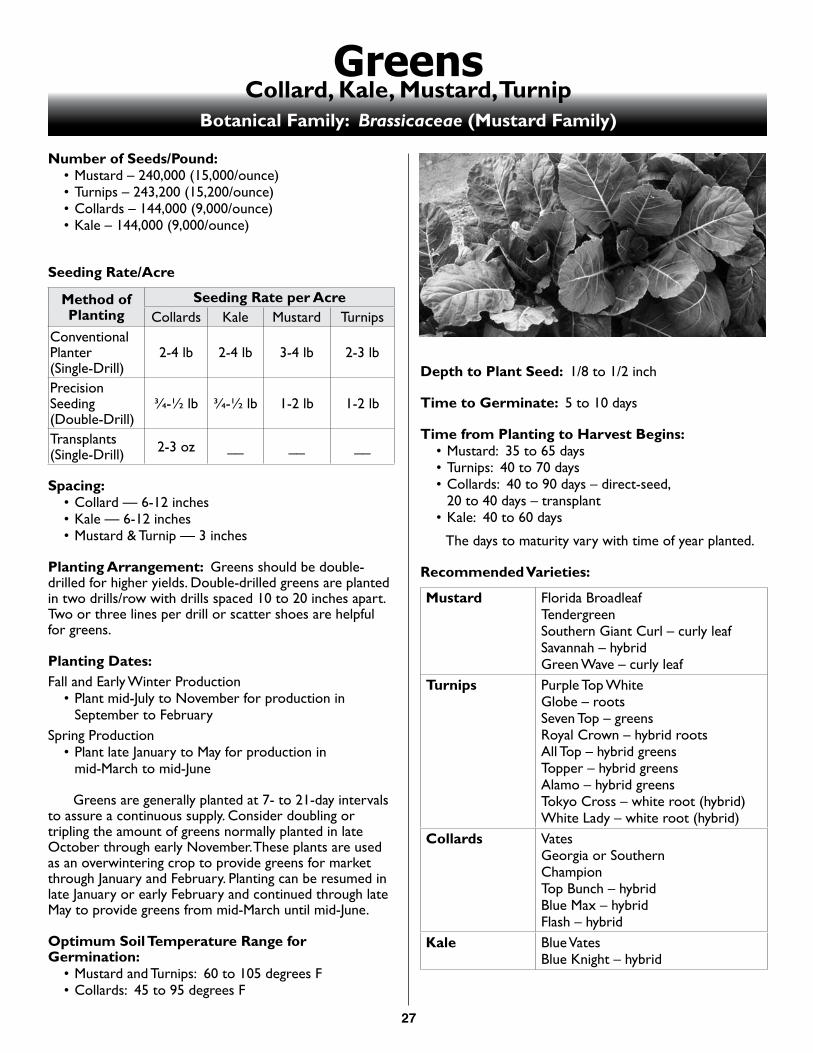
27
GreensCollard, Kale, Mustard, Turnip
Botanical Family: Brassicaceae (Mustard Family)
Number of Seeds/Pound:• Mustard – 240,000 (15,000/ounce)• Turnips – 243,200 (15,200/ounce)• Collards – 144,000 (9,000/ounce)• Kale – 144,000 (9,000/ounce)
Seeding Rate/Acre
Method of Planting
Seeding Rate per AcreCollards Kale Mustard Turnips
Conventional Planter(Single-Drill)
2-4 lb 2-4 lb 3-4 lb 2-3 lb
Precision Seeding (Double-Drill)
¾-½ lb ¾-½ lb 1-2 lb 1-2 lb
Transplants (Single-Drill) 2-3 oz __ __ __
Spacing:• Collard — 6-12 inches• Kale — 6-12 inches• Mustard & Turnip — 3 inches
Planting Arrangement: Greens should be double-drilled for higher yields. Double-drilled greens are planted in two drills/row with drills spaced 10 to 20 inches apart. Two or three lines per drill or scatter shoes are helpful for greens.
Planting Dates:Fall and Early Winter Production
• Plant mid-July to November for production in September to February
Spring Production• Plant late January to May for production in mid-March to mid-June
Greens are generally planted at 7- to 21-day intervals to assure a continuous supply. Consider doubling or tripling the amount of greens normally planted in late October through early November. These plants are used as an overwintering crop to provide greens for market through January and February. Planting can be resumed in late January or early February and continued through late May to provide greens from mid-March until mid-June.
Optimum Soil Temperature Range for Germination:
• Mustard and Turnips: 60 to 105 degrees F• Collards: 45 to 95 degrees F
Depth to Plant Seed: 1/8 to 1/2 inch
Time to Germinate: 5 to 10 days
Time from Planting to Harvest Begins:• Mustard: 35 to 65 days• Turnips: 40 to 70 days• Collards: 40 to 90 days – direct-seed,
20 to 40 days – transplant• Kale: 40 to 60 days
The days to maturity vary with time of year planted.
Recommended Varieties:
Mustard Florida Broadleaf Tendergreen Southern Giant Curl – curly leaf Savannah – hybrid Green Wave – curly leaf
Turnips Purple Top White Globe – rootsSeven Top – greensRoyal Crown – hybrid rootsAll Top – hybrid greensTopper – hybrid greens Alamo – hybrid greensTokyo Cross – white root (hybrid) White Lady – white root (hybrid)
Collards Vates Georgia or SouthernChampion Top Bunch – hybridBlue Max – hybridFlash – hybrid
Kale Blue VatesBlue Knight – hybrid
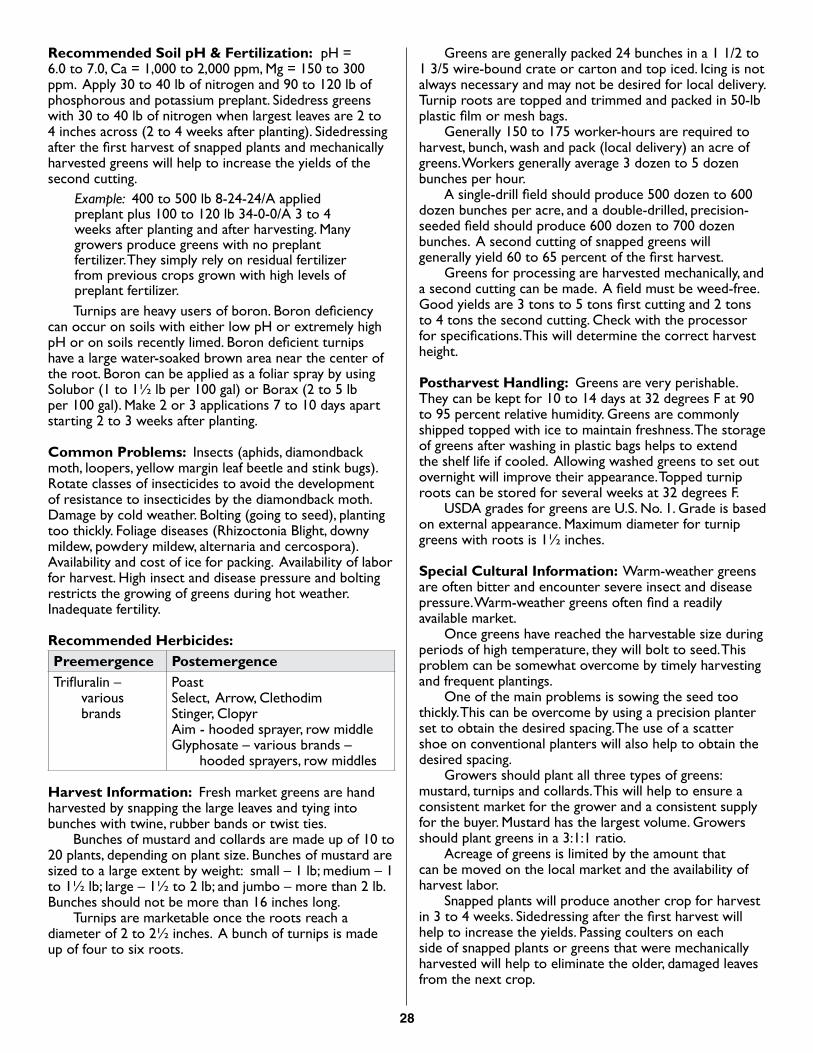
28
Recommended Soil pH & Fertilization: pH = 6.0 to 7.0, Ca = 1,000 to 2,000 ppm, Mg = 150 to 300 ppm. Apply 30 to 40 lb of nitrogen and 90 to 120 lb of phosphorous and potassium preplant. Sidedress greens with 30 to 40 lb of nitrogen when largest leaves are 2 to 4 inches across (2 to 4 weeks after planting). Sidedressing after the first harvest of snapped plants and mechanically harvested greens will help to increase the yields of the second cutting.
Example: 400 to 500 lb 8-24-24/A applied preplant plus 100 to 120 lb 34-0-0/A 3 to 4 weeks after planting and after harvesting. Many growers produce greens with no preplant fertilizer. They simply rely on residual fertilizer from previous crops grown with high levels of preplant fertilizer.
Turnips are heavy users of boron. Boron deficiency can occur on soils with either low pH or extremely high pH or on soils recently limed. Boron deficient turnips have a large water-soaked brown area near the center of the root. Boron can be applied as a foliar spray by using Solubor (1 to 1½ lb per 100 gal) or Borax (2 to 5 lb per 100 gal). Make 2 or 3 applications 7 to 10 days apart starting 2 to 3 weeks after planting.
Common Problems: Insects (aphids, diamondback moth, loopers, yellow margin leaf beetle and stink bugs). Rotate classes of insecticides to avoid the development of resistance to insecticides by the diamondback moth. Damage by cold weather. Bolting (going to seed), planting too thickly. Foliage diseases (Rhizoctonia Blight, downy mildew, powdery mildew, alternaria and cercospora). Availability and cost of ice for packing. Availability of labor for harvest. High insect and disease pressure and bolting restricts the growing of greens during hot weather. Inadequate fertility.
Recommended Herbicides:Preemergence PostemergenceTrifluralin –
various brands
Poast Select, Arrow, ClethodimStinger, Clopyr Aim - hooded sprayer, row middleGlyphosate – various brands –
hooded sprayers, row middles
Harvest Information: Fresh market greens are hand harvested by snapping the large leaves and tying into bunches with twine, rubber bands or twist ties. Bunches of mustard and collards are made up of 10 to 20 plants, depending on plant size. Bunches of mustard are sized to a large extent by weight: small – 1 lb; medium – 1 to 1½ lb; large – 1½ to 2 lb; and jumbo – more than 2 lb. Bunches should not be more than 16 inches long. Turnips are marketable once the roots reach a diameter of 2 to 2½ inches. A bunch of turnips is made up of four to six roots.
Greens are generally packed 24 bunches in a 1 1/2 to 1 3/5 wire-bound crate or carton and top iced. Icing is not always necessary and may not be desired for local delivery. Turnip roots are topped and trimmed and packed in 50-lb plastic film or mesh bags. Generally 150 to 175 worker-hours are required to harvest, bunch, wash and pack (local delivery) an acre of greens. Workers generally average 3 dozen to 5 dozen bunches per hour. A single-drill field should produce 500 dozen to 600 dozen bunches per acre, and a double-drilled, precision-seeded field should produce 600 dozen to 700 dozen bunches. A second cutting of snapped greens will generally yield 60 to 65 percent of the first harvest. Greens for processing are harvested mechanically, and a second cutting can be made. A field must be weed-free. Good yields are 3 tons to 5 tons first cutting and 2 tons to 4 tons the second cutting. Check with the processor for specifications. This will determine the correct harvest height.
Postharvest Handling: Greens are very perishable. They can be kept for 10 to 14 days at 32 degrees F at 90 to 95 percent relative humidity. Greens are commonly shipped topped with ice to maintain freshness. The storage of greens after washing in plastic bags helps to extend the shelf life if cooled. Allowing washed greens to set out overnight will improve their appearance. Topped turnip roots can be stored for several weeks at 32 degrees F. USDA grades for greens are U.S. No. 1. Grade is based on external appearance. Maximum diameter for turnip greens with roots is 1½ inches.
Special Cultural Information: Warm-weather greens are often bitter and encounter severe insect and disease pressure. Warm-weather greens often find a readily available market. Once greens have reached the harvestable size during periods of high temperature, they will bolt to seed. This problem can be somewhat overcome by timely harvesting and frequent plantings. One of the main problems is sowing the seed too thickly. This can be overcome by using a precision planter set to obtain the desired spacing. The use of a scatter shoe on conventional planters will also help to obtain the desired spacing. Growers should plant all three types of greens: mustard, turnips and collards. This will help to ensure a consistent market for the grower and a consistent supply for the buyer. Mustard has the largest volume. Growers should plant greens in a 3:1:1 ratio. Acreage of greens is limited by the amount that can be moved on the local market and the availability of harvest labor. Snapped plants will produce another crop for harvest in 3 to 4 weeks. Sidedressing after the first harvest will help to increase the yields. Passing coulters on each side of snapped plants or greens that were mechanically harvested will help to eliminate the older, damaged leaves from the next crop.
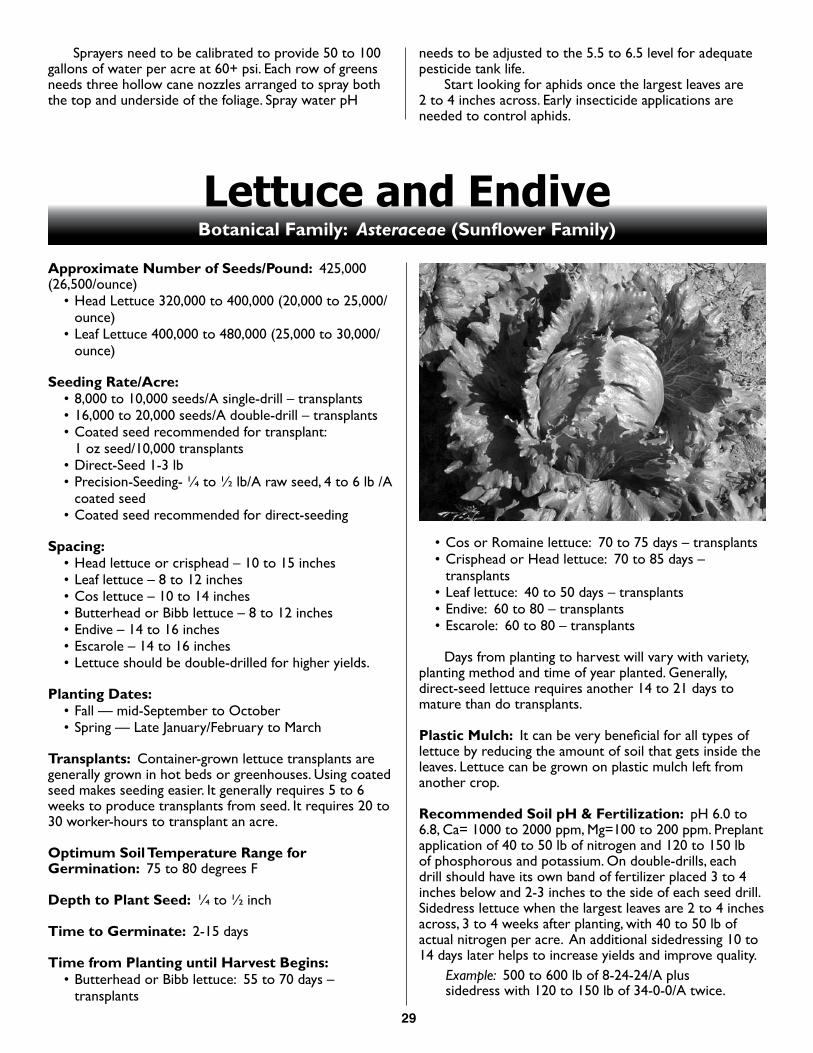
29
Sprayers need to be calibrated to provide 50 to 100 gallons of water per acre at 60+ psi. Each row of greens needs three hollow cane nozzles arranged to spray both the top and underside of the foliage. Spray water pH
Approximate Number of Seeds/Pound: 425,000 (26,500/ounce)
• Head Lettuce 320,000 to 400,000 (20,000 to 25,000/ounce)
• Leaf Lettuce 400,000 to 480,000 (25,000 to 30,000/ounce)
Seeding Rate/Acre: • 8,000 to 10,000 seeds/A single-drill – transplants• 16,000 to 20,000 seeds/A double-drill – transplants• Coated seed recommended for transplant:
1 oz seed/10,000 transplants• Direct-Seed 1-3 lb • Precision-Seeding- ¼ to ½ lb/A raw seed, 4 to 6 lb /A
coated seed• Coated seed recommended for direct-seeding
Spacing:• Head lettuce or crisphead – 10 to 15 inches• Leaf lettuce – 8 to 12 inches• Cos lettuce – 10 to 14 inches• Butterhead or Bibb lettuce – 8 to 12 inches• Endive – 14 to 16 inches• Escarole – 14 to 16 inches• Lettuce should be double-drilled for higher yields.
Planting Dates:• Fall — mid-September to October• Spring — Late January/February to March
Transplants: Container-grown lettuce transplants are generally grown in hot beds or greenhouses. Using coated seed makes seeding easier. It generally requires 5 to 6 weeks to produce transplants from seed. It requires 20 to 30 worker-hours to transplant an acre.
Optimum Soil Temperature Range for Germination: 75 to 80 degrees F
Depth to Plant Seed: ¼ to ½ inch
Time to Germinate: 2-15 days
Time from Planting until Harvest Begins:• Butterhead or Bibb lettuce: 55 to 70 days –
transplants
needs to be adjusted to the 5.5 to 6.5 level for adequate pesticide tank life. Start looking for aphids once the largest leaves are 2 to 4 inches across. Early insecticide applications are needed to control aphids.
Lettuce and EndiveBotanical Family: Asteraceae (Sunflower Family)
• Cos or Romaine lettuce: 70 to 75 days – transplants• Crisphead or Head lettuce: 70 to 85 days –
transplants• Leaf lettuce: 40 to 50 days – transplants• Endive: 60 to 80 – transplants• Escarole: 60 to 80 – transplants
Days from planting to harvest will vary with variety, planting method and time of year planted. Generally, direct-seed lettuce requires another 14 to 21 days to mature than do transplants.
Plastic Mulch: It can be very beneficial for all types of lettuce by reducing the amount of soil that gets inside the leaves. Lettuce can be grown on plastic mulch left from another crop.
Recommended Soil pH & Fertilization: pH 6.0 to 6.8, Ca= 1000 to 2000 ppm, Mg=100 to 200 ppm. Preplant application of 40 to 50 lb of nitrogen and 120 to 150 lb of phosphorous and potassium. On double-drills, each drill should have its own band of fertilizer placed 3 to 4 inches below and 2-3 inches to the side of each seed drill. Sidedress lettuce when the largest leaves are 2 to 4 inches across, 3 to 4 weeks after planting, with 40 to 50 lb of actual nitrogen per acre. An additional sidedressing 10 to 14 days later helps to increase yields and improve quality.
Example: 500 to 600 lb of 8-24-24/A plus sidedress with 120 to 150 lb of 34-0-0/A twice.
30
Common Problems: Sclerotinia drop, downy mildew, damping-off, viruses, rhizoctonia bottom rot, alternaria leaf spot, cabbage loopers, cutworms, corn earworm, aphids, army worms, beet army worms, diamondback moth, whiteflies, vegetable weevils, yellow margin leaf beetle, hard freezes, bolting, tip burn. Rotate classes of insecticides to avoid the development of resistance to insecticides by the diamondback moth. Inconsistency in quality because of the fluctuation in temperatures and sunlight during the growing season. Heavy rains splashing dirt into the head. High cost of stand establishment caused by use of transplants. Difficulty in getting stands by direct seeding during hot, cold and rainy weather. Lack of readily available herbicides. High cost of precooling equipment.
Recommended Varieties:
Crisphead or Head lettuce:Crispino (fall and spring)Ithaca (spring)Great Lakes (fall and spring)
Leaf lettuce - forms a bunch instead of a head, has a crisp texture and curly leaves. Available in a green leaf and red leaf (green leaf with red-tinged edges) types. Red SailsSloboltWaldmann’s GreenSalad BowlRuby Red
Romaine or Cos Lettuce – loaf-shaped head with coarse, wide-stemmed leaves.Green Forest – Green Towers, Red Eye Cos, Ideal CosSierra – Batvia TypesNevada – Batvia Types
Butterhead or Bibb lettuce - small heads with dark-green,soft,veryflexibleleaveswithsmallveins.
ButtercrunchErmosaEndive - also referred to as “chicory,” characterized
by loose heads of curly, edge-indented leaves that can vary from a dark green at the edges to almost white at the center near the stem. The Italian chicory is commonly known as radicchio.
Salad KingEscarole – similar to endive but has a looser head and
broader, less ruffled leaves. Florida Deep HeartFull Heart
Recommended Herbicides:
Preemergence Kerb (direct-seeding or transplanting)Balan (direct-seeded)Prefar (direct-seeding or transplanting)
PostemergenceAim – hooded sprayer, row middlesGlyphosate – various brands – hooded sprayers, row
middlesPoast Kerb (Do not apply to leaf lettuce.) Select, Arrow, Clethodim (leaf lettuce only)
Harvest Information: Harvest head lettuce when the heads are firm. A mature head will yield slightly when pressed with the thumb. The first harvest usually occurs when at least 25 percent of the heads are firm. Damage to wrapper leaves can be reduced to a minimum by harvesting in the afternoon or when the leaves are less turgid. Heads are cut and trimmed to remove excess wrapper leaves. Leave three undamaged wrapper leaves on each head. Head lettuce should not be cut after a heavy rain or in the early morning because the plants may be gorged with water and the outer, or wrapper, leaves are then easily broken or destroyed in handling. When it is necessary to harvest the lettuce when the leaves are brittle, the heads are cut carefully and turned butt up for a short time to permit the outer leaves to wilt slightly, after which the heads can be handled with less danger of breaking or destroying the wrapper leaves. A field is normally harvested two to four times. It generally requires 25 to 50 worker-hours to harvest an acre of lettuce. Head lettuce is individually wrapped and packed in cartons of 18, 24 or 30 count weighing 45 to 50 lb per carton or in a 1-1/9 bushel crate weighing 22 lb. Buttercrunch lettuce is packed in a carton or crate of 24-count weighing 20 lb. Bibb lettuce is packed in a flat carton or crate weighing 10 lb. Leaf lettuce is packed in a carton or crate of 24-count weighing 25 lb or 1-1/9 bushel crate weighing 14 lb. Romaine is packed in a carton of 24-count weighing 40 lb or a 1-1/9 bushel carton weighing 22 lb. The bottom layer of a box is arranged with butts down and the top layer with butts up.
Postharvest Handling: Lettuce is a high-respiration vegetable. Precooling to 32 degrees F and storing with good air circulation are necessary to protect quality. Lettuce is generally cut, wrapped and boxed in the field. Lettuce is cooled by vacuum cooling, hydrocooling or forced-air cooling and then stored at 32 degrees F at 95 to 100 percent relative humidity. Grades of head lettuce are U.S. Fancy, U.S. No. 1 and U.S. No. 2. Grades of romaine, endive and escarole are U.S. No. 1 and Unclassified. Differences among grades are based primarily on exterior appearance. Good-quality head lettuce should have a firm springy head with even green leaves. Good-quality Butterhead lettuce should have even-colored, dark green leaves with a soft buttery feel. Leaf lettuce should have crisp fresh leaves with a springy feel to the bunch. Endive and escarole should have crisp, bright-colored leaves with a semi-glossy appearance. The leaves should be crisp and should snap when broken.
31
Special Cultural Information: Lettuce should be grown for local markets. Fresh lettuce will bring a premium price at local markets. Growers should stagger small plantings on a 2- to 4-week schedule to provide a consistent supply for the markets. Because of small seed size, poor emergence vigor, heat and light sensitivity, lettuce must be sown at a very shallow depth (1/8 to 1/4 inches). Seedbed surfaces must not be allowed to dry out before emergence. Cooling the seedbed with irrigation will help obtain stands during hot weather. Lettuce thrives on cool nights. High-quality lettuce is produced only when the air and soil temperatures are moderately cool while the crop is maturing. High temperatures tend to cause loose heads, bitterness and some diseases. Early in its development,
lettuce will tolerate considerable frost, but, if severely frosted when nearly mature, it is more subject to slime. Bolting may occur if the lettuce plants are subjected to high temperatures during most of the growing season. Lettuce with developed seed stems has a bitter flavor. A seed stem can usually be detected by wide spaces between the outer leaves at their base and a knoblike swelling protruding beyond the normal contour of the head. Dead or discolored areas on the outer leaves (tip burn) may indicate decay. Mulching also keeps soil off the leaves, reducing chances of disease from soil-borne organisms. Direct-seeded plants should be thinned when two or three true leaves have formed. Delaying thinning can result in uneven harvest.
Number of Seeds/Pound: 8,000 (500/ounce)
Seeding Rate/Acre: • 5 to 6 lb drill-seeded – 40,000 to 50,000 seeds/A• 1 to 1½ lb transplants• 8,000 to 10,000 seeds/A transplant• 3 to 4 lb precision-seeded• Precision-seeding or transplant of hybrids is
recommended due to the high cost of seed.
Spacing: 8 to 12 inches Early yields will be higher for closer spacing. Total yields will be higher for wider spacing.
Planting Arrangement: Growers should consider planting okra on every other row or 2-to-1 skip, especially on narrow rows. The skip-row will facilitate harvest.
Planting Dates:• South Louisiana – late March or April to early August• North Louisiana – April to early August
Okra is very sensitive to cold soils. Plant after damage of frost is over and soil has warmed to 70 degrees F for several days.
Optimum Soil Temperature Range for Germination: 70 to 95 degrees F
Depth to Plant Seed: ½ to 1 inch
Time to Germinate: 10 to 14 days
Time from Planting to Harvest Begins: 50 to 60 days
Approximate Time from Pollination to Market: 4 to 6 days
Recommended Varieties:
Open PollinatedClemson Spineless (ribbed)Louisiana Green Velvet (round)Emerald (round)Gold Coast (round) (preferred type in the New
Orleans market area) (only local seed available)Hybrid
Annie Oakley II (ribbed)Cajun Delight (ribbed)
Recommended Soil pH & Fertilization: pH 5.5 to 6.5, Ca = 1,000 to 1,500 ppm, Mg = 100 to 200 ppm. Okra is very sensitive to low pH soils. Apply 0 to 30 lb of nitrogen and 60 to 90 lb of phosphorous and potassium per acre preplant. Okra is very sensitive to overfertilization with nitrogen. If the organic matter content of the soil is higher than 1.5 percent, no preplant or sidedress nitrogen is needed. Sidedress okra if the organic matter content is below 1.5 percent with 15 to 20 lb of nitrogen per acre at first fruit set and again in 3 to 4 weeks.
Example: 300-400 lb of 8-24-24/A plus 50 to 60 lb 34-0-0/A at first fruit set and again in 3 to 4 weeks. If organic matter is higher than 1.5 percent, apply 300 to 400 lb of 0-20-20/A preplant. Sidedressing is not necessary in this situation.
OkraBotanical Family: Malacca (Mallow Family)
32
Common Problems: Poor stands caused by planting too early or poor quality seed. Stink bugs (crooked pods), nematodes, plant bugs, aphids, leafhoppers. Fire ants feed on flowers and young fruit. Overfertilization with nitrogen. Pod rot during prolonged rainy periods. Adequate harvest labor is essential to the success of okra production. Blackening of pods during storage because of bruises.
Recommended Herbicides:
PreemergenceTrifluralin – various brands
PostemergenceAim – hooded sprayer, row middlesGlyphosate – various brands – hooded sprayers, row
middles
Harvest Information: Okra has to be harvested every 1 to 2 days to maintain pod size in a marketable range. Okra will continue to produce until frost if harvested regularly. Varieties with cut leaf characteristics make harvesting somewhat easier. Fresh market prefers small pods 2 to 4 inches long with a short stem (3/4 to 1 inch). Okra is packed in bushel hampers or crates with a weight of 30 lb. Good yields: 200 to 300 bushels/A; 250 to 300 worker-hours required to harvest 1 acre; 15 to 20 worker-hours required to pack 250 bushels of okra. Many growers harvest okra on halves with their labor. Okra pods can be snapped or cut from the plant. Snapping provides a means of grading during harvest. The caps of
the okra pods that are too hard will not break and snap cleanly from the stem. The hard okra should be discarded during harvest. Okra is also harvested by cutting. The leaves are often cut along with the pods. Cutting the leaves makes harvesting okra easier.
Postharvest Handling: Okra can be stored for 4 to 5 days at 45 to 50 degrees F at 85 to 95 percent relative humidity. The field heat should be removed as quickly as possible by hydrocooling after harvest. Temperatures below 45 degrees F cause chilling injury manifested by surface discoloration, pitting and decay. Placing okra in plastic bags when stored at room temperatures helps to extend shelf life. Handle okra as little as possible. To avoid bruising, it is best to grade and pack okra while harvesting. Market okra within 24 to 36 hours of harvest. All grading and packing tables should be padded to prevent bruising. USDA Grades of okra are U.S. No. 1 and Unclassified. Grades are based on external appearance. Fresh okra bruises easily; blackening of damaged areas occurs within a few hours. When held in hampers for more than 24 hours without refrigeration, a bleaching injury may develop.
Special Cultural Information: Plantings need to be made every 4 to 6 weeks to maintain a consistent volume. Using transplants and plastic mulch will increase earliness. Tall plants can be cut off about 12 to 18 inches above the ground in late July and August. The plants will sprout again to make a second crop. Growers are encouraged to check with local seed stores to determine the preferred varieties in the area.
OnionsBulb and Green
Botanical Family: Alliaceae (Onion Family)
Number of Seeds/Pound: 136,000 (8,500/ounce)
Seeding Rate/Acre:• 4 to 6 lb/A – direct-seeded, 500,000 to
800,000 seeds an acre• 3 to 4 lb/A – precision-seeded• 10 to 12 lb coated seed/A – precision-seeded• 15 to 20 lb coated seed/A – conventional planter• 1 lb/A – transplants• 25,000 to 30,000 plants/A single-drill• 50,000 to 60,000 plants/A double-drill• 3 oz seed/10,000 transplants
Spacing:• Bulb Onions: 2 to 4 inches Onions should be grown on double-drills (spaced 10
to 12 inches apart) to obtain higher yields. The use of a coulter or scatter shoe to obtain multiple rows (2 or 3 rows/drill) per seed drill will help to increase plant populations and yields.
• Green Onions: ½ to 1 inch Green onions are sown thickly on the drill. The use
of a coulter or scatter shoe on the planter to obtain multiple rows on the seed drill will help to increase plant populations and increase yields.
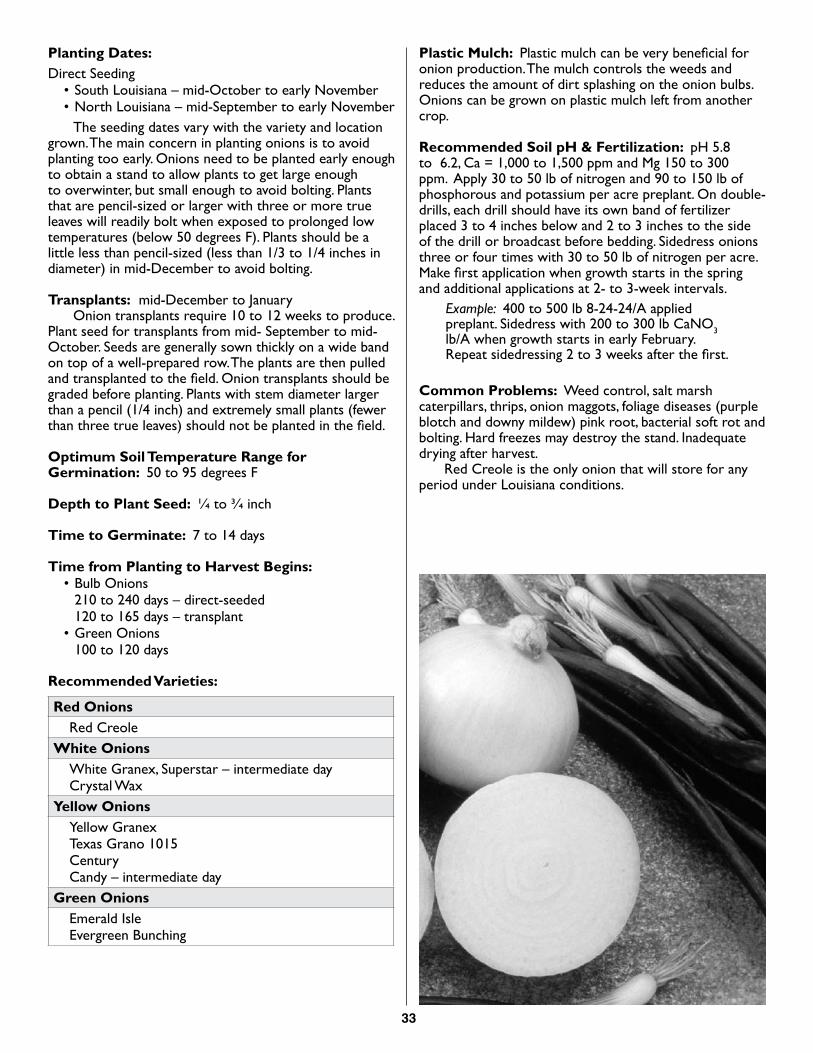
33
Planting Dates:Direct Seeding
• South Louisiana – mid-October to early November• North Louisiana – mid-September to early November
The seeding dates vary with the variety and location grown. The main concern in planting onions is to avoid planting too early. Onions need to be planted early enough to obtain a stand to allow plants to get large enough to overwinter, but small enough to avoid bolting. Plants that are pencil-sized or larger with three or more true leaves will readily bolt when exposed to prolonged low temperatures (below 50 degrees F). Plants should be a little less than pencil-sized (less than 1/3 to 1/4 inches in diameter) in mid-December to avoid bolting.
Transplants: mid-December to January Onion transplants require 10 to 12 weeks to produce. Plant seed for transplants from mid- September to mid-October. Seeds are generally sown thickly on a wide band on top of a well-prepared row. The plants are then pulled and transplanted to the field. Onion transplants should be graded before planting. Plants with stem diameter larger than a pencil (1/4 inch) and extremely small plants (fewer than three true leaves) should not be planted in the field.
Optimum Soil Temperature Range for Germination: 50 to 95 degrees F
Depth to Plant Seed: ¼ to ¾ inch
Time to Germinate: 7 to 14 days
Time from Planting to Harvest Begins:• Bulb Onions 210 to 240 days – direct-seeded 120 to 165 days – transplant• Green Onions 100 to 120 days
Recommended Varieties:
Red OnionsRed Creole
White OnionsWhite Granex, Superstar – intermediate dayCrystal Wax
Yellow OnionsYellow GranexTexas Grano 1015CenturyCandy – intermediate day
Green OnionsEmerald IsleEvergreen Bunching
Plastic Mulch: Plastic mulch can be very beneficial for onion production. The mulch controls the weeds and reduces the amount of dirt splashing on the onion bulbs. Onions can be grown on plastic mulch left from another crop.
Recommended Soil pH & Fertilization: pH 5.8 to 6.2, Ca = 1,000 to 1,500 ppm and Mg 150 to 300 ppm. Apply 30 to 50 lb of nitrogen and 90 to 150 lb of phosphorous and potassium per acre preplant. On double-drills, each drill should have its own band of fertilizer placed 3 to 4 inches below and 2 to 3 inches to the side of the drill or broadcast before bedding. Sidedress onions three or four times with 30 to 50 lb of nitrogen per acre. Make first application when growth starts in the spring and additional applications at 2- to 3-week intervals.
Example: 400 to 500 lb 8-24-24/A applied preplant. Sidedress with 200 to 300 lb CaNO3 lb/A when growth starts in early February. Repeat sidedressing 2 to 3 weeks after the first.
Common Problems: Weed control, salt marsh caterpillars, thrips, onion maggots, foliage diseases (purple blotch and downy mildew) pink root, bacterial soft rot and bolting. Hard freezes may destroy the stand. Inadequate drying after harvest. Red Creole is the only onion that will store for any period under Louisiana conditions.
34
Recommended Herbicides:
Preemergence Dacthal – direct-seeded and transplantPrefar – direct-seeded and transplantOutlook – direct-seeded and transplant
Post TransplantGoal, Galligan
PostemergenceFusiladeGoal, GalliganMoxyBattery acid 3 to 5 percent solution of sulfuric acidPoastSelect, Arrow, ClethodimProwl, Pendimax, PentagonAim – hooded sprayer, row middlesGlyphosate – various brands, hooded sprayer, row
middlesOutlook
Harvest Information: Onions are ready to harvest when 50 to 60 percent of the tops have fallen over. This generally occurs in May. Passing a lifter blade under the onions when the tops have fallen encourages the drying process and facilitates pulling. The bulbs are hand-pulled and trimmed. The roots are trimmed close to the bulb, and the neck is trimmed 1 to 1½ inches above the bulb. The bulbs are further dried by placing them in a shed or in burlap sacks in the field. After drying, the outer loose portions of the sheath are removed. The pulling, trimming and cleaning of onions require considerable handling and time. Any means to reduce the handling will help reduce the harvest expense. From 50 to 100 worker-hours are required to harvest and trim an acre of onions. Good yields: 200 to 400 50-lb sacks. Bulb onions can be sold as a fresh product. They are pulled once they reach the size of a golf ball. They are bunched with the tops (three or four onions/bunch). Sold as a fresh spring onion. This is a good way to increase the sales of onions. Green onions are harvested once they reach acceptable size (1/2 inch in diameter). They are pulled by hand, cleaned, washed and made into bunches weighing 1/3 to 1/2 lb and trimmed to the desired length, generally 12 to 18 inches. They are packed in wooden wire-bound crates or cartons (18 lb) holding 4 dozen bunches. Green onions are generally topped with ice for shipping.
Postharvest Handling: Onions are generally cured by drying for 3 to 4 days under natural conditions. A 3 to 5 percent weight loss from harvest is necessary for curing. Onions are stored in a cool, dry, well-ventilated area at 45 to 50 degrees F at 65 to 70 percent humidity. The storage life of onions mainly depends on the variety. Onions can be cured by the use of forced, heated air (90 to 93 degrees F for 8 to 16 hours) in grain bins or double floor wagons with portable crop dryers.
Onions are packed in 50-lb mesh sacks or 40- to 50-lb cartons. Many onions, especially the smaller sizes, are bought by wholesalers who repack them into smaller units, 3-lb mesh sacks. USDA grades of onions are U.S. No. 1, U.S. Combination and U.S. No. 2. Grades are based on external appearance. Sizes are specified in connection with the grade; colossal 3¾ inches or greater in diameter; jumbo are 3 to 3¾ inches in diameter; medium are 2 to 3 inches in diameter and smalls are 1 to 2 inches. Repacked or prepacked are from 1¾ to 3 inches in diameter with 60 percent or more 2 inches or larger in diameter and small are 1 to 2 inches in diameter. Green onions are very perishable. The field heat should be removed by hydrocooling or topping with ice soon after harvesting. A considerable amount of hand labor is required to harvest and pack green onions. Requires 20 to 30 worker-hours/A harvest labor; 100 to 120 worker-hours/A packing labor (400 crates/A).USDA grades of green onions are U.S. No. 1 (8 inches long and ¼-1 inch in diameter), U.S. No. 2 (more than 8 inches long and ¼ to 1½ inches in diameter).
Special Cultural Information: The trimming of onions in the field will help to reduce the handling time involved in harvesting onions. The drying of onions in burlap sacks (one-half to two-thirds full) either in the field or shed will facilitate the cleaning process. Sheep shears can be used to trim onions. To obtain good size, onions require lots of nitrogen and moisture during the bulbing process. Weed control is a serious problem in onions because of the extended time they are in the field and cold wet weather encountered during this time. A preemergence, postemergence and layby application of herbicides is essential for a clean onion crop. The onions should be cultivated and treated with a postemergence herbicide early. This can be followed by an additional layby application. This procedure will help to keep the onions clean. Problems with weeds develop when growers fail to use means of weed control early. Once the wet, cool weather sets in, successful weed control practices are essentially impossible. Growers are encouraged to check with potential buyers on the preference of green onion bunch size and length.
35
ParsleyBotanical Family: Apiaceae (Carrot Family)
Approximately Number of Seeds/Pound: 250,000 to 288,000 (15,000 to 18,000/ounce)
Seeding Rate/Acre (varies with the row arrangements)• Direct-seeded – 6 to 8 pounds, 2 to 3 ounces seed/A
transplants • Transplants – 2 to 3 ounces
Spacing: Direct-seeded parsley is planted thickly in drills. Parsley should be grown on double-drills (spaced 10 to 12 inches apart) to obtain higher yields. The use of a coulter or scatter shoe to obtain multiple rows per drill will help to increase plant populations and yields.
Transplants: 3 to 4 inches
Planting Dates: • Fall Crop: mid-September to early November to cut
in late November through March • Spring Crop: February to April to cut through June. • Transplants: Parsley is transplanted to overcome
the long time that seeds require to germinate and to ensure good stands. Transplanted parsley is quicker to cut and bunch than direct-seeded plants. Start transplants 6 to 8 weeks before the anticipated planting dates. Plant 4 to 5 seeds in a 1-inch plastic cell pack.
Optimum Soil Temperature Range for Germination: 50 to 85 degrees F
Depth to Plant Seed: 1/4 to 1/2 inch
Time to Germinate: 21 to 25 days
Time from Planting to Harvest Begins: • Direct-Seeded – 90 to 100 days • Transplants – 60 to 70 days
Recommended Varieties • Dark Green Italian • Giant of Italy • Forest Green – curly
Recommended Soil pH & Fertilization: pH 6.0 to 7.0, Ca= 1000 to 1500 ppm, Mg 100 to 200 ppm. Preplant application of 30 pounds of nitrogen, 90 to 150 pounds of phosphorus and potassium per acre. Sidedress with 30 pounds of nitrogen per acre 6 to 8 weeks after planting, (when the plants make a true leaf) and again in 2 to 3 weeks after the first sidedressing. Sidedress with 30 pounds of nitrogen per acre after each cutting.
Example: Preplant 400 to 500 lb of 8-24-24 /acre plus 100 lb of 34-0-0 6 to 8 weeks after planting and again in 2 to 3 weeks after the first sidedressing.
Common problems: Difficulty in obtaining a stand during hot weather and on soils that readily crusts. Slow germination of seed. Seeds take 21 to 25 days to germinate and 3 to 4 weeks to emerge from the soil. Damping off, downy mildew, alternaria, cercospora and bacterial blight. Aphids, worms, caterpillars, whiteflies. Parsley will develop seed heads after being exposed to low temperatures and as the days become longer.
Recommended Herbicides:
Preemergence PostemergenceLoroxPrefar
LoroxPoastAim – hooded sprayer, row middles Varsol, Stoddard Solvent
Harvest Information: Parsley is ready to harvest when the plants reach 6 inches tall. As the season progresses, plants become taller and may be 12-14 inches tall when cut. They are cut by hand and made into small bunches with rubber bands. The diameter of the stem end of the bunch is ¾ to 1 in (about the size a circle makes when touching thumb and forefinger. A planting of parsley can be cut every 3 or 4 weeks until it develops a seed stalk in the spring. Growers generally cut one-third or one-fourth of the planting every week for market. The first cutting is sidedressed and is ready to cut again in 3 or 4 weeks. For the wholesale market, the bunches of parsley are packed in 1-1/9 bushel cardboard cartons or wire bound crates weighing 21 pounds. Parsley has only a US No. 1 Grade, which is based on external appearance.
Postharvest Handling: Parsley is topped with ice for shipping. Parsley can be stored at 32 degrees F for 8 to 10 weeks.
Special Cultural Information: Parsley for the market should be planted in the early fall to allow it to become established before low temperatures occur. These plantings will provide parsley for the market through the winter months until spring, and plantings made in late fall and early winter will not be large enough to harvest until the spring.
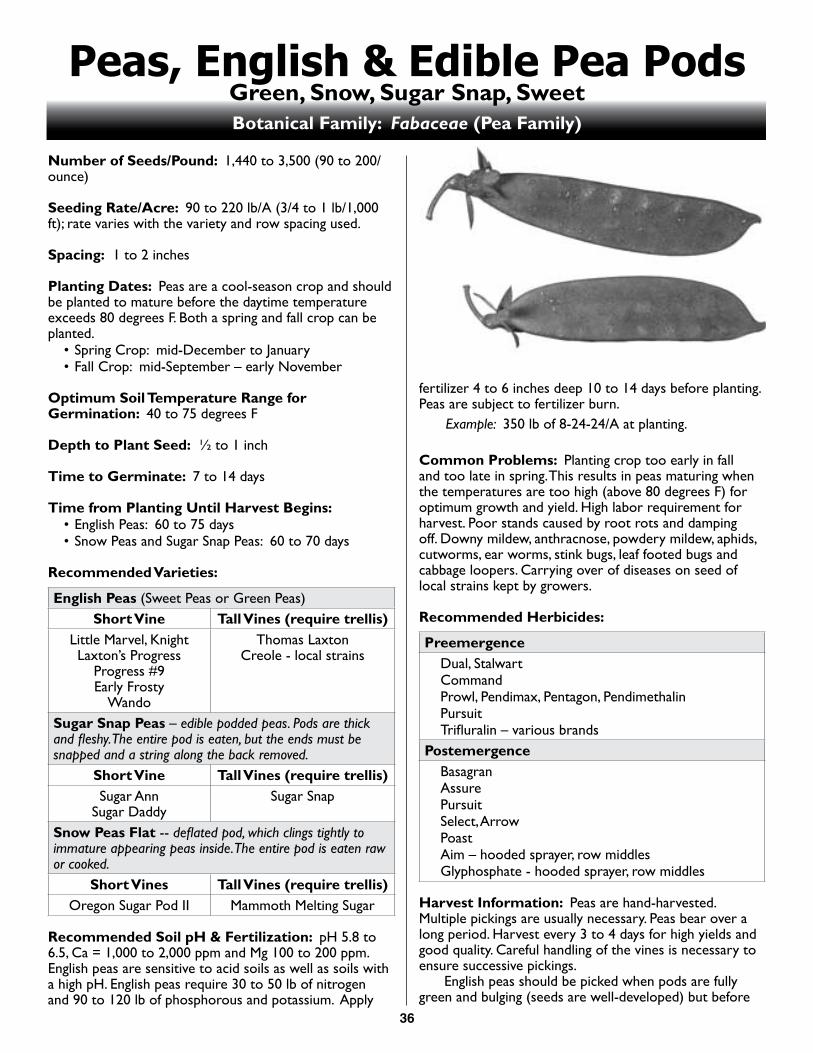
36
Peas, English & Edible Pea PodsGreen, Snow, Sugar Snap, Sweet Botanical Family: Fabaceae (Pea Family)
Number of Seeds/Pound: 1,440 to 3,500 (90 to 200/ounce)
Seeding Rate/Acre: 90 to 220 lb/A (3/4 to 1 lb/1,000 ft); rate varies with the variety and row spacing used.
Spacing: 1 to 2 inches
Planting Dates: Peas are a cool-season crop and should be planted to mature before the daytime temperature exceeds 80 degrees F. Both a spring and fall crop can be planted.
• Spring Crop: mid-December to January• Fall Crop: mid-September – early November
Optimum Soil Temperature Range for Germination: 40 to 75 degrees F
Depth to Plant Seed: ½ to 1 inch
Time to Germinate: 7 to 14 days
Time from Planting Until Harvest Begins: • English Peas: 60 to 75 days• Snow Peas and Sugar Snap Peas: 60 to 70 days
Recommended Varieties:
English Peas (Sweet Peas or Green Peas)Short Vine Tall Vines (require trellis)
Little Marvel, KnightLaxton’s Progress
Progress #9Early Frosty
Wando
Thomas LaxtonCreole - local strains
Sugar Snap Peas – edible podded peas. Pods are thick andfleshy.Theentirepodiseaten,buttheendsmustbesnapped and a string along the back removed.
Short Vine Tall Vines (require trellis)Sugar Ann
Sugar DaddySugar Snap
Snow Peas Flat -- deflatedpod,whichclingstightlytoimmature appearing peas inside. The entire pod is eaten raw or cooked.
Short Vines Tall Vines (require trellis)Oregon Sugar Pod II Mammoth Melting Sugar
Recommended Soil pH & Fertilization: pH 5.8 to 6.5, Ca = 1,000 to 2,000 ppm and Mg 100 to 200 ppm. English peas are sensitive to acid soils as well as soils with a high pH. English peas require 30 to 50 lb of nitrogen and 90 to 120 lb of phosphorous and potassium. Apply
fertilizer 4 to 6 inches deep 10 to 14 days before planting. Peas are subject to fertilizer burn.
Example: 350 lb of 8-24-24/A at planting.
Common Problems: Planting crop too early in fall and too late in spring. This results in peas maturing when the temperatures are too high (above 80 degrees F) for optimum growth and yield. High labor requirement for harvest. Poor stands caused by root rots and damping off. Downy mildew, anthracnose, powdery mildew, aphids, cutworms, ear worms, stink bugs, leaf footed bugs and cabbage loopers. Carrying over of diseases on seed of local strains kept by growers.
Recommended Herbicides:
Preemergence Dual, StalwartCommandProwl, Pendimax, Pentagon, PendimethalinPursuitTrifluralin – various brands
PostemergenceBasagranAssurePursuitSelect, ArrowPoastAim – hooded sprayer, row middlesGlyphosphate - hooded sprayer, row middles
Harvest Information: Peas are hand-harvested. Multiple pickings are usually necessary. Peas bear over a long period. Harvest every 3 to 4 days for high yields and good quality. Careful handling of the vines is necessary to ensure successive pickings. English peas should be picked when pods are fully green and bulging (seeds are well-developed) but before
37
the seeds start to turn hard. Quality depends primarily on tenderness and sugar content. As the pods increase in size, the sugar content declines and starch increases. Also, the seed coat and the pods become tough. The sugar snap peas are picked when the pods are thick and fleshy and the seeds are well developed. Snow peas are harvested in the immature stage once the pods have obtained their full length (3 to 4 inches), but before the seeds develop. The whole pod is eaten. Good yields of English peas and sugar snaps – 2,000 to 3,000 lb/A; snow peas 5,000 to 8,000 lb/A. Harvest labor – 400 to 600 worker-hours/A; 2 to 2½ worker-hours/bushel
Postharvest Handling: Peas lose their sugar content and quality rapidly unless they are cooled to 32 degrees F soon after harvest. Peas can be stored for 1 to 2 weeks at 32 degrees F at 85 to 90 percent relative humidity. To extend shelf life for local fresh market, pack peas in crushed ice soon after harvest. Peas are packed in 10-lb cardboard boxes, bushel baskets (28 to 30 lb) or bushel wire-bound crates (30
to 32 lb); snow peas, wire-bound crates (50 lb). Grades of peas are No. 1, Fancy. Grades are based on external appearance.
Special Cultural Information: Peas are highly susceptible to poor seedbed preparation, which results in uneven germination, stands and maturity. Peas should be inoculated. The fluctuations in temperature during the pod development process hinder concentrated maturity. Trellising recommended for all types of peas, even the short vine types. Trellising will make harvest easier and more efficient. It will also ensure continued harvest and high yields.
References:• Sanders, D.C. 1985. Garden Peas, North Carolina
Agricultural Extension Service. Leaflet No. 20-A.• Valenzuela, H. 1983. Edible Pod Pea Production in
California. University of California Cooperative Extension Service Leaflet 21328.
Peas, SouthernPurple Hull, Crowder, Black-eyed, Cream Botanical Family: Fabaceae (Pea Family)
Number of Seeds/Pound: 2,000 to 3,600 (125 to 225/ounce)
Seeding Rate/Acre: 15 to 20 lb/A – vining; 20 to 25 lb/A - bushy types, nonvining to semi-vining types; 12 to 15 lb/A - nonvining types for combine harvestSeeding rate varies with the size of seed and row spacing.
Spacing:• Hand harvest – 4 to 6 inches, 2 to 3 plants/foot• Mechanical harvest at green mature stage – 2 to 3
inches, 4 to 6 plants/foot. Use of narrow rows may help to increase yields. Combine harvest at dry stage of maturity – 9 to 12 inches, 1 to 1 1/3 plants/foot
Planting Dates:• South Louisiana – late March to early August• North Louisiana – April to late July
To ensure a continuous supply of fresh market peas, plant peas on a 2- to 3-week schedule. Plant combine-harvested peas in early June to mid July.
Optimum Soil Temperature Range for Germination: 70 to 95 degrees F
Depth to Plant Seed: ½ to 1½ inches
Time to Germinate: 5 to 7 days
Time from Planting Until Harvest Begins: 50 to 85 days; varies according to varieties, time of year planted and maturity stage at harvest.
Approximate Time from Pollination to Market: 17 to 21 days
Recommended Varieties: Growers are encouraged to purchase western-grown pea seed. Several of the new varieties of Southern peas have resistance to common pea diseases, nematodes and field tolerance to viruses.
Black-eyed Peas Pea varieties with seeds that have a dark black eye. These varietiesmayalsobeclassifiedasothertypessuchaspurplehulls.Magnolia Blackeye – bushy nonvining plant, green podQueen Anne – bushy, nonvining plant, recommended for
machine harvestCream Peas Pea varieties with light green or white seeds that do not turn dark when cooked. Pods of these types are light green to white at harvest maturity. The cooking water or pot liquor comes out bright and clear.Elite – bushy, nonvining plant, green/tan podsTop Pick Cream – bushy, nonvining plant, green/tan podZipper Cream – bushy, vining to semi-vining plant, green/
tan pods
38
Crowder Peas Pea varieties with closely spaced seeds. The seeds are tightly pressed against each other and generally have a higher starch content than other types. These varieties may also be classifiedasothertypessuchaspurplehulls.Mississippi Purple – low, bushy, vining plant, purple podMississippi Silver – low, bushy, vining plant, light green/
lime pod Mississippi Shipper – low, bushy, vining plant, purple podDixie Lee – vining plant, green/tan podTop Pick Crowder – bushy, nonvining plant, red/purple
podPurple Hull Peas Pea varieties with purple coloring on the pods. These varieties alsomaybeclassifiedasothertypessuchascrowdersorblack-eyed.Pinkeye Purple Hull – bushy, vining to semi-vining plant,
purple podPinkeye Purple Hull BVR – bushy, vining to semi-vining
plant, purple podsTexas Pinkeye – bushy, nonvining, purple pods,
recommended for machine harvestQuick Pic – bushy, nonvining, purple pod recommended
for machine harvestMississippi Pinkeye Purple Hull – bushy, vining to semi-
vining plant, purple podTop Pick Pinkeye – bushy, nonving red/purple pod
Recommended Soil pH & Fertilization: pH 5.5 to 6.5, Ca = 1,000 to 1,500 ppm, Mg = 100 to 150 ppm. Soils with less than 1 percent organic matter, apply 20 to 30 lb of nitrogen and 90 to 120 lb of phosphorous and potassium preplant. If organic matter is above 1 percent, little nitrogen is needed for peas. If high rates of fertilizer were applied to other crops, no preplant fertilizer is necessary for peas. On highly fertile soils such as the Mississippi River and Red River bottom soils, no preplant fertilizer is necessary for peas. Many growers grow peas on residue fertilizer from other crops.
Example: Apply 325 to 375 lb of 8-24-24/A on infertile soils. On soils with 1 percent or higher organic matter content, apply 400 to 450 lb of 0-20-20 or 0-24-24 per acre.
Common Problems: Planting too early results in poor stands. Seedling diseases, especially in cool wet soils. Low soil pH, excessive vine growth on highly fertile soils or from application of nitrogen fertilizer. Earworms, leaf-footed bugs, stink bugs, aphids, cow pea cucurillo, thrips, mites, viruses, diseases. Availability of seed of recommended varieties. Availability of western-grown virus-free seed. Availability of adequate labor to harvest peas. The amount of peas that can be grown is generally limited by the amount that can be sold locally and the availability of harvest labor.
Recommended Herbicides:
Preemergence PostemergenceTrifluralin – various brandsDual, StalwartProwl, Pendimax, Pendant PursuitCommand
BasagranPoastPursuitAssureArrowAim – hooded sprayer, row middlesGlyphosphate - various
brands – hooded sprayer, row middles
Harvest Information: Peas for the local fresh market are hand-harvested. Peas are harvested once they reach the green mature stage. Varieties with hulls that turn purple when green mature simplify the harvest procedure since it is easy to determine when they are ready to harvest. Peas are picked over a 2- to 3-week period at 4- to 5-day intervals. It requires 1/2 to 1 hour to pick a bushel of peas. Good yields are 100 to 150 bushel/A. Harvest labor is 100 to 150 worker-hours/A.
Postharvest Handling: Freshly harvested peas can easily undergo heat and spoil after harvest. Place peas in a well-ventilated, shaded place. Field heat should be removed from peas with forced-air cooling soon after harvest. Peas can be stored for 3 to 4 days at 50 to 45 degrees F and 80 to 90 percent relative humidity. Peas are subject to chilling injury if stored at temperatures below 45 degrees F. Provide adequate ventilation of peas in cold storage. Shelled peas should also be cooled rapidly. Fresh shelled peas in cello bags can be stored for 5 to 7 days at 32 degrees F and 90 to 95 percent relative humidity. Fresh peas are mainly packed in wooden bushel baskets or mesh bags weighing 24 to 25 lb. Do not use burlap sacks because they are not properly ventilated. USDA Grades of Southern peas are U.S. No. 1 (95 percent of pods must be at least 5 inches long) and U.S. Commercial (no minimum length requirement).
Special Cultural Information: Peas are a good local market crop. Different areas of the state prefer different types of peas. Growers are encouraged to check with local seed stores to determine the preferred types of peas grown in that area. A mechanical pea sheller will encourage sales. Hard-to-shell varieties will shell easier if they can be left out overnight to dry down a little in a well-ventilated area. Poor stands are the main reason for low yields. The degree of vining of pea varieties is influenced by the amount of rainfall and time of year grown. In periods of frequent rainfall, the nonvining varieties may become vining. As a general rule, there is a tendency toward more vine growth in the fall than in the spring. It is difficult to produce a consistent good-quality dry pea, like dry black-eyed, in Louisiana because of high humidity and frequent rains while the peas are drying.
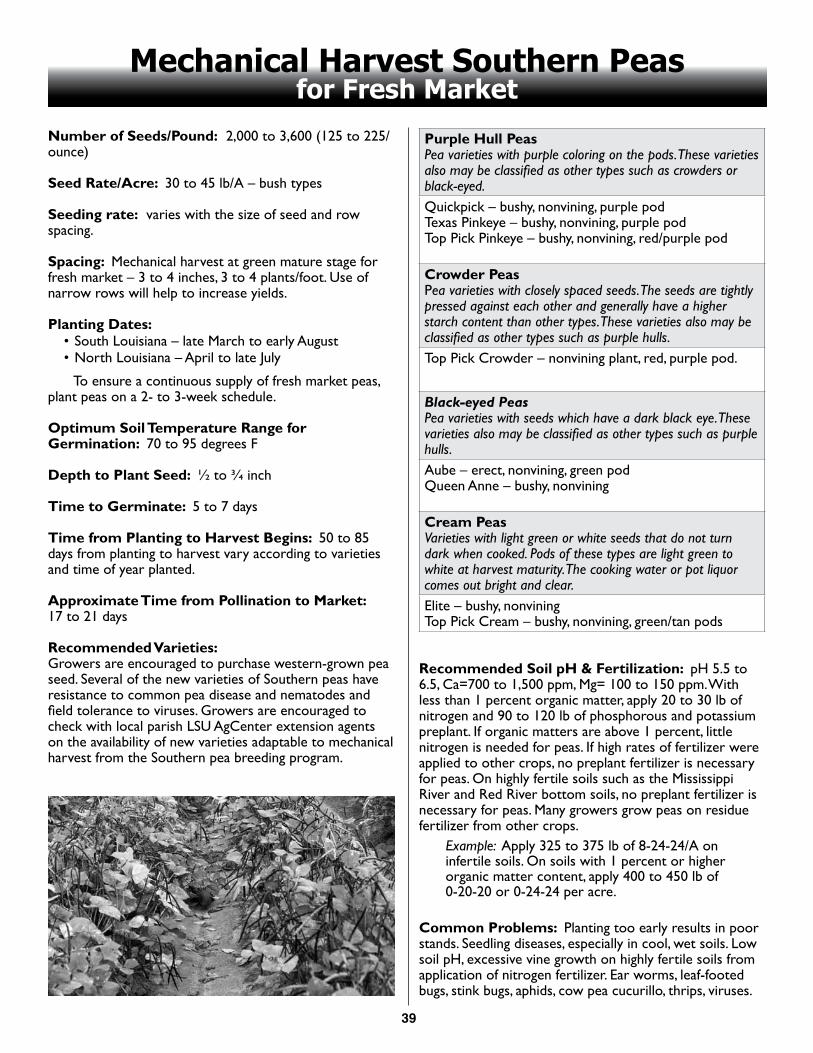
39
Mechanical Harvest Southern Peas for Fresh Market
Number of Seeds/Pound: 2,000 to 3,600 (125 to 225/ounce)
Seed Rate/Acre: 30 to 45 lb/A – bush types
Seeding rate: varies with the size of seed and row spacing.
Spacing: Mechanical harvest at green mature stage for fresh market – 3 to 4 inches, 3 to 4 plants/foot. Use of narrow rows will help to increase yields.
Planting Dates:• South Louisiana – late March to early August• North Louisiana – April to late July
To ensure a continuous supply of fresh market peas, plant peas on a 2- to 3-week schedule.
Optimum Soil Temperature Range for Germination: 70 to 95 degrees F
Depth to Plant Seed: ½ to ¾ inch
Time to Germinate: 5 to 7 days
Time from Planting to Harvest Begins: 50 to 85 days from planting to harvest vary according to varieties and time of year planted.
Approximate Time from Pollination to Market: 17 to 21 days
Recommended Varieties:Growers are encouraged to purchase western-grown pea seed. Several of the new varieties of Southern peas have resistance to common pea disease and nematodes and field tolerance to viruses. Growers are encouraged to check with local parish LSU AgCenter extension agents on the availability of new varieties adaptable to mechanical harvest from the Southern pea breeding program.
Purple Hull PeasPea varieties with purple coloring on the pods. These varieties alsomaybeclassifiedasothertypessuchascrowdersorblack-eyed.Quickpick – bushy, nonvining, purple podTexas Pinkeye – bushy, nonvining, purple podTop Pick Pinkeye – bushy, nonvining, red/purple pod
Crowder Peas Pea varieties with closely spaced seeds. The seeds are tightly pressed against each other and generally have a higher starch content than other types. These varieties also may be classifiedasothertypessuchaspurplehulls.Top Pick Crowder – nonvining plant, red, purple pod.
Black-eyed PeasPea varieties with seeds which have a dark black eye. These varietiesalsomaybeclassifiedasothertypessuchaspurplehulls.Aube – erect, nonvining, green podQueen Anne – bushy, nonvining
Cream Peas Varieties with light green or white seeds that do not turn dark when cooked. Pods of these types are light green to white at harvest maturity. The cooking water or pot liquor comes out bright and clear.Elite – bushy, nonvining Top Pick Cream – bushy, nonvining, green/tan pods
Recommended Soil pH & Fertilization: pH 5.5 to 6.5, Ca=700 to 1,500 ppm, Mg= 100 to 150 ppm. With less than 1 percent organic matter, apply 20 to 30 lb of nitrogen and 90 to 120 lb of phosphorous and potassium preplant. If organic matters are above 1 percent, little nitrogen is needed for peas. If high rates of fertilizer were applied to other crops, no preplant fertilizer is necessary for peas. On highly fertile soils such as the Mississippi River and Red River bottom soils, no preplant fertilizer is necessary for peas. Many growers grow peas on residue fertilizer from other crops.
Example: Apply 325 to 375 lb of 8-24-24/A on infertile soils. On soils with 1 percent or higher organic matter content, apply 400 to 450 lb of 0-20-20 or 0-24-24 per acre.
Common Problems: Planting too early results in poor stands. Seedling diseases, especially in cool, wet soils. Low soil pH, excessive vine growth on highly fertile soils from application of nitrogen fertilizer. Ear worms, leaf-footed bugs, stink bugs, aphids, cow pea cucurillo, thrips, viruses.
40
Availability of western-grown virus-free seed. Commercial availability of seed of recommended varieties. Control of morning glory and other vines in machine-harvested peas. Moisture stress during flowering and pod set lowers yield. Protect peas from damage of deer.
Recommended Herbicides:
Preemergence PostemergenceTrifluralin – various
brandsDual, StalwartProwl, Pendimax, PendantPursuitCommand
Basagran Poast Pursuit Assure Arrow Aim – hooded sprayer, row
middles Glyphosphate – various
brands, hooded sprayers, row middles
Harvest Information: Southern peas are machine-harvested at the green mature stage for the fresh market. A once-over harvester such as the Pixal bean harvester can be used. It is important to choose bushy, nonvining varieties that have a concentrated set of peas above the foliage. The peas and foliage are stripped from the plants, then a cleaning fan blows trash and the foliage out. It is important to time harvest to obtain the maximum number of mature peas. Growers need to learn to monitor the maturity of their crops. As the peas approach maturity, all the pods on several randomly selected plants should be picked. The sample is then separated into three maturity groups: dry, mature (peas that shell easily) and immature (snaps). The ideal time to harvest is when most of the sample is in the mature ready-to-shell pile with a few pods in which the seeds have turned from green to tan. This varies with the different varieties and weather conditions. Bright sunny days will enhance uniform maturity, and
cloudy weather will spread out the maturity scheme. The most common mistake growers make is picking too soon. This results in a number of immature pods that do not shell out. A good rule is to harvest when several of the pods are starting to dry down and the seed color turns from green to tan. With experience, a grower can determine maturity by looking at the crop. The timing of marketing plays a big part in determining the harvesting of the crop.
Postharvest Handling: Freshly harvested peas can easily undergo heat and spoil after harvest. Place peas in a well-ventilated, shaded place. Field heat should be removed from peas with forced-air cooling soon after harvest. Peas can be stored for 3 to 4 days at 50 to 45 degrees F at 80 to 90 percent relatively humidity. Peas are subject to chilling injury if stored at temperatures below 45 degrees F. Provide adequate ventilation of peas in cold storage. Shelled peas should also be cooled rapidly before bagging. Freshly shelled peas in cello bags can be stored for 5 to 7 days at 32 degrees and 90 to 95 percent relative humidity. Fresh peas are mainly packed in wooden bushel baskets or mesh bags weighing 24 to 25 lb. Do not use burlap sacks because they are not properly ventilated. USDA Grades of Southern peas are U.S. No. 1 (95 percent of pods must be at least 5 inches long) and U.S. Commercial (no minimum length requirement).
Special Culture Information: A mechanical pea sheller will encourage sales. Hard-to-shell varieties will shell easier if they can be left out overnight to dry down a little in a well-ventilated area. Poor stands are one of the main reasons for low yields. The degree of vining of pea varieties is influenced by the amount of rainfall, weather and time of year grown. In periods of frequent rainfall, the nonvining varieties may become vining. As a general rule, there is a tendency toward more vine growth in the fall than in the spring.
Peppers, BellBotanical Family: Solanaceae (Nightshade Family)
Number of Seeds/Pound: 72,000 to 75,000 (4,500 to 4,700/ounce)
Seeding Rate/Acre: • 7,500 to 10,000 plants/A transplants single-drilled• 15,000 to 20,000 plants/A transplants double-drilled• 7 ounces seed/10,000 transplants
Spacing: 9 to 18 inches (12 inches most commonly used spacing). Yields may be increased and sunscald may be reduced by the use of double-drills (12 to 16 inches apart) and
closer spacing (10 to 12 inches). Fruit size is not affected by spacing of 9 inches.
Planting Dates: Transplant to field after damage of frost is over.Spring:
• South Louisiana – late March to early April• North Louisiana – early April to mid May
Fall:• South Louisiana – July to early August• North Louisiana – July to early August
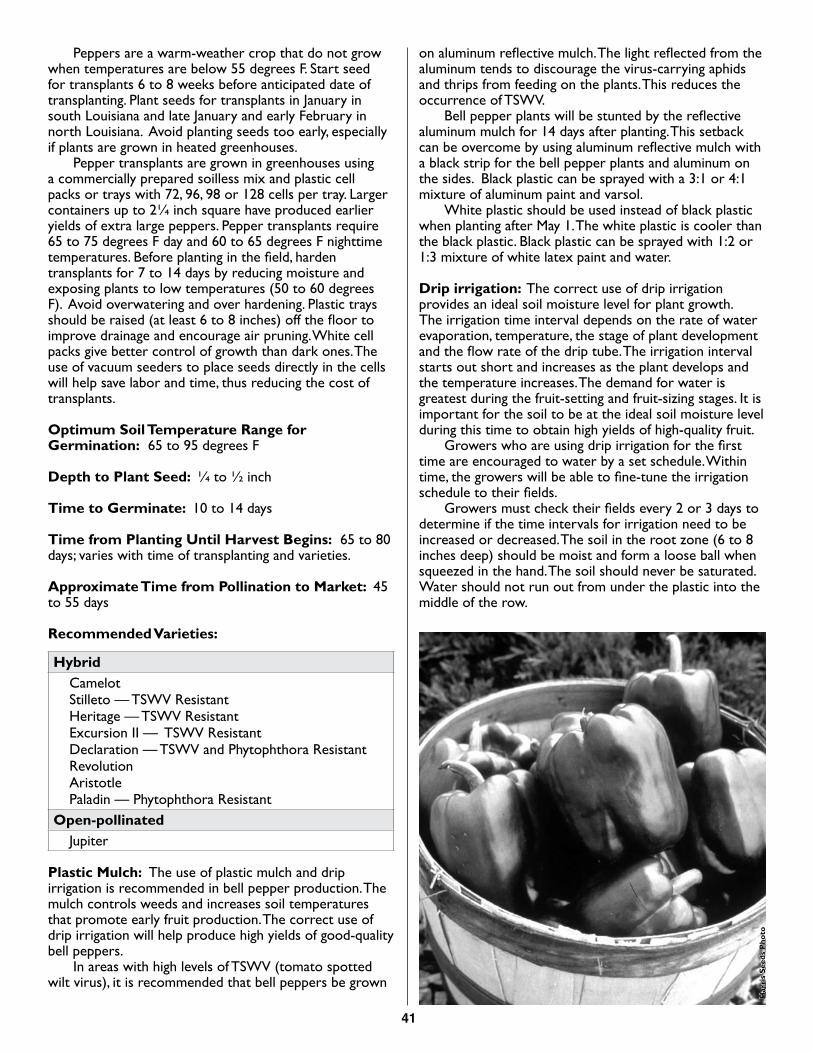
41
Peppers are a warm-weather crop that do not grow when temperatures are below 55 degrees F. Start seed for transplants 6 to 8 weeks before anticipated date of transplanting. Plant seeds for transplants in January in south Louisiana and late January and early February in north Louisiana. Avoid planting seeds too early, especially if plants are grown in heated greenhouses. Pepper transplants are grown in greenhouses using a commercially prepared soilless mix and plastic cell packs or trays with 72, 96, 98 or 128 cells per tray. Larger containers up to 2¼ inch square have produced earlier yields of extra large peppers. Pepper transplants require 65 to 75 degrees F day and 60 to 65 degrees F nighttime temperatures. Before planting in the field, harden transplants for 7 to 14 days by reducing moisture and exposing plants to low temperatures (50 to 60 degrees F). Avoid overwatering and over hardening. Plastic trays should be raised (at least 6 to 8 inches) off the floor to improve drainage and encourage air pruning. White cell packs give better control of growth than dark ones. The use of vacuum seeders to place seeds directly in the cells will help save labor and time, thus reducing the cost of transplants.
Optimum Soil Temperature Range for Germination: 65 to 95 degrees F
Depth to Plant Seed: ¼ to ½ inch
Time to Germinate: 10 to 14 days
Time from Planting Until Harvest Begins: 65 to 80 days; varies with time of transplanting and varieties.
Approximate Time from Pollination to Market: 45 to 55 days
Recommended Varieties:
HybridCamelot Stilleto — TSWV ResistantHeritage — TSWV ResistantExcursion II — TSWV ResistantDeclaration — TSWV and Phytophthora ResistantRevolutionAristotle Paladin — Phytophthora Resistant
Open-pollinatedJupiter
Plastic Mulch: The use of plastic mulch and drip irrigation is recommended in bell pepper production. The mulch controls weeds and increases soil temperatures that promote early fruit production. The correct use of drip irrigation will help produce high yields of good-quality bell peppers. In areas with high levels of TSWV (tomato spotted wilt virus), it is recommended that bell peppers be grown
on aluminum reflective mulch. The light reflected from the aluminum tends to discourage the virus-carrying aphids and thrips from feeding on the plants. This reduces the occurrence of TSWV. Bell pepper plants will be stunted by the reflective aluminum mulch for 14 days after planting. This setback can be overcome by using aluminum reflective mulch with a black strip for the bell pepper plants and aluminum on the sides. Black plastic can be sprayed with a 3:1 or 4:1 mixture of aluminum paint and varsol. White plastic should be used instead of black plastic when planting after May 1. The white plastic is cooler than the black plastic. Black plastic can be sprayed with 1:2 or 1:3 mixture of white latex paint and water.
Drip irrigation: The correct use of drip irrigation provides an ideal soil moisture level for plant growth. The irrigation time interval depends on the rate of water evaporation, temperature, the stage of plant development and the flow rate of the drip tube. The irrigation interval starts out short and increases as the plant develops and the temperature increases. The demand for water is greatest during the fruit-setting and fruit-sizing stages. It is important for the soil to be at the ideal soil moisture level during this time to obtain high yields of high-quality fruit. Growers who are using drip irrigation for the first time are encouraged to water by a set schedule. Within time, the growers will be able to fine-tune the irrigation schedule to their fields. Growers must check their fields every 2 or 3 days to determine if the time intervals for irrigation need to be increased or decreased. The soil in the root zone (6 to 8 inches deep) should be moist and form a loose ball when squeezed in the hand. The soil should never be saturated. Water should not run out from under the plastic into the middle of the row.
Har
ris
Seed
s P
hoto

42
Drip Irrigation Schedule for Bell Peppers
Crop Stage Weeks
Spring 1 Summer 2 Fall3South La North La South La. North La. South La. North La.Minutes/
DayMinutes/
DayMinutes/
DayMinutes/
DayMinutes/
DayMinutes/
DaySmall Plants 2 15 15 30 30 30 40Growing Plants
2 30 30 50 60 30 35
Fruit Production
6 100 120 100 120 80 75
Harvest 6 90 120 65 90 50 451Spring – plantings made in March and April.2Summer – plantings made in May and June.3Fall – plantings made in July and August.Note: All time intervals for irrigation are based on the use of a drip tube with a flow rate of ½ gallon per
minute per 100 feet.
Recommended Soil pH & Fertilization: pH 5.6 to 6.8, Ca 1,000 to 2,000 ppm, Mg = 150 to 300 ppm. Bell peppers are very sensitive to low soil pH. Manganese toxicity is a common problem where soil pH is 5.0 or less. Apply 80 to 120 lb of nitrogen and 90 to 200 lb phosphorous and potassium preplant per acre. Sidedress at first fruit set with 20 to 40 lb of nitrogen per acre.
Example: 650 to 750 lb 8-24-24/A or 700 to 800 lb 13-13-13/A. Sidedress at first fruit formation with 200 lb CaNO3/A.
Calcium nitrate is used as the sidedressing material. The calcium helps to prevent blossom end rot. Many growers use high rates of preplant fertilizer (800 to 1,000 lb 13-13-13/A) under black plastic. At these rates, a fertilizer burn can occur. Growers will wait for a rain (1 to 2 inches) after applying fertilizer before they put out plastic and plant peppers to avoid this burn.
Fertigation: Sidedressing also can be done by injecting the fertilizer through the drip lines by using an injection device. This method is known as fertigation. Growers apply some of the nitrogen fertilizer preplant (40 to 80 lb of N/A) and inject the sidedressing nitrogen in equal increments from bloom and fruit set (3 to 4 weeks after planting) and continue for 8 to 9 weeks to harvest. The nitrogen fertilizer is injected into the system at a rate of 1½ to 2 lb of N/A per day or 10 to 12 1/2 lb of N/A per week
Example: 600 to 650 lb of 8-24-24/A preplant. Fertigate at first fruit set (3 to 4 weeks after transplanting planting) and continue for 8 to 9 weeks until harvest. Inject 60 to 80 lb of CaNO3 or 75 to 100 lb of KNO3 per acre per week. The greenhouse grade of CaNO3 or KNO3 is easier to dissolve and inject.
Common Problems: Blossom end rot, viruses transmitted by aphids and thrips, vegetable weevil, cucumber beetle, worms, whiteflies, bacterial leaf spot in plant beds and field, sunscald of fruit, phytophthora blight,
southern blight, transplanting too early, development of bacterial stem rot in transit, improper postharvest cooling, water scalding of plants in field. The occurrence of cold winds after transplanting will damage leaves and break plants.
Staking: Staking bell peppers improves quality and yield. It also reduces fruit decay. Drive a 2- to 3-foot stake (1 inch wooden or metal rebar rods) 10 to 12 inches into the ground between every four to six plants. The first string is run 6 to 8 inches above the soil and should be strung when the plants are 12 to 15 inches high and before the plants fall over. Strings are passed along one side of the row, looping the string around each stake and pulling tight. Once you reach the end of the row, turn around and run a string at the same level on the opposite side of the row again looping the string around the stake and pulling it tight. The two strings bind the plants between the stakes. In this method, the plants are never tied to the strings or stakes. The second string is run at the top and on the outside of the stake. Only one string is used on the top string. Tying peppers in this manner helps to prevent fully loaded plants from being blown over in rainstorms and greatly reduces sun burning on the fruit.
43
Recommended Herbicides:
Preemergence PostemergenceTrifluralin – various
brandsDevrinolCommand (Do Not
use on Banana Pepper)
Goal – under plasticSandea – row middles
Poast Aim – hooded sprayer, row
middles Glyphosphate – various brands,
hooded sprayer, row middle Gramoxone, Firestorm,
Parazone – hooded sprayer between rows with plastic mulch.
Select, Arrow, Clethodim Sandea – row middles
Harvest Information: Peppers are generally harvested when they are firm and dark green. The stem of a mature pepper will easily snap from the plant when the fruit is slightly lifted. Bell peppers are harvested every 7 to 10 days for a 3- to 5-week period. From 250 to 350 worker-hours are required to harvest and 15 to 30 worker-hours for packing an acre of peppers. Bell peppers are packed in wooden bushel hampers, 1-1/9 bushel wire-bound crates and 1-1/9 bushel cardboard box. A bushel weighs 26 to 30 lb. Peppers are packed by count. Good yields are 800 to 1,000 bushels/acre single row; 1,500 to 2,000 bushels double row; staked and drip irrigation. Take care to avoid skin breaks and bruising peppers in harvest and storage. Chlorinate wash water at 150 ppm rate (1 quart bleach/100 gallons of water) to prevent spread of disease organisms (especially bacterial stem rot) in the packing operation.
Postharvest Handling: Bell peppers should be removed from the field soon after harvest and cooled by forced-air cooling to 45 to 50 degrees F. Store peppers at 45 to 50 degrees F at 85 to 90 percent relative humidity. Peppers are subject to chilling injury when exposed to temperatures below 45 degrees F. Temperatures above 50 degrees F encourage the development of bacterial stem rot and encourage ripening.
Shipper’s Grade: Extra Large (less than 65 count, more than 4 inches in diameter), Large (65 to 70 count, 4 to 3½ inches in diameter), Medium (75 to 85 count, 3½ to 3 inches in diameter). The USDA Grades for bell peppers are U.S. Fancy (3 inches or more in diameter and not less than 3½ inches long), U. S. No. 1 (3 to 2½ inches in diameter and 3½ to 2½ inches long), and U. S. No. 2 (based primarily on exterior appearance).
Special Cultural Information: Bell peppers respond to irrigation. Yields are reduced significantly when plants are stressed for moisture at any stage of development. Bell peppers are sensitive to wet conditions. High rows and good surface drainage are necessary for a successful bell pepper crop. Wet conditions enhance the occurrence of blossom end rot. The production of red and yellow bell peppers is extremely difficult in Louisiana. The high humidity and frequent rains during the maturity process enhance the development of anthracnose fruit rot (ripe rot).
Peppers, Hot and Other PeppersBanana, Cayenne, Chili, Italian, Habanera, Hungarian Yellow Wax,
Jalapeño, Serrano, Sport, TabascoBotanical Family: Solanacea (Nightshade Family)
Number of Seeds/Pound: 72,000 to 75,200 (4,500 to 4,700/ounce)
• Coated seed – 5,000/lb (300 to 315/ounce)• Minimum weight ratio of coated raw seed is 12:1.
Seeding Rate/Acre
Direct seeding:• Raw Seed – 2 to 4 lb/A• Coated Seed – 4 to 5 lb/A
Transplants: • 7 oz seed/10,000 transplant • 7,500 to 10,000 plants/A transplants
The seeding rate will vary with the method of seeding and plant population desired. The use of coated and
enhanced seed will facilitate the direct seeding procedure. This process involves putting an artificial coating around the pepper seed. This coating increases the size of the seed and makes them more uniform (about the size of okra seed). This will allow the peppers to be planted efficiently with planters. The seed should be enhanced as well as coated. This treatment improves the germination ability of the seed and increases the success of obtaining a stand from direct seeding. The cost of enhancing the seed is only slightly more than coating. Seed enhancement and coating are done by the seed company. A minimum order of several hundred dollars is required. It is difficult for a small grower to meet this minimum order.
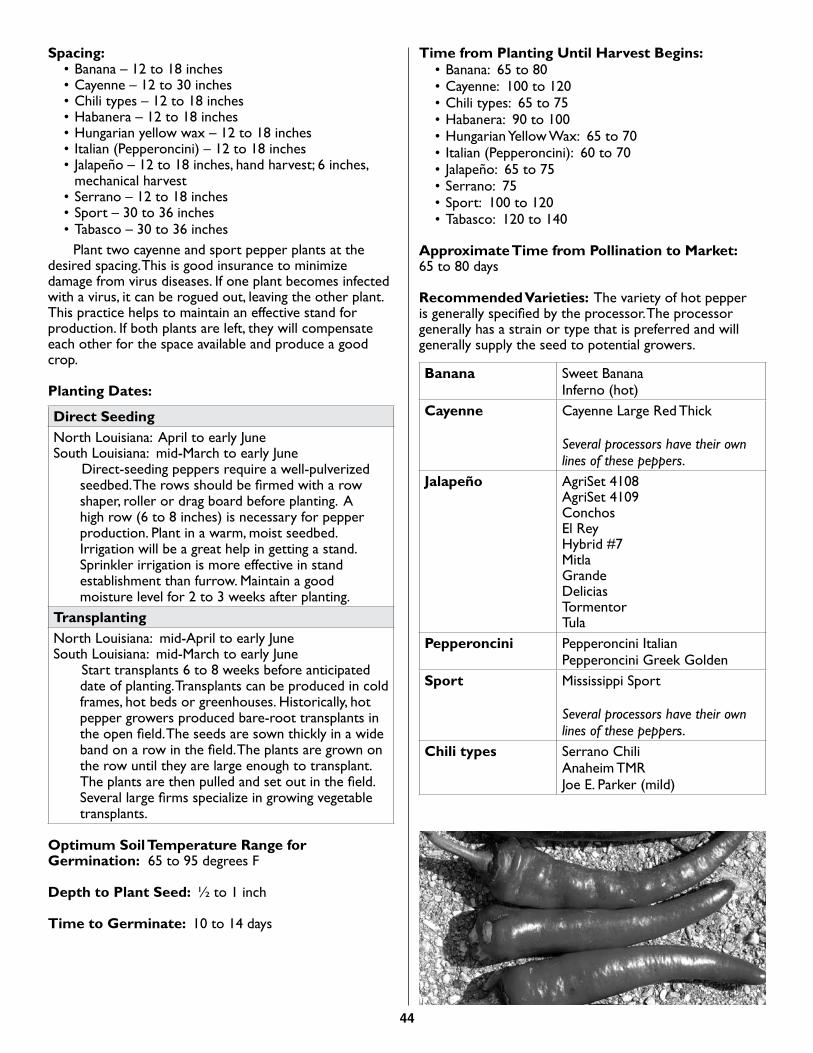
44
Spacing:• Banana – 12 to 18 inches• Cayenne – 12 to 30 inches• Chili types – 12 to 18 inches• Habanera – 12 to 18 inches• Hungarian yellow wax – 12 to 18 inches• Italian (Pepperoncini) – 12 to 18 inches• Jalapeño – 12 to 18 inches, hand harvest; 6 inches,
mechanical harvest• Serrano – 12 to 18 inches• Sport – 30 to 36 inches• Tabasco – 30 to 36 inches
Plant two cayenne and sport pepper plants at the desired spacing. This is good insurance to minimize damage from virus diseases. If one plant becomes infected with a virus, it can be rogued out, leaving the other plant. This practice helps to maintain an effective stand for production. If both plants are left, they will compensate each other for the space available and produce a good crop.
Planting Dates:
Direct SeedingNorth Louisiana: April to early JuneSouth Louisiana: mid-March to early June
Direct-seeding peppers require a well-pulverized seedbed. The rows should be firmed with a row shaper, roller or drag board before planting. A high row (6 to 8 inches) is necessary for pepper production. Plant in a warm, moist seedbed. Irrigation will be a great help in getting a stand. Sprinkler irrigation is more effective in stand establishment than furrow. Maintain a good moisture level for 2 to 3 weeks after planting.
TransplantingNorth Louisiana: mid-April to early JuneSouth Louisiana: mid-March to early June
Start transplants 6 to 8 weeks before anticipated date of planting. Transplants can be produced in cold frames, hot beds or greenhouses. Historically, hot pepper growers produced bare-root transplants in the open field. The seeds are sown thickly in a wide band on a row in the field. The plants are grown on the row until they are large enough to transplant. The plants are then pulled and set out in the field. Several large firms specialize in growing vegetable transplants.
Optimum Soil Temperature Range for Germination: 65 to 95 degrees F
Depth to Plant Seed: ½ to 1 inch
Time to Germinate: 10 to 14 days
Time from Planting Until Harvest Begins:• Banana: 65 to 80• Cayenne: 100 to 120• Chili types: 65 to 75• Habanera: 90 to 100• Hungarian Yellow Wax: 65 to 70• Italian (Pepperoncini): 60 to 70• Jalapeño: 65 to 75• Serrano: 75• Sport: 100 to 120• Tabasco: 120 to 140
Approximate Time from Pollination to Market: 65 to 80 days
Recommended Varieties: The variety of hot pepper is generally specified by the processor. The processor generally has a strain or type that is preferred and will generally supply the seed to potential growers.
Banana Sweet Banana Inferno (hot)
Cayenne Cayenne Large Red Thick
Several processors have their own lines of these peppers.
Jalapeño AgriSet 4108AgriSet 4109ConchosEl ReyHybrid #7MitlaGrandeDeliciasTormentorTula
Pepperoncini Pepperoncini ItalianPepperoncini Greek Golden
Sport Mississippi Sport
Several processors have their own lines of these peppers.
Chili types Serrano ChiliAnaheim TMR Joe E. Parker (mild)
45
Tabasco McIlhenny TabascoGreenleaf
Others Hungarian Yellow Wax HotHungarian Sweet WaxHabaneroRed Cherry Large, Hot
Recommended Soil pH & Fertilization: pH 6.0 to 7.0, Ca = 1,000 to 2,000 ppm, Mg = 100 to 200 ppm. Hot peppers are very sensitive to acid soils. If soil pH is below 5.5, lime soil to the pH 6.0 or higher level. Hot peppers will require 50 to 80 lb of nitrogen and 90 to 150 lb of phosphorous and potassium of preplant fertilizer. Sidedress 2 to 3 times with 30 to 80 lb of nitrogen per acre; apply first sidedressing at first fruit set; two more sidedressings are made on a 4- to 6- week schedule.
Example: 600 to 650 lb of 8-24-24/A preplant. Sidedress with 150 lb of 34-0-0/A at flowering and first fruit set. The second sidedressing is made 4 to 5 weeks after the first, and the third made 4 to 5 weeks after the second.
Common Problems: Virus diseases transmitted by thrips and aphids. Bacterial spot in plant beds and field. Pepper weevil, worms, leaf miners, cucumber beetles and spider mites. Poor quality seed. Disease infected seed. Ripe rot (anthracnose), damping off, southern blight. Frog eye (Cercospora leaf spot). Planting too early. High cost of transplanting. Large labor requirement for harvest.
Recommended Herbicides:
Preemergence transplant Postemergence
Trifluralin – various brands Devrinol Command (Do not use on
banana pepper)Goal – under plasticSandea – row middles
PoastFusilade – Tabasco peppers
and other hot and nonbell peppers
Gramoxone, Firestorm, Parazone, hooded sprayer, row middles
Select, Arrow, ClethodimSandea – row middlesAim – hooded sprayer, row
middlesGlyphosphate – various
brands, hooded sprayer, row middles
Direct-seededDevrinolCommand (Do not use on banana pepper)
Harvest Information: Hot peppers mature over a long period. Harvest every 7 to 10 days after the first peppers reach the correct stage of maturity. The type and intended use of hot peppers determine the maturity stage and harvest procedure. Check with buyer as to his or her preference in harvesting peppers.
Postharvest Handling: Hot peppers are generally sacked and delivered to a pickup point or to the processor. Prompt delivery is advisable. Place sack in shade while awaiting delivery. Peppers can be held for 2 to 3 weeks at temperatures of 45 to 50 degrees F. Peppers are sensitive to chilling injury below 45 degrees F.
Harvest InformationType of Pepper Intended
Use Maturity Stage
(Color) Comments
Banana Fresh Yellow/red Harvest with stems.Cayenne Hot sauce Red Remove stems.
ChiliFresh Green
Harvest with stems.Dried Red
Hungarian yellow wax hots Fresh Yellow Harvest with stems.
HabaneroFresh Green-orange Harvest with stems.
Hot sauce Orange Remove stems.
Italian Pepperoncini Pickled Green Harvest with stems.
Jalapeño
Fresh GreenHarvest with stems. Pack in 1- 1/9 bushel cardboard box, bushel wooden basket or wire-bound crate. A 10- to 12-lb cardboard box is also used.
Pickled Green Harvest with stems.Hot sauce or Relish Green and Red Remove stems.
SportHot sauce Red
Remove stems.Pickled Green
TabascoHot sauce Red
Remove stems.Pickled Green
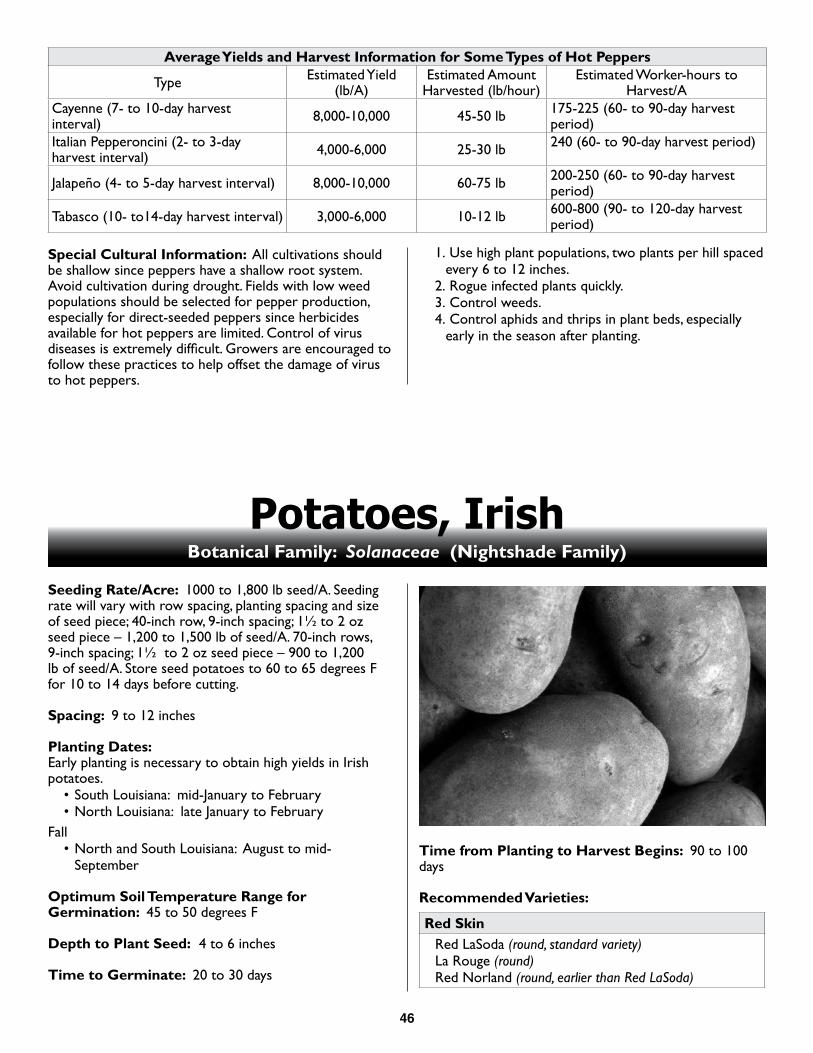
46
Average Yields and Harvest Information for Some Types of Hot Peppers
Type Estimated Yield (lb/A)
Estimated Amount Harvested (lb/hour)
Estimated Worker-hours to Harvest/A
Cayenne (7- to 10-day harvest interval) 8,000-10,000 45-50 lb 175-225 (60- to 90-day harvest
period)Italian Pepperoncini (2- to 3-day harvest interval) 4,000-6,000 25-30 lb 240 (60- to 90-day harvest period)
Jalapeño (4- to 5-day harvest interval) 8,000-10,000 60-75 lb 200-250 (60- to 90-day harvest period)
Tabasco (10- to14-day harvest interval) 3,000-6,000 10-12 lb 600-800 (90- to 120-day harvest period)
Special Cultural Information: All cultivations should be shallow since peppers have a shallow root system. Avoid cultivation during drought. Fields with low weed populations should be selected for pepper production, especially for direct-seeded peppers since herbicides available for hot peppers are limited. Control of virus diseases is extremely difficult. Growers are encouraged to follow these practices to help offset the damage of virus to hot peppers.
1. Use high plant populations, two plants per hill spaced every 6 to 12 inches.
2. Rogue infected plants quickly.3. Control weeds.4. Control aphids and thrips in plant beds, especially
early in the season after planting.
Potatoes, IrishBotanical Family: Solanaceae (Nightshade Family)
Seeding Rate/Acre: 1000 to 1,800 lb seed/A. Seeding rate will vary with row spacing, planting spacing and size of seed piece; 40-inch row, 9-inch spacing; 1½ to 2 oz seed piece – 1,200 to 1,500 lb of seed/A. 70-inch rows, 9-inch spacing; 1½ to 2 oz seed piece – 900 to 1,200 lb of seed/A. Store seed potatoes to 60 to 65 degrees F for 10 to 14 days before cutting.
Spacing: 9 to 12 inches
Planting Dates:Early planting is necessary to obtain high yields in Irish potatoes.
• South Louisiana: mid-January to February• North Louisiana: late January to February
Fall • North and South Louisiana: August to mid-
September
Optimum Soil Temperature Range for Germination: 45 to 50 degrees F
Depth to Plant Seed: 4 to 6 inches
Time to Germinate: 20 to 30 days
Time from Planting to Harvest Begins: 90 to 100 days
Recommended Varieties:
Red SkinRed LaSoda (round, standard variety)La Rouge (round)Red Norland (round, earlier than Red LaSoda)
47
White SkinAtlantic (chipper and fresh market, round, smooth skin)LaChipper (chipper and fresh market, round, smooth skin)Kennebec (fresh market, oblong, smooth skin; often the
only white skin variety available in local seed stores.) For plantings of large acreage, growers are encouraged to purchase high-quality seed in volume directly from seed growers.
Recommended Soil pH & Fertilization: pH 5.5 to 6.0, Ca 1,000 to 1,500 ppm, Mg = 100 to 150 ppm. If scab is a problem, keep soil pH 4.8 to 5.2 Apply 50 to 100 lb of nitrogen and 100 to 150 lb of phosphorous and potassium per acre at planting. Sidedress with additional 50 to 100 lb of nitrogen between the time when plants mark the row and are 8 to 10 inches tall. For early harvest potatoes, avoid nitrogen sidedressing. Apply all nitrogen preplant. Sidedressing with nitrogen will delay maturity. Some growers sidedress with a complete fertilizer (300 to 400 lb of 13-13- 13/A). They feel they get benefit in keeping quality from the extra phosphorous and potassium.
Example: 700 to 800 lb of 13-13-13/A at planting. Sidedress with 150 to 300 lb of 34-0-0/A when plants mark the row. An additional sidedressing can be applied when plants are 8 to 10 inches tall. Multiple sidedressings will help to improve nitrogen use. Apply all nitrogen preplant – 1,000 to 1,200 lb of 13-13-13/A – at planting.
Common Problems: Delay in planting because of wet weather. Occurrence of wet weather at harvest. Poor stands caused by seed decay. Early blight, late blight, scab, Colorado potato beetle, aphids, wire worms, grubs. High cost of seed. Lack of mechanization in cutting seed, planting, harvesting and grading. Availability of seed of recommended varieties. Poor quality seed. Bacterial soft rot in the field and in storage. Insufficient fertilization. Improper storage.
Recommended Herbicides:
Preemergence PostemergenceDual, StalwartSencor, MatrixProwl, Pendimax, Pentagon,
PendimethalinTrifluralin – various brandsEptamMatrixLorox OutlookChateau
PoastSencor, MatrixSelect, Arrow, ClethodimLaybyDual Sencor, Lexone Vine DessicantsRegloneGramoxone, Firestorm,
ParazoneDesicate
Harvest Information: Irish potatoes are ready to harvest once their skins have set. The skin of a mature potato will not rub off or feather. Red LaSoda generally
requires 100 to 120 days after planting to mature. Growers should plan to start digging potatoes 100 days after planting. Many markets prefer the small new potatoes that easily feather. They view the feathering as an earliness or freshness factor. To help reduce the amount of skinning at harvest of fresh market potatoes, the vines should be killed or cut 10 to 14 days before harvest. For chipping potatoes, vines are generally not killed.
• Good yields: 150 to 200 cwt/A.• Harvest Labor (hand labor) – 30 to 35
worker-hours/A• Packing Labor – 20 to 25 worker-hours/A
Postharvest Handling: Potatoes can be stored for 4 to 5 months at 40 degrees F at 90 percent relative humidity if cured 4 or more days at 60 to 70 degrees F before storage. They can be stored 2 to 3 months at 50 degrees F without curing. Potatoes for chipping should be stored at 70 degrees F and 90 percent relative humidity for best chipping quality. Generally, Louisiana potatoes are not stored. Potatoes should be harvested, washed or brushed clean and graded. Potatoes are packed in 100- or 50-lb sacks, 50-lb cardboard cartons and 5-, 10- and 20-lb plastic film bags. Potatoes are often sold in bulk lots to wholesalers (repackers) who grade and repack potatoes into smaller units. Grades of fresh market potatoes are: U.S. Extra No. 1 (2¼ inches to 1¼ inches diameter and 5 to 6 ounces in weight); U.S. No. 1 or A (not less than 1 7/8 inches in diameter); and U.S. No. 2 or B (not less than 1 1/2 inches in diameter). Grades also differ in their external appearance. Chipping grades are 1 7/8 inches to 3 1/4 inches in diameter with good external appearance.
Special Cultural Information: Sites for potatoes need to be prepared in the fall for early plantings. Good soil preparation is essential for a good crop of potatoes. Good surface drainage and high rows (6 to 8 inches high) are essential for a good crop of potatoes. Use large seed pieces (2 ounces) when making early plantings. Plants from large seed pieces are able to overcome injury. Lack of mechanization in planting and harvesting operation greatly adds to the cost of potato production. Hand labor requirements in potato production: cutting seed (2 to 3 worker-hour/100 lb of seed). Planting (16 to 19 worker-hours/A). Preemergence herbicide application directed to the row middles at layby will keep potato fields clean through harvest. Seed treatments such as Tops (fungicide) or finely ground Douglas Fir Bark are the current means used to protect seed potatoes. Growers who produce many acres of red potatoes for fresh market should consider planting 10 to 20 percent of their acreage to the variety Red Norland. Red Norland will be mature and ready to harvest in 90 to 95 days. It will yield higher than Red LaSoda at this time. This will allow growers to begin harvest operations 10 to 15 days earlier. Red Norland should be grown only for early harvest.

48
Potatoes, SweetBotanical Family: Convolvulaceae (Morning glory family)
Seed potatoes required to transplant an acre: 20 to 30 bushels, depending on variety.
Bedding Mother Roots: Early plant production is higher if seed roots are presprouted by holding them at 70 to 80 degrees F and 85 to 90 percent humidity for 2 to 3 weeks before bedding. Vent room each day to keep carbon dioxide levels low. Soil temperature should be above 60 degrees F for several days before bedding. Cover seed potatoes with about 2 inches of soil. Beds are covered with clear or black plastic mulch after bedding roots to warm soil and to encourage sprouting. Punch small holes in plastic on the side of the bed a couple of weeks after covering. The holes help provide better aeration under the plastic and reduce seed rotting caused by high temperatures and carbon dioxide buildup. Six to 8 weeks are required to produce plants large enough to transplant.
Spacing of plants in row: 10 to 14 inchesSize and days to harvest can be affected by plant spacing. The wider the plant spacing, the faster the roots size.
Transplanting Time:• South Louisiana – Late April through June (optimum
time early May through late June) • North Louisiana – Early May through June (optimum
time mid-May through late June)
Depth to set transplants: 3 to 4 inches (several nodes should be below the ground).
Time from Transplanting Until Harvesting Begins: 100 to 110 days (Beauregard)
Recommended Varieties: • Beauregard – early maturing, light rose skin, orange
flesh; resistance to soil rot disease; good sprout production; high yield potential; good shape; may tend to grow long in sandy soils; susceptible to root knot nematode and bacterial stem rot; good storage ability and excellent quality. Virus-tested clones of Beauregard are B-63 and B-14. B-63 is a Louisiana selection of Beauregard; B-14 is a North Carolina selection of Beauregard. B-14 tends to make a short, blocky storage root in our silt loam soils.
• O’Henry – tan skin, light yellow flesh, mutation of Beauregard – specialty market variety.
• Evangeline – An LSU AgCenter release that has root knot nematode resistance. Yield potential of this variety is similar to Beauregard. Evangeline has performed well in research trials across Louisiana. This variety is “slower” to sprout than Beauregard and careful handling is important during the bedding process.
Recommended Soil pH & Fertilization: pH 5.5 to 6.0 (low pH reduces incidence of soil rot; however, today’s varieties generally have moderate-to-high resistance to soil rot; therefore, it is not necessary to grow sweet potatoes in a low pH soil). Calcium 300 to 600 ppm, Magnesium 80 to 150 ppm. Soil pH 5.0 and below should be limed up to pH 5.8 to 6.0. Apply 30 to 45 lb nitrogen/A; 90 to 120 lb of phosphorous and 120 to 150 lb potassium per acre preplant. Nitrogen may be applied before transplanting or as a sidedressing 25 to 30 days after transplanting. Upland soils should receive the same preplant fertilizer plus a sidedressing of 20 to 30 lb nitrogen and 50 to 75 lb potassium per acre.
Example: 500 to 550 lb 8-24-24 per acre or 100 lb 4-11-11 liquid fertilizer. In upland soils, add 500 to 550 lb 8-24-24 preplant and sidedress with 200 lb potassium nitrate/A or 100 lb ammonium nitrate and 100 to 150 lb 60 percent KCl/A 4 to 5 weeks after transplanting.
Common Problems: Soil insects including sweet potato weevil, banded cucumber beetle, white grub, white fringe beetle, wireworms, flea beetle, sugarcane beetle; disease, including soil rot, scuff, bacterial stem rot, storage rots; cultural problems, including overfertilization with nitrogen, leaching of fertilizer by excessive rain, souring caused by excessive soil moisture, low yield caused by drought; skinning at harvest, low yields, poor shape, poor set, plant survival; weeds including purple nutsedge, rice flat sedge and yellow sedge, pigweed; nematodes; lack of labeled pesticides, both herbicides and insecticides. Sweet potatoes are very sensitive to adverse environmental conditions, high and low temperatures, excessive and insufficient rainfall, compacted soils.
Recommended Herbicides:
Preemergence Postemergence (grass control)
Command 3ME - 1 1/3 to 2 2/3 pints/A broadcast rate
Valor - 2 ounces/A pretransplant
Fusilade DK, Poast, Select
Weed control in sweet potatoes is critical. Rows should be relatively free of weeds and grasses until plants cover the row for maximum yields. Yellow nutsedge, rice flat sedge, purple nutsedge, carpetweed and pigweed are not controlled with Command herbicide. These may have to be controlled in rotation crops or with new herbicides as they become available. Valor herbicide is labeled for use on sweet potatoes in Louisiana for control of select broadleaf weeds, including pigweed and morning glory. Read and follow all label directions when applying
49
herbicides and refer to www.lsuagcenter.com for more detailed information on weed management in sweet potato.
Harvest Information: A bushel weighs 50 lb, but the trade adopted the 40-lb box as its standard shipping container. Sweet potatoes are harvested beginning in August, extending through November and into December if necessary. Sweet potatoes sold soon after harvest are sold as “green” potatoes and are not sweet if baked. Those held in storage for 7 to 8 weeks after harvest are sold as “cured” or “kiln dried.” Kiln dried indicates the sweet potatoes will be sweet and moist when baked. Kiln-dried potatoes are usually available at Thanksgiving. Sweet potatoes are field graded at harvest into No. 1, jumbo and canner. Field-graded potatoes may be either washed, graded and shipped immediately after harvest (green potatoes); or they may be placed in “quick curing” rooms, then moved to refrigerated storage; or they are harvested and placed in common storage for several weeks and shipped as cured or kiln-dried potatoes. Approximately 50 to 60 percent of the total yield is field run No. 1, and the rest are sold as canners. Of the 60 percent field graded 1, generally 60 to 70 percent of those will grade out as 1s when they are washed and passed over the grading line. The other 30 to 40 percent will grade as 2s, jumbos, canners and culls.
Postharvest Handling: Harvested sweet potatoes should be moved from the field as soon as possible after harvest to prevent sunscald. Place harvested sweet potatoes in the curing room as soon as possible, preferably within two hours. Sweet potatoes to be sold green will have a better appearance and shelf life if they are cured quickly. Quick curing is accomplished by subjecting freshly harvested roots to 85 to 90 degrees F at 85 to 95 percent relative humidity for 4 to 7 days. Curing heals skinned places and cuts on the root, making them less susceptible to disease infection in storage. It also improves the appearance and storage life of the roots. The sweetness of the roots begins to increase during curing. Sweet potatoes can be stored for several months if properly cured and stored under the right conditions. Ideal storage conditions after curing are 55 to 60 degrees F at 85 to 95 percent relative humidity. Skin may be tender when sweet potatoes are stored under high humidity conditions. It may be necessary to move potatoes out of high humidity conditions for 2 to 3 days before packing and shipping to help “set” the skin.
USDA sweet potato grades: • U.S. Extra No. 1• U.S. No. 1• U.S. Commercial• U.S. No. 2.
Size standards: • U.S. Extra No. 1: 3 to 9 inches long, 1¾ -3¼ inches
in diameter, maximum weight no more than 18 ounces.
• U.S. No. 1: 3 to 9 inches long, 1¾ -3½ inches in diameter, maximum weight no more than 20 ounces.
• U.S. Commercial: meets all the requirements of the U.S. No. 1 grade except that an increased tolerance for defects is allowed.
• U.S. No. 2: minimum size not less than 1½ inches and maximum weight no more than 36 ounces.
Special Cultural Information: • Virus-tested foundation and Certified Seed Programs
should be a part of a sweet potato program to maintain the highest yield and quality roots. By incorporating virus-tested G-1 seed into a seed program each year, the production crop should be no older than G-3s or third generation from virus-tested foundation.
• Soil insecticides, Mocap or Lorsban (where labeled) can be applied as preplant soil amendments to manage certain soil insects including larvae of the banded and spotted cucumber beetle, white grub, white fringe beetle and wireworm. Capture also can be applied as a layby application. Scouting programs and foliar insecticide spray programs should begin within 2 weeks following transplant and should continue for the duration of the season. Thresholds should be used where applicable. Management programs for sweetpotato weevils in Louisiana should follow the guidelines set forth by the Louisiana Department of Agriculture and Forestry. Please read and follow all label directions when applying insecticides and refer to www.lsuagcenter.com for more detailed information on insect pest management in sweetpotato.
• Nematode management. Reniform and root knot nematodes can be problems in commercial and home garden sweet potato production in Louisiana. Nematode soil samples should be collected in the fall of each year for all fields intended for sweetpotato production. Threshold level for root knot nematode is 150 per pint of soil. Threshold level for reniform nematode is 1,000 per pint of soil. Several nematicides are labeled for use on sweetpotato and can be applied in commercial fields prior to planting. Please refer to www.lsuagcenter.com for more information regarding nematode management in sweetpotato.
• Irrigation. Recent research indicates that average soil moisture before and immediately following transplanting is critical to establish good root set. Additionally, an average of about 1 inch of rainfall or irrigation weekly will help to ensure good yield and quality.
• Transplant quality. Plants should be cut 1-2 inches above soil line from the plant bed rather than pulled. The advantages of cut plants are a reduction in transmission of several diseases such as scurf, soil rot, circular rot, etc. from the plant bed to the field. Cut plants are almost 100 percent weevil free going into the field. Holding cut plants for 3 to 4 days before transplanting will encourage fibrous root development and increase plant survivability.
50
PumpkinsBotanical Family: Cucurbitaceae (Gourd Family)
Number of Seeds/Pound: 1,600 to 4,800 (100 to 300/ounce)
Seeding Rate/Acre: 2 to 4 pounds Seeding rate varies with size of pumpkin seed, plant
spacing and row width.
Spacing: 4 to 5 feet – vining types; 3 to 4 feet – semibush or compact types; 2 or 3 plants/hill. Many growers plant 4 to 5 seed per hill and thin to 2 to 3 plants.
Planting Arrangement: Pumpkins require a large area to vine and are grown on wide, raised beds (6 to 8 inches high). On rows wider than 40 inches, generally every row is planted. On 40-inch rows, every other row is planted. The skipped row is worked toward the planted row at layby.
Planting Dates:• South Louisiana – mid-March to late July• North Louisiana – late March to mid-July
For the Halloween jack-o’-lantern markets, plant pumpkins in late June to mid-July. The bulk of the crop from these plantings will be ready in late September to mid-October.
Optimum Soil Temperature Range for Germination: 70 to 90 degrees F
Depth to Plant Seed: ¾ to 1½ inch
Time to Germinate: 5 to 10 days
Time from Planting Until Harvest Begins: 60 to 120 days Days from planting to harvest vary with varieties and time of year planted. Pumpkins planted in June and July mature in fewer days (60 to 70 days) than spring plantings (100 to 120 days).
Approximate Time from Pollination to Market:• 80 to 90 days – spring plantings• 30 to 40 days – summer plantings
Recommended Varieties:
Giant – 25 to 80 lb (really a type of squash)
Big MaxAtlantic GiantPrize Winner
Miniature – less than 1 lb
MunchkinJack Be LittleOthers Cushaw Green Stripe Cushaw - local strains
Large – 10-30 lb CinderellaConnecticut Field Aspen Big AutumnSorcerer AppalachianAladdinPro Gold 510 Gold Standard
Medium – 5 to 10 lb Small Sugar
Creole or Cow Pumpkins
local strains of light orange pumpkins
Recommended Soil pH & Fertilization: pH = 5.8 to 6.5, Ca = 1,000 to 1,500 ppm, Mg = 100 to 150 ppm. Apply 50 to 80 lb of nitrogen and 90 to 120 lb of phosphorous and potassium per acre. Sidedress when vines begin to run (just before layby) with 30 to 40 lb of nitrogen per acre. Consider applying all nitrogen preplant for summer-planted pumpkins. This would avoid the task of sidedressing.
Example: 400 lb of 8-24-24/A applied preplant and sidedress with 120 lb of 34-0-0/A when vines begin to run. All nitrogen put out preplant, band 600 to 700 lb of 13-13-13/A.
Pollination Requirements: Pumpkins have male and female flowers and require bees for pollination. Place one strong hive of bees for every 2 to 3 acres of pumpkins near the field when female flowers appear. Apply all insecticides late in afternoon or early evening after the bees have left the field.
Common Problems: Low yields of summer-planted pumpkins caused by reduced fruit set and diseases. Foliage diseases especially during periods of rainy weather (downy mildew, powdery mildew, alternaria leaf spot and anthracnose). Fruit rots in field especially during rainy weather. Fruit rots in storage. Cucumber beetles, aphids, leaf miners, pickleworms, melon worms, squash bugs, squash vine borer, mites and stink bugs. A scouting and spraying program to control foliar diseases and insects is essential for successful pumpkin production. Failure to set fruit during rainy weather. Failure to obtain adequate spray coverage for insect and disease control. Reluctance of growers to follow preventive spray schedule to control diseases. Inadequate weed control. Planting too early or too late to hit Halloween market. Inadequate fertilization. Poor storage. Viral diseases.
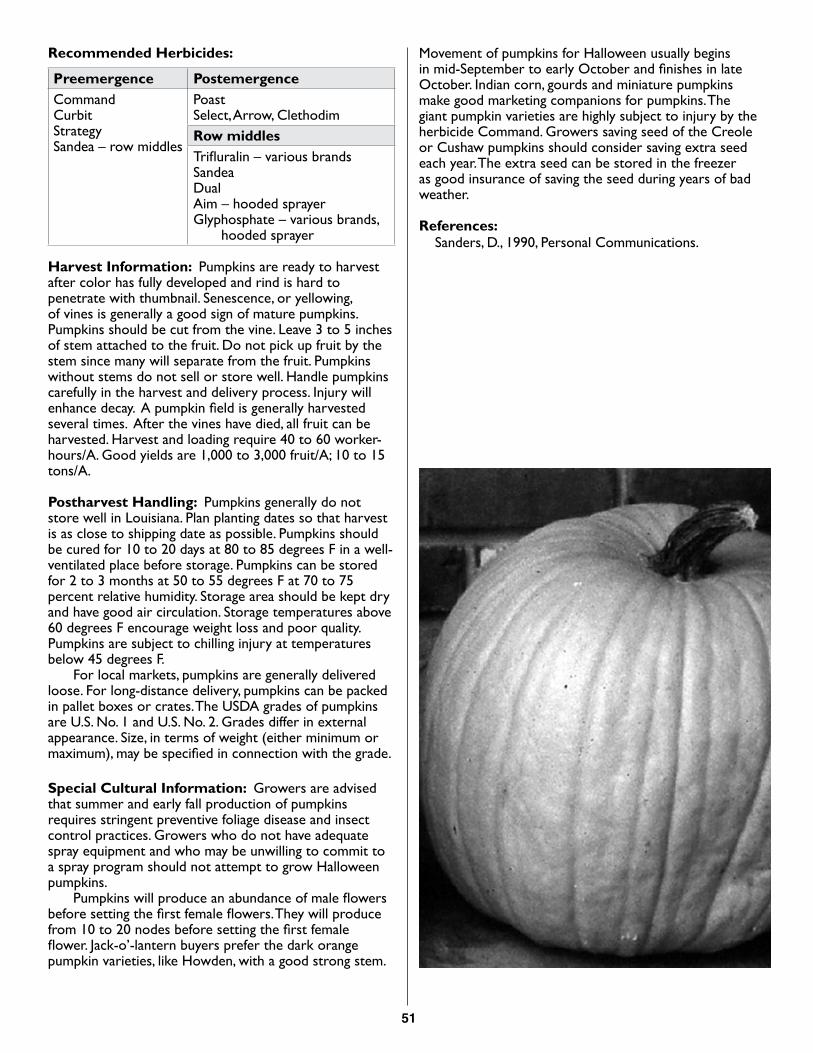
51
Recommended Herbicides:
Preemergence PostemergenceCommandCurbitStrategySandea – row middles
PoastSelect, Arrow, ClethodimRow middles Trifluralin – various brandsSandea DualAim – hooded sprayer Glyphosphate – various brands,
hooded sprayer
Harvest Information: Pumpkins are ready to harvest after color has fully developed and rind is hard to penetrate with thumbnail. Senescence, or yellowing, of vines is generally a good sign of mature pumpkins. Pumpkins should be cut from the vine. Leave 3 to 5 inches of stem attached to the fruit. Do not pick up fruit by the stem since many will separate from the fruit. Pumpkins without stems do not sell or store well. Handle pumpkins carefully in the harvest and delivery process. Injury will enhance decay. A pumpkin field is generally harvested several times. After the vines have died, all fruit can be harvested. Harvest and loading require 40 to 60 worker-hours/A. Good yields are 1,000 to 3,000 fruit/A; 10 to 15 tons/A.
Postharvest Handling: Pumpkins generally do not store well in Louisiana. Plan planting dates so that harvest is as close to shipping date as possible. Pumpkins should be cured for 10 to 20 days at 80 to 85 degrees F in a well-ventilated place before storage. Pumpkins can be stored for 2 to 3 months at 50 to 55 degrees F at 70 to 75 percent relative humidity. Storage area should be kept dry and have good air circulation. Storage temperatures above 60 degrees F encourage weight loss and poor quality. Pumpkins are subject to chilling injury at temperatures below 45 degrees F. For local markets, pumpkins are generally delivered loose. For long-distance delivery, pumpkins can be packed in pallet boxes or crates. The USDA grades of pumpkins are U.S. No. 1 and U.S. No. 2. Grades differ in external appearance. Size, in terms of weight (either minimum or maximum), may be specified in connection with the grade.
Special Cultural Information: Growers are advised that summer and early fall production of pumpkins requires stringent preventive foliage disease and insect control practices. Growers who do not have adequate spray equipment and who may be unwilling to commit to a spray program should not attempt to grow Halloween pumpkins. Pumpkins will produce an abundance of male flowers before setting the first female flowers. They will produce from 10 to 20 nodes before setting the first female flower. Jack-o’-lantern buyers prefer the dark orange pumpkin varieties, like Howden, with a good strong stem.
Movement of pumpkins for Halloween usually begins in mid-September to early October and finishes in late October. Indian corn, gourds and miniature pumpkins make good marketing companions for pumpkins. The giant pumpkin varieties are highly subject to injury by the herbicide Command. Growers saving seed of the Creole or Cushaw pumpkins should consider saving extra seed each year. The extra seed can be stored in the freezer as good insurance of saving the seed during years of bad weather.
References:Sanders, D., 1990, Personal Communications.
52
ShallotsBotanical Family: Alliaceae (Onion family)
Number of Seeds/Pound: 45 to 65 dry shallot sets/pound
Seeding Rate/Acre: 200 to 500 lb of dry shallot sets Seeding rate varies with row size and planting arrangement; 300 lb of dry shallot sets are required to plant an acre on single-drill, 70-inch rows.
Spacing: • 4 to 8 inches for market production• 8 to 10 inches for dry set production
Planting Arrangement: Growers should consider planting shallots on double-drills (spaced 10 to 12 inches apart) to obtain higher yields.
Planting Dates:• Green Onion Crop Dry Sets: Late August to early September – early crop October 1 – main crop• Green Transplants Mid-December to late January • Seed Crop Dry Sets: Mid-September to late October
Clean and grade dry shallots before planting. Grading sets will ensure a more uniform field. Separate the sets into small (diameter of a dime and less), medium (diameter of a nickel to a quarter) and large (diameter larger than a quarter). Use the large sets for the earliest planting. These large sets will reach a marketable age more quickly than the smaller sets. The small sets can be used for later plantings. Plant 2 or 3 of the small sets to a hill.
• Green Transplants Mid-December to early February
Select strong, healthy clumps for green transplants. Do not use small, weak plants. Discard all plants showing pink roots. Divide the cloves and set two plants to a hill. Do not trim the roots and tops of the green plants.
Optimum Soil Temperature Range for Germination: 50 to 95 degrees F
Depth to Plant Seed: • Dry sets for market – 1 inch• Dry sets for seeds – ¼ to ½ inch• Green transplants – set plants no deeper than their
original depth
Days to Germinate: 7 to 14 days
Days from Planting to Harvest Begins: 50 to 60 days
Varieties: The identification of shallot varieties is extremely difficult. It is doubtful that the shallot sets available for sale today are true to type.
Recommended Soil pH & Fertilization: pH 5.8 to 6.2; Ca = 1,000 to 1,500 ppm and Mg 150 to 300 ppm. Apply 30 to 60 lb of nitrogen and 60 to 120 lb of phosphorous and potassium per acre preplant. On double-drill, each drill should have its own band of fertilizer. Band fertilizer 3 to 4 inches below the drill and 2 to 3 inches to the side of the drill or broadcast before bedding. Sidedress shallots with 20 to 30 lb of nitrogen during their early growth stage (2 to 3 weeks after plants mark the row). Splitting the sidedressing into two applications two weeks apart is done by some growers. Growers harvesting just the tops should sidedress soon after harvest.
Example: 400 to 500 lb 13-13-13 or 8-24-24/A applied preplant. Sidedress with 100 lb of 34-0-0/A 2 to 3 weeks after plants mark the row.
Common Problems: Availability of seed. Loss of variety identity. Adequate labor for harvesting and cleaning. Green onions from other areas have replaced much of the Louisiana shallots in the market. Foliage diseases (purple blotch, downy mildew), pink root, thrips, salt marsh caterpillar, availability of herbicides.
Recommended Herbicides:
Preemergence PostemergencePrefar Prowl, Pendimax
Pendimethalin Pentagon (dry bulbs, shallots)Outlook (dry bulbs, shallots) PoastSelect, Arrow, ClethodimAim – hooded sprayer, row middlesGlyphosate – various brands, hooded
sprayers, row middles
Harvest Information: Shallots are ready to harvest once the diameter of the base of the shallot reaches ½ inch in diameter. Passing a lifter blade under the shallots and off barring the row will make pulling easier. The cloves are hand-pulled and brought out of the field for skinning, stripping, washing and bunching. The loose outer skin must be pulled completely off to the base of the roots. Avoid leaving two or more shallot stems encased in a wrapper sheath. Considerable labor is required to harvest, clean and pack shallots. Shallots are packed like green onions in cartons or crates either holding 4 dozen bunches weighing 15 to 25 lb or 2 dozen bunches weighing 20 lb. Good yields are 1,000 to 2,000 dozen bunches per acre. Harvest
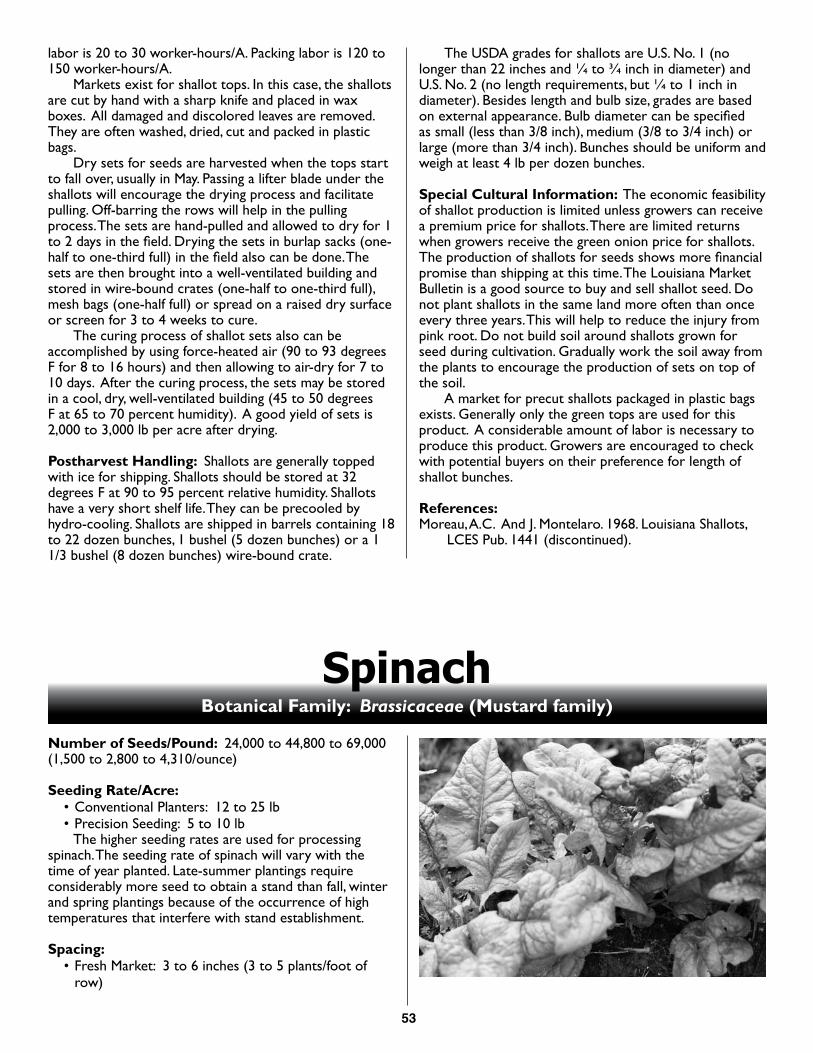
53
labor is 20 to 30 worker-hours/A. Packing labor is 120 to 150 worker-hours/A. Markets exist for shallot tops. In this case, the shallots are cut by hand with a sharp knife and placed in wax boxes. All damaged and discolored leaves are removed. They are often washed, dried, cut and packed in plastic bags. Dry sets for seeds are harvested when the tops start to fall over, usually in May. Passing a lifter blade under the shallots will encourage the drying process and facilitate pulling. Off-barring the rows will help in the pulling process. The sets are hand-pulled and allowed to dry for 1 to 2 days in the field. Drying the sets in burlap sacks (one-half to one-third full) in the field also can be done. The sets are then brought into a well-ventilated building and stored in wire-bound crates (one-half to one-third full), mesh bags (one-half full) or spread on a raised dry surface or screen for 3 to 4 weeks to cure. The curing process of shallot sets also can be accomplished by using force-heated air (90 to 93 degrees F for 8 to 16 hours) and then allowing to air-dry for 7 to 10 days. After the curing process, the sets may be stored in a cool, dry, well-ventilated building (45 to 50 degrees F at 65 to 70 percent humidity). A good yield of sets is 2,000 to 3,000 lb per acre after drying.
Postharvest Handling: Shallots are generally topped with ice for shipping. Shallots should be stored at 32 degrees F at 90 to 95 percent relative humidity. Shallots have a very short shelf life. They can be precooled by hydro-cooling. Shallots are shipped in barrels containing 18 to 22 dozen bunches, 1 bushel (5 dozen bunches) or a 1 1/3 bushel (8 dozen bunches) wire-bound crate.
The USDA grades for shallots are U.S. No. 1 (no longer than 22 inches and ¼ to ¾ inch in diameter) and U.S. No. 2 (no length requirements, but ¼ to 1 inch in diameter). Besides length and bulb size, grades are based on external appearance. Bulb diameter can be specified as small (less than 3/8 inch), medium (3/8 to 3/4 inch) or large (more than 3/4 inch). Bunches should be uniform and weigh at least 4 lb per dozen bunches.
Special Cultural Information: The economic feasibility of shallot production is limited unless growers can receive a premium price for shallots. There are limited returns when growers receive the green onion price for shallots. The production of shallots for seeds shows more financial promise than shipping at this time. The Louisiana Market Bulletin is a good source to buy and sell shallot seed. Do not plant shallots in the same land more often than once every three years. This will help to reduce the injury from pink root. Do not build soil around shallots grown for seed during cultivation. Gradually work the soil away from the plants to encourage the production of sets on top of the soil. A market for precut shallots packaged in plastic bags exists. Generally only the green tops are used for this product. A considerable amount of labor is necessary to produce this product. Growers are encouraged to check with potential buyers on their preference for length of shallot bunches.
References:Moreau, A.C. And J. Montelaro. 1968. Louisiana Shallots,
LCES Pub. 1441 (discontinued).
SpinachBotanical Family: Brassicaceae (Mustard family)
Number of Seeds/Pound: 24,000 to 44,800 to 69,000 (1,500 to 2,800 to 4,310/ounce)
Seeding Rate/Acre: • Conventional Planters: 12 to 25 lb • Precision Seeding: 5 to 10 lb
The higher seeding rates are used for processing spinach. The seeding rate of spinach will vary with the time of year planted. Late-summer plantings require considerably more seed to obtain a stand than fall, winter and spring plantings because of the occurrence of high temperatures that interfere with stand establishment.
Spacing: • Fresh Market: 3 to 6 inches (3 to 5 plants/foot of
row)
54
• Processing: 1 to 1½ inches (8 to 10 plants/foot of row)
Close spacing in processing encourages high yields and upright standing plants that facilitate mechanical harvesting.
Planting Arrangement: Both fresh market and processing spinach should be grown on double-drills to obtain high yields. An 80-inch bed with 4 to 6 drills should be considered for mechanical harvesting of processing spinach.
Planting Dates:• Fall and early winter crop harvest Late October and January Mid September to October• Winter crop harvest February to March November to December
Optimum Soil Temperature Range for Germination: 45-75 degrees F
Depth to Plant Seed: ½ to 1 inch
Time to Germinate: 7 to 10 days
Time from Planting to Harvest Begins: • Fresh Market – 45 to 60 days• Processing – 70 to 90 days
Recommended Varieties:
Savoy types or semi-Savoy Melody Seven RTyeeUnipak 151
Smooth Leaf Tiger CatUnipak 151GreyhoundBallet
Recommended Soil pH & Fertilization: pH 6.0 to 7.0, Ca = 1,500 to 2,000 ppm, Mg = 100 to 300 ppm. Spinach is very sensitive to acid soils. Apply 30 to 50 lb of nitrogen preplant and 90 to 150 lb of phosphorous and potassium. Sidedress with 30 to 50 lb of nitrogen/A 3 to 4 weeks after planting or when largest leaves are 2 to 4 inches in diameter. After each harvest, apply an additional 30 lb of nitrogen/A.
Example: Apply 350 to 400 lb 8-24-24 preplant. Sidedress with 150 lb of 34-0-0/A 3 to 4 weeks after planting. Apply 100 lb of 34-0-0/A after each harvest.
Common Problems: Acid soils. Failure to get early stands because of high temperatures. Webworms,
cucumber beetle, yellow margined leaf beetle, aphids and loopers. Blue mold (downy mildew) and white rust. Spinach will bolt when exposed to long days and high temperatures. Long standing varieties are more resistant to bolting. Weed control. Spinach fields for processing must be weed free.
Recommended Herbicides:
Preemergence PostemergenceRoNeetPrefarDacthal
PoastSelect, Arrow, ClethodimSpin-Aid StingerAim – hooded sprayer, row middlesGlyphosate – various brands, hooded sprayer, row middles
Harvest Information: Spinach is harvested once it reaches acceptable size. Several cuttings at 4- to 6-week intervals are possible from the same planting if managed correctly. Fresh market spinach is hand harvested either as close-cut whole plants (cut close to soil) or as loose-leaf (cut 3 to 4 inches above the soil). Good yields are 4,000 to 5,000 lb/A. Processing spinach is mechanically harvested and bulk loaded into trailers that are iced or refrigerated. Multiple harvests are easily obtained with processing spinach. Good yields are 5 to 8 tons/A.
Postharvest Handling: Whole plants are made into bundles with rubber bands and packed in 2 dozen bunches in a 20 to 22 lb carton, bushel baskets or wire-bound crate. Most loose-leaf spinach is trimmed, graded and prepackaged in 10-oz perforated cello bags and packed in a carton containing 8 to 12 cello packs/carton. Loose-leaf spinach is also packed loose in bushel baskets. Topping with ice is necessary to maintain shelf life for fresh spinach. Spinach is stored at 32 to 35 degrees F at 90 to 95 percent relative humidity. USDA Grades of spinach are No. 1 and Commercial. Differences in grades are based on external appearance.
Special Cultural Information: Varieties differ in their ability to resist bolting. Long-standing varieties are more resistant to bolting and are the preferred types for spring plantings. Many varieties have resistance to blue mold (downy mildew). Spinach will withstand hard freezes. Harvested spinach plants will produce another crop in 3 to 4 weeks. Sidedressing after the first harvest will help to increase the yields. Passing coulters on each side of plants will help to eliminate the older leaves from the next crop. Keeping the seed in a freezer until right before planting will enhance germination.
References:Dainello, F. 1990. Personal communication.
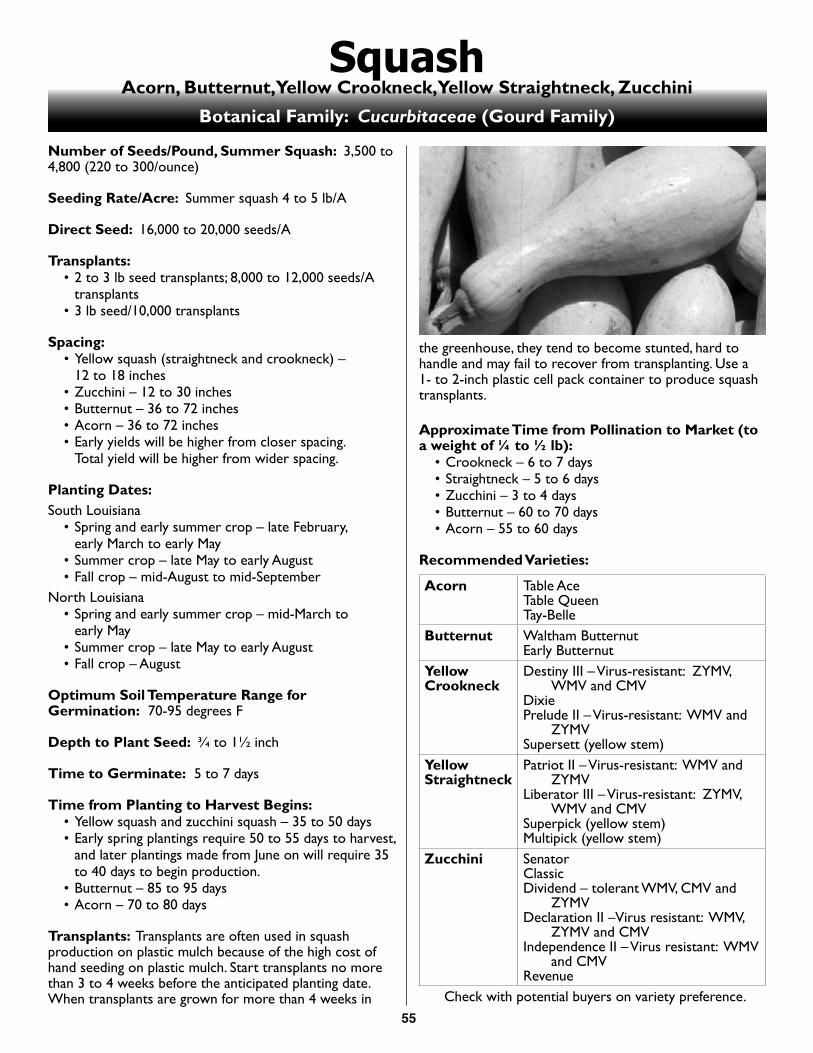
55
SquashAcorn, Butternut, Yellow Crookneck, Yellow Straightneck, Zucchini
Botanical Family: Cucurbitaceae (Gourd Family)
Number of Seeds/Pound, Summer Squash: 3,500 to 4,800 (220 to 300/ounce)
Seeding Rate/Acre: Summer squash 4 to 5 lb/A
Direct Seed: 16,000 to 20,000 seeds/A
Transplants: • 2 to 3 lb seed transplants; 8,000 to 12,000 seeds/A
transplants• 3 lb seed/10,000 transplants
Spacing:• Yellow squash (straightneck and crookneck) –
12 to 18 inches• Zucchini – 12 to 30 inches• Butternut – 36 to 72 inches• Acorn – 36 to 72 inches• Early yields will be higher from closer spacing.
Total yield will be higher from wider spacing.
Planting Dates:South Louisiana
• Spring and early summer crop – late February, early March to early May
• Summer crop – late May to early August• Fall crop – mid-August to mid-September
North Louisiana• Spring and early summer crop – mid-March to
early May• Summer crop – late May to early August• Fall crop – August
Optimum Soil Temperature Range for Germination: 70-95 degrees F
Depth to Plant Seed: ¾ to 1½ inch
Time to Germinate: 5 to 7 days
Time from Planting to Harvest Begins: • Yellow squash and zucchini squash – 35 to 50 days• Early spring plantings require 50 to 55 days to harvest,
and later plantings made from June on will require 35 to 40 days to begin production.
• Butternut – 85 to 95 days• Acorn – 70 to 80 days
Transplants: Transplants are often used in squash production on plastic mulch because of the high cost of hand seeding on plastic mulch. Start transplants no more than 3 to 4 weeks before the anticipated planting date. When transplants are grown for more than 4 weeks in
the greenhouse, they tend to become stunted, hard to handle and may fail to recover from transplanting. Use a 1- to 2-inch plastic cell pack container to produce squash transplants.
Approximate Time from Pollination to Market (to a weight of ¼ to ½ lb):
• Crookneck – 6 to 7 days• Straightneck – 5 to 6 days• Zucchini – 3 to 4 days• Butternut – 60 to 70 days• Acorn – 55 to 60 days
Recommended Varieties:
Acorn Table AceTable QueenTay-Belle
Butternut Waltham ButternutEarly Butternut
Yellow Crookneck
Destiny III – Virus-resistant: ZYMV, WMV and CMV
DixiePrelude II – Virus-resistant: WMV and
ZYMV Supersett (yellow stem)
Yellow Straightneck
Patriot II – Virus-resistant: WMV and ZYMV
Liberator III – Virus-resistant: ZYMV, WMV and CMV
Superpick (yellow stem)Multipick (yellow stem)
Zucchini Senator Classic Dividend – tolerant WMV, CMV and
ZYMVDeclaration II –Virus resistant: WMV,
ZYMV and CMVIndependence II – Virus resistant: WMV
and CMVRevenue
Check with potential buyers on variety preference.
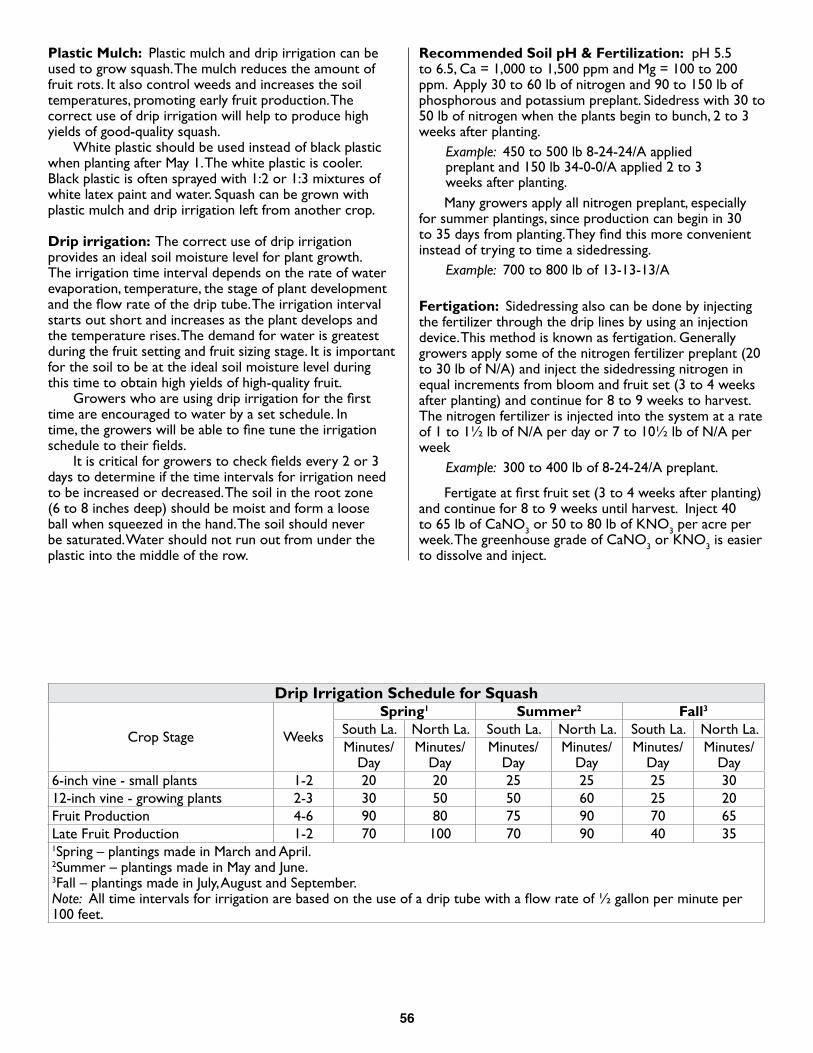
56
Plastic Mulch: Plastic mulch and drip irrigation can be used to grow squash. The mulch reduces the amount of fruit rots. It also control weeds and increases the soil temperatures, promoting early fruit production. The correct use of drip irrigation will help to produce high yields of good-quality squash. White plastic should be used instead of black plastic when planting after May 1. The white plastic is cooler. Black plastic is often sprayed with 1:2 or 1:3 mixtures of white latex paint and water. Squash can be grown with plastic mulch and drip irrigation left from another crop.
Drip irrigation: The correct use of drip irrigation provides an ideal soil moisture level for plant growth. The irrigation time interval depends on the rate of water evaporation, temperature, the stage of plant development and the flow rate of the drip tube. The irrigation interval starts out short and increases as the plant develops and the temperature rises. The demand for water is greatest during the fruit setting and fruit sizing stage. It is important for the soil to be at the ideal soil moisture level during this time to obtain high yields of high-quality fruit. Growers who are using drip irrigation for the first time are encouraged to water by a set schedule. In time, the growers will be able to fine tune the irrigation schedule to their fields. It is critical for growers to check fields every 2 or 3 days to determine if the time intervals for irrigation need to be increased or decreased. The soil in the root zone (6 to 8 inches deep) should be moist and form a loose ball when squeezed in the hand. The soil should never be saturated. Water should not run out from under the plastic into the middle of the row.
Recommended Soil pH & Fertilization: pH 5.5 to 6.5, Ca = 1,000 to 1,500 ppm and Mg = 100 to 200 ppm. Apply 30 to 60 lb of nitrogen and 90 to 150 lb of phosphorous and potassium preplant. Sidedress with 30 to 50 lb of nitrogen when the plants begin to bunch, 2 to 3 weeks after planting.
Example: 450 to 500 lb 8-24-24/A applied preplant and 150 lb 34-0-0/A applied 2 to 3 weeks after planting.
Many growers apply all nitrogen preplant, especially for summer plantings, since production can begin in 30 to 35 days from planting. They find this more convenient instead of trying to time a sidedressing.
Example: 700 to 800 lb of 13-13-13/A
Fertigation: Sidedressing also can be done by injecting the fertilizer through the drip lines by using an injection device. This method is known as fertigation. Generally growers apply some of the nitrogen fertilizer preplant (20 to 30 lb of N/A) and inject the sidedressing nitrogen in equal increments from bloom and fruit set (3 to 4 weeks after planting) and continue for 8 to 9 weeks to harvest. The nitrogen fertilizer is injected into the system at a rate of 1 to 1½ lb of N/A per day or 7 to 10½ lb of N/A per week
Example: 300 to 400 lb of 8-24-24/A preplant.
Fertigate at first fruit set (3 to 4 weeks after planting) and continue for 8 to 9 weeks until harvest. Inject 40 to 65 lb of CaNO3 or 50 to 80 lb of KNO3 per acre per week. The greenhouse grade of CaNO3 or KNO3 is easier to dissolve and inject.
Drip Irrigation Schedule for Squash
Crop Stage Weeks
Spring1 Summer2 Fall3South La. North La. South La. North La. South La. North La. Minutes/
DayMinutes/
Day Minutes/
DayMinutes/
DayMinutes/
Day Minutes/
Day6-inch vine - small plants 1-2 20 20 25 25 25 3012-inch vine - growing plants 2-3 30 50 50 60 25 20Fruit Production 4-6 90 80 75 90 70 65Late Fruit Production 1-2 70 100 70 90 40 351Spring – plantings made in March and April.2Summer – plantings made in May and June.3Fall – plantings made in July, August and September.Note: All time intervals for irrigation are based on the use of a drip tube with a flow rate of ½ gallon per minute per 100 feet.
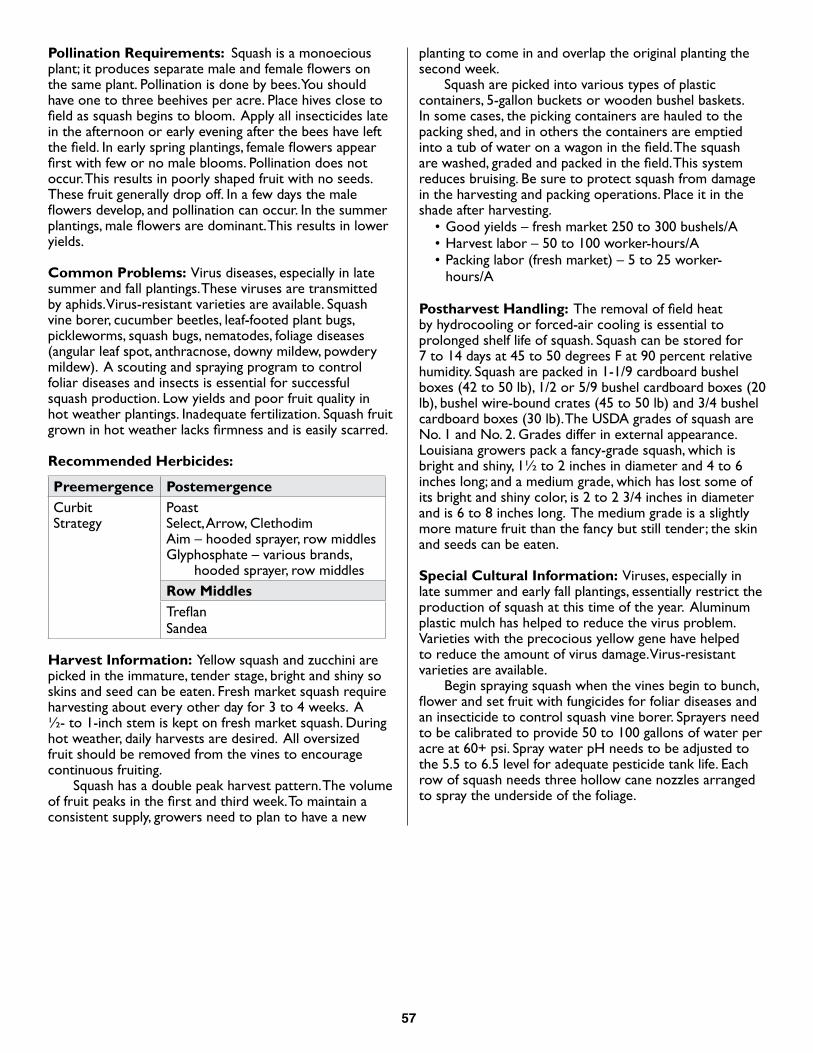
57
Pollination Requirements: Squash is a monoecious plant; it produces separate male and female flowers on the same plant. Pollination is done by bees. You should have one to three beehives per acre. Place hives close to field as squash begins to bloom. Apply all insecticides late in the afternoon or early evening after the bees have left the field. In early spring plantings, female flowers appear first with few or no male blooms. Pollination does not occur. This results in poorly shaped fruit with no seeds. These fruit generally drop off. In a few days the male flowers develop, and pollination can occur. In the summer plantings, male flowers are dominant. This results in lower yields.
Common Problems: Virus diseases, especially in late summer and fall plantings. These viruses are transmitted by aphids. Virus-resistant varieties are available. Squash vine borer, cucumber beetles, leaf-footed plant bugs, pickleworms, squash bugs, nematodes, foliage diseases (angular leaf spot, anthracnose, downy mildew, powdery mildew). A scouting and spraying program to control foliar diseases and insects is essential for successful squash production. Low yields and poor fruit quality in hot weather plantings. Inadequate fertilization. Squash fruit grown in hot weather lacks firmness and is easily scarred.
Recommended Herbicides:
Preemergence PostemergenceCurbitStrategy
PoastSelect, Arrow, ClethodimAim – hooded sprayer, row middlesGlyphosphate – various brands,
hooded sprayer, row middlesRow MiddlesTreflanSandea
Harvest Information: Yellow squash and zucchini are picked in the immature, tender stage, bright and shiny so skins and seed can be eaten. Fresh market squash require harvesting about every other day for 3 to 4 weeks. A ½- to 1-inch stem is kept on fresh market squash. During hot weather, daily harvests are desired. All oversized fruit should be removed from the vines to encourage continuous fruiting. Squash has a double peak harvest pattern. The volume of fruit peaks in the first and third week. To maintain a consistent supply, growers need to plan to have a new
planting to come in and overlap the original planting the second week. Squash are picked into various types of plastic containers, 5-gallon buckets or wooden bushel baskets. In some cases, the picking containers are hauled to the packing shed, and in others the containers are emptied into a tub of water on a wagon in the field. The squash are washed, graded and packed in the field. This system reduces bruising. Be sure to protect squash from damage in the harvesting and packing operations. Place it in the shade after harvesting.
• Good yields – fresh market 250 to 300 bushels/A• Harvest labor – 50 to 100 worker-hours/A • Packing labor (fresh market) – 5 to 25 worker-
hours/A
Postharvest Handling: The removal of field heat by hydrocooling or forced-air cooling is essential to prolonged shelf life of squash. Squash can be stored for 7 to 14 days at 45 to 50 degrees F at 90 percent relative humidity. Squash are packed in 1-1/9 cardboard bushel boxes (42 to 50 lb), 1/2 or 5/9 bushel cardboard boxes (20 lb), bushel wire-bound crates (45 to 50 lb) and 3/4 bushel cardboard boxes (30 lb). The USDA grades of squash are No. 1 and No. 2. Grades differ in external appearance. Louisiana growers pack a fancy-grade squash, which is bright and shiny, 1½ to 2 inches in diameter and 4 to 6 inches long; and a medium grade, which has lost some of its bright and shiny color, is 2 to 2 3/4 inches in diameter and is 6 to 8 inches long. The medium grade is a slightly more mature fruit than the fancy but still tender; the skin and seeds can be eaten.
Special Cultural Information: Viruses, especially in late summer and early fall plantings, essentially restrict the production of squash at this time of the year. Aluminum plastic mulch has helped to reduce the virus problem. Varieties with the precocious yellow gene have helped to reduce the amount of virus damage. Virus-resistant varieties are available. Begin spraying squash when the vines begin to bunch, flower and set fruit with fungicides for foliar diseases and an insecticide to control squash vine borer. Sprayers need to be calibrated to provide 50 to 100 gallons of water per acre at 60+ psi. Spray water pH needs to be adjusted to the 5.5 to 6.5 level for adequate pesticide tank life. Each row of squash needs three hollow cane nozzles arranged to spray the underside of the foliage.
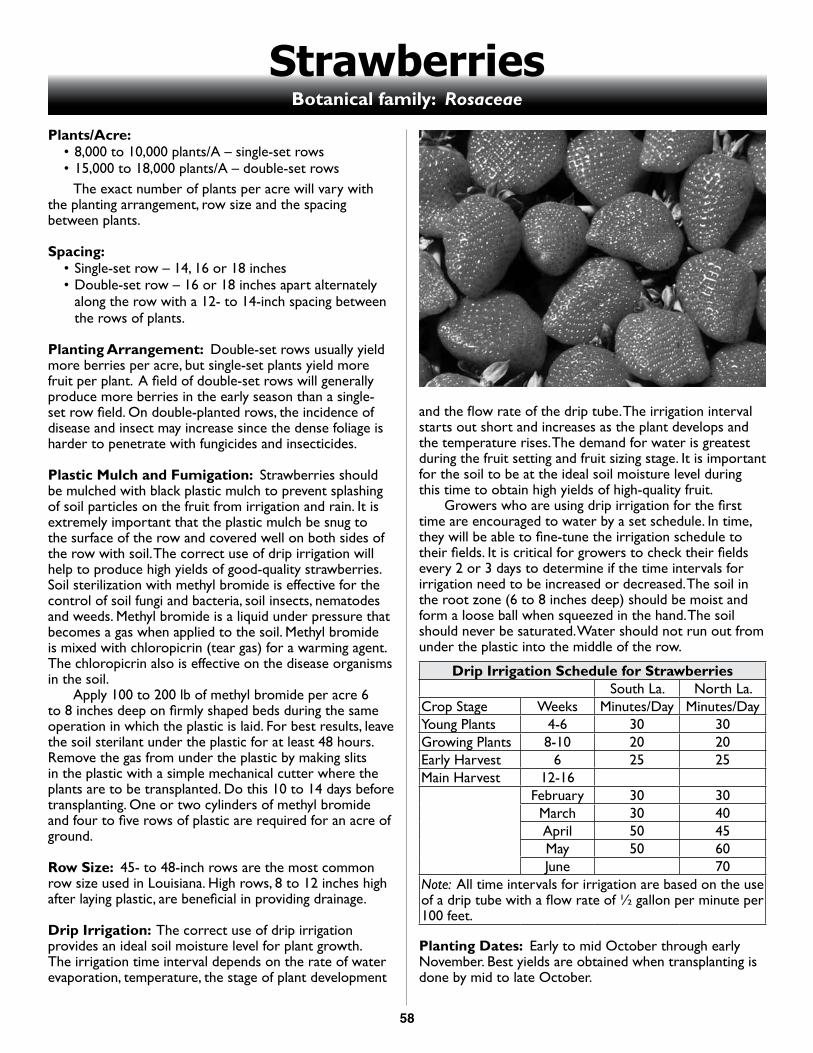
58
StrawberriesBotanical family: Rosaceae
Plants/Acre:• 8,000 to 10,000 plants/A – single-set rows • 15,000 to 18,000 plants/A – double-set rows
The exact number of plants per acre will vary with the planting arrangement, row size and the spacing between plants.
Spacing:• Single-set row – 14, 16 or 18 inches • Double-set row – 16 or 18 inches apart alternately
along the row with a 12- to 14-inch spacing between the rows of plants.
Planting Arrangement: Double-set rows usually yield more berries per acre, but single-set plants yield more fruit per plant. A field of double-set rows will generally produce more berries in the early season than a single-set row field. On double-planted rows, the incidence of disease and insect may increase since the dense foliage is harder to penetrate with fungicides and insecticides.
Plastic Mulch and Fumigation: Strawberries should be mulched with black plastic mulch to prevent splashing of soil particles on the fruit from irrigation and rain. It is extremely important that the plastic mulch be snug to the surface of the row and covered well on both sides of the row with soil. The correct use of drip irrigation will help to produce high yields of good-quality strawberries. Soil sterilization with methyl bromide is effective for the control of soil fungi and bacteria, soil insects, nematodes and weeds. Methyl bromide is a liquid under pressure that becomes a gas when applied to the soil. Methyl bromide is mixed with chloropicrin (tear gas) for a warming agent. The chloropicrin also is effective on the disease organisms in the soil. Apply 100 to 200 lb of methyl bromide per acre 6 to 8 inches deep on firmly shaped beds during the same operation in which the plastic is laid. For best results, leave the soil sterilant under the plastic for at least 48 hours. Remove the gas from under the plastic by making slits in the plastic with a simple mechanical cutter where the plants are to be transplanted. Do this 10 to 14 days before transplanting. One or two cylinders of methyl bromide and four to five rows of plastic are required for an acre of ground.
Row Size: 45- to 48-inch rows are the most common row size used in Louisiana. High rows, 8 to 12 inches high after laying plastic, are beneficial in providing drainage.
Drip Irrigation: The correct use of drip irrigation provides an ideal soil moisture level for plant growth. The irrigation time interval depends on the rate of water evaporation, temperature, the stage of plant development
and the flow rate of the drip tube. The irrigation interval starts out short and increases as the plant develops and the temperature rises. The demand for water is greatest during the fruit setting and fruit sizing stage. It is important for the soil to be at the ideal soil moisture level during this time to obtain high yields of high-quality fruit. Growers who are using drip irrigation for the first time are encouraged to water by a set schedule. In time, they will be able to fine-tune the irrigation schedule to their fields. It is critical for growers to check their fields every 2 or 3 days to determine if the time intervals for irrigation need to be increased or decreased. The soil in the root zone (6 to 8 inches deep) should be moist and form a loose ball when squeezed in the hand. The soil should never be saturated. Water should not run out from under the plastic into the middle of the row.
Drip Irrigation Schedule for StrawberriesSouth La. North La.
Crop Stage Weeks Minutes/Day Minutes/DayYoung Plants 4-6 30 30Growing Plants 8-10 20 20Early Harvest 6 25 25Main Harvest 12-16
February 30 30March 30 40April 50 45May 50 60June 70
Note: All time intervals for irrigation are based on the use of a drip tube with a flow rate of ½ gallon per minute per 100 feet.
Planting Dates: Early to mid October through early November. Best yields are obtained when transplanting is done by mid to late October.
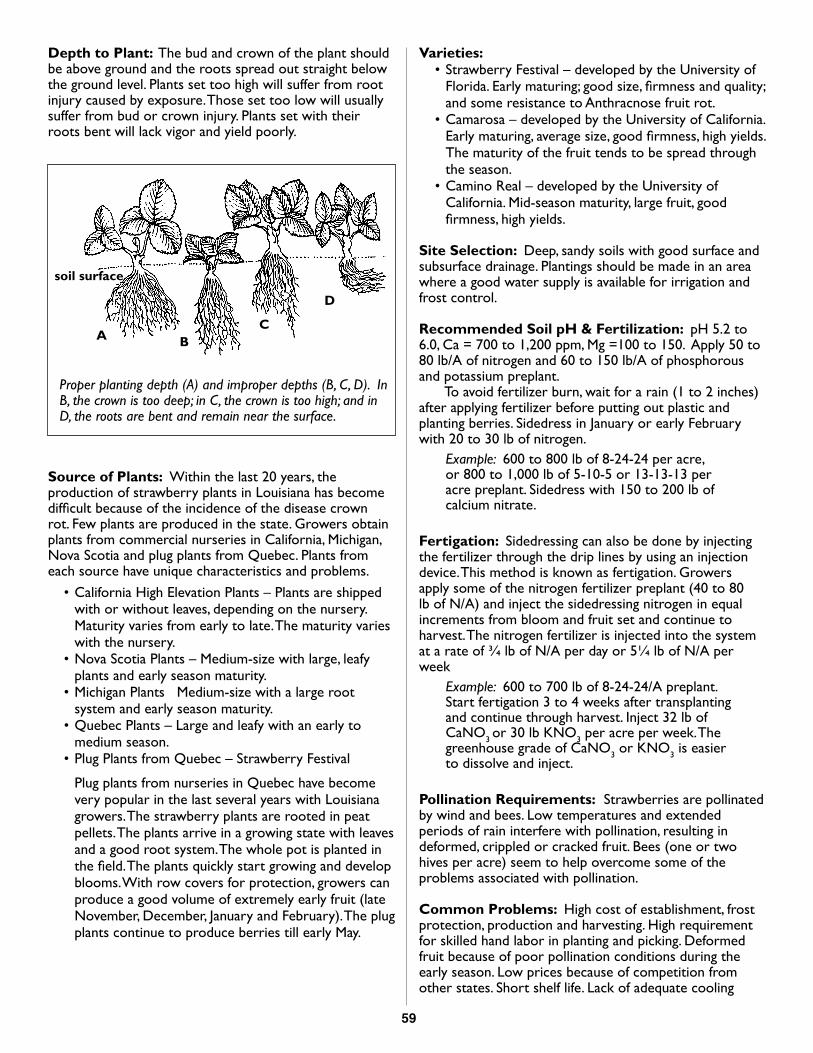
59
Depth to Plant: The bud and crown of the plant should be above ground and the roots spread out straight below the ground level. Plants set too high will suffer from root injury caused by exposure. Those set too low will usually suffer from bud or crown injury. Plants set with their roots bent will lack vigor and yield poorly.
Source of Plants: Within the last 20 years, the production of strawberry plants in Louisiana has become difficult because of the incidence of the disease crown rot. Few plants are produced in the state. Growers obtain plants from commercial nurseries in California, Michigan, Nova Scotia and plug plants from Quebec. Plants from each source have unique characteristics and problems.
• California High Elevation Plants – Plants are shipped with or without leaves, depending on the nursery. Maturity varies from early to late. The maturity varies with the nursery.
• Nova Scotia Plants – Medium-size with large, leafy plants and early season maturity.
• Michigan Plants Medium-size with a large root system and early season maturity.
• Quebec Plants – Large and leafy with an early to medium season.
• Plug Plants from Quebec – Strawberry Festival
Plug plants from nurseries in Quebec have become very popular in the last several years with Louisiana growers. The strawberry plants are rooted in peat pellets. The plants arrive in a growing state with leaves and a good root system. The whole pot is planted in the field. The plants quickly start growing and develop blooms. With row covers for protection, growers can produce a good volume of extremely early fruit (late November, December, January and February). The plug plants continue to produce berries till early May.
Varieties:• Strawberry Festival – developed by the University of
Florida. Early maturing; good size, firmness and quality; and some resistance to Anthracnose fruit rot.
• Camarosa – developed by the University of California. Early maturing, average size, good firmness, high yields. The maturity of the fruit tends to be spread through the season.
• Camino Real – developed by the University of California. Mid-season maturity, large fruit, good firmness, high yields.
Site Selection: Deep, sandy soils with good surface and subsurface drainage. Plantings should be made in an area where a good water supply is available for irrigation and frost control.
Recommended Soil pH & Fertilization: pH 5.2 to 6.0, Ca = 700 to 1,200 ppm, Mg =100 to 150. Apply 50 to 80 lb/A of nitrogen and 60 to 150 lb/A of phosphorous and potassium preplant. To avoid fertilizer burn, wait for a rain (1 to 2 inches) after applying fertilizer before putting out plastic and planting berries. Sidedress in January or early February with 20 to 30 lb of nitrogen.
Example: 600 to 800 lb of 8-24-24 per acre, or 800 to 1,000 lb of 5-10-5 or 13-13-13 per acre preplant. Sidedress with 150 to 200 lb of calcium nitrate.
Fertigation: Sidedressing can also be done by injecting the fertilizer through the drip lines by using an injection device. This method is known as fertigation. Growers apply some of the nitrogen fertilizer preplant (40 to 80 lb of N/A) and inject the sidedressing nitrogen in equal increments from bloom and fruit set and continue to harvest. The nitrogen fertilizer is injected into the system at a rate of ¾ lb of N/A per day or 5¼ lb of N/A per week
Example: 600 to 700 lb of 8-24-24/A preplant. Start fertigation 3 to 4 weeks after transplanting and continue through harvest. Inject 32 lb of CaNO3 or 30 lb KNO3 per acre per week. The greenhouse grade of CaNO3 or KNO3 is easier to dissolve and inject.
Pollination Requirements: Strawberries are pollinated by wind and bees. Low temperatures and extended periods of rain interfere with pollination, resulting in deformed, crippled or cracked fruit. Bees (one or two hives per acre) seem to help overcome some of the problems associated with pollination.
Common Problems: High cost of establishment, frost protection, production and harvesting. High requirement for skilled hand labor in planting and picking. Deformed fruit because of poor pollination conditions during the early season. Low prices because of competition from other states. Short shelf life. Lack of adequate cooling
soil surface
A BC
D
Proper planting depth (A) and improper depths (B, C, D). In B, the crown is too deep; in C, the crown is too high; and in D, the roots are bent and remain near the surface.
60
facilities to extend shelf life. Red spider mites, two-spotted spider mites, thrips, worms, aphids, snails and slugs, birds, gray mold, angular leaf spot, anthracnose fruit rot, rust (leaf spot), powdery mildew, crown rot and nematodes. A scouting and spraying program to control foliar diseases and insects is essential for successful production. Adequate spray coverage. Sprayers need to be calibrated to provide 50 to 100 gallons of water per acre at 60+ lb of pressure to move the foliage. Each row needs three hollow cone nozzles arranged to spray the underside of the foliage. Supply of plants at the optimum planting time.
Recommended Herbicides: Plastic mulch and fumigation with methyl bromide control most of the weeds on top of the row. Weeds are still a problem between the rows.
Preemergence PostemergenceGoal, Galigan – 30 days
before plantingProwl H2O, Chateau
Failure to control weeds in row middles will enhance the development of mites.
Gramoxone, Firestorm, Parazone – hooded sprayers, row middles
Select, Arrow, Clethodim Aim – hooded sprayers,
row middlesGlyphosate – various
brands, hooded sprayers, row middles
Frost Protection: Sprinkler systems are used for frost control in strawberries. Ice forming on the plants acts as insulation to prevent damage. As long as the supply of water is continuous, a slight amount of heat will be given off as the water turns to ice. This heat will maintain the temperature around the plant at 32 degrees F. Frost control should be turned on when the temperature in the field drops to 33 to 34 degrees F and is expected to go lower. Water should be left on until the ice that has formed on the plants thaws. Row covers: Row covers made of light polypropylene fabric can be placed directly on top of the crop to protect berries from frost. The heavier they are, the more protection the covers provide. Covers between 1 and 2 ounces per square foot are the most popular. These covers, in combination with sprinkle irrigation, have provided protection from frost. These covers also trap heat during the daytime, pushing plant development and earlier harvest. Most growers get covers 50 to 60 feet wide – enough to fit between the sprinkler lines. Plastic 10-lb rice bags filled with sand and spaced every 10 to 20 feet are used to hold the covers down (100 bags per acre).The covers should be put on when the farmer decides to start saving blooms. The covers should be removed during the day to allow pollination and spraying. It requires 4 to 6 people 15 to 20 minutes to uncover or recover an acre. The berries should be recovered at night. It is best to cover the berries well before a hard freeze. It is difficult to handle row covers when they are wet and in high wind conditions. Growers need to restrict the area covered to the amount of available labor they have to handle the
covers. The use of row covers creates an area of higher temperatures and high humidity around the plants. This tends to enhance the development of gray mold on the fruit and mites in the field. Growers need to monitor the disease and mite situation closely and use the correct control measure to be successful with row covers. It is difficult to get two years out of a row cover because of tears caused by moving and the difficulty in picking them up and storing them after the season. Row covers are expensive; the cost of covering an acre ranges between $1,000 and $1,700 per acre, depending on the thickness. They should be used only when farmers make a serious commitment to the production of strawberries. All other cultural practices must be used successfully to obtain the full benefits of row covers. Growers have started using a wire hoop and string system to keep the row covers off the plants. This prevents the row cover from damaging the fruit. A series of wire hoops is placed over the row of berries every 10 feet (1000 hoops/acre-cost of hoops $1000-$1200/acre). The hoops are made from heavy wire with a small curl in the corners of the hoop. These curls give the hoop some tension to aide in support of the row cover. A string is run on each side of the hoops and wrapped around the curl and tied to a short stake at the end of the row. The row covers are stretched over the hoops and strings. Sand bags are use to hold the covers down.
Harvest Information: Harvest berries early in the morning when the weather is cool. Berries should be handled carefully to avoid bruising. They should be pinched from the plant rather than pulled. Pinching leaves the caps (calyx) on the fruit and also provides a ½-inch stem attached to the fruit to handle the fruit without touching. A harvest every third day is usually required for maximum yields of high-quality fruit. Fruit for local, same-day sales is picked fully ripe, totally red. Fruit for shipping is picked with about 3/4 of the surface area pink or red. Strawberries are harvested, graded and packed by the pickers in the field. They are packed into fiberboard flats containing 12 1-pint baskets. The open-mesh molded plastic baskets are the most widely used. Plastic clamshell (1 quart) containers with an attached cover are also used. Pickers should always use a picking cart to keep flats off the ground. The packing of strawberries by the pickers in the field decreases the handling steps and reduces the possibility of damage. This system places a good deal of responsibility of maintaining fruit quality on the pickers. If the fruit is not picked and packed carefully, all other attempts to maintain fruit quality are useless. Pack only firm, well-shaped berries of good size and desired ripeness for the market. If overripe berries are packed, they can cause firm ones to decay before reaching their destination. Soft, bruised and overripe fruits should be discarded. Discard any berries with decay. Rotten, deformed or damaged berries should be removed from the plant at each harvest. Remove the discarded berries from the field to prevent the spread of disease.
61
Fruit should be handled gently at all times. Anytime a fruit is bruised, that area will discolor. In addition, bruising increases water loss. Trying to hold too many fruit at one time will result in bruising. Harvested strawberries should be placed, not dropped, in the flats. Overfilling flats causes bruising. The flats should be stacked directly onto pallets for shipping. This eliminates the need for further handling of individual flats. Travel over rough field roads can damage packed strawberries. Harvested berries should be kept in the shade and moved to a cooler within ½ to 1 hour after picking. Protect berries from heat and dust as much as possible when hauling.
Harvest Labor: Generally berries are harvested on a task system. Good pickers can average 3 to 4 flats per hour (harvested and packed) in good, high-yielding strawberries. The importance of picker training and supervision cannot be overemphasized. The quality of the pack depends on the picker. A financial incentive should be offered to pickers who pack a good grade of strawberries and remain with the grower throughout the season. Harvest efficiency can be increased by avoiding rows longer than 200 to 300 feet. The shorter rows minimize the time pickers spend traveling between the flat collection point and the field. Collection points on both ends of a field can save considerable time.
• Good yields: 1,000 to 2,000 flats/A. • Drip irrigation, row cover: 2,000 to 3,000 flats/A.
Postharvest Handling: Berries should be cooled to 32 degrees F as soon after harvest as possible. Forced-air cooling is the preferred method for removing field heat from strawberries. They should be stored at 32 to 34 degrees F. Strawberries are a very perishable crop. Holding periods should be kept as short as possible. Grades of strawberries are U.S. 1, Combination and U.S. 2. The principal grade on the market is U.S. 1. U.S. 1 strawberries are of one variety with the cap attached, which are firm, not overripe or underdeveloped and free from mold or decay and damage caused by dirt, moisture, foreign matter, disease, insects, mechanical or other means. The surface of each fruit should be at least three-fourths pink or red. The minimum diameter of each strawberry is not less that ¾ inch.
Special Cultural Information: Those interested in producing strawberries should check with their parish LSU AgCenter extension agent for a list of individuals handling plants. Growers with large acreage should consider using plants from several sources. This diversity will spread out the bloom and maturity sequence somewhat. It also helps to avoid damage from periods of bad weather. Summer cover crops such as cow peas, soybeans or Sudan grass are very desirable for strawberry production. The cover crop should be turned under in early August to allow crop residue to decompose and mix with the soil before planting in October. Soil preparation needs to be initiated at least 6 weeks before planting. Rows should be pulled up well ahead of time and allowed to firm up before placing plastic. A firm row will help ensure a good tight fit of the plastic on the row. Strawberries require a lot of water after transplanting. It is not uncommon for growers to water 4 to 5 hours for 5 to 10 days after planting.
Disease Control: Several diseases attack strawberries each year. Early in the season, foliar diseases are more important. Leaf spot (also called bird eye spot and rust) is common. It produces small spots with a white center and purple margins. These can coalesce and defoliate the plants. Angular leaf spot is most common during the winter after periods of rain or when growers are using frost control sprinklers. This bacterial disease produces small irregular spots that are most noticeable on the bottom of the leaf. The spots often look water-soaked and shiny. Two fruit rots commonly occur on strawberries: gray mold and fruit anthracnose. As the name implies, gray mold produces sunken brown to salmon lesions with a white to gray mycelium growth on the fruit. Gray mold usually develops at the calyx end of the fruit first. Anthracnose is a small black/brown spot and may appear anywhere on the fruit. It may rot the tip end of small green berries. Diseases are controlled by using recommended fungicides. It is critical to select the proper fungicides because many of them are highly specific and will not control all diseases.
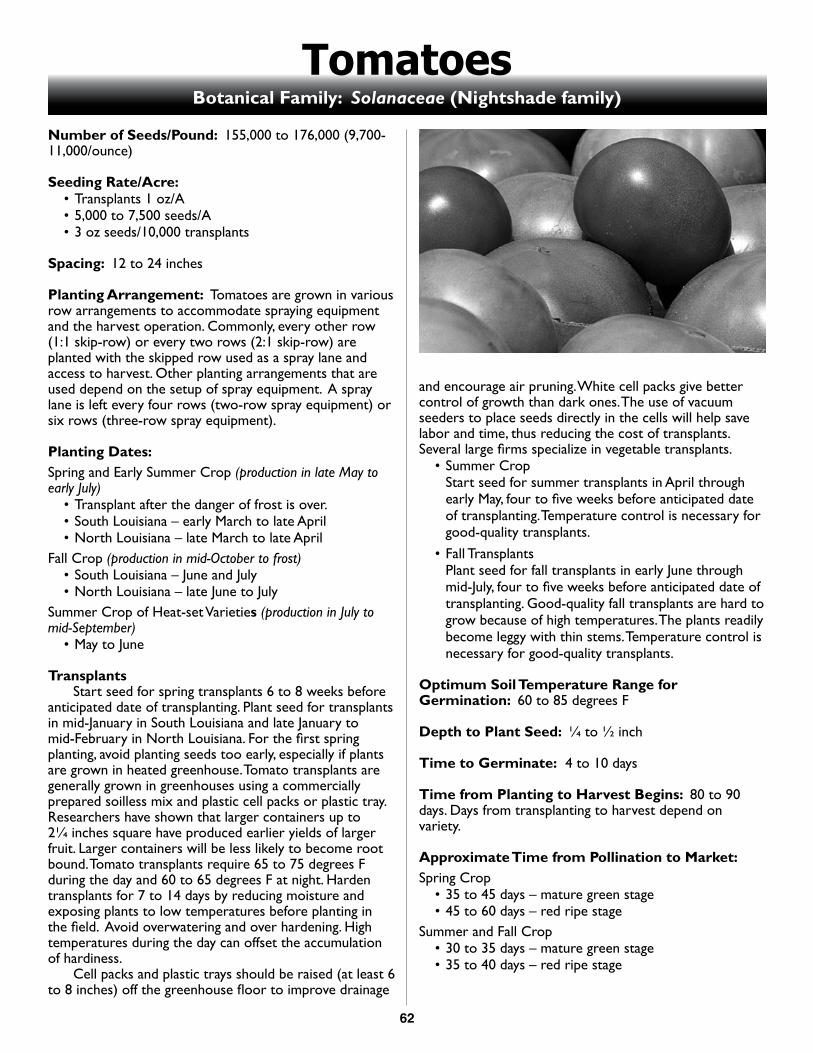
62
TomatoesBotanical Family: Solanaceae (Nightshade family)
Number of Seeds/Pound: 155,000 to 176,000 (9,700-11,000/ounce)
Seeding Rate/Acre: • Transplants 1 oz/A • 5,000 to 7,500 seeds/A• 3 oz seeds/10,000 transplants
Spacing: 12 to 24 inches
Planting Arrangement: Tomatoes are grown in various row arrangements to accommodate spraying equipment and the harvest operation. Commonly, every other row (1:1 skip-row) or every two rows (2:1 skip-row) are planted with the skipped row used as a spray lane and access to harvest. Other planting arrangements that are used depend on the setup of spray equipment. A spray lane is left every four rows (two-row spray equipment) or six rows (three-row spray equipment).
Planting Dates:Spring and Early Summer Crop (production in late May to early July)
• Transplant after the danger of frost is over.• South Louisiana – early March to late April• North Louisiana – late March to late April
Fall Crop (production in mid-October to frost)• South Louisiana – June and July • North Louisiana – late June to July
Summer Crop of Heat-set Varieties (production in July to mid-September)
• May to June
Transplants Start seed for spring transplants 6 to 8 weeks before anticipated date of transplanting. Plant seed for transplants in mid-January in South Louisiana and late January to mid-February in North Louisiana. For the first spring planting, avoid planting seeds too early, especially if plants are grown in heated greenhouse. Tomato transplants are generally grown in greenhouses using a commercially prepared soilless mix and plastic cell packs or plastic tray. Researchers have shown that larger containers up to 2¼ inches square have produced earlier yields of larger fruit. Larger containers will be less likely to become root bound. Tomato transplants require 65 to 75 degrees F during the day and 60 to 65 degrees F at night. Harden transplants for 7 to 14 days by reducing moisture and exposing plants to low temperatures before planting in the field. Avoid overwatering and over hardening. High temperatures during the day can offset the accumulation of hardiness. Cell packs and plastic trays should be raised (at least 6 to 8 inches) off the greenhouse floor to improve drainage
and encourage air pruning. White cell packs give better control of growth than dark ones. The use of vacuum seeders to place seeds directly in the cells will help save labor and time, thus reducing the cost of transplants. Several large firms specialize in vegetable transplants.
• Summer Crop Start seed for summer transplants in April through
early May, four to five weeks before anticipated date of transplanting. Temperature control is necessary for good-quality transplants.
• Fall Transplants Plant seed for fall transplants in early June through
mid-July, four to five weeks before anticipated date of transplanting. Good-quality fall transplants are hard to grow because of high temperatures. The plants readily become leggy with thin stems. Temperature control is necessary for good-quality transplants.
Optimum Soil Temperature Range for Germination: 60 to 85 degrees F
Depth to Plant Seed: ¼ to ½ inch
Time to Germinate: 4 to 10 days
Time from Planting to Harvest Begins: 80 to 90 days. Days from transplanting to harvest depend on variety.
Approximate Time from Pollination to Market: Spring Crop
• 35 to 45 days – mature green stage• 45 to 60 days – red ripe stage
Summer and Fall Crop• 30 to 35 days – mature green stage• 35 to 40 days – red ripe stage
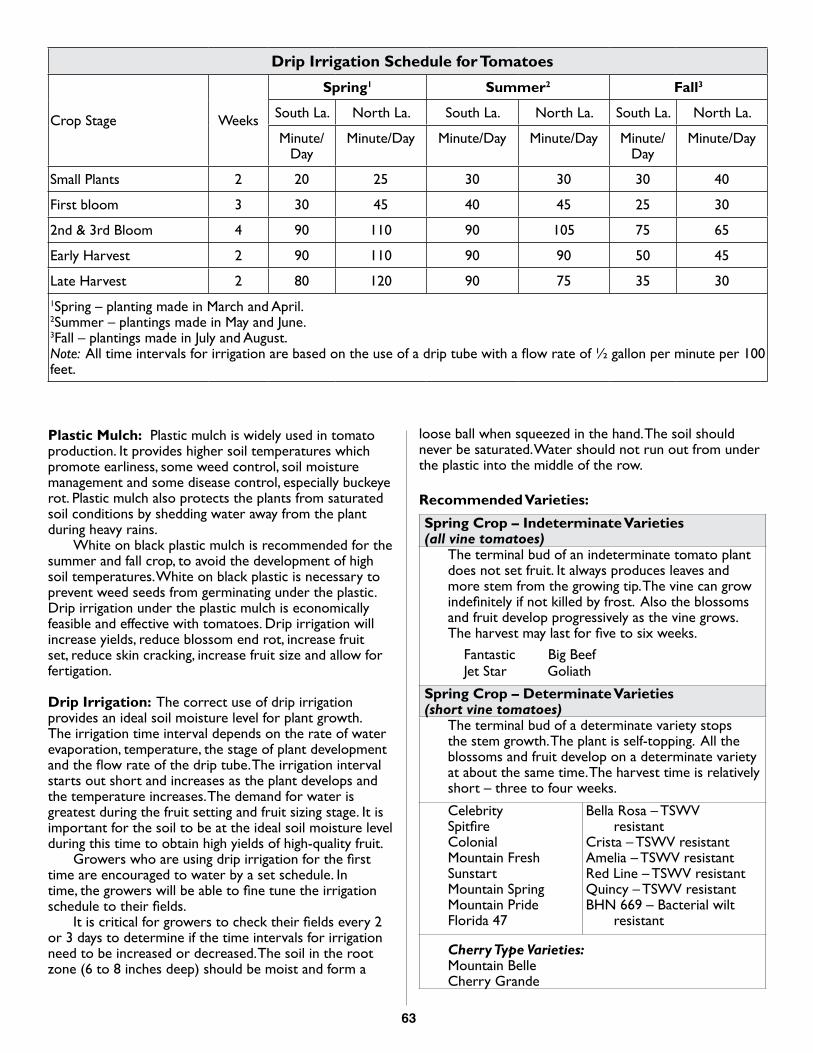
63
Plastic Mulch: Plastic mulch is widely used in tomato production. It provides higher soil temperatures which promote earliness, some weed control, soil moisture management and some disease control, especially buckeye rot. Plastic mulch also protects the plants from saturated soil conditions by shedding water away from the plant during heavy rains. White on black plastic mulch is recommended for the summer and fall crop, to avoid the development of high soil temperatures. White on black plastic is necessary to prevent weed seeds from germinating under the plastic. Drip irrigation under the plastic mulch is economically feasible and effective with tomatoes. Drip irrigation will increase yields, reduce blossom end rot, increase fruit set, reduce skin cracking, increase fruit size and allow for fertigation.
Drip Irrigation: The correct use of drip irrigation provides an ideal soil moisture level for plant growth. The irrigation time interval depends on the rate of water evaporation, temperature, the stage of plant development and the flow rate of the drip tube. The irrigation interval starts out short and increases as the plant develops and the temperature increases. The demand for water is greatest during the fruit setting and fruit sizing stage. It is important for the soil to be at the ideal soil moisture level during this time to obtain high yields of high-quality fruit. Growers who are using drip irrigation for the first time are encouraged to water by a set schedule. In time, the growers will be able to fine tune the irrigation schedule to their fields. It is critical for growers to check their fields every 2 or 3 days to determine if the time intervals for irrigation need to be increased or decreased. The soil in the root zone (6 to 8 inches deep) should be moist and form a
loose ball when squeezed in the hand. The soil should never be saturated. Water should not run out from under the plastic into the middle of the row.
Recommended Varieties:
Spring Crop – Indeterminate Varieties (all vine tomatoes)
The terminal bud of an indeterminate tomato plant does not set fruit. It always produces leaves and more stem from the growing tip. The vine can grow indefinitely if not killed by frost. Also the blossoms and fruit develop progressively as the vine grows. The harvest may last for five to six weeks.
Fantastic Big BeefJet Star Goliath
Spring Crop – Determinate Varieties (short vine tomatoes)
The terminal bud of a determinate variety stops the stem growth. The plant is self-topping. All the blossoms and fruit develop on a determinate variety at about the same time. The harvest time is relatively short – three to four weeks.
CelebritySpitfireColonialMountain FreshSunstartMountain SpringMountain Pride Florida 47
Bella Rosa – TSWV resistant
Crista – TSWV resistantAmelia – TSWV resistantRed Line – TSWV resistant Quincy – TSWV resistantBHN 669 – Bacterial wilt
resistant
Cherry Type Varieties:Mountain BelleCherry Grande
Drip Irrigation Schedule for Tomatoes
Crop Stage Weeks
Spring1 Summer2 Fall3
South La. North La. South La. North La. South La. North La.
Minute/ Day
Minute/Day Minute/Day Minute/Day Minute/ Day
Minute/Day
Small Plants 2 20 25 30 30 30 40
First bloom 3 30 45 40 45 25 30
2nd & 3rd Bloom 4 90 110 90 105 75 65
Early Harvest 2 90 110 90 90 50 45
Late Harvest 2 80 120 90 75 35 301Spring – planting made in March and April.2Summer – plantings made in May and June.3Fall – plantings made in July and August. Note: All time intervals for irrigation are based on the use of a drip tube with a flow rate of ½ gallon per minute per 100 feet.
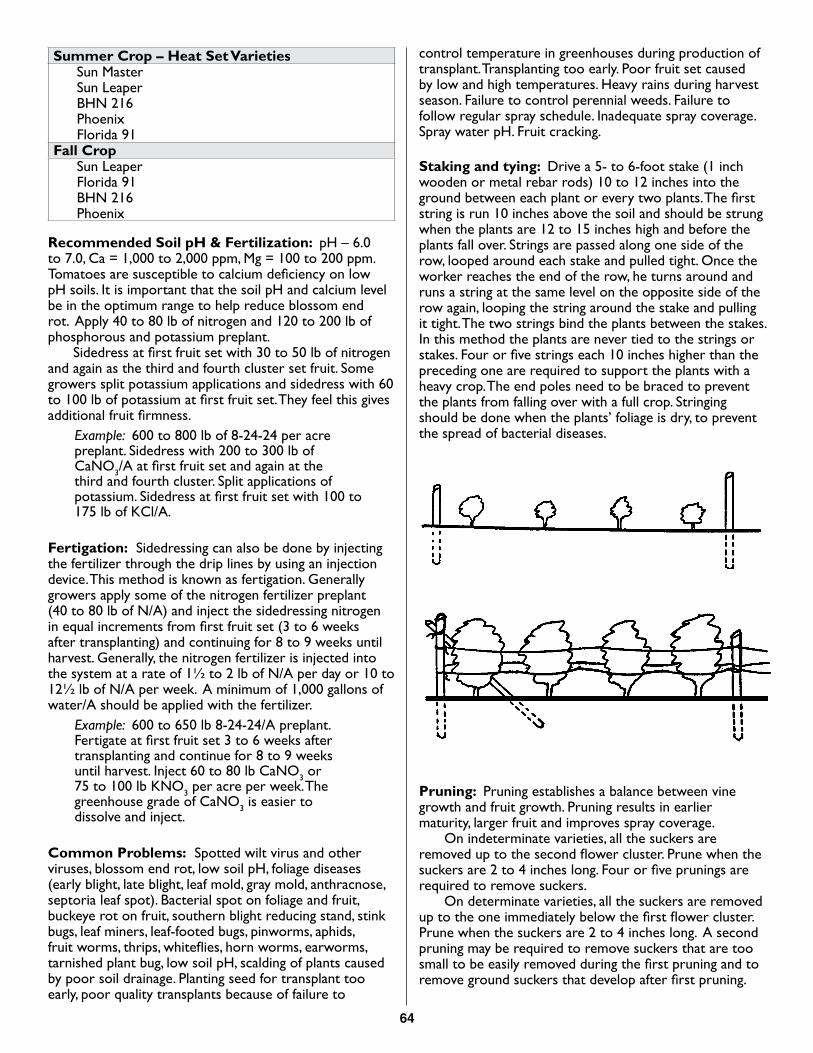
64
Summer Crop – Heat Set VarietiesSun Master Sun Leaper BHN 216PhoenixFlorida 91
Fall Crop Sun LeaperFlorida 91BHN 216Phoenix
Recommended Soil pH & Fertilization: pH – 6.0 to 7.0, Ca = 1,000 to 2,000 ppm, Mg = 100 to 200 ppm. Tomatoes are susceptible to calcium deficiency on low pH soils. It is important that the soil pH and calcium level be in the optimum range to help reduce blossom end rot. Apply 40 to 80 lb of nitrogen and 120 to 200 lb of phosphorous and potassium preplant. Sidedress at first fruit set with 30 to 50 lb of nitrogen and again as the third and fourth cluster set fruit. Some growers split potassium applications and sidedress with 60 to 100 lb of potassium at first fruit set. They feel this gives additional fruit firmness.
Example: 600 to 800 lb of 8-24-24 per acre preplant. Sidedress with 200 to 300 lb of CaNO3/A at first fruit set and again at the third and fourth cluster. Split applications of potassium. Sidedress at first fruit set with 100 to 175 lb of KCl/A.
Fertigation: Sidedressing can also be done by injecting the fertilizer through the drip lines by using an injection device. This method is known as fertigation. Generally growers apply some of the nitrogen fertilizer preplant (40 to 80 lb of N/A) and inject the sidedressing nitrogen in equal increments from first fruit set (3 to 6 weeks after transplanting) and continuing for 8 to 9 weeks until harvest. Generally, the nitrogen fertilizer is injected into the system at a rate of 1½ to 2 lb of N/A per day or 10 to 12½ lb of N/A per week. A minimum of 1,000 gallons of water/A should be applied with the fertilizer.
Example: 600 to 650 lb 8-24-24/A preplant. Fertigate at first fruit set 3 to 6 weeks after transplanting and continue for 8 to 9 weeks until harvest. Inject 60 to 80 lb CaNO3 or 75 to 100 lb KNO3 per acre per week. The greenhouse grade of CaNO3 is easier to dissolve and inject.
Common Problems: Spotted wilt virus and other viruses, blossom end rot, low soil pH, foliage diseases (early blight, late blight, leaf mold, gray mold, anthracnose, septoria leaf spot). Bacterial spot on foliage and fruit, buckeye rot on fruit, southern blight reducing stand, stink bugs, leaf miners, leaf-footed bugs, pinworms, aphids, fruit worms, thrips, whiteflies, horn worms, earworms, tarnished plant bug, low soil pH, scalding of plants caused by poor soil drainage. Planting seed for transplant too early, poor quality transplants because of failure to
control temperature in greenhouses during production of transplant. Transplanting too early. Poor fruit set caused by low and high temperatures. Heavy rains during harvest season. Failure to control perennial weeds. Failure to follow regular spray schedule. Inadequate spray coverage. Spray water pH. Fruit cracking.
Staking and tying: Drive a 5- to 6-foot stake (1 inch wooden or metal rebar rods) 10 to 12 inches into the ground between each plant or every two plants. The first string is run 10 inches above the soil and should be strung when the plants are 12 to 15 inches high and before the plants fall over. Strings are passed along one side of the row, looped around each stake and pulled tight. Once the worker reaches the end of the row, he turns around and runs a string at the same level on the opposite side of the row again, looping the string around the stake and pulling it tight. The two strings bind the plants between the stakes. In this method the plants are never tied to the strings or stakes. Four or five strings each 10 inches higher than the preceding one are required to support the plants with a heavy crop. The end poles need to be braced to prevent the plants from falling over with a full crop. Stringing should be done when the plants’ foliage is dry, to prevent the spread of bacterial diseases.
Pruning: Pruning establishes a balance between vine growth and fruit growth. Pruning results in earlier maturity, larger fruit and improves spray coverage. On indeterminate varieties, all the suckers are removed up to the second flower cluster. Prune when the suckers are 2 to 4 inches long. Four or five prunings are required to remove suckers. On determinate varieties, all the suckers are removed up to the one immediately below the first flower cluster. Prune when the suckers are 2 to 4 inches long. A second pruning may be required to remove suckers that are too small to be easily removed during the first pruning and to remove ground suckers that develop after first pruning.
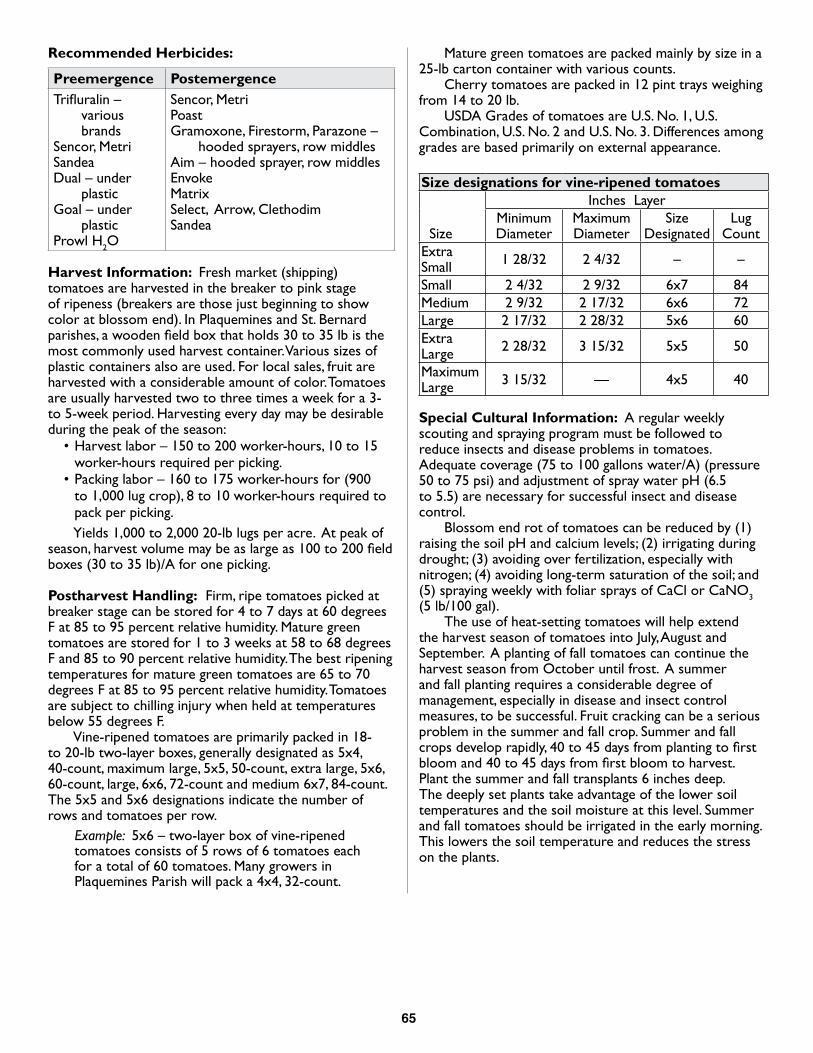
65
Recommended Herbicides:
Preemergence PostemergenceTrifluralin –
various brands
Sencor, MetriSandeaDual – under
plasticGoal – under
plasticProwl H2O
Sencor, MetriPoastGramoxone, Firestorm, Parazone –
hooded sprayers, row middlesAim – hooded sprayer, row middlesEnvokeMatrixSelect, Arrow, ClethodimSandea
Harvest Information: Fresh market (shipping) tomatoes are harvested in the breaker to pink stage of ripeness (breakers are those just beginning to show color at blossom end). In Plaquemines and St. Bernard parishes, a wooden field box that holds 30 to 35 lb is the most commonly used harvest container. Various sizes of plastic containers also are used. For local sales, fruit are harvested with a considerable amount of color. Tomatoes are usually harvested two to three times a week for a 3- to 5-week period. Harvesting every day may be desirable during the peak of the season:
• Harvest labor – 150 to 200 worker-hours, 10 to 15 worker-hours required per picking.
• Packing labor – 160 to 175 worker-hours for (900 to 1,000 lug crop), 8 to 10 worker-hours required to pack per picking.
Yields 1,000 to 2,000 20-lb lugs per acre. At peak of season, harvest volume may be as large as 100 to 200 field boxes (30 to 35 lb)/A for one picking.
Postharvest Handling: Firm, ripe tomatoes picked at breaker stage can be stored for 4 to 7 days at 60 degrees F at 85 to 95 percent relative humidity. Mature green tomatoes are stored for 1 to 3 weeks at 58 to 68 degrees F and 85 to 90 percent relative humidity. The best ripening temperatures for mature green tomatoes are 65 to 70 degrees F at 85 to 95 percent relative humidity. Tomatoes are subject to chilling injury when held at temperatures below 55 degrees F. Vine-ripened tomatoes are primarily packed in 18- to 20-lb two-layer boxes, generally designated as 5x4, 40-count, maximum large, 5x5, 50-count, extra large, 5x6, 60-count, large, 6x6, 72-count and medium 6x7, 84-count. The 5x5 and 5x6 designations indicate the number of rows and tomatoes per row.
Example: 5x6 – two-layer box of vine-ripened tomatoes consists of 5 rows of 6 tomatoes each for a total of 60 tomatoes. Many growers in Plaquemines Parish will pack a 4x4, 32-count.
Mature green tomatoes are packed mainly by size in a 25-lb carton container with various counts. Cherry tomatoes are packed in 12 pint trays weighing from 14 to 20 lb. USDA Grades of tomatoes are U.S. No. 1, U.S. Combination, U.S. No. 2 and U.S. No. 3. Differences among grades are based primarily on external appearance. Size designations for vine-ripened tomatoes
Size
Inches LayerMinimum Diameter
Maximum Diameter
Size Designated
Lug Count
Extra Small 1 28/32 2 4/32 – –
Small 2 4/32 2 9/32 6x7 84Medium 2 9/32 2 17/32 6x6 72Large 2 17/32 2 28/32 5x6 60Extra Large 2 28/32 3 15/32 5x5 50
Maximum Large 3 15/32 — 4x5 40
Special Cultural Information: A regular weekly scouting and spraying program must be followed to reduce insects and disease problems in tomatoes. Adequate coverage (75 to 100 gallons water/A) (pressure 50 to 75 psi) and adjustment of spray water pH (6.5 to 5.5) are necessary for successful insect and disease control. Blossom end rot of tomatoes can be reduced by (1) raising the soil pH and calcium levels; (2) irrigating during drought; (3) avoiding over fertilization, especially with nitrogen; (4) avoiding long-term saturation of the soil; and (5) spraying weekly with foliar sprays of CaCl or CaNO3 (5 lb/100 gal). The use of heat-setting tomatoes will help extend the harvest season of tomatoes into July, August and September. A planting of fall tomatoes can continue the harvest season from October until frost. A summer and fall planting requires a considerable degree of management, especially in disease and insect control measures, to be successful. Fruit cracking can be a serious problem in the summer and fall crop. Summer and fall crops develop rapidly, 40 to 45 days from planting to first bloom and 40 to 45 days from first bloom to harvest. Plant the summer and fall transplants 6 inches deep. The deeply set plants take advantage of the lower soil temperatures and the soil moisture at this level. Summer and fall tomatoes should be irrigated in the early morning. This lowers the soil temperature and reduces the stress on the plants.
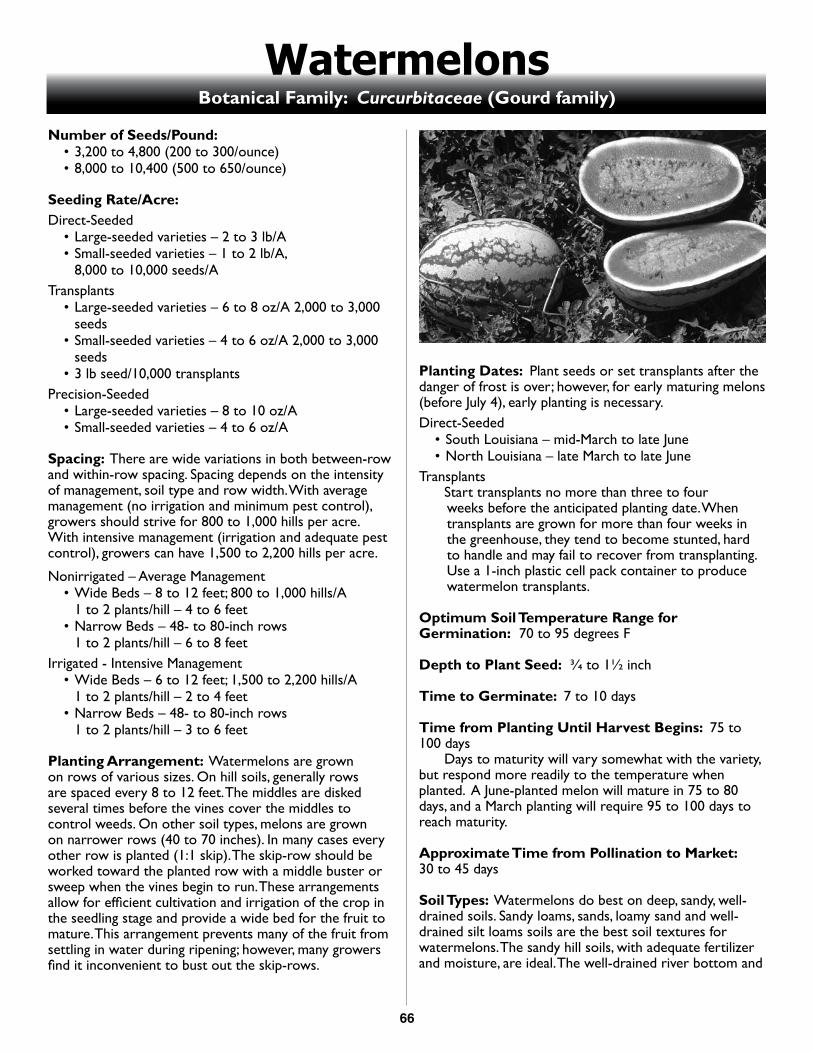
66
WatermelonsBotanical Family: Curcurbitaceae (Gourd family)
Number of Seeds/Pound:• 3,200 to 4,800 (200 to 300/ounce)• 8,000 to 10,400 (500 to 650/ounce)
Seeding Rate/Acre:Direct-Seeded
• Large-seeded varieties – 2 to 3 lb/A• Small-seeded varieties – 1 to 2 lb/A,
8,000 to 10,000 seeds/ATransplants
• Large-seeded varieties – 6 to 8 oz/A 2,000 to 3,000 seeds
• Small-seeded varieties – 4 to 6 oz/A 2,000 to 3,000 seeds
• 3 lb seed/10,000 transplantsPrecision-Seeded
• Large-seeded varieties – 8 to 10 oz/A• Small-seeded varieties – 4 to 6 oz/A
Spacing: There are wide variations in both between-row and within-row spacing. Spacing depends on the intensity of management, soil type and row width. With average management (no irrigation and minimum pest control), growers should strive for 800 to 1,000 hills per acre. With intensive management (irrigation and adequate pest control), growers can have 1,500 to 2,200 hills per acre.
Nonirrigated – Average Management• Wide Beds – 8 to 12 feet; 800 to 1,000 hills/A 1 to 2 plants/hill – 4 to 6 feet • Narrow Beds – 48- to 80-inch rows 1 to 2 plants/hill – 6 to 8 feet
Irrigated - Intensive Management• Wide Beds – 6 to 12 feet; 1,500 to 2,200 hills/A 1 to 2 plants/hill – 2 to 4 feet • Narrow Beds – 48- to 80-inch rows 1 to 2 plants/hill – 3 to 6 feet
Planting Arrangement: Watermelons are grown on rows of various sizes. On hill soils, generally rows are spaced every 8 to 12 feet. The middles are disked several times before the vines cover the middles to control weeds. On other soil types, melons are grown on narrower rows (40 to 70 inches). In many cases every other row is planted (1:1 skip). The skip-row should be worked toward the planted row with a middle buster or sweep when the vines begin to run. These arrangements allow for efficient cultivation and irrigation of the crop in the seedling stage and provide a wide bed for the fruit to mature. This arrangement prevents many of the fruit from settling in water during ripening; however, many growers find it inconvenient to bust out the skip-rows.
Planting Dates: Plant seeds or set transplants after the danger of frost is over; however, for early maturing melons (before July 4), early planting is necessary. Direct-Seeded
• South Louisiana – mid-March to late June• North Louisiana – late March to late June
Transplants Start transplants no more than three to four
weeks before the anticipated planting date. When transplants are grown for more than four weeks in the greenhouse, they tend to become stunted, hard to handle and may fail to recover from transplanting. Use a 1-inch plastic cell pack container to produce watermelon transplants.
Optimum Soil Temperature Range for Germination: 70 to 95 degrees F
Depth to Plant Seed: ¾ to 1½ inch
Time to Germinate: 7 to 10 days
Time from Planting Until Harvest Begins: 75 to 100 days Days to maturity will vary somewhat with the variety, but respond more readily to the temperature when planted. A June-planted melon will mature in 75 to 80 days, and a March planting will require 95 to 100 days to reach maturity.
Approximate Time from Pollination to Market: 30 to 45 days
Soil Types: Watermelons do best on deep, sandy, well-drained soils. Sandy loams, sands, loamy sand and well-drained silt loams soils are the best soil textures for watermelons. The sandy hill soils, with adequate fertilizer and moisture, are ideal. The well-drained river bottom and
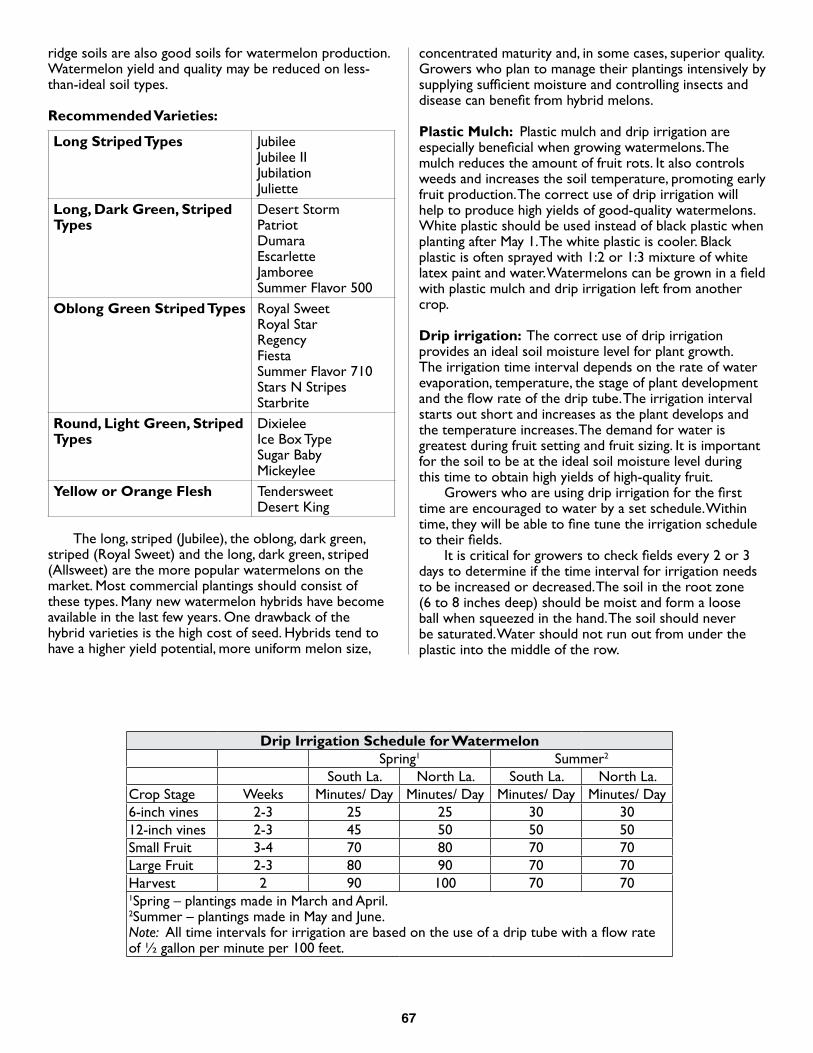
67
ridge soils are also good soils for watermelon production. Watermelon yield and quality may be reduced on less-than-ideal soil types.
Recommended Varieties:
Long Striped Types JubileeJubilee IIJubilation Juliette
Long, Dark Green, Striped Types
Desert StormPatriotDumaraEscarletteJamboreeSummer Flavor 500
Oblong Green Striped Types Royal SweetRoyal StarRegencyFiestaSummer Flavor 710 Stars N StripesStarbrite
Round, Light Green, Striped Types
DixieleeIce Box TypeSugar BabyMickeylee
Yellow or Orange Flesh TendersweetDesert King
The long, striped (Jubilee), the oblong, dark green, striped (Royal Sweet) and the long, dark green, striped (Allsweet) are the more popular watermelons on the market. Most commercial plantings should consist of these types. Many new watermelon hybrids have become available in the last few years. One drawback of the hybrid varieties is the high cost of seed. Hybrids tend to have a higher yield potential, more uniform melon size,
concentrated maturity and, in some cases, superior quality. Growers who plan to manage their plantings intensively by supplying sufficient moisture and controlling insects and disease can benefit from hybrid melons.
Plastic Mulch: Plastic mulch and drip irrigation are especially beneficial when growing watermelons. The mulch reduces the amount of fruit rots. It also controls weeds and increases the soil temperature, promoting early fruit production. The correct use of drip irrigation will help to produce high yields of good-quality watermelons. White plastic should be used instead of black plastic when planting after May 1. The white plastic is cooler. Black plastic is often sprayed with 1:2 or 1:3 mixture of white latex paint and water. Watermelons can be grown in a field with plastic mulch and drip irrigation left from another crop.
Drip irrigation: The correct use of drip irrigation provides an ideal soil moisture level for plant growth. The irrigation time interval depends on the rate of water evaporation, temperature, the stage of plant development and the flow rate of the drip tube. The irrigation interval starts out short and increases as the plant develops and the temperature increases. The demand for water is greatest during fruit setting and fruit sizing. It is important for the soil to be at the ideal soil moisture level during this time to obtain high yields of high-quality fruit. Growers who are using drip irrigation for the first time are encouraged to water by a set schedule. Within time, they will be able to fine tune the irrigation schedule to their fields. It is critical for growers to check fields every 2 or 3 days to determine if the time interval for irrigation needs to be increased or decreased. The soil in the root zone (6 to 8 inches deep) should be moist and form a loose ball when squeezed in the hand. The soil should never be saturated. Water should not run out from under the plastic into the middle of the row.
Drip Irrigation Schedule for WatermelonSpring1 Summer2
South La. North La. South La. North La.Crop Stage Weeks Minutes/ Day Minutes/ Day Minutes/ Day Minutes/ Day6-inch vines 2-3 25 25 30 3012-inch vines 2-3 45 50 50 50Small Fruit 3-4 70 80 70 70Large Fruit 2-3 80 90 70 70Harvest 2 90 100 70 701Spring – plantings made in March and April.2Summer – plantings made in May and June. Note: All time intervals for irrigation are based on the use of a drip tube with a flow rate of ½ gallon per minute per 100 feet.
68
Recommended Soil pH & Fertilization: pH 5.5 to 6.5; Ca = 700 to 1,500 ppm; Mg = 100 to 150 ppm. Watermelons are sensitive to acid soils below a pH of 5.0. Apply lime to acid soils several months before planting. Apply 30 to 50 lb of nitrogen and 90 to 150 lb of phosphorous and potassium preplant. Sidedress with 30 to 60 lb of nitrogen and 60 to 90 lb of potassium when vines begin to run (3 to 4 weeks after planting).
Example: Preplant application of 350 to 500 lb of 8-24-24 per acre. Sidedress with 100 to 150 lb of 34-0-0/A and 100 to 150 lb KCl/A when the vines begin to run or 200 to 300 lb KNO3/A.
Some growers sidedress with a complete fertilizer such as 13-13-13 or split the sidedressing between 34-0-0 and 13-13-13. They feel that the extra phosphorous and potassium increase fruit quality.
Example: Sidedress with a complete fertilizer 300 to 400 lb of 13-13-13 or 100 to 150 lb of 13-13-13 plus 60 to 75 lb of 34-0-0/A.
Fertigation: Sidedressing also can be done by injecting the fertilizer through the drip lines by using an injection device. This method is known as fertigation. Generally growers apply some of the nitrogen fertilizer preplant (20 to 30 lb of N/A) and inject the sidedressing nitrogen in equal increments from bloom and fruit set (3 to 4 weeks after planting) and continue for 6 to 8 weeks. Stopping fertigation 1 to 2 weeks before harvest enhances early maturity and improves quality. The nitrogen fertilizer is injected into the system at a rate of 1 to 1½ lb of N/A per day or 7 to 10½ lb of N/A per week.
Example: 300 to 400 lb of 8-24-24/A preplant. Fertigate at first fruit set (3 to 4 weeks after planting) and continue for 6 to 8 weeks. Inject 50 to 80 lb of KNO3 per acre per week. The greenhouse grade of CaNO3 or KNO3 is easier to dissolve and inject.
Pollination Requirements: The male and female flowers are borne separately on watermelon plants. Bees are the principal insects that pollinate watermelons. One to three strong hives of bees for each acre of melons are recommended to ensure a good set. Poor or partial pollinating may result in misshapen fruit (gourd neck melons). All spraying should be done late in the afternoon after bees have left the field. Two to three foliar applications of boron (5 oz Solubor/A) at weekly intervals coinciding with the opening of the first female flower has been shown to enhance pollination and improve fruit set.
Common Problems: Low yields, small melon size, foliage diseases (anthracnose, gummy stem blight and downy mildew). Failure of growers to control foliage diseases. Cucumber beetles, stink bugs, leaf-footed plant bugs, aphids, melon worms, pickleworms, squash bugs, mites and squash vine borer. Low-quality fruit caused by cloudy weather during ripening, interferes with the accumulation of sugar. The destruction of foliage by diseases also plays a part in low-quality fruit. Misshapen
fruit caused by poor pollination (low bee activity). Low fruit set on June and July planted melons because of high temperatures. Sunburn on melons because of insufficient foliage. Inadequate fertilization. Low soil pH. Overfertilization, especially with nitrogen, results in white streaks, hollow heart and poor melon quality. Varmint control: deer, coyote, raccoons, rats, mice, crows, etc. Failure of gaining total benefits from transplants. In recent years, fruit blotch has been a problem in some areas. The bacteria may be seedborne, but infection may occur from many types of secondary sources before or after planting. The most pronounced spread of bacterial fruit blotch occurs in greenhouses, where optimal conditions for spread of the disease exist.
Recommended Herbicides:
Preemergence PostemergenceCurbitCommandStrategySinbar – under
plasticSandea – under
plastic
PoastSelect, Arrow, ClethodimStrategyGlyphosate – various brands,
hooded sprayers, row middlesAim – hooded sprayer, row middles
Layby, row middlesSandeaTrifluralin – various brandsCurbitSinbarStrategy
Harvest Information: Determining maturity of melons is not easy. The experience of the grower is the most important factor. Look for a combination of the following signs for determining ripeness:
1. Hollow sound when melon is thumped or patted. 2. Most growers determine maturity by cutting different
sizes of melons. Growers then determine which size is mature. The harvest crew is then instructed to harvest all melons of that size.
3. Yellow ground spot on belly of melon.
Watermelons should be cut from the vine. A stem 2 to 3 inches long should be left on the melon. Rough handling will cause damage and quality loss. Melons should be dry when harvested and loaded. Melons should be taken to a shaded area as soon as possible after harvest, to prevent sunburning. A field is generally harvested two or three times at 3- to 5-day intervals. Some hybrid varieties offer a uniform maturity pattern (60 to 75 percent). Harvest and loading labor for watermelons is 40 to 50 worker-hours/A.
• Average yields 15,000 to 20,000 lb/A (700 to 1,000 melons/A).
• Good yields - 25,000 to 30,000 lb/A (1,200 to 1,500 melons/A)
Postharvest Handling: Watermelons can be stored for 2 to 3 weeks at 40 to 50 degrees F and 80 to 85 percent relative humidity. Watermelons are subject to
69
chilling injury (pitting and brown staining of the ring) when exposed to temperatures of 32 degrees F for eight days or more. Watermelons conditioned for four days at 80 degrees F at 85 percent relative humidity immediately after harvest can be safely stored for a week at 60 to 70 degrees F. Watermelons are shipped loose in bulk, in wooden pallet boxes or fiberboard bins (48 inches long x 40 inches wide x 36 inches high), which hold 50 melons or in 70 to 85-lb cartons with counts of three, four or five melons per carton. The use of pallet boxes, bins or cartons simplifies the loading and unloading process. Melons should be sized (by weight) before shipping. An 18- to 25-lb melon (medium) is the size preferred with large volume buyers. Large melons weighing more than 25 lb are sought by peddlers. Grades of melons are U.S. Fancy, U.S. No. 1 and U.S. No. 2. Grades differ in their external appearance and percentage of melons with defects at shipping point and en route. Watermelons are graded on a sample unit of 20 melons. Size may be specified in terms of average weight, minimum weight or minimum and maximum weight.
Special Cultural Information: Plastic mulch, transplants or a combination of both have been used to increase the yield and earliness of watermelons. The use of a starter solution to water transplants after planting is recommended to help plants overcome transplanting shock. A regular scouting and spraying program to control diseases and insects will help increase yields and quality. Sprayers need to be calibrated to provide 50 to 100 gallons of water per acre at 60+ psi. Spray water pH needs to be adjusted to the 5.5 to 6.5 level for adequate pesticide tank life. Begin spraying fungicides to control foliar diseases when vines fall over and begin to run and set fruit. Electric fences, butane guns, scarecrows, moth balls, human hair, pie plates on wires strung through fields, and placement of clothes and human waste in fields have been used for varmint control. Rats and mice may eat seeds after planting. To limit the damage, limit handling of seed to reduce human scent. Use a spoon or hand trowel to handle seed during planting. Inadequate soil fertility and low soil pH and low potassium will enhance the occurrence of foliar diseases.
Watermelons, TriploidBotanical Family: Curcurbitaceae (Gourd family)
Hybrid triploid watermelons are commonly called “seedless.” The melons produce a thin, whitish, edible seedlike structure. There may also be a few normal-looking seeds. The triploid hybrids do not produce viable pollen. Pollenator varieties or a seed-producing variety (different in appearance from the seedless variety) must be planted along with the seedless type as a source of pollen. Seedless melons are expensive and are grown from transplants. Extra care must be provided for successful germination, stand establishment and growth of seedless melons.
Number of Seeds/Pound: 8,000 to 10,400 (500 to 600/ounce)
Seeding Rate/Acre:Transplants 2 to 3 oz/A 2,000 to 3,000 seeds
Spacing: There are wide variations in between-row and within-row spacing. The spacing depends on the intensity of management, soil type and row width. The cost of the seed for triploid is extremely high. Growers should never try to produce triploid melons unless they commit to an intensive management system (irrigation, plastic mulch, proper soil fertility and adequate pest control). With intensive management, growers can have 1,500 to 2,000 hills per acre.
Irrigated – Intensive Management:• Wide beds – 8 to 12 feet; 1,500 to 2,000 hills/A 1 to 2 plants/hill – 2 to 4 feet • Narrow beds – 48- to 80-inch rows 1 to 2 plants/hill – 3 to 6 feet
Planting arrangement: Watermelons are grown on rows of various sizes. On hill soils, generally rows are spaced every 8 to 12 feet. The middles are disked to control weeds several times before the vines cover the middles. On other soil types, melons are grown on narrower rows (40 to 70 inches). In many cases every other row is planted (skip). The skip-row should be worked toward the planted row with a middle buster or sweeps when the vines begin to run. These arrangements allow for efficient cultivation and irrigation of the crop in the seedling stage and provide a wide bed for the fruit to mature. This arrangement prevents many of the fruit from settling in water during ripening, but many growers find it inconvenient to bust out the skip-rows.
Planting dates: Transplant well after the danger of frost is past.
• South Louisiana – April to late June• North Louisiana – late April to late June
Transplants: The high cost of triploid watermelon seeds makes transplanting necessary. Start transplants no more than 3 to 4 weeks before the anticipated planting date.
70
When transplants are grown for more than 4 weeks in the greenhouse, they tend to become stunted, hard to handle and may fail to recover from transplanting. Use a 1-inch plastic cell pack container to produce watermelon transplants. Extra care must be provided for successful germination, stand establishment and growth of seedless melons. The seed coat on triploid melons is thick and often adheres to the seedlings, causing distortion or death. The seed should be placed with the root end up at a 45- to 90-degree angle to reduce this problem. The seed coat needs to be removed by hand on the young seedlings. Germinate the seeds at 80 to 85 degrees F, and grow plants at 75 degrees F.
Optimum Soil Temperature Range for Germination: 80 to 85 degrees F
Depth to Plant Seed: ¾ to 1 inch
Time from Planting Until Harvest Begins: 75 to 100 days Days to maturity will vary somewhat with the variety, but respond more readily to the temperature when planted. A June-planted melon will mature in 70 to 80 days, and a spring planting will require 80 to 90 days to mature.
Approximate Time from Pollination to Market: 30 to 45 days
Soil Types: Watermelons do best on deep, sandy, well-drained soils. Sandy loam, sands, loamy sand and well-drained silt loam soils are the best textures for watermelons. The sandy hill soils with adequate fertilizer and moisture are ideal. The well-drained river bottom and ridge soils are also good soils for watermelon production.
Recommended Varieties:• Millionaire – Oval, dark green stripe• Summer Sweet 5244 – Oval, light green stripe• Cooperstown – Round, dark green stripe• Revolution – Long, dark green stripe• Trix 313 – Round, dark green stripe
Plastic Mulch: Plastic mulch and drip irrigation are especially beneficial when growing triploid watermelons. The mulch reduces the amount of fruit rots. It also controls weeds and increases soil temperatures that promote early fruit production. The correct use of drip irrigation will help produce high yields of good-quality triploids watermelons. White plastic should be used instead of black plastic when planting after May 1. The white plastic is cooler. Black plastic is often sprayed with 1:2 or 1:3 mixtures of white latex paint and water. Watermelons can be grown in a field with plastic mulch and drip irrigation left over from another crop.
Drip Irrigation: The correct use of drip irrigation provides an ideal soil moisture level for plant growth. The irrigation time interval depends on the rate of water evaporation, temperature, the stage of plant development and the flow rate of the drip tube. The irrigation interval starts out short and increases as the plant develops and the temperature increases. The demand for water is greatest during fruit setting and fruit sizing. It is important for the soil to be at the ideal soil moisture level during this time to obtain high yields of high-quality fruit. Growers who are using drip irrigation for the first time are encouraged to water by a set schedule. In time, the growers will be able to fine-tune the irrigation schedule to their fields. It is critical for growers to check fields every 2 or 3 days to determine if the time intervals for irrigation need to be increased or decreased. The soil in the root zone (6-8 inches deep) should be moist and form a loose ball when squeezed in the hand. The soil should never be saturated. Water should not run out from under the plastic into the middle of the row. Recommended Soil pH & Fertilization: pH 5.5 to 6.5; Ca = 700 to 1,500 ppm, Mg = 100 to 150 ppm. Watermelons are sensitive to acid soils below a pH of 5.0. Apply lime to acid soils several months before planting. Apply 30 to 50 lb of nitrogen and 90 to 150 lb of phosphorous and potassium preplant. Sidedress with 30 to 60 lb of nitrogen and 60 to 90 lb of potassium when the vines begin to run (3 to 4 weeks after transplanting).
Drip Irrigation Schedule for Triploid Watermelon
Crop Stage Week
Spring1 Summer2
South La. North La. South La. North La.Minutes/Day Minutes/Day Minutes/Day Minutes/Day
6-inch vines 2-3 25 25 30 3012-inch vines 2-3 45 50 50 50Small Fruit 3-4 70 80 70 70Large Fruit 2-3 80 90 70 70Harvest 2 90 100 70 701Spring – plantings made in March and April.2Summer – plantings made in May and June.Note: All time intervals for irrigation are based on the use of a drip tube with a flow rate of ½ gallon per minute per 100 feet.
71
Example: Preplant application of 350 to 400 lb of 8-24-24 per acre. Sidedress with 100 to 150 lb of 34-0-0/A and 100 to 150 lb KCl/A when the vines begin to run or 200 to 300 lb of KNO3/A.
Fertigation: Sidedressing also can be done by injecting the fertilizer through the drip lines by using an injection device. This method is known as fertigation. Generally growers apply some of the nitrogen fertilizer preplant (20 to 30 lb of N/A) and inject the sidedressing nitrogen in equal increments from bloom and fruit set (3 to 4 weeks after planting) and continue for 6 to 8 weeks until harvest. Stopping fertigation 1 to 2 weeks before harvest enhances early maturity and improves quality. The nitrogen fertilizer is injected into the system at a rate of 1 to 1½ lb of N/A per day or 7 to 10½ lb of N/A per week
Example: 300 to 400 lb of 8-24-24/A preplant. Fertigate at first fruit set (3 to 4 weeks after planting) and continue for 6 to 8 weeks. Inject 40 to 65 lb of CaNO3 or 50 to 80 lb of KNO3 per acre per week. The greenhouse grade of CaNO3 or KNO3 is easier to dissolve and inject.
Pollination Requirements: The pollen of triploid melons is not viable; a pollinator is necessary for pollination. Triploid melons require a nonseedless variety for pollination (at least one-third of the plants in the field should be pollinators). The outside edge of the field should be planted with pollenizer varieties. The pollenizer variety should be planted in a 1:3 row pattern, one row pollenizer, three rows triploids. The pollenizer variety should be set out 2 to 3 weeks before the triploid plants. This ensures the production of male flowers and pollen when the triploid plants bloom. Be sure the fruit of the variety chosen as pollinator is distinctly different from the fruit of the seedless variety. Special pollenizer varieties have been developed solely for pollen production and do not produce marketable fruit. The special pollenizer plants are planted every third or fourth plant within each row of the triploid melons. This allows the field to be dedicated to the production of seedless melons. Bees are the principal insects that pollinate watermelons. One to three strong hives of bees for each acre of melons are recommended to ensure a good set. All spraying should be done late in the afternoon after bees have left the field. Two or three foliar applications of boron (5 oz Solubor/A) at weekly intervals coinciding with the opening of the first female flower will enhance pollination and improve fruit set.
Common Problems: High cost of triploid watermelon seeds. Transplants are used because of high cost of triploid seed. Additional care (plastic, irrigation, disease and insect control) is required to grow seedless melons. Foliage diseases (anthracnose, gummy stem blight and downy mildew), fruit blotch, cucumber beetles, stink bugs, aphids, melon worms, pickle worms, squash bugs, mites, leaf-footed bugs and squash vine borer. Varmint control: deer, coyote, raccoons, rats, mice, crows, etc.
Recommended Herbicides: (Using plastic mulch provides weed control in melons.)
Preemergence PostemergenceCurbitCommandStrategySinbar – under
plasticSandea – under
plastic
Poast Select, Arrow, ClethodimLayby, Row Middles
Trifluralin – various brandsCurbit SandeaSinbarStrategyAim – hooded spryer, row middlesGlyphosate – various brands,
hooded sprayer, row middles
Harvest Information: Determining maturity of melons is not easy. The experience of the grower is the most important factor. Look for a combination of these signs for determining ripeness: 1. Hollow sound when the melon is thumped or patted. 2. Yellow ground spot on belly of melon. 3. Sample cuts. Most growers determine maturity
by cutting melons of different sizes. Growers then determine which sizes of melons are mature. The harvest crew is then instructed to harvest all melons of that size.
Watermelons should be cut from the vine. A 2- to 3-inch stem should be left on the melon. Rough handling will cause damage and quality loss. Melons should be dry when harvested and loaded. Take them to a shaded area as soon as possible after harvest to prevent sun burning. A field is generally harvested two or three times at 3- to 5-day intervals. Harvesting and loading labor for watermelons take 40 to 50 worker-hours/A.
Good Yields of Triploid melons- 20,000 to 40,000 lb/A
Postharvest Handling: Watermelons can be stored for 2 to 3 weeks at 40 to 50 degrees F at 80 to 85 percent relative humidity. Watermelons are subject to chilling injury (pitting and brown staining of the ring) when exposed to temperatures of 32 degrees F for eight days or more. Triploid melons are shipped in cartons with counts of 3 to 6 melons per carton.
Special Cultural Information: Plastic mulch, transplants and irrigation must be used to be successful in producing triploid melons. A regular scouting and spraying program to control diseases and insects will help increase yields and quality. Start spraying fungicides to control foliar diseases when the vines begin to run and set fruit. Electric fences, butane guns, scarecrows, moth balls, human hair, pie plates on wires strung through fields and placement of clothes and human waste in fields have been used for varmint control.

72
Visit our Web Site:www.lsuagcenter.com
Louisiana State University Agricultural CenterWilliam B. Richardson, Chancellor
Louisiana Agricultural Experiment StationDavid J. Boethel, Vice Chancellor and Director Louisiana Cooperative Extension Service
Paul D. Coreil, Vice Chancellor and Director
Pub. 2433 (2M) 5/09 Rev.
The LSU Agricultural Center follows a nondiscriminatory policy in programs and employment.
AuthorJames E. Boudreaux, Ph.D.
Professor (Commercial Vegetables)School of Plant, Environmental & Soil Sciences
AcknowledgmentThe author wishes to express appreciation to the following
LSU AgCenter personnel for their input into this publication:
Burden CenterAdley Peltier, Research Farm Manager
Citrus Research StationWayne Bourgeois, Professor (deceased)
Department of EntomologyDale K. Pollet, Ph.D. , Professor
Department of Plant PathologyDonald Ferrin, Ph.D. , Assistant Professor
Harry K. Whitam, Ph.D. , Professor (retired)
Hammond Research StationRegina Bracy, Ph.D. , Professor
Richard Parish, Ph.D. , Professor (retired)Roger Rosendale, Research AssociateJoey Quebedeaux, Research Associate
Red River Research StationBlair Buckley, Ph.D. , Associate Professor
School of Plant, Environmental and Soil SciencesHorticulture Unit
Amy Blanchard, Administrative Coordinator Charles Johnson, Ph.D. , Professor
Stephen Crnko, Extension Associate
Sweet Potato Research StationJames M. Cannon, Ph.D. , Professor (retired)
Tara Smith, Ph.D. , Assistant Professor Arthur Villordon, Ph.D. , Associate Professor
Numerous county agents and cooperating farmers assisted in demonstration plots that
generated much of this information.