Lined Stocking Tutorial - Make...
7
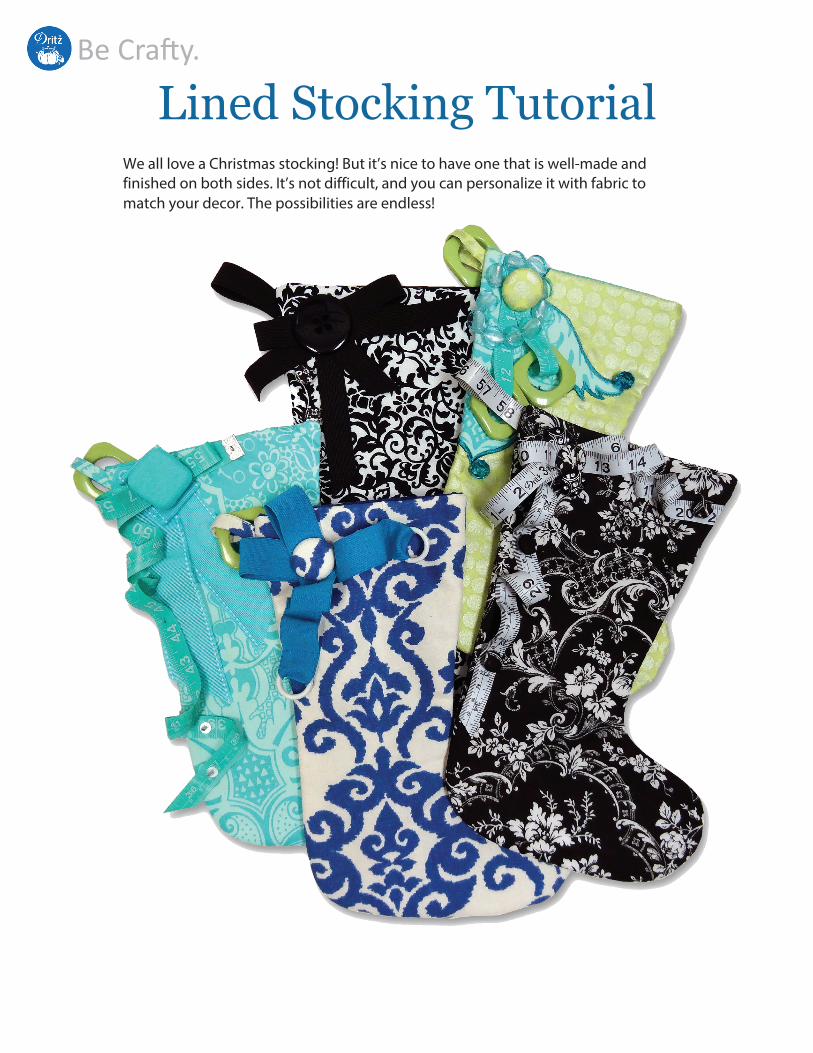
Lined Stocking Tutorial We all love a Christmas stocking! But it’s nice to have one that is well-made and finished on both sides. It’s not difficult, and you can personalize it with fabric to match your decor. The possibilities are endless!
Transcript of Lined Stocking Tutorial - Make...
Lined Stocking Tutorial We all love a Christmas stocking! But it’s nice to have one that is well-made and finished on both sides. It’s not difficult, and you can personalize it with fabric to match your decor. The possibilities are endless!
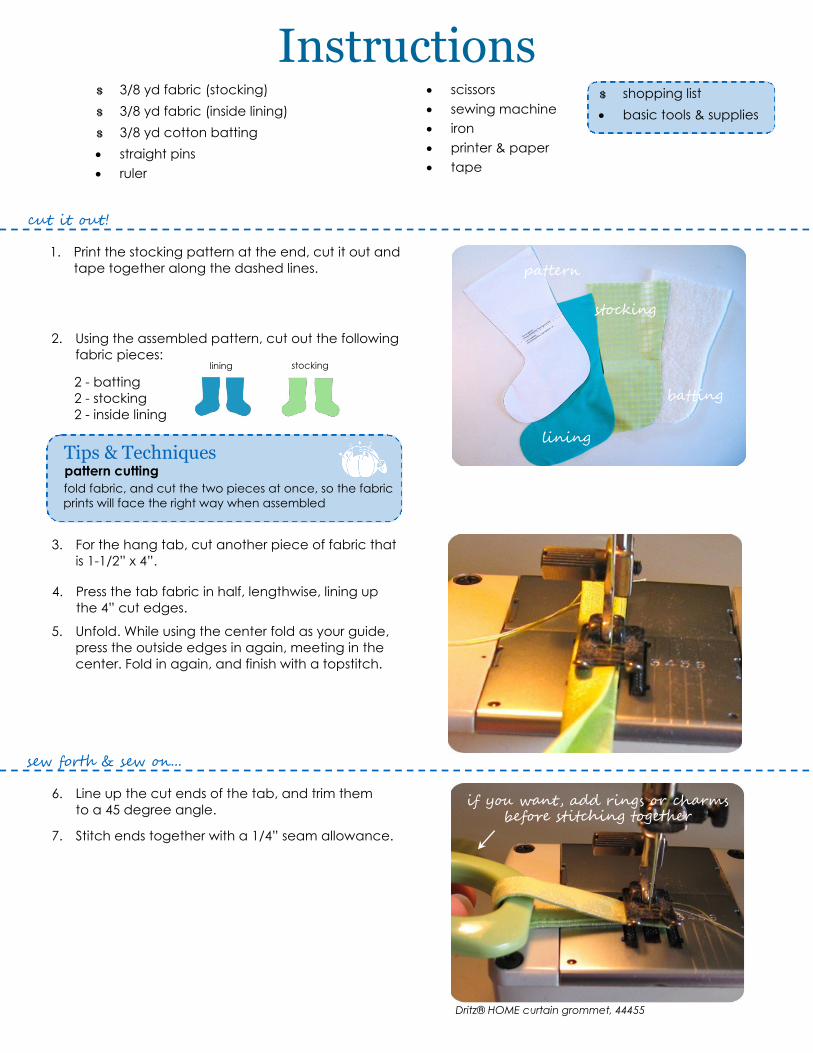
Instructions $ 3/8 yd fabric (stocking)
$ 3/8 yd fabric (inside lining)
$ 3/8 yd cotton batting
straight pins
ruler
scissors
sewing machine
iron
printer & paper
tape
1. Print the stocking pattern at the end, cut it out and
tape together along the dashed lines.
2. Using the assembled pattern, cut out the following
fabric pieces:
$ shopping list
basic tools & supplies
cut it out!
3. For the hang tab, cut another piece of fabric that
is 1-1/2” x 4”.
2 - batting
2 - stocking
2 - inside lining
4. Press the tab fabric in half, lengthwise, lining up
the 4” cut edges.
5. Unfold. While using the center fold as your guide,
press the outside edges in again, meeting in the
center. Fold in again, and finish with a topstitch.
sew forth & sew on...
6. Line up the cut ends of the tab, and trim them
to a 45 degree angle.
7. Stitch ends together with a 1/4” seam allowance.
fold fabric, and cut the two pieces at once, so the fabric
prints will face the right way when assembled
Tips & Techniques pattern cutting
lining stocking
pattern
lining
stocking
batting
if you want, add rings or charms before stitching together
Dritz® HOME curtain grommet, 44455
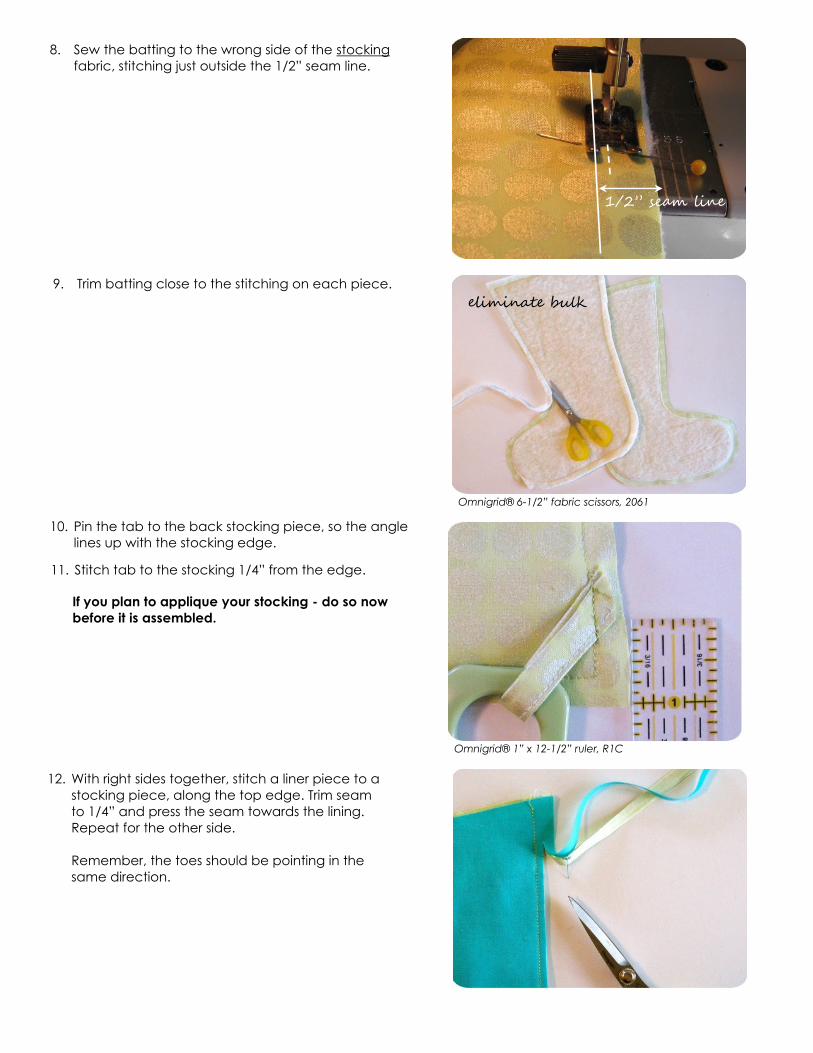
8. Sew the batting to the wrong side of the stocking
fabric, stitching just outside the 1/2” seam line.
10. Pin the tab to the back stocking piece, so the angle
lines up with the stocking edge.
12. With right sides together, stitch a liner piece to a stocking piece, along the top edge. Trim seam to 1/4” and press the seam towards the lining. Repeat for the other side.
Remember, the toes should be pointing in the same direction.
If you plan to applique your stocking - do so now
before it is assembled.
eliminate bulk
Omnigrid® 1” x 12-1/2” ruler, R1C
9. Trim batting close to the stitching on each piece.
11. Stitch tab to the stocking 1/4” from the edge.
1/2” seam line
Omnigrid® 6-1/2” fabric scissors, 2061
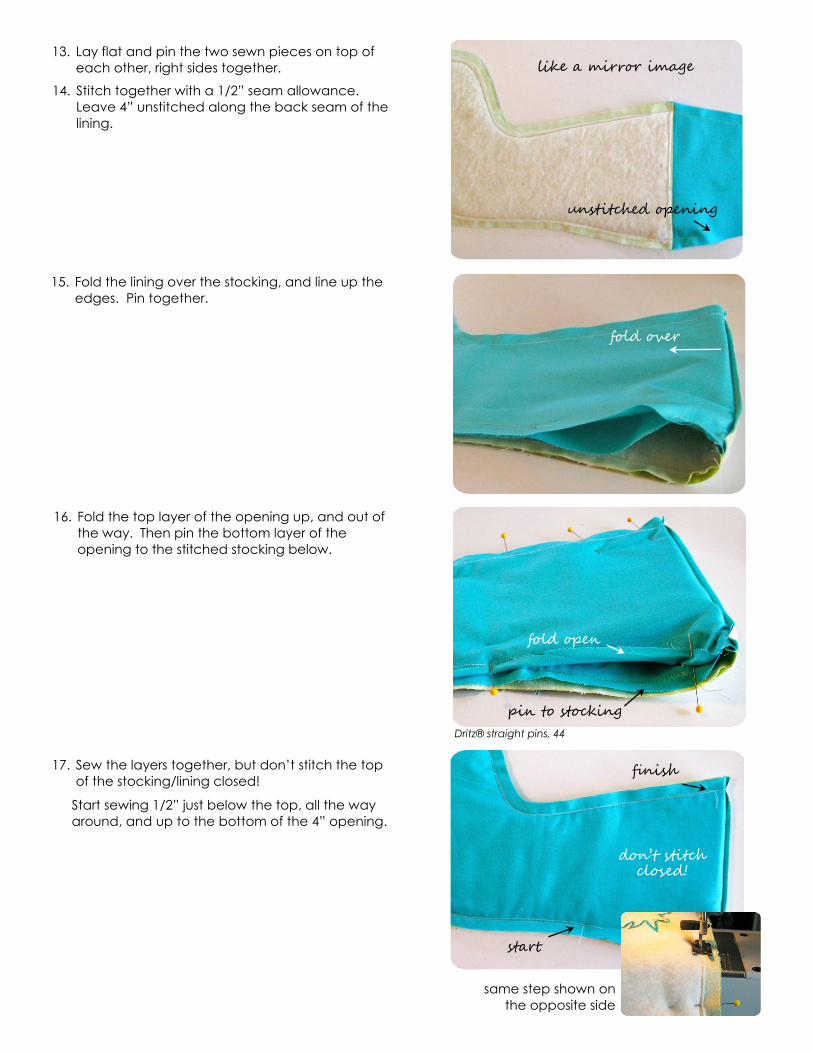
13. Lay flat and pin the two sewn pieces on top of
each other, right sides together.
14. Stitch together with a 1/2” seam allowance.
Leave 4” unstitched along the back seam of the
lining.
15. Fold the lining over the stocking, and line up the
edges. Pin together.
this part of the snap will not fit through clip loop!
like a mirror image
unstitched opening
fold over
16. Fold the top layer of the opening up, and out of the way. Then pin the bottom layer of the opening to the stitched stocking below.
17. Sew the layers together, but don’t stitch the top
of the stocking/lining closed!
Start sewing 1/2” just below the top, all the way
around, and up to the bottom of the 4” opening.
start
finish
don’t stitch closed!
same step shown on
the opposite side
fold open
pin to stocking
Dritz® straight pins, 44
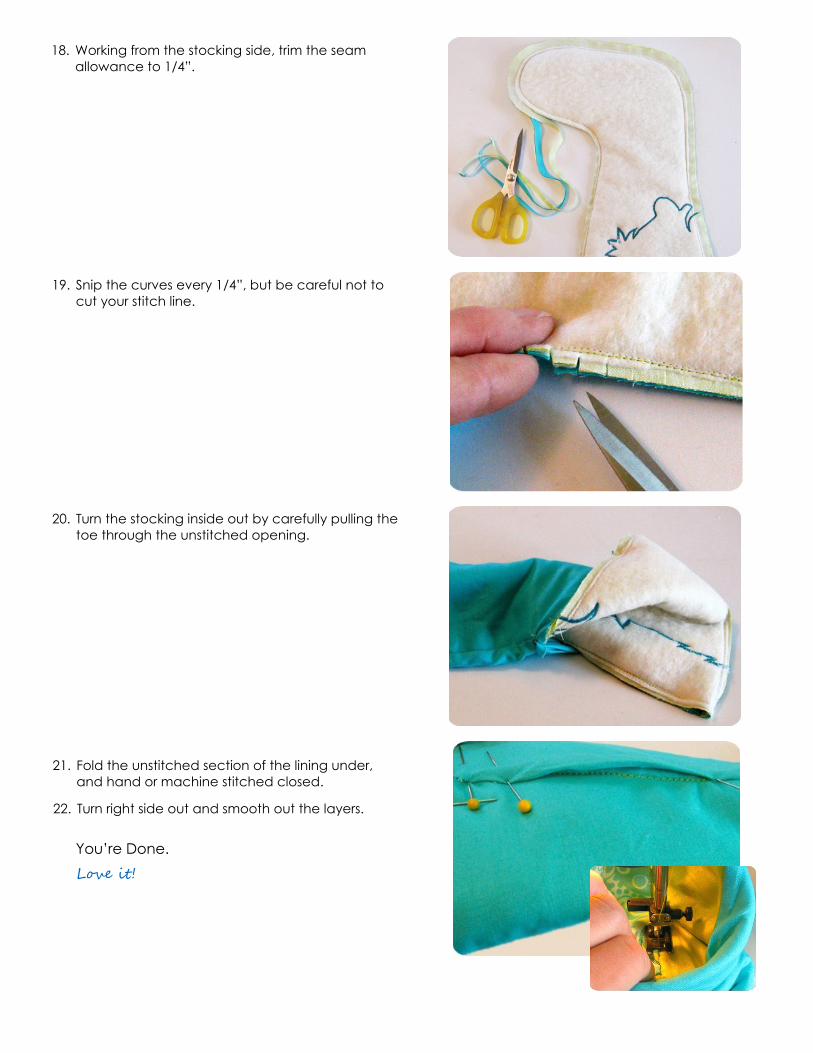
19. Snip the curves every 1/4”, but be careful not to
cut your stitch line.
20. Turn the stocking inside out by carefully pulling the
toe through the unstitched opening.
Dritz® HOME tack hammer, 44120
21. Fold the unstitched section of the lining under,
and hand or machine stitched closed.
this part of the snap will not fit through clip loop!
18. Working from the stocking side, trim the seam
allowance to 1/4”.
22. Turn right side out and smooth out the layers.
You’re Done.
Love it!
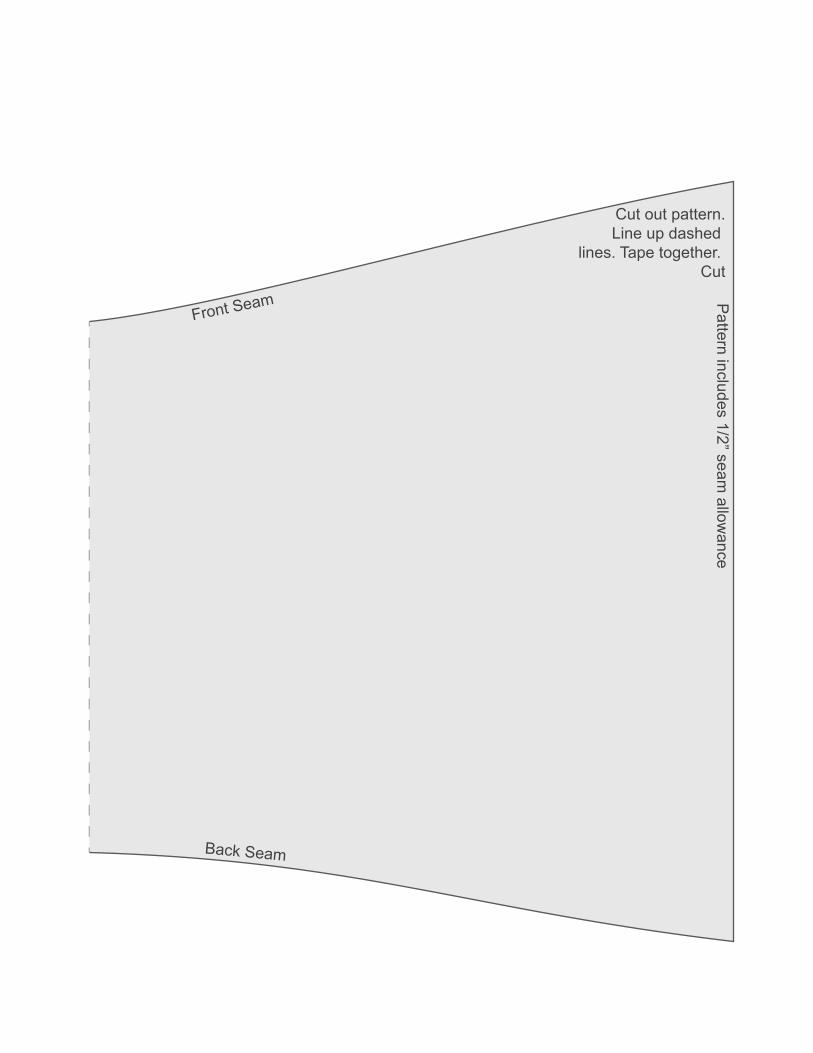
Cut out pattern.Line up dashed
lines. Tape together. Cut
Pattern includes 1/2” seam
allowance
Back Seam
Front Seam
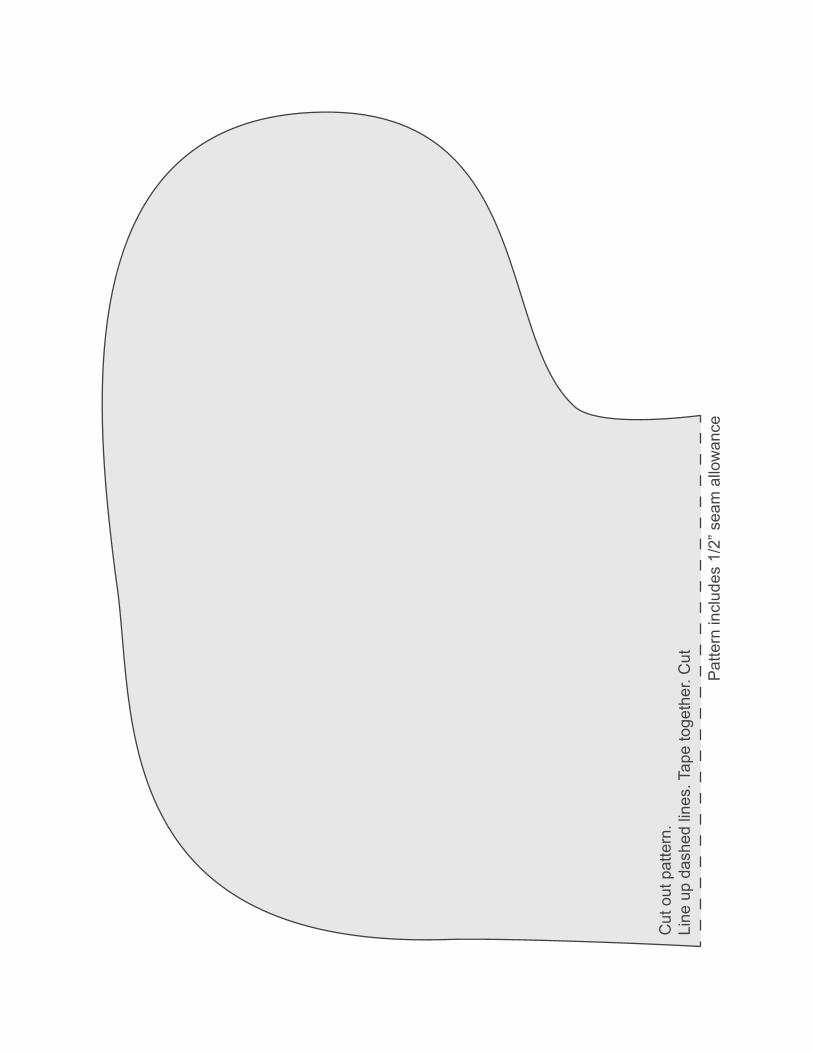
Cut
out
pat
tern
.Li
ne u
p da
shed
line
s. T
ape
toge
ther
. Cut
Pat
tern
incl
udes
1/2
” sea
m a
llow
ance