LG LX160 User Guide - Sprint Support
185
Phone User Guide www.sprint.com © 2007 Sprint Nextel. All rights reserved. SPRINT, the NEXTEL name and logo, and other trademarks are trademarks of Sprint Nextel. Printed in the U.S.A. Sprint Vision® Phone LX160 by LG®
-
Upload
duongtuyen -
Category
Documents
-
view
225 -
download
6
Transcript of LG LX160 User Guide - Sprint Support
Phone User Guide
www.sprint.com
© 2007 Sprint Nextel. All rights reserved. SPRINT, the NEXTEL name andlogo, and other trademarks are trademarks of Sprint Nextel.
Printed in the U.S.A.
Sprint Vision® PhoneLX160 by LG®

Table of ContentsIntroduction . . . . . . . . . . . . . . . . . . . . . . . . . . . . . . . . . . . . . .iYour Phone’s Menu . . . . . . . . . . . . . . . . . . . . . . . . . . . . . . .iiiGetting Started . . . . . . . . . . . . . . . . . . . . . . . . . . . . . . . . . . .1
Setting Up Service . . . . . . . . . . . . . . . . . . . . . . . . . . . . . . . . . . . . .2Setting Up Your Phone . . . . . . . . . . . . . . . . . . . . . . . . . . . . . . . . . . . . . . .3
Getting Started With Sprint Service . . . . . . . . . . . . . . . . . . . . . . . . . . .4
Setting Up Your Voicemail . . . . . . . . . . . . . . . . . . . . . . . . . . . . . . . . . . . .5
Sprint Account Passwords . . . . . . . . . . . . . . . . . . . . . . . . . . . . . . . . . . .6
Getting Help . . . . . . . . . . . . . . . . . . . . . . . . . . . . . . . . . . . . . . . . . . . . . . . .7
Your Phone . . . . . . . . . . . . . . . . . . . . . . . . . . . . . . . . . . . . . . .9Your Phone: The Basics . . . . . . . . . . . . . . . . . . . . . . . . . . . . . . . .10
Your Phone . . . . . . . . . . . . . . . . . . . . . . . . . . . . . . . . . . . . . . . . . . . . . . . .11
Viewing the Display Screen . . . . . . . . . . . . . . . . . . . . . . . . . . . . . . . . .14
Features of Your Phone . . . . . . . . . . . . . . . . . . . . . . . . . . . . . . . . . . . . .16
Turning Your Phone On and Off . . . . . . . . . . . . . . . . . . . . . . . . . . . . . .18
Using Your Phone’s Battery and Charger . . . . . . . . . . . . . . . . . . . . .19
Navigating Through Phone Menus . . . . . . . . . . . . . . . . . . . . . . . . . .22
Displaying Your Phone Number . . . . . . . . . . . . . . . . . . . . . . . . . . . . .23
Making and Answering Calls . . . . . . . . . . . . . . . . . . . . . . . . . . . . . . . .24
Entering Text . . . . . . . . . . . . . . . . . . . . . . . . . . . . . . . . . . . . . . . . . . . . . .35
Controlling Your Phone’s Settings . . . . . . . . . . . . . . . . . . . . . .40Sound Settings . . . . . . . . . . . . . . . . . . . . . . . . . . . . . . . . . . . . . . . . . . . .41
Display Settings . . . . . . . . . . . . . . . . . . . . . . . . . . . . . . . . . . . . . . . . . . . .44
Location Settings . . . . . . . . . . . . . . . . . . . . . . . . . . . . . . . . . . . . . . . . . .49
Messaging Settings . . . . . . . . . . . . . . . . . . . . . . . . . . . . . . . . . . . . . . . .50
Airplane Mode . . . . . . . . . . . . . . . . . . . . . . . . . . . . . . . . . . . . . . . . . . . . .54
TTY Use With Sprint Service . . . . . . . . . . . . . . . . . . . . . . . . . . . . . . . .55
Phone Setup Options . . . . . . . . . . . . . . . . . . . . . . . . . . . . . . . . . . . . . . .57
Setting Your Phone’s Security . . . . . . . . . . . . . . . . . . . . . . . . . .59Accessing the Security Menu . . . . . . . . . . . . . . . . . . . . . . . . . . . . . . . .60
Using Your Phone’s Lock Feature . . . . . . . . . . . . . . . . . . . . . . . . . . . . .60
Using Special Numbers . . . . . . . . . . . . . . . . . . . . . . . . . . . . . . . . . . . . .61
Erasing the Contacts List . . . . . . . . . . . . . . . . . . . . . . . . . . . . . . . . . . . .62
Restricting Your Phone . . . . . . . . . . . . . . . . . . . . . . . . . . . . . . . . . . . . .62
Erasing Private Browser Data . . . . . . . . . . . . . . . . . . . . . . . . . . . . . . .63
Erasing Voicetags . . . . . . . . . . . . . . . . . . . . . . . . . . . . . . . . . . . . . . . . . .64
Erasing My Content . . . . . . . . . . . . . . . . . . . . . . . . . . . . . . . . . . . . . . . .64
Resetting Favorites . . . . . . . . . . . . . . . . . . . . . . . . . . . . . . . . . . . . . . . . .64
Resetting Default Settings . . . . . . . . . . . . . . . . . . . . . . . . . . . . . . . . . .65
Resetting Your Phone . . . . . . . . . . . . . . . . . . . . . . . . . . . . . . . . . . . . . . .65
Controlling Your Roaming Experience . . . . . . . . . . . . . . . . . . .66Understanding Roaming . . . . . . . . . . . . . . . . . . . . . . . . . . . . . . . . . . .66
Setting Your Phone’s Roam Mode . . . . . . . . . . . . . . . . . . . . . . . . . . .68
Using Call Guard . . . . . . . . . . . . . . . . . . . . . . . . . . . . . . . . . . . . . . . . . . .69
Using Data Roam Guard . . . . . . . . . . . . . . . . . . . . . . . . . . . . . . . . . . . .70
Managing Call History . . . . . . . . . . . . . . . . . . . . . . . . . . . . . . . .72Viewing History . . . . . . . . . . . . . . . . . . . . . . . . . . . . . . . . . . . . . . . . . . .73
Call History Options . . . . . . . . . . . . . . . . . . . . . . . . . . . . . . . . . . . . . . . .74
Making a Call From Call History . . . . . . . . . . . . . . . . . . . . . . . . . . . . .75
Saving a Phone Number From Call History . . . . . . . . . . . . . . . . . . .75
Prepending a Phone Number From Call History . . . . . . . . . . . . . . .76
Erasing Call History . . . . . . . . . . . . . . . . . . . . . . . . . . . . . . . . . . . . . . . . .77
Using Contacts . . . . . . . . . . . . . . . . . . . . . . . . . . . . . . . . . . . . . . .78Adding a New Contacts Entry . . . . . . . . . . . . . . . . . . . . . . . . . . . . . . .79
Finding Contacts Entries . . . . . . . . . . . . . . . . . . . . . . . . . . . . . . . . . . . .80
Contacts Entry Options . . . . . . . . . . . . . . . . . . . . . . . . . . . . . . . . . . . . .82
Adding a Phone Number to a Contacts Entry . . . . . . . . . . . . . . . . .83
Editing a Contacts Entry’s Phone Number . . . . . . . . . . . . . . . . . . . .84
Assigning Speed Dial Numbers . . . . . . . . . . . . . . . . . . . . . . . . . . . . . .84
My Name Card . . . . . . . . . . . . . . . . . . . . . . . . . . . . . . . . . . . . . . . . . . . . .86
Send All Contacts . . . . . . . . . . . . . . . . . . . . . . . . . . . . . . . . . . . . . . . . . .87
Editing a Contacts Entry . . . . . . . . . . . . . . . . . . . . . . . . . . . . . . . . . . . .87
Selecting a Ringer Type for an Entry . . . . . . . . . . . . . . . . . . . . . . . . . .87

Dialing Sprint Services . . . . . . . . . . . . . . . . . . . . . . . . . . . . . . . . . . . . . .88
Wireless Backup . . . . . . . . . . . . . . . . . . . . . . . . . . . . . . . . . . . . . . . . . . .89
Using the Phone’s Calendar and Tools . . . . . . . . . . . . . . . . . . .90Using Your Phone’s Calendar . . . . . . . . . . . . . . . . . . . . . . . . . . . . . . . .91
Using Your Phone’s Alarm Clock . . . . . . . . . . . . . . . . . . . . . . . . . . . . .95
Using Your Phone’s Notepad . . . . . . . . . . . . . . . . . . . . . . . . . . . . . . . .96
Using Your Phone’s Tools . . . . . . . . . . . . . . . . . . . . . . . . . . . . . . . . . . . .96
Using Your Phone’s Voice Services . . . . . . . . . . . . . . . . . . . . . .98Managing Voice Memos . . . . . . . . . . . . . . . . . . . . . . . . . . . . . . . . . . . .99
Using Voice-Activated Dialing . . . . . . . . . . . . . . . . . . . . . . . . . . . . .101
Using Bluetooth . . . . . . . . . . . . . . . . . . . . . . . . . . . . . . . . . . . . .103Turning Bluetooth On and Off . . . . . . . . . . . . . . . . . . . . . . . . . . . . .103
Using the Bluetooth Settings Menu . . . . . . . . . . . . . . . . . . . . . . . .104
Bluetooth Profiles . . . . . . . . . . . . . . . . . . . . . . . . . . . . . . . . . . . . . . . .106
Pairing Bluetooth Devices . . . . . . . . . . . . . . . . . . . . . . . . . . . . . . . . .107
Sprint Service Features . . . . . . . . . . . . . . . . . . . . . . . . . .109Sprint Service Features: The Basics . . . . . . . . . . . . . . . . . . . . .110
Using Voicemail . . . . . . . . . . . . . . . . . . . . . . . . . . . . . . . . . . . . . . . . . .111
Using SMS Text Messaging . . . . . . . . . . . . . . . . . . . . . . . . . . . . . . . .119
Using SMS Voice Messaging . . . . . . . . . . . . . . . . . . . . . . . . . . . . . . .122
Using Caller ID . . . . . . . . . . . . . . . . . . . . . . . . . . . . . . . . . . . . . . . . . . . .124
Responding to Call Waiting . . . . . . . . . . . . . . . . . . . . . . . . . . . . . . . .125
Making a Three-Way Call . . . . . . . . . . . . . . . . . . . . . . . . . . . . . . . . . .126
Using Call Forwarding . . . . . . . . . . . . . . . . . . . . . . . . . . . . . . . . . . . . .127
Sprint Vision . . . . . . . . . . . . . . . . . . . . . . . . . . . . . . . . . . . . . . . .128Sprint Vision Applications . . . . . . . . . . . . . . . . . . . . . . . . . . . . . . . . .129
Getting Started With Sprint Vision . . . . . . . . . . . . . . . . . . . . . . . . .130
Accessing Messaging . . . . . . . . . . . . . . . . . . . . . . . . . . . . . . . . . . . . .136
Downloading Premium Services Content . . . . . . . . . . . . . . . . . . .139
Exploring the Web . . . . . . . . . . . . . . . . . . . . . . . . . . . . . . . . . . . . . . . .143
Sprint Vision FAQs . . . . . . . . . . . . . . . . . . . . . . . . . . . . . . . . . . . . . . . .148
Using Your Sprint Phone as a Modem . . . . . . . . . . . . . . . . . . . . . . .150

Sprint Voice Command . . . . . . . . . . . . . . . . . . . . . . . . . . . . . . .152Getting Started With Sprint Voice Command . . . . . . . . . . . . . . .153
Creating Your Own Address Book . . . . . . . . . . . . . . . . . . . . . . . . . .154
Making a Call With Sprint Voice Command . . . . . . . . . . . . . . . . .155
Accessing Information Using Sprint Voice Command . . . . . . . .156
Safety and Warranty Information . . . . . . . . . . . . . . . . .157Important Safety Information . . . . . . . . . . . . . . . . . . . . . . . .158
General Precautions . . . . . . . . . . . . . . . . . . . . . . . . . . . . . . . . . . . . . .159
Maintaining Safe Use of and Access to Your Phone . . . . . . . . . .160
Caring for the Battery . . . . . . . . . . . . . . . . . . . . . . . . . . . . . . . . . . . . .162
Radio Frequency (RF) Energy . . . . . . . . . . . . . . . . . . . . . . . . . . . . . . .163
Owner’s Record . . . . . . . . . . . . . . . . . . . . . . . . . . . . . . . . . . . . . . . . . . .165
Phone Guide Proprietary Notice . . . . . . . . . . . . . . . . . . . . . . . . . . .165
Manufacturer’s Warranty . . . . . . . . . . . . . . . . . . . . . . . . . . . .166Manufacturer’s Warranty . . . . . . . . . . . . . . . . . . . . . . . . . . . . . . . . .167
Index . . . . . . . . . . . . . . . . . . . . . . . . . . . . . . . . . . . . . . . . . .170

Introduction
This Phone Guide introduces you to Sprint® Service and allthe features of your new phone. It’s divided into foursections:
� Section 1: Getting Started
� Section 2: Your Phone
� Section 3: Sprint Service Features
� Section 4: Safety and Warranty Information
Throughout this guide, you’ll find tips that highlight specialshortcuts and timely reminders to help you make the mostof your new phone and service. The Table of Contents andIndex will also help you quickly locate specific information.
You’ll get the most out of your phone if you read each section.However, if you’d like to get right to a specific feature, simplylocate that section in the Table of Contents and go directly tothat page. Follow the instructions in that section, and you’llbe ready to use your phone in no time.
Phone Guide Note: Due to updates in phone software, this printed guidemay not be the most current version for your phone. Visit www.sprint.comand sign on to My SprintWireless to access the most recent version of thephone guide.
WARNING: Please refer to the Important Safety Information section onpage 158 to learn about information that will help you safely use yourphone. Failure to read and follow the Important Safety Information inthis phone guide may result in serious bodily injury, death, or propertydamage.
i

ii
WANT TO KEEP TRACK OF YOUR
MINUTES?
IT’S EASY TO CHECK RIGHT FROM YOUR
PHONE!
DIAL
You’ll hear a summary of your service plan minutes and theminutes remaining in your current billing cycle, along withyour phone’s individual usage if you’re on a shared plan. You’llalso hear a summary of your account balance and your mostrecent payment information.
USE YOUR PHONE’S WEB BROWSER
From the Sprint V ision Home Page, select My Account (Option0). You’ll see many helpful categories including Payment Due,Current Usage, and Plan Overview. Select a topic to display thelatest information.
NOTE
Reported minutes and balances are estimates only. Please consult yourSprint Invoice for actual minutes used.

iii
Your Phone’s Menu
The following list outlines your phone’s menu structure ingrid view. For more information about using your phone’smenus, see “Navigating Through Phone Menus”on page 22.
1. Bluetooth<Add New><Settings>
2. Messaging1. Send Message 1. Text Message / 2. VoiceSMS2. Text Messages 1. Inbox / 2. Sent / 3. Outbox / 4. Draft /
5. Edit Folder/ 6. Send Message3. Picture Mail4. VoiceSMS5. IM & Email 1. PCS Mail / 2. AOL / 3. MSN / 4. Yahoo! /
5. Other6. Chat & Dating7. Voicemail 1. Call Voicemail / 2. Voicemail Details /
3. Clear Icon8. Settings 1. Notification / 2. Message Reminder /
3. Callback Number / 4. Auto-Delete / 5. Delivery Receipt / 6. Signature / 7. Preset Messages / 8. VoiceSMS Options
3. Web1. Launch
4. Tools1. Alarm Clock 1. Alarm 1 / 2. Alarm 2 / 3. Alarm 3 /
4. Quick Alarm / 5. Reset All2. Calculator3. Ez Tip Calculator4. Bluetooth 5. Scheduler6. Voice Memo7. Notepad8. World Clock

iv
5. Call History1. Missed Calls2. Incoming Calls3. Outgoing Calls4. Recent Calls5. Delete Call History 1. Missed Calls / 2. Incoming Calls /
3. Outgoing Calls / 4. Recent Calls /5. All Calls
6. Contacts1. Find/Add Entry2. Speed Dial #'s3. Groups4. My Phone #5. My Name Card6. Services 1. Customer Service / 2. Dir Assistance /
3. Account Info / 4. Sprint Operator /5. Voice Command / 6. Community Info / 7. Non Emergency / 8. Traffic Info / 9. Repair Service / 0. TTY Relay Service / *. One Call Service
7. Send All Contacts8. Wireless Backup 1. Subscribe / 2. Learn More
7. Voice Services1. Voice Dial2. Voice Memo
8. My ContentGames Get New / My Content Manager / Brain
Juice DEMO / Midnight Pool / PAC-MAN/ Ms. PAC-MAN DEMO / Tetis Demo Pack / World Series of Poker
Ringers Get New / My Content ManagerScreen Savers Get New / My Content Manager /
Screen Saver PreviewApplications Get New / My Content Manager /
MobiTV TrialIM & Email Get New / My Content Manager/
Sprint Mobile Email

v
Call Tones<Options> Memory Status / Get New / My Content
Manager
9. Settings
1. Display1. Main Screen 1. Screen Saver / 2. Backlight / 3. Skins /
4. Menu Styles / 5. Foregrounds / 6. Incoming Calls
2. Outer Screen 1. Screen Saver / 2. Clock3. Font Size 1. Messaging / 2. Browser / 3. Notepad4. Keypad Light Always Off / 8 seconds / 15 seconds /
30 seconds5. Language English / Español6. Status Light On / Off
2. Sounds1. Volume 1. Ringer / 2. Earpiece / 3. Speakerphone /
4. Power On/Off / 5. Applications2. Ringer Type 1. Voice Calls / 2. Messages3. Alerts 1. Beep Each Minute / 2. Out of Service /
3. Connect / 4. Sig Fade/Call Drop4. Keytones 1. Tone Length / 2. Tone Volume
3. Bluetooth1. On/Off On / Off2. Visibility Hidden / Visible for 3 Min / Always Visible3. Device Name4. Device Info
4. Messaging1. Notification MSG & Icon / Icon 2. Message Reminder On / Off3. Callback Number None / My Phone Number / Other4. Auto-Delete On / Off5. Delivery Receipt On / Off6. Signature None / Custom7. Preset Messages8. VoiceSMS Options Speakerphone / From Name

vi
5. Text Entry1. Auto-Capital On / Off2. Auto-Space On / Off3. Word Choice List On / Off4. Word Prediction On / Off5. Word Completion On / Off6. Use My Words On / Off7. My Words8. Help
6. Phone Information 1. Phone Number / 2. Icon Glossary / 3. Version / 4. My Account / 5. Advanced
7. More...1. Accessibility 1. TTY / 2. Font Size2. Airplane Mode On / Off / On Power Up3. Call Setup 1. Auto-Answer / 2. Abbreviated Dialing /
3. Call Answer / 4. Contacts Match4. Data 1. On/Off / 2. Net Guard / 3. Update
Data Profile5. Location On / Off6. Navigation Keys 1. Left Navigation / 2. Right Navigation /
3. Up Navigation / 4. Down Navigation7. Restrict and Lock 1. Restrict Voice / 2. Lock Data /
3. Lock My Phone 8. Roaming 1. Set Mode / 2. Call Guard /
3. Data Roaming9. Security 1. Lock My Phone / 2. Change Lock Code /
3. Special Numbers / 4. Edit Contacts List /5. Erase/Reset
0. Update Phone S/W*. Wireless Backup 1. Subscribe / 2. Learn More

Getting Started
Section 1

2 Section 1A: Setting Up Service
Section 1A
Setting Up Service
In This Section
� Setting Up Your Phone (page 3)
� Getting Started With Sprint Service (page 4)
� Setting Up Your Voicemail (page 5)
� Sprint Account Passwords (page 6)
� Getting Help (page 7)
Setting up service on your new phone is quick and easy.Thissection walks you through the necessary steps to unlockyour phone, set up your voicemail, establish passwords, andcontact Sprint for assistance with your Sprint service.

Section 1A: Setting Up Service 3
Setting Up Your Phone
1. Install the battery (if necessary).
� Press the release button and remove the batterycover from the back of the phone.
� Insert the battery into the opening, making sure theconnectors align. Gently press down to secure thebattery.
� Replace the battery cover and press down until youhear a click.
2. Press to turn the phone on.
� Your phone will turn on, search for Sprint service,and enter standby mode.
� If your phone is not yet activated, or if it is locked, see“Getting Started With Sprint Service”on thefollowing page for more information.
3. Make your first call.
� Use your keypad to enter a phone number.
� Press .
Note: Your phone’s battery should have enough charge to turn on, find asignal, set up your voicemail, and make a call. You should fully charge yourbattery as soon as possible. See “Charging the Battery”on page 21 for details.
Setting Up Service

4 Section 1A: Setting Up Service
Getting Started With Sprint Service
Determining if Your Phone is Already Activated
If you purchased your phone at a Sprint Store, it is probablyactivated, unlocked, and ready to use. If you received yourphone in the mail, it probably has been activated; all you needto do is unlock it.
If your phone is not activated, please refer to the activationcard included with your phone.
Unlocking Your Phone
To unlock your phone, follow these easy steps:
1. Press and hold to turn the phone on.
2. Press Unlock (right softkey).
Note: To select a softkey, press the softkey button directly below the softkeytext that appears at the bottom left and bottom right of your phone’sdisplay screen. Softkey actions change according to the screen you’reviewing and will not appear if there is no corresponding action available.
3. Enter your four-digit lock code. (For security purposes,the code is not visible as you type.)
Tip: If you can’t recall your lock code, try using the last four digits of yourwireless phone number. If this doesn't work, call Sprint Customer Service at1-888-211-4727.
Section 1A: Setting Up Service 5
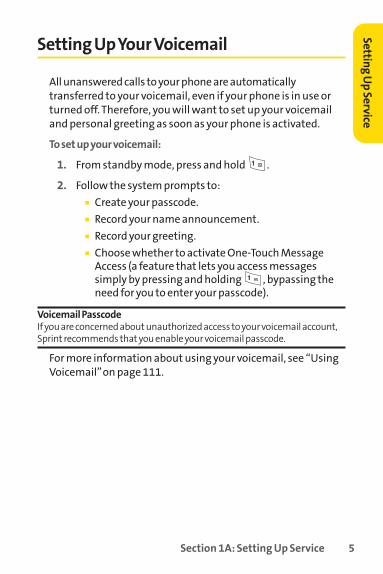
Setting UpYour Voicemail
All unanswered calls to your phone are automaticallytransferred to your voicemail, even if your phone is in use orturned off. Therefore, you will want to set up your voicemailand personal greeting as soon as your phone is activated.
To set up your voicemail:
1. From standby mode, press and hold .
2. Follow the system prompts to:
� Create your passcode.
� Record your name announcement.
� Record your greeting.
� Choose whether to activate One-Touch MessageAccess (a feature that lets you access messagessimply by pressing and holding , bypassing theneed for you to enter your passcode).
Voicemail PasscodeIf you are concerned about unauthorized access to your voicemail account,Sprint recommends that you enable your voicemail passcode.
For more information about using your voicemail, see “UsingVoicemail”on page 111.
Setting Up Service

6 Section 1A: Setting Up Service
Sprint Account Passwords
As a Sprint customer, you enjoy unlimited access to yourpersonal account information, your voicemail account, andyour Sprint Vision® account. To ensure that no one else hasaccess to your information, you will need to create passwordsto protect your privacy.
Account Password
If you are the account owner, you’ll have an account passwordto sign on to www.sprint.com and to use when calling SprintCustomer Service. Your default account password is the lastfour digits of your Social Security number. If you are not theaccount owner (if someone else receives the bill for yourSprint service), you can get a sub-account password atwww.sprint.com.
Voicemail Password
You’ll create your voicemail password (or passcode) when youset up your voicemail. See “Setting Up Your Voicemail”onpage 111 for more information on your voicemail password.
SprintVision Password
With your LX160 by LG, you may elect to set up a Sprint Vision password. This optional password may be used to authorize purchase of Premium Servicescontent and to protect personal information on multi-phoneaccounts.
For more information, or to change your passwords, sign on to www.sprint.com or call Sprint Customer Service at1-888-211-4727.
Section 1A: Setting Up Service 7
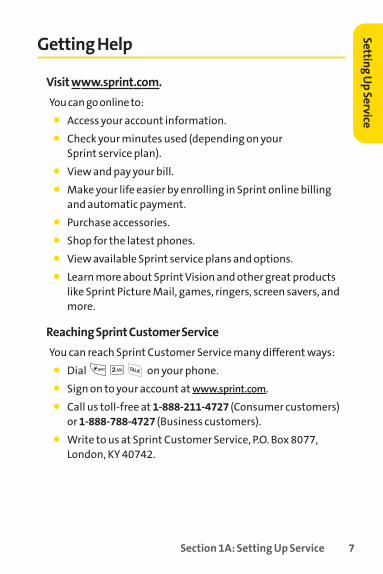
Getting Help
Visit www.sprint.com.
You can go online to:
� Access your account information.
� Check your minutes used (depending on your Sprint service plan).
� View and pay your bill.
� Make your life easier by enrolling in Sprint online billingand automatic payment.
� Purchase accessories.
� Shop for the latest phones.
� View available Sprint service plans and options.
� Learn more about Sprint Vision and other great productslike Sprint Picture Mail, games, ringers, screen savers, andmore.
Reaching Sprint Customer Service
You can reach Sprint Customer Service many different ways:
� Dial on your phone.
� Sign on to your account at www.sprint.com.
� Call us toll-free at 1-888-211-4727 (Consumer customers)or 1-888-788-4727 (Business customers).
� Write to us at Sprint Customer Service, P.O. Box 8077,London, KY 40742.
Setting Up Service

8 Section 1A: Setting Up Service
Receiving Automated Billing Information
For your convenience, your phone gives you access toinvoicing information on your Sprint account. Thisinformation includes balance due, payment received,invoicing cycle, and an estimate of the number of minutesused since your last invoicing cycle.
To access automated billing information:
� Press .
Note: This service may not be available in all Affiliate areas.
Sprint 411
Call from your phone and you’ll have access toa variety of services and information through Sprint 411,including residential, business, and government listings,movie listings or showtimes, driving directions, restaurantreservations, and major local event information. You can getup to three pieces of information per call, and the operator canautomatically connect your call at no additional charge.
There is a per-call charge to use Sprint 411 and you will bebilled for airtime.
To call Sprint 411:� Press .
Sprint Operator Services
Sprint Operator Services provides assistance when placingcollect calls or when placing calls billed to a local telephonecalling card or third party.
To access Sprint Operator Services:� Press .
For more information or to see the latest in products andservices, visit us online at www.sprint.com.

Section 2
Your Phone

10 Section 2A: Your Phone – The Basics
Section 2A
Your Phone: The Basics
In This Section
� Your Phone (page 11)
� Viewing the Display Screen (page 14)
� Features of Your Phone (page 16)
� Turning Your Phone On and Off (page 18)
� Using Your Phone’s Battery and Charger (page 19)
� Navigating Through Phone Menus (page 22)
� Displaying Your Phone Number (page 23)
� Making and Answering Calls (page 24)
� Entering Text (page 35)
Your phone is packed with features that simplify your life andexpand your ability to stay connected to the people andinformation that are important to you.This section will guideyou through the basic functions and calling features of yourphone.

Section 2A: Your Phone – The Basics 11
Your Phone
Phone Basics
2. Softkey Buttons
3. Headset Jack
4. Speaker Key
12. END (Power)
11. Navigation Key
14. MENU/OK
7. Voice Services Key
9. Microphone
10. Charger Jack
8. BACK (Clear)
5. Volume Control
15. Display Screen
17. Earpiece
1. Signal StrengthIndicator 16. Battery
StrengthIndicator
6. TALK
13. TEXT

12 Section 2A: Your Phone – The Basics
Key Functions1. Signal Strength Indicator indicates the signal strength by
displaying bars. The more bars displayed, the stronger thesignal.
2. Softkey Buttons let you select softkey actions or menuitems corresponding to the bottom left and right lines onthe display screen. You can access Favorites and Contactsin standby mode using the Softkey Buttons.
3. Headset Jack allows you to plug in an optional headset forconvenient, hands-free conversations. CAUTION! Inserting an accessory into the incorrect jackmay damage the phone.
4. Speaker Key enables your phone's built-in speaker,allowing you to hear other callers.
5. Volume Control allows you to adjust the ringer volume instandby mode (with the flip open) or to adjust the voicevolume during a call. The volume key can also be used toscroll up or down to navigate through the different menuoptions. To mute the ringer during an incoming call, pressthe volume key up or down.
6. TALK allows you to place or receive calls, answer CallWaiting, use Three-Way Calling, or activate Voice Dial.
7. Voice Services Key lets you dial phone numbers by saying acontact's name with the phone open in standby mode.
8. BACK(Clear) deletes characters from the display in textentry mode. When in a menu, press the Back key to returnto the previous menu. This key also allows you to return tothe previous screen in a Sprint Vision session.
9. Microphone allows other callers to hear you clearly whenyou are speaking to them.
Section 2A: Your Phone – The Basics 13
10. Charger Jack connects the phone to the battery charger.
11. Navigation Key scrolls through the phone’s menu optionsand acts as a shortcut key from standby mode. You mayalso customize the navigation shortcuts in the Settingsmenu (see “Shortcuts”on page 57).
� Press Up to access Messaging.
� Press Down to access My Content.
� Press Right to access Web.
� Press Left to view your Scheduler.
12. END (Power) ends a call. Press and hold this key for twoseconds to turn your phone on or off. While in the mainmenu, it returns the phone to standby mode and cancelsyour input.
13. TEXT allows you to send text messages quickly.
14. MENU/OK displays the phone's main menu from standbymode. It also selects the highlighted choice when you arenavigating through a menu.
15. Display Screen displays all the information needed tooperate your phone, such as the call status, the Contacts list,the date and time, and the signal and battery strength.
16. Battery Strength Indicator represents the amount ofremaining battery charge currently available in your phone.When all bars are displayed in the battery icon, the phone’sbattery is fully charged. When no bars are displayed, thephone’s battery is completely discharged or empty.
17. Earpiece lets you hear the caller and automated prompts.
Phone Basics

14 Section 2A: Your Phone – The Basics
Viewing the Display Screen
Your phone’s display screen provides a wealth of informationabout your phone’s status and options. This list identifies thesymbols you’ll see on your phone’s display screen:
Note: To view a list of your phone’s icons and descriptions, from the mainmenu select Settings > Phone Information > Icon Glossary.
indicates your current signal strength. (The morelines you have, the stronger your signal.)
indicates that a call is in progress.
indicates your phone cannot find a signal.
indicates you are “Roaming”off the Sprint NationalNetwork.
indicates your Sprint Vision connection is active(data is being transferred).
indicates battery charge level (icon shows fullcharge).
indicates battery needs to be recharged.
indicates ringer volume is set to vibrate.
indicates Ringer Off/Silence All mode is set.
indicates Ringer & Vibrate mode is set.
indicates you have new messages.
indicates you have new text message.
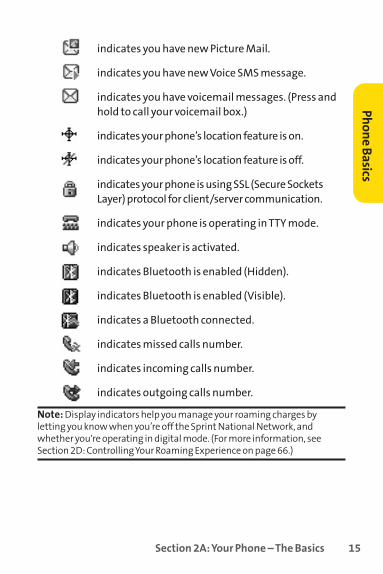
Section 2A: Your Phone – The Basics 15
indicates you have new Picture Mail.
indicates you have new Voice SMS message.
indicates you have voicemail messages. (Press andhold to call your voicemail box.)
indicates your phone’s location feature is on.
indicates your phone’s location feature is off.
indicates your phone is using SSL (Secure SocketsLayer) protocol for client/server communication.
indicates your phone is operating in TTY mode.
indicates speaker is activated.
indicates Bluetooth is enabled (Hidden).
indicates Bluetooth is enabled (Visible).
indicates a Bluetooth connected.
indicates missed calls number.
indicates incoming calls number.
indicates outgoing calls number.
Note: Display indicators help you manage your roaming charges byletting you know when you’re off the Sprint National Network, andwhether you're operating in digital mode. (For more information, seeSection 2D: Controlling Your Roaming Experience on page 66.)
Phone Basics

16 Section 2A: Your Phone – The Basics
Features of Your Phone
Congratulations on the purchase of your phone. The LX160 byLG is lightweight, easy-to-use, and reliable, and it also offersmany significant features and service options. The followinglist previews some of those features and provides pagenumbers where you can find out more:
� Digital dual-band capability allows you to make andreceive calls while on the Sprint National Network and toroam on other and 1900 and 800 MHz digital networkswhere Sprint has implemented roaming agreements(page 66).
� Sprint Vision provides access to the wireless Internet indigital mode (page 128).
� Sprint Mail (page 137), SMS Text Messaging (page 121),and SMS Voice Messaging (page 122) provide quick andconvenient messaging capabilities.
� Sprint Voice Command lets you dial phone numbers byspeaking someone’s name or the digits of that person’sphone number (page 152).
� Games, ringers, screen savers, and other applications canbe downloaded to make your phone as unique as you are(page 139). Additional charges may apply.
� Your Contacts list allows you to store up to 500 entries,with up to five phone numbers per entry (page 78).
� The built-in Calendar offers several personal informationmanagement features to help you manage your busylifestyle (page 90).
� Your phone is equipped with a Location feature for use inconnection with location-based services that may beavailable in the future (page 49).

Section 2A: Your Phone – The Basics 17
� Your phone’s external LCD display allows you to monitorthe phone’s status and to see who’s calling withoutopening the phone.
� T9 Text Input lets you quickly type messages with onekeypress per letter (page 35).
� Speed dial lets you dial phone numbers with one or twokeypresses (page 34).
� You can wirelessly pair your Bluetooth-enabled phone toother Bluetooth devices, including headsets and hands-free devices. You may also pair a personal computer orhand-held device with your phone for dial-up networking,using your phone as a wireless modem (page 103).
� Wireless Backup allows you to back up and manage yourphone’s Contacts list on a secure Web site (page 88).
Wireless Backup supports the following uses:
� Back up your phone’s Contacts list.
� Transfer your phone’s Contacts list to anotherWireless Backup–compatible phone on the Sprintnetwork.
� View and edit your phone's Contacts list using a Webbrowser on a desktop or laptop computer.
� Data Roam Guard will alert you when you are roaming andusing your browser or other online applications, givingyou the option to continue using those applications whilein the roaming area (page 71).
Phone Basics

18 Section 2A: Your Phone – The Basics
Turning Your Phone On and Off
Turning Your Phone On
To turn your phone on:
� Press and hold for approximately two seconds.
Once your phone is on, it may display “Looking for Service,”which indicates that your phone is searching for a signal.When your phone finds a signal, it automatically entersstandby mode – the phone’s idle state. At this point, you areready to begin making and receiving calls.
If your phone is unable to find a signal after 15 minutes ofsearching, a Power Save feature is automatically activated.When a signal is found, your phone automatically returns tostandby mode.
In Power Save mode, your phone searches for a signalperiodically without your intervention. You can also initiate asearch for Sprint Service by pressing any key (when your phoneis turned on).
Tip: The Power Save feature helps to conserve your battery power when youare in an area where there is no signal.
Turning Your Phone Off
To turn your phone off:
� Press and hold for two seconds until you see thepowering-down animation on the display screen.
Your screen remains blank while your phone is off (unless thebattery is charging).

Section 2A: Your Phone – The Basics 19
Using Your Phone’s Battery and Charger
WARNING: Use only Sprint-approved or manufacturer-approvedbatteries and chargers with your phone. The failure to use a Sprint-approved or manufacturer-approved battery and charger mayincrease the risk that your phone will overheat, catch fire, or explode,resulting in serious bodily injury, death, or property damage.
Sprint- or manufacturer-approved batteries and accessoriescan be found at Sprint Stores or through your phone’smanufacturer, or call 1-866-343-1114 to order. They’re alsoavailable at www.sprint.com. – click the Accessories tab.
Battery Capacity
Your phone is equipped with a Lithium-Ion (Li-Ion) batterythan can be recharged before it is fully drained. The batteryprovides up to 3.5 hours of continuous digital talk time.
When the battery reaches 5% of its capacity, the battery iconblinks. When there are approximately two minutes of talktime left, the phone sounds an audible alert and then powersdown.
Note: Long backlight settings, searching for service, vibrate mode, andbrowser use affect the battery’s talk and standby times.
Tip: Be sure to watch your phone’s battery level indicator and charge thebattery before it runs out of power.
Phone Basics

20 Section 2A: Your Phone – The Basics
Installingthe Battery
To install the Li-Ion battery:
� To install, insert the battery into the opening on the backof the phone (1) and gently press down until the latchsnaps into place (2).
Removingthe Battery
WARNING: Do not handle a damaged or leaking Li-Ion battery as youcan be burned.
To remove your battery:
1. Make sure the power is off so that you don’t lose anystored numbers or messages.
2. Push and slide the cover upward until it comes free fromthe phone.
3. Hold the phone in one hand so that the battery is facingyou.
4. Using two fingernails, hook the top edge of the battery(as shown in the photograph), and push down whilepulling out on the battery to remove it from the phone.

Section 2A: Your Phone – The Basics 21
Chargingthe Battery
Your phone’s Li-Ion battery is rechargeable and should becharged as soon as possible so you can begin using yourphone.
Keeping track of your battery’s charge is important. If itsbattery level becomes too low, your phone automatically turnsoff and you will lose all the information you were just workingon. For a quick check of your phone’s battery level, glance atthe battery charge indicator located in the upper-right cornerof your phone’s display screen. If the battery charge is gettingtoo low, the battery icon ( ) blinks and the phone sounds awarning tone.
Always use a Sprint- or manufacturer-approved desktopcharger, travel charger, or vehicle power adapter to chargeyour battery.
Using the Phone Charger
To use the phone charger provided with your phone:
� Plug the round end of the AC adapter into the phone’scharger jack and the other end into an electrical outlet.
� A red indicator light on the phone lets you know thebattery is charging.
� A green indicator light lets you know that the batteryis at least 90 percent charged.
It takes approximately three hours to fully recharge acompletely rundown battery. The Sprint-approved Li-Ionbattery can be recharged before it becomes completely rundown.
Phone Basics

22 Section 2A: Your Phone – The Basics
Navigating Through Phone Menus
The navigation key on your phone allows you to scroll throughmenus quickly and easily. The scroll bar at the right of themenu keeps track of your position in the menu at all times.
To navigate through a menu, simply press the navigation keyup or down. If you are in a first-level menu, such as Settings,you may also navigate to the next or previous first-level menuby pressing the navigation key right or left.
For a diagram of your phone’s menu, please see “Your Phone’sMenu”on page iii.
Selecting Menu Items
As you navigate through the menu, menu options arehighlighted. Select any numbered option by simply pressingthe corresponding number on the phone’s keypad. You mayalso select any item by highlighting it and pressing .
For example, if you want to view your last incoming call (whenmenu display is set to “grid”style):
1. Press to access the main menu.
2. Select Call History by pressing or by highlighting itand pressing . (It may already be highlighted.)
3. Select Incoming Calls by pressing or by highlighting itand pressing . (If you have received any calls, they aredisplayed on the screen.)
Note: For the purposes of this guide, the above steps condense into “Press Menu > Call History > Incoming Calls.”

Section 2A: Your Phone – The Basics 23
Backing Up Within a Menu
To go to the previous menu:
� Press .
To return to standby mode:
� Press .
DisplayingYour Phone Number
Just in case you forget your phone number, your phone canremind you.
To display your phone number:
� Press Menu > Settings > Phone Information > PhoneNumber. (Your phone number and other informationabout your phone and account will be displayed.)
Note: To select Menu, press . To select menu options (such as Settings,above), highlight the option and press . (If the menu options arenumbered, you may also select an option simply by pressing thecorresponding number key.)
Phone Basics
24 Section 2A: Your Phone – The Basics
Making and Answering Calls
Making CallsPlacing a call from your phone is as easy as making a call fromany landline phone. Just enter the number and press , andyou’re on your way to clear calls.
To make a call using your keypad:
1. Make sure your phone is on.
2. Enter a phone number from standby mode. (If you makea mistake while dialing, press to erase one digit at atime. Press and hold to erase the entire number.)
3. Press . (To make a call when you are roaming and Call Guard is enabled, highlight Roam Call and press .See “Using Call Guard”on page 70.)
4. Press or close the phone when you are finished.
Tip: To redial your last outgoing call, press TALK twice.
Tip: When making calls off the Sprint National Network, always dial using11 digits (1 + area code + phone number).
You can also place calls from your phone by using Sprint VoiceCommand (page 156), Speed Dialing numbers from yourContacts (page 84), and using your Call History listings (page 72).

Section 2A: Your Phone – The Basics 25
Dialing OptionsWhen you enter numbers in standby mode, you will see avariety of dialing options appear on the phone’s displayscreen.
Tip: To speed dial a phone number from standby mode, press and hold thespeed dial number. If the speed dial number is two digits, enter the firstdigit, and then press and hold the second digit. (For information on settingup speed dial numbers, see “Assigning Speed Dial Numbers”on page 84.)(This feature will not work when you are roaming off the Sprint NationalNetwork; when roaming you must dial using eleven digits [1 + the area code + the seven-digit phone number.])
� Call dials the displayed phone number. � Send Message allows you to send a text message to the
number being dialed.
� Save allows you to enter a seven- or ten-digit number(phone number and area code) and press Save to save thephone number in your Contacts. (See “Saving a PhoneNumber”on page 30.)
� Find allows you to enter a digit or string of digits. (See“Finding a Phone Number”on page 31.)
� Hard pause allows you to enter a hard pause. (See “Dialingand Saving Phone Numbers With Pauses”on page 32.)
� 2-sec pause allows you to enter a two-second pause. (See “Dialing and Saving Phone Numbers With Pauses”onpage 32.)
Phone Basics

26 Section 2A: Your Phone – The Basics
Answering CallsTo answer an incoming call:
1. Make sure your phone is on. (If your phone is off,incoming calls go to voicemail.)
2. Press to answer an incoming call. (Depending onyour phone’s settings, you may also answer incomingcalls by opening the phone or by pressing any numberkey. See “Call Answer Mode”on page 57 for moreinformation.)
Your phone notifies you of incoming calls in the followingways:
� The phone rings or vibrates.
� The indicator light flashes.
� The backlight illuminates.
� The screen displays an incoming call message.
If the incoming call is from a number stored in your Contacts,the entry’s name is displayed. The caller’s phone number mayalso be displayed, if available.
If Call Answer is set to TALK only, the following options are alsodisplayed. To select an option, press the corresponding softkeybutton.
� Quiet to mute the ringer.
� Ignore to send the call to your voicemail box.
Note: When your phone is off, incoming calls go directly to voicemail.

Section 2A: Your Phone – The Basics 27
Answering a Roam Call With Call Guard Enabled
Call Guard is an option that helps you manage your roamingcharges when making or receiving calls while outside theSprint National Network. Please see Section 2D: ControllingYour Roaming Experience for more information aboutroaming.
To answer a call when you are roaming and Call Guard is enabled:
� Select Answer to answer the call. (See “Call Guard”onpage 70 for additional information.)
Ending a Call
To disconnect a call when you are finished:
� Close the phone or press .
Missed Call NotificationWhen an incoming call is not answered, the Missed Call log isdisplayed on your screen.
To display the Missed Call entry from the notification screen:
� Highlight the entry and press . (To dial the phonenumber, press .)
To display a Missed Call entry from standby mode:
1. Press Menu > Call History > Missed Calls.
2. Select the entry you wish to view and press .
Phone Basics
28 Section 2A: Your Phone – The Basics
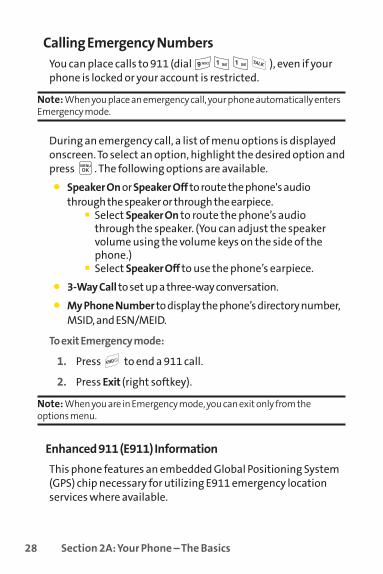
Calling Emergency NumbersYou can place calls to 911 (dial ), even if yourphone is locked or your account is restricted.
Note: When you place an emergency call, your phone automatically entersEmergency mode.
During an emergency call, a list of menu options is displayedonscreen. To select an option, highlight the desired option andpress . The following options are available.
� Speaker On or Speaker Off to route the phone's audiothrough the speaker or through the earpiece.
� Select Speaker On to route the phone’s audiothrough the speaker. (You can adjust the speakervolume using the volume keys on the side of thephone.)
� Select Speaker Off to use the phone’s earpiece.
� 3-Way Call to set up a three-way conversation.
� My Phone Number to display the phone’s directory number,MSID, and ESN/MEID.
To exit Emergency mode:
1. Press to end a 911 call.
2. Press Exit (right softkey).
Note: When you are in Emergency mode, you can exit only from the options menu.
Enhanced 911 (E911) Information
This phone features an embedded Global Positioning System(GPS) chip necessary for utilizing E911 emergency locationservices where available.

Section 2A: Your Phone – The Basics 29
When you place an emergency 911 call, the GPS feature ofyour phone begins to seek information to calculate yourapproximate location. Depending on several variables,including availability and access to satellite signals, it maytake 30 seconds or more to determine and report yourapproximate location.
IMPORTANT: Always report your location to the 911 operator when placingan emergency call. Some designated emergency call takers, known as PublicSafety Answering Points (PSAPs) may not be equipped to receive GPSlocation information from your phone.
In-Call OptionsWhile a call is in progess, a list of options is displayed that youmay use during the call. To select an option, highlight theoption and press . The following options are available:
� Mute or Unmute to mute your microphone, or to unmutethe microphone if it was muted earlier.
� Speaker On or Speaker Off routes the phone’s audiothrough the speaker or through the earpiece.
� Select Speaker On to route the phone’s audio throughthe speaker. (You can adjust the speaker volumeusing the volume keys on the side of the phone.)
� Select Speaker Off to use the phone’s earpiece.
Warning! Due to higher volume levels, do not place the phone near your earduring speakerphone use.
� 3-Way Call to set up a three-way conversation.
� Contacts to access the Contacts menu.
� Recent Calls to access the Recent Calls list.
� Send Message to send a text message.
� Record Voice Memo to record the current conversation.
Phone Basics

30 Section 2A: Your Phone – The Basics
� Notepad to display the phone’s electronic notepad.
� Menu to display the phone’s main menu.
End-of-Call OptionsAfter receiving a call from or making a call to a phone numberthat is not in your Contacts, the phone number and the durationof the call are displayed. Select this option if you wish to add thenew number to your Contacts. (See “Saving a Phone Number”below.)
After receiving a call from or making a call to a phone numberthat is already in your Contacts, the Contacts entry name and phone number and the duration of the call are displayed.To select one of the following options after a call has ended,press :
� Save to save the phone number in your Contacts list.
� View to view the Contacts entry if the number is already inyour Contacts list.
Note: The End-of-Call options are not displayed for calls identified as No IDor Restricted.
Saving a Phone NumberYour phone can store up to five phone numbers in each of 500Contacts entries. Each entry’s name can contain up to 32characters. Your phone automatically sorts the Contactsentries alphabetically. (For more information, see Section 2F:Using Contacts on page 78.)
To save a number from standby mode:
1. Enter a phone number.
2. Select Save and press .

Section 2A: Your Phone – The Basics 31
3. Select New Entry for a new contact or Existing Entry toadd a number to an existing contact and press .Scroll to the desired phone label.Mobile/Home/Office/Pager/Fax/None
4. Use the numeric keypad to enter the new contact nameand press to save the new entry.
– or –
Search for an existing contact name and press tosave the new number.
5. Press Done (left softkey) to save the new entry.
Finding a Phone NumberYou can search Contacts entries for phone numbers thatcontain a specific string of numbers.
To find a phone number:
1. Enter one or more digits in standby mode. (The morenumbers you enter, the more specific the searchbecomes.)
2. Select Contacts Match and press .
3. To display the Contacts entry that contains the phonenumber, highlight the entry and press .
4. To dial the number, select Call and press .
Tip:You can also dial the number by highlighting it and pressing TALKduring step 3 above.
Phone Basics

32 Section 2A: Your Phone – The Basics
Dialing and Saving Phone Numbers With Pauses
You can dial or save phone numbers with pauses for use withautomated systems, such as voicemail or credit card billingnumbers.
There are two types of pauses available on your phone:
� Hard pause sends the next set of numbers when you press.
� 2-sec pause automatically sends the next set of numbersafter two seconds.
Note:You can have multiple pauses in a phone number and combine two-second and hard pauses.
To dial or save phone numbers with pauses:
1. Enter the phone number.
2. Select either Hard pause or 2-sec pause and press . (Hard pauses are displayed as a “P”and two-second pauses as a “T.”)
3. Enter additional numbers.
4. Press to dial the number.
– or –
To save the number in your Contacts list, select Save andpress .
Note:When dialing a number with a hard pause, press OK to send the nextset of numbers.
Section 2A: Your Phone – The Basics 33
Plus (+) Code DialingWhen placing international calls, you can use Plus CodeDialing to automatically enter the international access codefor your location (for example, 011 for international callsmade from the United States).
To make a call using Plus Code Dialing:
1. Press and hold until a “+”appears on your phonedisplay.
2. Dial the country code and phone number you’re callingand press . (The access code for international dialingwill automatically be dialed, followed by the countrycode and phone number.)
Dialing From the ContactsTo dial directly from a Contacts entry:
1. Press to access the main menu. Contacts may also beaccessed by pressing Contacts (right softkey) while instandby mode.
2. Select Contacts.
3. Select Find/Add Entry and press .
Shortcut: Press Right on the Navigation key to list entries.
4. Use your Navigation key to scroll through the Contactslist, and then select an entry.
5. Press to dial the entry’s default phone number.
– or –
To dial another number from the entry, press , selectthe desired number, and press .
Phone Basics

34 Section 2A: Your Phone – The Basics
Using Speed DialingYou can store up to 99 numbers in your phone’s speed dialmemory to make contacting friends and family as easy aspressing a button or two. With this feature, you can dial speeddial entries using one keypress for locations 1-9 or twokeypresses for locations 10-99.
To use One-Touch Dialing for speed dial locations 1-9:
� Press and hold the appropriate key for approximately twoseconds. The display confirms that the number has beendialed when it shows “Calling... .”
To use Two-Touch Dialing for speed dial locations 10-99:
1. Press the first digit.
2. Press and hold the second digit for approximately twoseconds. The display confirms that the number has beendialed when it shows “Calling... .”
Note : Speed dialing is not available when you are roaming; when you areroaming off the Sprint National Network, you must always dial using 11digits (1 + area code + number).
Section 2A: Your Phone – The Basics 35
Entering Text
Selecting a Character Input ModeYour phone provides convenient ways to enter words, letters,punctuation, and numbers whenever you are prompted toenter text (for example, when adding a Contacts entry orwhen using Sprint Mail and SMS Text Messaging).
To change the character input mode:
1. When you display a screen where you can enter text,press Mode (right softkey) to change the character inputmode.
2. Select one of the following options:
� Abc to cycle through the alpha characters associatedwith the letters on the keypad (see page 38).
� T9Word to enter text using a predictive text enteringsystem that reduces the amount of keys that need tobe pressed while entering a word (see page 36).
� 123 to enter numbers by pressing the numbers onthe keypad (see page 38).
� Symbols to enter symbols (see page 38).
� Smileysto enter “emoticons”(see page 38).
� Preset Messages to enter preprogrammed messages (see page 39).
� Preset Suffix to enter preset suffix such ashttp://www., https://www., www., .com, .net , .org,.edu, .wap, //, ","", (), {}, [], <>, and << >>.
Tip: When entering text, press the * (Shift) key to change lettercapitalization (Abc > ABC > abc).
Phone Basics
36 Section 2A: Your Phone – The Basics
Entering Characters Using T9 Text InputT9 Text Input lets you enter text in your phone by pressingkeys just once per letter. (To select the T9 Word mode whenentering text, see “Selecting a Character Input Mode”on page 35.)
T9 Text Input analyzes the letters you enter using an intuitiveword database and creates a suitable word. (The word maychange as you type.)
To enter a word using T9 Text Input:
1. Select the T9 Word character input mode. (See “Selectinga Character Input Mode”on page 35.)
2. Press the corresponding keys once for each letter of theword. (For example, to enter the word “Bill,”press
.) (If you make a mistake, press toerase a single character. Press and hold to delete anentire entry.) If the word you want is not displayed afteryou have entered all the letters, press to scrollthrough additional word selections.
3. To accept a word and insert a space, press .

Section 2A: Your Phone – The Basics 37
Adding a Word to the T9 Database
If a word you want to enter is not displayed as an option whenyou are using T9 Text Input, you can add it to the database.
To add a word to the T9 Text Input database:
1. Select the Abc character input mode. (See “Selecting aCharacter Input Mode”on page 35.)
2. Enter the word using multi-tap text entry. (See “EnteringCharacters by Tapping the Keypad”below.)
3. Select Add My Word > Save. The word will appear as anoption the next time you scroll through options duringT9 Text Input.
For more information about T9 Text Input, visit the Tegic Website at www.T9.com.
Entering Characters by Tapping the KeypadTo enter characters by tapping the keypad:
1. Select the Abc Mode. (See “Selecting a Character InputMode”on page 35.)
2. Press the corresponding keys repeatedly until the desiredletter appears. (For example, to enter the word “Bill,”press twice, three times, three times, and
three times again.) (If you make a mistake, pressto erase a single character. Press and hold to
delete an entire entry.)
By default, the first letter of an entry is capitalized and thefollowing letters are lowercased. After a character is entered,the cursor automatically advances to the next space after twoseconds or when you enter a character on a different key.
Phone Basics

38 Section 2A: Your Phone – The Basics
Characters scroll in the following order:
. , @ 1' ? ! * # /
A B C 2
D E F 3
G H I 4
J K L 5
M N O 6
P Q R S 7
T U V 8
W X Y Z 9
0
SPACE
SHIFT
Entering Numbers, Symbols, Smileys, PresetMessages and Preset Suffix
To enter numbers:
� Select the 123 mode and press the appropriate key. (See “Selecting a Character Input Mode”on page 35.)
To enter symbols:
� Select the Symbols mode. (See “Selecting a CharacterInput Mode”on page 35.) To enter a symbol, press theappropriate key indicated on the display.
To enter “emoticons”(smileys):
� Select the Smileys mode and press the appropriate key.(See “Selecting a Character Input Mode”on page 35.)

Section 2A: Your Phone – The Basics 39
To enter presetmessages:
1. Select the Preset Messages mode. (See “Selecting aCharacter Input Mode”on page 35.)
2. Scroll to the desired preprogrammed message and press .
To enter preset suffix:
1. Select Send Message > Text Message.
2. In message input mode, press Mode (right softkey),select Preset Suffix, and press .
Note: Preset messages make composing text messages even easier byallowing you to enter preset messages, such as “Meet me at,”“Let's getlunch,”or a customized message of your own. (For more information onpreset messages, please see “Managing Preset Messages”on page 52.)
Phone Basics

40 Section 2B: Controlling Your Phone’s Settings
Section 2B
Controlling Your Phone’s Settings
In This Section
� Sound Settings (page 41)
� Display Settings (page 44)
� Location Settings (page 49)
� Messaging Settings (page 50)
� Airplane Mode (page 54)
� TTY Use With Sprint Service (page 55)
� Phone Setup Options (page 57)
Using the menu options available on your phone, you cancustomize your phone to sound, look, and operate just theway you want it to. This section describes how you canchange your phone’s settings to best suit your needs. Take afew moments to review these options and to adjust or addsettings that are right for you.

Section 2B: Controlling Your Phone’s Settings 41
Sound Settings
Ringer TypesRinger types help you identify incoming calls and messages.You can assign ringer types to individual Contacts entries,types of calls, and types of messages. You can select RingerTypes from Single Tones, Ring Tones, My Content, and VoiceMemo.
Selecting Ringer Types for Voice Calls
Your phone provides a variety of ringer options that allow youto customize your ring and volume settings. These optionsallow you to identify incoming calls by the ring.
To select a ringer type for voice calls:
1. Press Menu > Settings > Sounds > Ringer Type > Voice Calls.
2. Select Caller ID or No Caller ID. (The list ofpreprogrammed ringers is displayed.)
3. Use your navigation key to scroll through the availableringers. A sample ringer will sound as you highlight eachoption.
4. Press to assign the desired ringer.
– or –
Select My Content and scroll through the list ofdownloaded ringers. Assign the desired ringer bypressing .
Your Phone’s Settings
42 Section 2B: Controlling Your Phone’s Settings
Selecting Ringer Types for Messages
To select a ringer type for messages:
1. Select Menu > Settings > Sounds > Ringer Type > Messages.
2. Select Voicemail, Text Message or Picture Mail. (The list ofpreprogrammed ringers is displayed.)
3. Use your navigation key to scroll through the availableringers. A sample ringer will sound as you highlight eachoption.
4. Press to assign the desired ringer.
Selecting a Tone VolumeYou can adjust your phone's tone volume settings.
To select a tone volume:
1. Press Menu > Settings > Sounds > Keytones > Tone Volume.
2. Set the tone volume. (Off/Level 1 – 5)
Selecting a Tone LengthYour phone offers two options for selecting the audible tonesaccompanying a keypress. (Longer tone lengths may be betterfor tone recognition when dialing voicemail or otherautomated systems.)
To select a tone length:
1. Press Menu > Settings > Sounds > Keytones > Tone Length.
2. Select ShortTones or Long Tones and press .

Section 2B: Controlling Your Phone’s Settings 43
Adjusting the Phone’s Volume SettingsYou can adjust your phone’s volume settings to suit yourneeds and your environment.
To adjust your phone’s volume settings:
1. Press Menu > Settings > Sounds > Volume.
2. Select Ringer, Earpiece, Speakerphone, Power On/Off, orApplications.
3. Using the navigation key, choose a volume level andpress .
Tip: You can adjust the ringer volume in standby mode (or the earpiecevolume during a call) by using the volume key on the left side of yourphone.
Alert NotificationYour phone can alert you with an audible tone when youchange service areas, once a minute during a voice call, whena call has been connected, or when the signal fades or a call isdropped.
To enable or disable alert sounds:
1. Press Menu > Settings > Sounds > Alerts.
2. Select Beep Each Minute, Out of Service, Connect ,or Sig Fade/Call Drop and press .
3. Select On or Off and press .
Your Phone’s Settings
44 Section 2B: Controlling Your Phone’s Settings
Silence AllThere may be times when you need to silence your phoneentirely. The phone’s Silence All option allows you to mute allsounds without turning your phone off.
To activate Silence All:
� With the phone open, press and hold the volume key downin standby mode. (The screen will display “Silence All.”)
To deactivate Silence All:
� Press the volume key up repeatedly to select a desiredvolume level.
Display Settings
Changing the Text GreetingThe text greeting can be up to 12 characters and is displayedon your phone’s screen in standby mode. You may choose tokeep the phone’s default greeting (“Sprint”), or you may enteryour own custom greeting.
To display or change your greeting:
1. Press Menu > Settings > Display > Main Screen >Foregrounds > Greeting > Custom.
2. Use the numeric keypad to enter a new custom greeting.(See “Entering Text”on page 35.) (To erase the existinggreeting one character at a time, press . To erase theentire greeting, press and hold .)
3. Press to save your new greeting.

Section 2B: Controlling Your Phone’s Settings 45
Changing the BacklightTime LengthThe backlight setting lets you select how long the displayscreen is backlit after any keypress is made.
To change the backlight setting:
1. Press Menu > Settings > Display > Main Screen > Backlight.
2. Select a time setting and press .
Note: Long backlight settings affect the battery’s talk and standby times.
Changing the Display ScreenYour new phone offers options for what you see on the displayscreen and when in standby mode.
To change the display images:
1. Press Menu > Settings > Display > Main Screen > Screen Saver.
– or –
Press Menu > Settings > Display > Outer Screen >Screen Saver.
2. Select Preloaded or My Content.
3. Use the navigation key to select an image and press to view the image. (Once an image is displayed, you canuse your navigation key to scroll through and view theother default images.)
4. Press to assign the desired image.
Your Phone’s Settings
46 Section 2B: Controlling Your Phone’s Settings
Changing the Display Screen for Incoming CallsYou can set the downloaded image (screen saver) to be shown onthe Incoming Calls display.
To set the incoming calls display:
1. Press Menu > Settings > Display > Main Screen > IncomingCalls.
2. Select Caller ID or No Caller ID.
3. Select Preloaded or My Content.
4. Use the navigation key to highlight your selection andpress to view the image. (Once an image isdisplayed, you can use your navigation key to scrollthrough and view the other default images.)
5. Press to assign the desired image.
Changing the Phone’s Menu StyleYour phone allows you to choose how the top menu appearson your display screen.
To select the display’s menu style:
1. Press Menu > Settings > Display > Main Screen > MenuStyles.
2. Select Grid to view each main menu item as an animatedsingle-screen icon or List to view the main menu as a list,and press .
Section 2B: Controlling Your Phone’s Settings 47
Changing the Theme ColorYou can customize your phone’s display appearance byselecting a color scheme to reflect your personality.
To change the display’s theme color:
1. Press Menu > Settings > Display > Main Screen > Skins.
2. Select Blue, Glacial, Yellow, or Teal Blue and press .
Changing the Clock DisplayChoose whether you want your phone’s clock to be displayedin analog mode, digital mode, or with time and date.
To change the clock’s appearance on the standby screen:
1. Press Menu > Settings > Display > Main Screen >Foregrounds > Clock/Calendar.
– or –
Press Menu > Settings > Display > Outer Screen > Clock.
2. If you selected Main Screen, select Normal Clock, AnalogClock, Digital Clock, Dual Clock, or Calendar. If youselected Outer Screen, select Clock & Date, or Clock Only.
3. Press to apply the clock display setting.
Your Phone’s Settings
48 Section 2B: Controlling Your Phone’s Settings
Changing the Text Input FontThis setting allows you to adjust the display appearance whenentering text (for example, when using the notepad).
To change the text input font:
1. Press Menu > Settings > Display > Font Size.
2. Select Messaging, Browser, or Notepad.
3. Select a font size and press .
Changing the Keypad LightTime LengthThe keypad light setting lets you select how long the keypad isbacklit after any keypress is made.
To change the keypad light setting:
1. Press Menu > Settings > Display > Keypad Light.
2. Select Always Off, 8 seconds, 15 seconds, or 30 secondsand press .
Changing the Status Light ModeThis feature shows the status of your phone by blinking the light.
To change the status light mode:
1. Press Menu > Settings > Display > Status Light.
3. Select On or Off and press .
Section 2B: Controlling Your Phone’s Settings 49
Display LanguageYou can choose to display your phone’s onscreen menus inEnglish or in Spanish.
To assign a language for the phone’s display:
1. Press Menu > Settings > Display > Language.
2. Select English or Español and press .
Location Settings
Your phone is equipped with a Location feature for use inconnection with location-based services that may be availablein the future.
The Location feature allows the network to detect yourposition. Turning Location off will hide your location fromeveryone except 911.
Note: Turning Location on will allow the network to detect your positionusing GPS technology, making some Sprint applications and services easierto use. Turning Location off will disable the GPS location function for allpurposes except 911, but will not hide your general location based on thecell site serving your call. No application or service may use your locationwithout your request or permission. GPS-enhanced 911 is not available in allareas.
To enable your phone’s Location feature:
1. Press Menu > Settings > More... > Location. (The Location disclaimer is displayed.)
2. Read the disclaimer and press .
3. Select On or Off and press .
Your Phone’s Settings

50 Section 2B: Controlling Your Phone’s Settings
When the Location feature is on, your phone’s standby screen
will display the icon. When Location is turned off, the
icon will be displayed.
Messaging Settings
Staying connected to your friends and family has never beeneasier. With your phone’s advanced messaging capabilities,you can send and receive many different kinds of textmessages without placing a voice call. (For more information,see “Using SMS Text Messaging”on page 119.)
Your phone’s messaging settings make text messaging evenfaster and easier by letting you decide how you would like tobe notified of new messages, create a signature with eachsent message, and create your own preset messages, to namejust a few.
Displaying Pop-up Messages
When you receive a text message, your phone notifies you bydisplaying an icon on your display screen. You can also chooseto be notified with a larger pop-up message on your displayscreen. (When MSG & Icon is enabled, a larger pop-up messageas well as an icon will be displayed.)
To display pop-up messages:
1. Select Menu > Settings > Messaging > Notification.
2. Select MSG & Icon or Icon Only and press .

Section 2B: Controlling Your Phone’s Settings 51
Setting Message Reminders
To hear a recurring alert when you receive a new message:
1. Press Menu > Settings > Messaging > Message Reminder.
2. Select On or Off.
Callback Number
1. Press Menu > Settings > Messaging > Callback Number.
2. Select None, My Phone Number, or Other and press .
(If you select Other, enter a number and press .)
Deleting Old Messages
You can delete messages that you’ve already read wheneveryou like, or you can have your phone delete themautomatically for you.
To automatically delete read messages:
1. Press Menu > Settings > Messaging > Auto-Delete.
2. Select On or Off and press .
Delivery Receipt
With this feature, you can be notified if a message you havesent has been received.
To enable delivery receipts:
1. Press Menu > Settings > Messaging > Delivery Receipt.
2. Select On or Off and press .
Your Phone’s Settings
52 Section 2B: Controlling Your Phone’s Settings
Adding a Customized Signature
Each message you send can have a customized signature toreflect your personality.
To add a customized signature to each sent message:
1. Press Menu > Settings > Messaging > Signature > Custom.(If you do not wish to attach a signature to your outgoingmessages, select None.)
2. Enter your signature and press . (See “Entering Text”on page 35.)
Managing Preset Messages
Your phone is loaded with 20 preset messages to help makesending text messages faster and easier. These messages, suchas “Where are you?,”“Let's get lunch,”and “Meet me at,”can becustomized or deleted to suit your needs. You can even add yourown preset messages to the list.
To edit or delete a preset message:
1. Press Menu > Settings > Messaging > Preset Messages.(The list of preset messages is displayed.)
2. To edit or delete a preset message, highlight it and press .
3. Select Editand press , edit the selected message (see
“Entering Text”on page 35), and press .
– or –
Select Delete and press , and then select Yes to deletethe selected message. (Select Noto cancel the deletion.)
Note: Default preset messages cannot be deleted.

Section 2B: Controlling Your Phone’s Settings 53
To add a new preset message:
1. Press Menu > Settings > Messaging > Preset Messages.(The list of preset messages is displayed.)
2. To add a new preset message, select <Add New>.
3. Enter your message (see “Entering Text”on page 35),and press . (Your new message will be added to thebeginning of the list.)
Note:You may also add or edit preset messages in the “My Online Tools”area at www.sprint.com.
SMS Voice Options
Your phone offers several options for organizing andaccessing your SMS Voice messages.
1. Press Menu > Settings > Messaging > VoiceSMS Options.
2. Select Speakerphone, or From Name and press .
(If you select Speakerphone, select On or Off and press
to save your setting.)
Your Phone’s Settings

54 Section 2B: Controlling Your Phone’s Settings
Airplane Mode
Airplane Mode allows you to use many of your phone’sfeatures, such as Games, Notepad, and Voice Memos, whenyou are in an airplane or in any other area where making callsor receiving calls or data is prohibited. When your phone is inAirplane Mode, it cannot send or receive any calls or accessonline information.
To set your phone to Airplane Mode:
1. Press Menu > Settings > More... > Airplane Mode. (TheAirplane Mode disclaimer is displayed.)
2. Read the disclaimer and press .
3. Select On, Off, or On Power Up and press .
While in Airplane Mode, your phone’s standby screen willdisplay “Phone Off.”
Note: If Airplane Mode is set to On, this mode is automatically deactivatedwhen you power off or reset the phone.
When entering Airplane Mode, Bluetooth power isautomatically turned Off.
Section 2B: Controlling Your Phone’s Settings 55
TTY Use With Sprint Service
A TTY (also known as a TDD or TextTelephone) is atelecommunications device that allows people who are deaf, hard of hearing, or who have speech or languagedisabilities, to communicate by telephone.
Your phone is compatible with select TTY devices. Please checkwith the manufacturer of your TTY device to ensure that itsupports digital wireless transmission. Your phone and TTYdevice will connect via a special cable that plugs into yourphone’s headset jack. If this cable was not provided with yourTTY device, contact your TTY device manufacturer to purchasethe connector cable.
When establishing your Sprint Service, please call SprintCustomer Service via the state Telecommunications RelayService (TRS) by first dialing . Then provide thestate TRS with this number: 866-727-4889.
Your Phone’s Settings

56 Section 2B: Controlling Your Phone’s Settings
To turn TTY Mode on or off:
1. Press Menu > Settings > More... > Accessibility > TTY. (An informational message is displayed.)
2. Press .
3. Select On and press to turn TTY mode on.
– or –
Select Off and press to turn TTY mode off.
Note: In TTY Mode, your phone will display the TTY access icon when TTYdevices are connected to the headset jack.
Note: If TTY Mode is enabled, the audio quality of non-TTY devicesconnected to the headset jack may be impaired.
WARNING: 911 Emergency CallingSprint recommends thatTTY users make emergency calls by other means,including Telecommunications Relay Services (TRS), and landlinecommunications. Wireless TTY calls to 911 may be corrupted when receivedby public safety answering points (PSAPs), rendering some communicationsunintelligible. The problem encountered appears related to TTY equipmentor software used by PSAPs. This matter has been brought to the attention ofthe FCC, and the wireless industry and PSAPs community are currentlyworking to resolve this.

Section 2B: Controlling Your Phone’s Settings 57
Phone Setup Options
Shortcuts using navigation keyYour phone offers you the option of assigning a shortcut keyto a favorite or often-used function. Pressing the navigationleft, right, up, or down in standby mode will launch yourpersonally designated shortcut.
To assign your shortcut key:
1. Press Menu > Settings > More... > Navigation Keys. (An information window is displayed.)
2. Read the information and press .
3. Select Left Navigation, Right Navigation, Up Navigation, orDown Navigation and press .
4. Using the navigation key or your keypad, select thedesired shortcut and press .
5. Press to return to standby mode.
Call Answer ModeYou can determine how to answer incoming calls on yourphone, whether only by pressing , by pressing any numberkey, or simply by opening the phone.
To set call answer mode:
1. Press Menu > Settings > More... > Call Setup > Call Answer.
2. To select an option, highlight it and press .
� Flip Open / Any Key to allow an incoming call to beanswered by opening the phone or by pressing any key.
� TALK Only to require to be pressed to answer allincoming calls.
Your Phone’s Settings
58 Section 2B: Controlling Your Phone’s Settings
Auto Answer ModeYou may set your phone to automatically pick up incomingcalls when connected to headset.
To set Auto Answer mode:
1. Press Menu > Settings > More... > Call Setup > Auto-Answer.
2. To select an option, highlight it and press .
� Off to disable Auto Answer.
� Headset to answer calls automatically when thephone is connected to a headset (sold separately).Remember, your phone will answer calls in AutoAnswer mode even if you are not present.
Abbreviated DialingThis allows you to dial a number using only five or six digits.
To set your abbreviated dialing options:
1. Press Menu > Settings > More... > Call Setup > AbbreviatedDialing.
2. Select On and enter a five- or six-digit number (forexample, area code and prefix) and press .
Contacts MatchThis allows you to turn the contacts matching feature on oroff.
To set your dialing match options:
1. Press Menu > Settings > More... > Call Setup > ContactsMatch.
2. Select On or Off and press .

Section 2C: Setting Your Phone’s Security 59
Your Phone’s Security
Section 2C
Setting Your Phone’s Security
In This Section
� Accessing the Security Menu (page 60)
� Using Your Phone’s Lock Feature (page 60)
� Using Special Numbers (page 62)
� Erasing the Contacts List (page 62)
� Restricting Your Phone (page 63)
� Erasing Private Browser Data (page 63)
� Erasing Voicetags (page 64)
� Erasing My Content (page 64)
� Resetting Favorites (page 64)
� Resetting Default Settings (page 65)
� Resetting Your Phone (page 65)
By using the security settings on your phone, you receivepeace of mind without sacrificing flexibility.This section willfamiliarize you with your phone’s security settings. Withseveral options available, you can customize your phone tomeet your personal needs.
60 Section 2C: Setting Your Phone’s Security
Accessing the Security Menu
All of your phone’s security settings are available through theSecurity menu. You must enter your lock code to view theSecurity menu.
To access the Security menu:
1. Press Menu > Settings > More... > Security.
2. Enter your lock code to display the Security menu.
Tip: If you can’t recall your lock code, try using the last four digits of your wireless phone number. If this doesn't work, call Sprint CustomerService at 1-888-211-4727.
Using Your Phone’s Lock Feature
Locking Your Phone
When your phone is locked, you can only receive incomingcalls or make calls to 911, Sprint Customer Service, or specialnumbers. (See “Using Special Numbers”on page 62.)
To lock your phone:
� From the Security menu, select Lock My Phone > LockNow. (To set your phone to lock the next time it is turnedon, select On Power Up.)
Unlocking Your PhoneTo unlock your phone:
1. From standby mode, press Unlock (right softkey).
2. Enter your lock code.
Section 2C: Setting Your Phone’s Security 61
Changing the Lock CodeTo change your lock code:
1. Press Menu > Settings > More... > Security, and then enteryour lock code. (The Security menu is displayed.)
2. Select Change Lock Code, and then enter and re-enteryour new lock code.
Calling in Lock ModeYou can place calls to 911 and to your special numbers when inlock mode. (For information on special numbers, see “UsingSpecial Numbers”on page 62.)
To place an outgoing call in lock mode:
� To call an emergency number, special number, or Sprint Customer Service, enter the phone number and press .
Using Special NumbersSpecial numbers are important numbers that you havedesignated as being “always available in lock mode” You cancall and receive calls from special numbers even if your phoneis locked.
You can save up to 10 special numbers including 911 andsprint customer service in addition to your Contacts entries.(The same number may be in both directories.)
To add or replace a special number:
1. Press Menu > Settings > More... > Security, and then enteryour lock code. (The Security menu is displayed.)
2. Select Special Numbers.
Your Phone’s Security

62 Section 2C: Setting Your Phone’s Security
3. Select a location for your entry.
4. Enter the number and press .
Note: There are no speed dial options associated with special numbers.
Erasing the Contacts List
You can quickly and easily erase all of the contents of yourContacts.
To erase all the names and phone numbers in your Contacts:
1. Press Menu > Settings > More... > Security, then enter yourlock code. (The Security menu is displayed.)
2. Select Erase/Reset > Erase Contacts.
3. If you are certain you would like to erase all of yourContacts entries, select Yes.
Restricting Your Phone
There may be occasions when you want to limit the numbersyou make or receive call. You can use the Restrict Calls settingto do just that. (The Restrict Calls setting does not apply tocalls made to 911, or calls made to Sprint Customer Service.)
To restrict your phone:
1. Press Menu > Settings > More... > Restrict and Lock, andthen enter your lock code.
2. Select RestrictVoice.
3. Select Incoming Calls or Outgoing Calls and press .

Section 2C: Setting Your Phone’s Security 63
4. Select Contacts Only, Special #'s Only, or Unlock and press .
� Contacts Only allows you to call only the entriessaved in the Contacts list.
� Special #'s Only allows you to call only the 10numbers stored in the Special Number section in theSecurity Menu.
� Unlock allows all calls to be made without anyrestrictions (default setting).
Note: “Lock Code”is displayed when your restriction is set to Contacts Onlyand you make a call to a saved number or try to edit an existing entry.
To restrict application such as Internet browser:
1. Press Menu > Settings > More... > Restrict and Lock, andthen enter your lock code.
2. Select Lock Data.
3. Select Unlock or Lock and press .
Erasing Private Browser Data
This will erase data such as cache, cookie, homepage, historyor bookmarks made when you using the Internet.
To erase private browser data:
1. Press Menu > Settings > More... > Security, and then enteryour lock code.
2. Select Erase/Reset.
3. Select Erase Private Browser Data and press .
4. Select Erase or Cancel.
Your Phone’s Security
64 Section 2C: Setting Your Phone’s Security
Erasing Voicetags
This will erase voicetags saved in your phone.
To erase voicetag data:
1. Press Menu > Settings > More... > Security, and then enteryour lock code.
2. Select Erase/Reset.
3. Select Erase Voicetags and press .
4. Select Yes or No.
Erasing My Content
This will delete all data in My Content.
To erase my content data:
1. Press Menu > Settings > More... > Security, and then enteryour lock code.
2. Select Erase/Reset.
3. Select Erase My Content and press .
4. Select Yes or No.
Resetting Favorites
This will delete all favorites set by the user.
To reset favorites:
1. Press Menu > Settings > More... > Security, and then enteryour lock code.
2. Select Erase/Reset.
3. Select Reset Favorites and press .
4. Select Yes or No.
Section 2C: Setting Your Phone’s Security 65
Resetting Default Settings
Resetting the current default settings restores all the factorydefaults, including the ringer types and display settings. TheContacts, Call History, Scheduler, and Messaging are notaffected.
To reset default settings:
1. Press Menu > Settings > More... > Security, and then enteryour lock code. (The Security menu is displayed.)
2. Select Erase/Reset > Reset All Settings. (A disclaimerappears.)
3. Read the disclaimer and press .
4. If you are certain that you would like to restore all thefactory settings, select Yes.
ResettingYour Phone
Resetting the phone resets all settings and erases all data onyour phone.
To reset phone:
1. Press Menu > Settings > More... > Security, and then enteryour lock code. (The Security menu is displayed.)
2. Select Erase/Reset > Reset Phone. (A disclaimer appears.)
3. Read the disclaimer and press .
4. If you are certain that you would like to erase all the dataand reset your settings, select Yes.
Your Phone’s Security

66 Section 2D: Controlling Your Roaming Experience
Section 2D
Controlling Your Roaming Experience
In This Section
� Understanding Roaming (page 67)
� Setting Your Phone’s Roam Mode (page 69)
� Using Call Guard (page 70)
� Using Data Roam Guard (page 71)
Roaming is the ability to make or receive calls when you’re offthe Sprint National Network.Your new digital dual-bandLX160 by LG works anywhere on the Sprint NationalNetwork and 1900 and 800 MHz digital networks where we’veimplemented roaming agreements with other carriers.
This section explains how roaming works as well as specialfeatures that let you manage your roaming experience.
Section 2D: Controlling Your Roaming Experience 67
Understanding Roaming
Recognizing the Roaming Icon on the Display Screen
Your phone’s display screen always lets you know when you’reoff the Sprint National Network. Anytime you are roaming,the phone displays the roaming icon ( ). If you are roamingon a digital system, the roaming icon will be displayed alongwith the text – Digital Roam – .
Tip: Remember, when you are using your phone off the Sprint NationalNetwork, always dial numbers using 11 digits (1 + area code + number).
Note: Unless your Sprint service plan includes roaming, you will pay ahigher per-minute rate for roaming calls.
Roaming on Other Digital Networks
When you’re roaming on other digital networks, your callquality and security will be similar to the quality you receivewhen making calls on the Sprint National Network. However,you may not be able to access certain features, depending onthe available network.
Note: If you’re on a call when you leave the Sprint National Network andenter an area where roaming is available , your call is dropped. If your call isdropped in an area where you think Sprint service is available, turn yourphone off and on again to reconnect to the Sprint National Network.
Roaming
68 Section 2D: Controlling Your Roaming Experience
Checking for Voicemail Messages While Roaming
When you are roaming off the Sprint National Network, youwill not receive on-phone notification of new voicemailmessages. Callers can still leave messages, but you will needto periodically check your voicemail for new messages if youare in a roaming service area for an extended period of time.
To check your voicemail while roaming:
1. Dial 1 + area code + your phone number.
2. When you hear your voicemail greeting, press .
3. Enter your passcode at the prompt and follow the voiceprompts.
When you return to the Sprint National Network, voicemailnotification will resume as normal.

Section 2D: Controlling Your Roaming Experience 69
SettingYour Phone’s Roam Mode
Your phone allows you to control your roaming capabilities. Byusing the Roaming menu option, you can determine whichsignals your phone accepts.
Set Mode
Choose from three different settings on your dual- band phoneto control your roaming experience.
To set your phone’s roam mode:
1. Press Menu > Settings > More... > Roaming > Set Mode.
2. To select an option, highlight it and press .
� Automatic seeks service on the Sprint NationalNetwork. When Sprint service is unavailable, thephone searches for an alternate system.
� Sprint Only allows you to access the Sprint NationalNetwork only and prevents roaming on othernetworks.
� Roaming Only forces the phone to seek a roamingsystem. The previous setting (Sprint Only orAutomatic) is restored the next time the phone isturned on.
Roaming
70 Section 2D: Controlling Your Roaming Experience
Using Call Guard
Your phone has two ways of alerting you when you areroaming off the Sprint National Network: the onscreenroaming icon and Call Guard. Call Guard makes it easy tomanage your roaming charges by requiring an extra stepbefore you can place or answer a roaming call. (This additionalstep is not required when you make or receive calls while onthe Sprint National Network.)
Note: Call Guard is turned off by default on your phone.
Note: Voice dialing and speed dialing are not available when you areroaming with Call Guard enabled.
To turn Call Guard on or off:
1. Press Menu > Settings > More... > Roaming > Call Guard.
2. Select On or Off and press .
To place roaming calls with Call Guard on:
1. From standby mode, dial 1 + area code + the seven-digitnumber and press . (You can also initiate a call fromthe Contacts, Call History, or Messaging.)
2. Select Roam Call.
To answer incoming roaming calls with Call Guard on:
1. Press . (A message will be displayed notifying youthat roaming charges will apply.)
2. Select Answer.
Note: If the Call Guard feature is set to On, you need to take extra steps tomake and receive roaming calls.
Section 2D: Controlling Your Roaming Experience 71
Using Data Roam Guard
When Data Roam Guard is enabled, you will be asked if youwant to continue using your browser or other onlineapplications when you are in a data roaming area. When DataRoam Guard is turned off, your phone will establish ormaintain a data connection in a data roaming area withoutasking you for permission.
Note: Data Guard is turned off by default on your phone.
To turn Data Roam Guard on or off:
1. Press Menu > Settings > More... > Roaming > DataRoaming.
2. Select Always Ask or Never Ask and press .
Roaming

72 Section 2E: Managing Call History
Section 2E
Managing Call History
In This Section
� Viewing History (page 73)
� Call History Options (page 74)
� Making a Call From Call History (page 75)
� Saving a Phone Number From Call History (page 75)
� Prepending a Phone Number From Call History (page 76)
� Erasing Call History (page 77)
The Call History keeps track of incoming calls, calls made from your phone, and missed calls.This section guides youthrough accessing and making the most of your CallHistory.

Section 2E: Managing Call History 73
Viewing History
You’ll find the Call History feature very helpful. It is a list of thelast 50 phone numbers (or Contacts entries) for calls youplaced, accepted, or missed. Call History makes redialing anumber fast and easy. It is continually updated as newnumbers are added to the beginning of the list and the oldestentries are removed from the bottom of the list.
Each entry contains the phone number (if it is available) andContacts entry name (if the phone number is in yourContacts). All call logs (same number and type of call) mayappear on the list.
To view a Call History entry:
1. Press Menu > Call History, and then select Missed Calls,Incoming Calls, Outgoing Calls, or Recent Calls.
2. Highlight the entry you wish to view and press .
Note: Call History records only calls that occur while the phone is turned on.If a call is received while your phone is turned off, it will not appear in thephone’s Incoming or Missed call logs.
Note: If you return a call from the voicemail menu, it will not appear in yourphone’s Outgoing call log.
Call History
74 Section 2E: Managing Call History
Call History Options
For additional information and options on a particular call,highlight a Call History entry and press .This featuredisplays the date and time of the call, the phone number (ifavailable), and the caller’s name (if the number is already inyour Contacts). By pressing , you can select from thefollowing options:
� Call to dial the number.
� Save to save the number if it is not already in your internalContacts. (See “Saving a Phone Number From Call History”on page 75.)
� Phone book Info to view the phone book info if it is alreadyin your internal Contacts.
� Send Message to send a message.
� Prepend to add numbers to the beginning of the selectednumber. (See “Prepending a Phone Number From CallHistory”on page 76.)
� Delete to delete the entry.
� Next to view the next entry.
� Prev to view the previous entry.
Tip: You can also view the next Call History entry by pressing the navigationkey right or view the previous entry by pressing the navigation key left.

Section 2E: Managing Call History 75
Making a Call From Call History
To place a call from Call History:
1. Press Menu > Call History, and then select Missed Calls,Incoming Calls, Outgoing Calls, or Recent Calls.
2. Use your navigation key to select a Call History entry andpress .
Note: You cannot make calls from Call History to entries identified as No IDor Restricted.
Saving a Phone Number From Call History
Your phone can store up to 500 Contacts entries. Contactsentries can store up to a total of five phone numbers, and eachentry’s name can contain 32 characters.
To save a phone number from Call History:
1. Use your navigation key to select a Call History entry andpress .
2. Select Save and press .
3. Select New Entry to create a new internal Contacts entryfor the number or Existing Entry to save the number to anexisting entry.
4. Use your navigation key to highlight the informationyou want to edit, and then press .
Call History
76 Section 2E: Managing Call History
5. Use the keypad to type in the new entry name and press .
– or –
Use your navigation key to scroll through your existingContacts entries, highlight a name, and press .
6. Use your navigation key to select a phone number type(Mobile, Home, Office, etc.) and press .
7. Press Done (left softkey) to save the entry.
After you have saved the number, the new Contacts entry isdisplayed. (See “Contacts Entry Options”on page 82.)
Note: You cannot save phone numbers already in your Contacts or fromcalls identified as No ID or Restricted.
Prepending a Phone Number From Call History
If you need to make a call from Call History and you happen tobe outside your local area code, you can add the appropriateprefix by prepending the number.
To prepend a phone number from Call History:
1. Select a Call History entry and press .
2. Select Prepend and press .
3. Enter the prefix and press to call the number.
– or –
Select Save and press to save the amended numberin your Contacts.

Section 2E: Managing Call History 77
Erasing Call History
To erase individual Call History entries, see “Call HistoryOptions”on page 74.
To erase Call History:
1. Press Menu > Call History > Delete Call History.
2. Select Missed Calls, Incoming Calls, Outgoing Calls, RecentCalls, or All Calls. (A confirmation dialog will appear.)
3. If you are certain you want to erase the call history,select Yes.
– or –
Select No to return to the previous menu.
Call History

78 Section 2F: Using Contacts
Section 2F
Using Contacts
In This Section
� Adding a New Contacts Entry (page 79)
� Finding Contacts Entries (page 80)
� Contacts Entry Options (page 82)
� Adding a Phone Number to a Contacts Entry (page 83)
� Editing a Contacts Entry’s Phone Number (page 84)
� Assigning Speed Dial Numbers (page 84)
� My Name Card (page 86)
� Send All Contacts (page 87)
� Editing a Contacts Entry (page 87)
� Selecting a Ringer Type for an Entry (page 87)
� Dialing Sprint Services (page 88)
� Wireless Backup (page 89)
Now that you know the basics that make it easier to stay intouch with people and information, you’re ready to exploreyour phone’s more advanced features.This section explainshow to use your phone’s Contacts list and helps you make themost of your contacts and time when you are trying toconnect with the important people in your life.

Section 2F: Using Contacts 79
Adding a New Contacts Entry
Your phone can store up to 500 Contacts entries. Contactsentries can store up to a total of five phone numbers, and eachentry’s name can contain 32 characters.
To add a new entry:
1. Press Menu > Contacts > Find/Add Entry.
2. Select <New Entry> and press .
3. Enter a name for the new entry and press . (See “Entering Text”on page 35.)
4. Scroll to [Add Number], enter the phone number, andthen press .
5. Select a label field (Mobile, Home, Office, Pager, Fax, orNone) and press .
6. Scroll down to additional fields and enter or editinformation as desired.
7. Press Done (left softkey).
Shortcut:You can also begin by entering the phone number in standbymode and selecting Save. (See “Saving a Phone Number”on page 30.)
After you have saved the number, the new Contacts entry isdisplayed. (See “Contacts Entry Options”on page 82.)
Contacts
80 Section 2F: Using Contacts
Finding Contacts Entries
There are several ways to display your Contacts entries: byname, by speed dial number, and by group. Follow the stepsoutlined in the sections below to display entries from theContacts menu.
Finding Names
To find Contacts entries by name:
1. Press Menu > Contacts > Find/Add Entry.
2. Scroll through all the entries using your navigation key.
– or –
Enter the full letter of a name or part of a name.
3. To display an entry, highlight it and press .
4. To dial the entry’s default phone number, press .
– or –
To display additional Contacts entries, press thenavigation key left or right.
Shortcut: From standby mode, press Contacts (right softkey) to display theContacts feature.
Finding Group Entries
To find entries designated as part of a group:
1. Press Menu > Contacts > Groups.
2. Scroll through the group titles using your navigation key.To display entries belonging to a group, highlight thegroup and press .

Section 2F: Using Contacts 81
3. To display an entry within the group, highlight it andpress .
4. To dial the entry’s default phone number, press .
– or –
To display additional Contacts entries, press thenavigation key left or right.
Finding Speed Dial Numbers
To find phone numbers you have stored in speed dial locations:
1. Press Menu > Contacts > Speed Dial #'s.
2. Scroll through speed dial entries using your navigationkey. Speed dial numbers are displayed in numeric order.
– or –
Enter the number of a speed dial location using yourkeypad.
3. To display an entry, highlight it and press .
4. To dial the entry’s default phone number, press .
Contacts

82 Section 2F: Using Contacts
Contacts Entry Options
To access a Contacts entry’s options, display the entry,highlight <Edit Entry>, and press . To select an option,highlight it and press .
� [Add Name] to add a new contact name to the entry.
� [Add Number] to add a phone number to the entry.(See “Adding a Phone Number to a Contacts Entry”onpage 83.)
� [Add Email] to add an email address to the entry.
� [No Group] to assign the entry to a group.
� [Default] to assign a preprogrammed or downloadedringer.
� [Memo] to add a note, street address, or otherinformation.
� [URL] to add a Web site’s URL to the entry.
� [Default] to assign an image type to the entry.
Tip: You can view the next entry by pressing the navigation key right or viewthe previous entry by pressing the navigation key left.
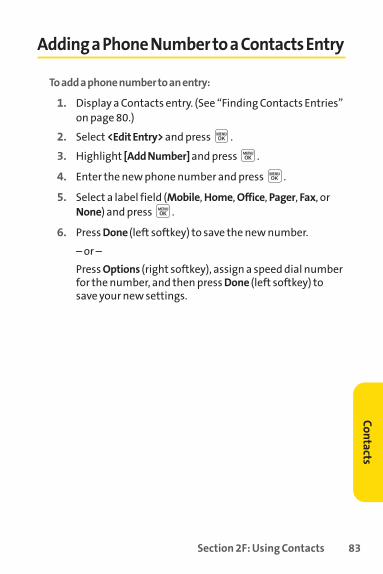
Section 2F: Using Contacts 83
Adding a Phone Number to a Contacts Entry
To add a phone number to an entry:
1. Display a Contacts entry. (See “Finding Contacts Entries”on page 80.)
2. Select <Edit Entry> and press .
3. Highlight [Add Number] and press .
4. Enter the new phone number and press .
5. Select a label field (Mobile, Home, Office, Pager, Fax, orNone) and press .
6. Press Done (left softkey) to save the new number.
– or –
Press Options (right softkey), assign a speed dial numberfor the number, and then press Done (left softkey) tosave your new settings.
Contacts

84 Section 2F: Using Contacts
Editing a Contacts Entry’s Phone Number
To edit an entry’s phone number:
1. Display a Contacts entry. (See “Finding Contacts Entries”on page 80.)
2. Select <Edit Entry> and press .
3. Highlight the number you wish to edit and press .
4. Press to clear one digit at a time, or press and holdto erase the entire number.
5. Re-enter or edit the number and press .
6. Press Done (left softkey) to save the number.
– or –
Press Options (right softkey) for additional options.When you’re finished, press Done (left softkey) to saveyour new settings.
Assigning Speed Dial Numbers
Your phone can store up to 99 phone numbers in speed diallocations. For details on how to make calls using speed dialnumbers, see “Using Speed Dialing”on page 34.
Speed dial numbers can be assigned when you add a newContacts entry, when you add a new phone number to anexisting entry, or when you edit an existing number.
To assign a speed dial number to a new phone number:
1. Add a phone number to a new or to an existing Contactsentry. (See “Adding a New Contacts Entry”on page 79 or“Adding a Phone Number to a Contacts Entry”on page 83.)
2. Press Options (right softkey).

Section 2F: Using Contacts 85
3. Highlight Set Speed Dial and press .
4. Select an available speed dial location and press . (A confirmation will be displayed.)
5. Scroll to Set Speed Dial and press . (A confirmation will be displayed.)
6. Press Done(left softkey) to save the new speed dial number.
To assign a speed dial number to an existing phone number:
1. Display a Contacts entry. (See “Finding Contacts Entries”on page 80.)
2. Select <Edit Entry> and press .
3. Highlight the phone number for which you wish to assigna speed dial number, and press Options (right softkey).
4. Highlight Set Speed Dial and press .
5. Select an available speed dial location and press .
6. Select Set Speed Dial and press . (A confirmation willbe displayed.)
7. Press Done(left softkey) to save the new speed dial number.
Note: If you attempt to assign an already in-use speed dial location to a newphone number, a dialog will appear asking if you wish to replace the existingspeed dial assignment. Select Yes to assign the location to the new phonenumber and delete the previous speed dial assignment.
Contacts

86 Section 2F: Using Contacts
My Name Card
You can view your phone number, edit your personal data, andsend a vCard via Bluetooth using the My Name Card feature.
To access to My Name Card:
� Press Menu > Contacts > My Name Card.
To edit My Name Card:
1. Press Menu > Contacts > My Name Card.
2. Select <Edit Entry> and press .
3. Enter a name for the new entry and press .
4. Select [Add Number], enter the phone number, and thenpress .
5. Select a label field (Mobile, Home, Office, Pager, Fax, orNone) and press .
6. Scroll down to additional fields and enter or editinformation as desired.
7. Press Done (left softkey).
To send Contacts via Bluetooth:
� Press Menu > Contacts > My Name Card.
� Send Name Card via Bluetooth: After searching foravailable Bluetooth devices, transmits My NameCard to the selected device.
� Exchange Name Card via Bluetooth: After searchingfor available Bluetooth devices, transmits My NameCard to the selected devices and requests thedevice’s name card.

Section 2F: Using Contacts 87
Send All Contacts
After searching for available Bluetooth devices, this featureallows you to send all entries saved in the Contacts list to theselected device.
To access to Send All Contacts:
� Press Menu > Contacts > Send All Contacts.
Editing a Contacts Entry
To make changes to an entry:
1. Display a Contacts entry.
2. Select <Edit Entry> and press .
3. Highlight the part of the entry you wish to edit (Name,Group, Ringer, etc.) and press .
4. Add or edit the desired information and press .
5. Press Done (left softkey) to save your changes.
Selecting a Ringer Type for an Entry
You can assign a ringer type to a Contacts entry so you can identifythe caller by the ringer type. (See “Ringer Types”on page 41.)
To select a ringer type for an entry:
1. Display a Contacts entry.
2. Select <Edit Entry> and press .
3. Highlight the current ringer type ( ) and press todisplay the Ringer Type menu.
4. Choose Single Tones orRing Tonesfor preprogrammedringers or My Content/Voice Memofor downloaded ringers.
5. Use your navigation key to scroll through availableringers. (When you highlight a ringer type, a sampleringer will sound.)
Contacts

88 Section 2F: Using Contacts
6. Highlight a ringer and press .
7. Press Done (left softkey) to save the new ringer type.
– or –
1. Display a Contacts entry and press .
2. Select <Edit Entry > and press .
3. Highlight the current ringer type ( ) and press thenavigation key right or left to display available ringertypes. As each ringer is displayed, you will hear a previewof that ringer’s sound.
4. When you’ve selected a ringer, press Done (left softkey)to save the new ringer type.
Dialing Sprint Services
Your Contacts list is preprogrammed with contact numbersfor various Sprint services.
To dial a service from your Contacts:
1. Press Menu > Contacts > Services.
2. Select Customer Service, Dir Assistance, Account Info,Sprint Operator, Voice Command, Community Info, NonEmergency, Traffic Info, Repair Service, TTY Relay Service,or One Call Service.
To dial a service from standby mode using your keypad:
1. Dial the appropriate service number:
� Customer Service –
� Sprint 411 –
� Account Info –
� Sprint Operator –
� Voice Command –

Section 2F: Using Contacts 89
� Community Info –
� Non Emergency –
� Traffic Info –
� Repair Service –
� TTY Relay Service –
� One Call Service –
2. Press to place the call.
Wireless Backup
Wireless Backup allows you to back up all of your Contacts tothe Sprint Web site and restore them if your phone is lost,stolen, damaged, or replaced.
To subscribe to the Wireless Backup service from your Contacts:
1. Press Menu > Contacts > Wireless Backup.
2. Select <Subscribe> and press .
Subscribe–Launches the subscription process. If you arealready subscribed to wireless backup, Unsubscribe will bedisplayed.
To subscribe to the wireless backup service, you will need topurchase a license to use the wireless backup service via theSprint vending machine, accessed through the WAP browseron your phone. The license expires after a set period of timeand must be renewed regularly. As part of the initialsubscription process, a random wireless backup password isgenerated. The randomly-generated password will be sent toyour phone as an SMS text message.
Learn More–Displays a series of information screens about theWireless Backup service.
Contacts

90 Section 2G: Using the Phone’s Calendar and Tools
Section 2G
Using the Phone’s Calendar and Tools
In This Section
� Using Your Phone’s Calendar (page 91)
� Using Your Phone’s Alarm Clock (page 95)
� Using Your Phone’s Notepad (page 96)
� Using Your Phone’s Tools (page 96)
Your phone is equipped with several personal informationmanagement features that help you manage your busy lifestyle.This section shows you how to use these features to turn yourphone into a time management planner that helps you keep upwith your contacts, schedules, and commitments. It takesproductivity to a whole new level.

Section 2G: Using the Phone’s Calendar and Tools 91
Using Your Phone’s Calendar
Adding an Event to the CalendarYour Calendar helps organize your time and reminds you ofimportant events.
To add an event:
1. Press Menu > Tools > Scheduler.
2. Using your navigation key, highlight the day to whichyou would like to add an event and press Add (leftsoftkey).
Tip: Press the navigation key up or down to scroll by week through the Calendar.
3. Select a time for the event by highlighting the time fieldand pressing .
� Using your keypad or navigation key, set the startand end time for the event and press .
4. Select a title for the event by highlighting [Content] and pressing .
� Enter the event title and press . (See “EnteringText”on page 35.)
5. Select a repeating status for the event by highlightingthe repeat field and pressing .
� Highlight None, Daily, Mon - Fri, Weekly, Monthly, orYearly and press .
6. Select an alarm time for the event by highlighting thealarm field and pressing .
� Highlight None, On time, 5 minutes, 10 minutes, 1 hour, 1 day, or 2 days and press .
Calendar & Tools
92 Section 2G: Using the Phone’s Calendar and Tools
7. Select a ringer type for the alarm by highlighting theringer field and pressing .
� To select a ringer menu, select Options (right softkey)> Single Tones/Ring Tones for preprogrammed ringersor Options (right softkey) > My Content fordownloaded ringers, or Options (right softkey) >Voice Memo.
8. Press Save (left softkey) to save the event.
Event AlertsThere are several ways your phone alerts you to scheduledevents:
� By playing the assigned ringer type.
� By illuminating the backlight.
� By flashing the LED.
Event Alert MenuWhen your phone is turned on and you have an event alarmscheduled, your phone alerts you and displays the eventsummary. To silence the alarm and reset the schedule, press .
To view additional options, press the appropriate softkey.
� Detail (right softkey) displays the event detail screen.
� Snooze (left softkey) silences the alarm and schedules it toreplay again in five minutes.
Section 2G: Using the Phone’s Calendar and Tools 93
Viewing EventsTo view your scheduled events:
1. Press Menu > Tools > Scheduler.
2. Using your navigation key, highlight the day for whichyou would like to view events and press . (If you haveevents scheduled for the selected day, they will be listedin chronological order.)
Tip: In the calendar view, days with events scheduled are underlined.
3. To display the details of an event listed in the schedule,highlight it and press .
Going to Today’s Calendar MenuTo go to the Calendar menu for today’s date:
� Press Menu >Tools > Scheduler > Options (right softkey) >Go to Today.
Erasing a Day’s EventsTo erase a day’s scheduled events:
1. Press Menu > Tools > Scheduler.
2. Using your navigation key, highlight the day for whichyou would like to erase events and press .
Tip: In the calendar view, days with events scheduled are underlined.
3. Press Options (right softkey) > Delete All. (An alert willappear notifying you of the number of events to beerased.)
4. Select Yes or No.
Calendar & Tools
94 Section 2G: Using the Phone’s Calendar and Tools
Note: If the day for which you are erasing events contains a repeating event,you will receive the following prompt: “This is a recurring event.”SelectDelete this event only to erase a single occurrence, Delete all events to eraseall occurrences of the event, or Cancel to cancel the deletion of the repeatingevent.
Purging Events
To delete events scheduled before a specific time and date:
1. Press Menu > Tools > Scheduler > Options (right softkey) >Delete Old.
2. Select the option to erase events older than One day,One week, One month, or One year. (A dialog will bedisplayed to inform you how many old events have beenerased.)
Purging All Events
To delete all scheduled events:
1. Press Menu > Tools > Scheduler > Options (right softkey) >Delete All. (A dialog will be displayed informing you howmany events will be erased.)
2. Select Yes to erase all events or No to return to thecalendar view.

Section 2G: Using the Phone’s Calendar and Tools 95
Using Your Phone’s Alarm Clock
Your phone comes with a built-in alarm clock with multiple alarm capabilities.
To use the alarm clock:
1. Press Menu > Tools > Alarm Clock.
2. Select Alarm 1, Alarm 2, Alarm 3, Quick Alarm, or Reset All.
3. Turn the alarm on or off by highlighting the activationfield and pressing .
� Select On or Off and press .
4. Select a time for the alarm by highlighting the time fieldand pressing .
� Using your keypad or navigation key, set the alarmtime and press .
5. Select a repeating status for the alarm by highlightingthe repeat field and pressing .
� Highlight Once, Daily, Mon - Fri, or Weekends andpress .
6. Select a ringer type for the alarm by highlighting theringer field and pressing .
� To select a ringer menu, select Options (right softkey)> Single Tones (or Options [right softkey] > Ring Tones)for preprogrammed ringers, or Options (rightsoftkey) > My Content for downloaded ringers, orOptions (right softkey) > Voice Memo, and press .
7. Press Save (left softkey) to save your alarm settings.
Calendar & Tools
96 Section 2G: Using the Phone’s Calendar and Tools
Using Your Phone’s Notepad
Your phone comes with a notepad you can use to composeand store reminders and notes to help keep you organized.
To compose a note:
1. Press Menu > Tools > Notepad > <Add New>.
2. Type your note using the numeric keypad and press .(See “Entering Text”on page 35.)
To read a saved note:
1. Press Menu > Tools > Notepad.
2. Highlight a note and press .
To delete saved notes:
1. Press Menu > Tools > Notepad.
2. Highlight a note and press .
3. Press Delete (right softkey).
4. Select Yes and press .
Using Your Phone’s Tools
In addition to helping you be more efficient and organized,your phone offers useful and entertaining tools.
Using Ez TipsTo quickly and easily calculate tip amounts:
1. Press Menu > Tools > Ez Tip Calculator.

Section 2G: Using the Phone’s Calendar and Tools 97
2. Use your keypad and navigation key to enter the billamount and desired tip percentage. (The correct tip willbe calculated instantly.)
3. If you’re splitting the check, select Split and enter thenumber of people in your party. (An equal split of the billwill be calculated and displayed.)
Using the CalculatorYour phone comes with a built-in calculator.
To use the calculator:
1. Press Menu > Tools > Calculator.
2. Enter numbers using your keypad.
� Press to enter decimal points.
� Press to change the numeric value from positiveto negative.
� Press Clear (left softkey) to clear all numbers.
3. Press for the total.
World ClockTo view the time in over 52 different locations:
1. Press Menu > Tools > World Clock.
2. Press Cities (right softkey) to select a city.
– or –
Press the navigation key left or right to scroll throughdifferent time zones.
Calendar & Tools
98 Section 2H: Using Your Phone’s Voice Services
Section 2H
Using Your Phone’s Voice Services
In This Section
� Managing Voice Memos (page 99)
� Using Voice-Activated Dialing (page 101)
Your phone’s Voice Services let you place calls using your voice,store voice reminders, and record memos right on your phone.This section includes easy-to-follow instructions on usingvoice-activated dialing and managing voice memos.

Section 2H: Using Your Phone’s Voice Services 99
Managing Voice Memos
You can use your phone’s Voice Services to record brief memosto remind you of important events, phone numbers, or grocerylist items.
Recording Voice MemosTo record a voice memo:
1. Press Menu > Voice Services > Voice Memo.
2. Select <Record New> and press . (The phone promptsyou to start recording after the beep.)
3. Wait for the beep and then start speaking. (As it isrecording, the phone displays a countdown timer thatshows how many seconds are left for recording.)
To end the recording of your memo:
� Press .
To record a conversation during a phone call:� During a call, select Record Voice Memo and
press . (A one-minute counter is displayed on thescreen to indicate the amount of time a single voicememo can be recorded.)
To end the recording of your conversation:
� Select Stop Voice Memo and press to end therecording prior to the countdown completion.
Note: Your phone can store a total of ten minutes of memos.
Voice Services
100 Section 2H: Using Your Phone’s Voice Services
Voice Memo OptionsTo play the voice memos you have recorded:
1. Press Menu > Voice Services > Voice Memo.
2. Select the voice memo you wish to hear and press .
� Play to play the selected voice memo.� Set As to assign the recording as a default ringer, a
voicemail alert, a message alert, or a Contacts ringer. � View Details to view the selected voice memo
information.� EditTitle to edit the selected voice memo title.� Delete to erase the selected voice memo.
3. Select Play and press .
Erasing Voice MemosTo erase all voice memos:
1. Press Menu > Voice Services > Voice Memo.
2. Select <Delete All> and press .
3. Select Yes and press to confirm that you want to erase allvoice memos.

Section 2H: Using Your Phone’s Voice Services 101
Using Voice-Activated Dialing
In addition to Sprint Voice Command (see page 155), you canuse a voice dial tag to automatically dial a phone number inyour Contacts. (A voice dial tag is a command you record anduse to place calls without using the keypad.) Your phone canstore up to 30 voice dial tags.
Programming Voice Dial TagsTo program a voice dial tag:
1. Press Menu > Voice Services > Voice Dial.
2. Select <Record New> and press .
3. Enter or highlight the entry (name) in the Contacts andpress .
Tip: If an entry has more than one number, press the navigation key rightor left to select the desired number, and then press OK.
4. After you are prompted to say the name you wish toprogram, wait for the beep and then say the name intoyour phone’s microphone.
5. Respond to the prompt by repeating the name after thebeep.
Voice Services

102 Section 2H: Using Your Phone’s Voice Services
Accessing the Voice Dial PromptTo access the Voice Dial prompt:
1. Press and hold the Talk key (or press the Voice Serviceskey on the left side of your phone) until the Voice Dialprompt appears on the screen.
2. Say the desired contact name after the audible prompt.To aid the recognition of the name, say the name in thesame intonation as it was recorded duringprogramming.
Reviewing Voice Dial TagsTo review Voice Dial tags:
1. Press Menu > Voice Services > Voice Dial.
2. Highlight the voice dial entry you want to review andpress .
3. Highlight an option and press .� Play to play the selected voice dial tag.� Re-record to rerecord the voice dial tag.� Delete to erase the voice dial tag. Select Yes to erase;
select No to cancel.
Erasing All Voice Dial TagsTo erase all Voice Dial tags:
1. Press Menu > Voice Services > Voice Dial.
2. Select <Delete All> and press .
3. Select Yes to erase all recorded voice dial tags; select Noto cancel.

Section 2I: Using Bluetooth 103
Section 2I
Using Bluetooth
In This Section
� Turning Bluetooth On and Off (page 104)
� Using the Bluetooth Settings Menu (page 105)
� Bluetooth Profiles (page 107)
� Pairing Bluetooth Devices (page 108)
Your phone features built-in Bluetooth technology, allowingyou to share information more easily than ever before.Bluetooth is a short-range communications technologythat allows you to connect wirelessly to a number ofBluetooth devices, such as headsets, hands-free car kits,and Bluetooth-enabled handhelds, PCs and wirelessphones. The Bluetooth communication range is usually upto approximately 30 feet.
This section details how to set up and make the most ofyour phone’s Bluetooth capabilities.
Using B
luetooth

104 Section 2I: Using Bluetooth
Turning Bluetooth On and Off
By default, your device’s Bluetooth feature is turned off.Turning Bluetooth on makes your phone “available”by otherin-range Bluetooth devices.
To turn Bluetooth on:
1. Press Menu > Settings > Bluetooth > On/Off.
2. Press the navigation key up or down to selectOn and press to enable Bluetooth.
To turn Bluetooth off:
1. Press Menu > Settings > Bluetooth > On/Off.
2. Press the navigation key up or down to selectOff and press to disable Bluetooth.
Bluetooth Status Indicators
The following icons show your Bluetooth connection status ata glance:
indicates Bluetooth is hidden (actual icon color isgray).
indicates Bluetooth is visible (actual icon color isblue).
indicates Bluetooth is connected with anotherBluetooth-enabled device.
Section 2I: Using Bluetooth 105
Using the Bluetooth Settings Menu
The Bluetooth settings menu allows you to set up many of thecharacteristics of your phone’s Bluetooth service, including:
� Entering or changing the name your phone uses forBluetooth communication.
� Setting your phone’s visibility (or “discoverability”) forother Bluetooth devices.
� Displaying your phone’s Bluetooth address.
To access the Bluetooth settings menu:
1. Press Menu > Settings > Bluetooth.
2. Use the navigation key to select Visibility, Device Name,or Device Info, and press .
Tip: You can also access the Bluetooth Settings menu by pressing MENU >Bluetooth > <Settings>.
Bluetooth Settings: VisibilityThe Visibility section of the Bluetooth settings menu allowsyou to manage your phone’s availability to other Bluetoothdevices.
To configure your phone’s visibility (discoverability) to otherBluetooth devices:
1. Press Menu > Settings > Bluetooth > Visibility.
2. Select your desired visibility setting and press :
� Hidden to prevent other Bluetooth devices fromdetecting and identifying your phone.
� Visible for 3 Min to allow Bluetooth devices to detectand identify your phone for three minutes.
Using B
luetooth

106 Section 2I: Using Bluetooth
� Always Visible to allow Bluetooth devices to detectand identify your phone at any time it is withinrange.
Note: Any changes you make to your Bluetooth settings will be saved to thecurrent profile when you exit the Bluetooth settings menu.
Bluetooth Settings: Device NameThe Device Name section of the Bluetooth settings menuallows you to select a Bluetooth name for your phone. Yourphone’s Bluetooth name will appear to other in-rangeBluetooth devices, depending on your visibility settings.
To set a Bluetooth name for your phone:
1. Press Menu > Settings > Bluetooth > Device Name.
2. Press to clear the current name.
3. Use your keypad to enter a new name and press tosave and exit.
Bluetooth Settings: Device InformationTo display your phone’s Bluetooth address:
� Press Menu > Settings > Bluetooth > Device Info.
Bluetooth transfer audio functionTo use the Bluetooth transfer audio function during a call:
1. Check that a Bluetooth headset is connected to yourphone.
2. During the call, transfer the phone's sound output fromthe phone to the headset (select Transfer to BT); or fromthe headset to the phone (select Transfer to Phone).

Section 2I: Using Bluetooth 107
Bluetooth Profiles
All the Bluetooth settings you configure are stored in yourphone’s Bluetooth user profile. Different profiles can be usedfor specific Bluetooth functions.
� Headset Profile (HSP) – This profile functions as a wirelessear jack. When an incoming call is received, the ringer canbe heard through the headset and a built-in alert tone canbe heard through the phone. The call can then be receivedby pushing a button. While using the phone, you can usethe headset instead of the phone by pushing a button onthe headset, the same as inserting a jack into the phone.Increase or decrease the volume by using the volume keyon the side of the phone.
� Hands-Free Profile (HFP) – This profile functions as awireless car kit. Incoming calls ring to the hands-freeheadset or device. Calls can be received by pressing abutton on the headset or device. For dialing, fourfunctions are supported: recent call dial, voice dial, speeddial, and number dial. Increase or decrease the volume byusing the volume key on the side of the phone.
� DUN: Dial-Up Network Profile – This profile functions as awireless data cable, connecting a PC or PDA to a networkthrough your phone.
� Object Push Profile (OPP) –You can send a vCard or avCalendar in your phone to other Bluetooth-enableddevices.
� Phonebook Access Profile (PBAP) –This profile enablesexchange of Contacts information between devices. It islikely to be used between a car kit and a mobile phone toallow the car kit to display the name of the incomingcaller.
Using B
luetooth
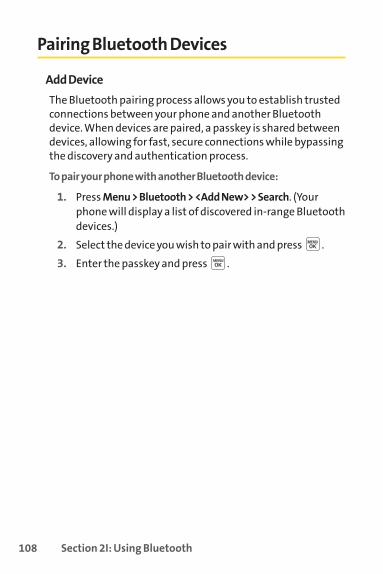
108 Section 2I: Using Bluetooth
Pairing Bluetooth Devices
Add Device
The Bluetooth pairing process allows you to establish trustedconnections between your phone and another Bluetoothdevice. When devices are paired, a passkey is shared betweendevices, allowing for fast, secure connections while bypassingthe discovery and authentication process.
To pair your phone with another Bluetooth device:
1. Press Menu > Bluetooth > <Add New> > Search. (Yourphone will display a list of discovered in-range Bluetoothdevices.)
2. Select the device you wish to pair with and press .
3. Enter the passkey and press .

Section 3
Sprint Service Features
110 Section 3A: Sprint Service Features – The Basics
Section 3A
Sprint Service Features: The Basics
In This Section
� Using Voicemail (page 111)
� Using SMS Text Messaging (page 119)
� Using SMS Voice Messaging (page 122)
� Using Caller ID (page 124)
� Responding to Call Waiting (page 125)
� Making a Three-Way Call (page 126)
� Using Call Forwarding (page 127)
Now that you’ve mastered your phone’s fundamentals, it’s time to explore the calling features that enhance yourSprint service.This section outlines your basic Sprint servicefeatures.
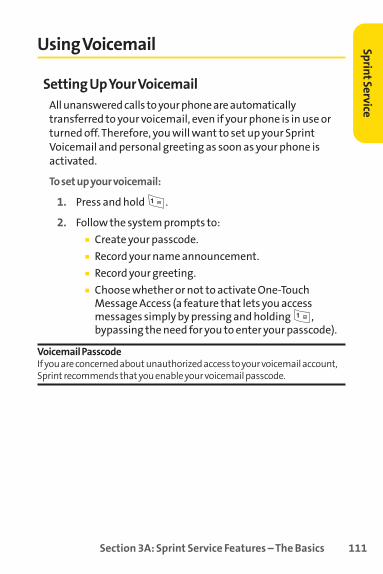
Section 3A: Sprint Service Features – The Basics 111
Using Voicemail
Setting UpYour VoicemailAll unanswered calls to your phone are automaticallytransferred to your voicemail, even if your phone is in use orturned off. Therefore, you will want to set up your SprintVoicemail and personal greeting as soon as your phone isactivated.
To set up your voicemail:
1. Press and hold .
2. Follow the system prompts to:
� Create your passcode.
� Record your name announcement.
� Record your greeting.
� Choose whether or not to activate One-TouchMessage Access (a feature that lets you accessmessages simply by pressing and holding ,bypassing the need for you to enter your passcode).
Voicemail PasscodeIf you are concerned about unauthorized access to your voicemail account,Sprint recommends that you enable your voicemail passcode.
SprintService

112 Section 3A: Sprint Service Features – The Basics
Voicemail NotificationThere are several ways your phone alerts you to a newmessage:
� By displaying a message on the screen.
� By sounding the assigned ringer type.
� By the LED blinking red.
� By displaying at the top of your screen.
New Voicemail Message AlertsWhen you receive a new voice message, your phone alerts youand prompts you to call your voicemail.
To call your voicemail:
� Press and hold .
To display your Missed Log:
� Press Detail (right softkey).
Note: When you are roaming off the Sprint National Network, you may notreceive notification of new voicemail messages. It is recommended that youperiodically check your voicemail by dialing 1 + area code + your wirelessphone number. When your voicemail answers, press (*) and enter yourpasscode. You will be charged roaming rates when accessing voicemailwhile roaming off the Sprint National Network.
Note: Your phone accepts messages even when it is turned off. However,you are only notified of new messages when your phone is turned on andyou are in a Sprint service area.
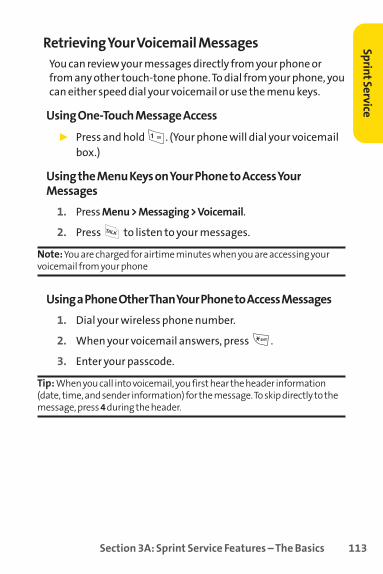
Section 3A: Sprint Service Features – The Basics 113
RetrievingYour Voicemail MessagesYou can review your messages directly from your phone orfrom any other touch-tone phone. To dial from your phone, youcan either speed dial your voicemail or use the menu keys.
Using One-Touch Message Access
� Press and hold . (Your phone will dial your voicemailbox.)
Using the Menu Keys on Your Phone to Access YourMessages
1. Press Menu > Messaging > Voicemail.
2. Press to listen to your messages.
Note: You are charged for airtime minutes when you are accessing yourvoicemail from your phone
Using a Phone Other Than Your Phone to Access Messages
1. Dial your wireless phone number.
2. When your voicemail answers, press .
3. Enter your passcode.
Tip: When you call into voicemail, you first hear the header information(date, time, and sender information) for the message. To skip directly to themessage, press 4 during the header.
SprintService

114 Section 3A: Sprint Service Features – The Basics
Voicemail Key Guide
Here’s a quick guide to your keypad functions while listeningto voicemail messages. For further details and menu options,see “Voicemail Menu Key”on page 118.
Date/Time Send Reply Advance
Replay Rewind Forward
Erase Call Back Save
Cancel Help Skip
Voicemail OptionsYour phone offers several options for organizing andaccessing your voicemail.
Using Expert Mode
Using the Expert Mode setting for your personal voicemailbox helps you navigate through the voicemail system morequickly by shortening the voice prompts you hear at eachlevel.
To turn Expert Mode on or off:
1. Press and hold to access your voicemail. (If yourvoicemail box contains any new or saved messages,press to access the main voicemail menu.)
2. Press to change your Personal Options, followingthe system prompts.
3. Press for Expert Mode.
4. Press to turn Expert Mode on or off.

Section 3A: Sprint Service Features – The Basics 115
Setting Up Group Distribution Lists
Create up to 20 separate group lists, each with up to 20customers.
1. Press and hold to access your voicemail. (If yourvoicemail box contains any new or saved messages,press to access the main voicemail menu.)
2. Press to change your Personal Options, followingthe system prompts.
3. Press for Administrative Options.
4. Press for Group Distribution Lists.
5. Follow the voice prompts to create, edit, rename, ordelete group lists.
Sprint Callback
Return a call after listening to a message withoutdisconnecting from voicemail.
� Press after listening to a message. (Once the call iscompleted, you’re returned to the voicemail mainmenu.)
Voicemail-to-Voicemail Message
Record and send a voice message to other SprintVoicemail users.
1. From the main voicemail menu, press to send amessage.
2. Follow the voice prompts to enter the phone number.
3. Follow the voice prompts to record and send your voicemessage.
SprintService

116 Section 3A: Sprint Service Features – The Basics
Voicemail-to-Voicemail Message Reply
Reply to a voice message received from any other SprintVoicemail user.
1. After listening to a voice message, press .
2. Follow the voice prompts to record and send your reply.
Voicemail-to-Voicemail Message Forwarding
Forward a voice message, except those marked “Private,”toother Sprint Voicemail users.
1. After listening to a message, press .
2. Follow the voice prompts to enter the phone number.
3. Follow the voice prompts to record your introductionand forward the voice message.
Voicemail-to-Voicemail Receipt Request
Receive confirmation that your voice message has beenlistened to when you send, forward, or reply to other Sprint users.
1. After you have recorded a message, press to indicateyou are satisfied with the message you recorded.
2. Press to mark receipt requested.
3. Press to send your voicemail message.
Section 3A: Sprint Service Features – The Basics 117
Continue Recording
When leaving a voice message, you can choose to continuerecording even after you’ve stopped.
� Before pressing to indicate that you are satisfiedwith the message you recorded, press to continuerecording.
Extended Absence Greeting
When your phone is turned off or you are off the SprintNational Network for an extended period, this greeting can beplayed instead of your normal personal greeting.
1. From the main voicemail menu, press for PersonalOptions.
2. Press for Greetings.
3. Press to record an Extended Absence Greeting.
Clearing the Message IconYour phone may temporarily continue to display the messageicon after you have checked your voice and text messages.
To clear the icon from the display screen:
1. Press Menu > Messaging > Voicemail > Clear Icon.
2. Select Yes or No and press .
SprintService
118 Section 3A: Sprint Service Features – The Basics
Voicemail Menu KeyFollowing the prompts on the voicemail system, you can useyour keypad to navigate through the voicemail menu. Thefollowing list outlines your phone’s voicemail menu structure.
Listen
Envelope Information
Reply
Advance 8 Seconds
Replay
Rewind
Forward Message
Erase
Callback
Save
Options
Send a Message
Personal Options
Notification Options
Phone Notification
Numeric Paging to a Phone
Return to Personal Options Menu
Administrative Options
Skip Passcode
Autoplay
Message Date & Time On/Off
Change Passcode
Group Distribution List
Return to Personal Options Menu
Section 3A: Sprint Service Features – The Basics 119
Greetings
Personal Greetings
Name Announcement
Extended Absence Greeting
Return to Personal Options Menu
Expert Mode (On/Off)
Place a Call
Disconnect
Using SMS Text Messaging
With SMS Text Messaging, you can use other people’s wirelessphone numbers to send instant text messages from yourphone to their messaging-ready phones – and they can sendmessages to you. When you receive a new message, it willautomatically be displayed on your phone’s screen.
In addition, SMS Text Messaging includes a variety of presetmessages, such as “I’m running late, I’m on my way,”that makecomposing messages fast and easy. You can also customizeyour own preset messages (up to 100 characters) from yourphone or at www.sprint.com.
Composing SMS Text MessagesTo compose an SMS Text message using the TEXT key:
1. Press the key.
2. Contacts are displayed. (If there are no contacts, make anew entry and save it.)
3. Select the desired contact and press .
4. Compose a text message.
SprintService
120 Section 3A: Sprint Service Features – The Basics
To compose an SMS Text message:
1. Press Menu > Messaging > Send Message > Text Messageor just press the key in standby mode and select theentry method you prefer:
� From Contacts to select a recipient from your internalContacts. (Qualifying Contacts entries must contain awireless phone number or an email address.)
� Mobile to use the keypad to enter the wireless phonenumber of the person to whom you wish to send amessage.
� Email to enter the recipient’s email address.� Recent List to select a recipient from your recent
messages.
2. Press to save the recipient. (To include additionalrecipients, input a new phone number or email address.You may include up to 25 recipients per message.)
3. Press Next (left softkey ) when you have finishedselecting or entering recipients, and compose a messageor use the preset messages or smileys (emoticons) and press .
� To type a message, use your keypad to enter yourmessage. Use the right softkey to select a characterinput mode. (See “Entering Text”on page 35.)
� To use a preset message or a smiley, press the rightsoftkey, select Preset Messages or Smileys, and thenhighlight your desired message or emoticon andpress .
Note: For more information about using and managing preset messages,see “Managing Preset Messages”on page 52.
4. Select Priority and press your navigation key right or leftto set the message priority (Normal or Urgent).

Section 3A: Sprint Service Features – The Basics 121
5. If you wish to change your callback number, scroll to it
and press , select None, My Phone Number, or Other,
and press . (If you select Other, enter the desired
number and press .)
6. Press Send (left softkey ) to send the message.
Accessing SMS Text MessagesTo read an SMS Text message:
� When you receive a text message, it will automaticallyappear on your phone’s main display screen. Use yournavigation key to scroll down and view the entiremessage.
To reply to an SMS Text message:
1. While the message is open, press Reply (left softkey).
2. Compose your reply or use the preset messages or icons.� To type a message, use your keypad to enter your
message. Use the right softkey to select a characterinput mode. (See “Entering Text”on page 35.)
� To use a preset message or a smiley, press the rightsoftkey, select Preset Messages or Smileys, highlightyour desired message or emoticon, and press .
3. Select Priority and press your navigation key right or leftto set the message priority (Normal or Urgent).
4. If you wish to change your callback number, scroll to itand press , select None, My Phone Number, or Other,and press . (If you select Other, enter the desirednumber and press .)
5. Press Send (left softkey ) to send the message.
SprintService

122 Section 3A: Sprint Service Features – The Basics
Using Preset MessagesPreset messages make sending text messages to your friends,family, and coworkers easier than ever.
To add or edit preset messages:
1. Press Menu > Settings > Messaging > Preset Messages > <Add New>.
– or –
Select a preset message you wish to edit and press ,select Edit, Send Message, Delete or Delete all.
2. Enter your new message or changes and press . (See “Entering Text”on page 35.)
Note: You may also add or edit preset messages in the “My Online Tools”area at www.sprint.com .
Using SMS Voice Messaging
In addition to sending and receiving SMS Text messages, yourphone is enabled with SMS Voice Messaging. With SMS VoiceMessaging, you can quickly and easily send a voice message toother SMS-enabled phones or working email addresseswithout making a phone call. Just record a message and sendit directly to the recipient’s phone messaging inbox.
Playing an SMS Voice MessageTo play an SMS Voice message from the main menu:
1. Press Menu > Messaging > VoiceSMS. ( indicates anunplayed message.)
2. Select the message you want to play.
3. Press to play the message. (To display the messageoptions, press Options [right softkey].)

Section 3A: Sprint Service Features – The Basics 123
Composing SMS Voice MessagesTo compose an SMS Voice message:
1. Press Menu > Messaging > Send Message > VoiceSMS.
2. Select Mobile or Email to enter a recipient’s wirelessphone number or email address directly.
3. Select From Contacts or Recent List.
4. Select your desired list and press to select therecipient.
5. Press Next (left softkey) when you have finishedselecting and entering recipients.
6. Start recording after the beep. (You can record up to two minutes.)
7. To finish recording, press Done (left softkey).
8. Press Send (left softkey) to send the voice message.
Accessing SMS Voice MessagesTo play an SMS Voice message:
� When you receive a voice message, a pop-up notificationwill automatically appear on your phone’s main displayscreen. Use your softkeys to view and play the voicemessage.
To reply to an SMS Voice message:
1. From the VoiceSMS inbox, press Reply (left softkey).
2. Record your reply, and then press Send (left softkey).
SprintService
124 Section 3A: Sprint Service Features – The Basics
Using Caller ID
Caller ID allows people to identify a caller before answeringthe phone by displaying the number of the incoming call. Ifyou do not want your number displayed when you make a call,just follow these easy steps.
To block your phone number from being displayed for a specificoutgoing call:
1. Press .
2. Enter the number you want to call.
3. Press .
To permanently block your number, call Sprint CustomerService.

Section 3A: Sprint Service Features – The Basics 125
Responding to Call Waiting
When you’re on a call, Call Waiting alerts you to incoming callsby sounding two beeps. Your phone’s screen informs you thatanother call is coming in and displays the caller’s phonenumber (if it is available and you are in digital mode).
To respond to an incoming call while you’re on a call:
� Press . (This puts the first caller on hold and answersthe second call.)
To switch back to the first caller:
� Press again.
Tip: For those calls where you don’t want to be interrupted, you cantemporarily disable Call Waiting by pressing *7 0 before placing your call.Call Waiting is automatically reactivated once you end the call.
SprintService

126 Section 3A: Sprint Service Features – The Basics
Making a Three-Way Call
With Three-Way Calling, you can talk to two people at thesame time. When using this feature, the normal airtime rateswill be charged for each of the two calls.
To make a Three-Way Call:
1. Enter a number you wish to call and press .
2. Once you have established the connection, enter thesecond number you wish to call and press . (This putsthe first caller on hold and dials the second number.)
3. When you’re connected to the second party, press again to begin your three-way call.
If one of the people you called hangs up during your call, youand the remaining caller stay connected. If you initiated thecall and are the first to hang up, all other callers aredisconnected.

Section 3A: Sprint Service Features – The Basics 127
Using Call Forwarding
Call Forwarding lets you forward all your incoming calls toanother phone number – even when your phone is turned off.You can continue to make calls from your phone when CallForwarding is activated.
To activate Call Forwarding:
1. Press .
2. Enter the area code and phone number to which yourfuture calls should be forwarded.
3. Press . (You will see a message and hear a tone toconfirm the activation of Call Forwarding.)
To deactivate Call Forwarding:
1. Press .
2. Press . (You will see a message and hear a tone toconfirm the deactivation.)
Note: You are charged a higher rate for calls you have forwarded.
SprintService

128 Section 3B: Sprint Vision
Section 3B
Sprint Vision
In This Section
� SprintVision Applications (page 129)
� Getting Started With SprintVision (page 130)
� Accessing Messaging (page 136)
� Downloading Premium Services Content (page 139)
� Exploring the Web (page 143)
� SprintVision FAQs (page 148)
� Using Your Sprint Phone as a Modem (page 150)
Sprint Vision offers easy and amazing data services you willreally use.These features – including messaging, games,downloadable ringers and screen savers, and portable Webaccess – let you have fun, stay in touch, and stay informedno matter where you go on the network.
This section introduces these advanced services and walksyou through the necessary steps to start taking advantage ofSprintVision services. For complete details and instructions,see the Sprint Vision User Guide online at www.sprint.com.
Section 3B: Sprint Vision 129
SprintVision Applications
Here is a brief list of the applications available through yourphone. For more information, please see the SprintVision UserGuide online at www.sprint.com.
Sprint Picture Mail – Receive pictures and short video clipswith your phone.
Messaging – Send and receive email and chat on yourphone.
Games – Play exciting games with full-color graphics,sound, and vibration.
Ringers – Personalize your phone by downloading andassigning different ringers to numbers in your Contacts.
Screen Savers – Download unique images to use as screensavers – or make it easy to tell who’s calling by assigningspecific images to numbers in your Contacts.
Web – Experience full-color graphic versions of popularWeb sites from your phone.
SprintVision

130 Section 3B: Sprint Vision
Getting Started With SprintVision
This section will help you learn the basics of using your Sprint Vision services, including managing your user name,launching a Vision connection, and navigating the Web withyour phone.
Your User NameWhen you buy a phone and sign up for service, you’reautomatically assigned a user name, which is typically basedon your name and a number, followed by “@sprint.com.”(Forexample, the third John Smith to sign up for Sprint Visionservices might have [email protected] as his user name.)
When you use Sprint Vision services, your user name issubmitted to identify you to the network. The user name isalso useful as an address for Sprint Mail, as a way topersonalize Web services, and as an online virtual identity.
Your user name will be automatically programmed into yourphone. You don’t have to enter it.
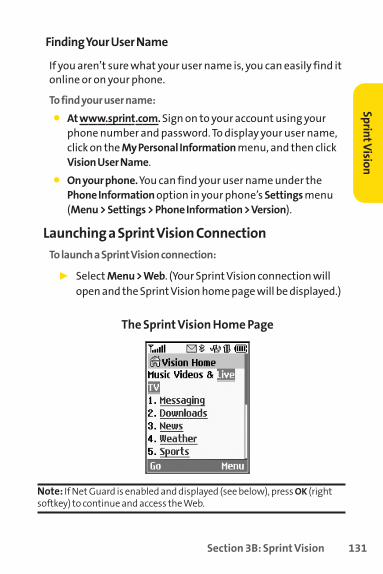
Section 3B: Sprint Vision 131
Finding Your User Name
If you aren’t sure what your user name is, you can easily find itonline or on your phone.
To find your user name:
� At www.sprint.com. Sign on to your account using yourphone number and password. To display your user name,click on the My Personal Information menu, and then clickVision User Name.
� On your phone.You can find your user name under thePhone Information option in your phone’s Settings menu(Menu > Settings > Phone Information > Version).
Launching a SprintVision ConnectionTo launch a SprintVision connection:
� Select Menu > Web. (Your Sprint Vision connection willopen and the Sprint Vision home page will be displayed.)
The Sprint Vision Home Page
Note: If Net Guard is enabled and displayed (see below), press OK (rightsoftkey) to continue and access the Web.
SprintVision
132 Section 3B: Sprint Vision
While connecting, the following will appear on the screen:Vision Connecting...
If you had a previous Sprint Vision connection, the last pageyou visited will be displayed when you launch your browser.When this occurs, you may not see the “Connecting...”message when you launch the session. Though the browser isopen, you are not currently in an active data session– that is,no data is being sent or received. As soon as you navigate toanother page, the active session will open and you will see the“Connecting...”message.
Net GuardWhen you first connect to the Web, the Net Guard will appearto confirm that you want to connect. This feature helps youavoid accidental connections. You can disable the Net Guardin the future by selecting Always Auto-Connect when the NetGuard is displayed.
To change your Net Guard settings:
� Press Menu > Settings > More... > Data > Net Guard andchoose an option:
� On to activate the Net Guard.
� Off to deactivate the Net Guard.
Note: When enabled, the Net Guard appears only once per session. The NetGuard does not appear if the phone is merely reconnecting due to a time-out.
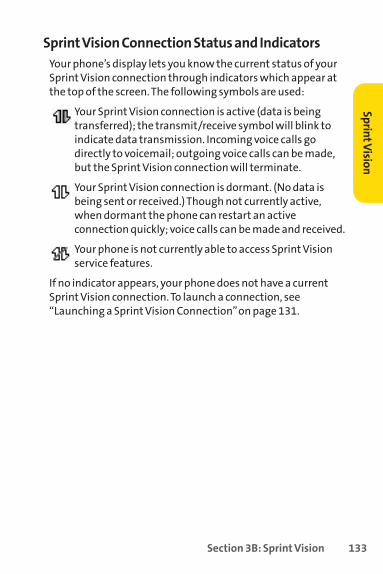
Section 3B: Sprint Vision 133
SprintVision Connection Status and IndicatorsYour phone’s display lets you know the current status of yourSprint Vision connection through indicators which appear atthe top of the screen. The following symbols are used:
Your Sprint Vision connection is active (data is beingtransferred); the transmit/receive symbol will blink toindicate data transmission. Incoming voice calls godirectly to voicemail; outgoing voice calls can be made,but the Sprint Vision connection will terminate.
Your Sprint Vision connection is dormant. (No data isbeing sent or received.) Though not currently active,when dormant the phone can restart an activeconnection quickly; voice calls can be made and received.
Your phone is not currently able to access Sprint Visionservice features.
If no indicator appears, your phone does not have a currentSprint Vision connection. To launch a connection, see“Launching a Sprint Vision Connection”on page 131.
SprintVision
134 Section 3B: Sprint Vision
Navigating the WebNavigating through menus and Web sites during a Sprint Vision session is easy once you’ve learned a few basics. Here are some tips for getting around:
Softkeys
During a Sprint Vision session, the bottom line of your phone’sdisplay contains one or more softkeys. These keys are shortcutcontrols for navigating around the Web, and they correspondto the softkey buttons directly below the phone’s displayscreen.
Tip: Depending on which Web sites you visit, the labels on the softkeys maychange to indicate their function.
To use softkeys:
� Press the desired softkey button. (If an additional pop-up menu appears when you press the softkeybutton, select the menu items using your keypad [ifthey’re numbered] or by highlighting the option andpressing .)
Scrolling
As with other parts of your phone’s menu, you’ll have to scrollup and down to see everything on some Web sites.
To scroll line by line through Web sites:
� Press the navigation key up and down.
To scroll page by page through Web sites:
� Press the volume buttons on the side of the phone.

Section 3B: Sprint Vision 135
Selecting
Once you’ve learned how to use softkeys and scroll, you canstart navigating the Web.
To select onscreen items:
� Use the navigation key to highlight the desired item, andthen press the desired softkey button (or press ).
Tip: You’ll find that the left softkey is used primarily for selecting items. Thissoftkey is often labeled “OK.”
Tip: If the items on a page are numbered, you can use your keypad (numberkeys) to select an item. (The tenth item in a numbered list may be selected bypressing the 0key on your phone’s keypad, even though the number 0doesn’t appear on the screen.)
Links, which appear as underlined text, allow you to jump todifferent Web pages, select special functions, or even placephone calls.
To select links:
� Highlight the link and press the appropriate softkey.
Going Back
To go back one page:
� Press the key on your phone.
Note: The BACK key is also used for deleting text (like a BACKSPACE key)when you are entering text.
SprintVision
136 Section 3B: Sprint Vision
Going Home
To return to the SprintVision home page from any other Webpage:
� Press and hold .
– or –
Press Menu (right softkey) and select Home ( ).
Sprint Messaging
Accessing Messaging
Now you can send and receive email and text messages and participate in Web-based chatrooms right from yourphone. Messaging allows you to stay connected to friends,family, and coworkers 24 hours a day anywhere on the SprintNational Network.
Message TypesThere are many types of text messaging available on your phone. These include SMS Text Messaging, Email, and Chat.
(Sprint Voicemail provides voicemail-to-mailbox messaging.For information on using your phone’s voicemail feature, see“Using Voicemail”on page 111.)

Section 3B: Sprint Vision 137
Accessing Sprint Mail
Sprint Mail allows you to perform many of the typical emailfunctions from your phone that you can from your personalcomputer. You can manage your Sprint Mail account fromyour phone or from your personal computer atwww.sprint.com.
To access Sprint Mail from your phone:
1. Select Menu > Messaging > IM & Email.
2. Select PCS Mail. (The browser will start and go to theemail page.) (If you’re a first-time user, your phone willprompt you to set up your Sprint Mail account byestablishing a user name and password.)
3. Select the folder you wish to view, such as InboxorCompose .
For information and instructions about reading, replying to,and composing Sprint Mail, please see the Sprint Vision UserGuide at www.sprint.com.
SprintVision

138 Section 3B: Sprint Vision
Accessing Additional EmailProvidersWith Sprint Vision, you can use popular email services such asAOL® Mail, Yahoo!® Mail, MSN® Hotmail and EarthLink® tokeep in touch, even while you’re on the go.
To access email providers from your phone:
1. From the Sprint Vision home page, select Messaging > IM & Email.
2. Select an email provider, such as AOL, MSN, or Yahoo!.
3. Use your keypad to enter the required sign-ininformation for the selected provider, such as user name,email address, or password, and select Sign In. (Yourmailbox for the selected provider will be displayed.)
Note: The information required to sign in will vary depending on the emailprovider you are accessing.
4. Follow the onscreen instructions to read, reply to, compose,send, and manage messages in your email account.
Accessing Wireless Chatrooms
Sprint Vision gives you the ability to join wireless chatroomsfrom your phone, to send text messages and icons tochatroom participants, or to launch a one-on-one (private)chatroom.
To access a chatroom from the browser:
1. Select Messaging > Chat & Dating .
2. Select a chat provider and follow the onscreeninstructions to begin chatting.
Note: For information about using wireless chatrooms on your phone,please see the SprintVision User Guide at www.sprint.com.

Section 3B: Sprint Vision 139
Downloading Premium Services Content
With Sprint Vision and your new phone, you have access to adynamic variety of Premium Service content, such asdownloadable Games, Ringers, Screen Savers, and otherapplications. (Additional charges may apply.) The basic stepsrequired to access and download Premium Service contentare outlined below.
Accessing the Download Menus
To access the SprintVision download menus:
1. Press Menu > My Content.
2. Select the type of file you wish to download (Games,Ringers, Screen Savers, Applications, IM & Email, Call Tones,or <Options>), and then select Get New. (The browser willstart and take you to the corresponding downloadmenu.)
To access the Sprint Vision download menus from the Webbrowser:
1. From the Sprint Vision home page, select Downloads.
2. Select Games, Ringers, Screen Savers, Applications, IM & Email, Messaging, or Call Tones to go to thecorresponding download menu. (For more informationon navigating the Web, see “Navigating the Web”onpage 134.)
SprintVision

140 Section 3B: Sprint Vision
Selecting an Item to Download
You can search for available items to download in a number ofways:
� Featured displays a rotating selection of featured items.
� Categories allows you to narrow your search to a generalcategory, such as Country or Pop/Rock for ringers or Forthe Ladies for screen savers. (There may be several pagesof available content in a list. Select Next 9 to viewadditional items.)
� Search allows you to use your keypad to enter searchcriteria to locate an item. You may enter an entire word ortitle or perform a partial-word search. (For example,entering “goo”returns “Good Ol’Boy,”“The Good, the Bad,and the Ugly,”and “Goofy - Club.”)
Downloading an Item
Once you’ve selected an item you wish to download, highlightit and press or press OK (left softkey). You will see asummary page for the item including its title, the vendor, thedownload detail, the file size, and the cost. Links allow you toview the License Details page, which outlines the price, licensetype, and length of license for the download; and the Terms ofUse page, which details the Premium Services Terms of Useand your responsibility for payment.
To download a selected item:
1. From the information page, select Buy. (The item willdownload automatically. When the New Downloadscreen appears, the item has been successfullydownloaded to your phone.)
Note: If you have not previously purchased an item, you will be prompted tocreate your purchasing profile.
Section 3B: Sprint Vision 141
2. Select an option to continue:
� Select Use/Run/View to assign the downloadeditem (or to start it, in the case of a game orapplication). Your Sprint Vision session will end andyou will be redirected to the appropriate phonemenu screen.
� Select Set as to assign a ringer or screen saver to aphone function.
� Select Settings to configure downloaded games orapplications.
� Select Shop to browse for other items to download.
� Press to quit the browser and return to standbymode.
Using My Content Manager
Whether you purchase your Premium Services content fromyour phone or from your online account management page atwww.sprint.com , all of your purchases are stored in My ContentManager and may be downloaded to your phone from there.
My Content Manager is a storage area on the Sprint NationalNetwork that is assigned specifically to your account. It allowsyou to store all of your Premium Service downloadable files. Thefiles remain in My Content Manager – even after you havedownloaded the content to your phone – until their licenseterms have expired. This provides you with a convenient place toaccess information about your downloaded files without havingto store the information in your phone’s memory.
To access My Content Manager:
� From the Sprint Vision home page, select Downloads >My Content Manager. (A list of your purchased items willbe displayed.)
SprintVision

142 Section 3B: Sprint Vision
To download purchased content from My Content Manager:
1. From the My Content Manager display, highlight thecategory and item you wish to download and press .(The information page for the selected item will bedisplayed.)
2. Scroll to highlight Download and press . (The itemwill download automatically. When the New Downloadscreen appears, the item has been successfullydownloaded to your phone.)
3. Select an option to continue:
� Select Use/Run/View to assign the downloadeditem (or to start it, in the case of a game orapplication). Your Sprint Vision session will end andyou will be redirected to the appropriate phonemenu screen.
� Select Set as to assign a ringer or screen saver to aphone function.
� Select Settings to configure downloaded games orapplications.
� Select Shop to browse for other items to download.
� Press to quit the browser and return to standbymode.
Tip: You can also access My Content Manager through the phone’s mainmenu. Press Menu > My Content > [Games, Ringers, Screen Savers,Applications, IM & Email, Call Tones, or<Options>] > My Content Manager. Thebrowser will start and take you to the corresponding content.
For complete information and instructions on downloadingGames, Ringers, Screen Savers, and Applications, see the Sprint Vision User’s Guide at www.sprint.com.
Section 3B: Sprint Vision 143
Exploring the Web
With Web access on your phone, you can browse full-colorgraphic versions of your favorite Web sites, making it easierthan ever to stay informed while on the go. Follow sportsscores and breaking news and weather and shop on yourphone anywhere on the Sprint National Network.
In addition to the features already covered in this section, theSprint Vision home page offers access to colorful, graphicallyrich Web categories, including News, Weather, Entertainment,Sports, Money, Travel, Shopping, and Tools, as well as usefulmanagement options including My Account and Search. Manysites are available under more than one menu – choose theone that’s most convenient for you.
Using the Browser MenuNavigating the Web from your phone using the Sprint Visionhome page is easy once you get the hang of it. For details onhow to navigate the Web, select menu items, and more, see“Navigating the Web”on page 134.
Although the Sprint Vision home page offers a broad andconvenient array of sites and services for you to browse, not allsites are represented, and certain functions, such as goingdirectly to specific Web sites, are not available. For these andother functions, you will need to use the browser menu. Thebrowser menu offers additional functionality to expand youruse of the Web on your phone.
SprintVision
144 Section 3B: Sprint Vision
Opening the Browser Menu
The browser menu may be opened anytime you have an activeSprint Vision session, from any page you are viewing.
To open the browser menu:
� Press the right softkey. (The browser menu will bedisplayed in a drop-down list.)
Options available under the browser menu include:
� Home. Returns the browser to the Sprint Vision home page.
� Forward. Returns you to a previously viewed page (afterhaving used the key).
� Mark this Page. Allows you to bookmark the current site.
� View Bookmarks. Allows you to access bookmarked sitesand manage your bookmarks.
� Search. Launches a Google search.
� Send page to.... Allows you to send the current page as atext message.
� Go to URL.... Allows you to navigate directly to a Web siteby entering its URL (Web site address).
� History. Keeps a list of links to your most recently visitedsites. To navigate to a site, highlight it and press , andthen select Connect.
� Refresh this page. Reloads the current Web page.
� More.... Displays additional options:
� Show URL. Displays the URL (Web site address) of thesite you’re currently viewing.
� Restart Browser. Restarts the current browsersession.

Section 3B: Sprint Vision 145
� About Browser. Displays technical informationabout the browser, its version, and the encryptionversion, and provides links to Certificate Informationfor the various components.
� Preferences. Displays additional options:
� Edit homepage URL. Lets you edit the home pageURL.
� Revert to default homepage URL. Lets you changeto default home page.
� Font Size. Lets you adjust the font size.
� Color. Lets you change browser color.
� Show Images. Lets you view a page’s image(s).
� Cookies. Lets you delete “cookies”stored inbrowser memory.
� Title Tag. Allows you to display a site’s titleinformation.
� Send Referrer. Allows you to turn send referrer onor off.
� Launch Page. Lets you view a recently visited page.
Creatinga Bookmark
Bookmarks allow you to store the addresses of your favoriteWeb sites for easy access at a later time.
To create a bookmark:
1. Go to the Web page you want to mark.
2. Press the right softkey to open the browser menu.
3. Select Mark this Page and press Save (left softkey) to savethe bookmark.
SprintVision
146 Section 3B: Sprint Vision
Note: Bookmarking a page does not store the page’s contents, just itsaddress. Some pages cannot be bookmarked. Whether a particular Webpage may be marked is controlled by its creator.
Accessinga Bookmark
To access a bookmark:
1. Press the right softkey to open the browser menu.
2. Select View Bookmarks.
3. Scroll to highlight the bookmark you’d like to access andpress (or press the number corresponding to thebookmark you wish to access).
Deletinga Bookmark
To delete a bookmark:
1. Press the right softkey to open the browser menu.
2. Select View Bookmarks.
3. Scroll to highlight the bookmark you’d like to delete andpress Options (right softkey).
4. Select Delete from the menu. (A confirmation screen willbe displayed.)
5. Press Yes (right softkey) to remove the bookmark.

Section 3B: Sprint Vision 147
Going to a Specific Web site
To go to a particular Web site by entering a URL (Web siteaddress):
1. Press the right softkey to open the browser menu.
2. Select Go to URL.
3. Select the URL field and press .
4. Use your keypad to enter the URL of the Web site youwish to go to and press .
5. Press again to go to the Web site.
Note: Not all Web sites are viewable on your phone.
Reloading a Web Page
To reload (refresh) a Web page:
1. Press the right softkey to open the browser menu.
2. Select Refresh. (The browser will reload the currentWeb page.)
Restarting the Web Browser
If the Web browser appears to be malfunctioning or stopsresponding, you can usually fix the problem by simplyrestarting the browser.
To restart the Web browser:
1. Press the right softkey to open the browser menu.
2. Select More > Restart Browser.
SprintVision

148 Section 3B: Sprint Vision
SprintVision FAQs
How will I know when my phone is ready for SprintVision service?Your user name (for example, [email protected]) will bedisplayed when you access Menu > Settings > PhoneInformation > Version.
How do I sign in for the first time?You are automatically signed in to access Sprint Vision serviceswhen you turn on your phone.
How do I know when my phone is connected to SprintVisionservices?Your phone automatically connects when Sprint Vision serviceis used or an incoming message arrives. Your phone will alsodisplay the icon. (Connecting takes about 10-12 seconds.)
Can I make calls and use Sprint Vision services at the same time?You cannot use voice and Sprint Vision servicessimultaneously. If you receive a call while Sprint Vision serviceis active, the call will be forwarded to voicemail. You can placean outgoing call anytime, but it will interrupt any in-progress Sprint Vision session.
When is my data connection active?Your connection is active when data is being transferred.Outgoing calls are allowed; incoming calls go directly tovoicemail. When active, the indicator flashes on yourphone’s display screen.
When is my data connection dormant?If no data is received for 10 seconds, the connection goesdormant. When the connection is dormant, voice calls are

Section 3B: Sprint Vision 149
allowed. (The connection may become active again quickly.) If no data is received for an extended period, the connectionwill terminate.
Can I sign out of data services?You can sign out without turning off your phone; however, youwill not be able to browse the Web or use other Sprint Visionservices. While signed out, you can still place or receive phonecalls, check voicemail, and use other voice services. You maysign in again at any time. To sign out, go to Menu > Settings >More... > Data > On/Off in your phone’s menu.
SprintVision

150 Section 3B: Sprint Vision
Using Your Sprint Phone as a Modem
Your phone’s data capabilities enable you to use your phone’shigh-speed data connection as a modem for your desktop orlaptop PC. You’ll be able to send and receive email, browse theInternet, and access your company’s network anywhere onthe Sprint National Network.
Note: To use this service, you are required to sign up on a SprintVision withPhone as Modem plan. Go to www.sprint.com or visit a Sprint Store for phoneas modem plan details and more information.
Setting Up a Data Connection With Your PCIn order to use your phone as a modem, you’ll first need toload the Sprint Connection ManagerSM software on your PC,and then use the supplied USB cable to connect your phone toyour PC.
To set up your phone-to-PC data connection:
1. From your computer’s Internet browser, go towww.sprint.com and download the Sprint ConnectionManager software. (The software and drivers can bedownloaded free of charge.)
2. Double-click the downloaded file and follow theonscreen instructions to install the Sprint ConnectionManager software and drivers to your PC.
3. Once the software has been fully installed, connect yourphone to your PC using a USB cable (sold separately).(Your PC will detect the connection and an icon willappear in your system tray.)
4. Launch the Sprint Connection Manager software, selecta profile, and click Connect.

Section 3B: Sprint Vision 151
5. Once the connection is established, launch an Internetsession, check your email, or do anything else you woulddo using a traditional data connection.
6. When you’re ready to terminate the data connection,double-click the Sprint Connection Manager icon in thesystem tray, and then click Disconnect to end the session.
7. Disconnect the USB cable from your phone and your PC.
Note: While your data connection is active, you will not be able to receiveincoming calls; all incoming calls will be forwarded to your SprintVoicemail.Placing an outgoing call during a data session terminates the dataconnection.
SprintVision services are available on the Sprint National Network.
SprintVision
152 Section 3C: Sprint Voice Command
Section 3C
Sprint Voice Command
In This Section
� Getting Started With SprintVoice Command (page 153)
� Creating Your Own Address Book (page 154)
� Making a Call With SprintVoice Command (page 155)
� Accessing Information Using SprintVoice Command (page 156)
With Sprint Voice Command, reaching your friends, family,and coworkers has never been easier – especially whenyou’re on the go. You can even listen to Web-basedinformation, such as news, weather, and sports. Your voicedoes it all with Sprint Voice Command.
This section outlines the Sprint Voice Command service.

Section 3C: Sprint Voice Command 153
Getting StartedWith SprintVoice Command
With Sprint Voice Command:
� You can store all your contacts’phone numbers, so you cansimply say the name of the person you want to call.
� There’s no need to punch in a lot of numbers, memorizevoicemail passwords, or try to dial while you’re driving.
� You can call anyone in your address book – even if youdon’t remember their phone number.
� You don’t need to worry about losing your contacts oraddress book. This advanced service is network-based, soif you switch or happen to lose your phone, you won’t loseyour contacts or address book.
It’s Easy to Get Started
There are two easy ways to sign up for Sprint Voice Command:
� Sign up when you purchase and activate your phone.
� Just dial from your phone to contact SprintCustomer Service and sign up.
There is a monthly charge for Sprint Voice Command.
Voice Comm
and
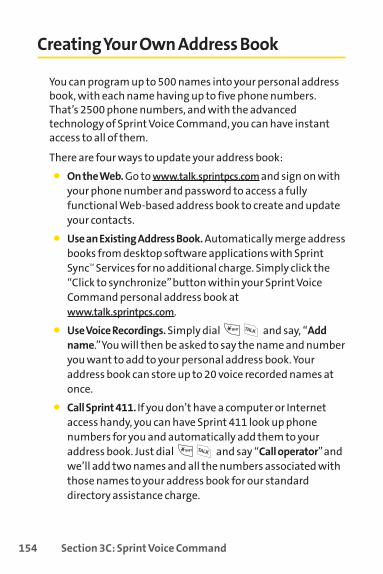
154 Section 3C: Sprint Voice Command
Creating Your Own Address Book
You can program up to 500 names into your personal addressbook, with each name having up to five phone numbers.That’s 2500 phone numbers, and with the advancedtechnology of Sprint Voice Command, you can have instantaccess to all of them.
There are four ways to update your address book:
� On the Web. Go to www.talk.sprintpcs.com and sign on withyour phone number and password to access a fullyfunctional Web-based address book to create and updateyour contacts.
� Use an Existing Address Book. Automatically merge addressbooks from desktop software applications with SprintSyncSM Services for no additional charge. Simply click the“Click to synchronize”button within your Sprint VoiceCommand personal address book atwww.talk.sprintpcs.com.
� Use Voice Recordings. Simply dial and say, “Addname.”You will then be asked to say the name and numberyou want to add to your personal address book. Youraddress book can store up to 20 voice recorded names atonce.
� Call Sprint 411. If you don’t have a computer or Internetaccess handy, you can have Sprint 411 look up phonenumbers for you and automatically add them to youraddress book. Just dial and say “Call operator”andwe’ll add two names and all the numbers associated withthose names to your address book for our standarddirectory assistance charge.

Section 3C: Sprint Voice Command 155
Making a CallWith SprintVoice Command
To make a call with SprintVoice Command:
1. Press and you’ll hear the “Ready”prompt.
2. After the “Ready”prompt, simply say, in a natural voice,“Call”and the name of the person or the number you’dlike to call. (For example, you can say, “Call Jane Smith atwork,”“Call John Baker on the mobile phone,”“Call 555-1234,”or “Call Bob Miller.”)
3. Your request will be repeated and you will be asked toverify. Say “Yes”to call the number or person. (Thenumber will automatically be dialed.) Say “No”if youwish to cancel.
Tip: Keep in mind that SprintVoice Command recognizes not only yourvoice, but any voice, so that others can experience the same convenience ifthey use your phone.
For more helpful hints on SprintVoice Command, including a listof recognized commands and an interactive tutorial, visitwww.talk.sprintpcs.com.
Voice Comm
and
156 Section 3C: Sprint Voice Command
Accessing Information Using Sprint Voice Command
To access information using SprintVoice Command:
1. Press .
2. Say “Call the Web”and choose from a listing ofinformation categories like news, weather, and sports.
– or –
Simply say “Call news room,”“Call the weather,”“CallSports Central,”etc.
Note: SprintVoice Command is not available while roaming off the SprintNational Network.

Safety and WarrantyInformation
Section 4

158 Section 4A: Important Safety Information
Section 4A
Important Safety Information
In This Section
� General Precautions (page 159)
� Maintaining Safe Use of and Access to Your Phone (page 160)
� Caring for the Battery (page 162)
� Radio Frequency (RF) Energy (page 163)
� Owner’s Record (page 165)
� Phone Guide Proprietary Notice (page 165)
This phone guide contains important operational and safetyinformation that will help you safely use your phone. Failureto read and follow the information provided in this phoneguide may result in serious bodily injury, death, or propertydamage.
Section 4A: Important Safety Information 159
General Precautions
There are several simple guidelines to operating your phone properly andmaintaining safe, satisfactory service.
� Hold the phone with the antenna raised, fully extended, and over yourshoulder.
� Try not to hold, bend, or twist the phone’s antenna.
� Don’t use the phone if the antenna is damaged.
� Speak directly into the mouthpiece.
� Avoid exposing your phone and accessories to rain or liquid spills. Ifyour phone does get wet, immediately turn the power off and removethe battery.
� Although your phone is quite sturdy, it is a complex piece of equipmentand can be broken. Avoid dropping, hitting, bending, or sitting on it.
� Any changes or modifications to your phone not expressly approved inthis document could void your warranty for this equipment and voidyour authority to operate this equipment.
Note: For the best care of your phone, only Sprint authorized personnel should serviceyour phone and accessories. Failure to do so may be dangerous and void your warranty.
ImportantSafety Inform
ation
160 Section 4A: Important Safety Information
Maintaining Safe Use of and Access to Your Phone
Do Not Rely on Your Phone for Emergency CallsMobile phones operate using radio signals, which cannot guaranteeconnection in all conditions. Therefore you should never rely solely uponany mobile phone for essential communication (e.g., medicalemergencies). Emergency calls may not be possible on all cellular networksor when certain network services and/or mobile phone features are in use.Check with your local service provider for details.
Using Your Phone While DrivingTalking on your phone while driving (or operating the phone without ahands-free device) is prohibited in some jurisdictions. Laws vary as tospecific restrictions. Remember that safety always comes first.
Tip: Purchase an optional hands-free accessory at your local Sprint Store, or by calling 1-800-974-2221 or by pressing # 2 2 2on your phone.
Following Safety GuidelinesTo operate your phone safely and efficiently, always follow any specialregulations in a given area. Turn your phone off in areas where use isforbidden or when it may cause interference or danger.
Using Your Phone Near Other Electronic DevicesMost modern electronic equipment is shielded from radio frequency (RF)signals. However, RF signals from wireless phones may affect inadequatelyshielded electronic equipment.
RF signals may affect improperly installed or inadequately shieldedelectronic operating systems or entertainment systems in motor vehicles.Check with the manufacturer or their representative to determine if thesesystems are adequately shielded from external RF signals. Also check withthe manufacturer regarding any equipment that has been added to yourvehicle.
Consult the manufacturer of any personal medical devices, such aspacemakers and hearing aids, to determine if they are adequately shieldedfrom external RF signals.
Note: Always turn off the phone in health-care facilities and request permission beforeusing the phone near medical equipment.
Section 4A: Important Safety Information 161
Turning Off Your Phone Before FlyingTurn off your phone before boarding any aircraft. To prevent possibleinterference with aircraft systems, the U.S. Federal Aviation Administration(FAA) regulations require you to have permission from a crew member touse your phone while the plane is on the ground. To prevent any risk ofinterference, FCC regulations prohibit using your phone while the plane isin the air.
Turning Off Your Phone in Dangerous AreasTo avoid interfering with blasting operations, turn your phone off when in ablasting area or in other areas with signs indicating two-way radios shouldbe turned off. Construction crews often use remote-control RF devices toset off explosives.
Turn your phone off when you’re in any area that has a potentially explosiveatmosphere. Although it’s rare, your phone and accessories could generatesparks. Sparks can cause an explosion or fire, resulting in bodily injury oreven death. These areas are often, but not always, clearly marked. Theyinclude:
� Fueling areas such as gas stations.
� Below deck on boats.
� Fuel or chemical transfer or storage facilities.
� Areas where the air contains chemicals or particles such as grain, dust,or metal powders.
� Any other area where you would normally be advised to turn off yourvehicle’s engine.
Note: Never transport or store flammable gas, flammable liquid, or explosives in thecompartment of your vehicle that contains your phone or accessories.
Restricting Children’s Access to Your PhoneYour phone is not a toy. Do not allow children to play with it as they couldhurt themselves and others, damage the phone or make calls that increaseyour Sprint invoice.
ImportantSafety Inform
ation

162 Section 4A: Important Safety Information
Caring for the Battery
Protecting Your BatteryThe guidelines listed below help you get the most out of your battery’sperformance.
� Recently there have been some public reports of wireless phonebatteries overheating, catching fire or exploding. It appears that many,if not all, of these reports involve counterfeit or inexpensive,aftermarket-brand batteries with unknown or questionablemanufacturing standards. Sprint is not aware of similar problems withSprint phones resulting from the proper use of batteries andaccessories approved by Sprint or the manufacturer of your phone. Useonly Sprint- or manufacturer-approved batteries and accessories foundat Sprint Stores or through your phone’s manufacturer, or call 1-866-343-1114 to order. They’re also available at www.sprint.com — clickAccessories. Buying the right batteries and accessories is the best way toensure they’re genuine and safe.
� In order to avoid damage, charge the battery only in temperatures thatrange from 32° F to 113° F (0° C to 45° C).
� Don’t use the battery charger in direct sunlight or in high humidityareas, such as the bathroom.
� Never dispose of the battery by incineration.
� Keep the metal contacts on top of the battery clean.
� Don’t attempt to disassemble or short-circuit the battery.
� The battery may need recharging if it has not been used for a long periodof time.
� It’s best to replace the battery when it no longer provides acceptableperformance. It can be recharged hundreds of times before it needsreplacing.
� Don’t store the battery in high temperature areas for long periods oftime. It’s best to follow these storage rules:
Less than one month:
-4° F to 140° F (-20° C to 60° C)
More than one month:
-4° F to 113° F (-20° C to 45° C)

Section 4A: Important Safety Information 163
Disposal of Lithium Ion (Li-Ion) BatteriesDo not handle a damaged or leaking Li-Ion battery as you can be burned.
For safe disposal options of your Li-Ion batteries, contact your nearestSprint authorized service center.
Special Note: Be sure to dispose of your battery properly. In some areas,the disposal of batteries in household or business trash may be prohibited.
Radio Frequency (RF) Energy
Understanding How Your Phone OperatesYour phone is basically a radio transmitter and receiver. When it’s turnedon, it receives and transmits radio frequency (RF) signals. When you useyour phone, the system handling your call controls the power level. Thispower can range from 0.006 watts to 0.2 watts in digital mode.
Knowing Radio Frequency SafetyThe design of your phone complies with updated NCRP standards describedbelow.
In 1991-92, the Institute of Electrical and Electronics Engineers (IEEE) andthe American National Standards Institute (ANSI) joined in updating ANSI’s1982 standard for safety levels with respect to human exposure to RFsignals. More than 120 scientists, engineers and physicians fromuniversities, government health agencies and industries developed thisupdated standard after reviewing the available body of research. In 1993,the Federal Communications Commission (FCC) adopted this updatedstandard in a regulation. In August 1996, the FCC adopted hybrid standardconsisting of the existing ANSI/IEEE standard and the guidelines publishedby the National Council of Radiation Protection and Measurements (NCRP).
Body-Worn OperationTo maintain compliance with FCC RF exposure guidelines, if you wear ahandset on your body, use the Sprint supplied or approved carrying case,holster or other body-worn accessory. If you do not use a body-wornaccessory, ensure the antenna is at least 7/16 inch (1.5 centimeters) fromyour body when transmitting. Use of non-Sprint approved accessories mayviolate FCC RF exposure guidelines.
For more information about RF exposure, visit the FCC Web site atwww.fcc.gov.
ImportantSafety Inform
ation

164 Section 4A: Important Safety Information
Specific Absorption Rate (SAR) for Wireless PhonesThe SAR is a value that corresponds to the relative amount of RF energyabsorbed in the head of a user of a wireless handset.
The SAR value of a phone is the result of an extensive testing, measuringand calculation process. It does not represent how much RF the phoneemits. All phone models are tested at their highest value in strict laboratorysettings. But when in operation, the SAR of a phone can be substantiallyless than the level reported to the FCC. This is because of a variety of factorsincluding its proximity to a base station antenna, phone design and otherfactors. What is important to remember is that each phone meets strictfederal guidelines. Variations in SARs do not represent a variation in safety.
All phones must meet the federal standard, which incorporates asubstantial margin of safety. As stated above, variations in SAR valuesbetween different model phones do not mean variations in safety. SARvalues at or below the federal standard of 1.6 W/kg are considered safe foruse by the public.
The highest reported SAR values of the LX160 are:
PCS mode (Part 24):Head: 1.19W/kg; Body-worn: 0.283W/kg
FCC Radio Frequency EmissionThis phone meets the FCC Radio Frequency Emission Guidelines. FCC ID number: BEJLX160. More information on the phone’s SAR can be found from the following FCCWeb site: http://www.fcc.gov/oet/fccid.
Note: Bluetooth QD ID (Qualified Design ID) is mandatory marking byBluetooth SIG (Bluetooth Special Interest Group) for all models supportingBluetooth.Bluetooth QD ID B012711

Section 4A: Important Safety Information 165
Owner’s Record
The model number, regulatory number and serial number are located on anameplate inside the battery compartment. Record the serial number inthe space provided below. This will be helpful if you need to contact usabout your phone in the future.
Model: SprintVision® Phone LX160 by LG®
Serial No.:
Phone Guide Proprietary Notice
CDMA Technology is licensed by QUALCOMM Incorporated under one ormore of the following patents:
4,901,307 5,109,390 5,267,262 5,416,797
5,506,865 5,544,196 5,657,420 5,101,501
5,267,261 5,414,796 5,504,773 5,535,239
5,600,754 5,778,338 5,228,054 5,337,338
5,710,784 5,056,109 5,568,483 5,659,569
5,490,165 5,511,073
T9 Text Input is licensed by Tegic Communications and is covered by U.S. Pat.5,818,437, U.S. Pat. 5,953,541, U.S. Pat. 6,011,554 and other patentspending.
Phone Guide template version 6A (September 2006)
ImportantSafety Inform
ation
166 Section 4B: Warranty
Section 4B
Manufacturer’s Warranty
In This Section
� Manufacturer’s Warranty (page 167)
Your phone has been designed to provide you with reliable,worry-free service. If for any reason you have a problem withyour equipment, please refer to the manufacturer’swarranty in this section.
For information regarding the terms and conditions of servicefor your phone, please visit www.sprint.com or call SprintCustomer Service at 1-888-211-4727.

Section 4B: Warranty 167
Manufacturer’s Warranty
1. WHAT THIS WARRANTY COVERS:LG offers you a limited warranty that the enclosed subscriber unit and itsenclosed accessories will be free from defects in material andworkmanship, according to the following terms and conditions:
(1) The limited warranty for the unit and enclosed accessories shall be aperiod of one (1) year from the date of original purchase. The remainingwarranty period for the unit being repaired or replaced shall bedetermined by presentation of the original sales receipt for the purchaseof the unit.
(2) The limited warranty extends only to the original purchaser of theproduct and is not assignable or transferable to any subsequentpurchaser / end user.
(3) The limited warranty is good only to the original purchaser of theproduct during the warranty period as long as it is in the U.S., includingAlaska, Hawaii, U.S. Territories, and all Canadian Provinces.
(4) The external housing and cosmetic parts shall be free of major defects atthe time of shipment and, therefore, shall not be covered under theselimited warranty terms.
(5) Upon request from LG, the consumer must provide informationsatisfactory to LG to prove the date of purchase or exchange.
(6) The customer shall bear the cost of shipping the product to theCustomer Service Department of LG. LG shall bear the cost of shippingthe product back to the consumer after the completion of service underthis limited warranty.
2. WHAT THIS WARRANTY DOES NOT COVER:(1) Defects or damage resulting from use of the product in other than its
normal and customary manner.
(2) Defect or damage from abnormal use, abnormal conditions, improperstorage, exposure to moisture or dampness, unauthorizedmodifications, unauthorized connections, unauthorized repair, misuse,neglect, abuse, accident, alteration, improper installation, or other actswhich are not the fault of LG, including damage caused by shipping,blown fuses, or spills of food or liquid.
Warranty

168 Section 4B: Warranty
(3) Breakage or damage to antennas unless caused directly by defects inmaterial or workmanship.
(4) Alleged defects or malfunctions of the product if the Customer ServiceDepartment at LG was not notified by the consumer during theapplicable limited warranty period.
(5) Products which have had the serial number removed or made illegible.
(6) This limited warranty is in lieu of all other warranties, express or impliedeither in fact or by operations of law, statutory or otherwise, includingbut not limited to any implied warranty of marketabilitymerchantability or fitness for a particular use.
(7) Damage resulting from use of non-LG approved accessories.
(8) All plastic surfaces and all other externally exposed parts that arescratched or damaged due to normal customer use.
(9) Products operated outside published maximum ratings.
(10) Products used or obtained in a rental program.
(11) Consumables (such as fuses).
3. WHAT LG WILL DO:LG will, at its sole option, either repair, replace or refund the purchase priceof any unit that does not conform to this limited warranty. LG may chooseat its option to use functionally equivalent re-conditioned, refurbished ornew units or parts or any units. In addition, LG will not re-install or back-upany data, applications or software that you have added to your phone. It istherefore recommended that you back-up any such data or informationprior to sending the unit to LG to avoid the permanent loss of suchinformation.
4. STATE LAW RIGHTS:No other express warranty is applicable to this product. THE DURATION OFANY IMPLIED WARRANTIES, INCLUDING THE IMPLIED WARRANTY OFMARKETABILITY OR MERCHANTABILITY, IS LIMITED TO THE DURATION OFTHE EXPRESS WARRANTY HEREIN. LG SHALL NOT BE LIABLE FOR THE LOSSOF THE USE OF THE PRODUCT, INCONVENIENCE, LOSS OR ANY OTHERDAMAGES, DIRECT OR CONSEQUENTIAL, ARISING OUT OF THE USE OF, ORINABILITY TO USE, THIS PRODUCT OR FOR ANY BREACH OF ANY EXPRESS ORIMPLIED WARRANTY, INCLUDING THE IMPLIED WARRANTY OFMARKETABILITY OR MERCHANTABILITY APPLICABLE TO THIS PRODUCT.

Section 4B: Warranty 169
Some states do not allow the exclusion of limitation of incidental orconsequential damages or limitations on how long an implied warrantylasts; so these limitations or exclusions may not apply to you. This warrantygives you specific legal rights and you may also have other rights, whichvary from state to state.
5. HOW TO GET WARRANTY SERVICE:To obtain warranty service, please call the following telephone numberfrom anywhere in the continental United States:
LG Electronics Service
201 James Record Road
Huntsville, AL 35824
Tel. 1-800-793-8896 Email: http://us.lgservice.com
Please call or write for the location of the LGE authorized service centernearest you and the procedures for obtaining warranty claims.
Warranty
170 Index
IndexAAirplane Mode 54Alarm Clock 95Answering Calls 26
BBattery 19-21
Capacity 19Charging 21Installing 20Removing 20
Bluetooth 103-108On/Off 104Pairing 108Profiles 107Settings 105
BookmarksAccessing 146Creating 145Deleting 146
Browser Menu 143
CCalculator 97Calendar 91-97Call Forwarding 127Call Guard 70Call History 72-77
Erasing 77Making a Call 75Prepending a Phone
Number 76Saving a Phone Number
75
Call Waiting 125Caller ID 124Chat 138Contacts 78-89
Adding 79Editing 87Erasing 62Finding 80My Name Card 86Wireless Backup 89
DDialing Options 25Display Screen 14Display Settings 44
EEmail 138Entering Text 35-39
Abc Mode 37Numbers 38Preset Messages 39Selecting Mode 35Smileys 38Symbols 38T9 Text Input 36
Ez Tips 96
KKey Functions 12
LLocation Settings 49Lock Code
Changing 61Locking Your Phone 60
Index 171
MMaking Calls 24Manufacturer’s Warranty
166-169Menu iiiMessaging Settings 50My Content Manager 141
NNet Guard 132Notepad 96
PPhone (Illus.) 11Phone Number
Displaying 23Finding 31Saving 30
Phone Setup Options 57Plus (+) Code Dialing 33
RRoaming 66-71
Setting Roam Mode 69
SSaving a Phone Number 30Security 59-65
Resetting 64, 65Restricting 62Security Menu 60
SMS Text Messaging 119-127
SMS Voice Messaging 122Sound Settings 41Special Numbers 61
Sprint Customer Service 7Sprint PCS Mail 137Sprint PCS Service
Account Passwords 6Operator Services 8Setting Up 2-8
Sprint PCS Vision 128-151Applications 129Chat 138Downloading Content
139FAQs 148Home Page 131Launching 131Messaging 136My Content Manager 141Navigating the Web 134Net Guard 132Password 6User Name 130
SprintVoice Command 152-156Accessing Information
156Creating Your Own
Address Book 154Getting Started 153Making a Call 155
TT9 Text Input 36Turning Your Phone On and
Off 18
UUnlocking Your Phone 60
Index

172 Index
VVoice Memos 99-102Voice Services 98-102Voicemail
Menu Key 118Options 114Retrieving 113Setting Up 5, 111While Roaming 68
WWeb 143-151World Clock 97

Notes________________________________________________________
________________________________________________________
________________________________________________________
________________________________________________________
________________________________________________________
________________________________________________________
________________________________________________________
________________________________________________________
________________________________________________________
________________________________________________________
________________________________________________________
________________________________________________________
________________________________________________________
________________________________________________________
________________________________________________________
________________________________________________________
________________________________________________________