Lesson Plans - Kenan Fellows Program · PDF fileC. Swink Lesson Plans—Motion and Design...
26
Lesson Plans Motion and Design Kit Carolina Biological (STC) Carol Swink NC Kenan Fellows Program
-
Upload
truongthuan -
Category
Documents
-
view
216 -
download
2
Transcript of Lesson Plans - Kenan Fellows Program · PDF fileC. Swink Lesson Plans—Motion and Design...

Lesson Plans
Motion and Design Kit
Carolina Biological (STC)
Carol Swink
NC Kenan Fellows Program

C. Swink Lesson Plans—Motion and Design (STC)
2
Lesson 1:
Designing Vehicles: Getting Started A
Part A:
1. Ask students to think about vehicles and what causes them to
move. Ask students how engineers design vehicles.
2. Gather materials: science notebooks, loose leaf paper, graph paper.
3. Discuss importance of dates in science notebooks.
4. SCIENCE NOTEBOOK: Respond to the question: “What we
know about the motion and design of vehicles.”
5. Share writings with cooperative group and then as a class. Write
responses on the chart paper or board.
6. SCIENCE NOTEBOOK: Respond to the question: “What we want
to find out about motion and design.”
7. Share writings with cooperative group and then as a class. Write
responses on chart paper or board.
8. Students collect a bucket and explore using the pieces. Students
will also receive a copy of the illustration of pieces handouts (2).
What pieces fit together? How?
9. Students share discoveries from the exploration.

C. Swink Lesson Plans—Motion and Design (STC)
3
Lesson 2:
Designing Vehicles: Getting Started B
Part B:
1. Students will begin their first design challenge: In 20 minutes of
less, design and build a vehicle that will move at least 100 cm (39
in).
2. In cooperative groups, discuss how to test the effectiveness of the
constructed vehicle.
3. SCIENCE NOTEBOOK: How did you make (construct) your
vehicle and how did you get your vehicle to move?
4. What was one problem your group encountered while building the
vehicle? How did you solve the problem?
5. Share designs.
6. SCIENCE NOTEBOOK: Complete LOL (line of learning) in
science notebooks based on student sharing of ideas. The LOL
may include a content blast.

C. Swink Lesson Plans—Motion and Design (STC)
4
Lesson 3:
Using Drawings to Record and Build
1. Distribute graph paper, circle templates, and colored pencils.
2. Discuss technical designs and why they are useful. Use page 7 in
the student guide as an example. Show samples of student work.
3. SCIENCE NOTEBOOK: On graph paper, students will use their
construction from lesson 1 to create an illustration (technical
drawing) of the vehicle. Remind students to write a date in the
science notebook.
4. Share and discuss technical drawings.
5. SCIENCE NOTEBOOK: After the drawing is complete, respond
to the following question: If you were to build the same vehicle
again, what features on the drawing would make it easy to build?
6. Discuss ideas from the science notebook question on what
component(s) of the vehicle should be changed/altered and why.
7. Discuss perspective and have students construct the vehicle on
page 7 of the student activity book (materials listed on page 35 of
teacher’s guide).
8. SCIENCE NOTEBOOK: Students complete LOL in notebook
after construction complete—line of learning discusses what the
student learned from the lesson. The LOL also may include a
content blast.
9. Class discussion using questions on page 34 of teacher’s guide.
• How is your own drawing similar to or different from the
technical drawing?
• On the technical drawing what do you notice about the two
views of the vehicle? How are they alike? How are they
different?
• What parts of the technical drawing might make it easy for
you to build this vehicle? What parts make it difficult?
• How does color help in the drawing?

C. Swink Lesson Plans—Motion and Design (STC)
5
* If students finish early, read the selection about “The Race That
Wasn’t Run” beginning on page 9 of the student book.
* Keep the standard vehicle assembled.

C. Swink Lesson Plans—Motion and Design (STC)
6
Lesson 4:
Pulling a Vehicle: Looking at Force
1. Discuss unbalanced forces (tug of war).
2. Have a student move from one end of the room to another. Other
students describe the student’s motion and change(s) in motion.
3. Give each group materials listed on page 42 of the teacher’s guide.
4. Students turn to pages 15-16 in the student book and follow the
directions as a group.
5. SCIENCE NOTEBOOK: Students will complete 3-A thoroughly
and then glue the page into their science notebooks.
6. SCIENCE NOTEBOOK: After students complete 3-A, students
develop their own question to investigate (using the materials
provided for lesson). Students write the question in their science
notebook. They also record both procedure and data for the
experiment for the investigation.
7. After the lesson, students share findings about force (the greater
the force, the greater the change in speed over the same distance”).
Discuss questions on page 44 of the teacher’s guide:
• When did you observe your vehicle begin to move?
• What caused your vehicle to move?
• Did the vehicle move differently when you changed the
weight? Why do you think this happened?
• What made the vehicle stop moving each time?
• Why did you use the bookend? Did you need it each time?
Why or why not?
• For each different weight you used, how would you describe
the motion of the vehicle?
8. Students discuss their original investigations and the results of
these investigations.
9. SCIENCE NOTEBOOK: After each group discussion, students
complete the LOL in their notebooks. The LOL also includes a
content blast.
C. Swink Lesson Plans—Motion and Design (STC)
7

C. Swink Lesson Plans—Motion and Design (STC)
8
Lesson 5:
Testing the Motion of Vehicles Carrying a Load
1. SCIENCE NOTEBOOK: Students write the question to be
investigated: How will adding blocks to the vehicle change the
way the vehicle moves? Students write a prediction about the
question. For future replication, students also write the materials
in the notebook that are used for this investigation.
2. Discussion of predictions (with group and then with class).
3. Show two blocks of wood and ask students how the vehicle could
be adapted to carry this load (brainstorm).
4. Distribute timers.
5. Practice using the timers (shorter time = higher speed)
6. With this experiment, students will conduct multiple trials of the
investigation. Ask students about the importance of using multiple
trials.
7. Distribute 4-A and discuss how to use the graph to show results.
Directions: Glue 4-A into the science notebook when complete.
Handout 4-A is the data/observation portion of the lesson.
8. Students use pages 20-22 from the student book to complete the
lesson.
9. SCIENCE NOTEBOOK: Students will record the procedure and
results of the investigation.
10. Discussion of results from the lesson. Then, discuss
questions on page 56 of teacher’s guide:
• What did you observe when testing various loads (blocks)?
• How did the vehicle move when it was loaded with two
blocks?
• How did the motion of the vehicle change when you removed
one block? How did it change when you removed both
blocks?
• What do you think would happen if you added a third and
fourth block to the vehicle?
C. Swink Lesson Plans—Motion and Design (STC)
9
• When the vehicle carried no blocks, what was left to
influence its motion? (the weight of the vehicle)
• What can you conclude about the effects of load (such as
blocks) on a vehicle’s motion? (The heavier the vehicle, the
longer the vehicle takes to respond to a force).
• What situations at home or in school may be similar to what
you tested in this lesson?
11. SCIENCE NOTEBOOK: Complete LOL from discussion
and from content blast on mass versus weight (see also page 51
from the teacher’s guide).
C. Swink Lesson Plans—Motion and Design (STC)
10
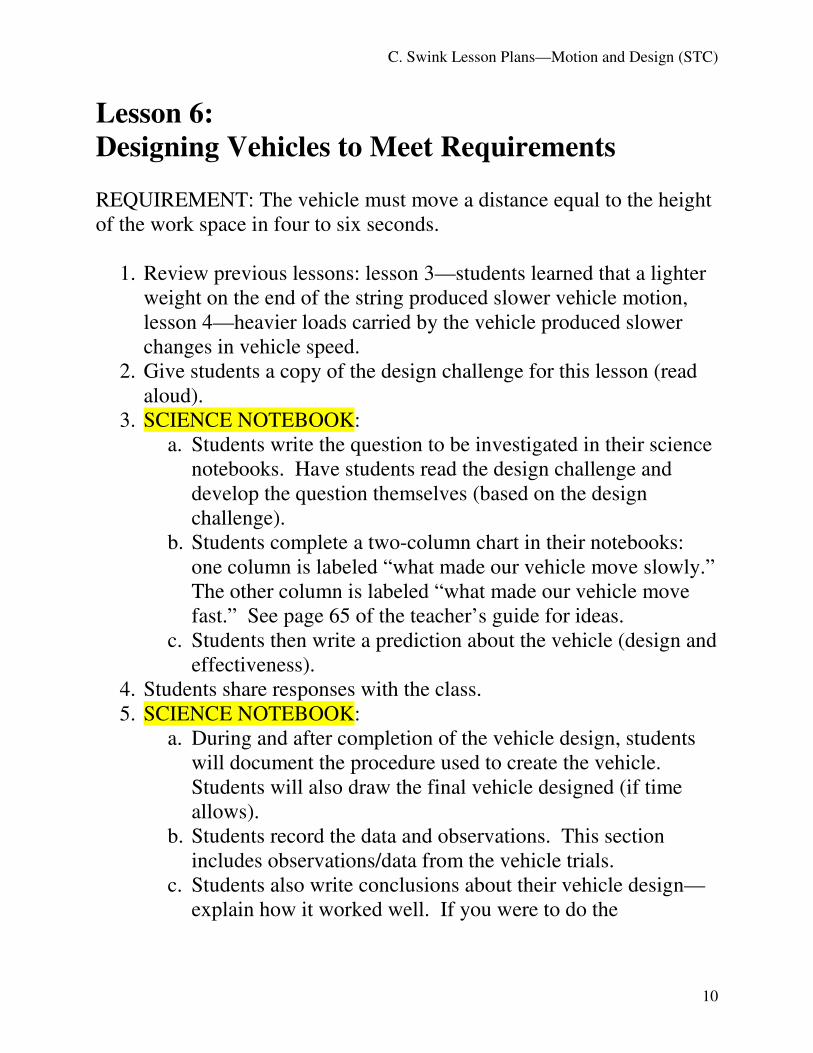
Lesson 6:
Designing Vehicles to Meet Requirements
REQUIREMENT: The vehicle must move a distance equal to the height
of the work space in four to six seconds.
1. Review previous lessons: lesson 3—students learned that a lighter
weight on the end of the string produced slower vehicle motion,
lesson 4—heavier loads carried by the vehicle produced slower
changes in vehicle speed.
2. Give students a copy of the design challenge for this lesson (read
aloud).
3. SCIENCE NOTEBOOK:
a. Students write the question to be investigated in their science
notebooks. Have students read the design challenge and
develop the question themselves (based on the design
challenge).
b. Students complete a two-column chart in their notebooks:
one column is labeled “what made our vehicle move slowly.”
The other column is labeled “what made our vehicle move
fast.” See page 65 of the teacher’s guide for ideas.
c. Students then write a prediction about the vehicle (design and
effectiveness).
4. Students share responses with the class.
5. SCIENCE NOTEBOOK:
a. During and after completion of the vehicle design, students
will document the procedure used to create the vehicle.
Students will also draw the final vehicle designed (if time
allows).
b. Students record the data and observations. This section
includes observations/data from the vehicle trials.
c. Students also write conclusions about their vehicle design—
explain how it worked well. If you were to do the
C. Swink Lesson Plans—Motion and Design (STC)
11
investigation again what would you change about your
vehicle and/or the design problem?
6. SCIENCE NOTEBOOK: Students share vehicle designs with the
class and complete the LOL in science notebooks. The LOL may
also consist of a content blast.
7. Groups that finish early will read the selection “Lunar Rover:
Making Tracks on the Moon” on pages 26-27 in the student book.
C. Swink Lesson Plans—Motion and Design (STC)
12
Lesson 7:
Evaluating Vehicle Design: Looking at Rubber
Band Energy
Note: Prior to the investigation, have rubber bands connected.
1. Students gather materials for the investigation. Discuss the reason
why goggles need to be worn for this lesson.
2. SCIENCE NOTEBOOK:
a. Students write the question to be investigated: How will the
energy from rubber bands affect the motion of the car?
b. Students write their prediction to the question.
3. Students will use pages 29-30 from the student book for this
lesson.
4. SCIENCE NOTEBOOK:
a. Students will complete handout 6-A. This handout is the
data/observation sheet and will be cut out and glued into the
science notebook.
b. Using the data and observations, students will write their
conclusions about the effect rubber band energy has on the
motion of the car.
5. Share findings with the class.
6. Discussion questions:
• What did you feel in your hand as you wound the rubber
band? Did the feeling change as you wound the rubber band
tighter? If so, how?
• Did the direction in which you wound the rubber band affect
the direction in which your vehicle traveled? If so, how?
7. SCIENCE NOTEBOOK: LOL consists of findings from other
groups and a content blast.

C. Swink Lesson Plans—Motion and Design (STC)
13
Lesson 8:
Testing the Effects of Rubber Band Energy
Note: Prior to the lesson, prepare dots and 4 m (13 ft) of machine tape.
Students also need two pieces of masking tape about 3 inches long to
tape the machine tape to the floor.
* Conduct this investigation in the hallway (need a space between 1 m
and 10 m)
1. SCIENCE NOTEBOOK:
a. Write the question to be investigated: How does the number
of turns of the rubber band on the axle affect the distance the
vehicle travels?
b. Write a prediction to the question.
2. Share predictions with the class.
3. Review the procedure for the investigation with the students
(located on pages 34-35 of the student book).
4. Students gather materials and follow the directions to conduct the
experiment.
5. SCIENCE NOTEBOOK:
a. Use the data table example on page 85 of the teacher’s guide
to record data for the investigation.
b. Also for your data and observation, record observation
patterns you observe in the placement of dots on the machine
tape.
c. Write your conclusions to the investigation. Use data and
observations to support your conclusions.
6. Display strips in the classroom for students to observe similarities
and differences in group findings.
7. Share and discuss findings with the class (remember to write down
findings fro other groups in the LOL of the science notebook).
8. Discussion questions:

C. Swink Lesson Plans—Motion and Design (STC)
14
a. Where does the energy to wind the rubber band come from?
(your muscles, fueled by sugar in your blood)
b. Where does the energy to move the vehicle come from?
(rubber band)
c. How do you store energy in the rubber band? (wind rubber
band around axle)
d. How do you release the energy stored in the rubber band? (let
go of vehicle)
e. What happens when the stored energy in the rubber band is
released? (vehicle gains energy of motion, axle turns)
f. How does the number of turns on the rubber band affect the
distance the vehicle travels? (more energy stored means
farther distance)
g. Why was it important to keep the number of turns the same
for all groups in the class? (to make fair comparisons)
h. What would happen if the number of turns was only 1? What
if the number of turns was 10?
9. SCIENCE NOTEBOOK: Students complete the LOL from student
sharing. The LOL may also include a content blast.

C. Swink Lesson Plans—Motion and Design (STC)
15
Lesson 9:
Evaluating Vehicle Design: Looking at Friction
1. SCIENCE NOTEBOOK: Students create and complete two
columns in their notebooks: What We Know about Friction and
What We Want to Find Out about Friction.
2. Share with the class and write ideas on the board.
3. Have students rub their hands together. Brainstorm and discuss
every day events that are related to and/or involve friction.
4. Students will be observing the following design features related to
friction: (a) wheels and tan hub connectors, (b) tires, and (c) frame
and crossbars. Remind students that the investigation questions
provided on the cards in 8-A are ideas. They can use those ideas
or create their own ideas to explore.
5. SCIENCE NOTEBOOK:
a. Students write the investigation question for each design
feature researched (see step 4).
b. Underneath the investigation question, students complete
handout 8-A. Cut out around the handout and glue the
handout into the science notebook.
c. After all handouts are glued in, students write a conclusion
about friction.
6. Share investigation findings with the class.
7. Discussion questions:
• Is there anything on your vehicle that rubs together? (tires
against the frame, wheels against the axle)
• What can this rubbing do to the motion of your vehicle?
(slows it down, takes away energy available to vehicle,
creates wasteful friction)
• What vehicle design features help reduce the amount of
rubbing between the wheels and the vehicle’s axle and
frame? (tan hub connectors, crossbars)
C. Swink Lesson Plans—Motion and Design (STC)
16
• What vehicle design features increase the friction between
the floor or work surface and the wheels? (tires)
• How does this rubbing influence your vehicle’s motion?
(creates useful friction, helps it move)
8. SCIENCE NOTEBOOK: Students complete the LOL from
student sharing. The LOL may also include a content blast.
C. Swink Lesson Plans—Motion and Design (STC)
17
Lesson 10:
Designing and Building a Vehicle with a Sail
1. Review list of what makes the vehicle go fast and what makes the
vehicle slow down (from lesson 5).
2. SCIENCE NOTEBOOK:
a. The question to be investigated is “How does a sail affect the
movement of the vehicle?” Explain how the sail might affect
the vehicle’s motion when moving with the wind and against
it.
3. Directions: Students will adapt their standard vehicle to hold a
cardboard sail that will catch the air. Students use page 38 for
group discussion. One student in each group will facilitate the
discussion.
4. SCIENCE NOTEBOOK: Students sketch their group’s design in
their science notebook prior to construction. Students also explain
why they selected the sail design.
5. Each group shares the design and explains their rationale for the
vehicle.
6. Students complete the Student Self-Assessment A handout.
Collect the self-assessments to review. Explain to students that the
self-assessment is not a grade—it is a reflection that we will revisit
at the end of the unit.
7. SCIENCE NOTEBOOK: Students complete the LOL in their
notebooks using group data from sharing.
C. Swink Lesson Plans—Motion and Design (STC)
18
Lesson 11:
Testing the Effects of Air Resistance on a
Vehicle’s Motion
1. SCIENCE NOTEBOOK:
a. Students will investigate the following question: How does
the upright sail affect a vehicle’s motion?
b. Write a prediction to the research question.
2. Review instructions for investigation on pages 44-45 of the student
book.
3. Review suggestion points on page 110 of the teacher’s guide.
4. SCIENCE NOTEBOOK:
a. Students glue in their procedure handouts.
b. Students record data using the same data table on page 111 of
the teacher’s guide.
c. Students write their conclusions (based on the data) in their
notebooks.
5. Each group shares their findings with the class.
6. SCIENCE NOTEBOOK: Students complete the LOL in their
notebooks using group data from sharing.

C. Swink Lesson Plans—Motion and Design (STC)
19
Lesson 12:
Building a Propeller-Driven Vehicle
1. Students construct the propeller to be used in the vehicle (see page
120 of the teacher guide). The text says to prepare the propellers
for the students, and the teachers are going to learn how to do this
preparation.
2. SCIENCE NOTEBOOK:
a. The research question is How does a propeller affect the
motion of the vehicle?
b. Students will think-pair-share “Design Ideas for Propeller-
Driven Vehicles.” (List ideas on the board).
3. Compare and contrast the technical drawings so far (standard car
versus propeller-driven vehicle). The propeller-driven vehicle
technical drawing is on page 48 in the student book.
4. Students construct the propeller-driven vehicle on page 48 of the
student book. Students will get the vehicle to move.
5. SCIENCE NOTEBOOK:
a. Students use the sample data table on page 49 in the student
book to record data.
b. Students write a conclusion about the motion of the
propeller-driven vehicle (based on the data).
6. Students will share their results with the class.
7. Discussion questions:
• How did you get the vehicle to move?
• How did you get the propeller to spin?
• What happened to the rubber band as you wound the
propeller?
• What happened when you let go of the propeller? Why
do you think this happened?
• How is the use of the rubber band with the
propeller-driven vehicle and the axle-driven
vehicle the same? (energy to move the vehicle
C. Swink Lesson Plans—Motion and Design (STC)
20
stored in rubber band, vehicle moves when energy
is released)
• How is the rubber band used differently? (rubber
band is twisted on propeller-driven vehicle, not
wrapped around the axle; rubber band moves the
propeller, not the axle)
8. SCIENCE NOTEBOOK: Students complete the LOL based on
student sharing of ideas and class discussion.
C. Swink Lesson Plans—Motion and Design (STC)
21
Lesson 13:
Analyzing the Motion and Design of a Propeller-
Driven Vehicle
1. Discuss the handout 12-A and that students need to make sure to
return their propeller vehicle to its original form following each
test.
2. Students work cooperatively to complete the “What If” questions
on handout 12-A.
3. When the investigations are complete, discuss findings for each
question with the class.
4. SCIENCE NOTEBOOK: Students will glue their handout into
their science notebook. Students will be sure to include the day and
time of the investigation in the notebook.

C. Swink Lesson Plans—Motion and Design (STC)
22
Lesson 14:
Looking at Cost A
PART A:
1. Review requirements for vehicles that have been met in
investigations so far.
2. Discuss what other challenges engineers may have to meet with
designs.
3. Discuss how the cost is an important factor in the design process.
4. Go over handout 13-A: Evaluating the Cost of Our Design.
5. SCIENCE NOTEBOOK: Glue the completed cost handout into the
science notebook.
6. As a class, discuss results.
7. Have students discuss what they deem to be an inexpensive and
expensive cost for a vehicle.
8. Have students brainstorm changes to make to the vehicle to reduce
cost.

C. Swink Lesson Plans—Motion and Design (STC)
23
Lesson 15:
Looking at Cost B
PART B:
1. Students redesign their vehicle to reduce the cost without affecting
the performance.
2. Students document their costs on the handout.
3. SCIENCE NOTEBOOK: For the redesigned vehicle, students label
the handout “redesigned cost effective vehicle” and glue it into
their science notebooks.
4. Share and discuss findings with the class.

C. Swink Lesson Plans—Motion and Design (STC)
24
Lesson 16:
Planning Our Final Design Challenge
1. Each team selects one of the design challenge cards.
2. SCIENCE NOTEBOOKS: Students write all of their ideas for a
resolution to the design problem (brainstorm).
3. With the group, each student will share his/her ideas with the
group. (students meet at the board)
4. One student will write the solutions on the board.
5. Students browse through and read all of the various solutions to the
design challenges to get ideas for their challenge.
6. Students return to their science groups to determine one idea to
implement for the design challenge.
7. Students record their plan on handout 14-A: Planning Our Final
Design Challenge.
8. SCIENCE NOTEBOOK: Students glue handout 14-A into their
science notebooks.
9. Each group presents their final design challenge idea to the class
for questions and feedback.

C. Swink Lesson Plans—Motion and Design (STC)
25
Lesson 17:
Refining Our Design
1. Review handout 14-A to determine materials needed.
2. Collect materials.
3. Begin construction of the design.
4. Test the design.
5. Modify the design.
6. Using handout 13-A as reference, students determine the cost of
their design and discuss cost effectiveness in their group.
7. Students create a technical drawing of their final vehicle.
8. SCIENE NOTEBOOK:
a. Students glue handout 13-A into their science notebooks.
b. Students glue the technical drawing (top, side, front optional)
into their science notebooks.
c. Students reflect on the construction process:
Sample questions for beginnings:
- What worked well?
- How did your vehicle change from the original plan?
- Explain your procedure for testing the effectiveness of
the car.
9. Students begin to plan their presentation for lesson 16 (discuss
presentation expectations).

C. Swink Lesson Plans—Motion and Design (STC)
26
Lesson 18:
Presentations
• Students present their final design products in a creative way.
Audience members (other students) ask questions to the group to
clarify information.
Notes:
These lessons plans follow the Motion and Design kit from STC
(Carolina Biological). The teacher guide provides many thought-
provoking questions (as cited in the lesson plans); however, teacher-
developed questions will definitely enhance the instruction. Use
these lesson plans as a guide for your classroom. Adapt these lesson
plans as needed to meet the educational needs of your students. This
guide will also assist you when you conduct your own teacher
training sessions.
As student groups work throughout the lessons, observe each group
and jot down questions to ask during a discussion. These questions
can include innovative ideas, comments, or possible misconceptions
that require further clarification.
Make sure all students and groups have the opportunity to share
findings and conclusions from the investigations. Then, further
questions for investigations can be developed by the groups.
Discussing investigation conclusions is an excellent way in which to
assess whether the student grasped the concepts.
Enjoy teaching Motion and Design!
- Carol ☺