Grade 4: Module 2B: Unit 1: Lesson 1 Building Background ...

KNOW YOUR BIKE
DISCUSSION One of the areas in which all new cyclists
struggle is making sure that their bike is
adjusted correctly and knowing what to
do if something goes wrong. If you are
really interested in learning how to fix
your bike, most local bike shops hold
mechanics classes or workshops.
However, everyone should know the
basics. Being able to make sure your bike
is safe to ride and being prepared when
you are out on a ride is an essential part of
riding safely.
ABCD CHECK: The ABCD check is
something you should do every time
before you ride. These are four safety
checks that can prevent larger accidents
from happening.
A-Air: Is the air pressure in the tires
correct? The ideal air pressure is on the
side of the tire. That will let you know how
much to inflate your tire. Having a good
pump makes it easy to keep your tires
inflated properly. Some people keep a
pump on their bike in case they need to
change a flat while out for a ride. That is a
good idea and we will talk more about
changing a flat later.
B-Brakes: Are your brake pads in good
shape? Can you feel or hear a rubbing
sound when you spin the tire? Make sure
your brake cables are neither too tight nor
too loose. Cables that are too tight can
make you brake too hard. You could flip
over your handlebars or just not stop
smoothly. You should be able to squeeze
your brakes tight, with about an inch
between your brakes and your
handlebars. If your brakes are too loose
you cannot stop effectively. If you can
squeeze your brakes to the handlebars
without coming to a complete stop, they
are too loose.
C-Chain: Is the chain straight? Does it
have any rust spots or kinks in it? A well
maintained chain should be clean and
lightly oiled. If you bike off road on dirt
paths you might need to clean your chain
after every ride to keep it in shape. Also,
make sure your shoelaces and pant legs
are out of the chain’s way when you ride.
Tuck in your shoelaces and roll up your
jeans so they don’t become a hazard. You
can also buy ankle bands or tuck your
pants into your socks.
D-Drop: Raise your bike an inch or two
off the ground and drop it. Listen for
rattles or funny noises. This can tell you if
something is loose, like a reflector or a
quick release lever. Be familiar with your
bike. If you have quick release levers on
your wheels or seat make sure they are
tight before you hop on your bike and ride
away. To tighten a quick release lever,
start with the lever facing out. Hand
tighten it on the other side and finish by
pushing the lever in. It should feel tight
and leave a faint imprint on your hand.
Do not leave the lever pointing out.
YOUR SEAT: If a rider’s legs are bending
more than 90 degrees at the top of your
stroke than the bike seat is too low. Your
legs are capable of generating the most
power when pushing between 90 and 180
degrees. If the saddle is too low, you do
not use all the power in your legs and you
will tire more quickly. If the saddle is too
high, you lose power when you lose full
contact with your pedal. You do not want
to bike on tip toes. To adjust a seat
correctly, position it level with the ground.
SAFE ROUTES TO SCHOOLS MIDDLE SCHOOL GD.6-8
STANDARDS CA.PE.6.4 Students demonstrate knowledge of
physical fitness concepts, principles, and
strategies to improve health and performance.
CA.PE.8.3 Students assess and maintain a level
of physical fitness to improve health and
performance.
CA.ELA.7.LS.1.7 Provide constructive feed back
to speakers concerning... a speech’s content and
delivery and its overall impact upon the listener.
CA.M.6.NS.1.2 ...Interpret and use ratios in
different contexts to show the relative sizes of
two quantities, using appropriate notations
OBJECTIVES
Students will know how to check
their bike for safety.
They will have a basic
understanding of how to change a
flat tire.
The will be familiar with the
different parts of the bike and how
they work together.
They will understand how shifting
gears can change pedaling power.
MATERIALS
Bicycle
Parts of the bike hang tags
Vehicle inspection check list
Changing a flat DVD
Gear Ratios handout
City Biking Handbook
M S 2 B
It should be high enough that one’s leg is
slightly bent when extended with the heel
on the pedal in the lowest position. This
means that when you stand up in your
seat, your toes just touch the ground. This
can be uncomfortable for the novice rider.
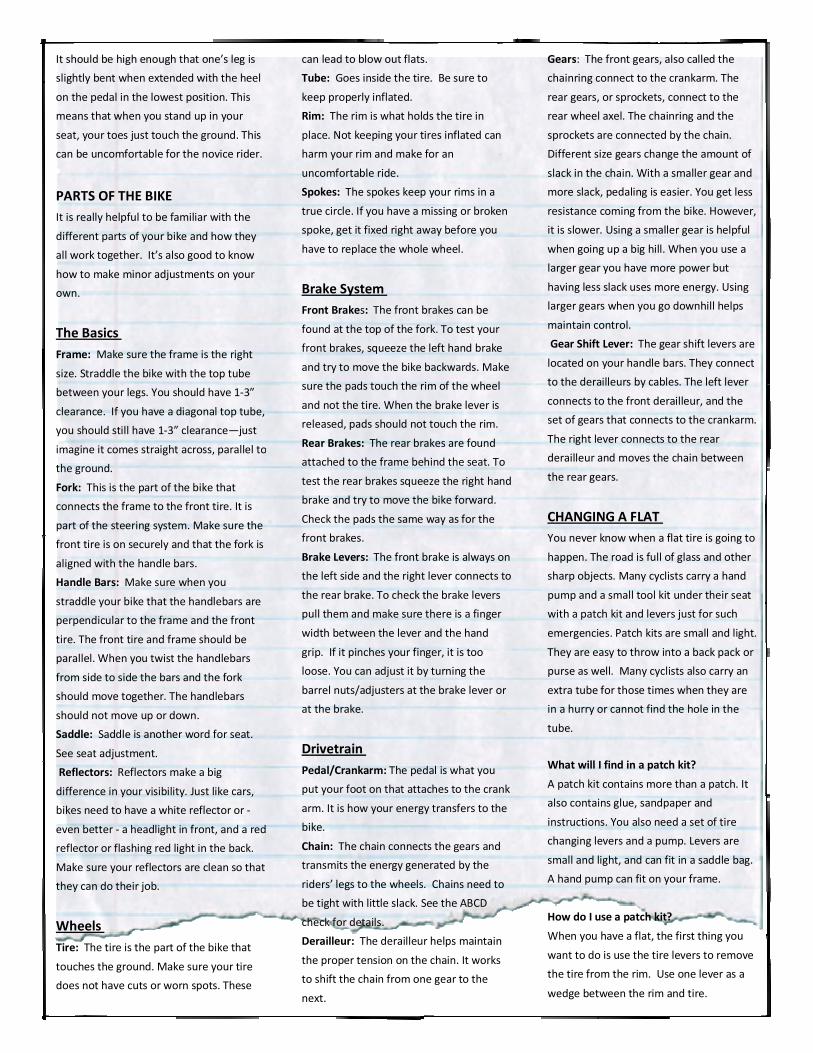
PARTS OF THE BIKE
It is really helpful to be familiar with the
different parts of your bike and how they
all work together. It’s also good to know
how to make minor adjustments on your
own.
The Basics
Frame: Make sure the frame is the right
size. Straddle the bike with the top tube
between your legs. You should have 1-3”
clearance. If you have a diagonal top tube,
you should still have 1-3” clearance—just
imagine it comes straight across, parallel to
the ground.
Fork: This is the part of the bike that
connects the frame to the front tire. It is
part of the steering system. Make sure the
front tire is on securely and that the fork is
aligned with the handle bars.
Handle Bars: Make sure when you
straddle your bike that the handlebars are
perpendicular to the frame and the front
tire. The front tire and frame should be
parallel. When you twist the handlebars
from side to side the bars and the fork
should move together. The handlebars
should not move up or down.
Saddle: Saddle is another word for seat.
See seat adjustment.
Reflectors: Reflectors make a big
difference in your visibility. Just like cars,
bikes need to have a white reflector or -
even better - a headlight in front, and a red
reflector or flashing red light in the back.
Make sure your reflectors are clean so that
they can do their job.
Wheels
Tire: The tire is the part of the bike that
touches the ground. Make sure your tire
does not have cuts or worn spots. These
can lead to blow out flats.
Tube: Goes inside the tire. Be sure to
keep properly inflated.
Rim: The rim is what holds the tire in
place. Not keeping your tires inflated can
harm your rim and make for an
uncomfortable ride.
Spokes: The spokes keep your rims in a
true circle. If you have a missing or broken
spoke, get it fixed right away before you
have to replace the whole wheel.
Brake System
Front Brakes: The front brakes can be
found at the top of the fork. To test your
front brakes, squeeze the left hand brake
and try to move the bike backwards. Make
sure the pads touch the rim of the wheel
and not the tire. When the brake lever is
released, pads should not touch the rim.
Rear Brakes: The rear brakes are found
attached to the frame behind the seat. To
test the rear brakes squeeze the right hand
brake and try to move the bike forward.
Check the pads the same way as for the
front brakes.
Brake Levers: The front brake is always on
the left side and the right lever connects to
the rear brake. To check the brake levers
pull them and make sure there is a finger
width between the lever and the hand
grip. If it pinches your finger, it is too
loose. You can adjust it by turning the
barrel nuts/adjusters at the brake lever or
at the brake.
Drivetrain
Pedal/Crankarm: The pedal is what you
put your foot on that attaches to the crank
arm. It is how your energy transfers to the
bike.
Chain: The chain connects the gears and
transmits the energy generated by the
riders’ legs to the wheels. Chains need to
be tight with little slack. See the ABCD
check for details.
Derailleur: The derailleur helps maintain
the proper tension on the chain. It works
to shift the chain from one gear to the
next.
Gears: The front gears, also called the
chainring connect to the crankarm. The
rear gears, or sprockets, connect to the
rear wheel axel. The chainring and the
sprockets are connected by the chain.
Different size gears change the amount of
slack in the chain. With a smaller gear and
more slack, pedaling is easier. You get less
resistance coming from the bike. However,
it is slower. Using a smaller gear is helpful
when going up a big hill. When you use a
larger gear you have more power but
having less slack uses more energy. Using
larger gears when you go downhill helps
maintain control.
Gear Shift Lever: The gear shift levers are
located on your handle bars. They connect
to the derailleurs by cables. The left lever
connects to the front derailleur, and the
set of gears that connects to the crankarm.
The right lever connects to the rear
derailleur and moves the chain between
the rear gears.
CHANGING A FLAT
You never know when a flat tire is going to
happen. The road is full of glass and other
sharp objects. Many cyclists carry a hand
pump and a small tool kit under their seat
with a patch kit and levers just for such
emergencies. Patch kits are small and light.
They are easy to throw into a back pack or
purse as well. Many cyclists also carry an
extra tube for those times when they are
in a hurry or cannot find the hole in the
tube.
What will I find in a patch kit?
A patch kit contains more than a patch. It
also contains glue, sandpaper and
instructions. You also need a set of tire
changing levers and a pump. Levers are
small and light, and can fit in a saddle bag.
A hand pump can fit on your frame.
How do I use a patch kit?
When you have a flat, the first thing you
want to do is use the tire levers to remove
the tire from the rim. Use one lever as a
wedge between the rim and tire.
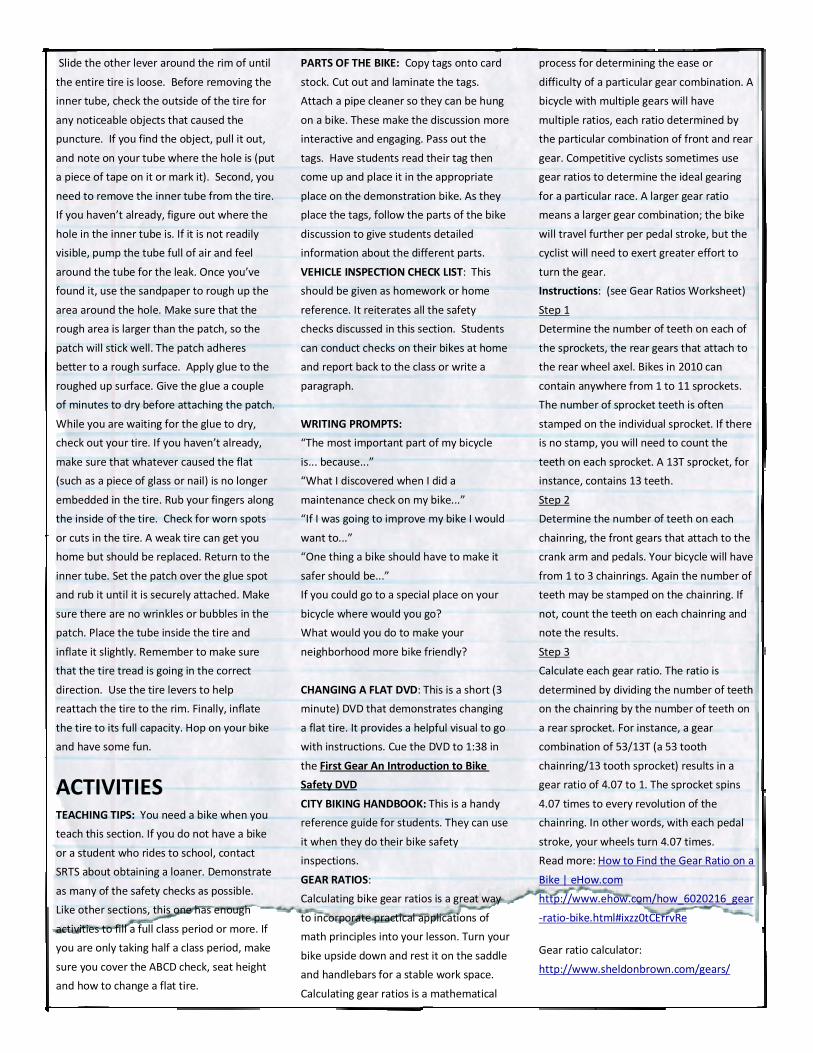
Slide the other lever around the rim of until
the entire tire is loose. Before removing the
inner tube, check the outside of the tire for
any noticeable objects that caused the
puncture. If you find the object, pull it out,
and note on your tube where the hole is (put
a piece of tape on it or mark it). Second, you
need to remove the inner tube from the tire.
If you haven’t already, figure out where the
hole in the inner tube is. If it is not readily
visible, pump the tube full of air and feel
around the tube for the leak. Once you’ve
found it, use the sandpaper to rough up the
area around the hole. Make sure that the
rough area is larger than the patch, so the
patch will stick well. The patch adheres
better to a rough surface. Apply glue to the
roughed up surface. Give the glue a couple
of minutes to dry before attaching the patch.
While you are waiting for the glue to dry,
check out your tire. If you haven’t already,
make sure that whatever caused the flat
(such as a piece of glass or nail) is no longer
embedded in the tire. Rub your fingers along
the inside of the tire. Check for worn spots
or cuts in the tire. A weak tire can get you
home but should be replaced. Return to the
inner tube. Set the patch over the glue spot
and rub it until it is securely attached. Make
sure there are no wrinkles or bubbles in the
patch. Place the tube inside the tire and
inflate it slightly. Remember to make sure
that the tire tread is going in the correct
direction. Use the tire levers to help
reattach the tire to the rim. Finally, inflate
the tire to its full capacity. Hop on your bike
and have some fun.
ACTIVITIES TEACHING TIPS: You need a bike when you
teach this section. If you do not have a bike
or a student who rides to school, contact
SRTS about obtaining a loaner. Demonstrate
as many of the safety checks as possible.
Like other sections, this one has enough
activities to fill a full class period or more. If
you are only taking half a class period, make
sure you cover the ABCD check, seat height
and how to change a flat tire.
PARTS OF THE BIKE: Copy tags onto card
stock. Cut out and laminate the tags.
Attach a pipe cleaner so they can be hung
on a bike. These make the discussion more
interactive and engaging. Pass out the
tags. Have students read their tag then
come up and place it in the appropriate
place on the demonstration bike. As they
place the tags, follow the parts of the bike
discussion to give students detailed
information about the different parts.
VEHICLE INSPECTION CHECK LIST: This
should be given as homework or home
reference. It reiterates all the safety
checks discussed in this section. Students
can conduct checks on their bikes at home
and report back to the class or write a
paragraph.
WRITING PROMPTS:
“The most important part of my bicycle
is... because...”
“What I discovered when I did a
maintenance check on my bike...”
“If I was going to improve my bike I would
want to...”
“One thing a bike should have to make it
safer should be...”
If you could go to a special place on your
bicycle where would you go?
What would you do to make your
neighborhood more bike friendly?
CHANGING A FLAT DVD: This is a short (3
minute) DVD that demonstrates changing
a flat tire. It provides a helpful visual to go
with instructions. Cue the DVD to 1:38 in
the First Gear An Introduction to Bike
Safety DVD
CITY BIKING HANDBOOK: This is a handy
reference guide for students. They can use
it when they do their bike safety
inspections.
GEAR RATIOS:
Calculating bike gear ratios is a great way
to incorporate practical applications of
math principles into your lesson. Turn your
bike upside down and rest it on the saddle
and handlebars for a stable work space.
Calculating gear ratios is a mathematical
process for determining the ease or
difficulty of a particular gear combination. A
bicycle with multiple gears will have
multiple ratios, each ratio determined by
the particular combination of front and rear
gear. Competitive cyclists sometimes use
gear ratios to determine the ideal gearing
for a particular race. A larger gear ratio
means a larger gear combination; the bike
will travel further per pedal stroke, but the
cyclist will need to exert greater effort to
turn the gear.
Instructions: (see Gear Ratios Worksheet)
Step 1
Determine the number of teeth on each of
the sprockets, the rear gears that attach to
the rear wheel axel. Bikes in 2010 can
contain anywhere from 1 to 11 sprockets.
The number of sprocket teeth is often
stamped on the individual sprocket. If there
is no stamp, you will need to count the
teeth on each sprocket. A 13T sprocket, for
instance, contains 13 teeth.
Step 2
Determine the number of teeth on each
chainring, the front gears that attach to the
crank arm and pedals. Your bicycle will have
from 1 to 3 chainrings. Again the number of
teeth may be stamped on the chainring. If
not, count the teeth on each chainring and
note the results.
Step 3
Calculate each gear ratio. The ratio is
determined by dividing the number of teeth
on the chainring by the number of teeth on
a rear sprocket. For instance, a gear
combination of 53/13T (a 53 tooth
chainring/13 tooth sprocket) results in a
gear ratio of 4.07 to 1. The sprocket spins
4.07 times to every revolution of the
chainring. In other words, with each pedal
stroke, your wheels turn 4.07 times.
Read more: How to Find the Gear Ratio on a
Bike | eHow.com
http://www.ehow.com/how_6020216_gear
-ratio-bike.html#ixzz0tCErrvRe
Gear ratio calculator:
http://www.sheldonbrown.com/gears/

FrameFrameFrameFrame Frame ForkFrame ForkFrame ForkFrame Fork
HandlebarsHandlebarsHandlebarsHandlebars SaddleSaddleSaddleSaddle
ReflecReflecReflecReflectorstorstorstors Tire and RimTire and RimTire and RimTire and Rim

SpokesSpokesSpokesSpokes Rear BrakesRear BrakesRear BrakesRear Brakes
Front BrakesFront BrakesFront BrakesFront Brakes Rear Brake Rear Brake Rear Brake Rear Brake
leverleverleverlever
Front Brake Front Brake Front Brake Front Brake
leverleverleverlever ChainChainChainChain

Pedal/ Pedal/ Pedal/ Pedal/
CrankarmCrankarmCrankarmCrankarm DerailleurDerailleurDerailleurDerailleur
Front gears/ Front gears/ Front gears/ Front gears/
ChainringsChainringsChainringsChainrings
Front gear Front gear Front gear Front gear
shiftershiftershiftershifter
Rear gears/ Rear gears/ Rear gears/ Rear gears/
SprocketsSprocketsSprocketsSprockets
Rear gear Rear gear Rear gear Rear gear
shiftershiftershiftershifter
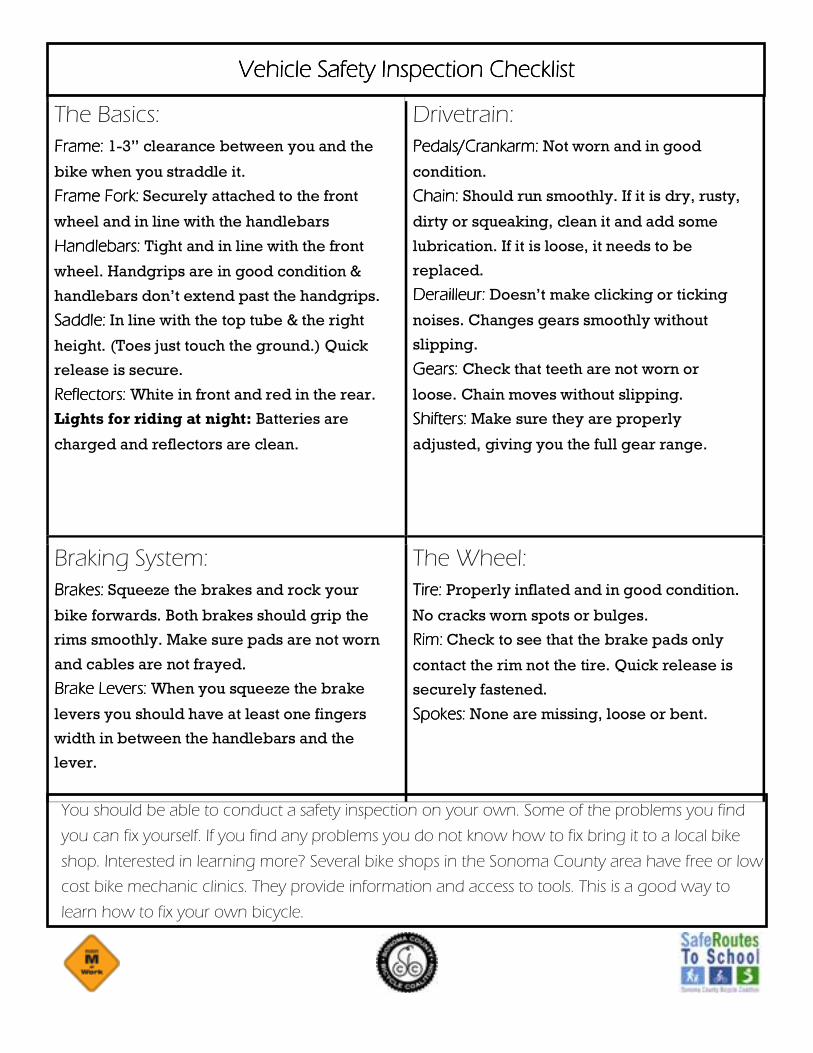
The Basics: Frame:Frame:Frame:Frame: 1-3” clearance between you and the
bike when you straddle it.
Frame Fork:Frame Fork:Frame Fork:Frame Fork: Securely attached to the front
wheel and in line with the handlebars
Handlebars:Handlebars:Handlebars:Handlebars: Tight and in line with the front
wheel. Handgrips are in good condition &
handlebars don’t extend past the handgrips.
SaddleSaddleSaddleSaddle:::: In line with the top tube & the right
height. (Toes just touch the ground.) Quick
release is secure.
Reflectors:Reflectors:Reflectors:Reflectors: White in front and red in the rear.
Lights for riding at night: Batteries are
charged and reflectors are clean.
Drivetrain: Pedals/CrankarPedals/CrankarPedals/CrankarPedals/Crankarm:m:m:m: Not worn and in good
condition.
Chain:Chain:Chain:Chain: Should run smoothly. If it is dry, rusty,
dirty or squeaking, clean it and add some
lubrication. If it is loose, it needs to be
replaced.
Derailleur:Derailleur:Derailleur:Derailleur: Doesn’t make clicking or ticking
noises. Changes gears smoothly without
slipping.
Gears:Gears:Gears:Gears: Check that teeth are not worn or
loose. Chain moves without slipping.
Shifters:Shifters:Shifters:Shifters: Make sure they are properly
adjusted, giving you the full gear range.
Braking System: Brakes:Brakes:Brakes:Brakes: Squeeze the brakes and rock your
bike forwards. Both brakes should grip the
rims smoothly. Make sure pads are not worn
and cables are not frayed.
Brake Levers:Brake Levers:Brake Levers:Brake Levers: When you squeeze the brake
levers you should have at least one fingers
width in between the handlebars and the
lever.
The Wheel: Tire: Tire: Tire: Tire: Properly inflated and in good condition.
No cracks worn spots or bulges.
Rim:Rim:Rim:Rim: Check to see that the brake pads only
contact the rim not the tire. Quick release is
securely fastened.
Spokes:Spokes:Spokes:Spokes: None are missing, loose or bent.
Vehicle Safety Inspection CVehicle Safety Inspection CVehicle Safety Inspection CVehicle Safety Inspection Checklisthecklisthecklisthecklist
You should be able to conduct a safety inspection on your own. Some of the problems you find
you can fix yourself. If you find any problems you do not know how to fix bring it to a local bike
shop. Interested in learning more? Several bike shops in the Sonoma County area have free or low
cost bike mechanic clinics. They provide information and access to tools. This is a good way to
learn how to fix your own bicycle.

Where do reflectors go on a bike? Draw them in and label them. What color reflector should you have
in the back? What color in the front?
What side of the handlebars are the front brakes on? Distinguish between the front brakes and the
rear brakes, and then label them.
Label the rear gears. What is another name for them?
Label the front gears. What is another name for them?
Where does one usually find the front and rear gear shifters? What side are the front gear shifters on?
What side are the rear gear shifters on?
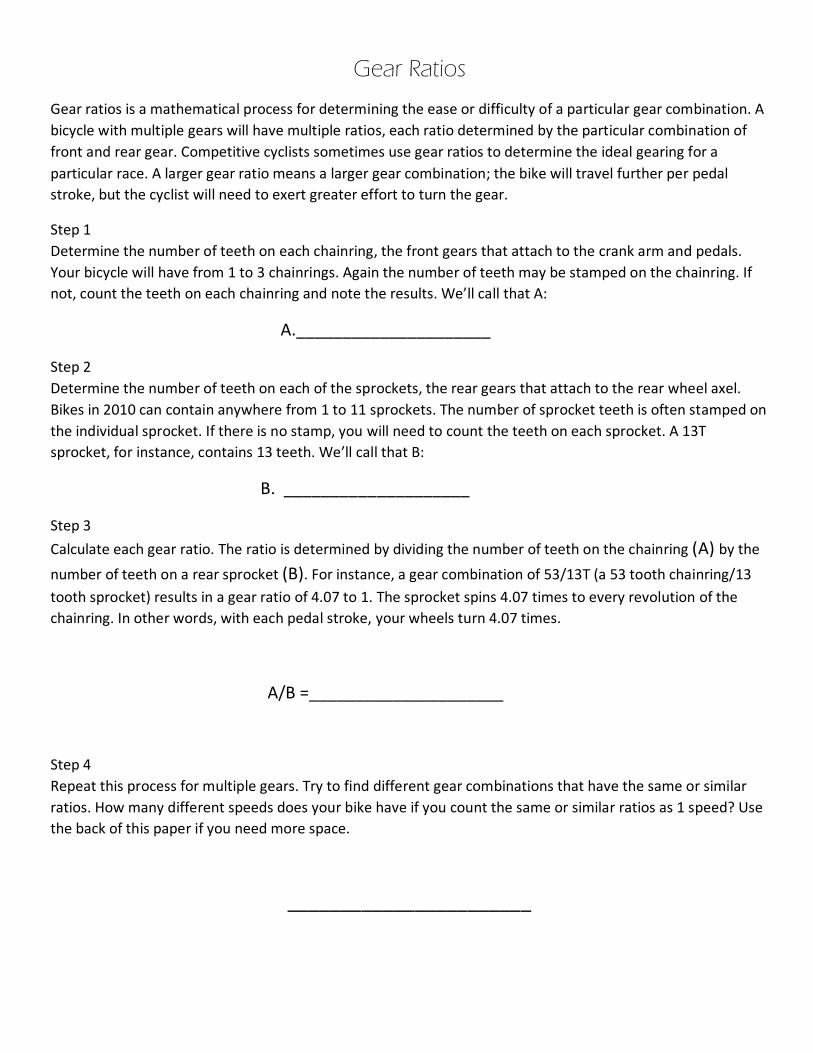
Gear Ratios
Gear ratios is a mathematical process for determining the ease or difficulty of a particular gear combination. A
bicycle with multiple gears will have multiple ratios, each ratio determined by the particular combination of
front and rear gear. Competitive cyclists sometimes use gear ratios to determine the ideal gearing for a
particular race. A larger gear ratio means a larger gear combination; the bike will travel further per pedal
stroke, but the cyclist will need to exert greater effort to turn the gear.
Step 1
Determine the number of teeth on each chainring, the front gears that attach to the crank arm and pedals.
Your bicycle will have from 1 to 3 chainrings. Again the number of teeth may be stamped on the chainring. If
not, count the teeth on each chainring and note the results. We’ll call that A:
A._____________________
Step 2
Determine the number of teeth on each of the sprockets, the rear gears that attach to the rear wheel axel.
Bikes in 2010 can contain anywhere from 1 to 11 sprockets. The number of sprocket teeth is often stamped on
the individual sprocket. If there is no stamp, you will need to count the teeth on each sprocket. A 13T
sprocket, for instance, contains 13 teeth. We’ll call that B:
B. ____________________
Step 3
Calculate each gear ratio. The ratio is determined by dividing the number of teeth on the chainring (A) by the
number of teeth on a rear sprocket (B). For instance, a gear combination of 53/13T (a 53 tooth chainring/13
tooth sprocket) results in a gear ratio of 4.07 to 1. The sprocket spins 4.07 times to every revolution of the
chainring. In other words, with each pedal stroke, your wheels turn 4.07 times.
A/B =_____________________
Step 4
Repeat this process for multiple gears. Try to find different gear combinations that have the same or similar
ratios. How many different speeds does your bike have if you count the same or similar ratios as 1 speed? Use
the back of this paper if you need more space.
_______________________