Lesson 24: Adding Graphics, Animation, and Sound.
15
Lesson 24: Adding Graphics, Animation, and Sound
-
Upload
jason-watts -
Category
Documents
-
view
225 -
download
2
Transcript of Lesson 24: Adding Graphics, Animation, and Sound.
Lesson 24: Adding Graphics, Animation, and Sound

2
Learning Objectives
After studying this lesson, you will be able to:
Add clip art, photos, and screen shots to a presentation
Remove backgrounds and apply artistic effects to slide
images
Add transition effects to a slide show
Add animation to objects on a slide
Add sound effects to transitions and animations

Working with Clip Art
Add clip art to emphasize key points
Microsoft Office clip art collection
3
Insert a digital
photo or
custom artwork
Open the Clip
Art task pane

Working with Clip Art
Search for clip art
Keyword
4
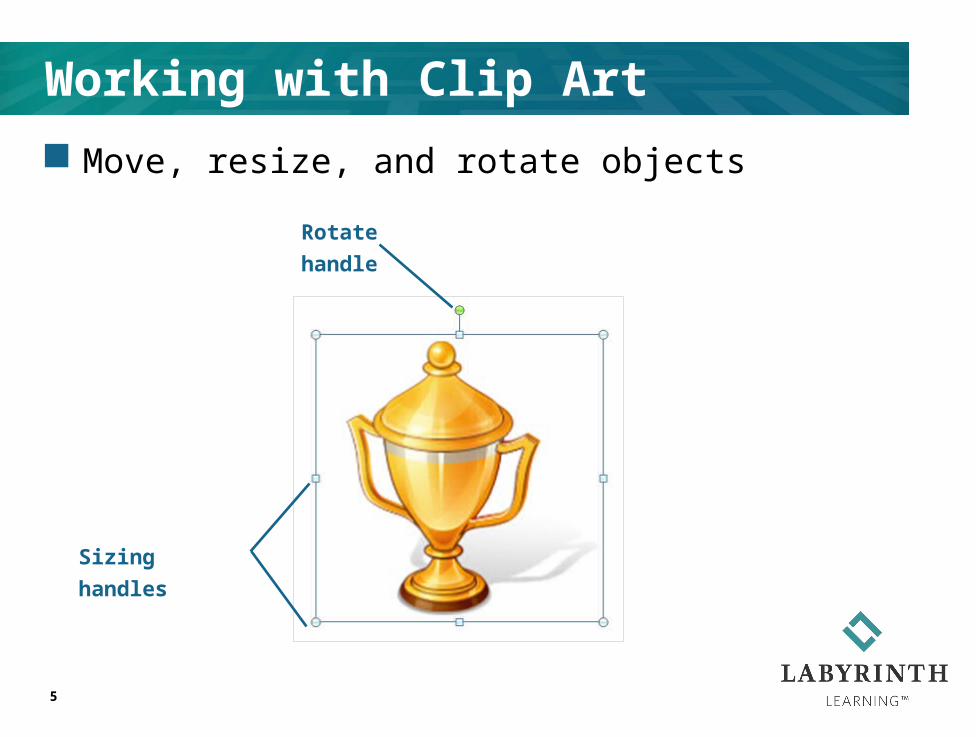
Working with Clip Art
Move, resize, and rotate objects
5
Rotate handle
Sizing handles

Formatting Clip Art
From the Format tab, you can:
Resize clip art
Move clip art
Rotate clip art
Format clip art
6

Original photo with
background
Areas to be hidden
overlayed in purple
Background
removed
Removing a Background
Background is hidden, not deleted permanently
7

23 artistic effects
Artistic effects
gallery
Pencil sketch effect
applied
Applying Artistic Effects
8
Pencil sketch effect
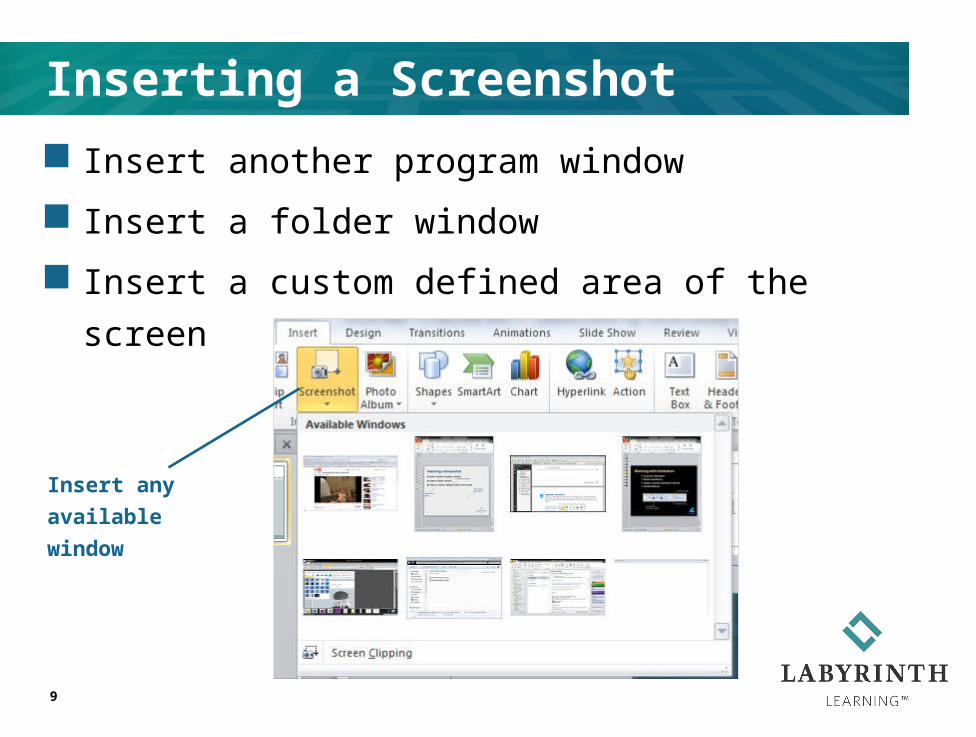
Insert another program window
Insert a folder window
Insert a custom defined area of the screen
Insert any available
window
Inserting a Screenshot
9

Resize and rotate just like clip art
Add text
Yellow diamonds change shape
Shape with text
Working with Shapes
10
Yellow diamonds
alter shape design

Animates the transition between slides
Applied to slide being entered
More than thirty
transitions
available
Working with Slide Transitions
11
Transition speed
Transition sound
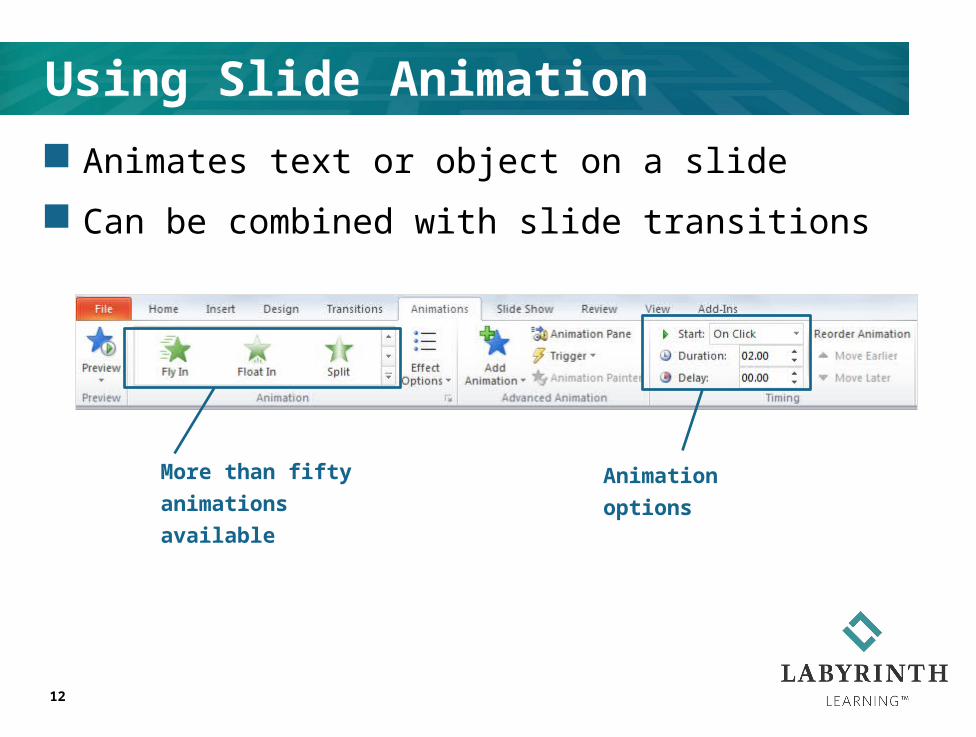
Animates text or object on a slide
Can be combined with slide transitions
More than fifty
animations
available
Using Slide Animation
12
Animation options
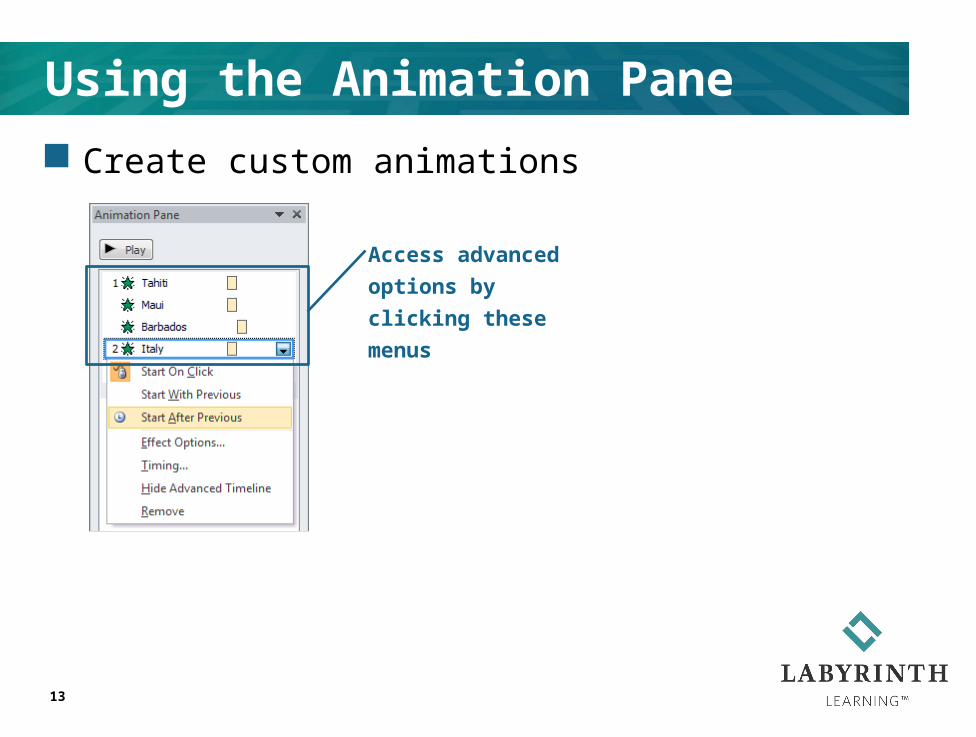
Create custom animations
Using the Animation Pane
13
Access advanced
options by clicking
these menus

Add sound to transitions and animations
Adding Sound Effects
14
Add sound to an
animation via the
Animation Pane

Lesson 24: Adding Graphics, Animation, and Sound