LCD I 2C/Serial RX Backpack Data Sheet - HobbyTronics I 2C/Serial RX Backpack Data Sheet LCD to...
15
LCD I 2 C/Serial RX Backpack Data Sheet LCD to I2C/Serial RX Backpack I2C or Serial RX communication with Standard 16 Pin LCD modules Version 2.03 Sep 2013
Transcript of LCD I 2C/Serial RX Backpack Data Sheet - HobbyTronics I 2C/Serial RX Backpack Data Sheet LCD to...

LCD I2C/Serial RX Backpack
Data Sheet
LCD to I2C/Serial RX Backpack
I2C or Serial RX communication with Standard 16 Pin LCD modules
Version 2.03
Sep 2013

HOBBYTRONICS.co.uk LCD Backpack V2 .
© Hobbytronics Ltd Version 2.0 Page 2
Contents
Contents ........................................................................................................................................ 2
Introduction................................................................................................................................... 3
Voltage Levels............................................................................................................................... 3
Specifications................................................................................................................................ 3
Pinout ............................................................................................................................................ 4
Fitting the backpack to an LCD .................................................................................................... 4
Command Interface....................................................................................................................... 5
I2C Slave Address Configuration ................................................................................................. 5
Serial RX Baud Rate Configuration .............................................................................................. 6
Reset Configuration to Defaults ................................................................................................... 6
Arduino I2C Library....................................................................................................................... 6
Software Updates.......................................................................................................................... 7
Example Programs........................................................................................................................ 8
Arduino I2C Example .............................................................................................................. 9
Arduino Serial RX Example................................................................................................... 11
Raspberry Pi Python Serial RX Example............................................................................... 14
Raspberry Pi – I2C example using i2cset .............................................................................. 15

HOBBYTRONICS.co.uk LCD Backpack V2 .
© Hobbytronics Ltd Version 2.0 Page 3
Introduction The Hobbytronics LCD Backpack is a useful little board that can be soldered onto the back of LCD’s that use the standard Hitachi HD44780 compatible interface. This allows the LCD (and backlight if fitted) to be controlled directly from a microcontroller using either the I2C interface or via a serial RX connection at baud rates from 2400 up to 115200. This has a number of advantages
• Reduces the minimum number of connections needed from 12 (for an LCD with backlight) to only 3 or 4 thus saving many input/output pins on the microcontroller
• Control an LCD using virtually any microcontroller either through the I2C interface or via a serial RX connection (either in hardware or software)
• Simplifies wiring
• Digital control of LCD backlight brightness from off (0) to fully on (250) and any level in between
• LCD Contrast adjustment potentiometer fitted to backpack
• Allows the connection of multiple LCD displays to one microcontroller without additional pins. The backpack uses a 160 byte command buffer to alleviate any need for delays in your code. Send commands and data in a stream and the backpack will process then in order. Note: Digital LCD backlight control is suitable for common Anode LCD backlights. I.e. Anode (+) is pin 15, Cathode is pin 16. If used on an LCD that is common cathode – DO NOT use the backlight functionality.
Voltage Levels The LCD Backpack requires a 5V supply. This is primarily because the LCD itself runs at 5V. This means that communication using I2C will be at 5V levels. To connect to a 3.3V microcontroller using the I2C interface you will need to use a voltage logic level shifter. This does not apply to the Serial connection however. Because only the RX in pin of the backpack is used, this can be connected directly to the TX of a system running at 3.3V without any level shifting. This makes it ideally suited to connecting directly to a Raspberry Pi for instance.
Specifications
• Suitable for 5V common Anode LCD’s with Hitachi HD44780 compatible interface
• I2C address defaults to 58 (0x3A) but can be set to any valid I2C address in the range 1 - 127
• Digital control of LCD backlight brightness with 250 brightness levels.
• LCD contrast set by trimmer potentiometer.
• Space for I2C pullup resistors (if needed)
• Bootloader installed for easy software updates
• Serial connection at 2400, 4800, 9600, 14400, 19200, 28800, 57600, 115200
• 160 byte command buffer • I2C Communication at 5V levels
• Serial RX communication at 5V or 3.3V levels

HOBBYTRONICS.co.uk LCD Backpack V2 .
© Hobbytronics Ltd Version 2.0 Page 4
Pinout
For I2C connection use 5V GND SDA SCL
For Serial RX Connection use
5V GND RX connected to microcontroller’s TX TX does NOT need to be connected. The TX pin is only used for software updates
Fitting the backpack to an LCD
The six pin (straight or right-angle) header pins should be soldered on first Then the backpack should be soldered to the back of the LCD using the 16 row header pins supplied with the backpack. Alternatively, a combination 16 pin male headers and a 16 pin female socket can be used. Ensure you leave sufficient room underneath the backpack so as no pins touch any of the metal tabs that are quite often found on the back of LCD’s

HOBBYTRONICS.co.uk LCD Backpack V2 .
© Hobbytronics Ltd Version 2.0 Page 5
Command Interface The backpack can be used by any microcontroller with an I2C or serial RX/TX interface by sending a command code followed by one or more bytes of data. The command codes are as follows
Command Code
Description Data 1 Data 2
1 Print a string Character 1 Character 2 etc…
2 Set Cursor Position Line number Column Number
3 Clear line. Afterwards, places cursor at beginning of the line ready for write
Line number
4 Clear Display
5 Set LCD Type Num Lines Num Columns
6 Send a HD44780 command to the LCD
HD44780 command
7 Backlight Brightness Brightness value (0-250)
10 Write single character Ascii Character code
32 Change I2C Address Note: I2C address change
command can only be sent using the serial connection
1 - 127
33 Set Baud Rate 0 - 2400 1 - 4800 2 - 9600 3 - 14400 4 - 19200 5 - 28800 6 - 57600 7 - 115200
64 Create a character Character storage position (0-7)
Send 8 bytes defining character
Commands are the same whether you are using I2C or serial RX connection, with one difference. With the Serial Connection we need to send an end of command character (0xFF) otherwise the backpack doesn’t know the command is complete. With I2C this is not required. This is easier to see in the example programs at the end of the document.
I2C Slave Address Configuration The default address is 58 (hex 0x3A) and no change is necessary if this address is to be used. To change the I2C address, send the command 32 followed by a number between 1 and 127 (hex 0x01 to 0x7F) After changing the I2C address, the backpack needs to be powered off and back on again. NOTE: The I2C address can only be changed using the serial connection. We have implemented this security feature due to the possibility of changing the I2C address if erroneous data or commands are received.

HOBBYTRONICS.co.uk LCD Backpack V2 .
© Hobbytronics Ltd Version 2.0 Page 6
Serial RX Baud Rate Configuration To set the Baud rate, send the command 33 followed by a number between 0 and 7 (hex 0x00 to 0x07) based on the following table. 0 - 2400 1 - 4800 2 - 9600 3 - 14400 4 - 19200 5 - 28800 6 - 57600 7 – 115200 After changing the Baud Rate, the backpack needs to be powered off and back on again.
Reset Configuration to Defaults If you have set the I2C address or baud rate and you can’t remember what they are, you can reset then to the defaults of
• I2C Address 58 (0x3A)
• Baud Rate 9600 Do this by connecting the TX pin to GND then briefly applying power.
Arduino I2C Library We have created a free I2C Arduino Library for the LCD Backpack to make it even easier to use with the I2C protocol. The library can be easily modified for use with other programming languages The following commands are available in the library clear Clear the screen write Write a single character to the LCD createChar Create a user defined character clearLine Clear a complete line backLight Send a backlight brightness command setType Set the type of display (number of rows, columns) setCursor Set cursor position print Print a string command Send an HD44780 command to the LCD. I.e. Turn cursor on/off
To install the library
• Download the HTI2CLCD.zip file from the product page on our website
• open the HTI2CLCD.zip file
• drag and drop the HTI2CLCD directory into your Arduino Libraries folder

HOBBYTRONICS.co.uk LCD Backpack V2 .
© Hobbytronics Ltd Version 2.0 Page 7
Software Updates The LCD Backpack uses a bootloader which enables the software to be upgraded without needing a special programmer. A suitable serial connection to a PC is required Note: This is NOT an RS232 connection – do not connect to a PC serial port
Downloading software to the board is easy because it has a bootloader already installed. You can download software using the free ds30Loader. You can download the ds30Loader application from http://mrmackey.no-ip.org/elektronik/ds30loader/
Run the ds30loader application and...
• Select the hex file to upload (our latest software version for the Backpack)
• Set the device to be PIC18F and 14K22
• Set Baud rate to 115200
• Set Port to your serial port connection In order to make the bootloader active we need to reset the board – Use a small loop of wire to connect the reset pin to earth. The reset pin is the top one on the 5-way header at the left of the board, just below the text “PROG”. Connect this to the centre (0V) pin on the same connector. Once you have this setup, click on the Write button just below the Commands menu, then immediately
remove the wire. The software will attempt to connect to the bootloader and upload the firmware.
HOBBYTRONICS.co.uk LCD Backpack V2 .
© Hobbytronics Ltd Version 2.0 Page 8
Example Programs We have some example programs written using Arduino using I2C Arduino using software serial Hi-Tech C compiler Python on Raspberry Pi These examples should be easily ported to other languages. The Arduino examples are shown below. Please refer to our website at www.hobbytronics.co.uk for other examples and library functions.
HOBBYTRONICS.co.uk LCD Backpack V2 .
© Hobbytronics Ltd Version 2.0 Page 9
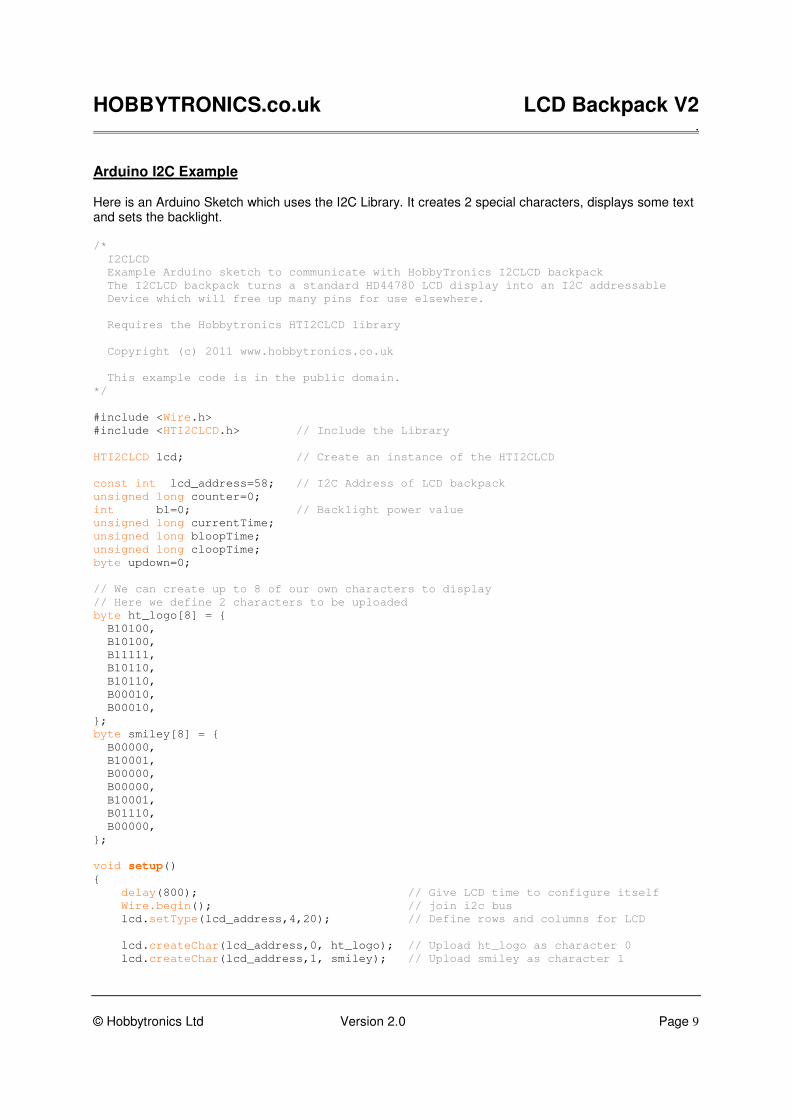
Arduino I2C Example Here is an Arduino Sketch which uses the I2C Library. It creates 2 special characters, displays some text and sets the backlight. /*
I2CLCD
Example Arduino sketch to communicate with HobbyTronics I2CLCD backpack
The I2CLCD backpack turns a standard HD44780 LCD display into an I2C addressable
Device which will free up many pins for use elsewhere.
Requires the Hobbytronics HTI2CLCD library
Copyright (c) 2011 www.hobbytronics.co.uk
This example code is in the public domain.
*/
#include <Wire.h>
#include <HTI2CLCD.h> // Include the Library
HTI2CLCD lcd; // Create an instance of the HTI2CLCD
const int lcd_address=58; // I2C Address of LCD backpack
unsigned long counter=0;
int bl=0; // Backlight power value
unsigned long currentTime;
unsigned long bloopTime;
unsigned long cloopTime;
byte updown=0;
// We can create up to 8 of our own characters to display
// Here we define 2 characters to be uploaded
byte ht_logo[8] = {
B10100,
B10100,
B11111,
B10110,
B10110,
B00010,
B00010,
};
byte smiley[8] = {
B00000,
B10001,
B00000,
B00000,
B10001,
B01110,
B00000,
};
void setup()
{
delay(800); // Give LCD time to configure itself
Wire.begin(); // join i2c bus
lcd.setType(lcd_address,4,20); // Define rows and columns for LCD
lcd.createChar(lcd_address,0, ht_logo); // Upload ht_logo as character 0
lcd.createChar(lcd_address,1, smiley); // Upload smiley as character 1

HOBBYTRONICS.co.uk LCD Backpack V2 .
© Hobbytronics Ltd Version 2.0 Page 10
lcd.clear(lcd_address); // Clear LCD
lcd.backLight(lcd_address,10); // Set backlight to dim
// Display String
lcd.write(lcd_address,0); // Display our ht_logo character
lcd.print(lcd_address," HobbyTronics ");
lcd.write(lcd_address,1); // Display our smiley character
currentTime = millis();
cloopTime = currentTime;
bloopTime = currentTime;
}
void loop()
{
currentTime = millis();
if(currentTime >= (cloopTime + 1000)){
// Create String with Text and Number
lcd.setCursor(lcd_address,2,1);
char ascii[32];
sprintf(ascii,"Counter: %0.7d",counter);
lcd.print(lcd_address,ascii);
counter++;
cloopTime = currentTime; // Updates cloopTime
}
if(currentTime >= (bloopTime + 30)){
// Lets increase the brightness until we hit 150, then we reduce back to 0 again
if(updown==0) bl++;
else bl--;
if(bl==150) updown=1;
if(bl==0) updown=0;
lcd.backLight(lcd_address,bl);
bloopTime = currentTime; // Updates bloopTime
}
}
HOBBYTRONICS.co.uk LCD Backpack V2 .
© Hobbytronics Ltd Version 2.0 Page 11
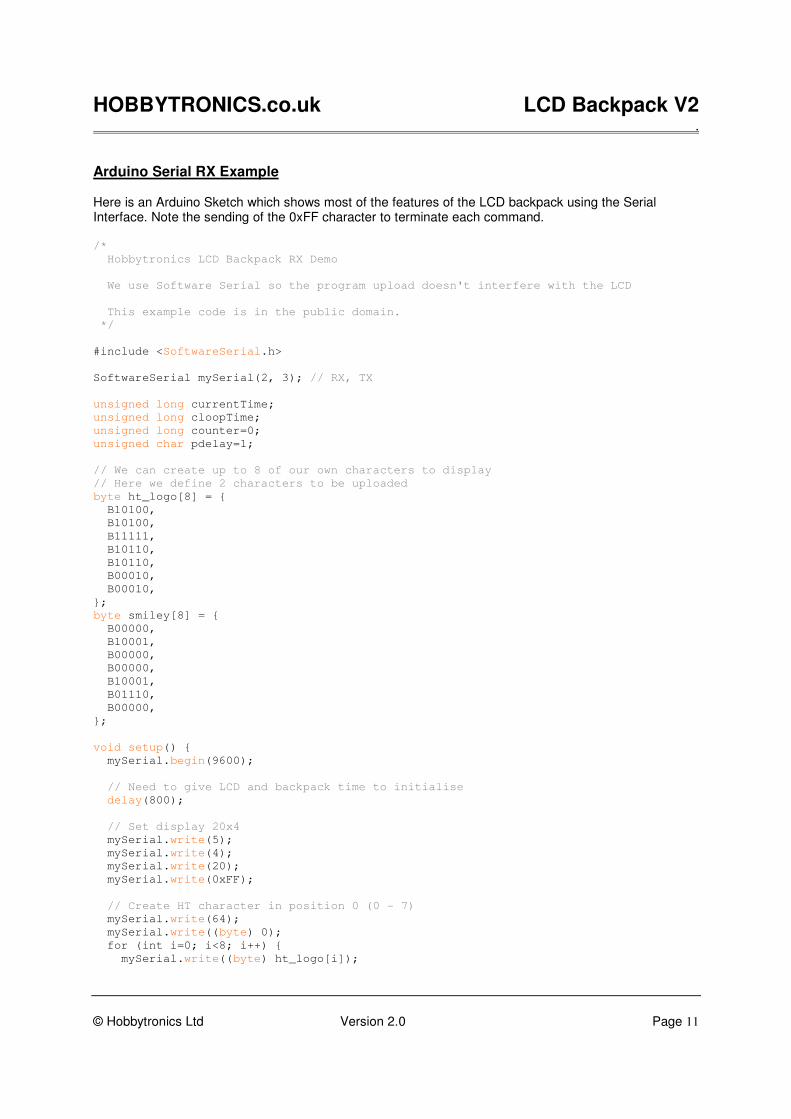
Arduino Serial RX Example Here is an Arduino Sketch which shows most of the features of the LCD backpack using the Serial Interface. Note the sending of the 0xFF character to terminate each command. /*
Hobbytronics LCD Backpack RX Demo
We use Software Serial so the program upload doesn't interfere with the LCD
This example code is in the public domain.
*/
#include <SoftwareSerial.h>
SoftwareSerial mySerial(2, 3); // RX, TX
unsigned long currentTime;
unsigned long cloopTime;
unsigned long counter=0;
unsigned char pdelay=1;
// We can create up to 8 of our own characters to display
// Here we define 2 characters to be uploaded
byte ht_logo[8] = {
B10100,
B10100,
B11111,
B10110,
B10110,
B00010,
B00010,
};
byte smiley[8] = {
B00000,
B10001,
B00000,
B00000,
B10001,
B01110,
B00000,
};
void setup() {
mySerial.begin(9600);
// Need to give LCD and backpack time to initialise
delay(800);
// Set display 20x4
mySerial.write(5);
mySerial.write(4);
mySerial.write(20);
mySerial.write(0xFF);
// Create HT character in position 0 (0 - 7)
mySerial.write(64);
mySerial.write((byte) 0);
for (int i=0; i<8; i++) {
mySerial.write((byte) ht_logo[i]);

HOBBYTRONICS.co.uk LCD Backpack V2 .
© Hobbytronics Ltd Version 2.0 Page 12
}
mySerial.write(0xFF);
// Create Smiley character in position 1 (0 - 7)
mySerial.write(64);
mySerial.write((byte) 1);
for (int i=0; i<8; i++) {
mySerial.write((byte) smiley[i]);
}
mySerial.write(0xFF);
// Clear Display
mySerial.write(4);
mySerial.write(0xFF);
// Set backlight on bright
mySerial.write(7);
mySerial.write(250);
mySerial.write(0xFF);
// Print single character - HT Character
mySerial.write(10);
mySerial.write((byte) 0);
mySerial.write(0xFF);
// Print Hello
mySerial.write(1);
mySerial.print(" Hello ");
mySerial.write(0xFF);
// Print single character - Smiley Character
mySerial.write(10);
mySerial.write((byte) 1);
mySerial.write(0xFF);
// Move to line 2 column 1
mySerial.write(2);
mySerial.write(2);
mySerial.write(1);
mySerial.write(0xFF);
// Print Hobbytronics
mySerial.write(1);
mySerial.print("Hobbytronics");
mySerial.write(0xFF);
currentTime = millis();
cloopTime = currentTime;
}
void loop() {
currentTime = millis();
if(currentTime >= (cloopTime + 1000)){
// Move to line 1 column 10
mySerial.write(2);
mySerial.write(1);
mySerial.write(10);
mySerial.write(0xFF);

HOBBYTRONICS.co.uk LCD Backpack V2 .
© Hobbytronics Ltd Version 2.0 Page 13
// Create right justified counter text
char ascii[32];
sprintf(ascii,"%7.0d",counter);
mySerial.write(1);
mySerial.print(ascii);
mySerial.write(0xFF);
counter++;
cloopTime = currentTime; // Updates cloopTime
}
}
HOBBYTRONICS.co.uk LCD Backpack V2 .
© Hobbytronics Ltd Version 2.0 Page 14
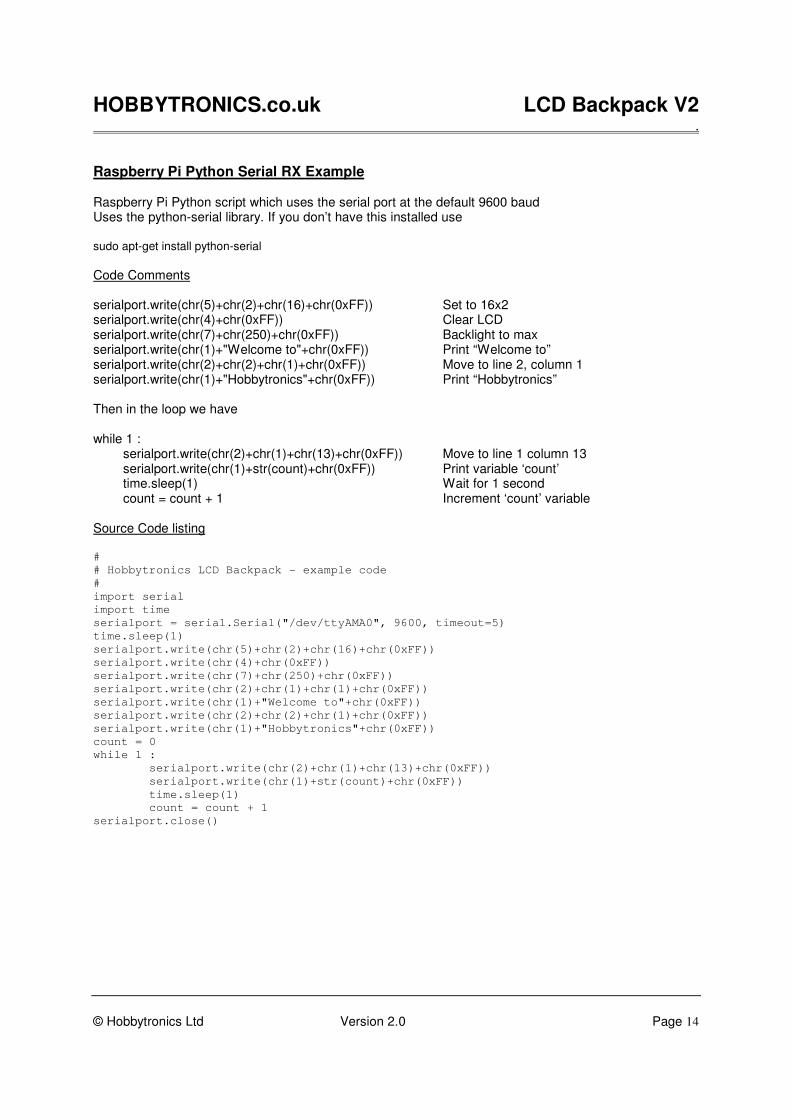
Raspberry Pi Python Serial RX Example Raspberry Pi Python script which uses the serial port at the default 9600 baud Uses the python-serial library. If you don’t have this installed use sudo apt-get install python-serial Code Comments serialport.write(chr(5)+chr(2)+chr(16)+chr(0xFF)) Set to 16x2 serialport.write(chr(4)+chr(0xFF)) Clear LCD serialport.write(chr(7)+chr(250)+chr(0xFF)) Backlight to max serialport.write(chr(1)+"Welcome to"+chr(0xFF)) Print “Welcome to” serialport.write(chr(2)+chr(2)+chr(1)+chr(0xFF)) Move to line 2, column 1 serialport.write(chr(1)+"Hobbytronics"+chr(0xFF)) Print “Hobbytronics” Then in the loop we have while 1 : serialport.write(chr(2)+chr(1)+chr(13)+chr(0xFF)) Move to line 1 column 13 serialport.write(chr(1)+str(count)+chr(0xFF)) Print variable ‘count’ time.sleep(1) Wait for 1 second count = count + 1 Increment ‘count’ variable Source Code listing #
# Hobbytronics LCD Backpack - example code
#
import serial
import time
serialport = serial.Serial("/dev/ttyAMA0", 9600, timeout=5)
time.sleep(1)
serialport.write(chr(5)+chr(2)+chr(16)+chr(0xFF))
serialport.write(chr(4)+chr(0xFF))
serialport.write(chr(7)+chr(250)+chr(0xFF))
serialport.write(chr(2)+chr(1)+chr(1)+chr(0xFF))
serialport.write(chr(1)+"Welcome to"+chr(0xFF))
serialport.write(chr(2)+chr(2)+chr(1)+chr(0xFF))
serialport.write(chr(1)+"Hobbytronics"+chr(0xFF))
count = 0
while 1 :
serialport.write(chr(2)+chr(1)+chr(13)+chr(0xFF))
serialport.write(chr(1)+str(count)+chr(0xFF))
time.sleep(1)
count = count + 1
serialport.close()

HOBBYTRONICS.co.uk LCD Backpack V2 .
© Hobbytronics Ltd Version 2.0 Page 15
Raspberry Pi – I2C example using i2cset
We tested it out using a 20x4 LCD display and the following commands. // Turn Backlight on (value 0xF0)
i2cset -y 0 0x3A 0x07 0xf0
// Set display type to 20x4
i2cset -y 0 0x3A 0x05 0x04 0x14 i
// Print Hello
i2cset -y 0 0x3A 0x01 0x48 0x65 0x6C 0x6C 0x6F i
// Move to line 2 position 1
i2cset -y 0 0x3A 0x02 0x02 0x01 i
// Print Hello again
i2cset -y 0 0x3A 0x01 0x48 0x65 0x6C 0x6C 0x6F i