LAUN SLR AMNOITCURTSNI - digital-jukeboxes.com · •VCD •SVCD • Mpeg2 • Mpeg4 • ASF 320 x...
10
Digital Point of Purchase Unit INSTRUCTION MANUAL SLR Sandleas Way, Leeds, LS15 8AR T : +44 (0) 845 230 1775 F: +44 (0) 845 230 1776 E: [email protected] www.slretail.co.uk Part of the sound leisure group www.soundleisure.com
Transcript of LAUN SLR AMNOITCURTSNI - digital-jukeboxes.com · •VCD •SVCD • Mpeg2 • Mpeg4 • ASF 320 x...
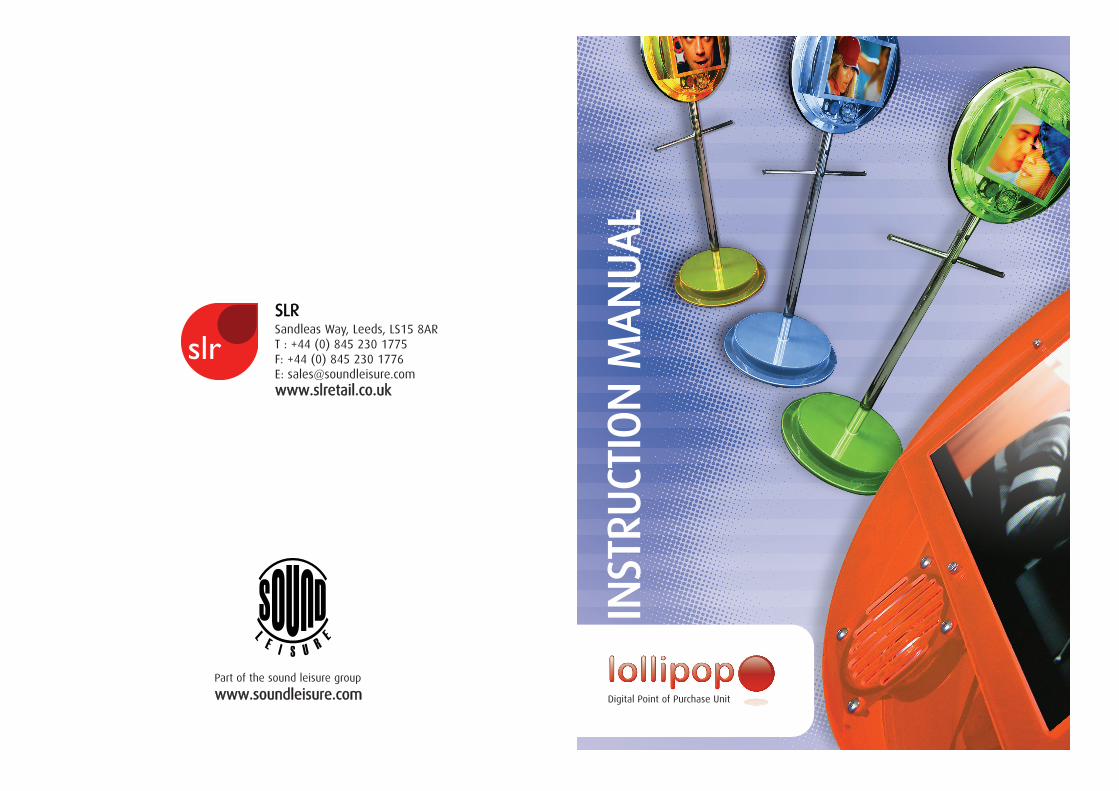
Digital Point of Purchase Unit
IINNSSTT
RRUUCCTT
IIOONN
MMAA
NNUU
AALL
SSLLRRSandleas Way, Leeds, LS15 8ART : +44 (0) 845 230 1775F: +44 (0) 845 230 1776E: [email protected]
Part of the sound leisure group
wwwwww..ssoouunnddlleeiissuurree..ccoomm

NOTES :
18
Digital Point of Purchase Unit
Contents 1: Introduction 1.1 Welcome: What IS a lollipop?1.2 What’s included with your lollipop? 1.3 Specifications and media types
2: Setting up your lollipop2.1 Powering up your lollipop2.2 Inserting your media card2.3 Using the remote control
3: Lollipop Media Player 3.1 What will my media player do?3.2 What types of file will it play?3.3 Creating and Playing files3.4 Photo mode – Displaying static image files on your media player3.5 Movie mode – playing video files on your media player3.6 Music Mode – Playing audio files: mp33.7 Playing files in a specific order3.8 Adjusting the playback volume3.9 Can I contact soundleisure to create my content?
4: Remote Text messaging (optional)
5: Troubleshooting5.1 Connection problems and cables5.2 The display is blank5.3 The media I have created wont display5.4 There is no sound5.5 There is no video5.6 My screen is displaying the set up menu5.7 The screen says “No media detected”
1

Introduction
1.1 Welcome: What IS a lollipop?
Thank you for purchasing your SLR Lollipop – Digital Point of Purchase Unit. Lollipopsoffer a stylish, fun method of displaying video images, audio and even your ownuser defined text messages.* The lollipop is made of a bright polycarbonatemolding and features a 15” LG | Philips | Samsung TFT LCD Panel. Media is playedusing a smart card reader enabling the use of many different media files from stillimages to video footage, and because the card is removable it is easy to changepresentations in minutes. Just remove the card and slot another in. Cards can holdanything up to 3 GB – so you can hold an entire movie (or two!) on one card!
*Optional
1.2 What’s included with your lollipop?
Delivered with your lollipop you should have received:
1: 1 x Lollipop2: 1 x Power supply cable3: 1 x remote control4: 1 x 64 mg smart media card (the size of the card delivered will depend on
your order)5: 2 x Security Keys for lock located in the back of the Lollipops head.
Optional extras may include
• Remote keyboard for text messaging• Additional media cards• Rechargeable battery supply (lollipop mobile)
217
SPECIAL CHARACTERSALTCTRLSHIFT
12
34
56
78
90
-+
?/
>:;
@

1.3 Specifications and Media Types
• Power• 10w Amplifier• 15 “ LG | Philips | Samsung TFT, LCD Panel• Average Brightness 300 cd/m2
Smart Card Reader Supported Media:
• Compact Flash Type ll (CF)• Smart Media (SM)• Secure Digital (SD)• Multi Media Card (MMC)
Support Play Format
• Mpeg1• VCD• SVCD• Mpeg2• Mpeg4• ASF 320 x 240) • Jpeg
• mp3
2: Setting up your Lollipop
The Lollipop is simple to set up. Follow these steps to power up the unit and playthe default media file on your card. This will ensure the Lollipop is set up andworking correctly.
1: Insert the key into the barrel lock, turn the key tothe right, push the barrel inwards and turn the key back to the left. The barrel should now be locked in place. Remove the key which will allowthe rear casing to slide upwards and be removed.
2: Insert the memory card into the media player - Ifit is not allready installed. To insert the media card gently push the card into the slot on the sideof the media player.
3
5.5 There is no video.Ensure that the Lollipop is powered correctly and the media player is turn on.
Ensure that there is a media card inserted in the Lollipop and that the file format is supported by the media player.
5.6 My screen is displaying the setup menu.To switch back from the Setup screen to the display screen. Navigate usingthe arrow buttons to highlight the “Exit Setup” selection. Press the tick button and this will return you to the main display window.
5.7 The screen says “No media detected”.Ensure that there is a media card inserted firmly into the media player. Ensure that the media card contains content that is compatable with the media player.
16

5: Troubleshooting
The following are just a few of the problems you may incure in trying to use yourLollipop. For further assistance please feel free to contact us:
T: 0845 230 1775E: [email protected]
5.1 Connection problems and cables.If your lollipops screen fails to display or is not internaly lit. It might be that the power cable is not correctly inserted into the foot of the base.
5.2 The display is blank. IIff yyoouurr LLoolllliippoopp ssccrreeeenn iiss bbllaannkk aanndd tthhee IInntteerrnnaall lliigghhttss ddoo nnoott ccoommee oonnEnsure the power cable is correctly inserted in the base of the Lollipop andthe wall socket is swithed on.
IIff tthhee LLoolllliippoopp IISS iinntteerrnnaallllyy iilllluummiinnaatteedd bbuutt tthhee ssccrreeeenn iiss bbllaannkkEnsure the power to the media player is switched on.
Ensure that you have inserted a media card with correctly formatted mediawritten to it.
5.3 The media I have created won’t display.Sound Leisure cannot guarentee any media that you have created yourself will display upon the Lollipop. There are many factors that might effect succesfull playback of media files including mpegs that are created through3rd party plugins or media players. See the section upon creating media files for details of succcesful media creation.
5.4 There is no sound.Ensure that the volume control in the rear of the Lollipop’s head is at the correct volume. You can tell if this is set as when you switch your Lollipop media player on you will hear a “bing”
If you hear a bing and still no audio is playing - Use your remote control volume controls to ensure the media player is set to the correct volume and the “mute” button is not deppressed. you will notice that “mute” and “mute off” is displayed. “ensure that “mute off” is the correct setting.
15
3: Take the power supply and connect this to thepower socket located in the foot of the Lollipop.Connect the plug into the mains wall socket.
Upon inserting the power supply you will noticethe interior lights illuminate within the Lollipopand the media should begin to play.
4: Adjust the volume to suit by twisting the volumecontrol knob. This is situated in the sound module located to the left of the media player, the opposite side to the main Lollipop support pole.
5: To swap the memory card, power down the Lollipop by removing the power socket from the foot of the Lollipop. Replace the card and re-connect the power.
Volume Control
Media Player
Unlock the Back of the Lollipop
PPLLEEAASSEE EENNSSUURREE YYOOUU HHAAVVEE TTHHEE CCAARRDD TTHHEE CCOORRRREECCTT WWAAYY AARROOUUNNDD –– FFOORRCCIINNGG TTHHEECCAARRDD WWIILLLL DDAAMMAAGGEE TTHHEE MMEEDDIIAA PPLLAAYYEERR..
NNEEVVEERR IINNSSEERRTT AA MMEEDDIIAA CCAARRDD IIFF TTHHEE PPLLAAYYEERR IISS PPOOWWEERREEDD UUPP –– AALLWWAAYYSS PPOOWWEERR DDOOWWNNBBEEFFOORREE SSWWAAPPPPIINNGG MMEEDDIIAA CCAARRDDSS..
4

2.2 Inserting your Media Card
1: ALWAYS MAKE SURE THE MEDIA PLAYER IS SWITCHED OFF BEFORE INSERTING YOUR CARD!
2: Insert the card with the base facing you – GENTLY push the card into place. Forcing the card in the wrong way will damage the card AND the media player.
3: Once the card is in place – Power up the media player. You will hear the “bing”tone and the media will play.
2.3 Using the Remote Control
Photo Mode
Music Mode
Video Mode
File Mode
RepeatVolume Adjust
Skip
Stop
Play
Setup
Auto
Goto
Mode
5 14
4) On the reverse of the remote keyboard, press the “CONNECT” button.
6) The lights on the Lollipop base will stop flashing
7) The lollipop and remote keyboard are now paired.

PPhhoottoo mmooddee::Enables the media player to display static image files.
VViiddeeoo MMooddee::Enables the video player. Pressing will open the folder displaying all video files. Usesetup to define how these files are played.
MMuussiicc MMooddee::Opens up the folder storing any .mp3 files. Use the arrow buttons to select the trackyou wish then the play button to play. Use the repeat feature to enable repetitionof the track or the entire folder.
FFiillee MMooddee::Displays all the folders and files on the media. Use the arrows and play buttons tonavigate and play media
GGoottoo::Alternative way of switching modes.
AAuuttoo::Simplest way oof playing ALL the media on the card. The player loops through allthe files on the card repeatedly.
SSeettuupp::Enters the set up mode for the media player. From here you can set up eachdifferent mode in more detail.
VVoouummee AAddjjuusstt::+ = Increases the volume of the Lollipop Media player.- = Decreases the volume of the Lollipop Media player.
SSttoopp::Stops the media player.
PPllaayy::Starts the media player displaying content.
SSkkiipp::Skips the media player to the next file of content.
MMooddee:: Changes the display transition. fade, blinds etc...
RReeppeeaatt::Sets the media player to repeat the content on the media card.
6
Input data in the same manner as described for page 1.
The unit will only display text from one page at a time, and DOES NOT scroll frompage1 to page 2 to page3 etc. You must manually move to another page byentering the program mode and using the ‘Page Up’ and ‘Page Down’ buttons.The intention of the facility is to enable the user to program more than onepromotion into the unit then quickly swap between the various pages to changethe details of subject of the promotion.
10) Exit program mode and set the unit scrolling.
Press the F8 button. The unit will start scrolling the last accessed page repeatedly.To edit any part of the text or move to a promotion held on another page pressthe enter button again.
MAIN BUTTONS
F8 Start scrollingF9 Clear text from current pageF10 Reset the current page (character size / colour etc)F11 Reset all pages (character size / colour etc)
11) Resetting the wireless keyboard.
If you find your text module no longer responds to your keyboard. The two unitsmight need “pairing”. To do this:
1) Remove the power supply from the base of theLollipop.
2) Raise the base of the Lollipop. (this may be screwed in position on some models, in which case remove the screws carefully).
3) Locate the text unit and press the button on the top and hold for 5 seconds. The pairing lights will begin to flash.
Release the button. The lights will continue to flash
13

3: Lollipop Media Player
3.1 What will my media player do?
The Lollipop Media Player is the heart and soul of your Lollipop. It reads the contentstored on yoru media card and plays it back as audio through the built in speakerand video through the TFT/LCD Panel.
3.2 What types of file will it play?
The following files types are compatible with the media player:
SSttaattiicc iimmaaggee aanndd PPiiccttuurree FFiilleess::Jpeg
VViiddeeoo ffoorrmmaatt ffiilleess::Mpeg (Moving Picture Experts Group)*Mpeg files should be correctly encoded before uploading onto your media card. Ifmpeg files are incorrectly created the data will not be able to be played. VariousMpeg encoders are available to download from the Internet.
Mpeg 1 Mpeg 2Mpeg 4VCDSVCD
AAuuddiioo FFoorrmmaattss::.mp3 - Note the format of the. mp3 format should be a standard encoding. Themedia player will not play formats such as .aac (itunes formatted) .wma (windowsmedia player file)
3.3 Creating and playing files
Can you create your own media? Of course! There are various ways to get mediaquickly onto your Lollipop and lots of different ways to display it once its there.
3.4 Photo mode – Displaying static image files on your media player.
The easiest way to display media is to take pictures with your digital camera in jpegformat. Once you have taken your pictures simply remove the card from thecamera, slot it into the media player of the Lollipop and switch the player on.The media player will display the images in the order in which they were taken. When swtched on the media player automatically detects images on the memorycard and display them as a slide show.
7
6) Set the character size.
You can set the character size of lines 1 and 11 independently. Lines 2 – 10 canalso be set although these lines are set as a group so must all be the same size.
There are 4 text sizes, normal, medium, large and extra large. To set the line sizesuse the following key combinations:
ALT (plus) F5 Line 1 Extra LargeCTRL (plus) F5 Line 1 LargeShift (plus) F5 Line 1 Medium
F5 Line 1 NormalALT (plus) F6 Lines 2 - 10 Extra LargeCTRL (plus) F6 Lines 2 - 10 LargeShift (plus) F6 Lines 2 - 10 Medium
F6 Lines 2 - 10 NormalALT (plus) F7 Line 11 Extra LargeCTRL (plus) F7 Line 11 LargeShift (plus) F7 Line 11 Medium
F7 Line 11 Normal
7) Type in your text.
You can add special characters using the key combinations shown on the followingpage and toggle between upper and lower case characters using the ‘Caps Lock’button. Remember the text appears on screen at the height you type it at on thepage, so use your cursor keys to spread out your message evenly across the page.
8) Cutbars
If you want to reduce the time it takes to scroll through the empty space betweenyour line of text enter a CUTBAR by pressing ALT and / (back slash.) A small flat Tshape will appear on the screen. This causes the unit to run straight to the nextpiece of text rather than scroll though the spaces between your characters. You canalso enter a CUTBAR at the beginning of your message to ensure text placed in themiddle of a page displays immediately, rather then having to wait for the emptycharacter spaces in front of it to be scrolled through. Experiment with CUTBARS toget the timing of your message just right.
9) Input additional pages of text.
The overlay unit has 4 pages of text available. To scroll through the various pagesof text use the ‘Page Up’ and ‘Page Down’ buttons.
12

CChhaannggiinngg IImmaaggee TTrraannssiittiioonnssThe way in which the media player moves from one image to another is referredto as an “image transition”. Various image transitions are available. Press “mode”on your remote control to scroll through the following transitions:
1: full screen (hard cut)2: roll top to bottom3: roll bottom to top4: roll bottom to top5: roll centre to top/bottom6: blind top to bottom7: roll left to right8: roll right to left9: roll right/left to centre10: roll centre to right/left11: implode12: blind left to right13: random – any of the above
RReeppeeaatt MMooddeeThe media player will play all the files on the media card then stop and revert tothe thumbnail display. If you require the files to loop continuously, you can enablethe “Repeat” feature by pressing the “Repeat” button on the remote control.
IImmaaggee DDiissppllaayy TTiimmeeYou can alter the time that your image is displayed for by entering “Setup” andnavigating to “slideshow set up”. Choose the “Interval Time” setting. You can setthe image to remain on screen for either 1,3,5,or ten seconds.
IImmaaggee TTrraannssiittiioonn SSppeeeeddThe time it takes for one image to fade into another can be altered by entering“Setup” and navigating to “transition speed”. You can set the transition speedbetween images to fast (about 1 sec), Normal (about 2 secs) or Slow (About 3 secs)
3.5 Video Mode – Playing movie format files.
In order to play movie files on the media player, correctly formatted files must beplaced on the memory card. The media player supports Mpeg files as well as VCDand SVCD files. Once written to the memory card, insert the card into the mediaplayer and power up. The player will “bing” and then the media will play. As withthe picture mode, the movie mode will play multiple clips in the specific order(See section 3.7 for details of how to rename your files)
8
2) Select Overlay mode or Full colour mode by pressing:
F3 Overlay mode (the content been played by the media player should be visible in the background.)
Shift F3 Full Colour Mode (a background colour should be visible)
3) Use the cursor keys to move up and down the page. When scrolling the text will appear on screen at the level it is typed on the page, so if you need the message to scroll across the bottom of the screen, use your cursor keys to position the flashing cursor at the bottom of the page beforeyou start typing.
4) Enable / Disable the character border
The background border can make it much easier to read scrolling text messages byplacing a dark semi transparent border behind the text. This is particularly useful inOverlay mode which the content been played by the media player is white or verylight in colour, making the white text difficult to see.
F1 Enable character border (you will see the border above the cursor)Shift F1 Disable character border
5) Enable / Disable flashing text
This allows the text to flash repeatedly as it scrolls onto the screen.
F2 Enable flashing textShift F2 Disable flashing text
4) Set colour options (in Full colour mode only)
Use the key combinations shown here to alter the various colour options. Whentyping the numbers (0 to 9) use the numerical pad on the right hand side of thekeyboard ONLY.
Character Colour Keys 0 – 9Character Border Shift (plus) 0 – 9Character outline ALT (plus) 0 – 9 Background Colour Ctrl (plus) 0 – 9
NNOOTTEE:: SSeeee iinnssiiddee bbaacckk ccoovveerr ffoorr ssppeecciiaall cchhaarraacctteerr ssppeecciiffiiccaattiioonnss
11

3.6 Music Mode - Playing Music files : Mp3
Once you have placed the .mp3 files upon the media card. Pressing the “musicmode” button will display all readable files. Select the track you wish to play andthen press the “play” button. You will see the graphic display playing the file andhear audio.
3.7 Playing files in a specific order.
If you need to play any files (image, video, music...) in a specific order thefilenames must be altered on a pc. To do this you will need a compact flashreader/writer which can be purchased from any good computer store or directlyfrom Sound Leisure (Item number MEMRW-01 - £12.95). Ensure the file names areformatted in the three digit format as shown below:
001.jpg002.vcd003.mp3004.mpg
The file extention (i.e .jpg / .mp3 etc) is ignored. Only the three digit numbereffects the order in which files are played back, hence several diferent file formatscan be organised into a single playlist as in the example above where the playorder would be: jpeg image, vcd video, mp3 audio track, mpg video
3.8 Adjusting the playback volume
Adjust the volume to suit by twisting the volume control knob. This is situated inthe sound module located to the left of the media player, the opposite side to themain Lollipop support pole.
3.9 Can I contact Sound Leisure to create my content for me?
Sound Leisure offers a complete service in producing any media you wish to showon your media player. We can create animated files and adverts, presentations andimage files as well as converting your existing adverts or images. Because we havebeen producing media to play on the Lollipop since it’s invention we are familiarwith how to produce the highest quality files in order to get your file format rightfirst time.
If you are interested in contacting us to produce Lollipop Media Please call us on : ++4444 ((00))884455 223300 11777755Or email us at the following address: ccrreeaattiivvee@@ssoouunnddlleeiissuurree..ccoommPlease contact us for more information and our current pricing structure.
4: Remote Text Messaging (optional)
The text overlay module allows scrolling text messages to be displayed on thelollipop. Text is inputted from the wireless keyboard which is included with your textoverlay module.
The unit stores 4 separate pages of text which can be scrolled across the screen toadd additional details to your promotions, such as current pricing, availability orupdated schedules etc. Each page has 11 vertical lines each holding 28 characters(including spaces at normal character size.)
Text can be displayed it two modes, which are:
1) Overlay mode (default)
In overlay mode plain white text can be overlaid on images or video playing fromthe media player. In situations where the text is difficult to read the characterborder can be enabled, which extends a semi transparent box behind the scrollingtext to make it easily distinguishable from the background images. Additionally textin full colour mode can flash as it scrolls across the screen.
2) Full colour mode
In full colour mode the text is displayed over a solid background. The colour of thebackground, character, character border and character outline can all be changed.
Additionally text in full colour mode can flash as it scrolls across the screen. In fullcolour mode however, text cannot be overlaid on images or video playing from theMedia player.
INSTRUCTIONS FOR USE.
The options shown below can help improve the look of your message and make itinstantly noticeable, and you can set the options individually for each of the fourpages. Be sure to select all the options you require before typing in your text andremember you can use the following options for all or just parts of your text toreally push your message home.
1) To enter the programming mode press the ‘Enter’ button on the keyboard. Aflashing cursor will appear on the screen. This is the cursor for the text to beinputted on page 1. There are three additional pages of text which you can entertext into later.
9 10