
Laravel: Code Happy - Le Blogblog.flds.fr/site/assets/files/1212/code_happy.pdf ·...
138
-
Upload
truongdang -
Category
Documents
-
view
221 -
download
0
Transcript of Laravel: Code Happy - Le Blogblog.flds.fr/site/assets/files/1212/code_happy.pdf ·...

Laravel: Code Happy
Application development with the Laravel PHPFramework for beginners.
©2012 Dayle Rees
This version was published on 2012-05-30
This is a Leanpub book, for sale at:
http://leanpub.com/codehappy
Leanpub helps authors to self-publish in-progress ebooks. We call this idea Lean Publishing. Tolearn more about Lean Publishing, go to: http://leanpub.com/manifesto
To learn more about Leanpub, go to: http://leanpub.com

Tweet This Book!Please help Dayle Rees by spreading the word about this book on Twitter!
The suggested hashtag for this book is #codehappy.
Find out what other people are saying about the book by clicking on this link to search for thishashtag on Twitter:
https://twitter.com/search/#codehappy

Contents
Acknowledgments i
Errata ii
Feedback iii
Introduction iv
1 Getting Started 1
1.1 Method 1 Create a new VirtualHost . . . . . . . . . . . . . . . . . . . . . . . . . 1
1.2 Method 2 Symbolic link the public folder. . . . . . . . . . . . . . . . . . . . . . 2
1.3 Getting back on track.. . . . . . . . . . . . . . . . . . . . . . . . . . . . . . . . . 3
2 Project Structure 4
2.1 Root Directory Structure . . . . . . . . . . . . . . . . . . . . . . . . . . . . . . . 4
2.2 Application Directory Structure . . . . . . . . . . . . . . . . . . . . . . . . . . . 5
3 Using Controllers 8
3.1 Routing Controllers . . . . . . . . . . . . . . . . . . . . . . . . . . . . . . . . . 8
3.2 Passing Parameters . . . . . . . . . . . . . . . . . . . . . . . . . . . . . . . . . . 10
3.3 Using Views . . . . . . . . . . . . . . . . . . . . . . . . . . . . . . . . . . . . . 10
3.4 RESTful Controllers . . . . . . . . . . . . . . . . . . . . . . . . . . . . . . . . . 12
3.5 The Base_Controller . . . . . . . . . . . . . . . . . . . . . . . . . . . . . . . . . 13
3.6 Advanced Routing . . . . . . . . . . . . . . . . . . . . . . . . . . . . . . . . . . 13
4 Routes With Closures 15
4.1 Closures . . . . . . . . . . . . . . . . . . . . . . . . . . . . . . . . . . . . . . . 15
4.2 Redirects and Named Routes . . . . . . . . . . . . . . . . . . . . . . . . . . . . 16
4.3 Filters . . . . . . . . . . . . . . . . . . . . . . . . . . . . . . . . . . . . . . . . . 17
4.4 Route Groups . . . . . . . . . . . . . . . . . . . . . . . . . . . . . . . . . . . . . 19
5 Links and URLs 20
5.1 Retrieving URLs . . . . . . . . . . . . . . . . . . . . . . . . . . . . . . . . . . . 20
5.2 Generating Links . . . . . . . . . . . . . . . . . . . . . . . . . . . . . . . . . . . 23
i

CONTENTS ii
6 Forms 25
6.1 Creating Forms . . . . . . . . . . . . . . . . . . . . . . . . . . . . . . . . . . . . 25
6.2 Adding Labels . . . . . . . . . . . . . . . . . . . . . . . . . . . . . . . . . . . . 26
6.3 Generating Inputs . . . . . . . . . . . . . . . . . . . . . . . . . . . . . . . . . . 26
6.4 Generating Buttons . . . . . . . . . . . . . . . . . . . . . . . . . . . . . . . . . 28
6.5 Secret Inputs . . . . . . . . . . . . . . . . . . . . . . . . . . . . . . . . . . . . . 28
6.6 CSRF Token . . . . . . . . . . . . . . . . . . . . . . . . . . . . . . . . . . . . . . 28
6.7 Form Macros . . . . . . . . . . . . . . . . . . . . . . . . . . . . . . . . . . . . . 28
7 Handling Input 30
7.1 Request data . . . . . . . . . . . . . . . . . . . . . . . . . . . . . . . . . . . . . 30
7.2 Files . . . . . . . . . . . . . . . . . . . . . . . . . . . . . . . . . . . . . . . . . . 31
7.3 Flash Data . . . . . . . . . . . . . . . . . . . . . . . . . . . . . . . . . . . . . . 31
8 Validation 33
8.1 Set up validation . . . . . . . . . . . . . . . . . . . . . . . . . . . . . . . . . . . 33
8.2 Errors . . . . . . . . . . . . . . . . . . . . . . . . . . . . . . . . . . . . . . . . . 35
8.3 Validation Rules . . . . . . . . . . . . . . . . . . . . . . . . . . . . . . . . . . . 36
8.4 Custom Error Messages . . . . . . . . . . . . . . . . . . . . . . . . . . . . . . . 38
8.5 Custom Validation Rules . . . . . . . . . . . . . . . . . . . . . . . . . . . . . . . 39
8.6 Validation Classes . . . . . . . . . . . . . . . . . . . . . . . . . . . . . . . . . . 39
9 Migrations 41
9.1 Database Setup . . . . . . . . . . . . . . . . . . . . . . . . . . . . . . . . . . . . 41
9.2 Migrations . . . . . . . . . . . . . . . . . . . . . . . . . . . . . . . . . . . . . . 42
10 Fluent Query Builder 47
10.1 Retrieving Results . . . . . . . . . . . . . . . . . . . . . . . . . . . . . . . . . . 48
10.2 Where Clauses . . . . . . . . . . . . . . . . . . . . . . . . . . . . . . . . . . . . 48
10.3 Table Joins . . . . . . . . . . . . . . . . . . . . . . . . . . . . . . . . . . . . . . 50
10.4 Ordering . . . . . . . . . . . . . . . . . . . . . . . . . . . . . . . . . . . . . . . 51
10.5 Limiting.. no Taking . . . . . . . . . . . . . . . . . . . . . . . . . . . . . . . . . 51
10.6 Skipping Results . . . . . . . . . . . . . . . . . . . . . . . . . . . . . . . . . . . 52
10.7 Aggregates . . . . . . . . . . . . . . . . . . . . . . . . . . . . . . . . . . . . . . 52
10.8 Expressions . . . . . . . . . . . . . . . . . . . . . . . . . . . . . . . . . . . . . . 52

CONTENTS iii
10.9 ++ (or decrementing) . . . . . . . . . . . . . . . . . . . . . . . . . . . . . . . . . 53
10.10 Insert . . . . . . . . . . . . . . . . . . . . . . . . . . . . . . . . . . . . . . . . . 53
10.11 Update . . . . . . . . . . . . . . . . . . . . . . . . . . . . . . . . . . . . . . . . 54
10.12 Delete . . . . . . . . . . . . . . . . . . . . . . . . . . . . . . . . . . . . . . . . . 54
11 Eloquent ORM 56
11.1 Creating and using Eloquent Models . . . . . . . . . . . . . . . . . . . . . . . . 56
11.2 Relationships . . . . . . . . . . . . . . . . . . . . . . . . . . . . . . . . . . . . . 60
11.3 Inserting Related Models . . . . . . . . . . . . . . . . . . . . . . . . . . . . . . . 63
11.4 Pivot Tables . . . . . . . . . . . . . . . . . . . . . . . . . . . . . . . . . . . . . . 65
11.5 Eager Loading . . . . . . . . . . . . . . . . . . . . . . . . . . . . . . . . . . . . 65
11.6 Setters and Getters . . . . . . . . . . . . . . . . . . . . . . . . . . . . . . . . . . 67
12 Events 68
12.1 Fire An Event . . . . . . . . . . . . . . . . . . . . . . . . . . . . . . . . . . . . . 68
12.2 Listen for an Event . . . . . . . . . . . . . . . . . . . . . . . . . . . . . . . . . . 69
12.3 Events With Parameters . . . . . . . . . . . . . . . . . . . . . . . . . . . . . . . 69
12.4 Laravel Events . . . . . . . . . . . . . . . . . . . . . . . . . . . . . . . . . . . . 69
12.5 Example Usage . . . . . . . . . . . . . . . . . . . . . . . . . . . . . . . . . . . . 70
13 Blade Templates 72
13.1 The Basics . . . . . . . . . . . . . . . . . . . . . . . . . . . . . . . . . . . . . . 72
13.2 Logic . . . . . . . . . . . . . . . . . . . . . . . . . . . . . . . . . . . . . . . . . 72
13.3 Blade Layouts . . . . . . . . . . . . . . . . . . . . . . . . . . . . . . . . . . . . 73
14 Authentication 76
14.1 Setup . . . . . . . . . . . . . . . . . . . . . . . . . . . . . . . . . . . . . . . . . 76
14.2 Setting up the form . . . . . . . . . . . . . . . . . . . . . . . . . . . . . . . . . . 78
14.3 Handling Login . . . . . . . . . . . . . . . . . . . . . . . . . . . . . . . . . . . . 79
14.4 Protecting Routes . . . . . . . . . . . . . . . . . . . . . . . . . . . . . . . . . . 81
14.5 Customization . . . . . . . . . . . . . . . . . . . . . . . . . . . . . . . . . . . . 82

CONTENTS iv
15 The Blog Tutorial 85
15.1 The Design . . . . . . . . . . . . . . . . . . . . . . . . . . . . . . . . . . . . . . 85
15.2 Basic Setup . . . . . . . . . . . . . . . . . . . . . . . . . . . . . . . . . . . . . . 86
15.3 Eloquent Models . . . . . . . . . . . . . . . . . . . . . . . . . . . . . . . . . . . 88
15.4 Routes . . . . . . . . . . . . . . . . . . . . . . . . . . . . . . . . . . . . . . . . . 88
15.5 Views . . . . . . . . . . . . . . . . . . . . . . . . . . . . . . . . . . . . . . . . . 89
15.6 Get Coding . . . . . . . . . . . . . . . . . . . . . . . . . . . . . . . . . . . . . . 91
15.7 The Future . . . . . . . . . . . . . . . . . . . . . . . . . . . . . . . . . . . . . . 95
16 Unit Testing 97
16.1 Installation . . . . . . . . . . . . . . . . . . . . . . . . . . . . . . . . . . . . . . 97
16.2 Creating a Test . . . . . . . . . . . . . . . . . . . . . . . . . . . . . . . . . . . . 97
16.3 Running Tests . . . . . . . . . . . . . . . . . . . . . . . . . . . . . . . . . . . . 98
16.4 Testing The Core . . . . . . . . . . . . . . . . . . . . . . . . . . . . . . . . . . . 99
17 Caching 100
17.1 Setup . . . . . . . . . . . . . . . . . . . . . . . . . . . . . . . . . . . . . . . . . 100
17.2 Setting values . . . . . . . . . . . . . . . . . . . . . . . . . . . . . . . . . . . . . 100
17.3 Retrieving Values . . . . . . . . . . . . . . . . . . . . . . . . . . . . . . . . . . . 100
17.4 A better way . . . . . . . . . . . . . . . . . . . . . . . . . . . . . . . . . . . . . 101
18 Autoloading Classes 102
18.1 Mappings . . . . . . . . . . . . . . . . . . . . . . . . . . . . . . . . . . . . . . . 102
18.2 Directory Mapping . . . . . . . . . . . . . . . . . . . . . . . . . . . . . . . . . . 103
18.3 Namespace Mapping . . . . . . . . . . . . . . . . . . . . . . . . . . . . . . . . . 103
18.4 Mapping Underscores . . . . . . . . . . . . . . . . . . . . . . . . . . . . . . . . 104
19 Configuration 105
19.1 Creating new Configuration Files . . . . . . . . . . . . . . . . . . . . . . . . . . 105
19.2 Reading Configuration . . . . . . . . . . . . . . . . . . . . . . . . . . . . . . . . 106
19.3 Setting Configuration . . . . . . . . . . . . . . . . . . . . . . . . . . . . . . . . 107
20 The IoC Container 108
20.1 Registering Objects . . . . . . . . . . . . . . . . . . . . . . . . . . . . . . . . . . 108
20.2 Resolving Objects . . . . . . . . . . . . . . . . . . . . . . . . . . . . . . . . . . 109
20.3 Singletons . . . . . . . . . . . . . . . . . . . . . . . . . . . . . . . . . . . . . . . 109
CONTENTS v
21 Encryption 112
21.1 One Way Encryption . . . . . . . . . . . . . . . . . . . . . . . . . . . . . . . . . 112
21.2 Two Way Encryption . . . . . . . . . . . . . . . . . . . . . . . . . . . . . . . . 113
22 AJAX Content 114
22.1 Page Template . . . . . . . . . . . . . . . . . . . . . . . . . . . . . . . . . . . . 114
22.2 The Javascript . . . . . . . . . . . . . . . . . . . . . . . . . . . . . . . . . . . . 115
22.3 Post Data . . . . . . . . . . . . . . . . . . . . . . . . . . . . . . . . . . . . . . . 117
22.4 JSON Responses . . . . . . . . . . . . . . . . . . . . . . . . . . . . . . . . . . . 118
22.5 Detecting an AJAX Request . . . . . . . . . . . . . . . . . . . . . . . . . . . . . 119
23 Debugging Applications 121
23.1 Error Handler . . . . . . . . . . . . . . . . . . . . . . . . . . . . . . . . . . . . 121
23.2 Error Configuration . . . . . . . . . . . . . . . . . . . . . . . . . . . . . . . . . 122
23.3 Logging . . . . . . . . . . . . . . . . . . . . . . . . . . . . . . . . . . . . . . . . 123
24 The Future 125

AcknowledgmentsFirst of all I would like to thank my girlfriend Emma, for not only putting up with all my nerdyventures, but also for taking the amazing red panda shot for the books cover! Love you Emma!
Taylor Otwell, I love you too man, but in a totally manly way. Thanks for making a frameworkthat’s a real pleasure to use, makes our code read like poetry, and for putting so much time, andpassion into its development.
Eric Barnes, Phill Sparks, Shawn McCool, Jason Lewis, Ian Landsman, thanks for all the supportwith the framework, and for allowing me to be part of a project with so much potential.
To all my blog readers who took interest in my tutorials, thanks! Without you I would neverhave had the confidence to write a book.
i

ErrataAlthough I have taken every care to ensure that the book is error-free, sometimes tired eyes willproof read badly, and errors will slip through the radar. If you do happen to encounter an error inthe book, be it a spelling mistake or an error within a code block. I would be grateful if you couldalert me to its presence by emailing me at [email protected]¹ and let me know the chapter andlocation of the error.
Errors will be fixed as they are discovered, and fixes will be released with the next publish of thebook.
¹mailto:[email protected]
ii

FeedbackLikewise you can send any feedback you may have about the content of the book or otherwiseby sending an email to [email protected]². I will endevour to reply to all mail that I receiveabout the book.
²mailto:[email protected]
iii
IntroductionHi there! I’m Dayle Rees, and I’m going to be taking you on a magical journey into the world ofLaravel! Okay on second thoughts that sounds really cheesy. You see this is my first book, so Iam gonna be a little rusty at all the posh literary stuff, so if you like straight talking, and being“spoken” to like a real human being boy are you in for a treat!
You might be asking yourselves “So why should I trust this guy to teach me Laravel? He isn’teven an experienced author!”
Well what I lack in experience, I make up for in enthusiasm. I am a huge fan of web development,and the tools and tricks that save us time, or make our job a lot easier. Laravel fills both of thoserequirements, and is one of the most useful pieces of software I have ever discovered. In fact myenthusiasm and passion for the framework, that can only be rivaled by the framework authorhimself has led to me being included as a member of the Laravel core team, or “Council” as welike to call it, sounds fancier right?
Being on the Council grants me certain privaledges such as being notified of new ideas andplanned additions to the framework, and by contributing to the framework I am constantly intouch with its forever improving codebase. This puts me in a good position to keep the book upto date, which I intend to do with every future release of the framework.
Although I despise going off-topic, it seems compulsary to have a short paragraph about theauthor within books of this kind, so let’s keep it short and sweet. I live on the coast of Wales(that’s a country on the side of England for you Americans) and I work for a large publicsector organization in Aberystwyth but in my spare time I am highly involved with the Laravelframework. Oh and as I said before, I don’t claim to be a literary genius, let’s be honest mywriting is gonna suck, it’s not gonna be all fancy like those other coding books. I will be ‘talking’to you like a real person, you might actually talk back too, we will see. Hopefully my passionfor Laravel will make up for my common English (to be fair, I am a Welshman). You don’t needto know anything more about me though, let’s switch our focus to Laravel.
Laravel is a breath of fresh air in the world of PHP. The PHP programming language is generallyquite renowned for its ugly function names, and while we PHP developers have learned to loveit, the syntax can be a little ugly compared to some modern Japanese languages. Hi Ruby!
Fortunately Laravel changes this, in fact.. I believe that the Laravel syntax (which granted buildson PHP’s own) is so expressive, and neat that I find it much easier to read than Ruby. It’s nottoo compact, and while it won’t read like an English sentence, it will read like poetry that canonly be seen by the eyes of a programmer.
But Dayle..
You say, suddenly worried that your $4.99 could have been better spent on some mind numbingfun juice.
Laravel is a framework, not a language!
iv
Introduction v
It’s true, you got me. Laravel may not be a language, but it doesn’t need to be. We love PHP,come on, let’s be honest, we put up with its ugliness, we enjoy typing all those brackets andsemi-colons. Laravel simply adds the shortcuts, or a code disguise on top to make the experienceso much sweeter.
I think that the pleasure of working from the framework, is brought on by its expressive methods,which are consistent throughout the framework. Str::upper() Try to tell me you don’t knowwhat this does, try to tell me it doesn’t make sense.
I can’t.
Yep, I thought so. Well I could jabber on all day about everything that makes Laravel wonderful,let’s see, theres Eloquent, the best ORM I have ever seen. It was what first brought me to theframework.
The option of using closures to route, but only if you want to. I think they look great!
Not having to load libraries before using them, yes.. you heard me right. You will see this inaction later.
No there are far too many wonderful features to explain here, I think it would be best if we divedin and started learning, after all.. if you spent $4.99 on this instead of mind numbing juice, youmust already have had your interests peaked by the framework right? Onwards!
1 Getting StartedLaravel¹ is a PHP 5.3 web application framework written by Taylor Otwell². It was written withPHP 5.3 features in mind, the combination of these features and its very expressive syntax hasled to the framework gaining in popularity.
In this book we will be exploring Laravel from the ground up starting with its installation, whichI am sure you will agree is a breeze.
In order to use any PHP Framework (not just Laravel) you will need to have a PHP enabled webserver, I would recommend installing a webserver on your local development machine, to allowyou to test your work without needing to upload your files each time you make a change.
This chapter makes the following assumptions:
• You have a working Apache-based web server.
• You are familiar with the servers file system, and how to move / copy files.
• You have access to modify Apache config files.
If you use a different web server, you will be able to find many articles online on how toaccomplish the tasks found below for your server.
First we will need a copy of the framework’s source code, simply head over to Laravel.com³and hit the big orange download button. For added security, I would recommend extracting thecontents of the package to somewhere other than your web root. Make a mental note of whereyou extracted the source to (or find a sticky note!).
We now have two options to allow the framework to execute as expected, I would advise tryingthe first method, as it is the “real” way of installing the framework and allows us to specify amore thorough config. However I find the second method much quicker when working withmany projects on a development server.
1.1 Method 1 Create a new VirtualHost
We will need to create a new Apache config file On most standard installations creating amyproject.conf file in the Apache conf.d folder will include it by default, please see thedocumentation for your current setup for more information.
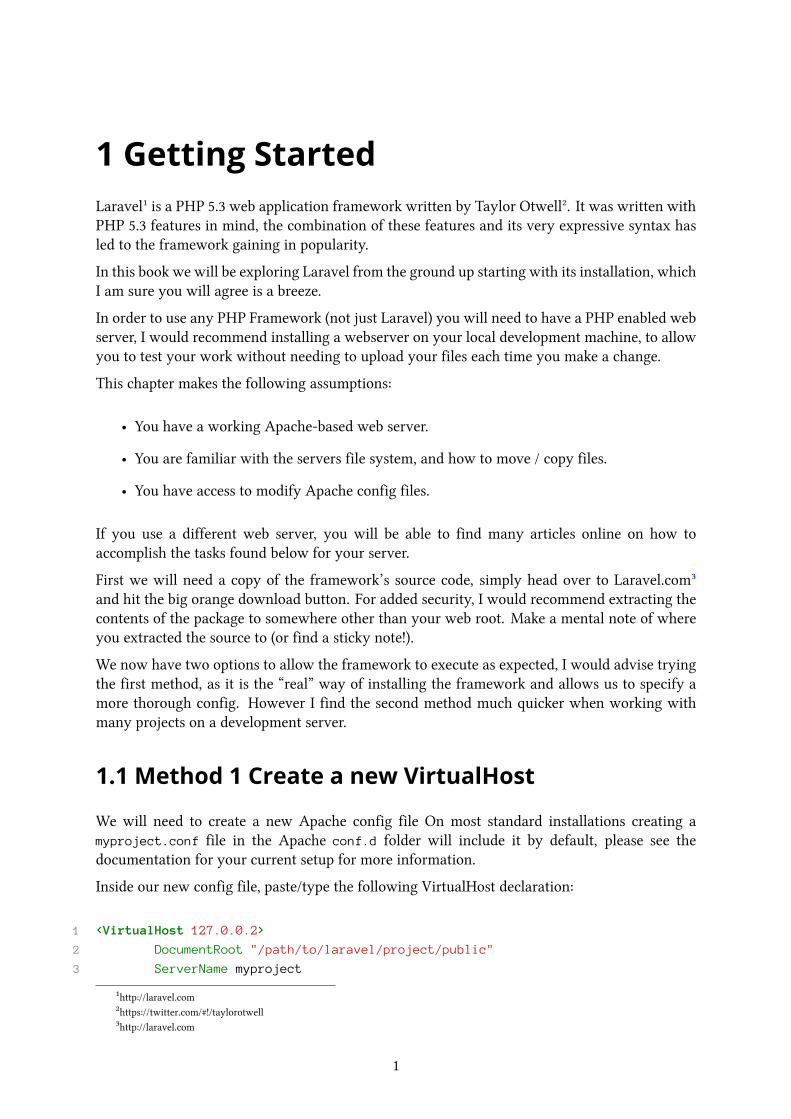
Inside our new config file, paste/type the following VirtualHost declaration:
1 <VirtualHost 127.0.0.2>
2 DocumentRoot "/path/to/laravel/project/public"
3 ServerName myproject
¹http://laravel.com²https://twitter.com/#!/taylorotwell³http://laravel.com
1
Getting Started 2
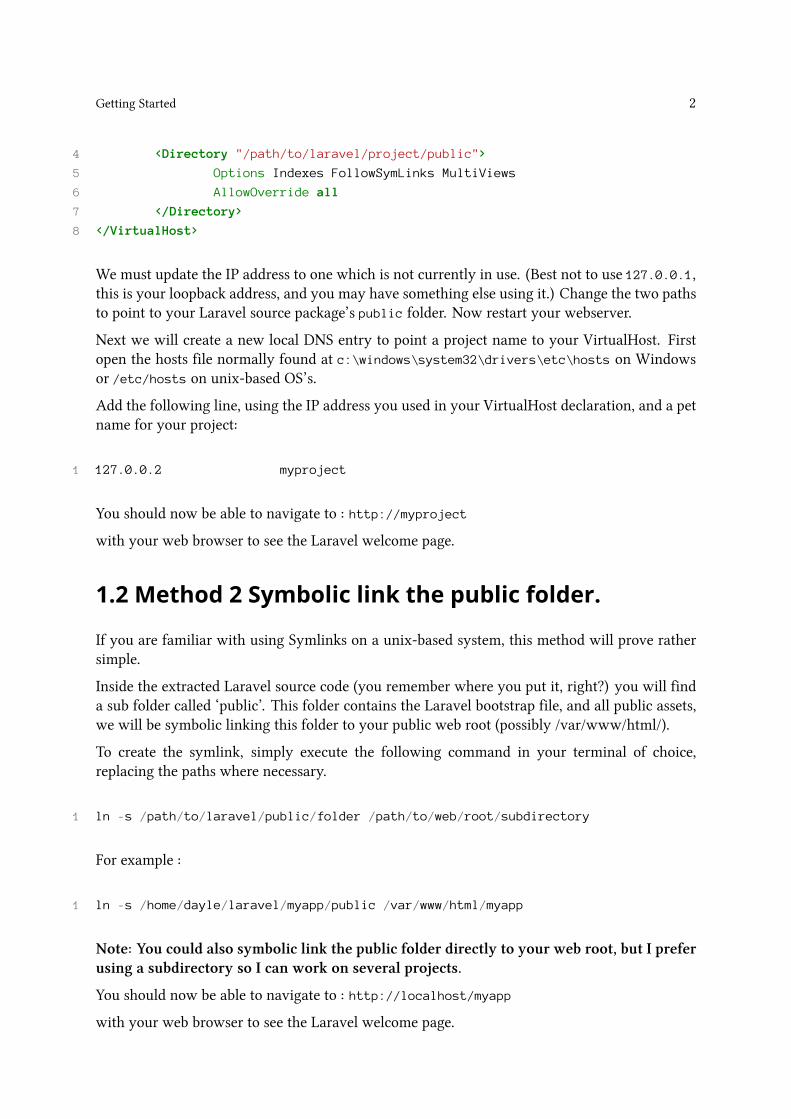
4 <Directory "/path/to/laravel/project/public">
5 Options Indexes FollowSymLinks MultiViews
6 AllowOverride all
7 </Directory>
8 </VirtualHost>
We must update the IP address to one which is not currently in use. (Best not to use 127.0.0.1,this is your loopback address, and you may have something else using it.) Change the two pathsto point to your Laravel source package’s public folder. Now restart your webserver.
Next we will create a new local DNS entry to point a project name to your VirtualHost. Firstopen the hosts file normally found at c:\windows\system32\drivers\etc\hosts on Windowsor /etc/hosts on unix-based OS’s.
Add the following line, using the IP address you used in your VirtualHost declaration, and a petname for your project:
1 127.0.0.2 myproject
You should now be able to navigate to : http://myproject
with your web browser to see the Laravel welcome page.
1.2 Method 2 Symbolic link the public folder.
If you are familiar with using Symlinks on a unix-based system, this method will prove rathersimple.
Inside the extracted Laravel source code (you remember where you put it, right?) you will finda sub folder called ‘public’. This folder contains the Laravel bootstrap file, and all public assets,we will be symbolic linking this folder to your public web root (possibly /var/www/html/).
To create the symlink, simply execute the following command in your terminal of choice,replacing the paths where necessary.
1 ln -s /path/to/laravel/public/folder /path/to/web/root/subdirectory
For example :
1 ln -s /home/dayle/laravel/myapp/public /var/www/html/myapp
Note: You could also symbolic link the public folder directly to your web root, but I preferusing a subdirectory so I can work on several projects.
You should now be able to navigate to : http://localhost/myapp
with your web browser to see the Laravel welcome page.

Getting Started 3
1.3 Getting back on track..
At this point you should now be able to see your Laravel welcome page, if so..
Congratulations! You have a brand new Laravel project, you are now ready to get coding!
In the next chapter we will be covering the Laravel project structure, and providing anexplanation of each of the important files and folders.
If you happen to find any of the topics covered in this book confusing, the following links can beused to find the help and support you need, or simply post a new comment on DayleRees.com⁴.
• Laravel Website⁵
• Laravel Docs⁶
• Laravel API⁷
• Laravel Forums⁸
Why not come and join our ever expanding community by using an IRC client to connect toirc.freenode.net:6667 and joining the #laravel channel!
⁴http://daylerees.com⁵http://laravel.com⁶http://laravel.com/docs⁷http://laravel.com/api⁸http://forums.laravel.com

2 Project StructureLaravel’s source package contains a number of different directories, let’s take a look at the projectstructure, to gain a greater understanding of how things work. I may use some terms to describevarious features of Laravel that could be confusing if you are just starting out, if so, bear withme as we will cover each feature in more detail in a later chapter.
2.1 Root Directory Structure
Lets take a quick look at the top-level file and directory structure :
1 /application
2 /bundles
3 /laravel
4 /public
5 /storage
6 /vendor
7 /artisan [file]
8 /paths.php [file]
Now lets take a closer look at each item :
/application
This is where the majority of the code for your application will live, it contains your routing,data models and views. You will be spending most of your time here!
/bundles
Bundles are Laravel applications, they can be used to separate aspects of your application, or canbe released / downloaded to share common code¹. By installing new bundles with artisan, youcan extend the functionality of Laravel to suit your needs.
Interestingly, the /application directory is also a bundle, known as the DEFAULT_BUNDLE,this means that anything you use in /application you can also use in your bundles!
/laravel
This is where the framework’s core files live, these are the files it needs to execute a request.You will rarely have to interact with this directory, but it can sometimes be useful to browse thesource to see how a Class or Method works, alternatively you could check the Laravel API².
/public
This is the directory that you point your web server to, it contains the bootstrap file index.phpwhich starts the Laravel framework, and the routing process. The public directory can also be
¹http://bundles.laravel.com/²http://laravel.com/api
4
Project Structure 5
used to hold any publicly accessible assets, such as CSS, Javascript files and images. The laravelsubfolder contains the files needed to render the offline documentation correctly.
/storage
The storage directory is used as file store for services that use the file system as a driver, forexample Sessions, or the Cache class. This directory must be writable by the web-server. Youwill not need to interact with this directory to build a Laravel application.
/vendor
The vendor directory contains code used by Laravel, but wasn’t written by the frameworksauthor or contributors. The folder contains open source software, or parts of software thatcontribute to Laravels features.
/artisan [file]
Artisan is Laravel’s Command Line Interface, it allows you to perform numerous tasks³ on thecommand line, and even create your own tasks! To run Artisan simply type:
1 php artisan
/paths.php [file]
This file is used by the Framework to determine paths to the important directories mentionedabove, and provide a shortcut for retrieving them ( using path()). You should not need to editthis file.
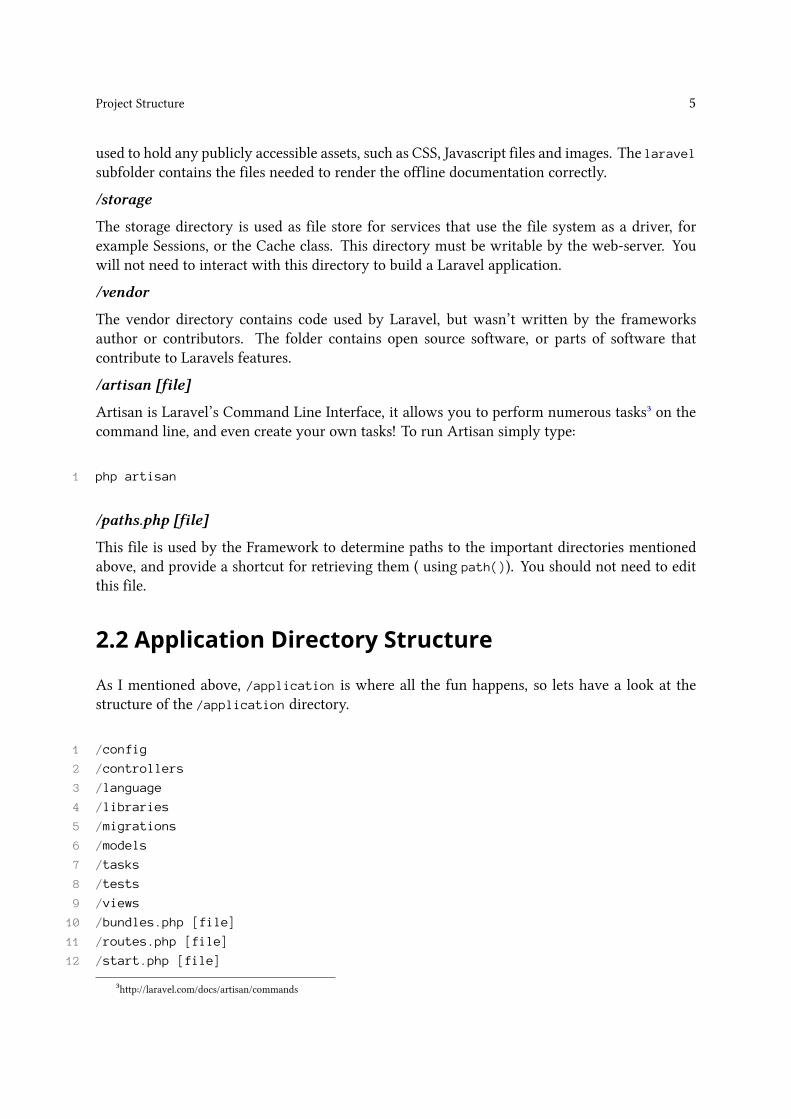
2.2 Application Directory Structure
As I mentioned above, /application is where all the fun happens, so lets have a look at thestructure of the /application directory.
1 /config
2 /controllers
3 /language
4 /libraries
5 /migrations
6 /models
7 /tasks
8 /tests
9 /views
10 /bundles.php [file]
11 /routes.php [file]
12 /start.php [file]
³http://laravel.com/docs/artisan/commands

Project Structure 6
And now a closer look at each one.
/config
The config folder contains a number of config files for changing various aspects of theframework, no config needs to be set at install for the framework to work ‘out of the box’.Most of the config files return key-value PHP arrays of options, sometimes key-closure pairsthat allow a great deal of freedom to modify the inner working of some of Laravel’s core classes.
/controllers
Laravel provides two methods for routing, using controllers and using routes, this foldercontains the Controller classes that are used to provide basic logic, interact with data models, andload view files for your application. Controllers were added to the framework at a later date toprovide familiar ground for users migrating from other frameworks. Although they were addedas an afterthought, due to Laravel’s powerful routing system, they allow you to perform anyaction which can be performed using routes.
/language
In this directory, PHP files containing arrays of strings exist to enable easy localization ofapplications written on Laravel, by default the directory contains string files for pagination andform validation in the English language.
/libraries
The libraries directory can be used to ‘drop in’ single class PHP Libraries to provide extrafunctionality for your application, for larger Libraries it is recommended that you create a Bundleinstead. The libraries folder is added to the Autoloader at startup from the start.php file.
/migrations
The migrations folder contains PHP classes which allow Laravel to update the Schema of yourcurrent database, or populate it with values, while keeping all versions of the application in sync.Migration files must not be created manually, as their file name contains a timestamp, insteaduse the Artisan CLI interface command php artisan migrate:make <migration_name> to createa new Migration.
/models
Models are classes that represent your project’s data. Normally this would mean integratingwith a form of database, or other data source. Laravel provides three methods for interactingwith common database platforms, including a Query builder named ‘Fluent’⁴, which allows youto create SQL queries by chaining PHP methods, using Eloquent ORM to represent your tablesas PHP Objects, or the plain old raw SQL queries that you’re used to. Fluent and Eloquent bothuse a similar syntax, making their adoption a smooth transition.
The models directory has been auto-loaded automatically from start.php.
/tasks
By creating classes in the tasks directory, you are able to add your own custom tasks to theLaravel Artisan command line interface. Tasks are represented by Classes and methods.
⁴http://laravel.com/docs/database/fluent
Project Structure 7
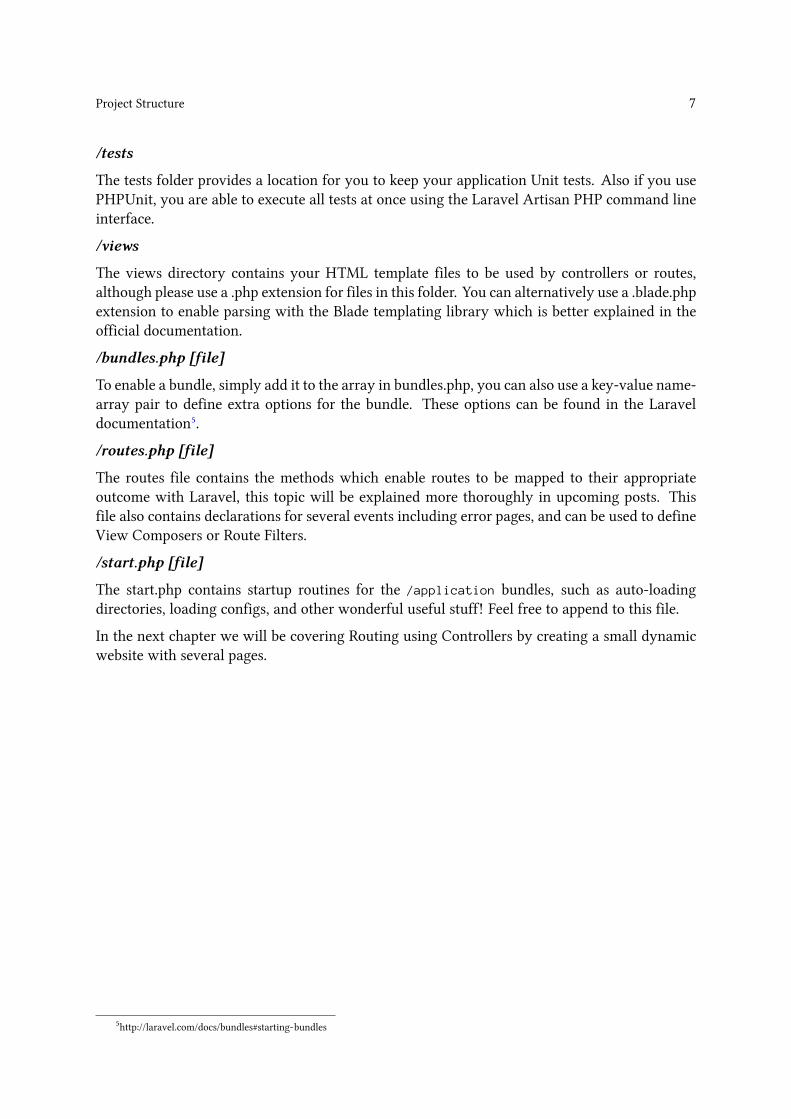
/tests
The tests folder provides a location for you to keep your application Unit tests. Also if you usePHPUnit, you are able to execute all tests at once using the Laravel Artisan PHP command lineinterface.
/views
The views directory contains your HTML template files to be used by controllers or routes,although please use a .php extension for files in this folder. You can alternatively use a .blade.phpextension to enable parsing with the Blade templating library which is better explained in theofficial documentation.
/bundles.php [file]
To enable a bundle, simply add it to the array in bundles.php, you can also use a key-value name-array pair to define extra options for the bundle. These options can be found in the Laraveldocumentation⁵.
/routes.php [file]
The routes file contains the methods which enable routes to be mapped to their appropriateoutcome with Laravel, this topic will be explained more thoroughly in upcoming posts. Thisfile also contains declarations for several events including error pages, and can be used to defineView Composers or Route Filters.
/start.php [file]
The start.php contains startup routines for the /application bundles, such as auto-loadingdirectories, loading configs, and other wonderful useful stuff! Feel free to append to this file.
In the next chapter we will be covering Routing using Controllers by creating a small dynamicwebsite with several pages.
⁵http://laravel.com/docs/bundles#starting-bundles
3 Using ControllersIn this chapter we will be creating a simple multi page website to demonstrate the workings ofLaravel’s routing system, without delving into anything too complicated.
As I mentioned in the previous chapter, there are two options available to route web requeststo your code, Controllers and Routes. In this chapter we will be using Controllers, as anyonejoining us from other Frameworks may be more familiar with them.
3.1 Routing Controllers
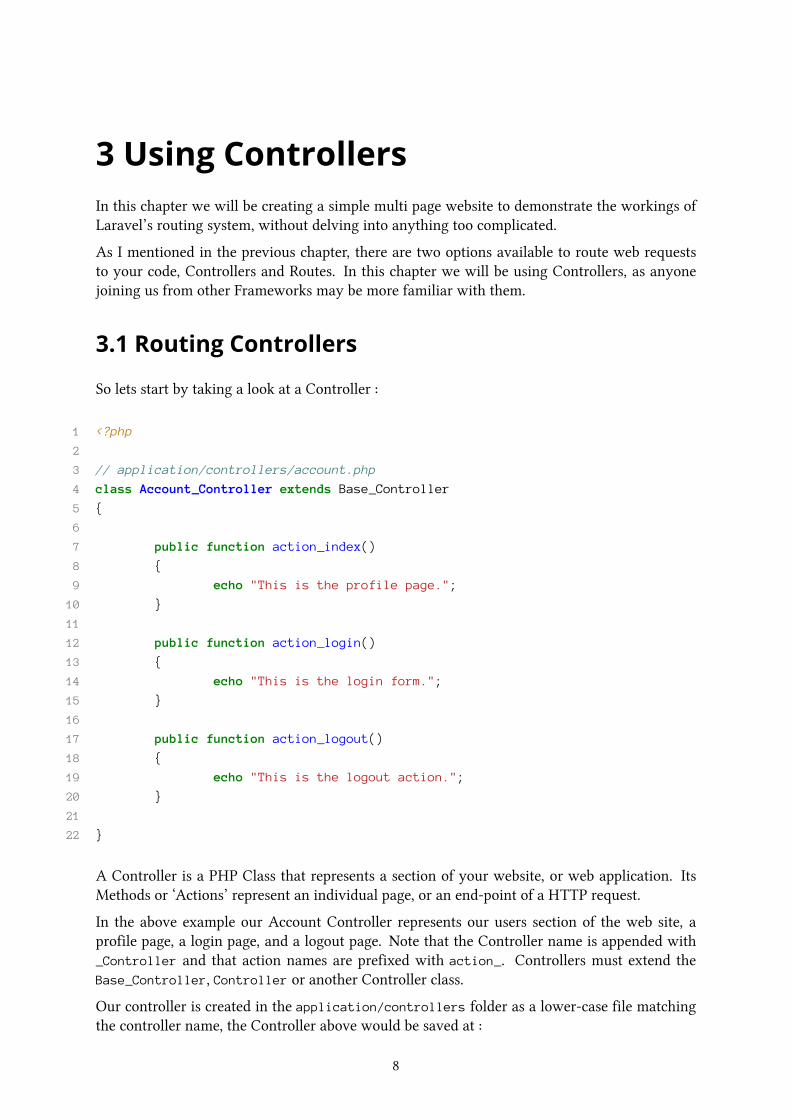
So lets start by taking a look at a Controller :
1 <?php
2
3 // application/controllers/account.php
4 class Account_Controller extends Base_Controller
5 {
6
7 public function action_index()
8 {
9 echo "This is the profile page.";
10 }
11
12 public function action_login()
13 {
14 echo "This is the login form.";
15 }
16
17 public function action_logout()
18 {
19 echo "This is the logout action.";
20 }
21
22 }
A Controller is a PHP Class that represents a section of your website, or web application. ItsMethods or ‘Actions’ represent an individual page, or an end-point of a HTTP request.
In the above example our Account Controller represents our users section of the web site, aprofile page, a login page, and a logout page. Note that the Controller name is appended with_Controller and that action names are prefixed with action_. Controllers must extend theBase_Controller, Controller or another Controller class.
Our controller is created in the application/controllers folder as a lower-case file matchingthe controller name, the Controller above would be saved at :
8

Using Controllers 9
1 /application/controllers/account.php
Before we can use our Controller, we need to register it in /application/routes.php, lets addthe following line :
1 <?php
2
3 // application/routes.php
4 Route::controller('account');
If our controller is in a sub-folder of the controllers directory simply use periods (.) to separatethe director(y | ies) like so :
1 <?php
2
3 // application/routes.php
4 Route::controller('in.a.sub.folder.account');
If our controller exists in a bundle, simply prefix with the bundle name and a double colon :
1 <?php
2
3 // application/routes.php
4 Route::controller('mybundle::account');
Now if we visit:
1 http://myproject/account/login
we see This is the login form.. This is because now that our Controller has been mapped inthe Route class, the first segment (between the slashes) of the URL specifies the controller, andthe second segment (yes, again between the slashes) specifies the action.
In simple terms /account/login is mapped to Account_Controller->action_login() and theresult of our method is displayed.
Now lets try visiting /account instead :
1 This is the profile page.
Why does this happen? The index action is a special action, it is calledwhen no action is specifiedin the URL, therefore the above page could also be “called” with the following URL :
1 /account/index
Using Controllers 10
3.2 Passing Parameters
This simple routing is interesting, but it doesn’t offer us anything that a simple PHP websitecould not.
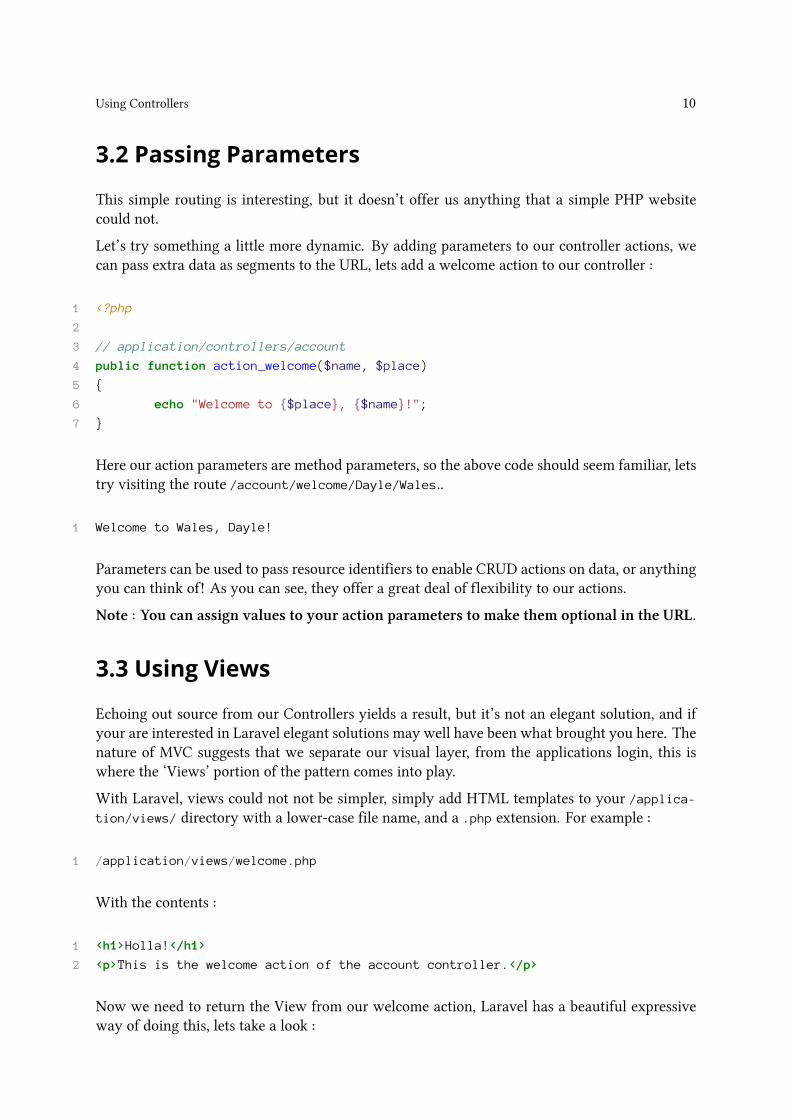
Let’s try something a little more dynamic. By adding parameters to our controller actions, wecan pass extra data as segments to the URL, lets add a welcome action to our controller :
1 <?php
2
3 // application/controllers/account
4 public function action_welcome($name, $place)
5 {
6 echo "Welcome to {$place}, {$name}!";
7 }
Here our action parameters are method parameters, so the above code should seem familiar, letstry visiting the route /account/welcome/Dayle/Wales..
1 Welcome to Wales, Dayle!
Parameters can be used to pass resource identifiers to enable CRUD actions on data, or anythingyou can think of! As you can see, they offer a great deal of flexibility to our actions.
Note : You can assign values to your action parameters to make them optional in the URL.
3.3 Using Views
Echoing out source from our Controllers yields a result, but it’s not an elegant solution, and ifyour are interested in Laravel elegant solutions may well have been what brought you here. Thenature of MVC suggests that we separate our visual layer, from the applications login, this iswhere the ‘Views’ portion of the pattern comes into play.
With Laravel, views could not not be simpler, simply add HTML templates to your /applica-tion/views/ directory with a lower-case file name, and a .php extension. For example :
1 /application/views/welcome.php
With the contents :
1 <h1>Holla!</h1>
2 <p>This is the welcome action of the account controller.</p>
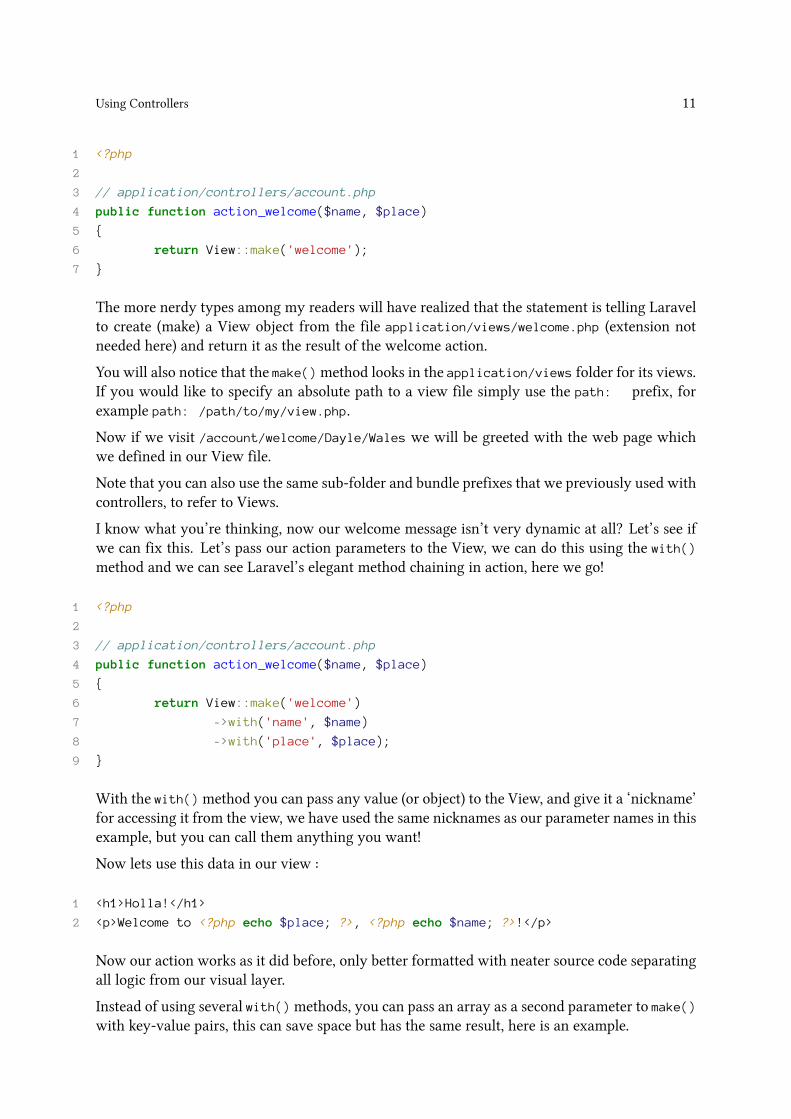
Now we need to return the View from our welcome action, Laravel has a beautiful expressiveway of doing this, lets take a look :
Using Controllers 11
1 <?php
2
3 // application/controllers/account.php
4 public function action_welcome($name, $place)
5 {
6 return View::make('welcome');
7 }
The more nerdy types among my readers will have realized that the statement is telling Laravelto create (make) a View object from the file application/views/welcome.php (extension notneeded here) and return it as the result of the welcome action.
You will also notice that the make()method looks in the application/views folder for its views.If you would like to specify an absolute path to a view file simply use the path: prefix, forexample path: /path/to/my/view.php.
Now if we visit /account/welcome/Dayle/Wales we will be greeted with the web page whichwe defined in our View file.
Note that you can also use the same sub-folder and bundle prefixes that we previously used withcontrollers, to refer to Views.
I know what you’re thinking, now our welcome message isn’t very dynamic at all? Let’s see ifwe can fix this. Let’s pass our action parameters to the View, we can do this using the with()method and we can see Laravel’s elegant method chaining in action, here we go!
1 <?php
2
3 // application/controllers/account.php
4 public function action_welcome($name, $place)
5 {
6 return View::make('welcome')
7 ->with('name', $name)
8 ->with('place', $place);
9 }
With the with()method you can pass any value (or object) to the View, and give it a ‘nickname’for accessing it from the view, we have used the same nicknames as our parameter names in thisexample, but you can call them anything you want!
Now lets use this data in our view :
1 <h1>Holla!</h1>
2 <p>Welcome to <?php echo $place; ?>, <?php echo $name; ?>!</p>
Now our action works as it did before, only better formatted with neater source code separatingall logic from our visual layer.
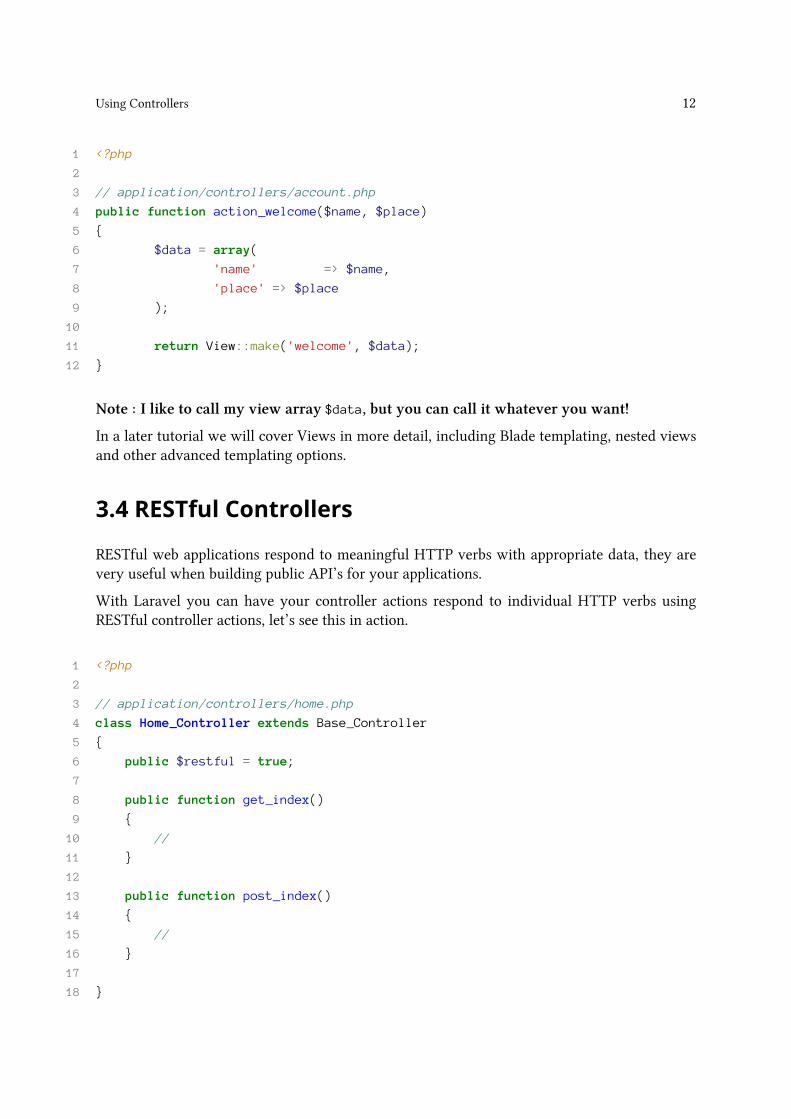
Instead of using several with()methods, you can pass an array as a second parameter to make()with key-value pairs, this can save space but has the same result, here is an example.
Using Controllers 12
1 <?php
2
3 // application/controllers/account.php
4 public function action_welcome($name, $place)
5 {
6 $data = array(
7 'name' => $name,
8 'place' => $place
9 );
10
11 return View::make('welcome', $data);
12 }
Note : I like to call my view array $data, but you can call it whatever you want!
In a later tutorial we will cover Views in more detail, including Blade templating, nested viewsand other advanced templating options.
3.4 RESTful Controllers
RESTful web applications respond to meaningful HTTP verbs with appropriate data, they arevery useful when building public API’s for your applications.
With Laravel you can have your controller actions respond to individual HTTP verbs usingRESTful controller actions, let’s see this in action.
1 <?php
2
3 // application/controllers/home.php
4 class Home_Controller extends Base_Controller
5 {
6 public $restful = true;
7
8 public function get_index()
9 {
10 //
11 }
12
13 public function post_index()
14 {
15 //
16 }
17
18 }
Using Controllers 13
Simply add a boolean public class attribute names $restful and set it to true, then prefix youractions with the HTTP verb to respond to, rather than action_.
Common HTTP verbs are GET, POST, PUT and DELETE.
3.5 The Base_Controller
You can edit the Base_Controller, and extend it with your other Controllers to provide globalfunctionality across all of your controllers, a default action index, or class values, anything youwant!
The Base_Controller can be found in /application/controllers/base.php.
If you do not wish to use a Base_Controller, simply have your controllers extend the ‘Controller’class instead.
3.6 Advanced Routing
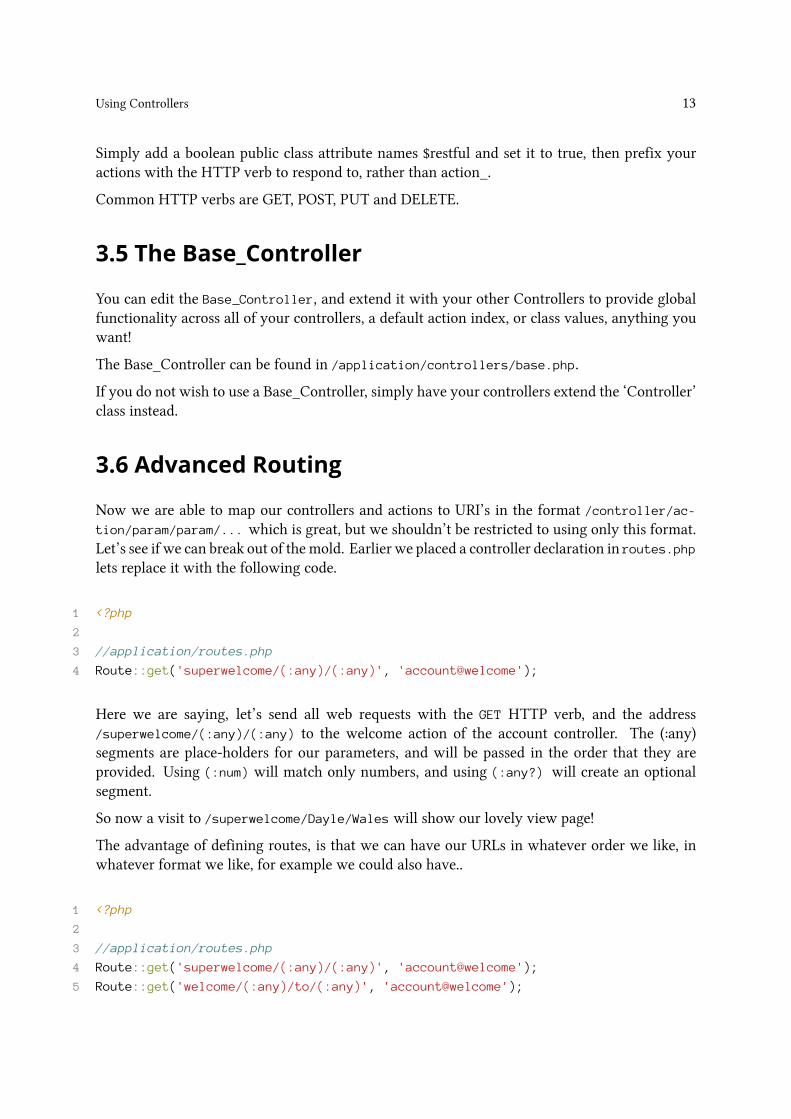
Now we are able to map our controllers and actions to URI’s in the format /controller/ac-tion/param/param/... which is great, but we shouldn’t be restricted to using only this format.Let’s see if we can break out of themold. Earlier we placed a controller declaration in routes.phplets replace it with the following code.
1 <?php
2
3 //application/routes.php
4 Route::get('superwelcome/(:any)/(:any)', 'account@welcome');
Here we are saying, let’s send all web requests with the GET HTTP verb, and the address/superwelcome/(:any)/(:any) to the welcome action of the account controller. The (:any)segments are place-holders for our parameters, and will be passed in the order that they areprovided. Using (:num) will match only numbers, and using (:any?) will create an optionalsegment.
So now a visit to /superwelcome/Dayle/Wales will show our lovely view page!
The advantage of defining routes, is that we can have our URLs in whatever order we like, inwhatever format we like, for example we could also have..
1 <?php
2
3 //application/routes.php
4 Route::get('superwelcome/(:any)/(:any)', 'account@welcome');
5 Route::get('welcome/(:any)/to/(:any)', 'account@welcome');
Using Controllers 14
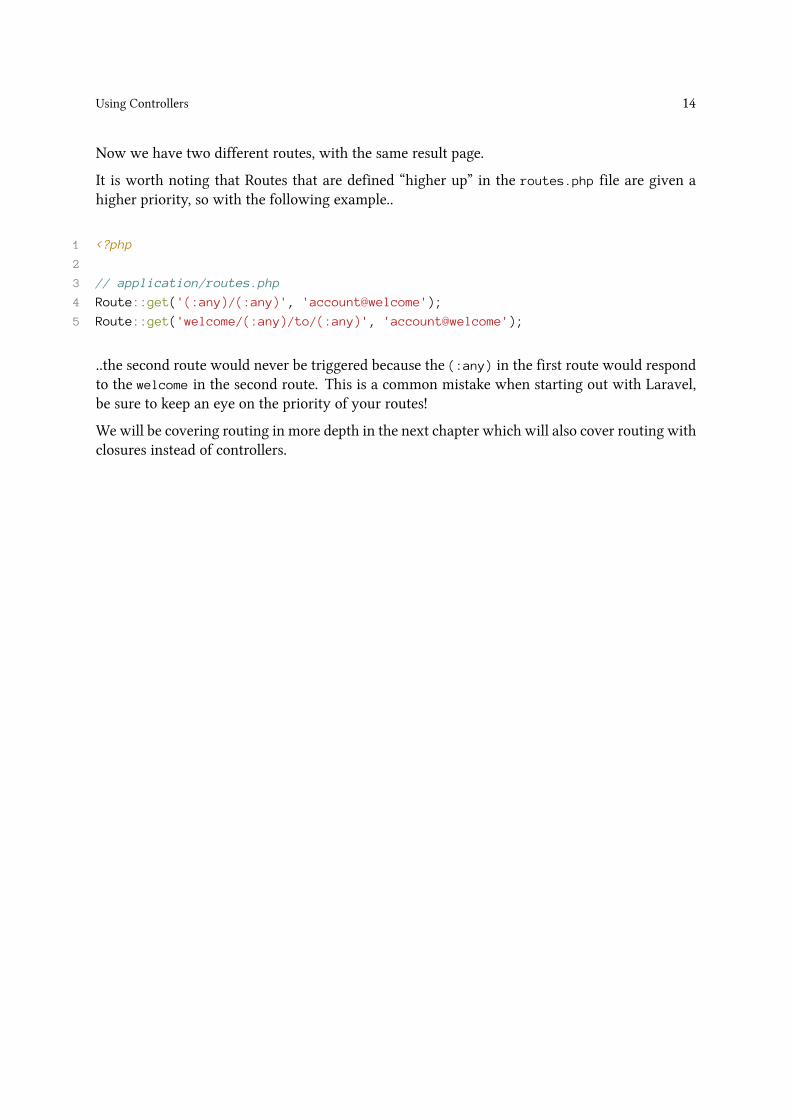
Now we have two different routes, with the same result page.
It is worth noting that Routes that are defined “higher up” in the routes.php file are given ahigher priority, so with the following example..
1 <?php
2
3 // application/routes.php
4 Route::get('(:any)/(:any)', 'account@welcome');
5 Route::get('welcome/(:any)/to/(:any)', 'account@welcome');
..the second route would never be triggered because the (:any) in the first route would respondto the welcome in the second route. This is a common mistake when starting out with Laravel,be sure to keep an eye on the priority of your routes!
We will be covering routing in more depth in the next chapter which will also cover routing withclosures instead of controllers.
4 Routes With ClosuresIn this chapter we will be using Routes with Closures instead of Controllers with Actions. Ifyou have not already read the previous chapter on the topic of using controllers I would suggeststarting there as we will be building on what we have already learned that in this chapter.
Routes allow us to map our framework URL’s to closures which is a very clean way of containingour logic, without all of the ‘class fluff’. Closures are anonymous functions (function() {}),they can be assigned to and treated like any other variable. For more information on Closures,check out the PHP API article¹.
4.1 Closures
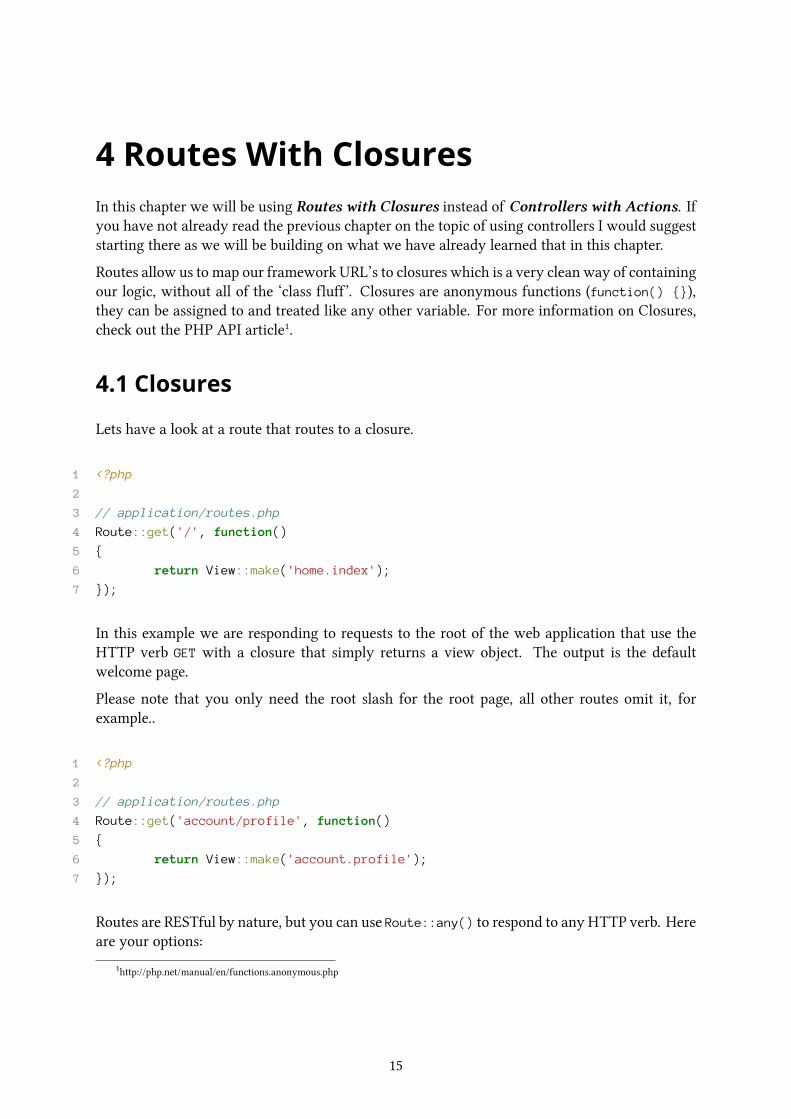
Lets have a look at a route that routes to a closure.
1 <?php
2
3 // application/routes.php
4 Route::get('/', function()
5 {
6 return View::make('home.index');
7 });
In this example we are responding to requests to the root of the web application that use theHTTP verb GET with a closure that simply returns a view object. The output is the defaultwelcome page.
Please note that you only need the root slash for the root page, all other routes omit it, forexample..
1 <?php
2
3 // application/routes.php
4 Route::get('account/profile', function()
5 {
6 return View::make('account.profile');
7 });
Routes are RESTful by nature, but you can use Route::any() to respond to any HTTP verb. Hereare your options:
¹http://php.net/manual/en/functions.anonymous.php
15

Routes With Closures 16
1 <?php
2
3 // application/routes.php
4 Route::get();
5 Route::post();
6 Route::put();
7 Route::delete();
8 Route::any();
To pass parameters to your Closures, simply add the usual view placeholders to the URI, anddefine parameters in your Closure, they will be matched in the order from left to right, forexample..
1 <?php
2
3 // application/routes.php
4 Route::get('user/(:any)/task/(:num)', function($username, $task_number)
5 {
6 // $username will be replaced by the value of (:any)
7 // $task_number will be replaced by the integer in place of (:num)
8
9 $data = array(
10 'username' => $username,
11 'task' => $task_number
12 );
13
14 return View::make('tasks.for_user', $data);
15 });
Available placeholders are:
Placeholder Explanation
(:any) Match any alpha-numeric string(:num) Match any whole number.(:any?) Optional parameter.
4.2 Redirects and Named Routes
It would be kinda silly to look at named routes before seeing a method that uses them wouldn’tit? Lets have a look at the Redirect class, it can be used to Redirect to another route. It can beused in a similar fashion to returning a view.
1 <?php
2

Routes With Closures 17
3 // application/routes.php
4 Route::get('/', function()
5 {
6 return Redirect::to('account/profile');
7 });
Lovely! Couldn’t be simpler, wait no, it could, and is! Lets take a look at a named route :
1 <?php
2
3 Route::get('account/profile', array('as' => 'profile', 'do' => function()
4 {
5 return View::make('account/profile');
6 }));
Instead of passing a Closure as the second parameter, we now pass an array with the key ‘do’pointing to the closure instead, this allows us to add all kind of extra information to the route.The ‘as’ key, assigns a nickname to our route, this is what named routing is all about. Let’s seehow it can be used to improve the Redirect:: from before.
1 <?php
2
3 Route::get('/', function()
4 {
5 return Redirect::to_route('profile');
6 });
There, now we have that nasty URI out of our code, very pretty. All of the classes or helperswhich refer to routes have a similar method to route to a named route, this can really clean upyour code, and makes it read like a book. Also, if you later decide to change the URI for a certainpage, you will not have to go back and change all of your links and redirects!
4.3 Filters
Ok ok… I said I was going to be explaining Routes in this one, but I honestly can’t think of abetter place to cover Filters, and they are related, so here we go.
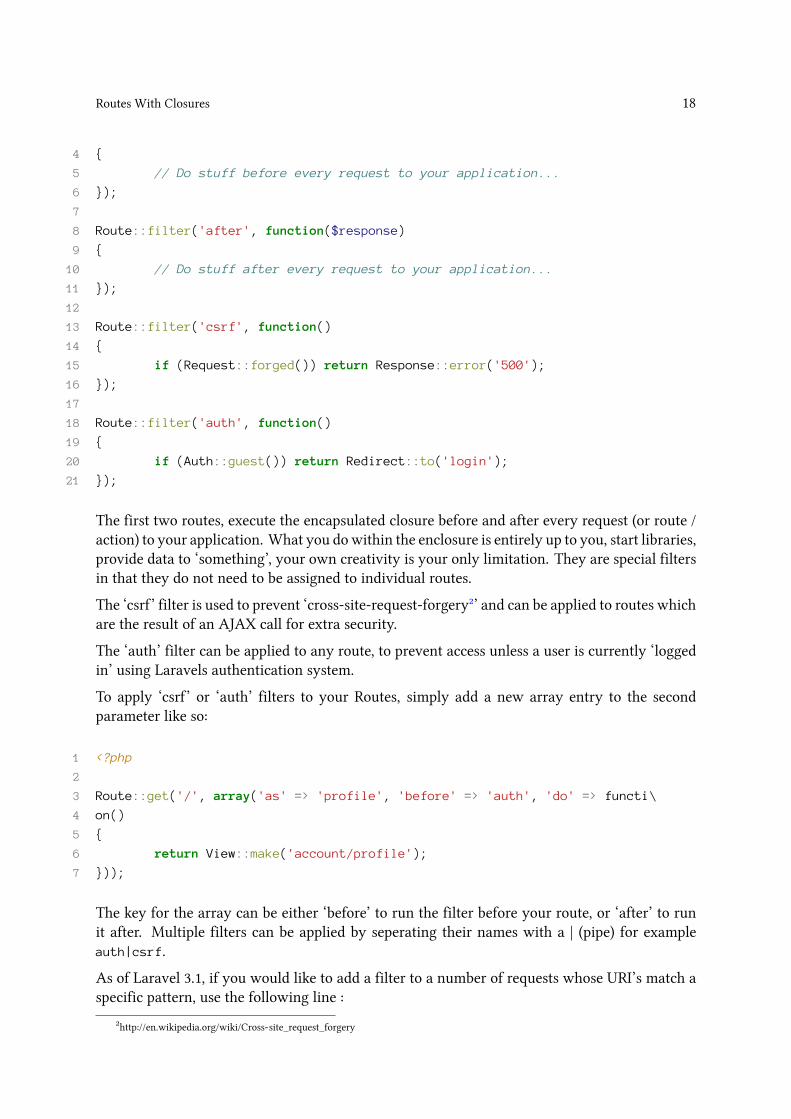
Filters are exactly as they sound, they are code, or tests that can be performed ‘before’ or ‘after’a route, and other key events within the framework. Laravel has four special route filters thatare defined by default in application/routes.php, let’s take a look at them.
1 <?php
2
3 Route::filter('before', function()
Routes With Closures 18
4 {
5 // Do stuff before every request to your application...
6 });
7
8 Route::filter('after', function($response)
9 {
10 // Do stuff after every request to your application...
11 });
12
13 Route::filter('csrf', function()
14 {
15 if (Request::forged()) return Response::error('500');
16 });
17
18 Route::filter('auth', function()
19 {
20 if (Auth::guest()) return Redirect::to('login');
21 });
The first two routes, execute the encapsulated closure before and after every request (or route /action) to your application. What you dowithin the enclosure is entirely up to you, start libraries,provide data to ‘something’, your own creativity is your only limitation. They are special filtersin that they do not need to be assigned to individual routes.
The ‘csrf’ filter is used to prevent ‘cross-site-request-forgery²’ and can be applied to routes whichare the result of an AJAX call for extra security.
The ‘auth’ filter can be applied to any route, to prevent access unless a user is currently ‘loggedin’ using Laravels authentication system.
To apply ‘csrf’ or ‘auth’ filters to your Routes, simply add a new array entry to the secondparameter like so:
1 <?php
2
3 Route::get('/', array('as' => 'profile', 'before' => 'auth', 'do' => functi\
4 on()
5 {
6 return View::make('account/profile');
7 }));
The key for the array can be either ‘before’ to run the filter before your route, or ‘after’ to runit after. Multiple filters can be applied by seperating their names with a | (pipe) for exampleauth|csrf.
As of Laravel 3.1, if you would like to add a filter to a number of requests whose URI’s match aspecific pattern, use the following line :
²http://en.wikipedia.org/wiki/Cross-site_request_forgery

Routes With Closures 19
1 <?php
2
3 Route::filter('pattern: admin/*', 'auth');
This will apply the ‘auth’ filter to all route URI’s that start with admin/.
4.4 Route Groups
You may want to apply a number of settings across a range of routes, you can do this easily usingthe Route Grouping option, take a look :
1 <?php
2
3 Route::group(array('before' => 'auth'), function()
4 {
5 Route::get('panel', function()
6 {
7 // do stuff
8 });
9
10 Route::get('dashboard', function()
11 {
12 // do stuff
13 });
14 });
now both the panel and dashboard routes are protected by the auth filter.
Although routing can be very simple, routes can also be as complex as you need them to be, useroute groups to avoid duplicating common rules across many routes and keep your code DRY.(Don’t repeat yourself!)
The next chapter will cover the creation of links, so that we can move from one routes page tothe next.
5 Links and URLsOur applicationmight get a little boring if we only have one page, and I’m sure the user would getpeeved quite quickly if they had to type out the full URI each time to switch pages. Fortunatelyhyper-links are here to save the day.
If you haven’t been living under a rock for the past couple of decades you will already knowwhat hyper-links are, and I won’t bore you with the technical explanation. Before we have alook at links let’s take a look at how Laravel handles its URLs.
5.1 Retrieving URLs
First let’s take a look at a problem. You see frameworks have very unique URL structures, somemay have an index.php in them, some installations won’t. Others will have complex routes. Inmost cases using a relative URL like you would on another website would lead to trouble in thelong run. If you chose to provide full URL’s to everything, and decided to move the applicationat a later date, you might find yourself abusing the find and replace function of your favoriteeditor.
Why not let Laravel do all the hard work? Laravel knows the full URL to your application, itknows whether or not you are using URL rewriting. It even knows about your routes. Let’s takeadvantage of this information by using the URL class to generate some site URLs.
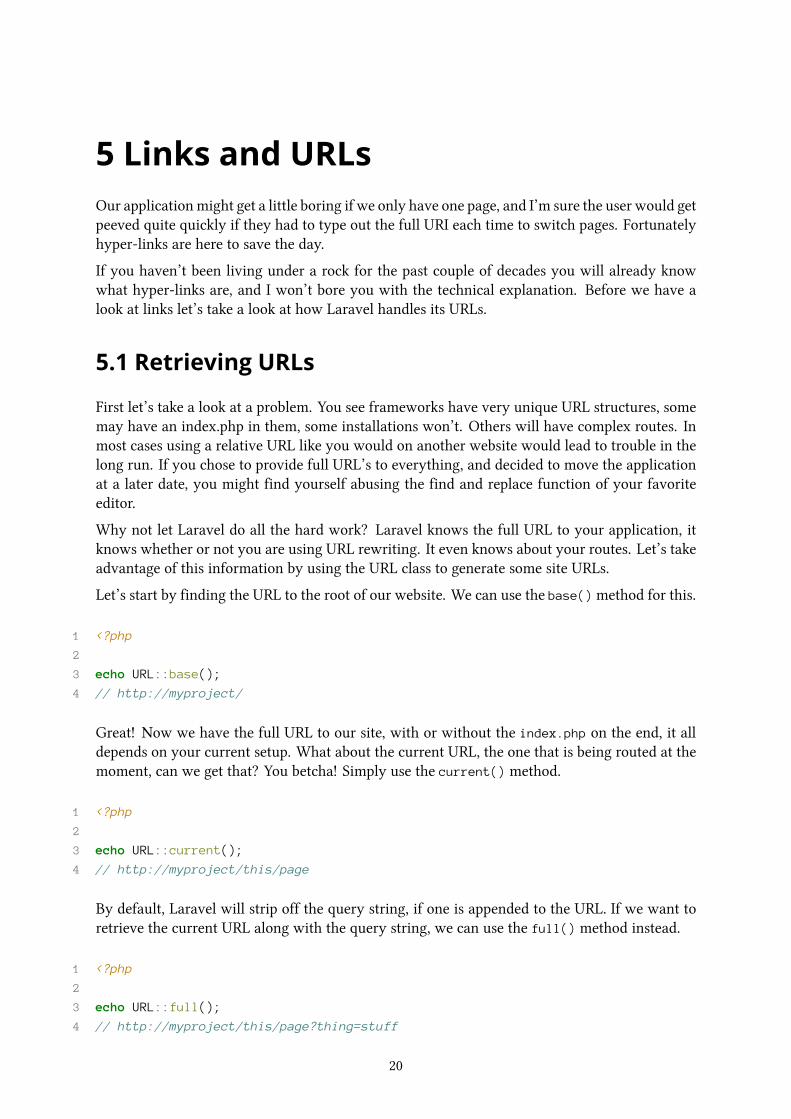
Let’s start by finding the URL to the root of our website. We can use the base()method for this.
1 <?php
2
3 echo URL::base();
4 // http://myproject/
Great! Now we have the full URL to our site, with or without the index.php on the end, it alldepends on your current setup. What about the current URL, the one that is being routed at themoment, can we get that? You betcha! Simply use the current() method.
1 <?php
2
3 echo URL::current();
4 // http://myproject/this/page
By default, Laravel will strip off the query string, if one is appended to the URL. If we want toretrieve the current URL along with the query string, we can use the full() method instead.
1 <?php
2
3 echo URL::full();
4 // http://myproject/this/page?thing=stuff
20
Links and URLs 21
Knowing our base URL and current URL can be handy, but it would be more useful if we couldget the URL to other routes or pages, then we could create links.
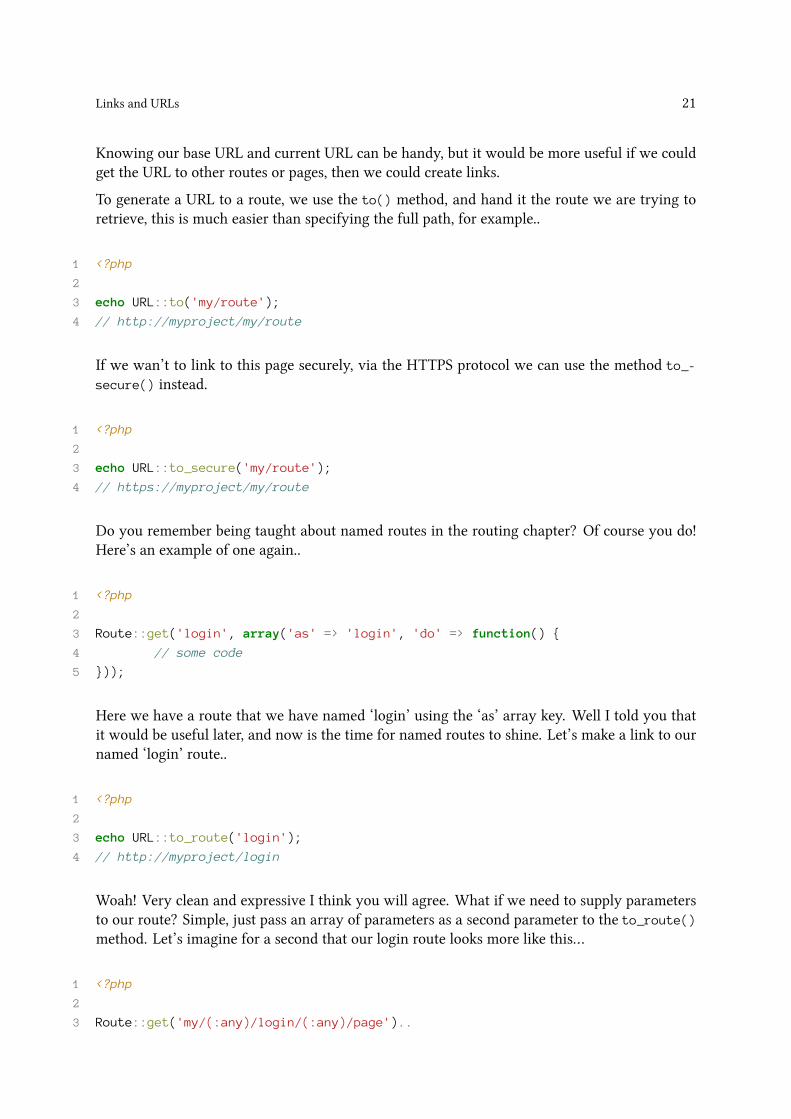
To generate a URL to a route, we use the to() method, and hand it the route we are trying toretrieve, this is much easier than specifying the full path, for example..
1 <?php
2
3 echo URL::to('my/route');
4 // http://myproject/my/route
If we wan’t to link to this page securely, via the HTTPS protocol we can use the method to_-
secure() instead.
1 <?php
2
3 echo URL::to_secure('my/route');
4 // https://myproject/my/route
Do you remember being taught about named routes in the routing chapter? Of course you do!Here’s an example of one again..
1 <?php
2
3 Route::get('login', array('as' => 'login', 'do' => function() {
4 // some code
5 }));
Here we have a route that we have named ‘login’ using the ‘as’ array key. Well I told you thatit would be useful later, and now is the time for named routes to shine. Let’s make a link to ournamed ‘login’ route..
1 <?php
2
3 echo URL::to_route('login');
4 // http://myproject/login
Woah! Very clean and expressive I think you will agree. What if we need to supply parametersto our route? Simple, just pass an array of parameters as a second parameter to the to_route()method. Let’s imagine for a second that our login route looks more like this…
1 <?php
2
3 Route::get('my/(:any)/login/(:any)/page')..
Links and URLs 22
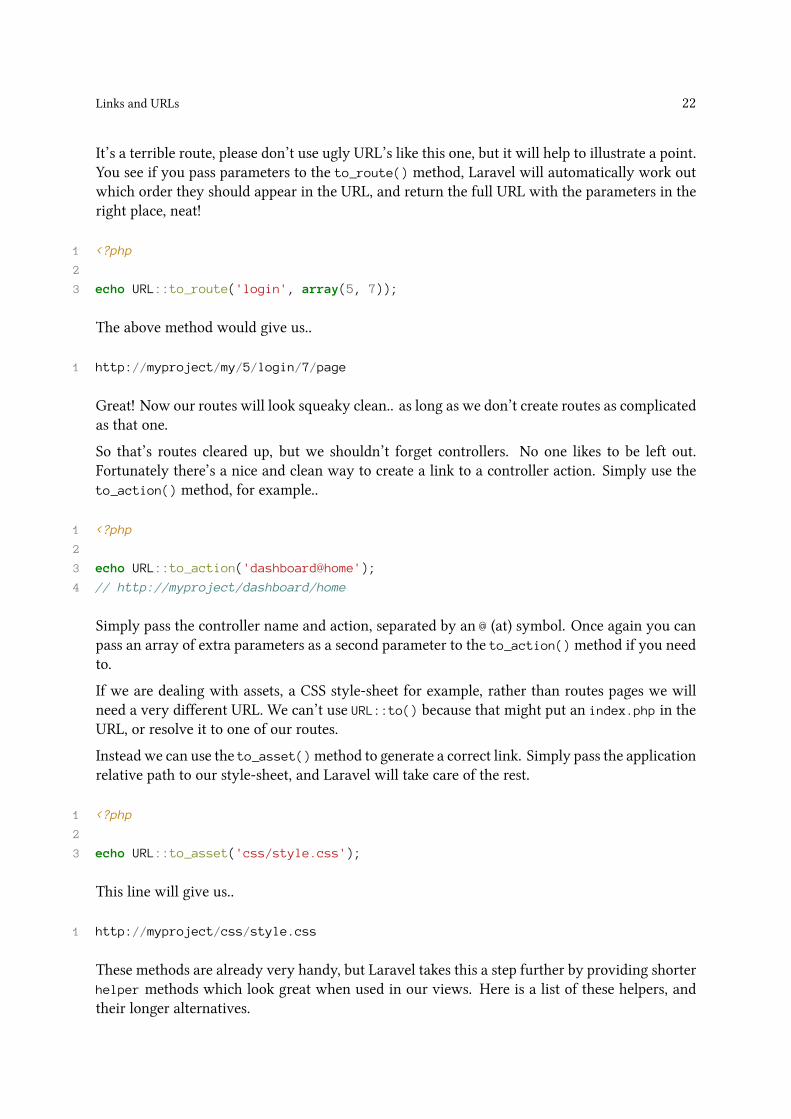
It’s a terrible route, please don’t use ugly URL’s like this one, but it will help to illustrate a point.You see if you pass parameters to the to_route() method, Laravel will automatically work outwhich order they should appear in the URL, and return the full URL with the parameters in theright place, neat!
1 <?php
2
3 echo URL::to_route('login', array(5, 7));
The above method would give us..
1 http://myproject/my/5/login/7/page
Great! Now our routes will look squeaky clean.. as long as we don’t create routes as complicatedas that one.
So that’s routes cleared up, but we shouldn’t forget controllers. No one likes to be left out.Fortunately there’s a nice and clean way to create a link to a controller action. Simply use theto_action() method, for example..
1 <?php
2
3 echo URL::to_action('dashboard@home');
4 // http://myproject/dashboard/home
Simply pass the controller name and action, separated by an @ (at) symbol. Once again you canpass an array of extra parameters as a second parameter to the to_action()method if you needto.
If we are dealing with assets, a CSS style-sheet for example, rather than routes pages we willneed a very different URL. We can’t use URL::to() because that might put an index.php in theURL, or resolve it to one of our routes.
Instead we can use the to_asset()method to generate a correct link. Simply pass the applicationrelative path to our style-sheet, and Laravel will take care of the rest.
1 <?php
2
3 echo URL::to_asset('css/style.css');
This line will give us..
1 http://myproject/css/style.css
These methods are already very handy, but Laravel takes this a step further by providing shorterhelper methods which look great when used in our views. Here is a list of these helpers, andtheir longer alternatives.

Links and URLs 23
Helper Method
url() URL::to()asset() URL::to_asset()route() URL::to_route()action() URL::to_action()
5.2 Generating Links
Now that we can retrieve our site links, the next logical step would be to use them to createhyper-links, now I know what you’re thinking, we can do it like this..
1 <a href="<?php echo URL::to('my/page'); ?>">My Page</a>
Sure that would work, but it’s a little ugly. In Laravel if something is a little ugly, there is alwaysa better way of handling it. Links are no exception.
Why don’t we use the HTML class to generate a link? After all, that’s what the HTML class isfor. It is used to generate all kinds of HTML tags.
1 <?php echo HTML::link('my/page', 'My Page'); ?>
That looks a lot better! Let’s see the result.
1 <a href="http://myproject/my/page">My Page</a>
If you are an SEO ninja, and cannot stand to see a link without a title attribute, simply pass anextra array.
1 <?php echo HTML::link('my/page', 'My Page', array('title' => 'My page!')); \
2 ?>
Which gives..
1 <a href="http://myproject/my/page" title="My page!">My Page</a>
One of the great features of Laravel is how consistent its method naming is, many of theHTML::link methods follow a similar naming pattern as the URL::to methods, which makesthem easy to remember. Let’s take a look at how we can link to a secure page (via HTTPS).
1 <?php
2
3 HTML::link_to_secure('my/page', 'My Page');
4 // <a href="https://myproject/my/page">My Page</a>

Links and URLs 24
We can also use link_to_route, to create a link to a named route just like we did with the URLlibrary.
1 <?php
2
3 HTML::link_to_route('login', 'Login!');
4 // <a href="http://myproject/login/page">Login!</a>
Once again we can use the link_to_action() method to link to a controller-action pair, forexample..
1 <?php
2
3 HTML::link_to_action('account@login', 'Login!');
4 // <a href="http://myproject/account/login">Login!</a>
Laravel even gives us a method of easily creating ‘mailto’ links from an email address. Let’s takea look.
1 <?php
2
3 HTML::mailto('[email protected]', 'Mail me!');
4 // <a href="mailto:[email protected]">Mail me!</a>
Nice and clean!
Now that you know how to create URL’s and links, your applications will start to grow in size,covering many routes until they consume our planet and take over the unive…
Your applications will be a lot more interesting!
6 FormsForms are an important part of any web-based application. They help control the flow ofthe application, allow us to receive input from our users and make decisions that affect thefunctionality of our applications. They are also my least favorite thing in the world to write.
Fortunately for me, Laravel’s form class takes care of a lot of the hard work for us, by providinguseful methods for generating common form elements. Let’s use the form class to create a simpleweb form in one of our views.
6.1 Creating Forms
1 // form.php
2 <?php echo Form::open('my/route'); ?>
3
4 <!-- username field -->
5 <?php echo Form::label('username', 'Username'); ?>
6 <?php echo Form::text('username'); ?>
7
8 <!-- password field -->
9 <?php echo Form::label('password', 'Password'); ?>
10 <?php echo Form::password('password'); ?>
11
12 <!-- login button -->
13 <?php echo Form::submit('Login');
14
15 <?php echo Form::close(); ?>
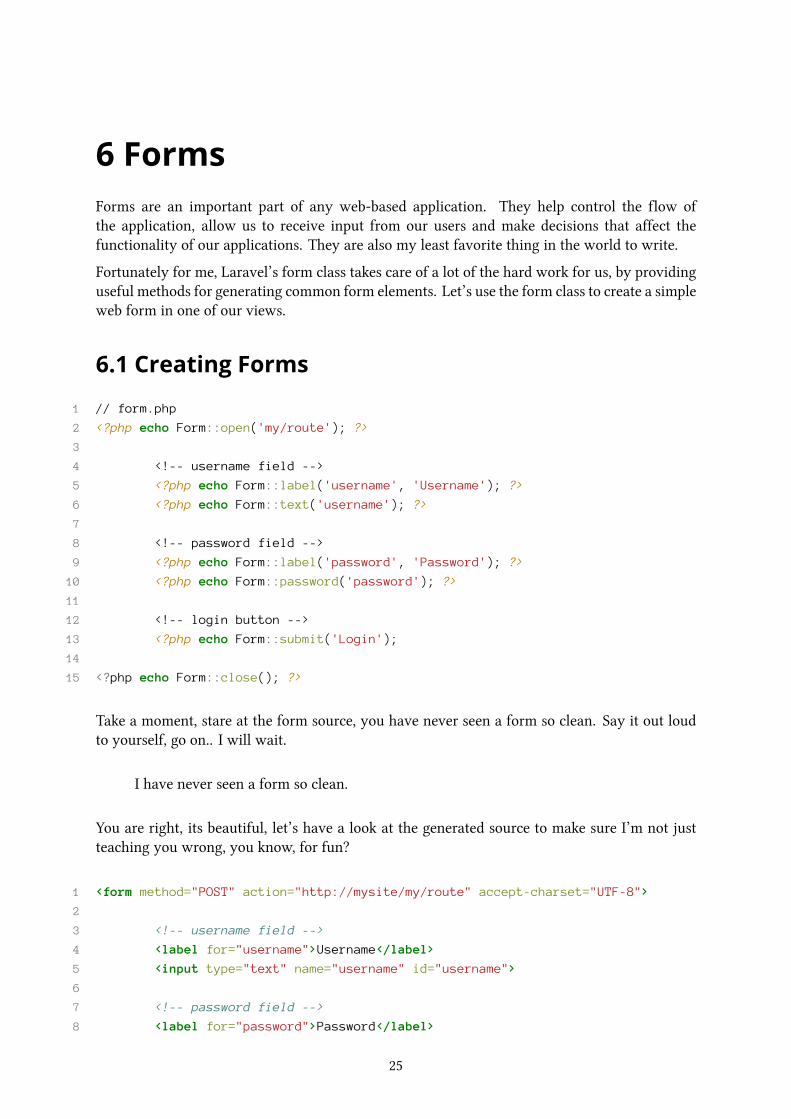
Take a moment, stare at the form source, you have never seen a form so clean. Say it out loudto yourself, go on.. I will wait.
I have never seen a form so clean.
You are right, its beautiful, let’s have a look at the generated source to make sure I’m not justteaching you wrong, you know, for fun?
1 <form method="POST" action="http://mysite/my/route" accept-charset="UTF-8">
2
3 <!-- username field -->
4 <label for="username">Username</label>
5 <input type="text" name="username" id="username">
6
7 <!-- password field -->
8 <label for="password">Password</label>
25

Forms 26
9 <input type="password" name="password" id="password">
10
11 <!-- login button -->
12 <input type="submit" value="Login">
13
14 </form>
Great, it worked! I mean of course it did! Let’s go over the form line by line to see how it works,on our first line we have the Form::open() method, which creates a form open tag for us.
1 <?php echo Form::open('my/route'); ?>
The first parameter to the method is the URI we wish to submit the form to. The secondparameter is the METHOD used to submit the form, if you don’t provide a method as a stringLaravel will assume that you want a POST form, which is the most common usage.
The third parameter is also optional, you can pass an array of attribute => value pairs to addextra attributes to the <form> tag. For example if you wished to target the form with Javascriptyou may want to pass array('id' => 'myform') as the third parameter to give the element anid.
To submit a form to a secure URI (https) you will need to use the open_secure()method insteadof open(), it accepts the same parameters.
If you wish to be able to have files uploaded from your form, it will need to use multipart/data,use open_for_files() instead of the open() method. This method also accepts the sameparameters.
Finally if you wish to submit to a secure URI, and have files uploaded you will need to usethe open_secure_for_files()method, which once again accepts the same parameters, and is acombination of both open_secure() and open_for_files().
6.2 Adding Labels
The next line contains the Form::label() method which is used to create a <label> element.The first parameter is the name of the input element that it describes to be used in the for=""
attribute. The second parameter is what will be used as the content of the label element. Youcan pass an array as an optional third parameter to apply extra HTML element attributes.
6.3 Generating Inputs
Next we have the input generators, these methods help to generate all of the HTML elementsthat are common to forms. In the example above we use the text() and password() method togenerate <input type="text".. and <input type="password".. elements.

Forms 27
The first parameter to the method, is the value of the elements name attribute, the second optionalparameter is the default value of the element. Once more we can pass an array of HTMLattributes as an optional third parameter, are you starting to see a pattern yet?
The textarea() and hidden() fields also accept the same parameters.
Checkboxes can be created using the checkbox() method, with the first parameter being thename of the element, the second being the value, and the third option is an optional booleanswitch to set whether the element is initially checked or not. The fourth optional parameteragain sets attributes, in fact.. go ahead an assume all future inputs accept an attributes array astheir optional final parameter. Let’s have a look at a checkbox generator..
1 <?php echo Form::checkbox('admin', 'yes', true, array('id' => 'admin-checke\
2 r')); ?>
The radio() method creates radio buttons, and shares the same parameters as the checkbox()method.
Next we have drop downs, the most awkward of all form elements. Fortunately all we needto do is pass a name, an array of value => label options, and an optional parameter to statewhich option should be selected by default to the select()method. Our dropdown will then begenerated for us, for example..
1 <?php
2
3 Form::select('roles', array(
4 0 => 'User',
5 1 => 'Member',
6 2 => 'Editor',
7 3 => 'Administrator'
8 ), 2);
and we get..
1 <select name="roles">
2 <option value="0">User</option>
3 <option value="1">Member</option>
4 <option value="2" selected="selected">Editor</option>
5 <option value="3">Administrator</option>
6 </select>
Great! Now it’s time to submit our form.
Forms 28
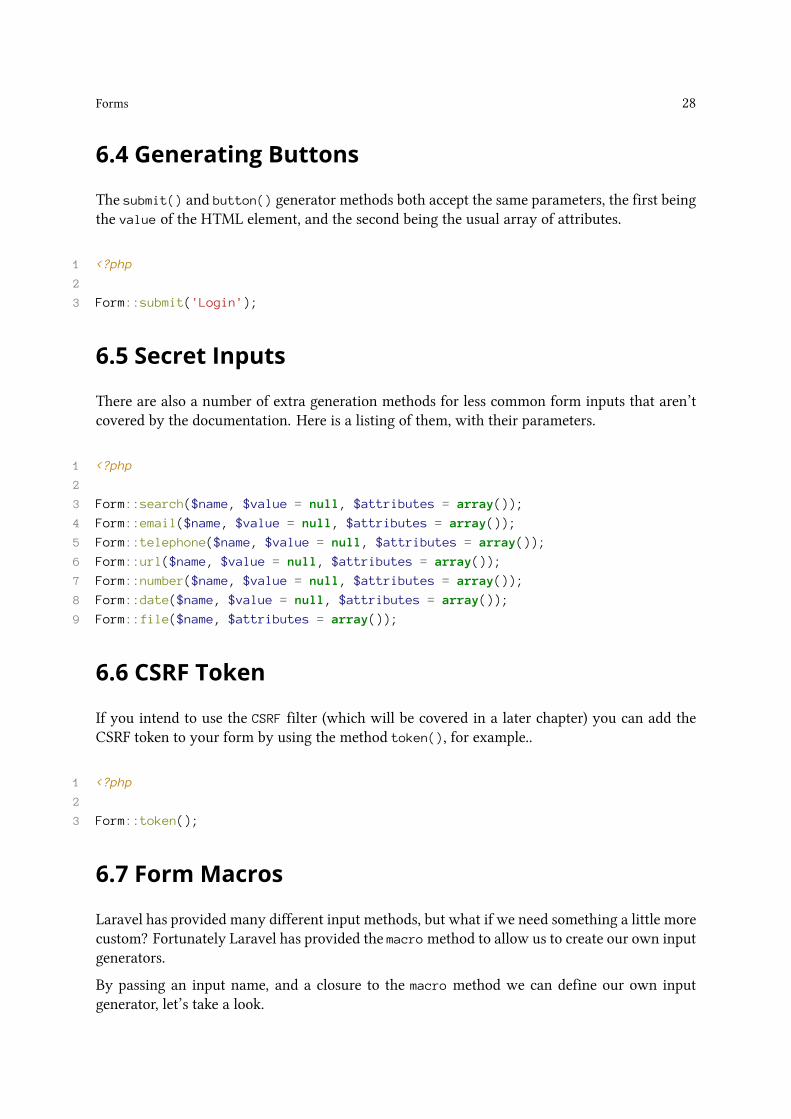
6.4 Generating Buttons
The submit() and button() generator methods both accept the same parameters, the first beingthe value of the HTML element, and the second being the usual array of attributes.
1 <?php
2
3 Form::submit('Login');
6.5 Secret Inputs
There are also a number of extra generation methods for less common form inputs that aren’tcovered by the documentation. Here is a listing of them, with their parameters.
1 <?php
2
3 Form::search($name, $value = null, $attributes = array());
4 Form::email($name, $value = null, $attributes = array());
5 Form::telephone($name, $value = null, $attributes = array());
6 Form::url($name, $value = null, $attributes = array());
7 Form::number($name, $value = null, $attributes = array());
8 Form::date($name, $value = null, $attributes = array());
9 Form::file($name, $attributes = array());
6.6 CSRF Token
If you intend to use the CSRF filter (which will be covered in a later chapter) you can add theCSRF token to your form by using the method token(), for example..
1 <?php
2
3 Form::token();
6.7 Form Macros
Laravel has provided many different input methods, but what if we need something a little morecustom? Fortunately Laravel has provided the macromethod to allow us to create our own inputgenerators.
By passing an input name, and a closure to the macro method we can define our own inputgenerator, let’s take a look.
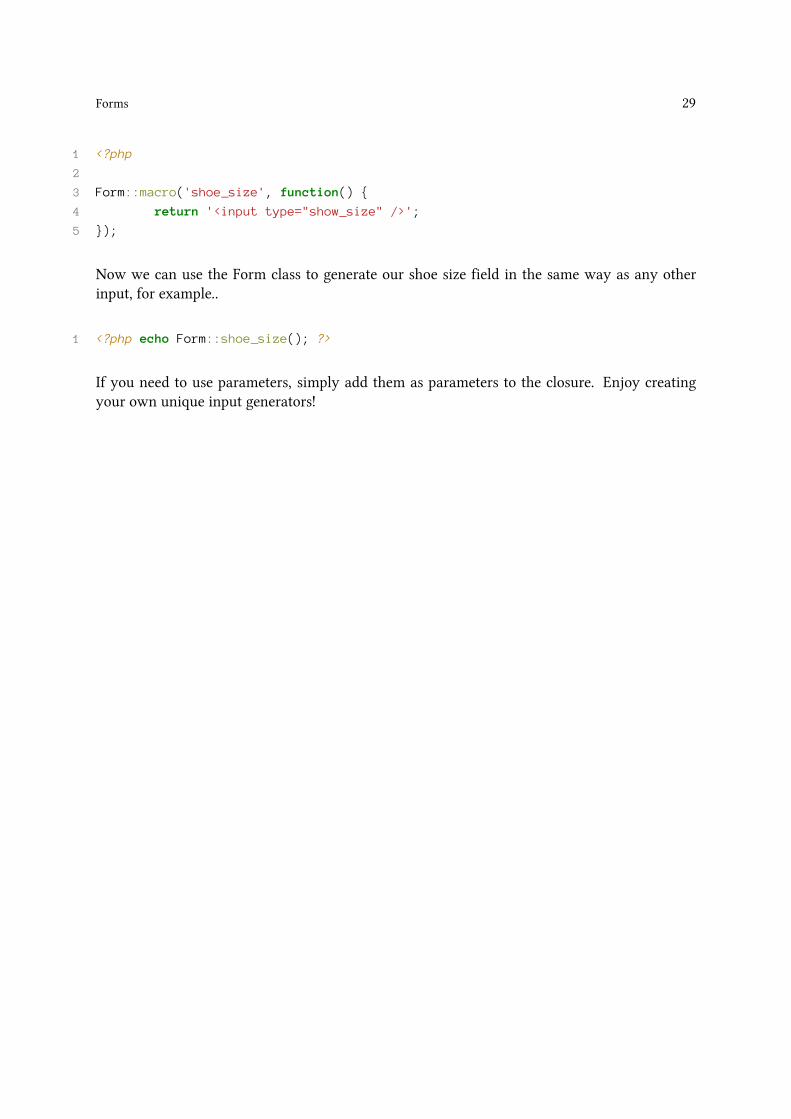
Forms 29
1 <?php
2
3 Form::macro('shoe_size', function() {
4 return '<input type="show_size" />';
5 });
Now we can use the Form class to generate our shoe size field in the same way as any otherinput, for example..
1 <?php echo Form::shoe_size(); ?>
If you need to use parameters, simply add them as parameters to the closure. Enjoy creatingyour own unique input generators!

7 Handling InputNow that we know how to create forms, we need to learn how to handle the input that has beensent by them. As always, Laravel has provided an ultra clean way of dealing with your inputdata. No need to interact with PHP arrays such as $_POST, $_GET and $_FILES. Let’s be honest,those look ugly.
7.1 Request data
Let’s use the Input class to handle this instead.
1 <?php
2
3 $panda = Input::get('panda');
Now we have a Panda! Great.. we have too many already. One thing you need to rememberabout the get() method on the Input class, is that it doesn’t refer to $_GET data, get() is justa nice and expressive short method name for retrieving all kinds of data. The input class addsresponds to get() with all kinds of request data, including $_POST.
If a piece of request data isn’t set, the Input class will return null. If you pass a secondparameter to the get() method and the index doesn’t exist, then the method will return thesecond parameter instead. Very useful!
1 <?php
2
3 $panda = Input::get('panda', 'Muffin');
If you would like to retrieve the entire request array, simply skip the index. Easy as that.
1 <?php
2
3 $morepandas = Input::get();
By default the get() array won’t includes values from the $_FILES array, however if you useall() instead of get() it will contain files too.
1 <?php
2
3 $pandas_and_files = Input::all();
If you would like to check if a piece of post data exists, without actually returning it, simply usethe elegant and highly expressive has() method, which will return a boolean result.
1 <?php
2
3 $do_we_have_a_panda = Input::has('panda');
30
Handling Input 31
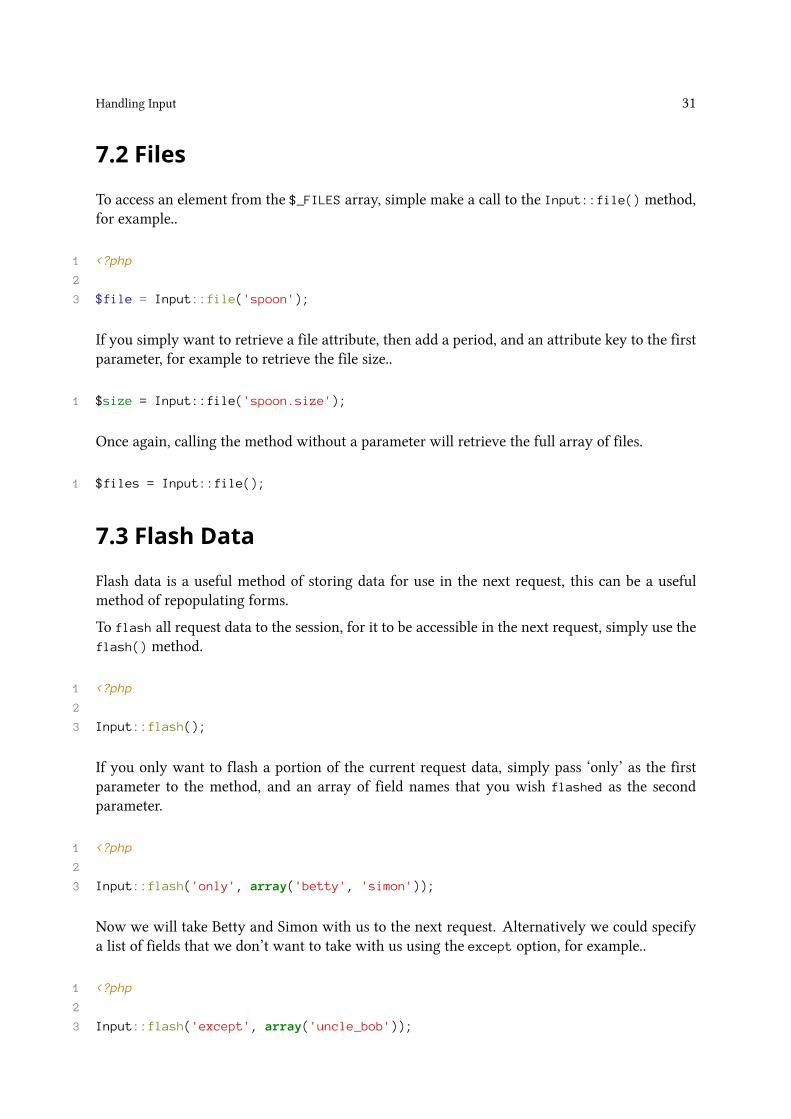
7.2 Files
To access an element from the $_FILES array, simple make a call to the Input::file() method,for example..
1 <?php
2
3 $file = Input::file('spoon');
If you simply want to retrieve a file attribute, then add a period, and an attribute key to the firstparameter, for example to retrieve the file size..
1 $size = Input::file('spoon.size');
Once again, calling the method without a parameter will retrieve the full array of files.
1 $files = Input::file();
7.3 Flash Data
Flash data is a useful method of storing data for use in the next request, this can be a usefulmethod of repopulating forms.
To flash all request data to the session, for it to be accessible in the next request, simply use theflash() method.
1 <?php
2
3 Input::flash();
If you only want to flash a portion of the current request data, simply pass ‘only’ as the firstparameter to the method, and an array of field names that you wish flashed as the secondparameter.
1 <?php
2
3 Input::flash('only', array('betty', 'simon'));
Now we will take Betty and Simon with us to the next request. Alternatively we could specifya list of fields that we don’t want to take with us using the except option, for example..
1 <?php
2
3 Input::flash('except', array('uncle_bob'));

Handling Input 32
There, now we can leave Uncle Bob behind, he’s an arrogant soul, and dislikes our nationalanimal the red panda.
Now we can use the usual Redirect::to() method to move to a new request. From here wecan use the expressive Input::old() method to retrieve a value that has been flashed from aprevious request.
1 <?php
2
3 $betty = Input::old('betty');
As you can see, Betty has survived the transition. You can think of flash data as those fuzzytransporter pads from Star Trek, moving Kirk and his buddies from one request to the next.
Once again you can skip the parameter to return a full array of flash data.
1 <?php
2
3 $people = Input::old();
You can use the had() method to see if an index of flash data exists.
1 <?php
2
3 Input::had('uncle_bob');
Of course not, we hate Uncle Bob.
Laravel wouldn’t be the framework it is, without its wonderful shortcuts and expressivemethods.Let’s have a look at a prime example of this in action.
1 <?php
2
3 return Redirect::to('party')->with_input();
The with_input() method will flash all of our request data for us, it also accepts the same onlyand except methods as our flash() method.
1 <?php
2
3 return Redirect::to('party')->with_input('only', array('betty', 'simon'));
4 return Redirect::to('party')->with_input('except', array('uncle_bob'));
8 ValidationValidation is an important part of many web applications. You can never trust your users, theyhave been plotting to destroy you for weeks, by abusing your forms with evil javascripts.
We can’t let them win, they must not destroy our beautiful applications. Let’s validate all inputprovided by the user, that way they won’t be able to harm us at all.
Naturally Laravel has a library, aptly named ‘Validation’ that will do all the hard work for us.
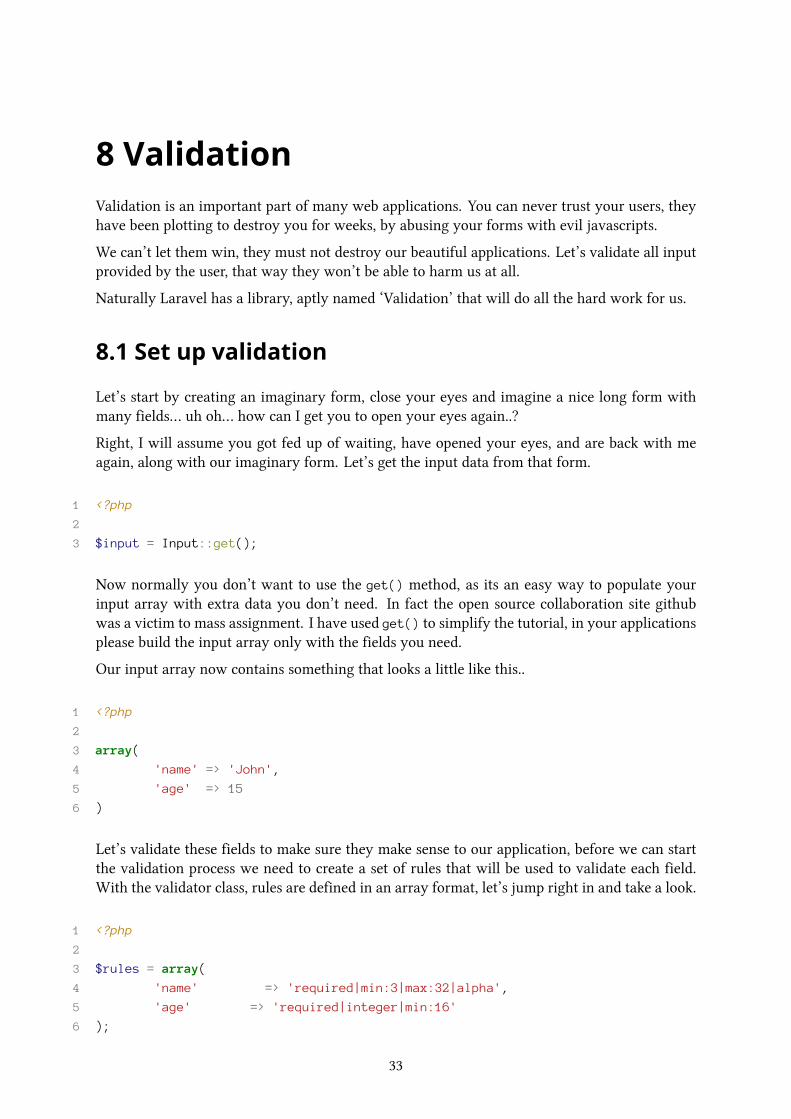
8.1 Set up validation
Let’s start by creating an imaginary form, close your eyes and imagine a nice long form withmany fields… uh oh… how can I get you to open your eyes again..?
Right, I will assume you got fed up of waiting, have opened your eyes, and are back with meagain, along with our imaginary form. Let’s get the input data from that form.
1 <?php
2
3 $input = Input::get();
Now normally you don’t want to use the get() method, as its an easy way to populate yourinput array with extra data you don’t need. In fact the open source collaboration site githubwas a victim to mass assignment. I have used get() to simplify the tutorial, in your applicationsplease build the input array only with the fields you need.
Our input array now contains something that looks a little like this..
1 <?php
2
3 array(
4 'name' => 'John',
5 'age' => 15
6 )
Let’s validate these fields to make sure they make sense to our application, before we can startthe validation process we need to create a set of rules that will be used to validate each field.With the validator class, rules are defined in an array format, let’s jump right in and take a look.
1 <?php
2
3 $rules = array(
4 'name' => 'required|min:3|max:32|alpha',
5 'age' => 'required|integer|min:16'
6 );
33
Validation 34
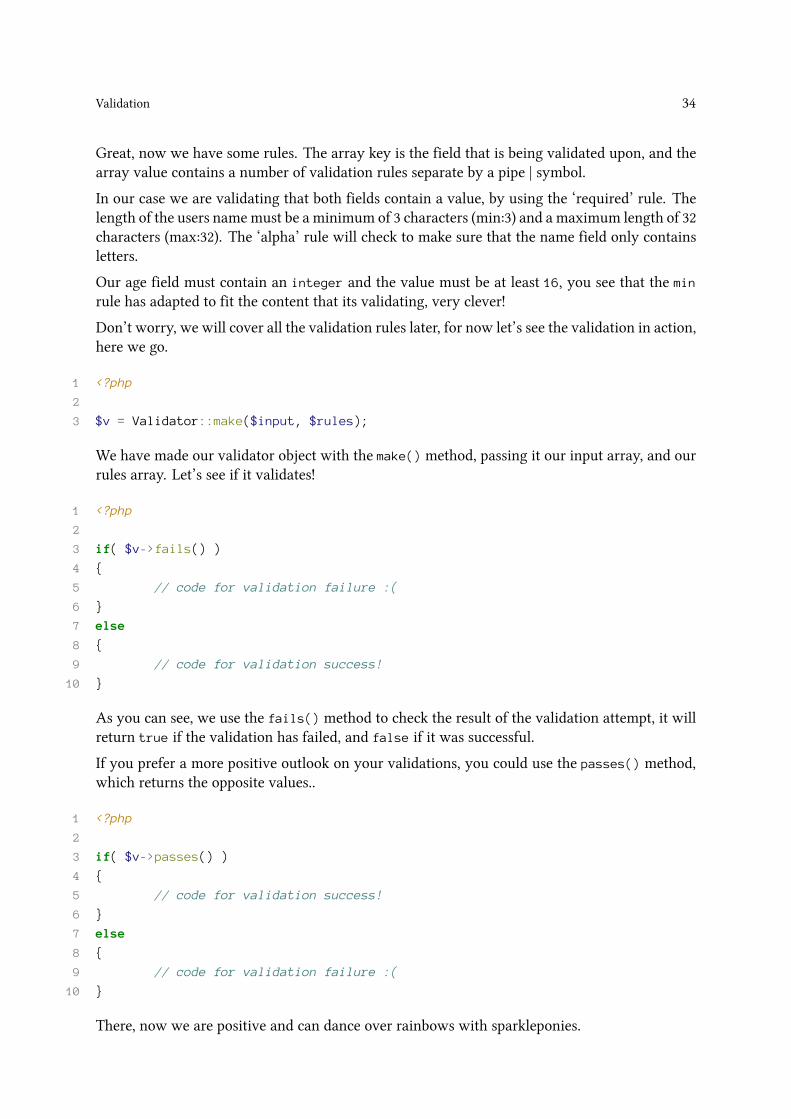
Great, now we have some rules. The array key is the field that is being validated upon, and thearray value contains a number of validation rules separate by a pipe | symbol.
In our case we are validating that both fields contain a value, by using the ‘required’ rule. Thelength of the users namemust be a minimum of 3 characters (min:3) and a maximum length of 32characters (max:32). The ‘alpha’ rule will check to make sure that the name field only containsletters.
Our age field must contain an integer and the value must be at least 16, you see that the min
rule has adapted to fit the content that its validating, very clever!
Don’t worry, we will cover all the validation rules later, for now let’s see the validation in action,here we go.
1 <?php
2
3 $v = Validator::make($input, $rules);
We have made our validator object with the make() method, passing it our input array, and ourrules array. Let’s see if it validates!
1 <?php
2
3 if( $v->fails() )
4 {
5 // code for validation failure :(
6 }
7 else
8 {
9 // code for validation success!
10 }
As you can see, we use the fails() method to check the result of the validation attempt, it willreturn true if the validation has failed, and false if it was successful.
If you prefer a more positive outlook on your validations, you could use the passes() method,which returns the opposite values..
1 <?php
2
3 if( $v->passes() )
4 {
5 // code for validation success!
6 }
7 else
8 {
9 // code for validation failure :(
10 }
There, now we are positive and can dance over rainbows with sparkleponies.

Validation 35
8.2 Errors
If your validation fails, which it will because our user is under 16 (sorry for slaying yoursparklepony), you will want to find out what went wrong. The validator provides an errors
Messages object which allows us to easily find the information we need.
The errors object has similar methods to the Input class, so I will not need to go over them all,let’s retrieve an array of errors for a specific field.
1 <?php
2
3 $age_errors = $v->errors->get('age');
Now we have an array containing all of the errors associated with the age field..
1 <?php
2
3 array(
4 'The age must be at least 16.'
5 )
Most of the time I find myself using the first() method in my views, which returns the firstarray item if it exists, or null if it doesn’t. For example..
1 <?php echo Form::label('username', 'Username') ?>
2 <?php echo $errors->first('username') ?>
3 <?php echo Form::text('username') ?>
Now our validation errors will appear for this field if any are present. You can also pass a secondparameter to the first() method to format the output..
1 <?php echo $errors->first('username', '<span class="error">:message</span>'\
2 ) ?>
Neat!
You can also use has() to check to see if an error exists, and all() to retrieve all errors as anarray.
Validation 36
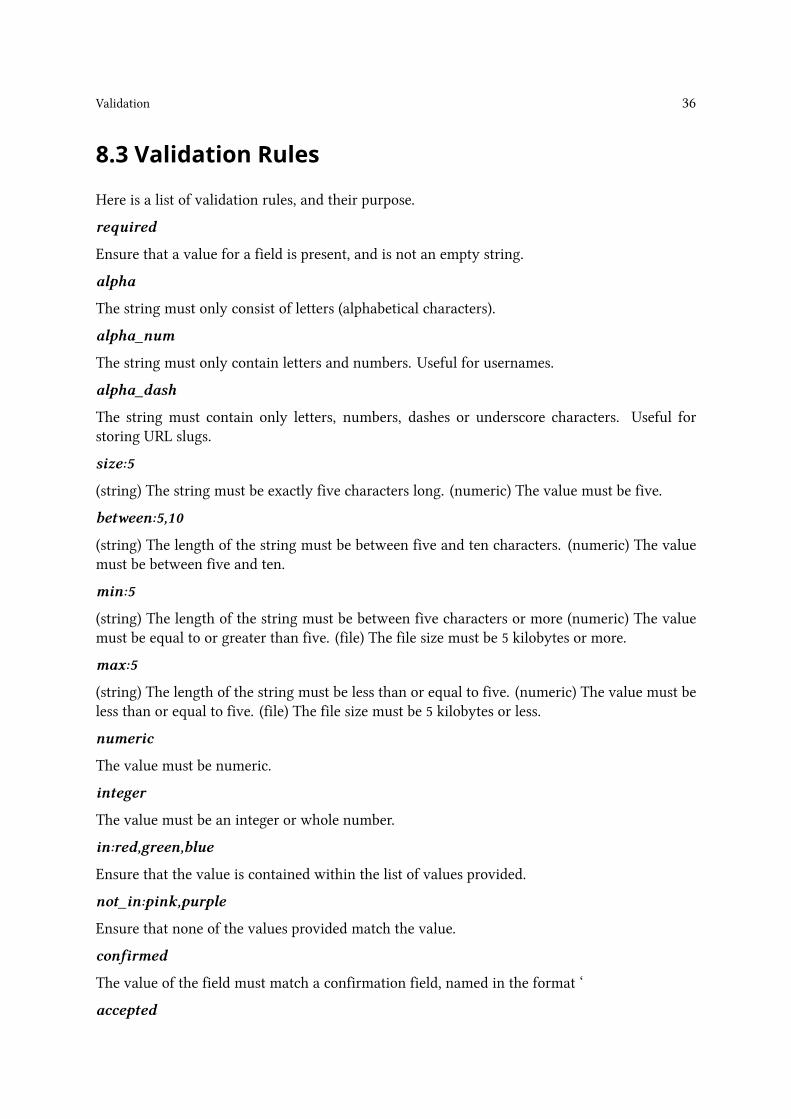
8.3 Validation Rules
Here is a list of validation rules, and their purpose.
required
Ensure that a value for a field is present, and is not an empty string.
alpha
The string must only consist of letters (alphabetical characters).
alpha_num
The string must only contain letters and numbers. Useful for usernames.
alpha_dash
The string must contain only letters, numbers, dashes or underscore characters. Useful forstoring URL slugs.
size:5
(string) The string must be exactly five characters long. (numeric) The value must be five.
between:5,10
(string) The length of the string must be between five and ten characters. (numeric) The valuemust be between five and ten.
min:5
(string) The length of the string must be between five characters or more (numeric) The valuemust be equal to or greater than five. (file) The file size must be 5 kilobytes or more.
max:5
(string) The length of the string must be less than or equal to five. (numeric) The value must beless than or equal to five. (file) The file size must be 5 kilobytes or less.
numeric
The value must be numeric.
integer
The value must be an integer or whole number.
in:red,green,blue
Ensure that the value is contained within the list of values provided.
not_in:pink,purple
Ensure that none of the values provided match the value.
confirmed
The value of the field must match a confirmation field, named in the format ‘
accepted
Validation 37
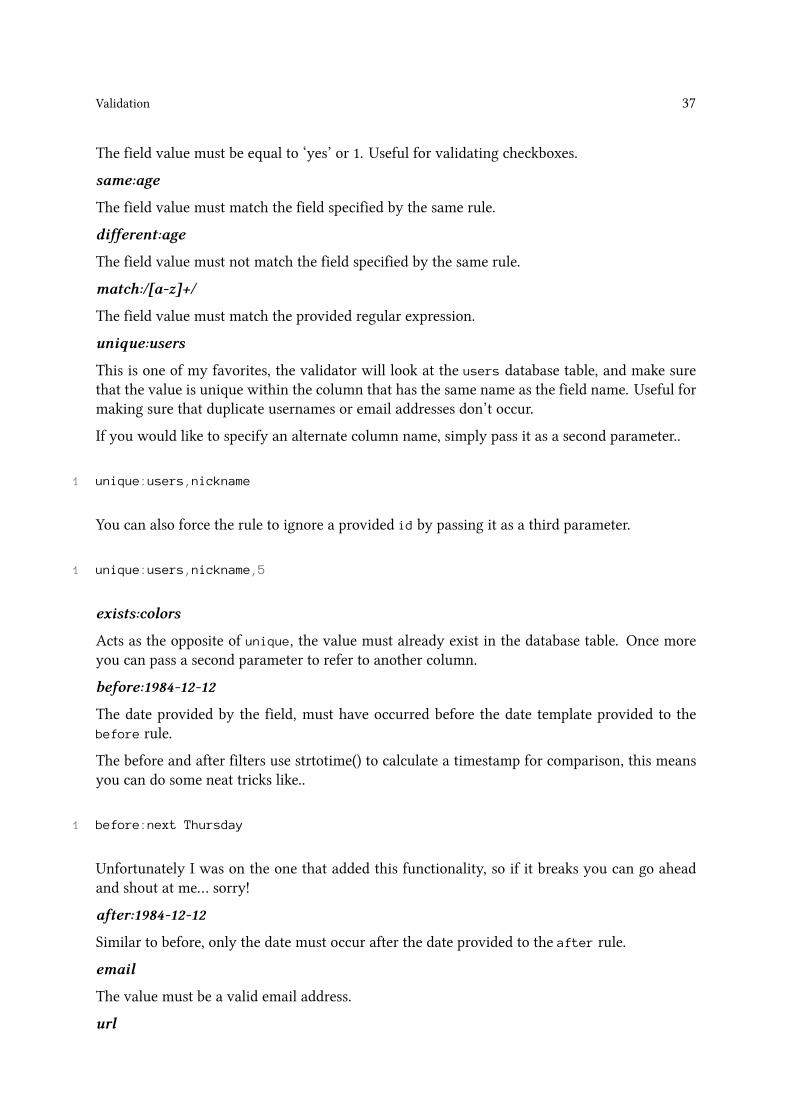
The field value must be equal to ‘yes’ or 1. Useful for validating checkboxes.
same:age
The field value must match the field specified by the same rule.
different:age
The field value must not match the field specified by the same rule.
match:/[a-z]+/
The field value must match the provided regular expression.
unique:users
This is one of my favorites, the validator will look at the users database table, and make surethat the value is unique within the column that has the same name as the field name. Useful formaking sure that duplicate usernames or email addresses don’t occur.
If you would like to specify an alternate column name, simply pass it as a second parameter..
1 unique:users,nickname
You can also force the rule to ignore a provided id by passing it as a third parameter.
1 unique:users,nickname,5
exists:colors
Acts as the opposite of unique, the value must already exist in the database table. Once moreyou can pass a second parameter to refer to another column.
before:1984-12-12
The date provided by the field, must have occurred before the date template provided to thebefore rule.
The before and after filters use strtotime() to calculate a timestamp for comparison, this meansyou can do some neat tricks like..
1 before:next Thursday
Unfortunately I was on the one that added this functionality, so if it breaks you can go aheadand shout at me… sorry!
after:1984-12-12
Similar to before, only the date must occur after the date provided to the after rule.
The value must be a valid email address.
url

Validation 38
The value must match the format of an URL.
active_url
The value must match a valid active URL. checkdnsr is used to verify that the URL is active.
mimes:png,mp3
The value must be a $_FILE which whose MIME type matches the file extensions provided. Youcan add additional MIME types to the array in config/mimes.php.
image
The uploaded file must be an image.
8.4 Custom Error Messages
I find the default error messages quite descriptive, but your clients might have their own ideas.Let’s see how we can customize our error messages to suit our needs.
You can edit the validation error messages directly by modifying the file application/lan-
guage/en/validation.php…
1 ...
2 "after" => "The :attribute must be a date after :date.",
3 "alpha" => "The :attribute may only contain letters.",
4 "alpha_dash" => "The :attribute may only contain letters, numbers, and \
5 dashes.",
6 ...
Laravel replaces the :attribute marker with the name of the field. Other markers also existwithin the rules, and their purpose is quite self explanatory.
If you would rather change the messages for a single form, rather than edit them globally, youcan pass a third array of messages to the Validator::make() method.
1 <?php
2
3 $messages = array(
4 'same' => 'The :attribute and :other must match, fool!',
5 'size' => 'The :attribute must be exactly :size , like duh!'
6 );
7
8 $v = Validator::make($input, $rules, $messages);
Great now we have custom messages! We can even specify error messages for individual fields,by setting the message key to field_rule, for example..
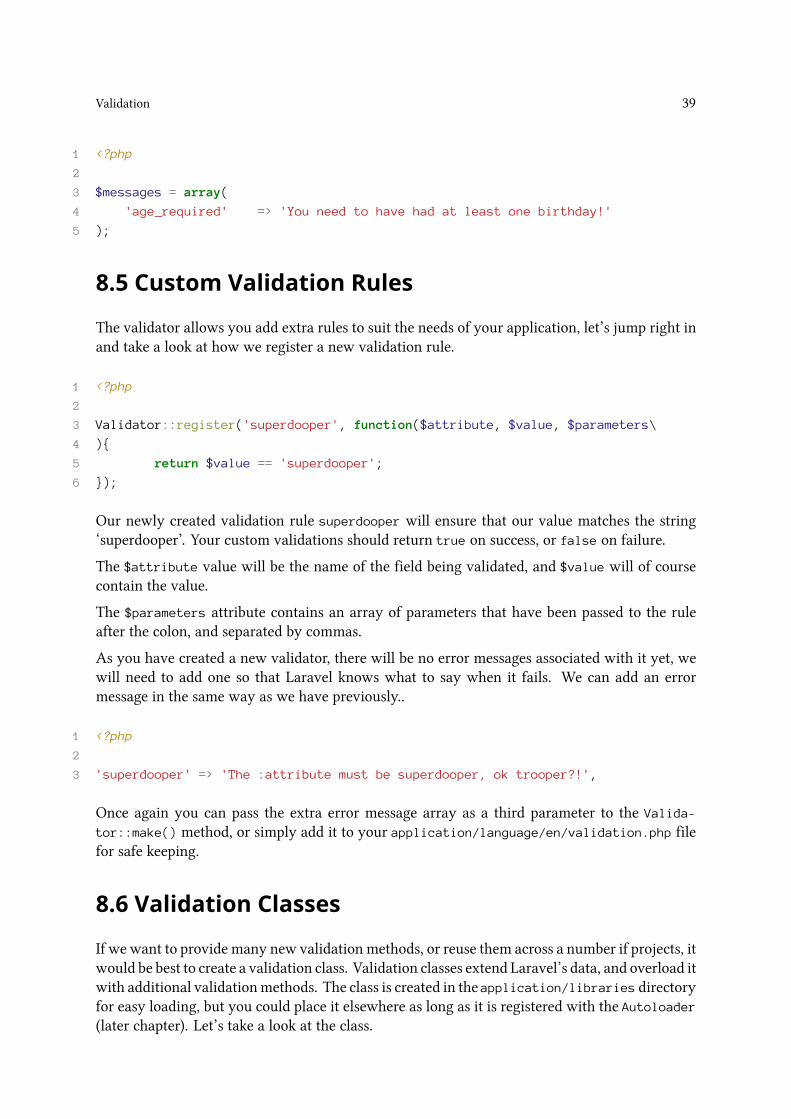
Validation 39
1 <?php
2
3 $messages = array(
4 'age_required' => 'You need to have had at least one birthday!'
5 );
8.5 Custom Validation Rules
The validator allows you add extra rules to suit the needs of your application, let’s jump right inand take a look at how we register a new validation rule.
1 <?php
2
3 Validator::register('superdooper', function($attribute, $value, $parameters\
4 ){
5 return $value == 'superdooper';
6 });
Our newly created validation rule superdooper will ensure that our value matches the string‘superdooper’. Your custom validations should return true on success, or false on failure.
The $attribute value will be the name of the field being validated, and $value will of coursecontain the value.
The $parameters attribute contains an array of parameters that have been passed to the ruleafter the colon, and separated by commas.
As you have created a new validator, there will be no error messages associated with it yet, wewill need to add one so that Laravel knows what to say when it fails. We can add an errormessage in the same way as we have previously..
1 <?php
2
3 'superdooper' => 'The :attribute must be superdooper, ok trooper?!',
Once again you can pass the extra error message array as a third parameter to the Valida-
tor::make() method, or simply add it to your application/language/en/validation.php filefor safe keeping.
8.6 Validation Classes
If we want to provide many new validation methods, or reuse them across a number if projects, itwould be best to create a validation class. Validation classes extend Laravel’s data, and overload itwith additional validationmethods. The class is created in the application/libraries directoryfor easy loading, but you could place it elsewhere as long as it is registered with the Autoloader(later chapter). Let’s take a look at the class.
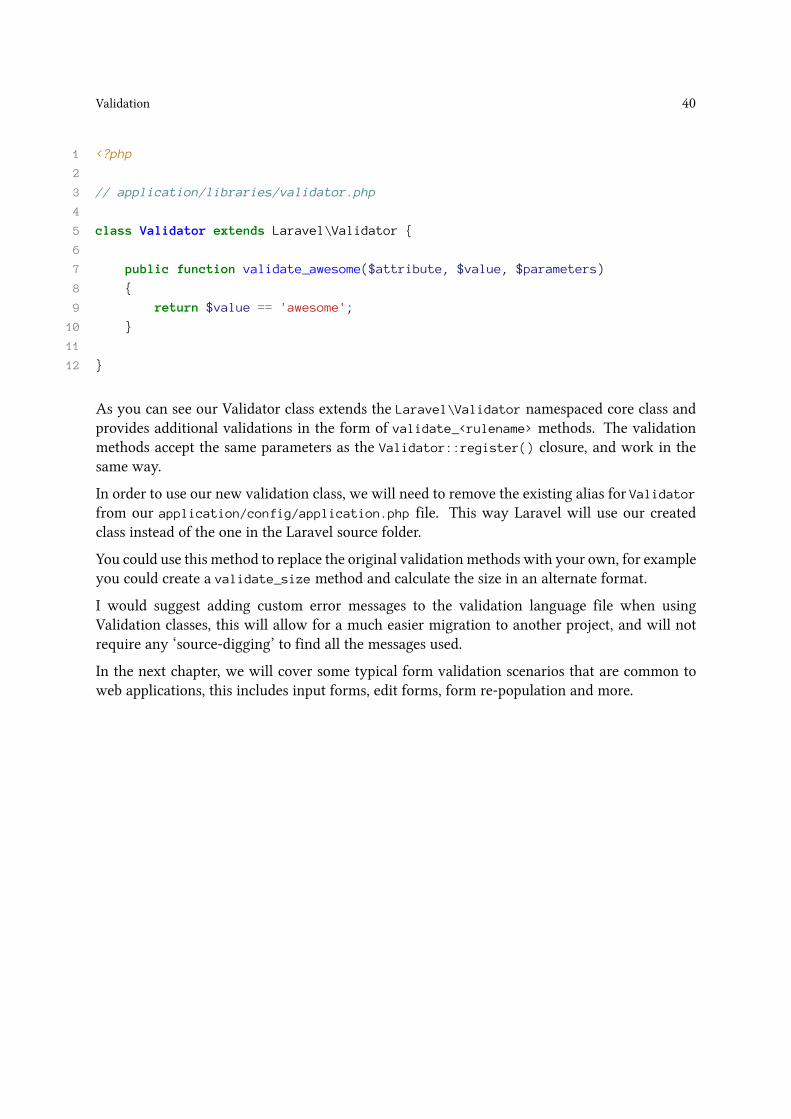
Validation 40
1 <?php
2
3 // application/libraries/validator.php
4
5 class Validator extends Laravel\Validator {
6
7 public function validate_awesome($attribute, $value, $parameters)
8 {
9 return $value == 'awesome';
10 }
11
12 }
As you can see our Validator class extends the Laravel\Validator namespaced core class andprovides additional validations in the form of validate_<rulename> methods. The validationmethods accept the same parameters as the Validator::register() closure, and work in thesame way.
In order to use our new validation class, we will need to remove the existing alias for Validatorfrom our application/config/application.php file. This way Laravel will use our createdclass instead of the one in the Laravel source folder.
You could use this method to replace the original validation methods with your own, for exampleyou could create a validate_size method and calculate the size in an alternate format.
I would suggest adding custom error messages to the validation language file when usingValidation classes, this will allow for a much easier migration to another project, and will notrequire any ‘source-digging’ to find all the messages used.
In the next chapter, we will cover some typical form validation scenarios that are common toweb applications, this includes input forms, edit forms, form re-population and more.
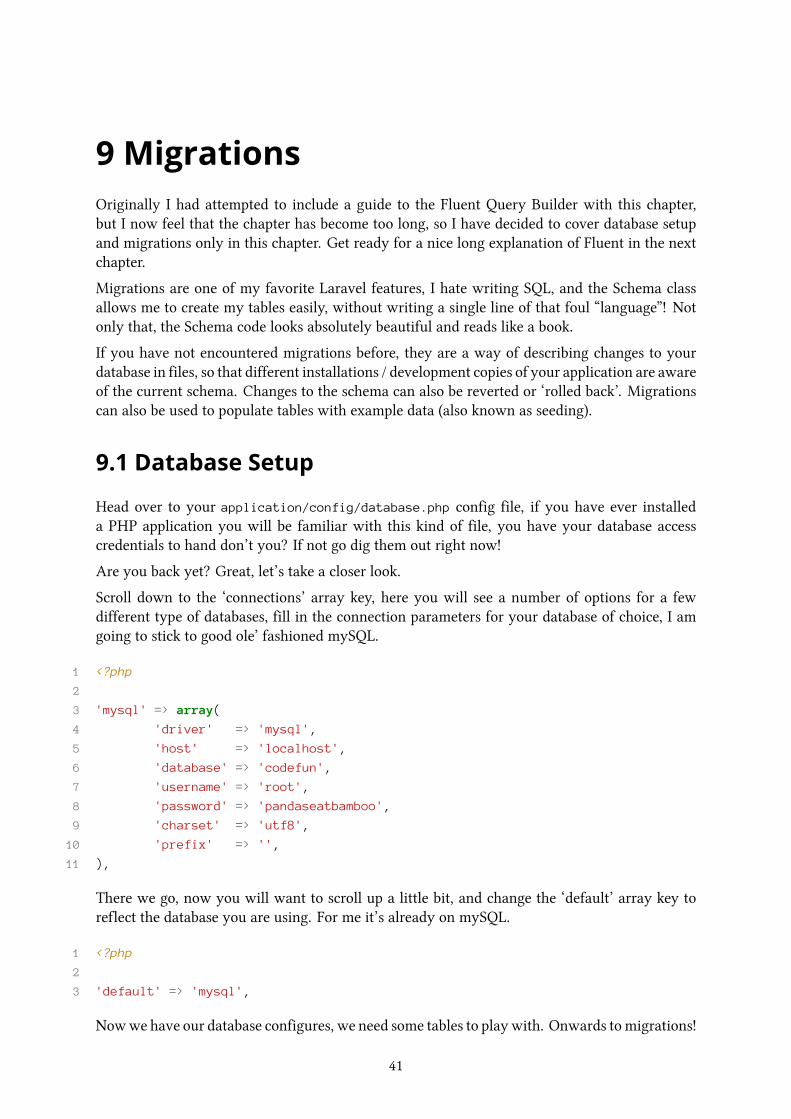
9 MigrationsOriginally I had attempted to include a guide to the Fluent Query Builder with this chapter,but I now feel that the chapter has become too long, so I have decided to cover database setupand migrations only in this chapter. Get ready for a nice long explanation of Fluent in the nextchapter.
Migrations are one of my favorite Laravel features, I hate writing SQL, and the Schema classallows me to create my tables easily, without writing a single line of that foul “language”! Notonly that, the Schema code looks absolutely beautiful and reads like a book.
If you have not encountered migrations before, they are a way of describing changes to yourdatabase in files, so that different installations / development copies of your application are awareof the current schema. Changes to the schema can also be reverted or ‘rolled back’. Migrationscan also be used to populate tables with example data (also known as seeding).
9.1 Database Setup
Head over to your application/config/database.php config file, if you have ever installeda PHP application you will be familiar with this kind of file, you have your database accesscredentials to hand don’t you? If not go dig them out right now!
Are you back yet? Great, let’s take a closer look.
Scroll down to the ‘connections’ array key, here you will see a number of options for a fewdifferent type of databases, fill in the connection parameters for your database of choice, I amgoing to stick to good ole’ fashioned mySQL.
1 <?php
2
3 'mysql' => array(
4 'driver' => 'mysql',
5 'host' => 'localhost',
6 'database' => 'codefun',
7 'username' => 'root',
8 'password' => 'pandaseatbamboo',
9 'charset' => 'utf8',
10 'prefix' => '',
11 ),
There we go, now you will want to scroll up a little bit, and change the ‘default’ array key toreflect the database you are using. For me it’s already on mySQL.
1 <?php
2
3 'default' => 'mysql',
Nowwe have our database configures, we need some tables to playwith. Onwards tomigrations!
41
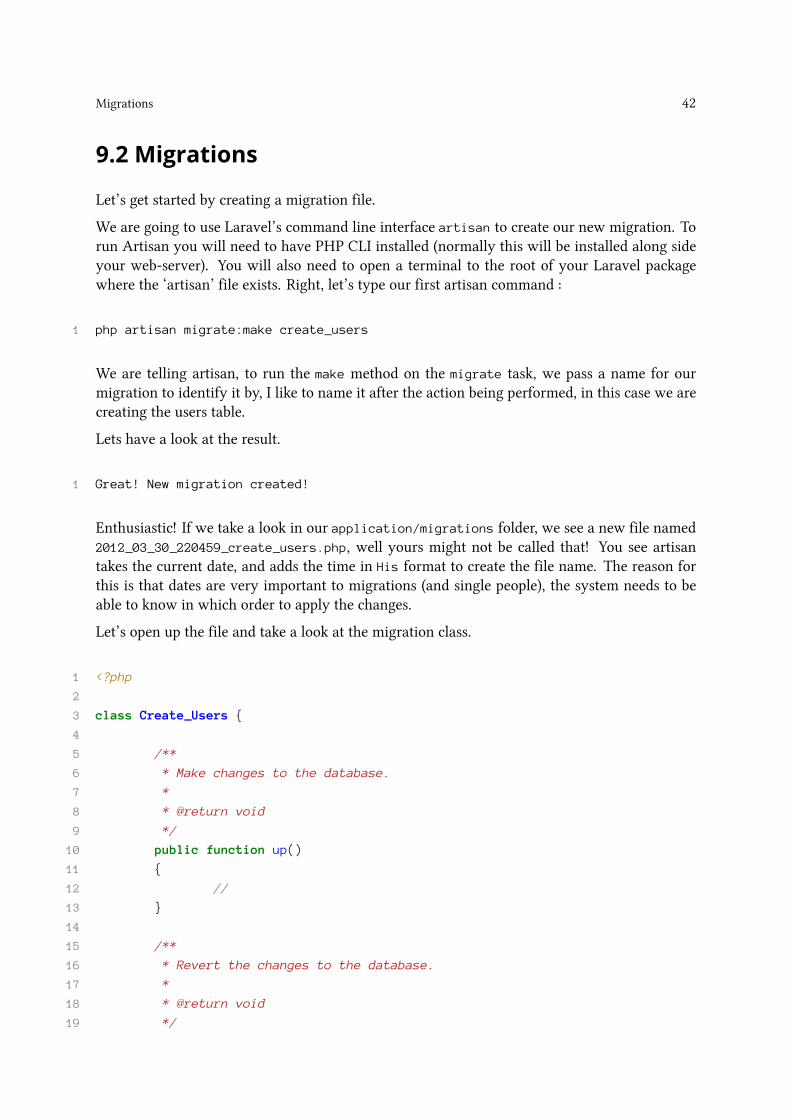
Migrations 42
9.2 Migrations
Let’s get started by creating a migration file.
We are going to use Laravel’s command line interface artisan to create our new migration. Torun Artisan you will need to have PHP CLI installed (normally this will be installed along sideyour web-server). You will also need to open a terminal to the root of your Laravel packagewhere the ‘artisan’ file exists. Right, let’s type our first artisan command :
1 php artisan migrate:make create_users
We are telling artisan, to run the make method on the migrate task, we pass a name for ourmigration to identify it by, I like to name it after the action being performed, in this case we arecreating the users table.
Lets have a look at the result.
1 Great! New migration created!
Enthusiastic! If we take a look in our application/migrations folder, we see a new file named2012_03_30_220459_create_users.php, well yours might not be called that! You see artisantakes the current date, and adds the time in His format to create the file name. The reason forthis is that dates are very important to migrations (and single people), the system needs to beable to know in which order to apply the changes.
Let’s open up the file and take a look at the migration class.
1 <?php
2
3 class Create_Users {
4
5 /**
6 * Make changes to the database.
7 *
8 * @return void
9 */
10 public function up()
11 {
12 //
13 }
14
15 /**
16 * Revert the changes to the database.
17 *
18 * @return void
19 */

Migrations 43
20 public function down()
21 {
22 //
23 }
24
25 }
As you can see, our migration class consists of two methods, up() is responsible for making allof your database changes, where down() accomplishes the exact reverse, this way a migrationcan be performed, and rolled back when necessary. If you were to create a table within the up()method, we would DROP the same table in the down() method.
So how do we perform changes on our database, no doubt with some complex ugly SQL queryright? Haha, no. We are using Laravel, if it’s ugly, it’s not in the framework. Lets have a look atcreating a table with the Laravel Schema class.
1 <?php
2
3 Schema::create('users', function($table) {
4 // auto incremental id (PK)
5 $table->increments('id');
6
7 // varchar 32
8 $table->string('username', 32);
9 $table->string('email', 320);
10 $table->string('password', 64);
11
12 // int
13 $table->integer('role');
14
15 // boolean
16 $table->boolean('active');
17
18 // created_at | updated_at DATETIME
19 $table->timestamps();
20 });
We call the create() method on the Schema class to create a new table, as parameters we passthe name of the table to be created, and a closure as the second parameter. We also need to passa parameter to the closure, you can call it whatever you like, but I like using $table because Ithink it makes the code read better.
Inside the closure, we can use the $table parameter to create our fields with a number of handy,well-named methods, lets take a quick look at them.
increments()
Add an auto-incrementing ID to the table, most of your tables will have this!
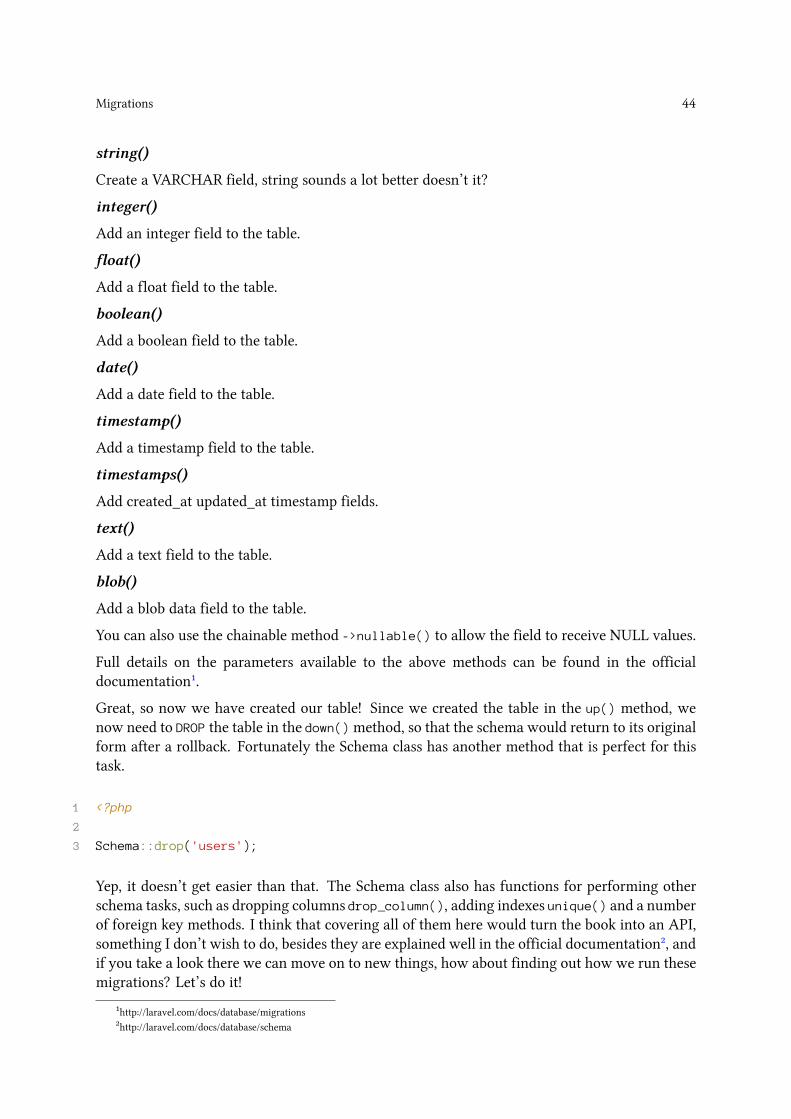
Migrations 44
string()
Create a VARCHAR field, string sounds a lot better doesn’t it?
integer()
Add an integer field to the table.
float()
Add a float field to the table.
boolean()
Add a boolean field to the table.
date()
Add a date field to the table.
timestamp()
Add a timestamp field to the table.
timestamps()
Add created_at updated_at timestamp fields.
text()
Add a text field to the table.
blob()
Add a blob data field to the table.
You can also use the chainable method ->nullable() to allow the field to receive NULL values.
Full details on the parameters available to the above methods can be found in the officialdocumentation¹.
Great, so now we have created our table! Since we created the table in the up() method, wenow need to DROP the table in the down()method, so that the schema would return to its originalform after a rollback. Fortunately the Schema class has another method that is perfect for thistask.
1 <?php
2
3 Schema::drop('users');
Yep, it doesn’t get easier than that. The Schema class also has functions for performing otherschema tasks, such as dropping columns drop_column(), adding indexes unique() and a numberof foreign key methods. I think that covering all of them here would turn the book into an API,something I don’t wish to do, besides they are explained well in the official documentation², andif you take a look there we can move on to new things, how about finding out how we run thesemigrations? Let’s do it!
¹http://laravel.com/docs/database/migrations²http://laravel.com/docs/database/schema
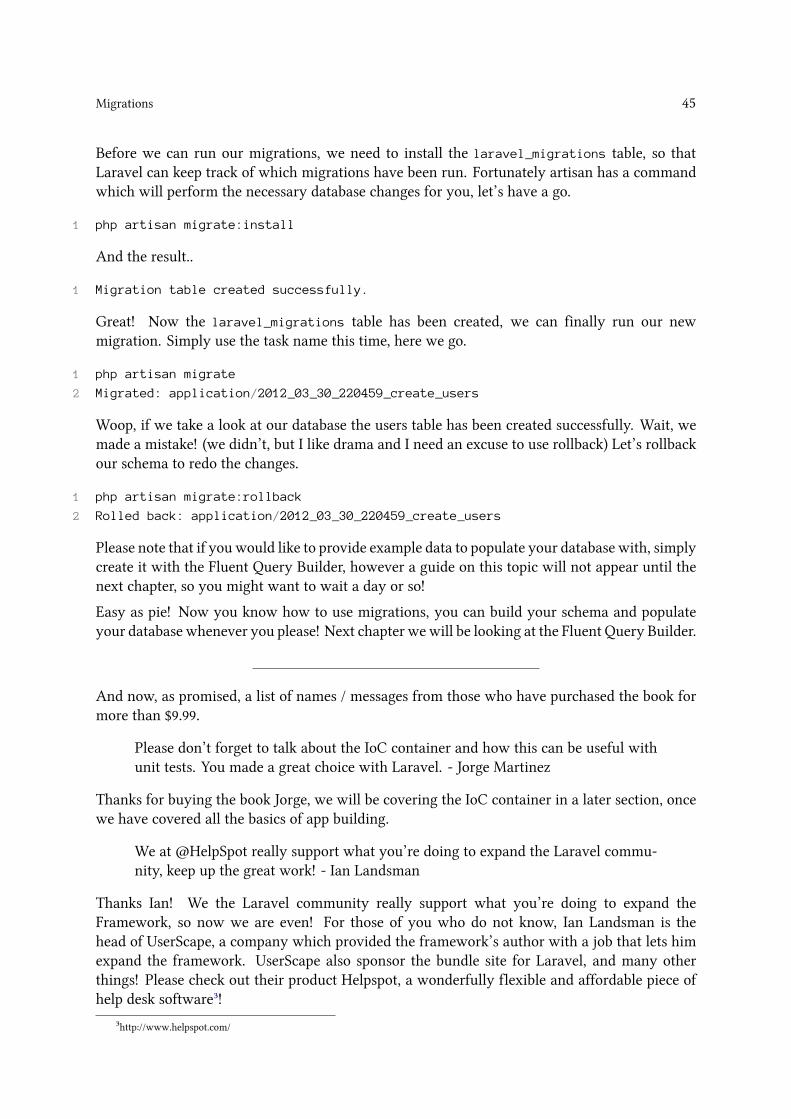
Migrations 45
Before we can run our migrations, we need to install the laravel_migrations table, so thatLaravel can keep track of which migrations have been run. Fortunately artisan has a commandwhich will perform the necessary database changes for you, let’s have a go.
1 php artisan migrate:install
And the result..
1 Migration table created successfully.
Great! Now the laravel_migrations table has been created, we can finally run our newmigration. Simply use the task name this time, here we go.
1 php artisan migrate
2 Migrated: application/2012_03_30_220459_create_users
Woop, if we take a look at our database the users table has been created successfully. Wait, wemade a mistake! (we didn’t, but I like drama and I need an excuse to use rollback) Let’s rollbackour schema to redo the changes.
1 php artisan migrate:rollback
2 Rolled back: application/2012_03_30_220459_create_users
Please note that if you would like to provide example data to populate your database with, simplycreate it with the Fluent Query Builder, however a guide on this topic will not appear until thenext chapter, so you might want to wait a day or so!
Easy as pie! Now you know how to use migrations, you can build your schema and populateyour database whenever you please! Next chapter wewill be looking at the Fluent Query Builder.
And now, as promised, a list of names / messages from those who have purchased the book formore than $9.99.
Please don’t forget to talk about the IoC container and how this can be useful withunit tests. You made a great choice with Laravel. - Jorge Martinez
Thanks for buying the book Jorge, we will be covering the IoC container in a later section, oncewe have covered all the basics of app building.
We at @HelpSpot really support what you’re doing to expand the Laravel commu-nity, keep up the great work! - Ian Landsman
Thanks Ian! We the Laravel community really support what you’re doing to expand theFramework, so now we are even! For those of you who do not know, Ian Landsman is thehead of UserScape, a company which provided the framework’s author with a job that lets himexpand the framework. UserScape also sponsor the bundle site for Laravel, and many otherthings! Please check out their product Helpspot, a wonderfully flexible and affordable piece ofhelp desk software³!
³http://www.helpspot.com/
Migrations 46
There were some other purchases over $9.99 that I have not received an email from yet, rememberif you pay more than $9.99 and you would like your name to appear in the book, please send anemail to [email protected] , unfortunately I can’t see the names of those who purchased on thesales tab.
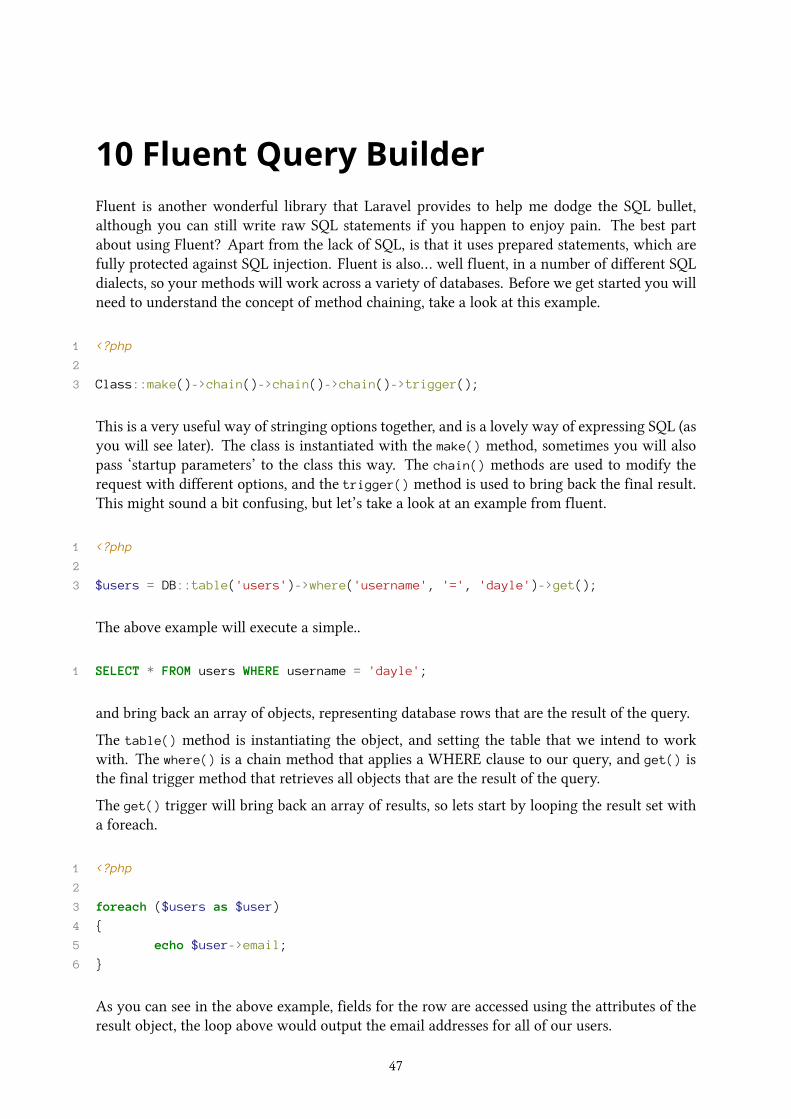
10 Fluent Query BuilderFluent is another wonderful library that Laravel provides to help me dodge the SQL bullet,although you can still write raw SQL statements if you happen to enjoy pain. The best partabout using Fluent? Apart from the lack of SQL, is that it uses prepared statements, which arefully protected against SQL injection. Fluent is also… well fluent, in a number of different SQLdialects, so your methods will work across a variety of databases. Before we get started you willneed to understand the concept of method chaining, take a look at this example.
1 <?php
2
3 Class::make()->chain()->chain()->chain()->trigger();
This is a very useful way of stringing options together, and is a lovely way of expressing SQL (asyou will see later). The class is instantiated with the make() method, sometimes you will alsopass ‘startup parameters’ to the class this way. The chain() methods are used to modify therequest with different options, and the trigger() method is used to bring back the final result.This might sound a bit confusing, but let’s take a look at an example from fluent.
1 <?php
2
3 $users = DB::table('users')->where('username', '=', 'dayle')->get();
The above example will execute a simple..
1 SELECT * FROM users WHERE username = 'dayle';
and bring back an array of objects, representing database rows that are the result of the query.
The table() method is instantiating the object, and setting the table that we intend to workwith. The where() is a chain method that applies a WHERE clause to our query, and get() isthe final trigger method that retrieves all objects that are the result of the query.
The get() trigger will bring back an array of results, so lets start by looping the result set witha foreach.
1 <?php
2
3 foreach ($users as $user)
4 {
5 echo $user->email;
6 }
As you can see in the above example, fields for the row are accessed using the attributes of theresult object, the loop above would output the email addresses for all of our users.
47

Fluent Query Builder 48
10.1 Retrieving Results
Lets have a look at some of the other trigger methods for retrieving results.
get()
We have just used this, it will bring back all objects which are the result of the query in an array.
first()
This trigger will bring back a single result object, the first object to match the requirements ofthe query.
find($id)
This trigger will find the item by its database id, this is a handy shortcut to where('id', '=',
$id) it will bring back a single result object.
only($fieldname)
This will bring back the result for a single field matching the query.
get(array())
Pass an array of fields to get() to retrieve only those fields.
10.2 Where Clauses
So now we have the methods that we need to retrieve our database results, how can we applyconditions to these SQL queries? Well in the example above you saw me using the where()
method, let’s take a closer look at this.
1 <?php
2
3 $users = DB::table('users')->where('username', '=', 'dayle')->get();
Here we have the same snippet again, but we are concentrating on the where() part of the chain:
1 <?php
2
3 where('username', '=', 'dayle')
The great thing about how Laravel handles the where clause, is that the chain looks a little bit likethe SQL being generated. In the chain method above we are saying WHERE username = 'dayle',the first parameter to the method states the field which we are comparing, the second parameterstates the operator to use for the comparison, and the third parameter is the value which we arecomparing with. We could also use :

Fluent Query Builder 49
1 <?php
2
3 where('age', '>', '18')
4 // WHERE age > '18'
5 // drink up! not if you are American though, sorry.
What if we want more conditions? Well first we need to decide, if we need ‘AND WHERE’, or‘OR WHERE’, to include an ‘AND’ where clause, simply use the where() method again in thechain, for example :
1 <?php
2
3 $users = DB::table('users')
4 ->where('username', '=', 'dayle')
5 ->where('sexyness', '>', 5000)
6 ->get();
As you can see in the above example, I have put each chain method on a new line, I find thisis easier to read, and avoids having terribly long lines of code. This chain will perform thefollowing SQL :
1 SELECT * FROM users WHERE username = 'dayle' AND sexyness > 5000;
If we would prefer to use an OR where condition we simply use the or_where() method, whichaccepts the same parameters, for example :
1 <?php
2
3 $users = DB::table('users')
4 ->where('username', '=', 'dayle')
5 ->or_where('face', 'LIKE', '%malemodel%')
6 ->get();
which gives us :
1 SELECT * FROM users WHERE username = 'dayle' OR face LIKE '%malemodel%';
Now I don’t need to explain how every feature of SQL works, there are plenty of other books forthat, but I will name the methods used to accomplish common tasks instead.
Use the where_in(), where_not_in(), or_where_in() and or_where_not_in() methods tomatch a field to one of an array of items.
The where_null(), where_not_null(), or_where_null(), and or_where_not_null() methodsto match a field to a NULL value.
Sometimes you will want to nest where clauses together, Laravel provides functionality for thisin the form of ‘Nested Where Clauses’, lets take a look at a code example from the official docs.
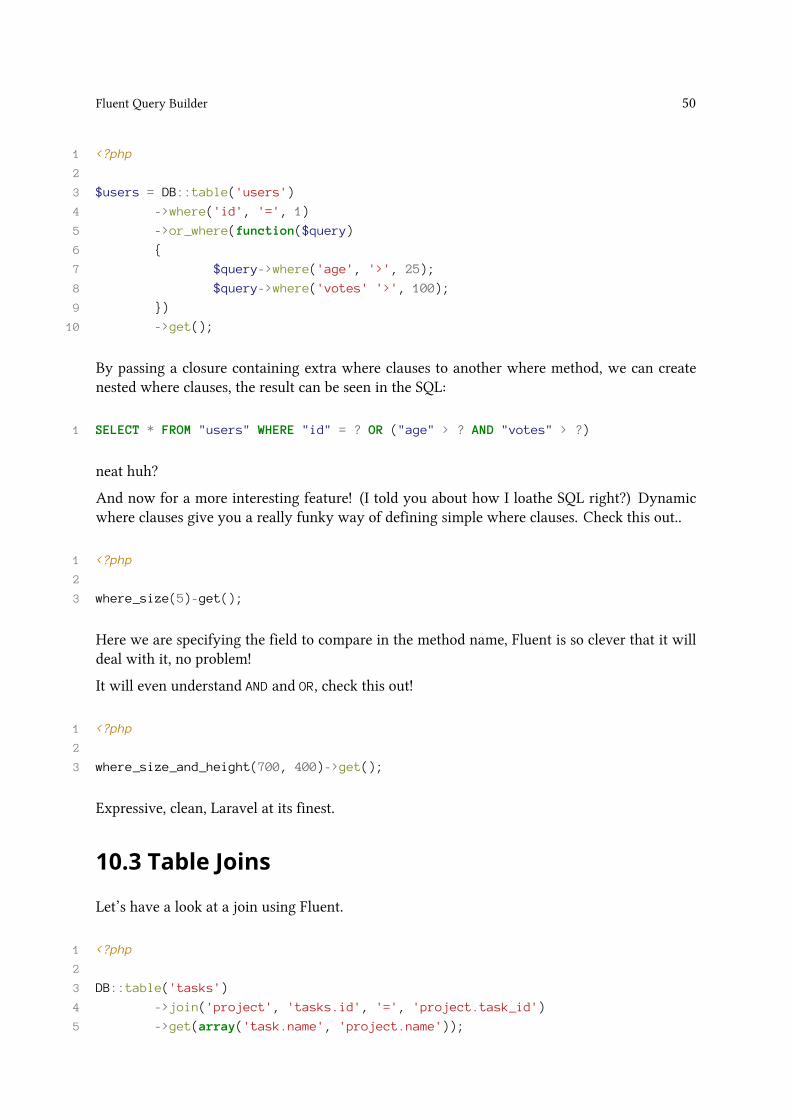
Fluent Query Builder 50
1 <?php
2
3 $users = DB::table('users')
4 ->where('id', '=', 1)
5 ->or_where(function($query)
6 {
7 $query->where('age', '>', 25);
8 $query->where('votes' '>', 100);
9 })
10 ->get();
By passing a closure containing extra where clauses to another where method, we can createnested where clauses, the result can be seen in the SQL:
1 SELECT * FROM "users" WHERE "id" = ? OR ("age" > ? AND "votes" > ?)
neat huh?
And now for a more interesting feature! (I told you about how I loathe SQL right?) Dynamicwhere clauses give you a really funky way of defining simple where clauses. Check this out..
1 <?php
2
3 where_size(5)-get();
Here we are specifying the field to compare in the method name, Fluent is so clever that it willdeal with it, no problem!
It will even understand AND and OR, check this out!
1 <?php
2
3 where_size_and_height(700, 400)->get();
Expressive, clean, Laravel at its finest.
10.3 Table Joins
Let’s have a look at a join using Fluent.
1 <?php
2
3 DB::table('tasks')
4 ->join('project', 'tasks.id', '=', 'project.task_id')
5 ->get(array('task.name', 'project.name'));
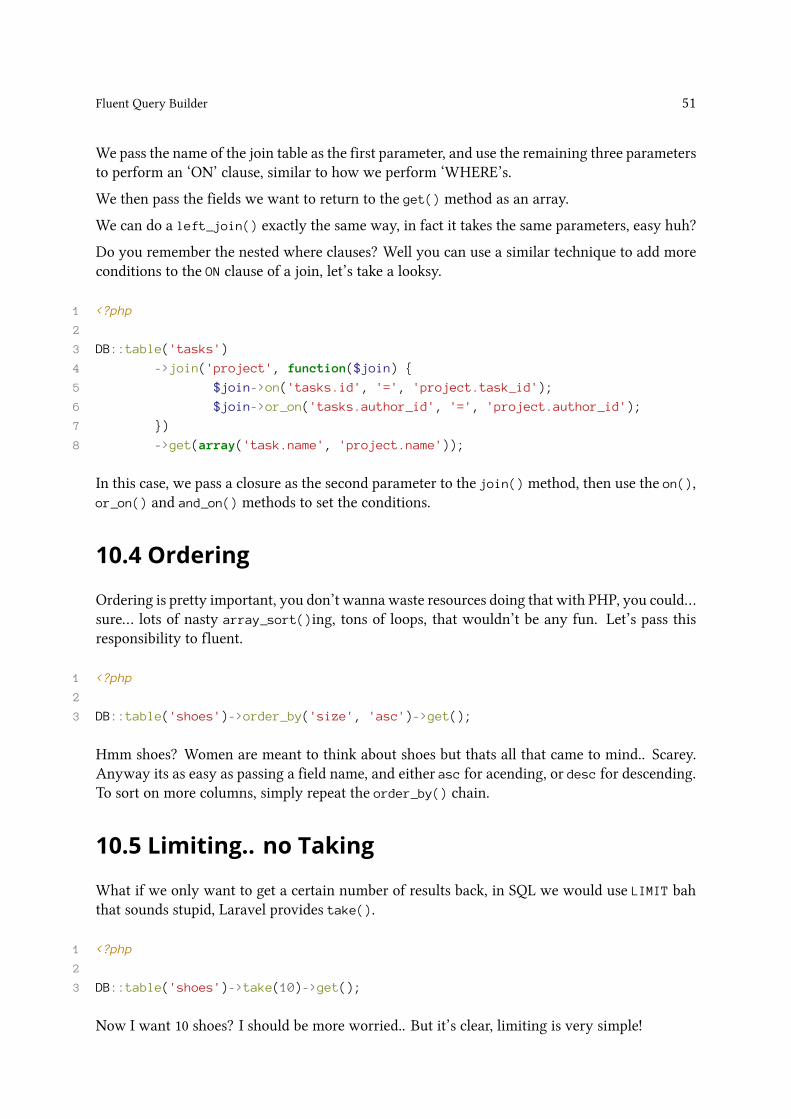
Fluent Query Builder 51
We pass the name of the join table as the first parameter, and use the remaining three parametersto perform an ‘ON’ clause, similar to how we perform ‘WHERE’s.
We then pass the fields we want to return to the get() method as an array.
We can do a left_join() exactly the same way, in fact it takes the same parameters, easy huh?
Do you remember the nested where clauses? Well you can use a similar technique to add moreconditions to the ON clause of a join, let’s take a looksy.
1 <?php
2
3 DB::table('tasks')
4 ->join('project', function($join) {
5 $join->on('tasks.id', '=', 'project.task_id');
6 $join->or_on('tasks.author_id', '=', 'project.author_id');
7 })
8 ->get(array('task.name', 'project.name'));
In this case, we pass a closure as the second parameter to the join()method, then use the on(),or_on() and and_on() methods to set the conditions.
10.4 Ordering
Ordering is pretty important, you don’t wanna waste resources doing that with PHP, you could…sure… lots of nasty array_sort()ing, tons of loops, that wouldn’t be any fun. Let’s pass thisresponsibility to fluent.
1 <?php
2
3 DB::table('shoes')->order_by('size', 'asc')->get();
Hmm shoes? Women are meant to think about shoes but thats all that came to mind.. Scarey.Anyway its as easy as passing a field name, and either asc for acending, or desc for descending.To sort on more columns, simply repeat the order_by() chain.
10.5 Limiting.. no Taking
What if we only want to get a certain number of results back, in SQL we would use LIMIT bahthat sounds stupid, Laravel provides take().
1 <?php
2
3 DB::table('shoes')->take(10)->get();
Now I want 10 shoes? I should be more worried.. But it’s clear, limiting is very simple!

Fluent Query Builder 52
10.6 Skipping Results
We don’t need the first 5 pairs of shoes do we? They are leather shoes, I like to wear skate shoes,very wide feet you see.. Let’s just skip them.
1 <?php
2
3 DB::table('shoes')->skip(5)->get();
The we go, now we can skip() the first 5 results, easy as pie!
10.7 Aggregates
Sometimes its handy to run basic maths on queries, AVG, MIN, MAX, SUM, and COUNT areused all the time to quickly get the result we want with SQL, and they are all available with theFluent Query Builder, lets take a look.
1 <?php
2
3 $val = DB::table('shoes')->avg('size');
4 $val = DB::table('shoes')->min('size');
5 $val = DB::table('shoes')->max('size');
6 $val = DB::table('shoes')->sum('size');
7 $val = DB::table('shoes')->count();
Simple! Don’t forget that these are trigger methods, we don’t need to add get() here. You arealso welcome to add conditions with where() or whatever you like!
10.8 Expressions
The methods we have been using so far escape and quote the parameters you provide automati-cally, but what if we need something really custom, what if we don’t want anything else added?For this we can use the DB::raw() method, heres an example :
1 <?php
2
3 DB::table('shoes')->update(array('worn' => DB::raw('NOW()')));
In this query the NOW() will not be escaped or quotes, lots of freedom there, but don’t forget thatspiderman quote, be responsible with this power.
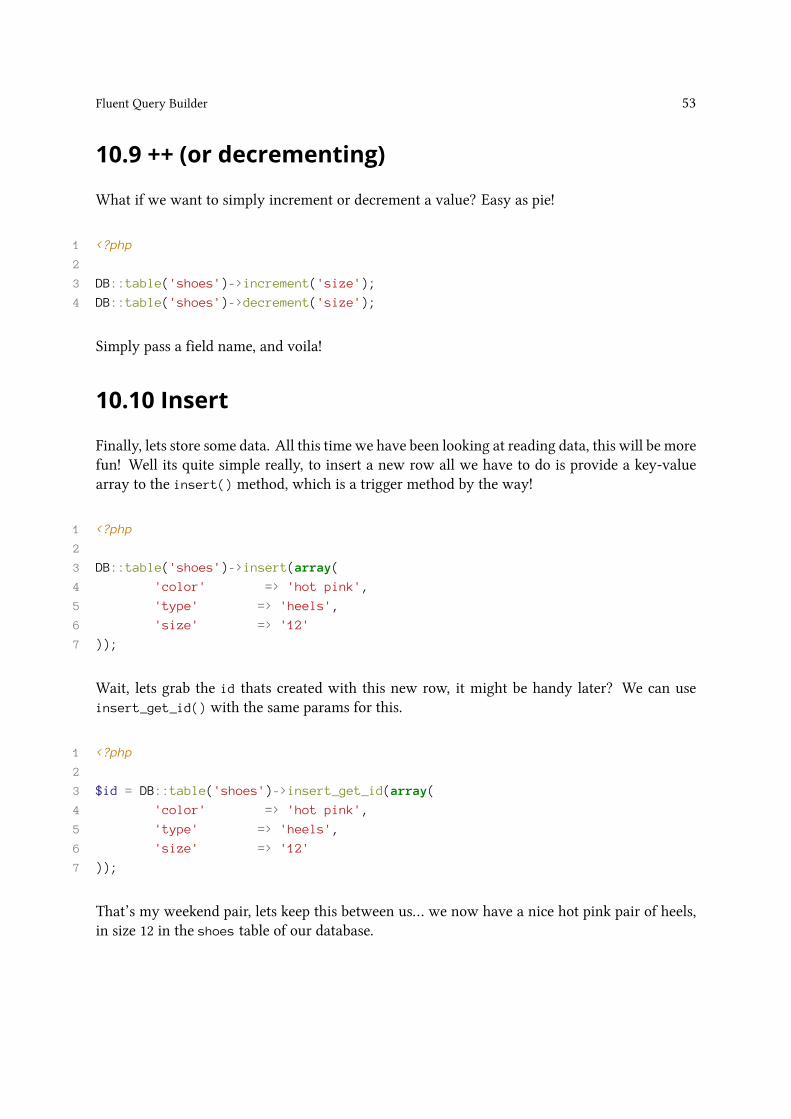
Fluent Query Builder 53
10.9 ++ (or decrementing)
What if we want to simply increment or decrement a value? Easy as pie!
1 <?php
2
3 DB::table('shoes')->increment('size');
4 DB::table('shoes')->decrement('size');
Simply pass a field name, and voila!
10.10 Insert
Finally, lets store some data. All this time we have been looking at reading data, this will be morefun! Well its quite simple really, to insert a new row all we have to do is provide a key-valuearray to the insert() method, which is a trigger method by the way!
1 <?php
2
3 DB::table('shoes')->insert(array(
4 'color' => 'hot pink',
5 'type' => 'heels',
6 'size' => '12'
7 ));
Wait, lets grab the id thats created with this new row, it might be handy later? We can useinsert_get_id() with the same params for this.
1 <?php
2
3 $id = DB::table('shoes')->insert_get_id(array(
4 'color' => 'hot pink',
5 'type' => 'heels',
6 'size' => '12'
7 ));
That’s my weekend pair, lets keep this between us… we now have a nice hot pink pair of heels,in size 12 in the shoes table of our database.
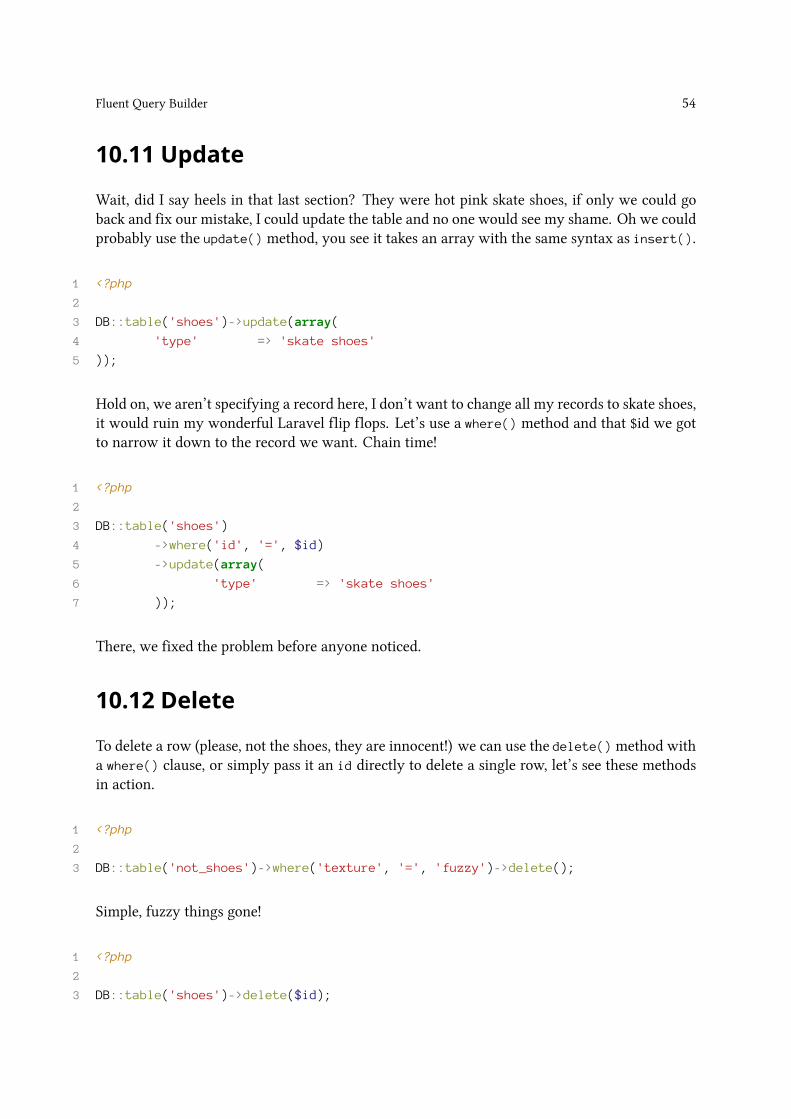
Fluent Query Builder 54
10.11 Update
Wait, did I say heels in that last section? They were hot pink skate shoes, if only we could goback and fix our mistake, I could update the table and no one would see my shame. Oh we couldprobably use the update() method, you see it takes an array with the same syntax as insert().
1 <?php
2
3 DB::table('shoes')->update(array(
4 'type' => 'skate shoes'
5 ));
Hold on, we aren’t specifying a record here, I don’t want to change all my records to skate shoes,it would ruin my wonderful Laravel flip flops. Let’s use a where() method and that $id we gotto narrow it down to the record we want. Chain time!
1 <?php
2
3 DB::table('shoes')
4 ->where('id', '=', $id)
5 ->update(array(
6 'type' => 'skate shoes'
7 ));
There, we fixed the problem before anyone noticed.
10.12 Delete
To delete a row (please, not the shoes, they are innocent!) we can use the delete()method witha where() clause, or simply pass it an id directly to delete a single row, let’s see these methodsin action.
1 <?php
2
3 DB::table('not_shoes')->where('texture', '=', 'fuzzy')->delete();
Simple, fuzzy things gone!
1 <?php
2
3 DB::table('shoes')->delete($id);

Fluent Query Builder 55
NO! Not the hot pink skate shoes, you have obviously learned too much, please keep theresponsibility and power thing in mind.. we don’t want any more shoe massacres.
In the next chapter, we will be moving on from sho… Fluent, and taking a look at Eloquent.Eloquent allows us to treat our database rows as objects, and provides an elegant.. or eloquentsolution to handling relationships.
I would like to thank Max Schwanekamp for purchasing the book, and also Douglas Grubba whohad the following to say:
Keep up the great work Dayle! A wonderful resource. Thank you to the @laravelteam. @taylorotwell you are really changing the php world.
Thanks Doug! I’m sure Taylor will also be pleased to hear that he is changing the PHP world,one method at a time!
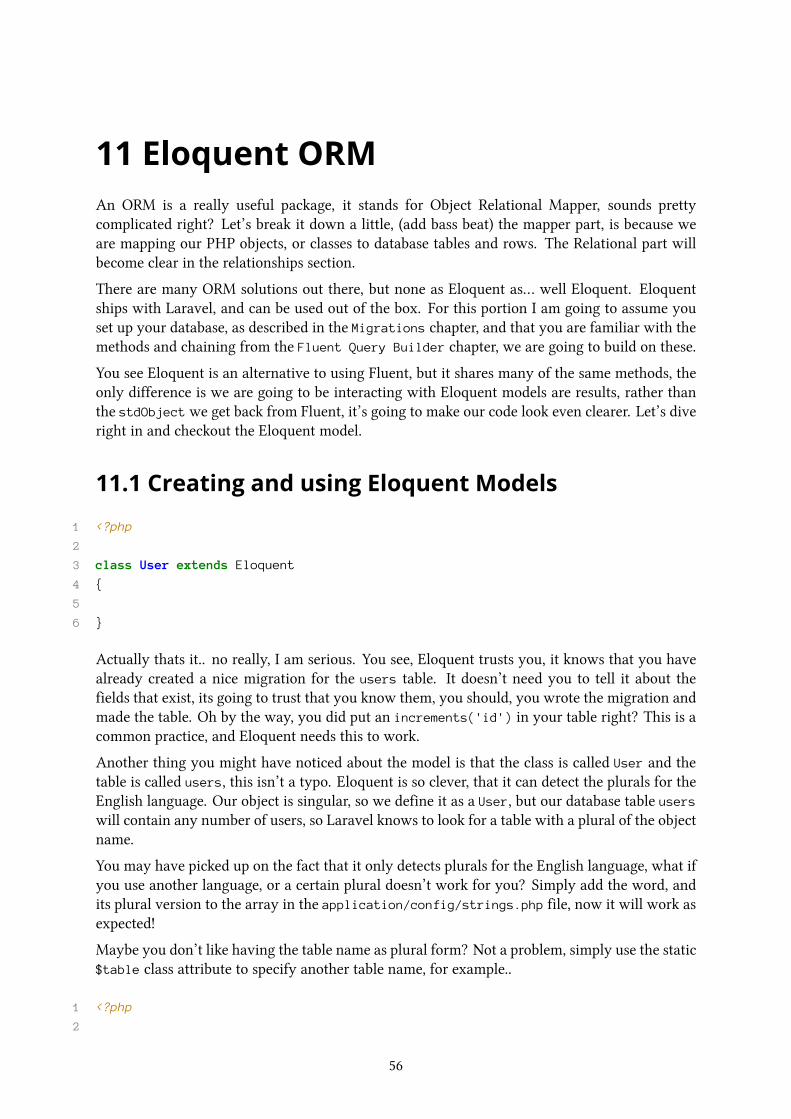
11 Eloquent ORMAn ORM is a really useful package, it stands for Object Relational Mapper, sounds prettycomplicated right? Let’s break it down a little, (add bass beat) the mapper part, is because weare mapping our PHP objects, or classes to database tables and rows. The Relational part willbecome clear in the relationships section.
There are many ORM solutions out there, but none as Eloquent as… well Eloquent. Eloquentships with Laravel, and can be used out of the box. For this portion I am going to assume youset up your database, as described in the Migrations chapter, and that you are familiar with themethods and chaining from the Fluent Query Builder chapter, we are going to build on these.
You see Eloquent is an alternative to using Fluent, but it shares many of the same methods, theonly difference is we are going to be interacting with Eloquent models are results, rather thanthe stdObject we get back from Fluent, it’s going to make our code look even clearer. Let’s diveright in and checkout the Eloquent model.
11.1 Creating and using Eloquent Models
1 <?php
2
3 class User extends Eloquent
4 {
5
6 }
Actually thats it.. no really, I am serious. You see, Eloquent trusts you, it knows that you havealready created a nice migration for the users table. It doesn’t need you to tell it about thefields that exist, its going to trust that you know them, you should, you wrote the migration andmade the table. Oh by the way, you did put an increments('id') in your table right? This is acommon practice, and Eloquent needs this to work.
Another thing you might have noticed about the model is that the class is called User and thetable is called users, this isn’t a typo. Eloquent is so clever, that it can detect the plurals for theEnglish language. Our object is singular, so we define it as a User, but our database table userswill contain any number of users, so Laravel knows to look for a table with a plural of the objectname.
You may have picked up on the fact that it only detects plurals for the English language, what ifyou use another language, or a certain plural doesn’t work for you? Simply add the word, andits plural version to the array in the application/config/strings.php file, now it will work asexpected!
Maybe you don’t like having the table name as plural form? Not a problem, simply use the static$table class attribute to specify another table name, for example..
1 <?php
2
56

Eloquent ORM 57
3 class User extends Eloquent
4 {
5 public static $table = 'app_users';
6 }
Right, typing that huge model definition must have worn you out (please note the sarcasm), let’shave a go at using our new model.
1 <?php
2
3 $user = User::find(1);
Wait hold on… we have seen this before, do you remember find() from our Fluent chapter, itbrings back a single result by its primary key. You see Eloquent uses many of the methods usedby Fluent, this is really convenient because you can use a combination of both Database librarieswithout forgetting which method is for what. Sweet!
For eloquent, simply use the object’s name, and supply a static method, we don’t need to useDB::table() for this one.
You can use the result object in a similar way, the truth is you are now interacting with anEloquent object, but you couldn’t really tell the difference at this point, lets get that users name.
1 <?php
2
3 echo $user->name;
Yep thats the same as last time, nice and easy.
What if we would rather have our User object returned as an array? Simply call the to_array()method on any Eloquent model to receive an array instead of an object.
1 <?php
2
3 $user = $user->to_array();
If you want to exclude certain fields from this array, you can add a $hidden static attribute toyour Eloquent model, containing an array of all the fields to exclude, for example :
1 <?php
2
3 class User extends Eloquent
4 {
5 public static $hidden = array('nickname');
6 }

Eloquent ORM 58
Say we want multiple results back? We can use the fancy all() method to bring back everyuser, then we can have a sexy user party.
1 <?php
2
3 $users = User::all();
What we have now, is an array of user objects, we can loop through them to access each oneindividually, simple as that.
1 <?php
2
3 foreach ($users as $user)
4 {
5 add_to_sexy_party($user);
6 }
Nice, its really swinging in here, quite a few guys though.. well let’s increase our chances, andget rid of the other guys. Then it really will be a sexy party!
1 <?php
2
3 $sexy_users = User::where('sex', '=', 'female')->get();
Wahey, lots better! The eye-candy threshold went up significantly. You see we just used awhere() chain method, and get() just like we did with fluent, nothing new there, just increasedclarity.
I could cover all the query methods again for returning results, but I don’t really need to, simplyflick back a chapter, and mentally replace the word Fluent with Eloquent, you will get the idea.
Instead, let’s see what has changed. Creating and updating objects (rows) just got a whole lotbetter!
1 <?php
2
3 $user = new User();
4
5 $user->name = 'Captain Sexypants';
6 $user->mojo = '100%';
7
8 $user->save();
Best not to invite Captain Sexypants to our party, we won’t get any action with him around,even his parrot has swagger.
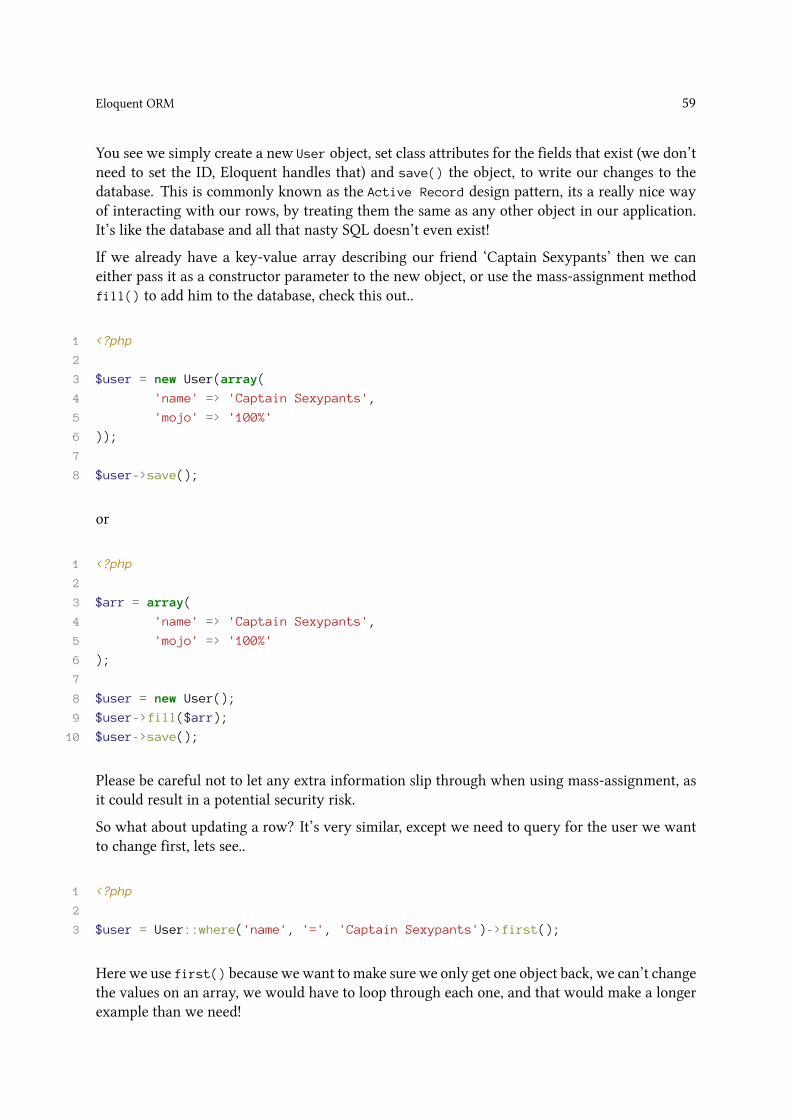
Eloquent ORM 59
You see we simply create a new User object, set class attributes for the fields that exist (we don’tneed to set the ID, Eloquent handles that) and save() the object, to write our changes to thedatabase. This is commonly known as the Active Record design pattern, its a really nice wayof interacting with our rows, by treating them the same as any other object in our application.It’s like the database and all that nasty SQL doesn’t even exist!
If we already have a key-value array describing our friend ‘Captain Sexypants’ then we caneither pass it as a constructor parameter to the new object, or use the mass-assignment methodfill() to add him to the database, check this out..
1 <?php
2
3 $user = new User(array(
4 'name' => 'Captain Sexypants',
5 'mojo' => '100%'
6 ));
7
8 $user->save();
or
1 <?php
2
3 $arr = array(
4 'name' => 'Captain Sexypants',
5 'mojo' => '100%'
6 );
7
8 $user = new User();
9 $user->fill($arr);
10 $user->save();
Please be careful not to let any extra information slip through when using mass-assignment, asit could result in a potential security risk.
So what about updating a row? It’s very similar, except we need to query for the user we wantto change first, lets see..
1 <?php
2
3 $user = User::where('name', '=', 'Captain Sexypants')->first();
Here we use first() because we want to make sure we only get one object back, we can’t changethe values on an array, we would have to loop through each one, and that would make a longerexample than we need!

Eloquent ORM 60
1 <?php
2
3 $user->mojo = '5%';
4 $user->save();
Well I couldn’t take all his mojo, that wouldn’t be fair. At least he can come to the party now.So you see updating is performed exactly the same way as inserting, except we need to find theobject that we want to update first.
Do you remember using $table->timestamps() with in the migrations chapter to makeupdated_at and created_at fields? Eloquent will update these automatically for you, insertinga timestamp when an object is created, and updating the updated_at field every time you save, ifyou would like to disable this feature simply add the $timestamps class attribute to your modeland set it to false.
1 <?php
2
3 class User extends Eloquent
4 {
5 public static $timestamps = false;
6 }
11.2 Relationships
Relationships are beautiful. No I haven’t gone all soppy. I mean relationships between tables, inEloquent they are beautiful. None of that ‘JOIN’ rubbish, we can define ‘one-to-one’, ‘one-to-many’ and ‘many-to-many’ just by adding some simple methods to our Eloquent Models, let’sjump right in, you will learn more with a code snippet in front of you.
On To One
Jumping right in..
1 <?php
2
3 class User extends Eloquent
4 {
5 public function invite()
6 {
7 return $this->has_one('Invite');
8 }
9 }
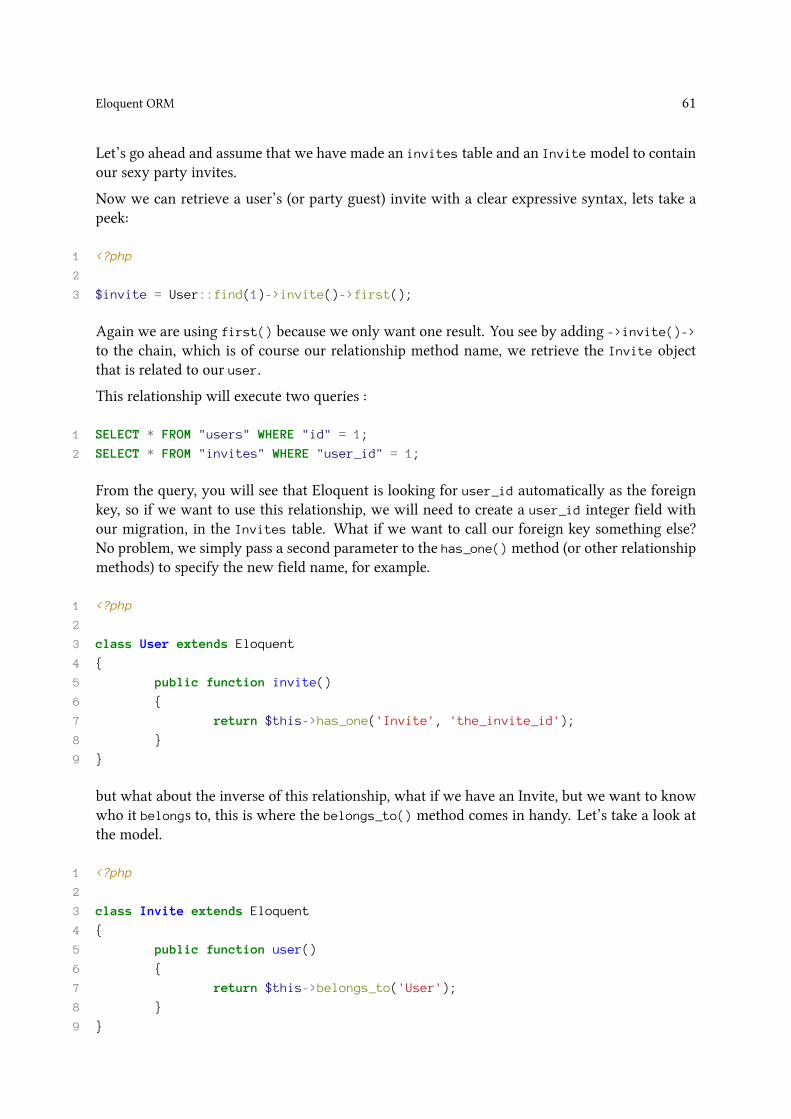
Eloquent ORM 61
Let’s go ahead and assume that we have made an invites table and an Invitemodel to containour sexy party invites.
Now we can retrieve a user’s (or party guest) invite with a clear expressive syntax, lets take apeek:
1 <?php
2
3 $invite = User::find(1)->invite()->first();
Again we are using first() because we only want one result. You see by adding ->invite()->
to the chain, which is of course our relationship method name, we retrieve the Invite objectthat is related to our user.
This relationship will execute two queries :
1 SELECT * FROM "users" WHERE "id" = 1;
2 SELECT * FROM "invites" WHERE "user_id" = 1;
From the query, you will see that Eloquent is looking for user_id automatically as the foreignkey, so if we want to use this relationship, we will need to create a user_id integer field withour migration, in the Invites table. What if we want to call our foreign key something else?No problem, we simply pass a second parameter to the has_one()method (or other relationshipmethods) to specify the new field name, for example.
1 <?php
2
3 class User extends Eloquent
4 {
5 public function invite()
6 {
7 return $this->has_one('Invite', 'the_invite_id');
8 }
9 }
but what about the inverse of this relationship, what if we have an Invite, but we want to knowwho it belongs to, this is where the belongs_to() method comes in handy. Let’s take a look atthe model.
1 <?php
2
3 class Invite extends Eloquent
4 {
5 public function user()
6 {
7 return $this->belongs_to('User');
8 }
9 }
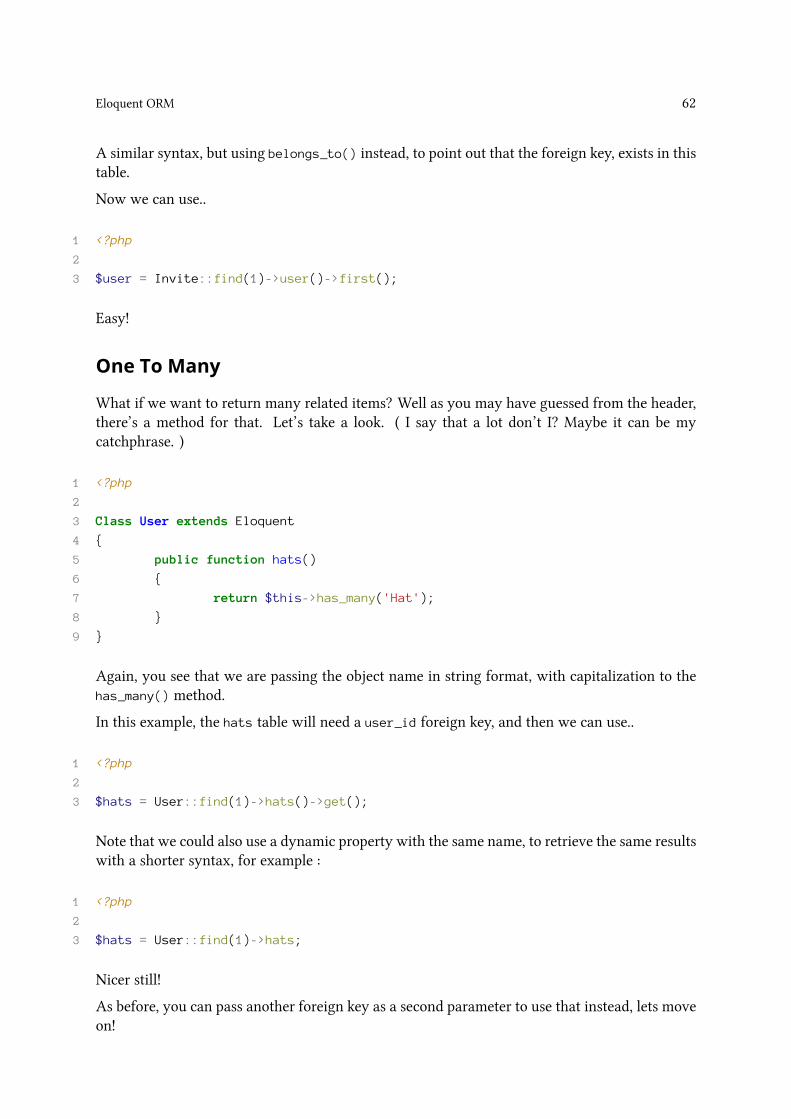
Eloquent ORM 62
A similar syntax, but using belongs_to() instead, to point out that the foreign key, exists in thistable.
Now we can use..
1 <?php
2
3 $user = Invite::find(1)->user()->first();
Easy!
One To Many
What if we want to return many related items? Well as you may have guessed from the header,there’s a method for that. Let’s take a look. ( I say that a lot don’t I? Maybe it can be mycatchphrase. )
1 <?php
2
3 Class User extends Eloquent
4 {
5 public function hats()
6 {
7 return $this->has_many('Hat');
8 }
9 }
Again, you see that we are passing the object name in string format, with capitalization to thehas_many() method.
In this example, the hats table will need a user_id foreign key, and then we can use..
1 <?php
2
3 $hats = User::find(1)->hats()->get();
Note that we could also use a dynamic property with the same name, to retrieve the same resultswith a shorter syntax, for example :
1 <?php
2
3 $hats = User::find(1)->hats;
Nicer still!
As before, you can pass another foreign key as a second parameter to use that instead, lets moveon!
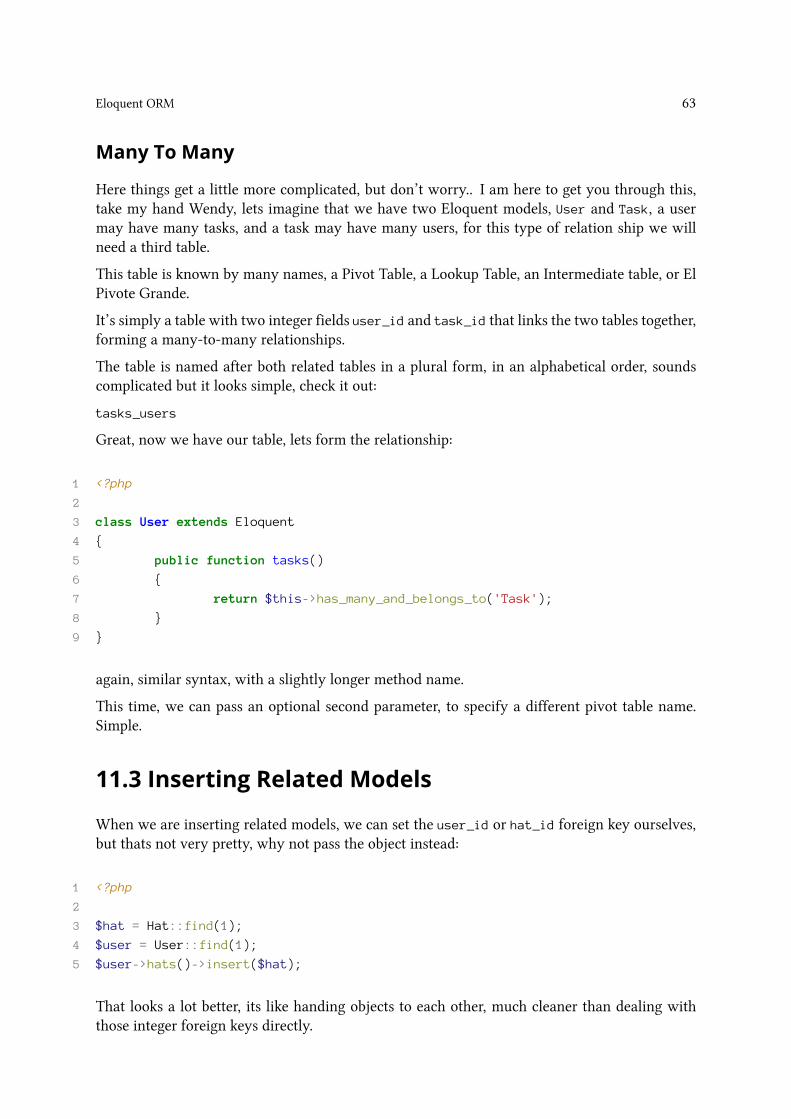
Eloquent ORM 63
Many To Many
Here things get a little more complicated, but don’t worry.. I am here to get you through this,take my hand Wendy, lets imagine that we have two Eloquent models, User and Task, a usermay have many tasks, and a task may have many users, for this type of relation ship we willneed a third table.
This table is known by many names, a Pivot Table, a Lookup Table, an Intermediate table, or ElPivote Grande.
It’s simply a table with two integer fields user_id and task_id that links the two tables together,forming a many-to-many relationships.
The table is named after both related tables in a plural form, in an alphabetical order, soundscomplicated but it looks simple, check it out:
tasks_users
Great, now we have our table, lets form the relationship:
1 <?php
2
3 class User extends Eloquent
4 {
5 public function tasks()
6 {
7 return $this->has_many_and_belongs_to('Task');
8 }
9 }
again, similar syntax, with a slightly longer method name.
This time, we can pass an optional second parameter, to specify a different pivot table name.Simple.
11.3 Inserting Related Models
When we are inserting related models, we can set the user_id or hat_id foreign key ourselves,but thats not very pretty, why not pass the object instead:
1 <?php
2
3 $hat = Hat::find(1);
4 $user = User::find(1);
5 $user->hats()->insert($hat);
That looks a lot better, its like handing objects to each other, much cleaner than dealing withthose integer foreign keys directly.
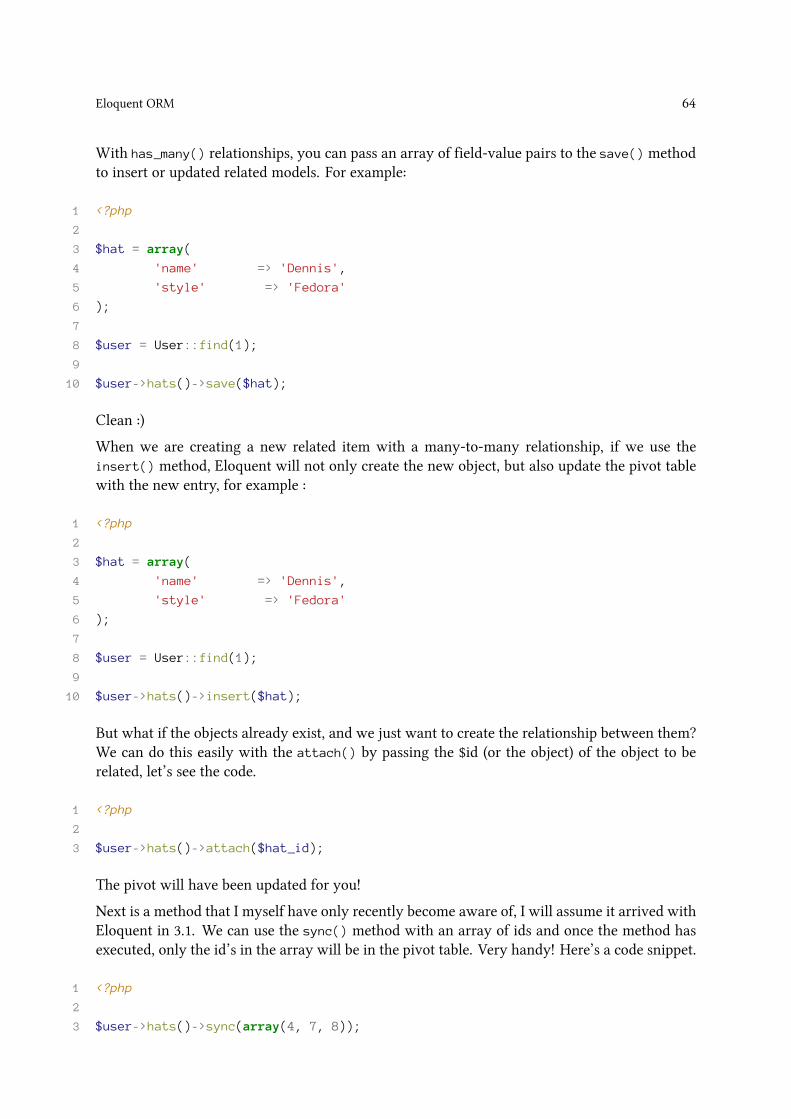
Eloquent ORM 64
With has_many() relationships, you can pass an array of field-value pairs to the save() methodto insert or updated related models. For example:
1 <?php
2
3 $hat = array(
4 'name' => 'Dennis',
5 'style' => 'Fedora'
6 );
7
8 $user = User::find(1);
9
10 $user->hats()->save($hat);
Clean :)
When we are creating a new related item with a many-to-many relationship, if we use theinsert() method, Eloquent will not only create the new object, but also update the pivot tablewith the new entry, for example :
1 <?php
2
3 $hat = array(
4 'name' => 'Dennis',
5 'style' => 'Fedora'
6 );
7
8 $user = User::find(1);
9
10 $user->hats()->insert($hat);
But what if the objects already exist, and we just want to create the relationship between them?We can do this easily with the attach() by passing the $id (or the object) of the object to berelated, let’s see the code.
1 <?php
2
3 $user->hats()->attach($hat_id);
The pivot will have been updated for you!
Next is a method that I myself have only recently become aware of, I will assume it arrived withEloquent in 3.1. We can use the sync() method with an array of ids and once the method hasexecuted, only the id’s in the array will be in the pivot table. Very handy! Here’s a code snippet.
1 <?php
2
3 $user->hats()->sync(array(4, 7, 8));
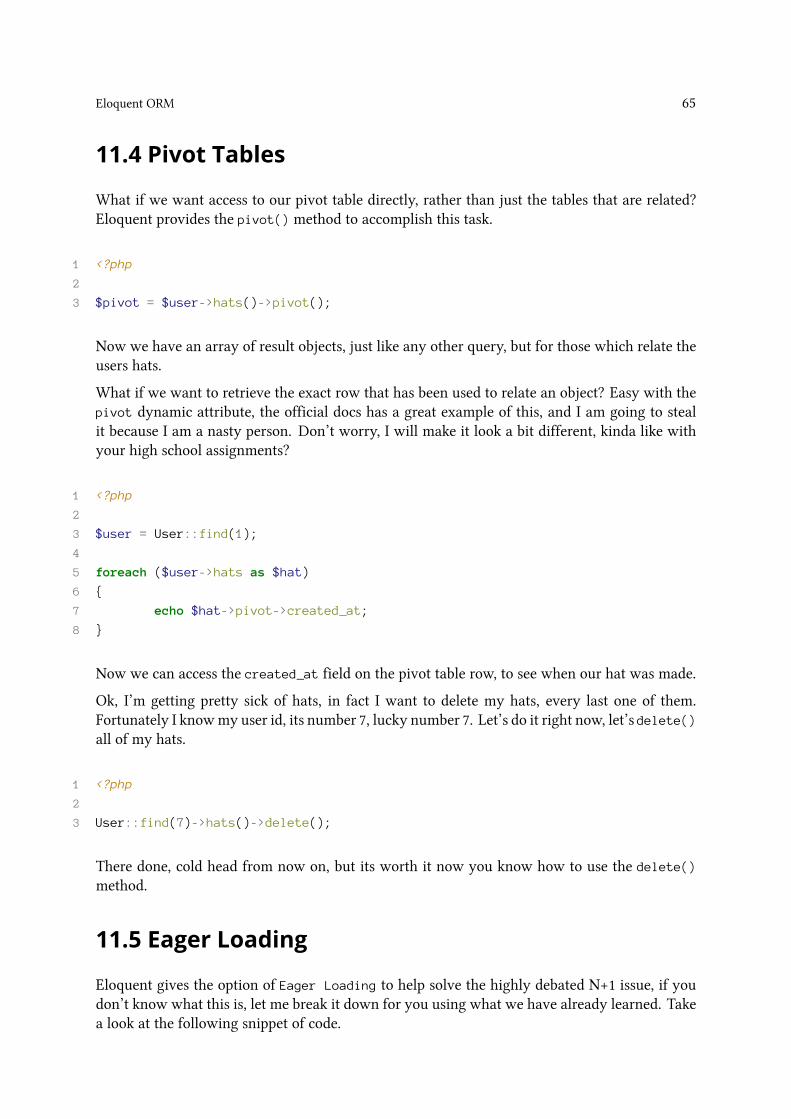
Eloquent ORM 65
11.4 Pivot Tables
What if we want access to our pivot table directly, rather than just the tables that are related?Eloquent provides the pivot() method to accomplish this task.
1 <?php
2
3 $pivot = $user->hats()->pivot();
Now we have an array of result objects, just like any other query, but for those which relate theusers hats.
What if we want to retrieve the exact row that has been used to relate an object? Easy with thepivot dynamic attribute, the official docs has a great example of this, and I am going to stealit because I am a nasty person. Don’t worry, I will make it look a bit different, kinda like withyour high school assignments?
1 <?php
2
3 $user = User::find(1);
4
5 foreach ($user->hats as $hat)
6 {
7 echo $hat->pivot->created_at;
8 }
Now we can access the created_at field on the pivot table row, to see when our hat was made.
Ok, I’m getting pretty sick of hats, in fact I want to delete my hats, every last one of them.Fortunately I knowmy user id, its number 7, lucky number 7. Let’s do it right now, let’s delete()all of my hats.
1 <?php
2
3 User::find(7)->hats()->delete();
There done, cold head from now on, but its worth it now you know how to use the delete()
method.
11.5 Eager Loading
Eloquent gives the option of Eager Loading to help solve the highly debated N+1 issue, if youdon’t know what this is, let me break it down for you using what we have already learned. Takea look at the following snippet of code.

Eloquent ORM 66
1 <?php
2
3 $users = User::all();
4
5 foreach ($users as $user)
6 {
7 echo $user->hat->size();
8 }
For every loop iteration, Eloquent has to perform another SQL query, to retrieve that users Hatobject, and find its size. Now this isn’t going to be a huge problem on small data sets, butwith hundreds of rows it could drastically affect performance. With eager loading we can tellEloquent to run a SELECT * FROM hats; when retrieving the User object, so that we alreadyhave all the data we need. That reduces the amount of strain to only two SQL queries. Muchbetter!
Let’s see how we can tell Eloquent to eager load a relation:
1 <?php
2
3 $users = User::with('hat')->get();
There, now the hat relationship is eager loaded. If you want to eager load several relationships,simply pass an array to the with() method. It’s worth noting that the with() method is static,and as such must always be at the start of the chain.
You can even eager load nested relationships, lets assume our Hat object has a hatstand()
relationship to let us know which stand it’s on, we can eager load both of the relationshipslike this.
1 <?php
2
3 $users = User::with(array('hat', 'hat.hatstand'))->get();
Simply prefix the relationship name, with the nested object.
What if we want to add some conditions to our eager loading, maybe we are only going to beusing blue hats? Of course we can do this with Eloquent! simply pass the relationship name asa key to the array, and a closure containing conditions as a parameter, this is better explainedthrough code.
1 <?php
2
3 $users = User::with(array('hat' => function($query) {
4 $query->where('color', '=', 'blue');
5 }))->get();
Simple, you can add as many queries as you need to!

Eloquent ORM 67
11.6 Setters and Getters
Setters are handy little methods that allow us to format our new model data in a certain waywhen it is assigned, lets take a look at a code snippet.
1 <?php
2
3 public function set_password($password)
4 {
5 $this->set_attribute('hashed_password', Hash::make($password));
6 }
We create a method with the name of the setter, prefixed with set_, pass it a variable which willreceive the field value. Now we can use set_attribute() to set a field to its new value, this letsus modify the passed value anyway we like. The snippet above will cause the hashed_passwordfield to be updated with a hashed version of the supplied value when we call :
1 <?php
2
3 $user->password = "secret_panda_ninja";
Very useful!
Getters are the exact opposite, they can be used to adjust a value when it is being read, forexample :
1 <?php
2
3 public function get_panda_name()
4 {
5 return 'Panda'.$this->get_attribute('name');
6 }
Now if our name is Dayle we can use..
1 <?php
2
3 echo $user->panda_name;
which would give ‘PandaDayle’.
I haven’t yet decided what we are going to cover in the next chapter, but rest assured, it will bean amazing feature of Laravel (because they all are, get it?).
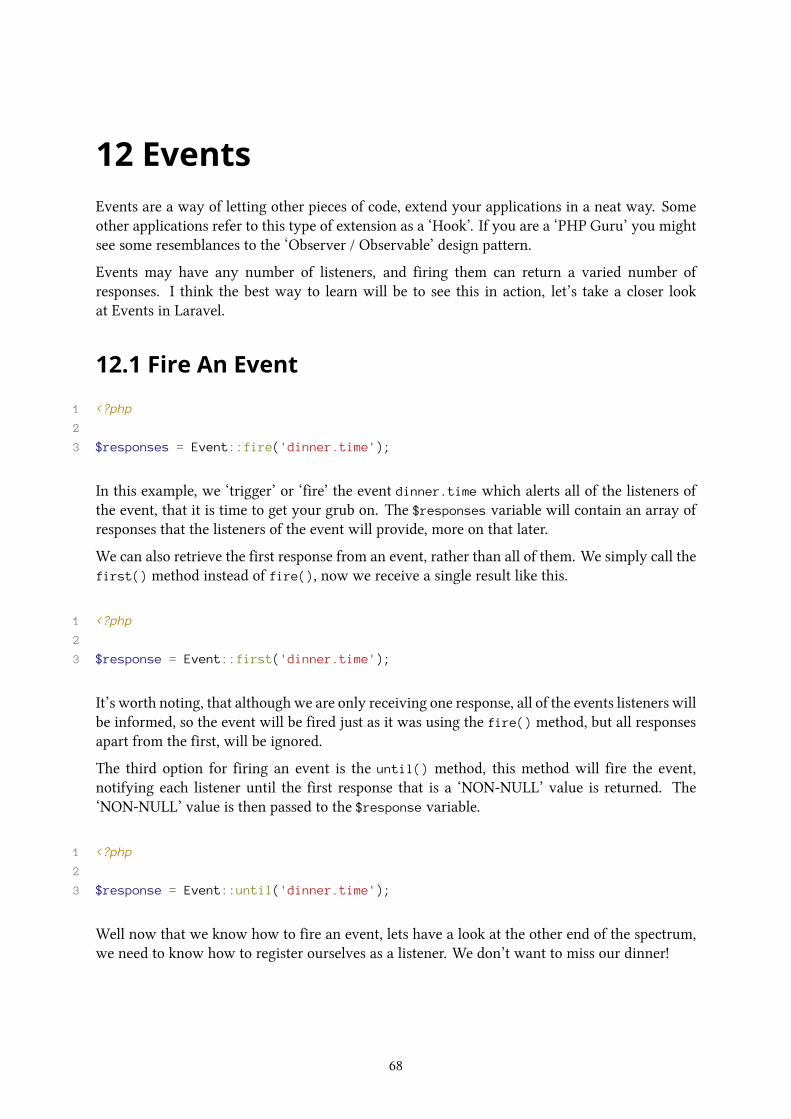
12 EventsEvents are a way of letting other pieces of code, extend your applications in a neat way. Someother applications refer to this type of extension as a ‘Hook’. If you are a ‘PHP Guru’ you mightsee some resemblances to the ‘Observer / Observable’ design pattern.
Events may have any number of listeners, and firing them can return a varied number ofresponses. I think the best way to learn will be to see this in action, let’s take a closer lookat Events in Laravel.
12.1 Fire An Event
1 <?php
2
3 $responses = Event::fire('dinner.time');
In this example, we ‘trigger’ or ‘fire’ the event dinner.time which alerts all of the listeners ofthe event, that it is time to get your grub on. The $responses variable will contain an array ofresponses that the listeners of the event will provide, more on that later.
We can also retrieve the first response from an event, rather than all of them. We simply call thefirst() method instead of fire(), now we receive a single result like this.
1 <?php
2
3 $response = Event::first('dinner.time');
It’s worth noting, that although we are only receiving one response, all of the events listeners willbe informed, so the event will be fired just as it was using the fire() method, but all responsesapart from the first, will be ignored.
The third option for firing an event is the until() method, this method will fire the event,notifying each listener until the first response that is a ‘NON-NULL’ value is returned. The‘NON-NULL’ value is then passed to the $response variable.
1 <?php
2
3 $response = Event::until('dinner.time');
Well now that we know how to fire an event, lets have a look at the other end of the spectrum,we need to know how to register ourselves as a listener. We don’t want to miss our dinner!
68
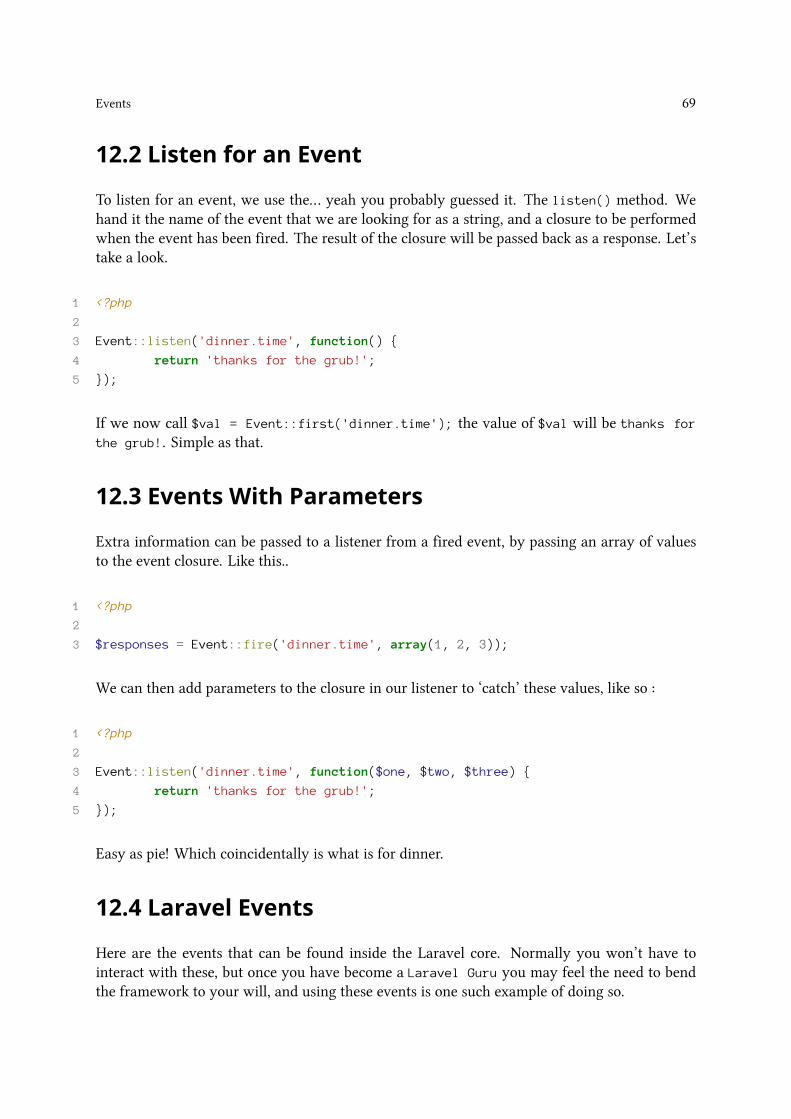
Events 69
12.2 Listen for an Event
To listen for an event, we use the… yeah you probably guessed it. The listen() method. Wehand it the name of the event that we are looking for as a string, and a closure to be performedwhen the event has been fired. The result of the closure will be passed back as a response. Let’stake a look.
1 <?php
2
3 Event::listen('dinner.time', function() {
4 return 'thanks for the grub!';
5 });
If we now call $val = Event::first('dinner.time'); the value of $val will be thanks for
the grub!. Simple as that.
12.3 Events With Parameters
Extra information can be passed to a listener from a fired event, by passing an array of valuesto the event closure. Like this..
1 <?php
2
3 $responses = Event::fire('dinner.time', array(1, 2, 3));
We can then add parameters to the closure in our listener to ‘catch’ these values, like so :
1 <?php
2
3 Event::listen('dinner.time', function($one, $two, $three) {
4 return 'thanks for the grub!';
5 });
Easy as pie! Which coincidentally is what is for dinner.
12.4 Laravel Events
Here are the events that can be found inside the Laravel core. Normally you won’t have tointeract with these, but once you have become a Laravel Guru you may feel the need to bendthe framework to your will, and using these events is one such example of doing so.
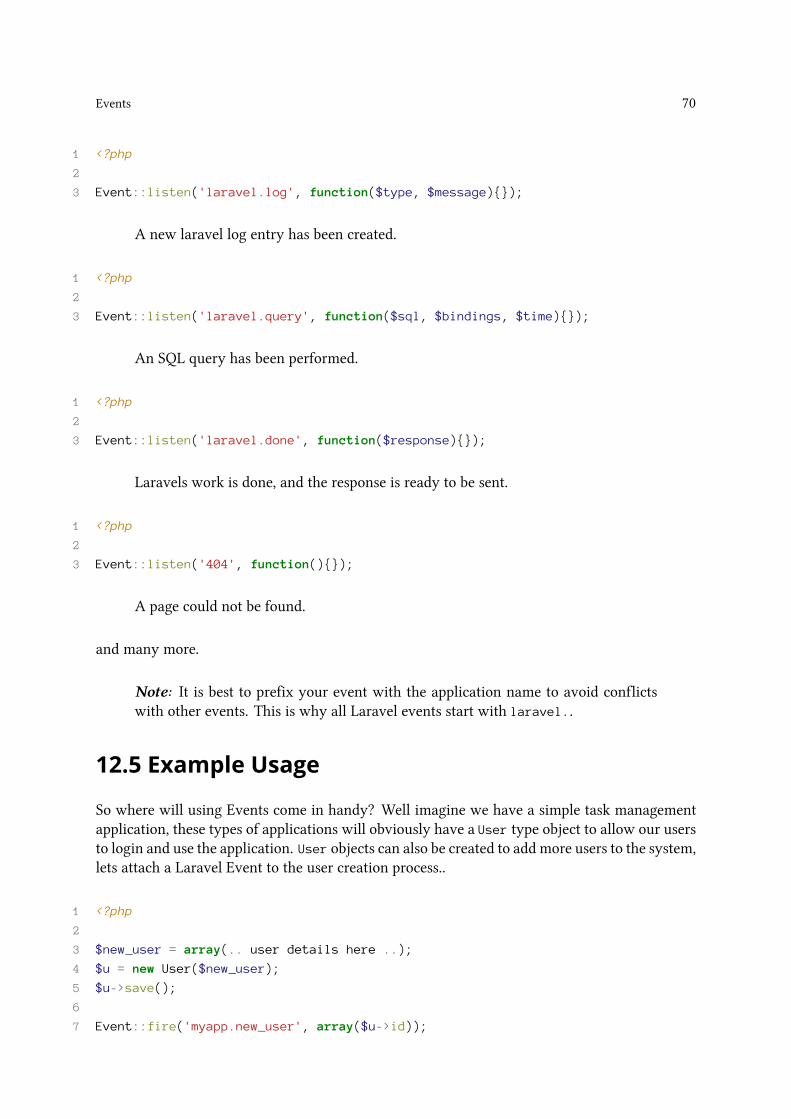
Events 70
1 <?php
2
3 Event::listen('laravel.log', function($type, $message){});
A new laravel log entry has been created.
1 <?php
2
3 Event::listen('laravel.query', function($sql, $bindings, $time){});
An SQL query has been performed.
1 <?php
2
3 Event::listen('laravel.done', function($response){});
Laravels work is done, and the response is ready to be sent.
1 <?php
2
3 Event::listen('404', function(){});
A page could not be found.
and many more.
Note: It is best to prefix your event with the application name to avoid conflictswith other events. This is why all Laravel events start with laravel..
12.5 Example Usage
So where will using Events come in handy? Well imagine we have a simple task managementapplication, these types of applications will obviously have a User type object to allow our usersto login and use the application. User objects can also be created to add more users to the system,lets attach a Laravel Event to the user creation process..
1 <?php
2
3 $new_user = array(.. user details here ..);
4 $u = new User($new_user);
5 $u->save();
6
7 Event::fire('myapp.new_user', array($u->id));
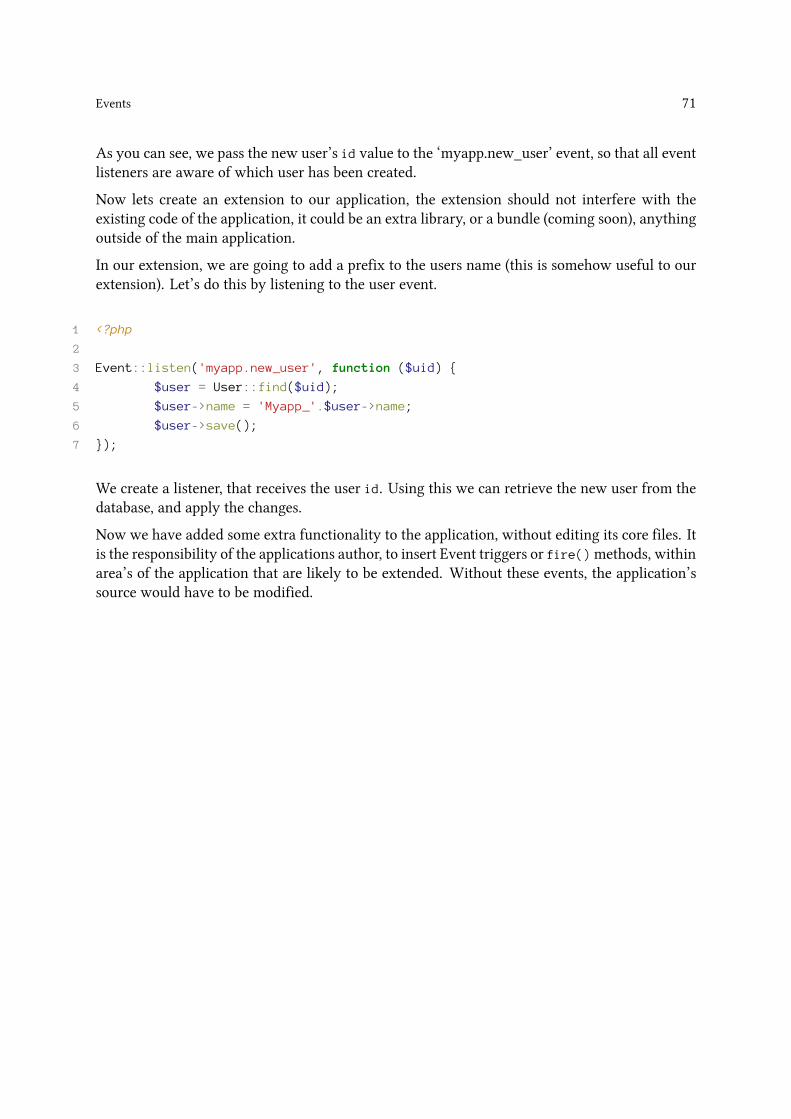
Events 71
As you can see, we pass the new user’s id value to the ‘myapp.new_user’ event, so that all eventlisteners are aware of which user has been created.
Now lets create an extension to our application, the extension should not interfere with theexisting code of the application, it could be an extra library, or a bundle (coming soon), anythingoutside of the main application.
In our extension, we are going to add a prefix to the users name (this is somehow useful to ourextension). Let’s do this by listening to the user event.
1 <?php
2
3 Event::listen('myapp.new_user', function ($uid) {
4 $user = User::find($uid);
5 $user->name = 'Myapp_'.$user->name;
6 $user->save();
7 });
We create a listener, that receives the user id. Using this we can retrieve the new user from thedatabase, and apply the changes.
Now we have added some extra functionality to the application, without editing its core files. Itis the responsibility of the applications author, to insert Event triggers or fire()methods, withinarea’s of the application that are likely to be extended. Without these events, the application’ssource would have to be modified.
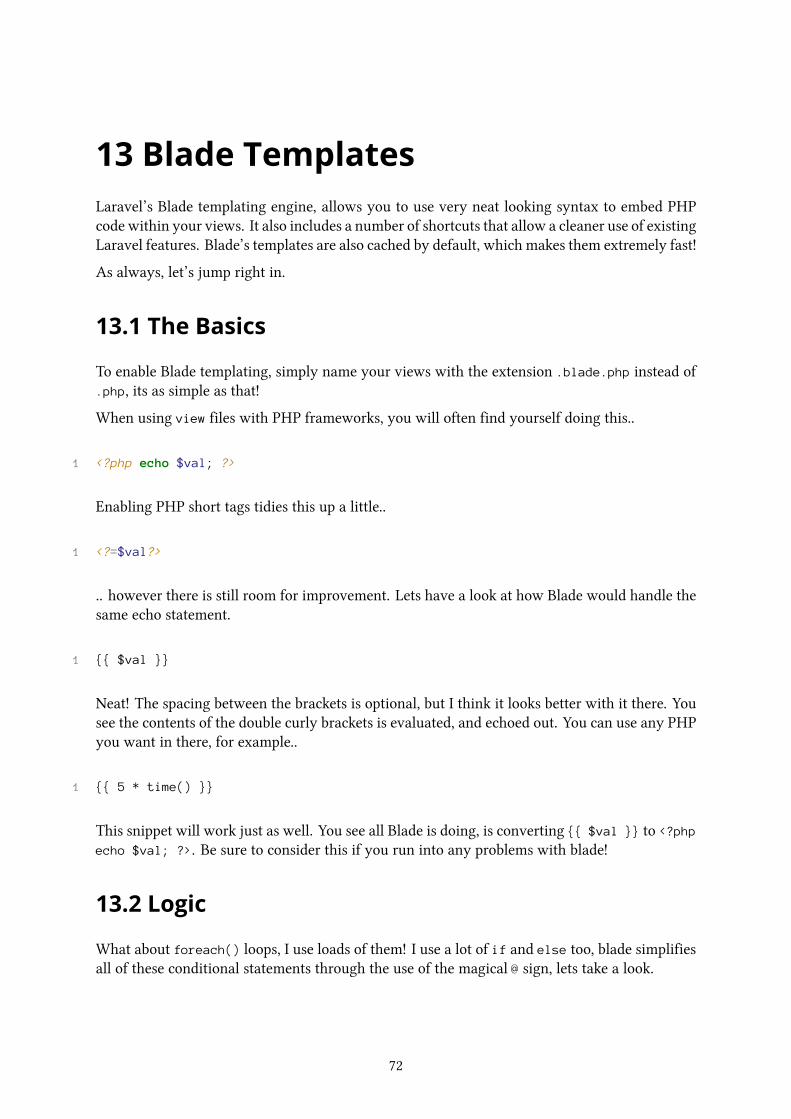
13 Blade TemplatesLaravel’s Blade templating engine, allows you to use very neat looking syntax to embed PHPcode within your views. It also includes a number of shortcuts that allow a cleaner use of existingLaravel features. Blade’s templates are also cached by default, which makes them extremely fast!
As always, let’s jump right in.
13.1 The Basics
To enable Blade templating, simply name your views with the extension .blade.php instead of.php, its as simple as that!
When using view files with PHP frameworks, you will often find yourself doing this..
1 <?php echo $val; ?>
Enabling PHP short tags tidies this up a little..
1 <?=$val?>
.. however there is still room for improvement. Lets have a look at how Blade would handle thesame echo statement.
1 {{ $val }}
Neat! The spacing between the brackets is optional, but I think it looks better with it there. Yousee the contents of the double curly brackets is evaluated, and echoed out. You can use any PHPyou want in there, for example..
1 {{ 5 * time() }}
This snippet will work just as well. You see all Blade is doing, is converting {{ $val }} to <?php
echo $val; ?>. Be sure to consider this if you run into any problems with blade!
13.2 Logic
What about foreach() loops, I use loads of them! I use a lot of if and else too, blade simplifiesall of these conditional statements through the use of the magical @ sign, lets take a look.
72
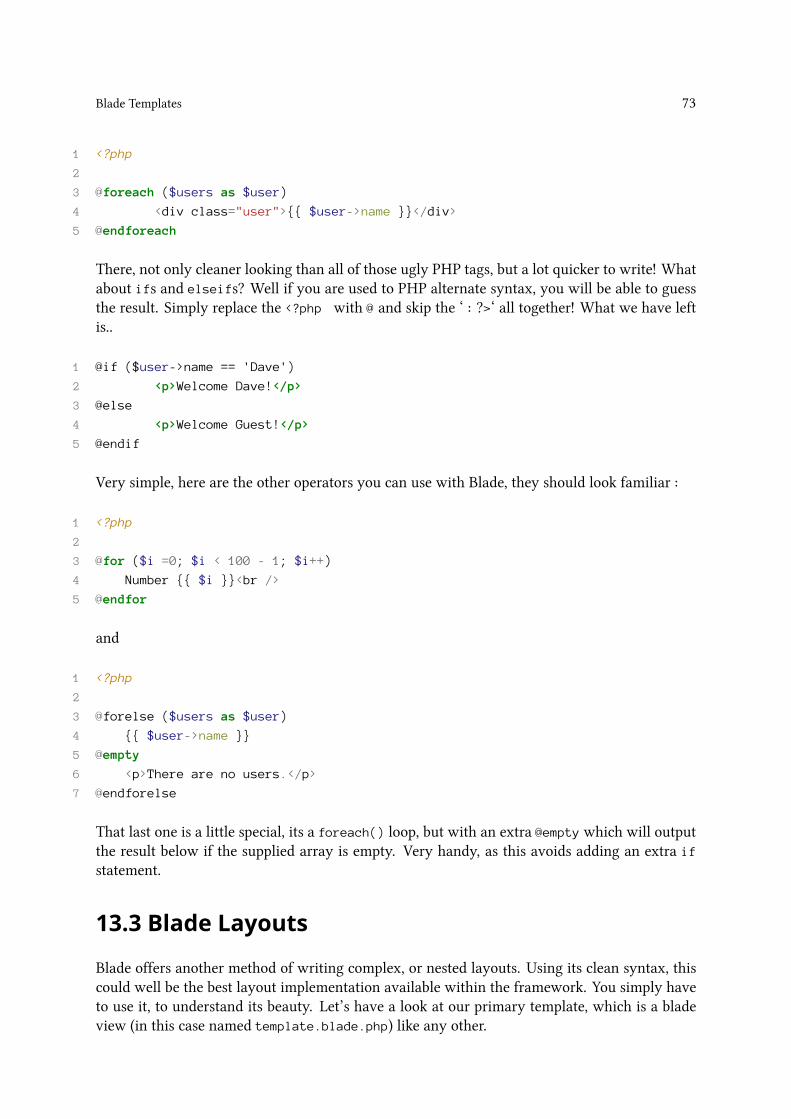
Blade Templates 73
1 <?php
2
3 @foreach ($users as $user)
4 <div class="user">{{ $user->name }}</div>
5 @endforeach
There, not only cleaner looking than all of those ugly PHP tags, but a lot quicker to write! Whatabout ifs and elseifs? Well if you are used to PHP alternate syntax, you will be able to guessthe result. Simply replace the <?php with @ and skip the ‘ : ?>‘ all together! What we have leftis..
1 @if ($user->name == 'Dave')
2 <p>Welcome Dave!</p>
3 @else
4 <p>Welcome Guest!</p>
5 @endif
Very simple, here are the other operators you can use with Blade, they should look familiar :
1 <?php
2
3 @for ($i =0; $i < 100 - 1; $i++)
4 Number {{ $i }}<br />
5 @endfor
and
1 <?php
2
3 @forelse ($users as $user)
4 {{ $user->name }}
5 @empty
6 <p>There are no users.</p>
7 @endforelse
That last one is a little special, its a foreach() loop, but with an extra @empty which will outputthe result below if the supplied array is empty. Very handy, as this avoids adding an extra if
statement.
13.3 Blade Layouts
Blade offers another method of writing complex, or nested layouts. Using its clean syntax, thiscould well be the best layout implementation available within the framework. You simply haveto use it, to understand its beauty. Let’s have a look at our primary template, which is a bladeview (in this case named template.blade.php) like any other.
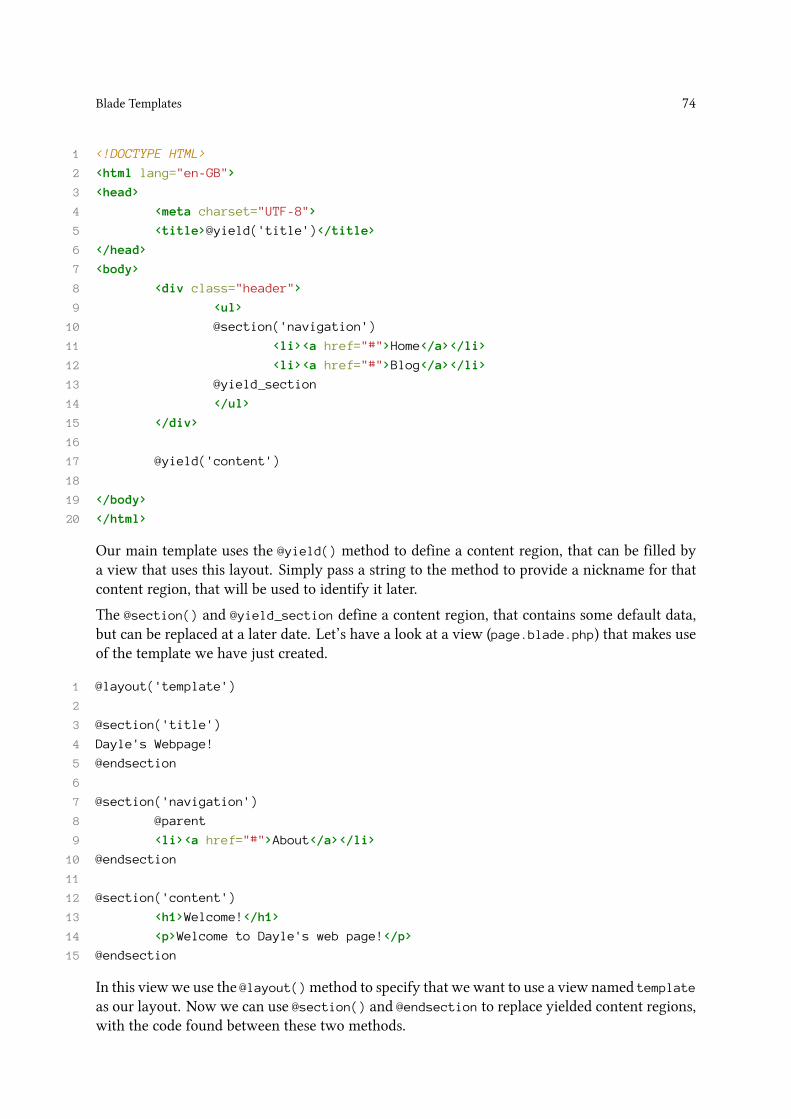
Blade Templates 74
1 <!DOCTYPE HTML>
2 <html lang="en-GB">
3 <head>
4 <meta charset="UTF-8">
5 <title>@yield('title')</title>
6 </head>
7 <body>
8 <div class="header">
9 <ul>
10 @section('navigation')
11 <li><a href="#">Home</a></li>
12 <li><a href="#">Blog</a></li>
13 @yield_section
14 </ul>
15 </div>
16
17 @yield('content')
18
19 </body>
20 </html>
Our main template uses the @yield() method to define a content region, that can be filled bya view that uses this layout. Simply pass a string to the method to provide a nickname for thatcontent region, that will be used to identify it later.
The @section() and @yield_section define a content region, that contains some default data,but can be replaced at a later date. Let’s have a look at a view (page.blade.php) that makes useof the template we have just created.
1 @layout('template')
2
3 @section('title')
4 Dayle's Webpage!
5 @endsection
6
7 @section('navigation')
8 @parent
9 <li><a href="#">About</a></li>
10 @endsection
11
12 @section('content')
13 <h1>Welcome!</h1>
14 <p>Welcome to Dayle's web page!</p>
15 @endsection
In this viewwe use the @layout()method to specify that we want to use a view named templateas our layout. Now we can use @section() and @endsection to replace yielded content regions,with the code found between these two methods.
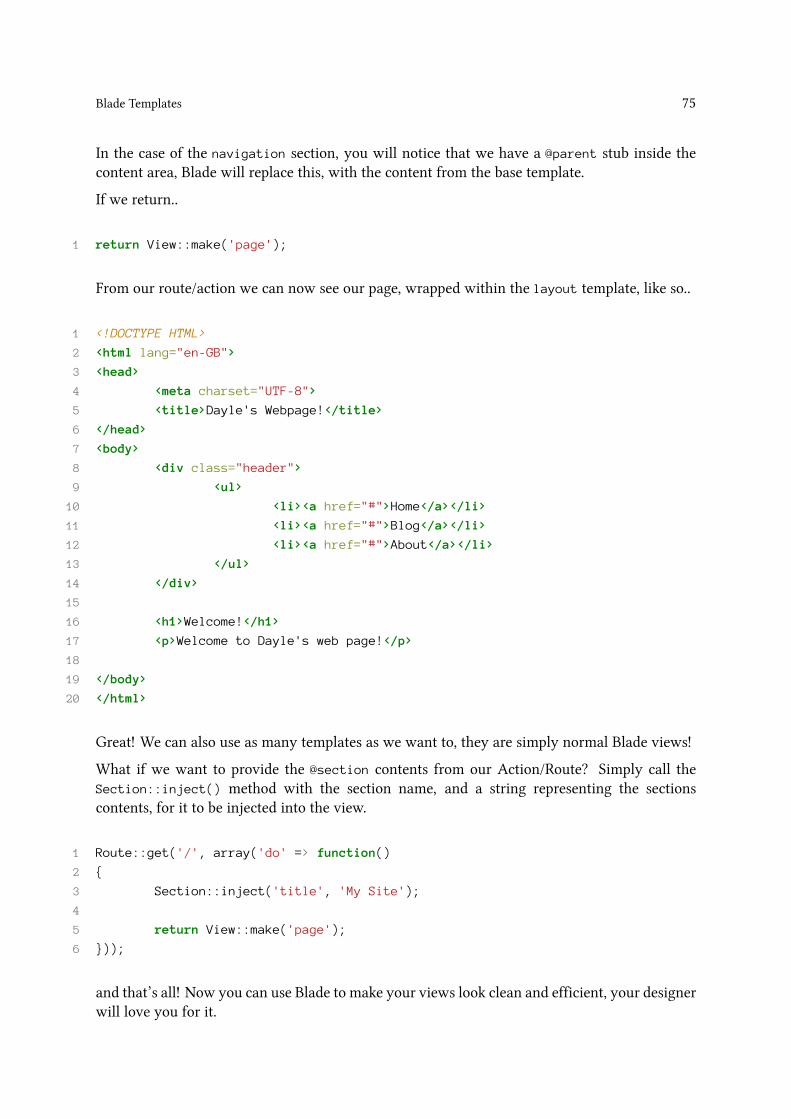
Blade Templates 75
In the case of the navigation section, you will notice that we have a @parent stub inside thecontent area, Blade will replace this, with the content from the base template.
If we return..
1 return View::make('page');
From our route/action we can now see our page, wrapped within the layout template, like so..
1 <!DOCTYPE HTML>
2 <html lang="en-GB">
3 <head>
4 <meta charset="UTF-8">
5 <title>Dayle's Webpage!</title>
6 </head>
7 <body>
8 <div class="header">
9 <ul>
10 <li><a href="#">Home</a></li>
11 <li><a href="#">Blog</a></li>
12 <li><a href="#">About</a></li>
13 </ul>
14 </div>
15
16 <h1>Welcome!</h1>
17 <p>Welcome to Dayle's web page!</p>
18
19 </body>
20 </html>
Great! We can also use as many templates as we want to, they are simply normal Blade views!
What if we want to provide the @section contents from our Action/Route? Simply call theSection::inject() method with the section name, and a string representing the sectionscontents, for it to be injected into the view.
1 Route::get('/', array('do' => function()
2 {
3 Section::inject('title', 'My Site');
4
5 return View::make('page');
6 }));
and that’s all! Now you can use Blade to make your views look clean and efficient, your designerwill love you for it.
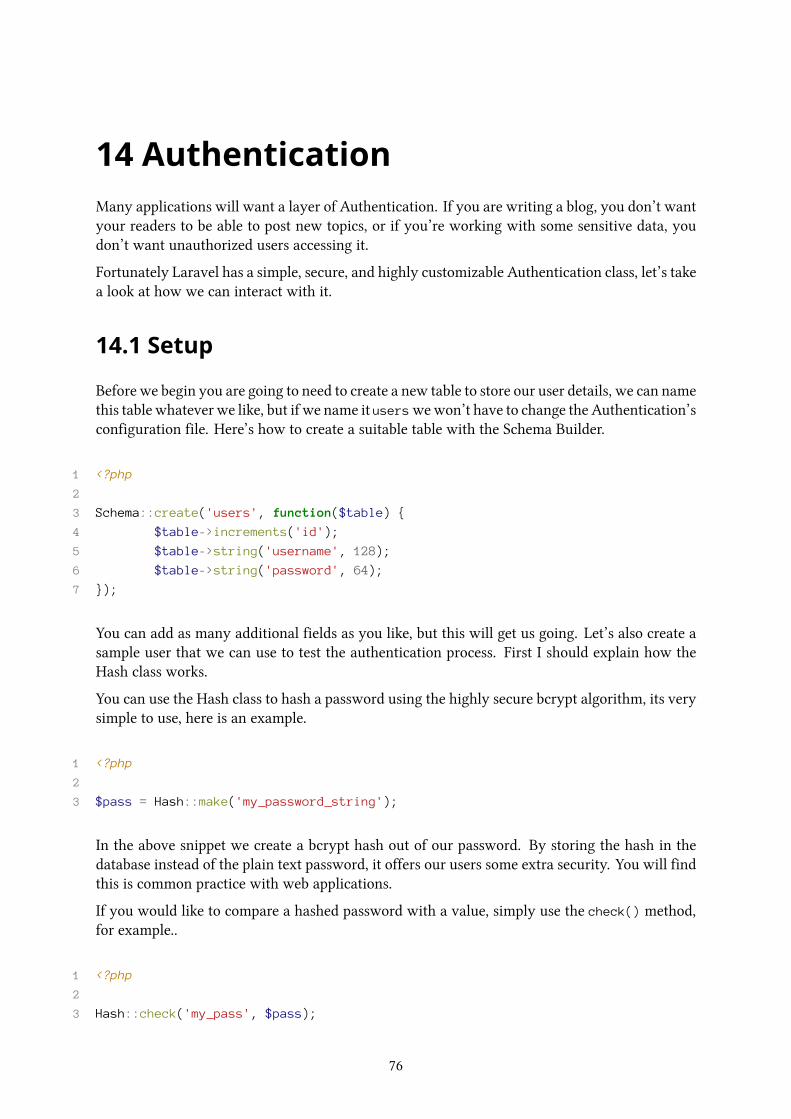
14 AuthenticationMany applications will want a layer of Authentication. If you are writing a blog, you don’t wantyour readers to be able to post new topics, or if you’re working with some sensitive data, youdon’t want unauthorized users accessing it.
Fortunately Laravel has a simple, secure, and highly customizable Authentication class, let’s takea look at how we can interact with it.
14.1 Setup
Before we begin you are going to need to create a new table to store our user details, we can namethis table whatever we like, but if we name it userswewon’t have to change the Authentication’sconfiguration file. Here’s how to create a suitable table with the Schema Builder.
1 <?php
2
3 Schema::create('users', function($table) {
4 $table->increments('id');
5 $table->string('username', 128);
6 $table->string('password', 64);
7 });
You can add as many additional fields as you like, but this will get us going. Let’s also create asample user that we can use to test the authentication process. First I should explain how theHash class works.
You can use the Hash class to hash a password using the highly secure bcrypt algorithm, its verysimple to use, here is an example.
1 <?php
2
3 $pass = Hash::make('my_password_string');
In the above snippet we create a bcrypt hash out of our password. By storing the hash in thedatabase instead of the plain text password, it offers our users some extra security. You will findthis is common practice with web applications.
If you would like to compare a hashed password with a value, simply use the check() method,for example..
1 <?php
2
3 Hash::check('my_pass', $pass);
76

Authentication 77
This will return a boolean result, true on successful match, and false on failure. Now that weknow how to hash a password, we can create our sample user, I am going to call him Dexter,you see I am watching the TV show Dexter while writing this chapter, it’s great to write withbackground noise, try it with coding, it really works! Onwards to Dexter..
1 <?php
2
3 DB::table('users')->insert(array(
4 'username' => 'Dexter',
5 'password' => Hash::make('knife')
6 ));
Now we must choose which of the default authentication drivers we wish to use, we have thechoice of ‘eloquent’ or ‘fluent’.
The ‘fluent’ driver will use Fluent to interact with the database, and return an object representingthe the user tables rowwhen we call Auth::user(). The eloquent driver will return an Eloquentmodel representing the user instead.
Configuration for authentication driver, table or object name, and field names can all be foundwithin ‘application/config/auth.php’.
1 <?php
2
3 return array(
4
5 'driver' => 'eloquent',
6
7 'username' => 'email',
8
9 'model' => 'User',
10
11 'table' => 'users',
12 );
Let’s change ‘driver’ to fluent to use the fluent query builder as the authentication driver, andchange the ‘username’ config item to ‘username’ so that we can log our users into our applicationusing their username rather than an email address.
1 <?php
2
3 return array(
4
5 'driver' => 'fluent',
6
7 'username' => 'username',

Authentication 78
8
9 'model' => 'User',
10
11 'table' => 'users',
12 );
14.2 Setting up the form
Righto! We are going to need a login form, let’s make a pretty one with blade! We love Bladenow right? Let’s do it. Creating login.blade.php.
1 {{ Form::open('login') }}
2
3 <!-- check for login errors flash var -->
4 @if (Session::has('login_errors'))
5 <span class="error">Username or password incorrect.</span>
6 @endif
7
8 <!-- username field -->
9 <p>{{ Form::label('username', 'Username') }}</p>
10 <p>{{ Form::text('username') }}</p>
11
12 <!-- password field -->
13 <p>{{ Form::label('password', 'Password') }}</p>
14 <p>{{ Form::text('password') }}</p>
15
16 <!-- submit button -->
17 <p>{{ Form::submit('Login') }}</p>
18
19 {{ Form::close() }}
That is a beautif..
Ssssh, that was a few chapters ago now, I’m not into brain washing, you can let it go. Sure is abeautiful form though! Let’s create a nice route to show the form.
1 <?php
2
3 Route::get('login', function() {
4 return View::make('login');
5 });
Let’s make a POST variant of this route, we can use that to handle when the login form issubmitted, that way we can use a single URL for both.
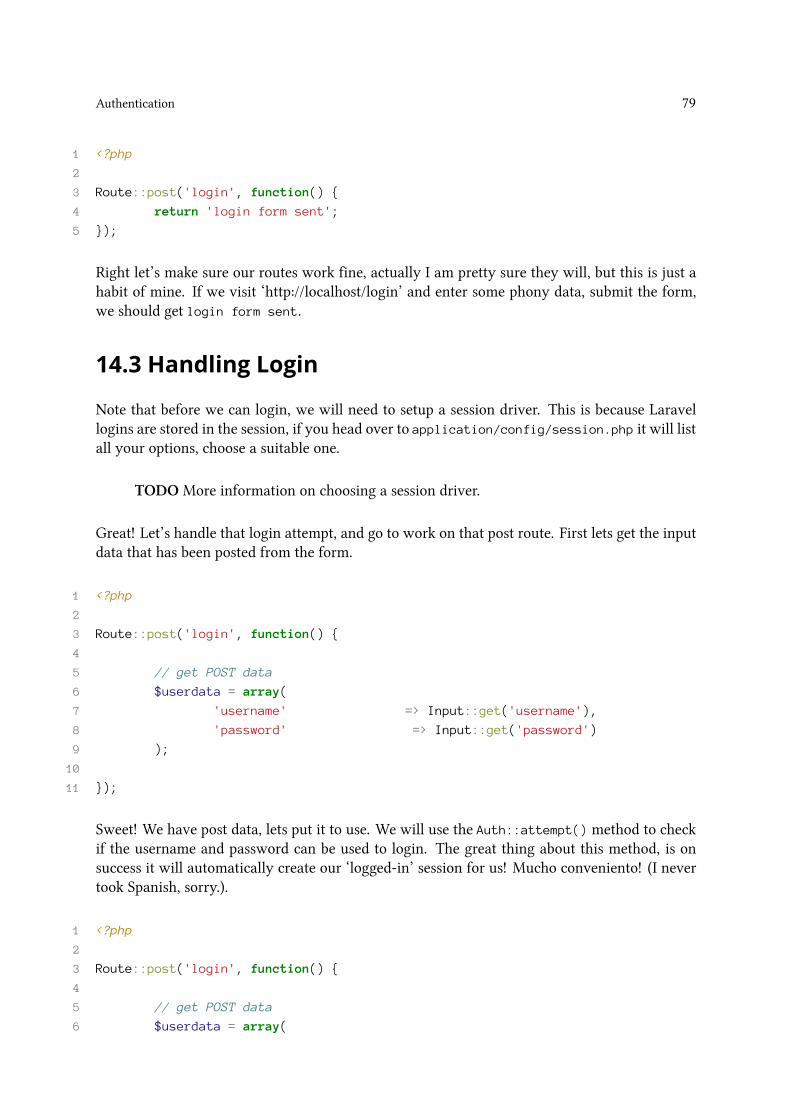
Authentication 79
1 <?php
2
3 Route::post('login', function() {
4 return 'login form sent';
5 });
Right let’s make sure our routes work fine, actually I am pretty sure they will, but this is just ahabit of mine. If we visit ‘http://localhost/login’ and enter some phony data, submit the form,we should get login form sent.
14.3 Handling Login
Note that before we can login, we will need to setup a session driver. This is because Laravellogins are stored in the session, if you head over to application/config/session.php it will listall your options, choose a suitable one.
TODOMore information on choosing a session driver.
Great! Let’s handle that login attempt, and go to work on that post route. First lets get the inputdata that has been posted from the form.
1 <?php
2
3 Route::post('login', function() {
4
5 // get POST data
6 $userdata = array(
7 'username' => Input::get('username'),
8 'password' => Input::get('password')
9 );
10
11 });
Sweet! We have post data, lets put it to use. We will use the Auth::attempt() method to checkif the username and password can be used to login. The great thing about this method, is onsuccess it will automatically create our ‘logged-in’ session for us! Mucho conveniento! (I nevertook Spanish, sorry.).
1 <?php
2
3 Route::post('login', function() {
4
5 // get POST data
6 $userdata = array(
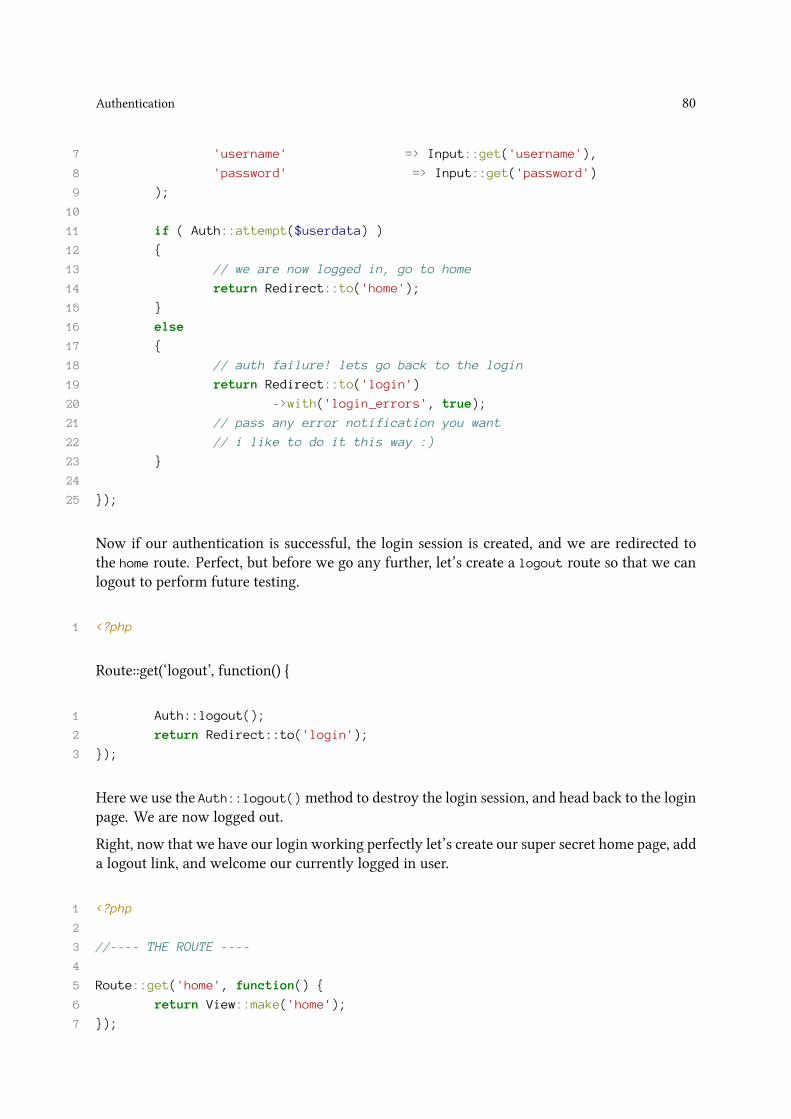
Authentication 80
7 'username' => Input::get('username'),
8 'password' => Input::get('password')
9 );
10
11 if ( Auth::attempt($userdata) )
12 {
13 // we are now logged in, go to home
14 return Redirect::to('home');
15 }
16 else
17 {
18 // auth failure! lets go back to the login
19 return Redirect::to('login')
20 ->with('login_errors', true);
21 // pass any error notification you want
22 // i like to do it this way :)
23 }
24
25 });
Now if our authentication is successful, the login session is created, and we are redirected tothe home route. Perfect, but before we go any further, let’s create a logout route so that we canlogout to perform future testing.
1 <?php
Route::get(‘logout’, function() {
1 Auth::logout();
2 return Redirect::to('login');
3 });
Here we use the Auth::logout()method to destroy the login session, and head back to the loginpage. We are now logged out.
Right, now that we have our login working perfectly let’s create our super secret home page, adda logout link, and welcome our currently logged in user.
1 <?php
2
3 //---- THE ROUTE ----
4
5 Route::get('home', function() {
6 return View::make('home');
7 });

Authentication 81
8
9 //---- THE VIEW (home.blade.php) ----
10
11 <div class="header">
12 Welcome back, {{ Auth::user()->username }}!<br />
13 {{ HTML::link('logout', 'Logout') }}
14 </div>
15
16 <div class="content">
17 <h1>Squirrel Info</h1>
18 <p>This is our super red squirrel information page.</p>
19 <p>Be careful, the grey squirrels are watching.</p>
20 </div>
Now you can test our login loop.. Login, be greeted with the welcome page, logout. Repeat. Dothis at least 800 times to set your mind to rest. Don’t worry, this is normal behavior, besides..you get paid by the hour right PHP Guru?
Youwill notice that we use Auth::user() in the above example, this will return a Fluent databaseresult object representing the current logged in user. Very handy for finding its id, or echoingout welcome information.
14.4 Protecting Routes
Ok, we are almost done here! There is a slight bug, and security issue that we need to take careof first. Logout of the system, (no not the machine you are reading this on, just the site) andhead over to the home URL by hand.
Uh oh, now the gray squirrels can see our attack plans without even logging in! We will need tofix this. Also because we don’t have a user logged into the system, we get an undefined index
(or something similar) error when trying to access the users username.
Cast your mind way back, the solution is there lurking in the shadows near the start of the book.What? No shadows? I paid the publisher to put them in… never mind let’s carry on. Do youremember route filters? Using filters we can run a snippet of code before the route is executed,and if we return something it will be used in place of what we return from our route. Woah lotsof potential there.
It’s even easier than that, you see Taylor has a degree in amateur mind reading, he knew wewould be writing this chapter, and he knew we would need to protect a route from non-loggedin users. That is why he created the ‘auth’ filter, which is included with Laravel as standard.Let’s have a look at the filter itself. (You can find this in routes.php)
1 <?php
2
3 Route::filter('auth', function()
4 {

Authentication 82
5 if (Auth::guest()) return Redirect::to('login');
6 });
Neat!
You see the Auth::guest() method? It’s a nicely expressive method which returns true onlyif the current request has no logged in user. Very handy! You can also use Auth::check() toperform the opposite check, to see if a user is currently logged in. We know these methods doexactly the same thing, but by providing clean expressive method names, using the right onewill appear much clearer within your source.
As you can see, if no user is logged in, the auth filter returns a redirect to the login page,overwriting the view supplied by our route. All we need to do is attach this to our home route.
1 <?php
2
3 Route::get('home', array('before' => 'auth', 'do' => function() {
4 return View::make('home');
5 }));
There we go, now the home route is protected, the undefined notices will never be seen, andunauthorized squirr… users will no longer be able to see the home page. Please remember not toapply the auth filter to your login URI, you will experience a terrible loop!
14.5 Customization
I know what you’re thinking. What if I don’t want to use Eloquent or Fluent, this seems verylimited!
Please, this is Laravel. You should have learned this by now! Laravel allows you to createcustom classes known as ‘Auth Drivers’ so that you can modify parameters or hook intoany authentication system you like. Simply create a new class. I like to put mine inapplication/libraries so that they are autoloaded for me!
1 <?php
2
3 // application/libraries/myauth.php
4 class Myauth extends Laravel\Auth\Drivers\Driver {
5
6 public function attempt($arguments = array())
7 {
8
9 }
10
11 public function retrieve($id)
12 {
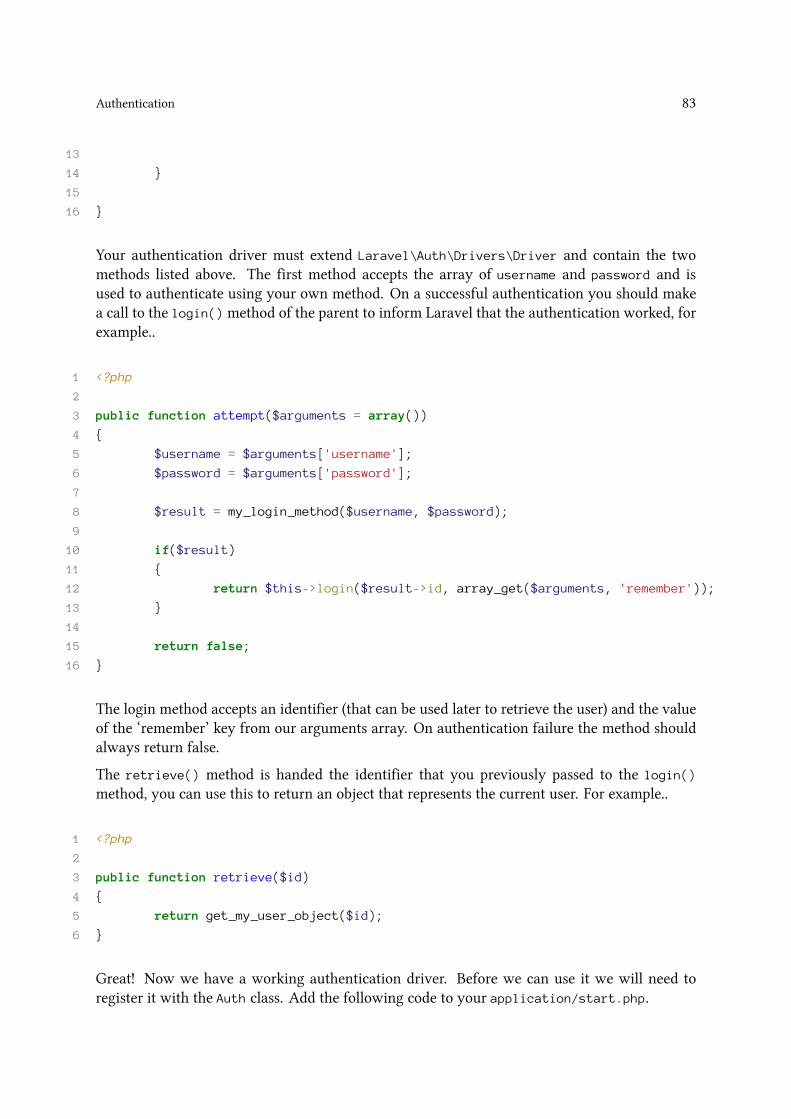
Authentication 83
13
14 }
15
16 }
Your authentication driver must extend Laravel\Auth\Drivers\Driver and contain the twomethods listed above. The first method accepts the array of username and password and isused to authenticate using your own method. On a successful authentication you should makea call to the login()method of the parent to inform Laravel that the authentication worked, forexample..
1 <?php
2
3 public function attempt($arguments = array())
4 {
5 $username = $arguments['username'];
6 $password = $arguments['password'];
7
8 $result = my_login_method($username, $password);
9
10 if($result)
11 {
12 return $this->login($result->id, array_get($arguments, 'remember'));
13 }
14
15 return false;
16 }
The login method accepts an identifier (that can be used later to retrieve the user) and the valueof the ‘remember’ key from our arguments array. On authentication failure the method shouldalways return false.
The retrieve() method is handed the identifier that you previously passed to the login()
method, you can use this to return an object that represents the current user. For example..
1 <?php
2
3 public function retrieve($id)
4 {
5 return get_my_user_object($id);
6 }
Great! Now we have a working authentication driver. Before we can use it we will need toregister it with the Auth class. Add the following code to your application/start.php.
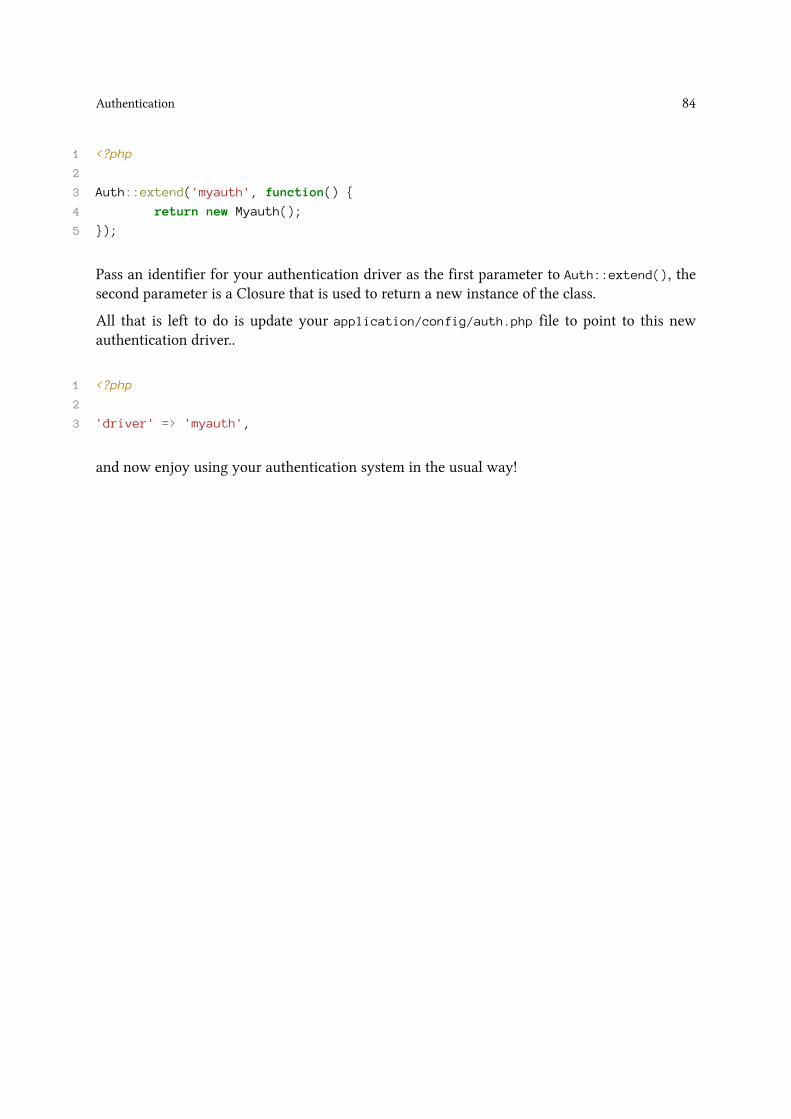
Authentication 84
1 <?php
2
3 Auth::extend('myauth', function() {
4 return new Myauth();
5 });
Pass an identifier for your authentication driver as the first parameter to Auth::extend(), thesecond parameter is a Closure that is used to return a new instance of the class.
All that is left to do is update your application/config/auth.php file to point to this newauthentication driver..
1 <?php
2
3 'driver' => 'myauth',
and now enjoy using your authentication system in the usual way!

15 The Blog TutorialIt’s finally time to write our first full application. If you haven’t read the other chapters youmight find this a little tricky, let’s have a look at what we are going to be using to create theblog.
• Routes
• Migrations
• Eloquent
• Blade Templates
• Authentication
• Filters
Let’s have a look at the plan Stan, and see exactly what we are going to be building.
15.1 The Design
We are going to build a three page blog. The first page will consist of a listing of blog posts,similar to the front of a Wordpre.. Wordpush blog. The next page will be the full-view page, itis the page you reach when you click an article that you want to read. The final page will be thepage where we write our posts. Normally you would have the ability to edit or delete posts, butwe can add all that stuff later. I’m not counting the usual login page in that count, as it is usedwith any application that implements authentication.
Let’s think about the database schema for a moment. We know that we are going to need a tableto store our blog posts. We will also need a table to store our users, and we are going to needsome form of relationship between them both. Let’s map this out and think about the fields.
Table : posts
Field Type
id INTEGERtitle VARCHAR(128)body TEXTauthor_id INTEGERcreated_at DATETIMEupdated_at DATETIME
Table : users
Field Type
id INTEGER
85
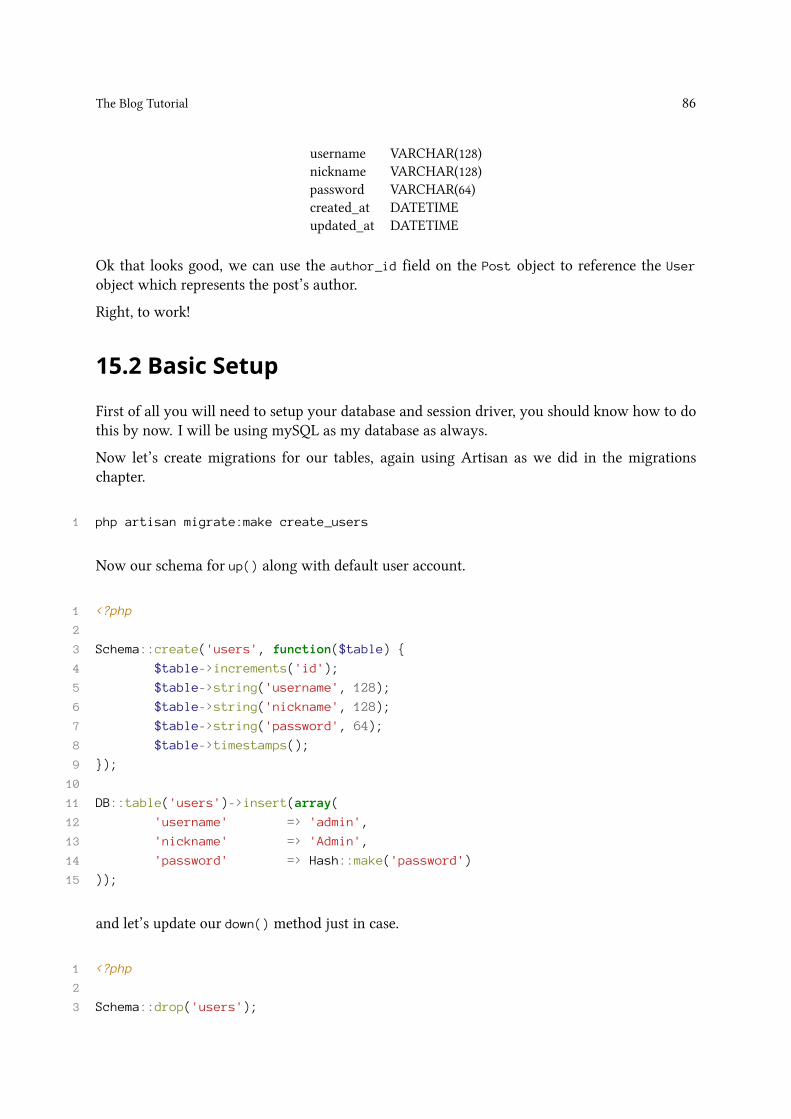
The Blog Tutorial 86
username VARCHAR(128)nickname VARCHAR(128)password VARCHAR(64)created_at DATETIMEupdated_at DATETIME
Ok that looks good, we can use the author_id field on the Post object to reference the User
object which represents the post’s author.
Right, to work!
15.2 Basic Setup
First of all you will need to setup your database and session driver, you should know how to dothis by now. I will be using mySQL as my database as always.
Now let’s create migrations for our tables, again using Artisan as we did in the migrationschapter.
1 php artisan migrate:make create_users
Now our schema for up() along with default user account.
1 <?php
2
3 Schema::create('users', function($table) {
4 $table->increments('id');
5 $table->string('username', 128);
6 $table->string('nickname', 128);
7 $table->string('password', 64);
8 $table->timestamps();
9 });
10
11 DB::table('users')->insert(array(
12 'username' => 'admin',
13 'nickname' => 'Admin',
14 'password' => Hash::make('password')
15 ));
and let’s update our down() method just in case.
1 <?php
2
3 Schema::drop('users');
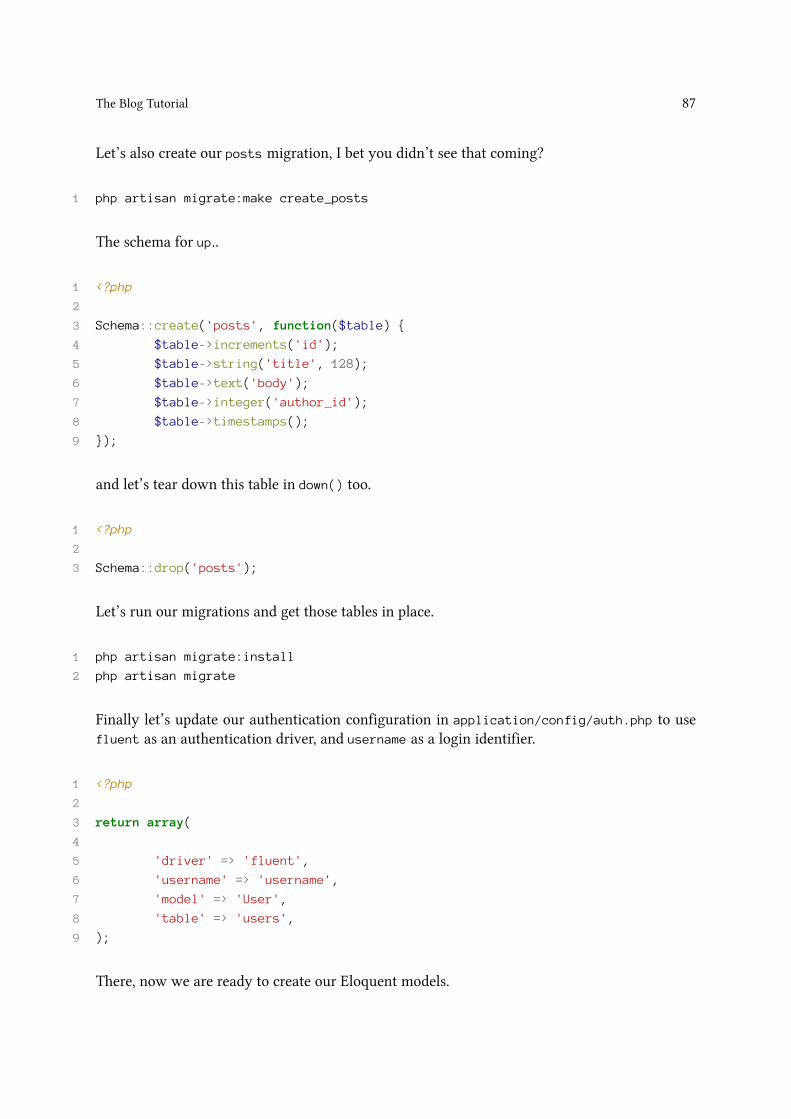
The Blog Tutorial 87
Let’s also create our posts migration, I bet you didn’t see that coming?
1 php artisan migrate:make create_posts
The schema for up..
1 <?php
2
3 Schema::create('posts', function($table) {
4 $table->increments('id');
5 $table->string('title', 128);
6 $table->text('body');
7 $table->integer('author_id');
8 $table->timestamps();
9 });
and let’s tear down this table in down() too.
1 <?php
2
3 Schema::drop('posts');
Let’s run our migrations and get those tables in place.
1 php artisan migrate:install
2 php artisan migrate
Finally let’s update our authentication configuration in application/config/auth.php to usefluent as an authentication driver, and username as a login identifier.
1 <?php
2
3 return array(
4
5 'driver' => 'fluent',
6 'username' => 'username',
7 'model' => 'User',
8 'table' => 'users',
9 );
There, now we are ready to create our Eloquent models.

The Blog Tutorial 88
15.3 Eloquent Models
Right, you know exactly how to create Eloquent models, so let’s just have a look at the source.
1 <?php
2
3 class User extends Eloquent
4 {
5 public function posts()
6 {
7 return $this->has_many('Post');
8 }
9 }
10
11 class Post extends Eloquent
12 {
13 public function author()
14 {
15 return $this->belongs_to('User', 'author_id');
16 }
17 }
Nice and simple, we have our User object which has_many posts, and our Post object whichbelongs_to a user.
15.4 Routes
Ok, we have our tables, we have models, and since we are now following my work flow let’screate placeholders for the routes we will need.
1 <?php
2
3 Route::get('/', function() {
4 // this is our list of posts
5 });
6
7 Route::get('view/(:num)', function($post) {
8 // this is our single view
9 });
10
11 Route::get('admin', function() {
12 // show the create new post form
13 });
14

The Blog Tutorial 89
15 Route::post('admin', function() {
16 // handle the create new post form
17 });
18
19 Route::get('login', function() {
20 // show the login form
21 });
22
23 Route::post('login', function() {
24 // handle the login form
25 });
26
27 Route::get('logout', function() {
28 // logout from the system
29 });
Right, those are done. As you can see I am using GET/POST to show and handle forms with thesame URI.
15.5 Views
Let’s start by creating a blade layout as a wrapper for our application.
templates/main.blade.php
1 <!DOCTYPE HTML>
2 <html lang="en-GB">
3 <head>
4 <meta charset="UTF-8">
5 <title>Wordpush</title>
6 {{ HTML::style('css/style.css') }}
7 </head>
8 <body>
9 <div class="header">
10 <h1>Wordpush</h1>
11 <h2>Code is Limmericks</h2>
12 </div>
13
14 <div class="content">
15 @yield('content')
16 </div>
17 </body>
18 </html>
As you can see we have a very simple HTML5 template, with a CSS style-sheet (which we willnot be covering, by all means use it to make your blog pretty.. but this is not a design book) anda yielded content area, for our page content.

The Blog Tutorial 90
We are going to need a login form, so our post authors can create new entries. I am going tosteal this view from the last tutorial, and hack it a bit to work with blade layouts. This is actuallygood practice, re-use anything you can and eventually you will have built up your own Laraveldevelopment toolkit.
pages/login.blade.php
1 @layout('templates.main')
2
3 @section('content')
4 {{ Form::open('login') }}
5
6 <!-- check for login errors flash var -->
7 @if (Session::has('login_errors'))
8 <span class="error">Username or password incorrect.</span>
9 @endif
10
11 <!-- username field -->
12 <p>{{ Form::label('username', 'Username') }}</p>
13 <p>{{ Form::text('username') }}</p>
14
15 <!-- password field -->
16 <p>{{ Form::label('password', 'Password') }}</p>
17 <p>{{ Form::password('password') }}</p>
18
19 <!-- submit button -->
20 <p>{{ Form::submit('Login') }}</p>
21
22 {{ Form::close() }}
23 @endsection
As you can see, our login form is using our newly created blade layout. Let’s also create our‘Create New Post’ form.
pages/new.blade.php
1 <?php
2
3 @layout('templates.main')
4
5 @section('content')
6 {{ Form::open('admin') }}
7
8 <!-- title field -->
9 <p>{{ Form::label('title', 'Title') }}</p>
10 {{ $errors->first('title', '<p class="error">:message</p>') }}
11 <p>{{ Form::text('title', Input::old('title')) }}</p>

The Blog Tutorial 91
12
13 <!-- body field -->
14 <p>{{ Form::label('body', 'Body') }}</p>
15 {{ $errors->first('body', '<p class="error">:message</p>') }}
16 <p>{{ Form::textarea('body', Input::old('body')) }}</p>
17
18 <!-- submit button -->
19 <p>{{ Form::submit('Create') }}</p>
20
21 {{ Form::close() }}
22 @endsection
15.6 Get Coding
Finally it’s time to get our hands dirty, let’s start with the authentication routine. First we needto link our login route to the login form view.
1 <?php
2
3 Route::get('login', function() {
4 return View::make('pages.login');
5 });
There, that wasn’t so hard. Now let’s handle the authentication in the POST route in the usualway.
1 <?php
2
3 Route::post('login', function() {
4
5 $userdata = array(
6 'username' => Input::get('username'),
7 'password' => Input::get('password')
8 );
9
10 if ( Auth::attempt($userdata) )
11 {
12 return Redirect::to('admin');
13 }
14 else
15 {
16 return Redirect::to('login')
17 ->with('login_errors', true);
18 }
19 });
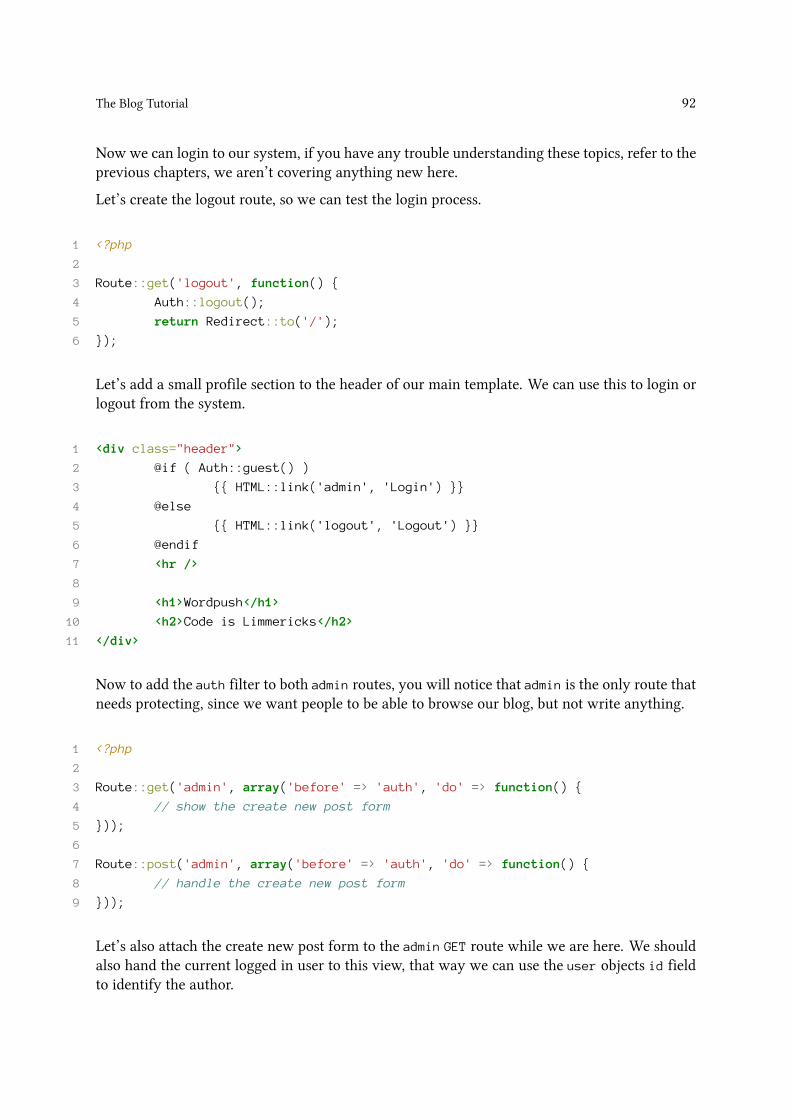
The Blog Tutorial 92
Now we can login to our system, if you have any trouble understanding these topics, refer to theprevious chapters, we aren’t covering anything new here.
Let’s create the logout route, so we can test the login process.
1 <?php
2
3 Route::get('logout', function() {
4 Auth::logout();
5 return Redirect::to('/');
6 });
Let’s add a small profile section to the header of our main template. We can use this to login orlogout from the system.
1 <div class="header">
2 @if ( Auth::guest() )
3 {{ HTML::link('admin', 'Login') }}
4 @else
5 {{ HTML::link('logout', 'Logout') }}
6 @endif
7 <hr />
8
9 <h1>Wordpush</h1>
10 <h2>Code is Limmericks</h2>
11 </div>
Now to add the auth filter to both admin routes, you will notice that admin is the only route thatneeds protecting, since we want people to be able to browse our blog, but not write anything.
1 <?php
2
3 Route::get('admin', array('before' => 'auth', 'do' => function() {
4 // show the create new post form
5 }));
6
7 Route::post('admin', array('before' => 'auth', 'do' => function() {
8 // handle the create new post form
9 }));
Let’s also attach the create new post form to the admin GET route while we are here. We shouldalso hand the current logged in user to this view, that way we can use the user objects id fieldto identify the author.
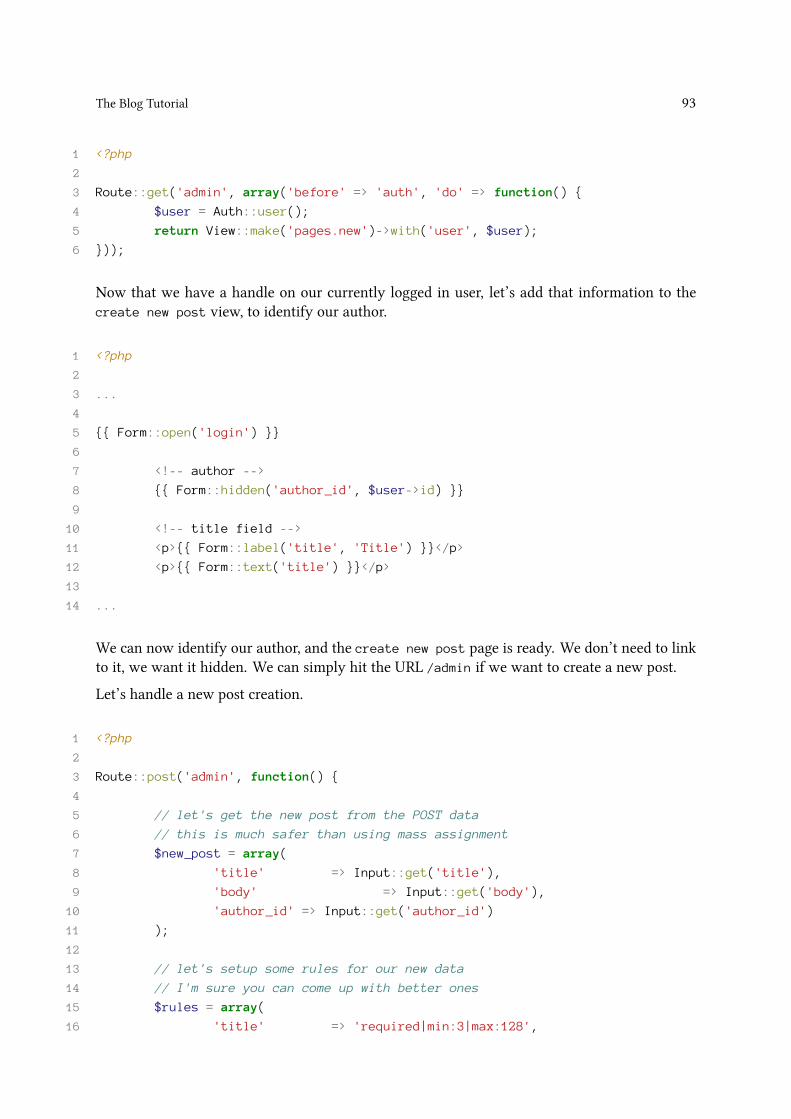
The Blog Tutorial 93
1 <?php
2
3 Route::get('admin', array('before' => 'auth', 'do' => function() {
4 $user = Auth::user();
5 return View::make('pages.new')->with('user', $user);
6 }));
Now that we have a handle on our currently logged in user, let’s add that information to thecreate new post view, to identify our author.
1 <?php
2
3 ...
4
5 {{ Form::open('login') }}
6
7 <!-- author -->
8 {{ Form::hidden('author_id', $user->id) }}
9
10 <!-- title field -->
11 <p>{{ Form::label('title', 'Title') }}</p>
12 <p>{{ Form::text('title') }}</p>
13
14 ...
We can now identify our author, and the create new post page is ready. We don’t need to linkto it, we want it hidden. We can simply hit the URL /admin if we want to create a new post.
Let’s handle a new post creation.
1 <?php
2
3 Route::post('admin', function() {
4
5 // let's get the new post from the POST data
6 // this is much safer than using mass assignment
7 $new_post = array(
8 'title' => Input::get('title'),
9 'body' => Input::get('body'),
10 'author_id' => Input::get('author_id')
11 );
12
13 // let's setup some rules for our new data
14 // I'm sure you can come up with better ones
15 $rules = array(
16 'title' => 'required|min:3|max:128',

The Blog Tutorial 94
17 'body' => 'required'
18 );
19
20 // make the validator
21 $v = Validator::make($new_post, $rules);
22
23 if ( $v->fails() )
24 {
25 // redirect back to the form with
26 // errors, input and our currently
27 // logged in user
28 return Redirect::to('admin')
29 ->with('user', Auth::user())
30 ->with_errors($v)
31 ->with_input();
32 }
33
34 // create the new post
35 $post = new Post($new_post);
36 $post->save();
37
38 // redirect to viewing our new post
39 return Redirect::to('view/'.$post->id);
40
41 });
Now we should be able to create some blog posts, go ahead! Write a few articles so we havesomething to view in our list all posts view.
Speaking of which, let’s get to work on that.
1 <?php
2
3 Route::get('/', function() {
4 // lets get our posts and eager load the
5 // author
6 $posts = Post::with('author')->all();
7
8 return View::make('pages.home')
9 ->with('posts', $posts);
10 });
We also need a view to list all of our blog posts, here we go..
pages/home.blade.php
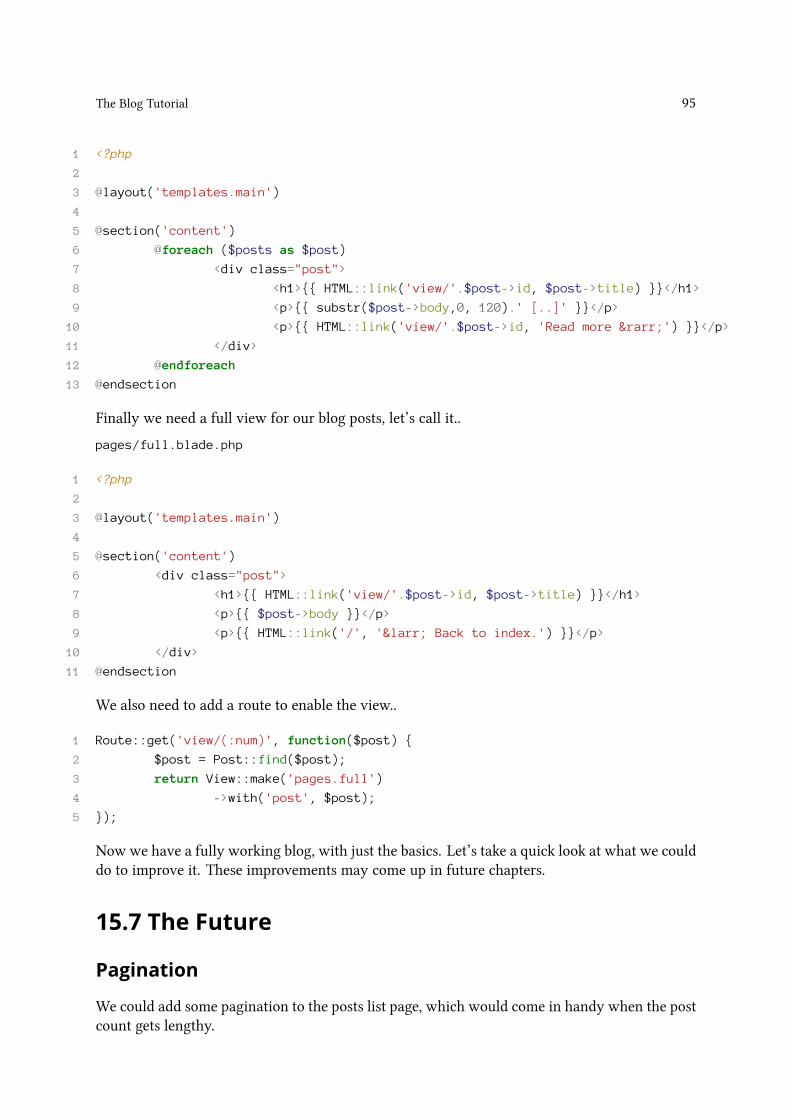
The Blog Tutorial 95
1 <?php
2
3 @layout('templates.main')
4
5 @section('content')
6 @foreach ($posts as $post)
7 <div class="post">
8 <h1>{{ HTML::link('view/'.$post->id, $post->title) }}</h1>
9 <p>{{ substr($post->body,0, 120).' [..]' }}</p>
10 <p>{{ HTML::link('view/'.$post->id, 'Read more →') }}</p>
11 </div>
12 @endforeach
13 @endsection
Finally we need a full view for our blog posts, let’s call it..
pages/full.blade.php
1 <?php
2
3 @layout('templates.main')
4
5 @section('content')
6 <div class="post">
7 <h1>{{ HTML::link('view/'.$post->id, $post->title) }}</h1>
8 <p>{{ $post->body }}</p>
9 <p>{{ HTML::link('/', '← Back to index.') }}</p>
10 </div>
11 @endsection
We also need to add a route to enable the view..
1 Route::get('view/(:num)', function($post) {
2 $post = Post::find($post);
3 return View::make('pages.full')
4 ->with('post', $post);
5 });
Now we have a fully working blog, with just the basics. Let’s take a quick look at what we coulddo to improve it. These improvements may come up in future chapters.
15.7 The Future
Pagination
We could add some pagination to the posts list page, which would come in handy when the postcount gets lengthy.

The Blog Tutorial 96
Edit / Delete Posts
Adding the functionality to edit or remove posts wouldn’t be a lot of work, and would allow formaintenance to be performed on the blog.
Post Slugs
We could create post slugs to use instead of post ids in our URLs, this will result in better searchengine optimization.

16 Unit TestingUnit testing can be a very useful tool for aweb developer, it can be used to checkwhether adding afeature, or modifying the codebase in some way has accidentally altered another feature, causingit to fail. Some developers even practice Test-Driven development, where tests are written beforethe code, to ensure that the code being written meets all requirements.
Laravel provides the tests directory to contain all of your applications tests, and even adds ahelper command to Artisan, the CLI interface for running PHPUnit test cases.
Not only can the application be tested, but bundles can also contain their own test suites. In factLaravel has a bundle devoted to testing the core features of the framework, it can be found inthe Laravel tests github respository¹.
16.1 Installation
No we’re not going to cover the Laravel installation again!
Laravel uses the PHPUnit software to execute its tests, before we can use the unit testing featuresof Laravel we will need to install this software.
Installation of PHPUnit can vary from operating system to operating system, therefore I think itwould be best to look at the official documentation for PHP Unit to find installation instructions.You will find the installation page here².
16.2 Creating a Test
Let’s take a look at a test case, fortunately Laravel has included an example test case for us!
1 <?php
2
3 // application/tests/example.test.php
4
5 class TestExample extends PHPUnit_Framework_TestCase {
6
7 /**
8 * Test that a given condition is met.
9 *
10 * @return void
11 */
12 public function testSomethingIsTrue()
13 {
14 $this->assertTrue(true);
¹https://github.com/laravel/tests²http://www.phpunit.de/manual/current/en/installation.html
97

Unit Testing 98
15 }
16
17 }
As you can see we create our test cases in a file with the extension test.php, the name of theclass must start with the word Test and it must extend the class PHPUnit_Framework_TestCasethese are limitations set not by Laravel, but by the PHPUnit software.
A PHPUnit test case may contain any number of tests, as camel-cased actions, prefixed with theword test. Our tests can contain a number of different assertions, that decide whether our testswill pass or fail.
A full list of assertations can be found on the PHPUnit documentation website³.
16.3 Running Tests
Tests can be ran using the Artisan command line interface, simply use the test command to runall test cases.
1 php artisan test
and the result..
1 PHPUnit 3.6.10 by Sebastian Bergmann.
2
3 Configuration read from /home/daylerees/www/laravel/develop/phpunit.xml
4
5 .
6
7 Time: 0 seconds, Memory: 6.25Mb
8
9 OK (1 test, 1 assertion)
With the OK part appearing in bright green to show us that the tests have passed.
Of course we knew that the test would succeed because we are using the assertTrue() methodto check the value true. There is no way it could fail.
Let’s bully the test so that it will fail, we will simply change the parameter to false.
1 ...
2 $this->assertTrue(false);
3 ...
and the result :
³http://www.phpunit.de/manual/current/en/writing-tests-for-phpunit.html#writing-tests-for-phpunit.assertions
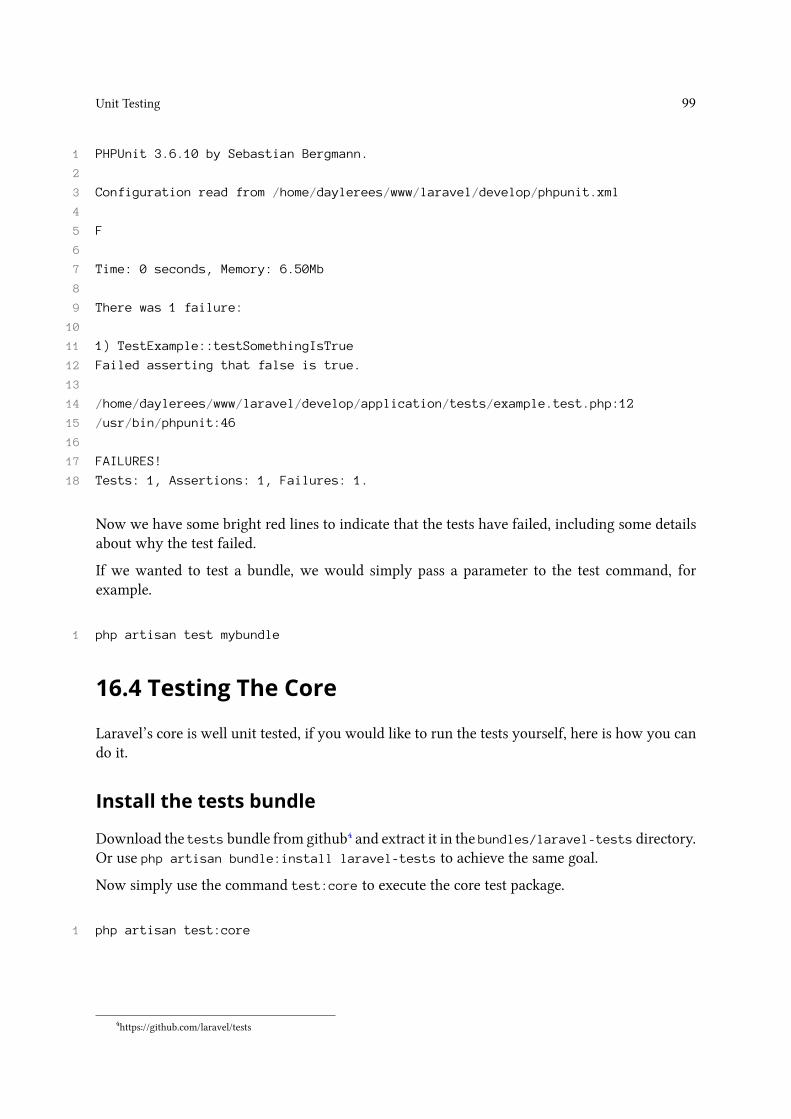
Unit Testing 99
1 PHPUnit 3.6.10 by Sebastian Bergmann.
2
3 Configuration read from /home/daylerees/www/laravel/develop/phpunit.xml
4
5 F
6
7 Time: 0 seconds, Memory: 6.50Mb
8
9 There was 1 failure:
10
11 1) TestExample::testSomethingIsTrue
12 Failed asserting that false is true.
13
14 /home/daylerees/www/laravel/develop/application/tests/example.test.php:12
15 /usr/bin/phpunit:46
16
17 FAILURES!
18 Tests: 1, Assertions: 1, Failures: 1.
Now we have some bright red lines to indicate that the tests have failed, including some detailsabout why the test failed.
If we wanted to test a bundle, we would simply pass a parameter to the test command, forexample.
1 php artisan test mybundle
16.4 Testing The Core
Laravel’s core is well unit tested, if you would like to run the tests yourself, here is how you cando it.
Install the tests bundle
Download the tests bundle from github⁴ and extract it in the bundles/laravel-tests directory.Or use php artisan bundle:install laravel-tests to achieve the same goal.
Now simply use the command test:core to execute the core test package.
1 php artisan test:core
⁴https://github.com/laravel/tests
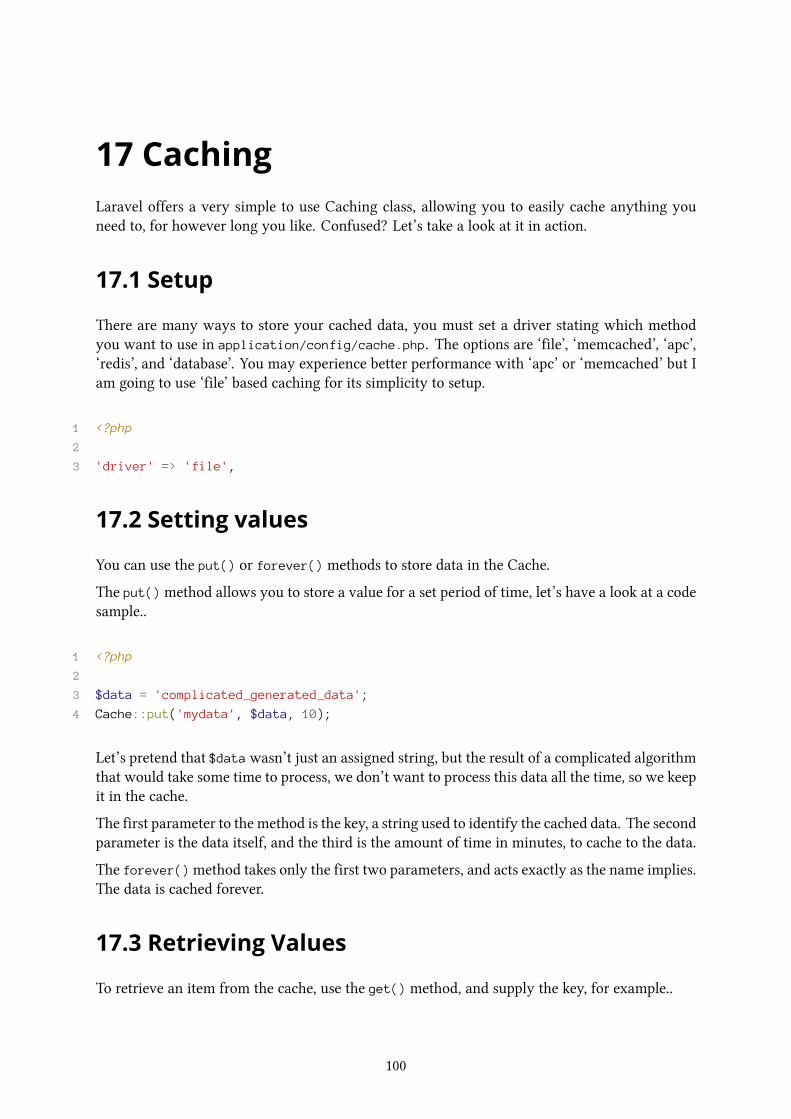
17 CachingLaravel offers a very simple to use Caching class, allowing you to easily cache anything youneed to, for however long you like. Confused? Let’s take a look at it in action.
17.1 Setup
There are many ways to store your cached data, you must set a driver stating which methodyou want to use in application/config/cache.php. The options are ‘file’, ‘memcached’, ‘apc’,‘redis’, and ‘database’. You may experience better performance with ‘apc’ or ‘memcached’ but Iam going to use ‘file’ based caching for its simplicity to setup.
1 <?php
2
3 'driver' => 'file',
17.2 Setting values
You can use the put() or forever() methods to store data in the Cache.
The put()method allows you to store a value for a set period of time, let’s have a look at a codesample..
1 <?php
2
3 $data = 'complicated_generated_data';
4 Cache::put('mydata', $data, 10);
Let’s pretend that $datawasn’t just an assigned string, but the result of a complicated algorithmthat would take some time to process, we don’t want to process this data all the time, so we keepit in the cache.
The first parameter to the method is the key, a string used to identify the cached data. The secondparameter is the data itself, and the third is the amount of time in minutes, to cache to the data.
The forever()method takes only the first two parameters, and acts exactly as the name implies.The data is cached forever.
17.3 Retrieving Values
To retrieve an item from the cache, use the get() method, and supply the key, for example..
100

Caching 101
1 <?php
2
3 $data = Cache::get('mydata');
By default, if the cached item does not exist, or has expired already, the method will return NULL.However, you can pass an optional second parameter to provide an alternate default value.
1 <?php
2
3 $data = Cache::get('mydata', 'complicated data');
You can also pass a closures as the second parameter, and the value returned by the closure willbe used if the cache data does not exist. The closure will only be executed if the key does notexist.
17.4 A better way
You might find yourself using the has() method, to check if a cached item exists, and fallinginto this familiar pattern..
1 <?php
2
3 if (! Cache::has('mydata'))
4 {
5 $data = 'complicated_generated_data';
6 Cache::put('mydata', $data, 10);
7 }
8
9 return $data;
However, you can use the remember()method as a much more elegant solution. The remember()method will return the value if it exists in the cache, or it will store and return the value of thesecond parameter for a defined length of time, for example..
1 <?php
2
3 return Cache::remember('mydata', function () {
4 return 'complicated_generated_data';
5 }, 10);
Of course the closure will not be executed unless the key does not exist, or has expired.
Have fun using the Cache!

18 Autoloading ClassesWith many frameworks, knowing where to put your files, and how to load class definitions canbe a tricky topic, however with Laravel there are no strict rules applied to the layout of yourapplication. Laravel’s auto loader is a clever library which simplifies the loading of classes withvarious naming or sub-folder conventions. It is flexible enough to handle the addition of complexlibraries or packages with ease. Let’s have a look at the functions we have available.
18.1 Mappings
Mappings are the simplest method of loading classes, you can pass the auto loader an arrayof Class name to file location key-value pairs and Laravel will handle the rest. It’s efficientautoloader will only load the required class definition when the class is used. By default theAutoloader mappings are set within the start.php file, you can however use the class fromanywhere, but the start.php file is a good choice due to it being loaded early. Let’s take a lookat a mapping..
1 <?php
2
3 // application/start.php
4
5 Autoloader::map(array(
6 'Cloud' => path('app').'libraries/ff/cloud.php',
7 'Tifa' => path('app').'libraries/ff/tifa.php',
8 ));
The path('app') is a handy helper method to retrieve the absolute path to your projectsapplication folder. You can also retrieve absolute paths to other folders using the path()
method, here is a short list.
Method Directory
path(‘app’) applicationpath(‘sys’) laravelpath(‘bundle’) bundlespath(‘storage’) storage
In the mapping example, you see that we specify our Class name as the array index, and the fileand location as the value, now if we wish to use the Cloud class..
1 <?php
2
3 $c = new Cloud();
102

Autoloading Classes 103
Laravel’s autoloader will ‘detect’ (php magic methods) that a class definition needs to be loaded,it will look at the mapping definitions to see if our Class exists there, and proceed to include()
the source.
18.2 Directory Mapping
If you have a number of Classes which follow the Class name to lower-case file name pattern,you may want to specify the directory, rather than each file individually. You can do this byusing the directories()method of the Autoloader, however this time you need only supply anarray of values as locations and file names. For example..
1 <?php
2
3 Autoloader::directories(array(
4 path('app').'smurfs'
5 ));
Now all of our classes inside the application/smurfs directory will be auto loaded, so long astheir file name matches the lower-case of their Class name.
18.3 Namespace Mapping
PHP 5.3 saw the arrival of namespacing. Although far from perfect, namespacing allow thePSR-0 convention of loading files. Under the PSR-0, namespaces are used to indicate directorystructure, and class names are used to identify the file name, therefore we can assume that..
1 <?php namespace Paladin\Mage;
2
3 class Princess
4 {
5 // so pretty
6 }
will live in the file..
paladin/mage/princess.php
Before we can use this convention, Laravel needs to know where our root namespace folder is.We can help it find our files by using the namespaces() method of the Autoloader class, forexample..
1 <?php
2
3 Autoloader::namespaces(array(
4 'Paladin' => path('libraries').'paladin'
5 ));
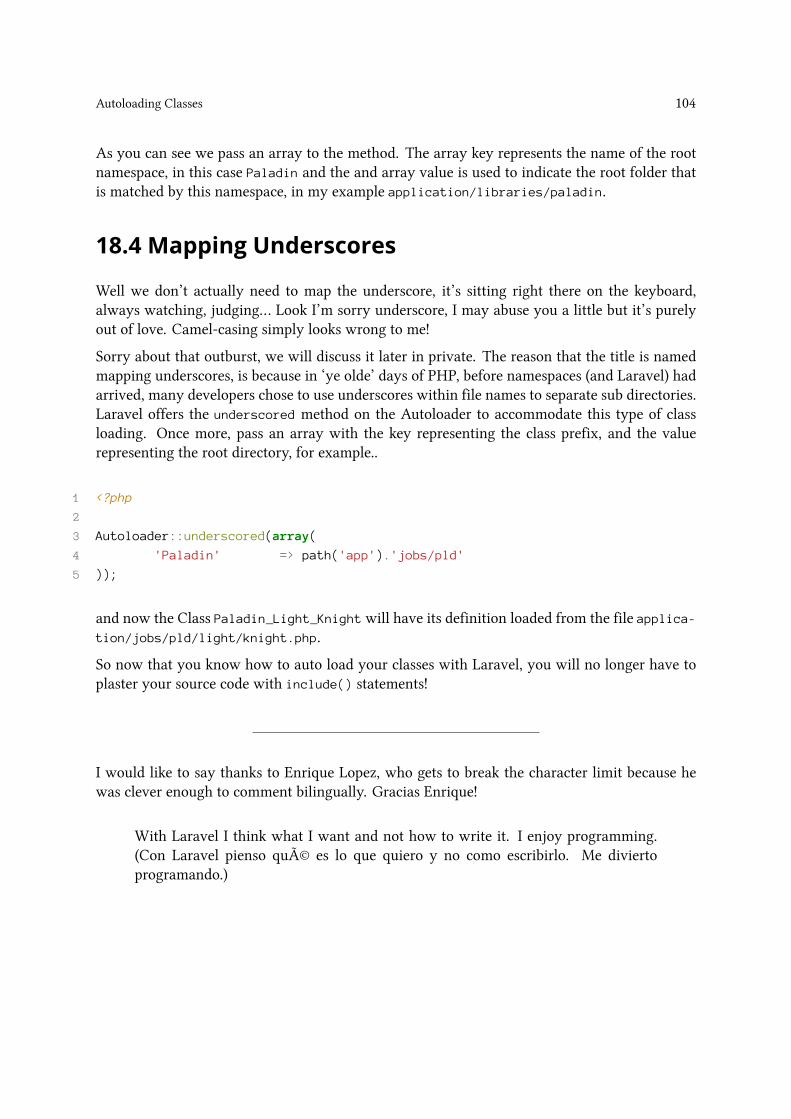
Autoloading Classes 104
As you can see we pass an array to the method. The array key represents the name of the rootnamespace, in this case Paladin and the and array value is used to indicate the root folder thatis matched by this namespace, in my example application/libraries/paladin.
18.4 Mapping Underscores
Well we don’t actually need to map the underscore, it’s sitting right there on the keyboard,always watching, judging… Look I’m sorry underscore, I may abuse you a little but it’s purelyout of love. Camel-casing simply looks wrong to me!
Sorry about that outburst, we will discuss it later in private. The reason that the title is namedmapping underscores, is because in ‘ye olde’ days of PHP, before namespaces (and Laravel) hadarrived, many developers chose to use underscores within file names to separate sub directories.Laravel offers the underscored method on the Autoloader to accommodate this type of classloading. Once more, pass an array with the key representing the class prefix, and the valuerepresenting the root directory, for example..
1 <?php
2
3 Autoloader::underscored(array(
4 'Paladin' => path('app').'jobs/pld'
5 ));
and now the Class Paladin_Light_Knight will have its definition loaded from the file applica-tion/jobs/pld/light/knight.php.
So now that you know how to auto load your classes with Laravel, you will no longer have toplaster your source code with include() statements!
I would like to say thanks to Enrique Lopez, who gets to break the character limit because hewas clever enough to comment bilingually. Gracias Enrique!
With Laravel I think what I want and not how to write it. I enjoy programming.(Con Laravel pienso qué es lo que quiero y no como escribirlo. Me diviertoprogramando.)
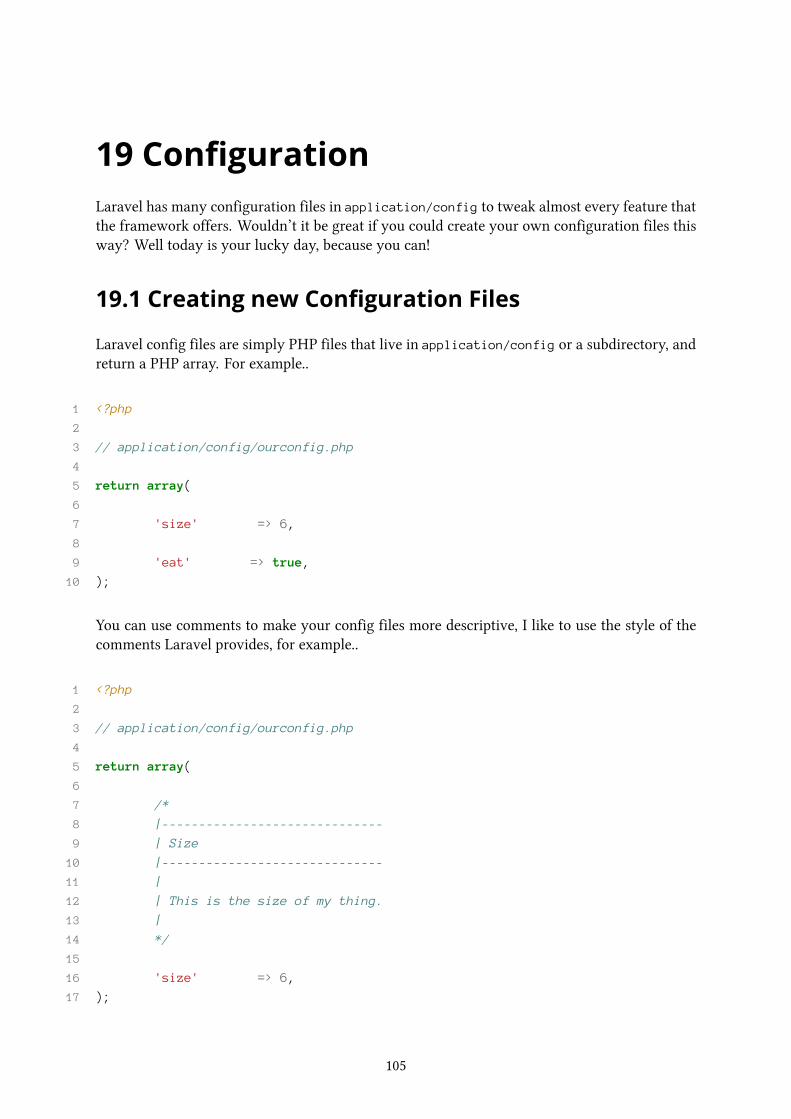
19 ConfigurationLaravel has many configuration files in application/config to tweak almost every feature thatthe framework offers. Wouldn’t it be great if you could create your own configuration files thisway? Well today is your lucky day, because you can!
19.1 Creating new Configuration Files
Laravel config files are simply PHP files that live in application/config or a subdirectory, andreturn a PHP array. For example..
1 <?php
2
3 // application/config/ourconfig.php
4
5 return array(
6
7 'size' => 6,
8
9 'eat' => true,
10 );
You can use comments to make your config files more descriptive, I like to use the style of thecomments Laravel provides, for example..
1 <?php
2
3 // application/config/ourconfig.php
4
5 return array(
6
7 /*
8 |------------------------------
9 | Size
10 |------------------------------
11 |
12 | This is the size of my thing.
13 |
14 */
15
16 'size' => 6,
17 );
105
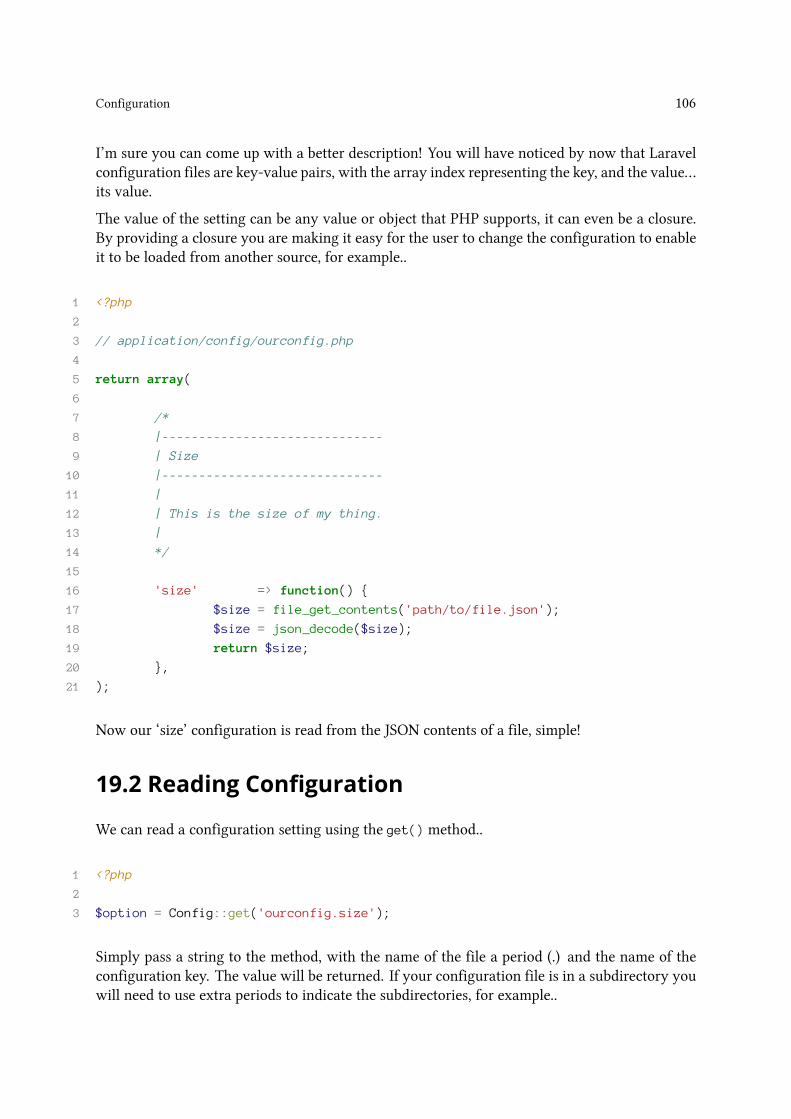
Configuration 106
I’m sure you can come up with a better description! You will have noticed by now that Laravelconfiguration files are key-value pairs, with the array index representing the key, and the value…its value.
The value of the setting can be any value or object that PHP supports, it can even be a closure.By providing a closure you are making it easy for the user to change the configuration to enableit to be loaded from another source, for example..
1 <?php
2
3 // application/config/ourconfig.php
4
5 return array(
6
7 /*
8 |------------------------------
9 | Size
10 |------------------------------
11 |
12 | This is the size of my thing.
13 |
14 */
15
16 'size' => function() {
17 $size = file_get_contents('path/to/file.json');
18 $size = json_decode($size);
19 return $size;
20 },
21 );
Now our ‘size’ configuration is read from the JSON contents of a file, simple!
19.2 Reading Configuration
We can read a configuration setting using the get() method..
1 <?php
2
3 $option = Config::get('ourconfig.size');
Simply pass a string to the method, with the name of the file a period (.) and the name of theconfiguration key. The value will be returned. If your configuration file is in a subdirectory youwill need to use extra periods to indicate the subdirectories, for example..
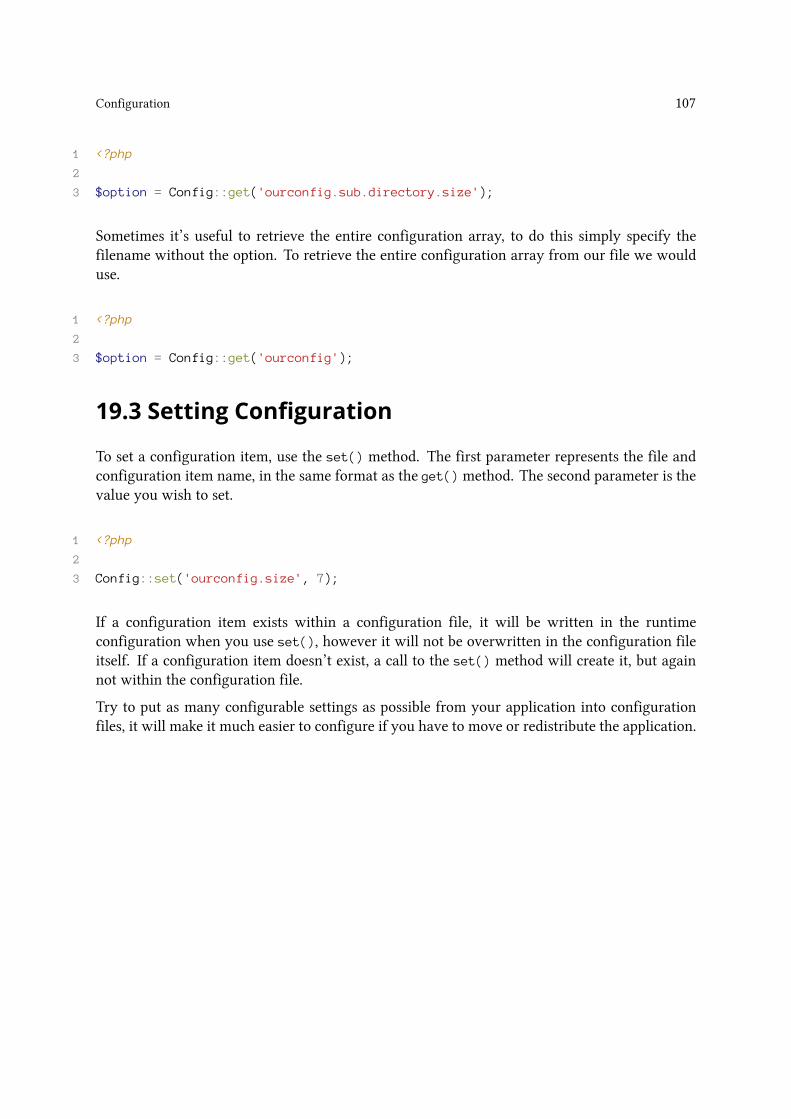
Configuration 107
1 <?php
2
3 $option = Config::get('ourconfig.sub.directory.size');
Sometimes it’s useful to retrieve the entire configuration array, to do this simply specify thefilename without the option. To retrieve the entire configuration array from our file we woulduse.
1 <?php
2
3 $option = Config::get('ourconfig');
19.3 Setting Configuration
To set a configuration item, use the set() method. The first parameter represents the file andconfiguration item name, in the same format as the get() method. The second parameter is thevalue you wish to set.
1 <?php
2
3 Config::set('ourconfig.size', 7);
If a configuration item exists within a configuration file, it will be written in the runtimeconfiguration when you use set(), however it will not be overwritten in the configuration fileitself. If a configuration item doesn’t exist, a call to the set() method will create it, but againnot within the configuration file.
Try to put as many configurable settings as possible from your application into configurationfiles, it will make it much easier to configure if you have to move or redistribute the application.
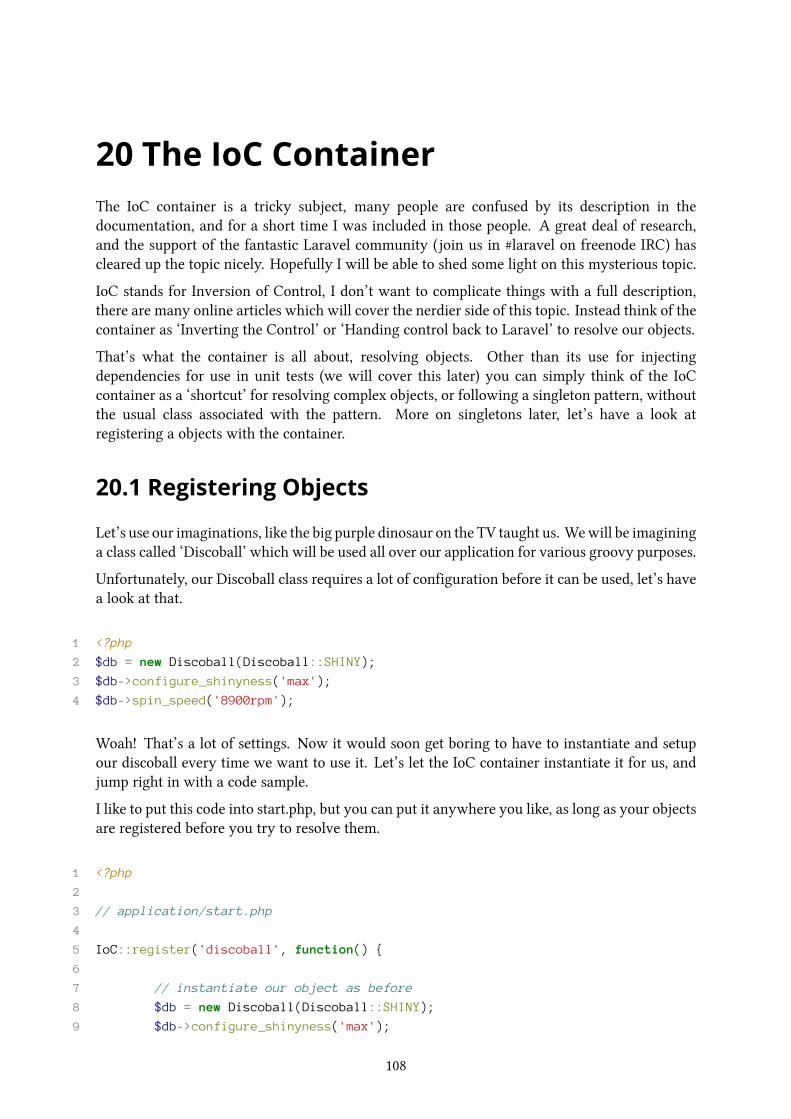
20 The IoC ContainerThe IoC container is a tricky subject, many people are confused by its description in thedocumentation, and for a short time I was included in those people. A great deal of research,and the support of the fantastic Laravel community (join us in #laravel on freenode IRC) hascleared up the topic nicely. Hopefully I will be able to shed some light on this mysterious topic.
IoC stands for Inversion of Control, I don’t want to complicate things with a full description,there are many online articles which will cover the nerdier side of this topic. Instead think of thecontainer as ‘Inverting the Control’ or ‘Handing control back to Laravel’ to resolve our objects.
That’s what the container is all about, resolving objects. Other than its use for injectingdependencies for use in unit tests (we will cover this later) you can simply think of the IoCcontainer as a ‘shortcut’ for resolving complex objects, or following a singleton pattern, withoutthe usual class associated with the pattern. More on singletons later, let’s have a look atregistering a objects with the container.
20.1 Registering Objects
Let’s use our imaginations, like the big purple dinosaur on the TV taught us. Wewill be imagininga class called ‘Discoball’ which will be used all over our application for various groovy purposes.
Unfortunately, our Discoball class requires a lot of configuration before it can be used, let’s havea look at that.
1 <?php
2 $db = new Discoball(Discoball::SHINY);
3 $db->configure_shinyness('max');
4 $db->spin_speed('8900rpm');
Woah! That’s a lot of settings. Now it would soon get boring to have to instantiate and setupour discoball every time we want to use it. Let’s let the IoC container instantiate it for us, andjump right in with a code sample.
I like to put this code into start.php, but you can put it anywhere you like, as long as your objectsare registered before you try to resolve them.
1 <?php
2
3 // application/start.php
4
5 IoC::register('discoball', function() {
6
7 // instantiate our object as before
8 $db = new Discoball(Discoball::SHINY);
9 $db->configure_shinyness('max');
108

The IoC Container 109
10 $db->spin_speed('8900rpm');
11
12 // hand the object as the result of the closure
13 return $db;
14 });
We use the IoC::register() method to register our object with the controller. The firstparameter is a string that will be used to resolve the object later, I used the word ‘discoball’as it made the most sense to me. The second parameter is a closure that we can use to instantiateour object.
Inside the closure you will see the familiar discoball configuration code, and we will return theconfigured discoball object from the closure.
Great! Our object is registered, and that’s all there is to the Io… just kidding. Let’s have a lookat how we can use our registered object.
20.2 Resolving Objects
Now we have our disco ball registered, let’s see how we can get it back. Let’s make a call toresolve.
1 <?php
2 $db = IoC::resolve('discoball');
And that’s it! Instead of creating and configuring a new instance of our discoball each time, wemake a call to the resolve() method, passing the string that identifies the object and the IoCcontainer will execute the closure we created in the first section, and return our instantiated andconfigured discoball object.
Handy, and saves many lines of code!
You can register and resolve as many objects as you want, go ahead and try it. For now letsmove on to singletons.
20.3 Singletons
Resolving our discoball is useful, but what if our discoball was expensive on resources toinstantiate, or should only be instantiated once? The register method will not be useful in thiscase, since the closure is executed with every call to resolve() and a new instance of the objectis returned each time. This is where the singleton design pattern comes in.
The singleton design pattern involves writing your classes in a certain way, so that they can becalled using a static method, and will always return the same instance of itself. This way theclass is instantiated only once.
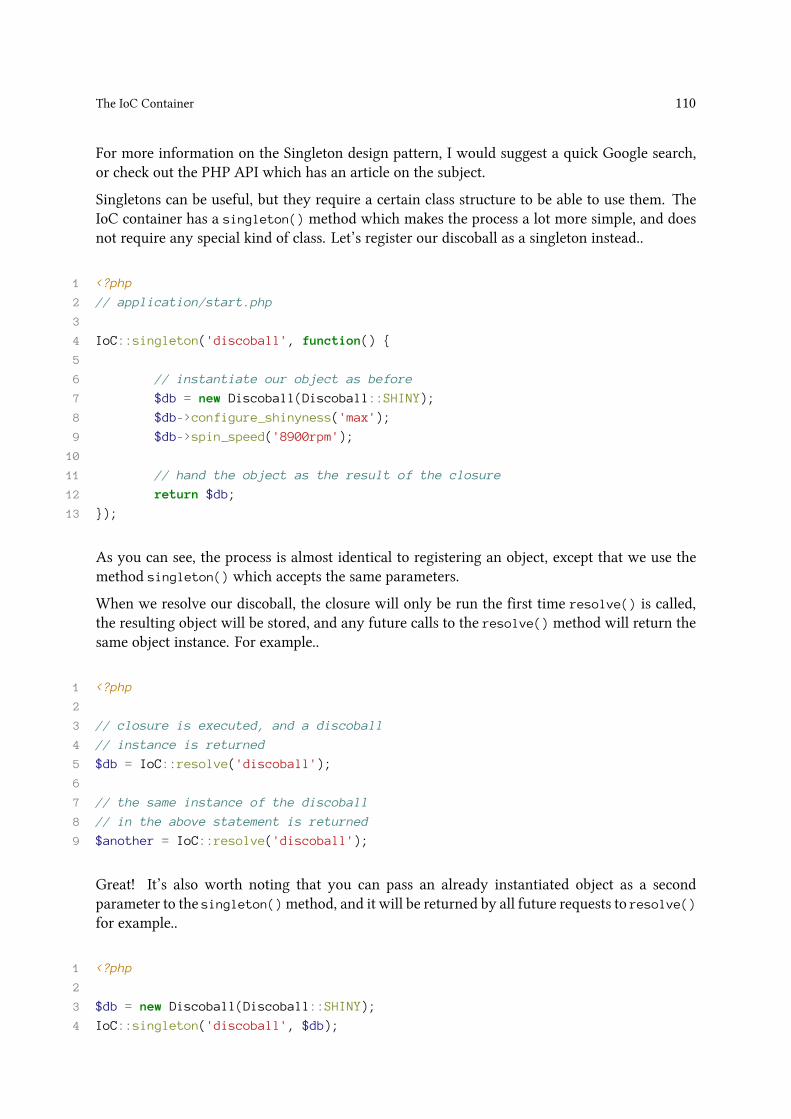
The IoC Container 110
For more information on the Singleton design pattern, I would suggest a quick Google search,or check out the PHP API which has an article on the subject.
Singletons can be useful, but they require a certain class structure to be able to use them. TheIoC container has a singleton() method which makes the process a lot more simple, and doesnot require any special kind of class. Let’s register our discoball as a singleton instead..
1 <?php
2 // application/start.php
3
4 IoC::singleton('discoball', function() {
5
6 // instantiate our object as before
7 $db = new Discoball(Discoball::SHINY);
8 $db->configure_shinyness('max');
9 $db->spin_speed('8900rpm');
10
11 // hand the object as the result of the closure
12 return $db;
13 });
As you can see, the process is almost identical to registering an object, except that we use themethod singleton() which accepts the same parameters.
When we resolve our discoball, the closure will only be run the first time resolve() is called,the resulting object will be stored, and any future calls to the resolve() method will return thesame object instance. For example..
1 <?php
2
3 // closure is executed, and a discoball
4 // instance is returned
5 $db = IoC::resolve('discoball');
6
7 // the same instance of the discoball
8 // in the above statement is returned
9 $another = IoC::resolve('discoball');
Great! It’s also worth noting that you can pass an already instantiated object as a secondparameter to the singleton()method, and it will be returned by all future requests to resolve()for example..
1 <?php
2
3 $db = new Discoball(Discoball::SHINY);
4 IoC::singleton('discoball', $db);
The IoC Container 111
5
6 // get hold of our discoball
7 $ball = IoC::resolve('discoball');
In a future chapter we will discuss using the IoC container and dependency injection incombination with unit testing.
Thanks to Andrew Smith and Julien Tant (AoSix) for buying the book. Julien had the followingto say..
Hey Dayle, thanks a lot for this book, the Laravel framework is just awesome ! Ifany french guys read this, visit http://www.laravel.fr/ !
Thanks guys, and great work translating the tutorials to French!
Also thanks to Proger_XP for buying the book and translating my tutorials to Russian, whichare available at Laravel.ru. Great work!
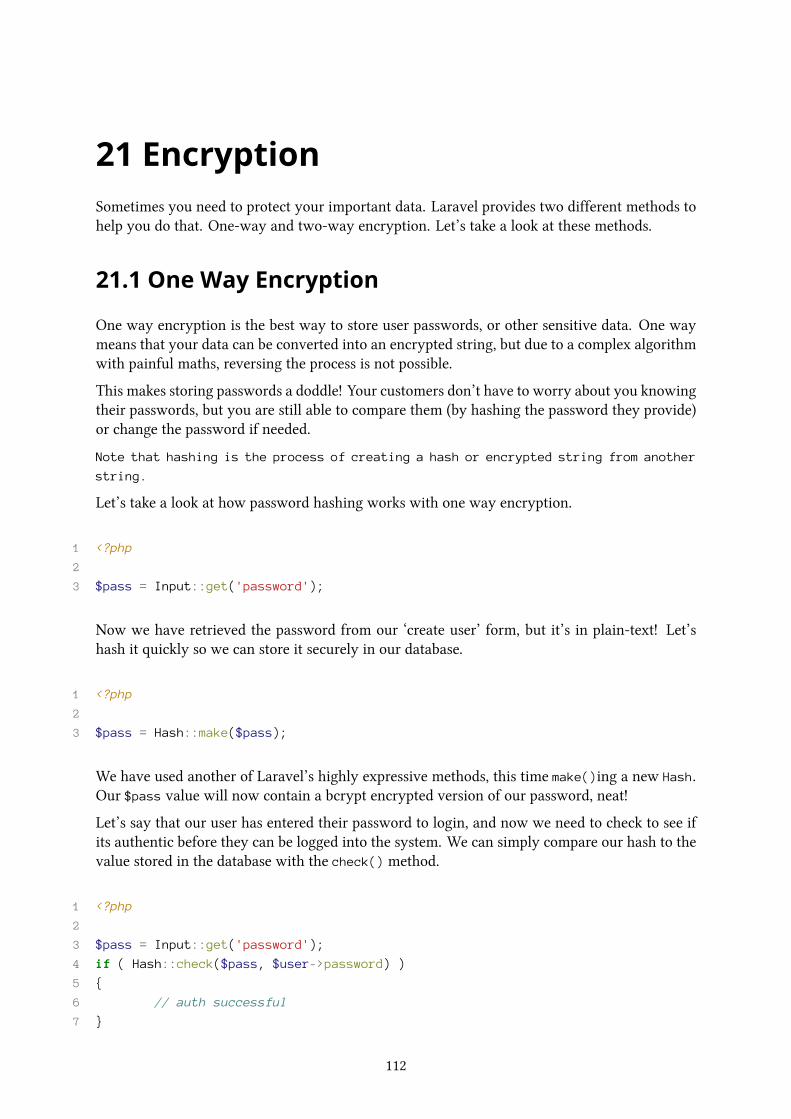
21 EncryptionSometimes you need to protect your important data. Laravel provides two different methods tohelp you do that. One-way and two-way encryption. Let’s take a look at these methods.
21.1 One Way Encryption
One way encryption is the best way to store user passwords, or other sensitive data. One waymeans that your data can be converted into an encrypted string, but due to a complex algorithmwith painful maths, reversing the process is not possible.
This makes storing passwords a doddle! Your customers don’t have to worry about you knowingtheir passwords, but you are still able to compare them (by hashing the password they provide)or change the password if needed.
Note that hashing is the process of creating a hash or encrypted string from another
string.
Let’s take a look at how password hashing works with one way encryption.
1 <?php
2
3 $pass = Input::get('password');
Now we have retrieved the password from our ‘create user’ form, but it’s in plain-text! Let’shash it quickly so we can store it securely in our database.
1 <?php
2
3 $pass = Hash::make($pass);
We have used another of Laravel’s highly expressive methods, this time make()ing a new Hash.Our $pass value will now contain a bcrypt encrypted version of our password, neat!
Let’s say that our user has entered their password to login, and now we need to check to see ifits authentic before they can be logged into the system. We can simply compare our hash to thevalue stored in the database with the check() method.
1 <?php
2
3 $pass = Input::get('password');
4 if ( Hash::check($pass, $user->password) )
5 {
6 // auth successful
7 }
112
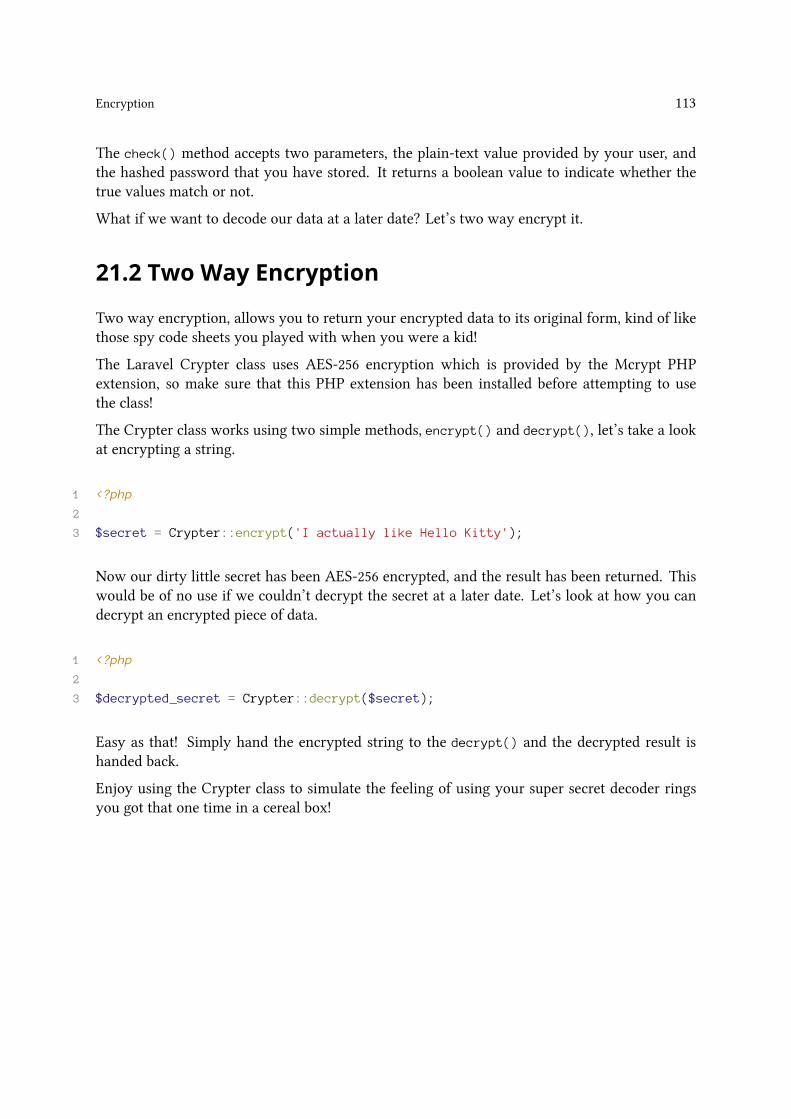
Encryption 113
The check() method accepts two parameters, the plain-text value provided by your user, andthe hashed password that you have stored. It returns a boolean value to indicate whether thetrue values match or not.
What if we want to decode our data at a later date? Let’s two way encrypt it.
21.2 Two Way Encryption
Two way encryption, allows you to return your encrypted data to its original form, kind of likethose spy code sheets you played with when you were a kid!
The Laravel Crypter class uses AES-256 encryption which is provided by the Mcrypt PHPextension, so make sure that this PHP extension has been installed before attempting to usethe class!
The Crypter class works using two simple methods, encrypt() and decrypt(), let’s take a lookat encrypting a string.
1 <?php
2
3 $secret = Crypter::encrypt('I actually like Hello Kitty');
Now our dirty little secret has been AES-256 encrypted, and the result has been returned. Thiswould be of no use if we couldn’t decrypt the secret at a later date. Let’s look at how you candecrypt an encrypted piece of data.
1 <?php
2
3 $decrypted_secret = Crypter::decrypt($secret);
Easy as that! Simply hand the encrypted string to the decrypt() and the decrypted result ishanded back.
Enjoy using the Crypter class to simulate the feeling of using your super secret decoder ringsyou got that one time in a cereal box!
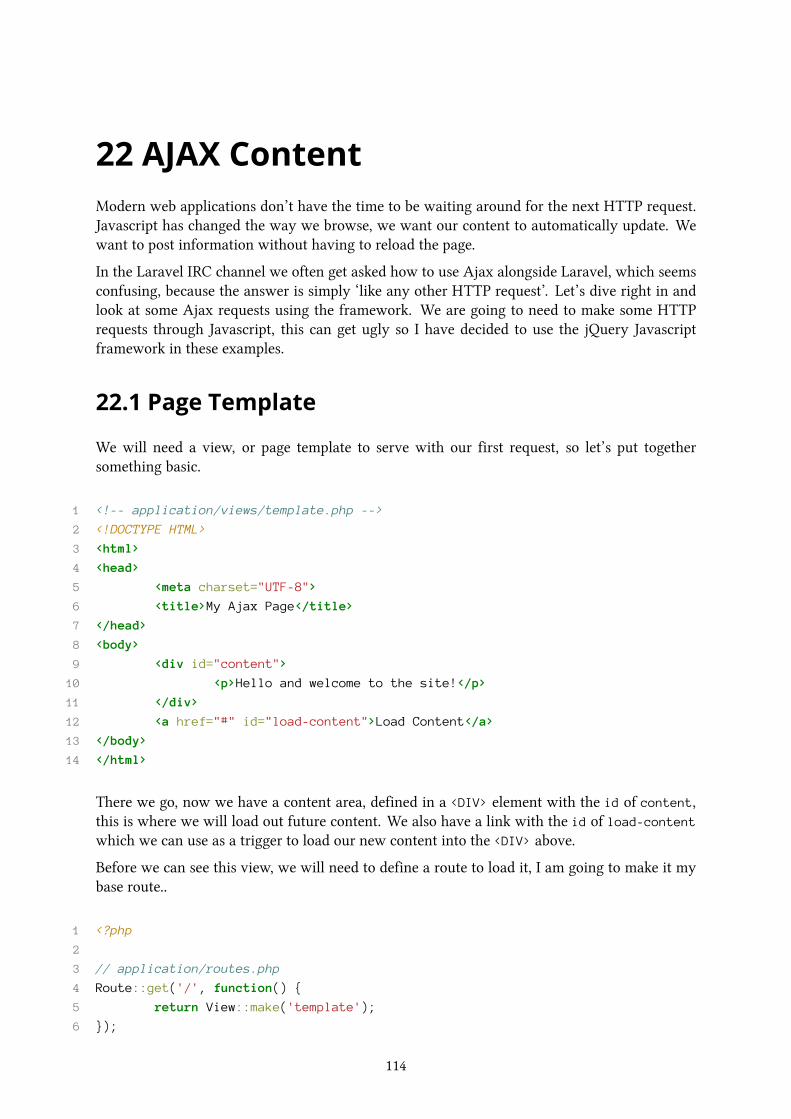
22 AJAX ContentModern web applications don’t have the time to be waiting around for the next HTTP request.Javascript has changed the way we browse, we want our content to automatically update. Wewant to post information without having to reload the page.
In the Laravel IRC channel we often get asked how to use Ajax alongside Laravel, which seemsconfusing, because the answer is simply ‘like any other HTTP request’. Let’s dive right in andlook at some Ajax requests using the framework. We are going to need to make some HTTPrequests through Javascript, this can get ugly so I have decided to use the jQuery Javascriptframework in these examples.
22.1 Page Template
We will need a view, or page template to serve with our first request, so let’s put togethersomething basic.
1 <!-- application/views/template.php -->
2 <!DOCTYPE HTML>
3 <html>
4 <head>
5 <meta charset="UTF-8">
6 <title>My Ajax Page</title>
7 </head>
8 <body>
9 <div id="content">
10 <p>Hello and welcome to the site!</p>
11 </div>
12 <a href="#" id="load-content">Load Content</a>
13 </body>
14 </html>
There we go, now we have a content area, defined in a <DIV> element with the id of content,this is where we will load out future content. We also have a link with the id of load-contentwhich we can use as a trigger to load our new content into the <DIV> above.
Before we can see this view, we will need to define a route to load it, I am going to make it mybase route..
1 <?php
2
3 // application/routes.php
4 Route::get('/', function() {
5 return View::make('template');
6 });
114
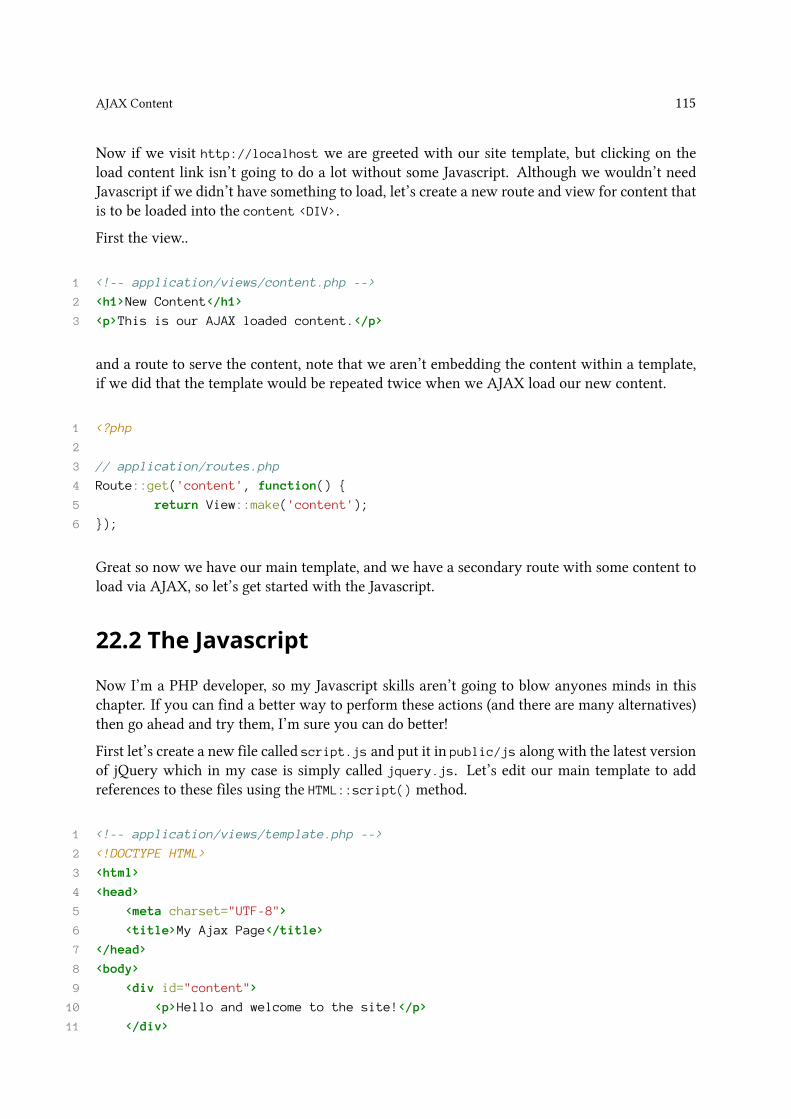
AJAX Content 115
Now if we visit http://localhost we are greeted with our site template, but clicking on theload content link isn’t going to do a lot without some Javascript. Although we wouldn’t needJavascript if we didn’t have something to load, let’s create a new route and view for content thatis to be loaded into the content <DIV>.
First the view..
1 <!-- application/views/content.php -->
2 <h1>New Content</h1>
3 <p>This is our AJAX loaded content.</p>
and a route to serve the content, note that we aren’t embedding the content within a template,if we did that the template would be repeated twice when we AJAX load our new content.
1 <?php
2
3 // application/routes.php
4 Route::get('content', function() {
5 return View::make('content');
6 });
Great so now we have our main template, and we have a secondary route with some content toload via AJAX, so let’s get started with the Javascript.
22.2 The Javascript
Now I’m a PHP developer, so my Javascript skills aren’t going to blow anyones minds in thischapter. If you can find a better way to perform these actions (and there are many alternatives)then go ahead and try them, I’m sure you can do better!
First let’s create a new file called script.js and put it in public/js along with the latest versionof jQuery which in my case is simply called jquery.js. Let’s edit our main template to addreferences to these files using the HTML::script() method.
1 <!-- application/views/template.php -->
2 <!DOCTYPE HTML>
3 <html>
4 <head>
5 <meta charset="UTF-8">
6 <title>My Ajax Page</title>
7 </head>
8 <body>
9 <div id="content">
10 <p>Hello and welcome to the site!</p>
11 </div>

AJAX Content 116
12 <a href="#" id="load-content">Load Content</a>
13
14 <!-- javascript files -->
15 <script type="text/javascript">var BASE = "<?php echo URL::base(); ?>";\
16 </script>
17 <?php echo HTML::script('js/jquery.js'); ?>
18 <?php echo HTML::script('js/script.js'); ?>
19 </body>
20 </html>
As you can see, I have referenced my Javascript files before the closing tag, so that the HTTPrequests to load them don’t block the page loading. This is a good practice to stick to. Let’s getstarted and add some Javascript to our public/js/script.js file.
We also create a new BASE variable so that Javascript is aware of the base URL to our application,we will need this later to create request URLs.
1 // public/js/script.js
2 jQuery(document).ready(function($) {
3 // perform javascript only when the document
4 // has been fully loaded
5 });
Here we are using the jQuery() object to get a handle on the current document, and adding aready() event with a closure to hold our code. By waiting for the document object to be ready()we can be sure that all DOM objects have loaded, and that the jQuery library has been loaded.
You may see other examples written like this..
1 // public/js/script.js
2 $(document).ready(function() {
3 // perform javascript only when the document
4 // has been fully loaded
5 });
This is fine, but could lead to problems if other Javascript libraries chose to use the $ object at alater date. My method uses the jQuery class, and hands the inner closure a $which is reassignedto the jQuery object. This prevents any collisions.
Let’s get started on creating a click event for our content loader link, there are many ways to dothis with jQuery, I am going to use the .click() method. Here we go..
1 // public/js/script.js
2 $(document).ready(function() {
3
4 $('#load-content').click(function(e) {

AJAX Content 117
5 e.preventDefault();
6 })
7
8 });
Now we have a click event defined, with a callback closure. By providing an event parametercalled e to the inner closure, we can use the e.preventDefault();method to prevent the defaultclick action from being performed. In this case the link will not act as a hyper-link. Now weneed to make another HTTP request to GET the new content, and load it into our #content area.Let’s use the jQuery .get() method to perform this task.
1 // public/js/script.js
2 $(document).ready(function() {
3 $('#load-content').click(function(e) {
4 // prevent the links default action
5 // from firing
6 e.preventDefault();
7
8 // attempt to GET the new content
9 $.get(BASE+'content', function(data) {
10 $('#content').html(data);
11 });
12 })
13 });
Remember the BASE attribute we set earlier? We can use it to build our request URL, and createa callback method to catch the data that is returned. We will inject the response from our GETrequest into the #content element using the .html() method.
That was a lot of hard work wasn’t it? Well at least now we can see our hard work in action,let’s load up the application at http://localhost and click the load content link. Hopefully itworked!
So as you can see, using AJAX with Laravel is the same as using any other framework or plainPHP, just be sure you format the views for your AJAX routes in a suitable manner.
22.3 Post Data
Sometimes you need to send extra alongwith your requests, let’s create a new POSTHTTP requestwith jQuery to demonstrate how this can be done. First we will need a route that will respondto a POST request.
1 <?php
2
3 // application/routes.php

AJAX Content 118
4 Route::post('content', function() {
5 // deal with the post data..
6 });
By using the Route::post()method instead of get() our content route will now respond to ourPOST request, let’s get started on the Javascript.
1 // attempt a POST request with
2 // some additional data
3 $.post(BASE+'content', {
4 name: "Dayle",
5 age: 27
6 }, function(data) {
7 $('#content').html(data);
8 });
We are using the POST method to post some data to the content route, we can receive the datawith Laravel in a similar manner to form processing using the Input class.
1 <?php
2
3 // application/routes.php
4 Route::post('content', function() {
5 echo Input::get('name'); // Dayle
6 echo Input::get('age'); // 27
7 });
Simple as that!
22.4 JSON Responses
When interacting with Javascript, its useful to be able to return data in JSON format, a stringbased array that Javascript is more familiar with.
To return a JSON response, first we need to encode our PHP array, and then sendthe appropriate headers to inform the client of our JSON content type.
The above quote used to be true, but the method Response::json() was added with Laravel 3.2which achieves the same goal.
Let’s create a new route.
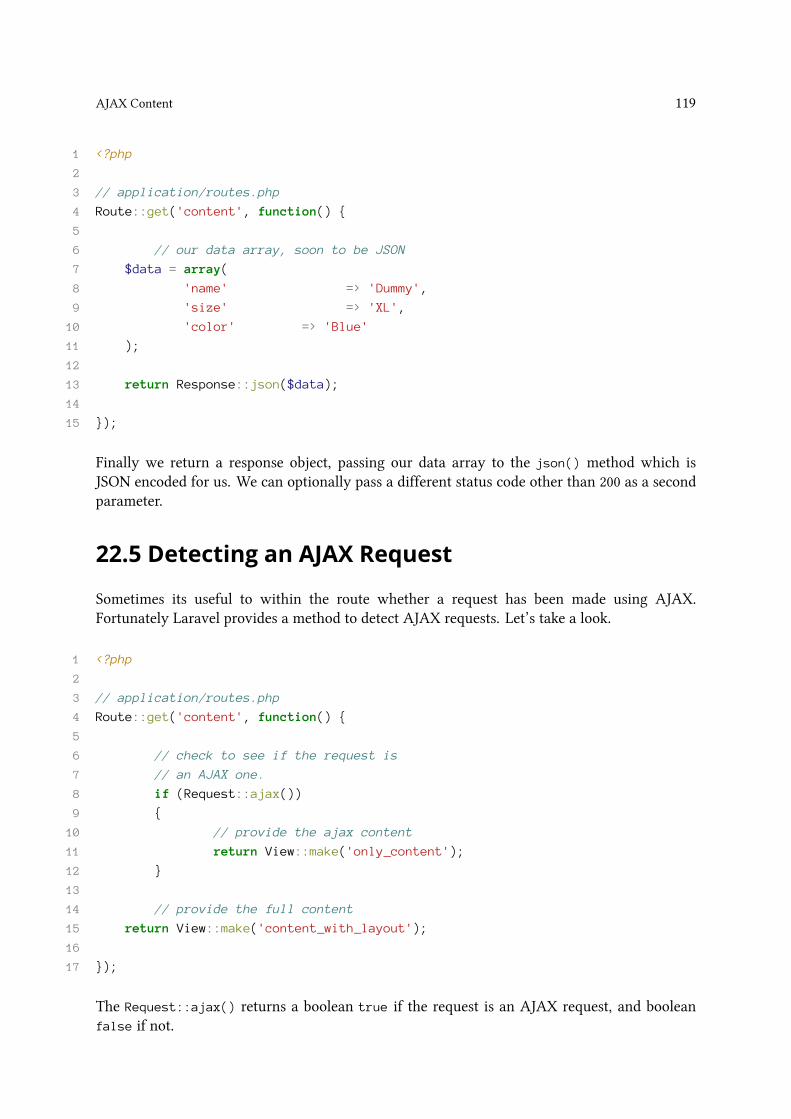
AJAX Content 119
1 <?php
2
3 // application/routes.php
4 Route::get('content', function() {
5
6 // our data array, soon to be JSON
7 $data = array(
8 'name' => 'Dummy',
9 'size' => 'XL',
10 'color' => 'Blue'
11 );
12
13 return Response::json($data);
14
15 });
Finally we return a response object, passing our data array to the json() method which isJSON encoded for us. We can optionally pass a different status code other than 200 as a secondparameter.
22.5 Detecting an AJAX Request
Sometimes its useful to within the route whether a request has been made using AJAX.Fortunately Laravel provides a method to detect AJAX requests. Let’s take a look.
1 <?php
2
3 // application/routes.php
4 Route::get('content', function() {
5
6 // check to see if the request is
7 // an AJAX one.
8 if (Request::ajax())
9 {
10 // provide the ajax content
11 return View::make('only_content');
12 }
13
14 // provide the full content
15 return View::make('content_with_layout');
16
17 });
The Request::ajax() returns a boolean true if the request is an AJAX request, and booleanfalse if not.
AJAX Content 120
I would like to say thanks to the following people for buying a copy of Code Happy, thanks!
• William Manley
• Nate Nolting
• Jorijn Schrijvershof
• Caleb Griffin
• Florian Uhlrich
• Stefano Giordano
• Simon Edwards
I’d also like to say thanks to everyone that sent kind emails about the book, thanks for all thesupport!
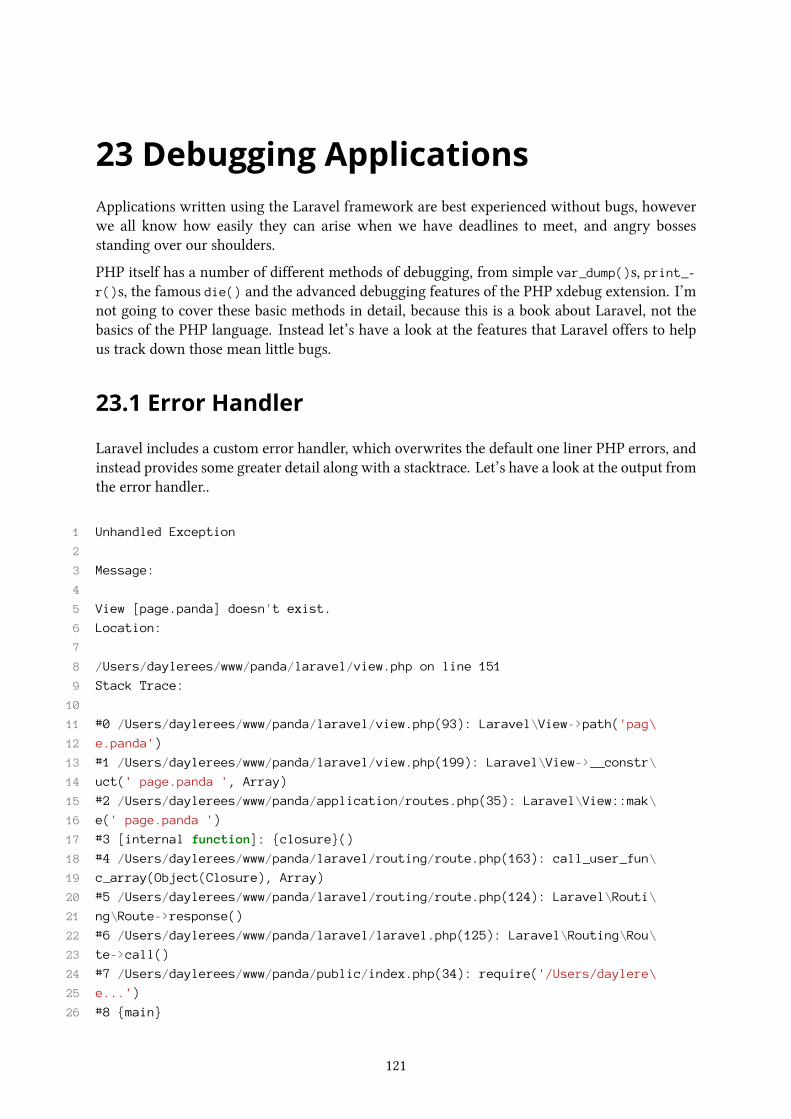
23 Debugging ApplicationsApplications written using the Laravel framework are best experienced without bugs, howeverwe all know how easily they can arise when we have deadlines to meet, and angry bossesstanding over our shoulders.
PHP itself has a number of different methods of debugging, from simple var_dump()s, print_-r()s, the famous die() and the advanced debugging features of the PHP xdebug extension. I’mnot going to cover these basic methods in detail, because this is a book about Laravel, not thebasics of the PHP language. Instead let’s have a look at the features that Laravel offers to helpus track down those mean little bugs.
23.1 Error Handler
Laravel includes a custom error handler, which overwrites the default one liner PHP errors, andinstead provides some greater detail along with a stacktrace. Let’s have a look at the output fromthe error handler..
1 Unhandled Exception
2
3 Message:
4
5 View [page.panda] doesn't exist.
6 Location:
7
8 /Users/daylerees/www/panda/laravel/view.php on line 151
9 Stack Trace:
10
11 #0 /Users/daylerees/www/panda/laravel/view.php(93): Laravel\View->path('pag\
12 e.panda')
13 #1 /Users/daylerees/www/panda/laravel/view.php(199): Laravel\View->__constr\
14 uct(' page.panda ', Array)
15 #2 /Users/daylerees/www/panda/application/routes.php(35): Laravel\View::mak\
16 e(' page.panda ')
17 #3 [internal function]: {closure}()
18 #4 /Users/daylerees/www/panda/laravel/routing/route.php(163): call_user_fun\
19 c_array(Object(Closure), Array)
20 #5 /Users/daylerees/www/panda/laravel/routing/route.php(124): Laravel\Routi\
21 ng\Route->response()
22 #6 /Users/daylerees/www/panda/laravel/laravel.php(125): Laravel\Routing\Rou\
23 te->call()
24 #7 /Users/daylerees/www/panda/public/index.php(34): require('/Users/daylere\
25 e...')
26 #8 {main}
121
Debugging Applications 122
This is the error that is shown if a requested view doesn’t exist at run time. As you can seewe have an informative error message from Laravel, as well as the file in which the error wasencountered, and a line number. In addition we also have a stacktrace that shows the initialerror, following all the method calls through the ‘View’ layer all the way down to the routingsystem.
Most of the time youwon’t need the stacktrace, but it could prove useful for themore experienceddevelopers, for example when an error occurs within a complex library.
23.2 Error Configuration
We don’t always want our errors to show in this way, especially on a production site whereshowing a stacktrace could pose a significant security risk.
Fortunately, and as always, Laravel has made it easy for us to change the configuration forthe display of errors. The configuration file for the error reporting system can be found atapplication/config/error.php. Let’s have a run through the configuration options that arecontained in this array.
1 'ignore' => array(),
The ignore array contains a list of errors that are to be ignored by the error handler. Althoughthese errors will no longer be displayed when they are encountered, they will always be logged.Keep this in mind when using the ignore array.
To add an error type to this array, add the PHP error type constant, or an integer value to thearray.
1 'ignore' => array(E_ERROR);
A full list of PHP error type constants can be found on the PHP API, however here are some ofthe more useful ones.
E_ERROR This will match all fatal run time errors.
E_WARNING This constant will match all warning, or non fatal type errors.
E_PARSE This constant will match all parse time errors, or syntax errors.
E_NOTICE This constant will match all run time notices.
E_ALL This constant will match all of the above, except for E_STRICT errors.
1 'detail' => true,
The detail config option can be used to switch the detailed error reporting on or off. Whenenabled (true) it will show the full error report along with stack trace as shown above. Disablingthis option (false) will cause the default error 500 page to be displayed instead.

Debugging Applications 123
1 'log' => false,
If the log config option is set to true, the closure contained within the logger config option willbe executed with each error, and passed an exception object.
1 'logger' => function($exception)
2 {
3 Log::exception($exception);
4 },
By default, the closure contained within the logger config option will write an entry to a log filewithin the storage/logs. However, providing a closure has provided a great deal of flexibility,allowing you to override the default logging method with anything you can think of. Perhapsyou would prefer to log to a database? Make it so number 1! Engage.
23.3 Logging
Being able to show errors, and log them to files is handy, but what if we want to log our owncustom information? The Laravel Log class contains two different methods for logging usefulinformation from your application. Let’s take a look at these methods now.
The Log::write() method accepts a log type, and a string message to be written to the log file.For example..
1 <?php
2
3 Log::write('myapp', 'Here is some useful information.');
Will result in the following line being written to the log file.
1 2012-05-29 19:10:17 MYAPP - Here is some useful information.
The entry will of course be written to the active log file in the storage/logs directory in a filenamed after the current day, for example 2011-02-05.log. This allows for the logs to be rotatedand avoid having log files that are huge!
You can also use a magic method to set the log type, for example..
1 <?php
2
3 Log::shoe('my log entry');
Will have the same effect as..
Debugging Applications 124
1 <?php
2
3 Log::write('shoe', 'my log entry');
Very useful!
Make use of all of the features you have learned in this chapter to diagnose your applications ifanything goes wrong!
I would like to thank the following wonderful people for buying a copy of the book!
• Marc Carson
• David Wosnitza AKA _druuuuuuuu
• Mark van der Waarde from Alsjeblaft!
• Joseph Wynn
• Alexander Karisson
• Victor Petrov
• Josh Kennedy
• Alexandru Bucur

24 The FutureI feel that the book has become all that you need to write a successful web application. HoweverI will continue to update the book for all future editions of Laravel, and if I find a topic that Icould cover in more detail, I will surely do so!
This book is a publish in progress book, since you have paid for it, you will be able to downloadall future updates for free from Leanpub.com.
Thanks for buying the book!
Dayle.
125