LANDING PAGE USER GUIDE -...
72
LANDING PAGE USER GUIDE
Transcript of LANDING PAGE USER GUIDE -...

LANDING PAGE USER GUIDE

Copyright © 2018 SimplyCast
Landing Page User Guide
ii
Table of Contents Overview ...................................................................................................................................................... 1
Landing Page Dashboard .......................................................................................................................... 1
Create a New Project ............................................................................................................................. 1
View the List of Projects ........................................................................................................................ 2
Find Older Landing Page Projects ........................................................................................................ 2
Search/Sort Landing Page Projects ...................................................................................................... 2
Edit / Delete Landing Page Projects ..................................................................................................... 3
Get Link for Landing Page Project ........................................................................................................ 4
Copy Existing Landing Page Project ..................................................................................................... 4
Publish/Unpublish a Landing Page Project ......................................................................................... 5
Access Landing Page Reports ............................................................................................................... 5
Create a New Project ................................................................................................................................. 5
Name and Create a New Page .............................................................................................................. 6
View the List of Created Pages ............................................................................................................. 6
Edit a Page ............................................................................................................................................... 7
Duplicate a Page ..................................................................................................................................... 7
Preview a Page ........................................................................................................................................ 7
Delete a Page .......................................................................................................................................... 7
Search/Sort Pages .................................................................................................................................. 8
Go to Summary ....................................................................................................................................... 8
Landing Page Editor ................................................................................................................................... 8
Configure the Project Settings .............................................................................................................. 9
Publish as a Template ........................................................................................................................ 9
Preview............................................................................................................................................... 10
Edit Header ........................................................................................................................................ 10
Autosave ............................................................................................................................................ 10
Default Background ......................................................................................................................... 10
Image Background ........................................................................................................................... 11

Copyright © 2018 SimplyCast
Landing Page User Guide
iii
Default Padding ................................................................................................................................ 11
Configure Main Element Settings ....................................................................................................... 11
Configure Project’s Default Styles ...................................................................................................... 12
Text ..................................................................................................................................................... 12
Header ............................................................................................................................................... 14
Sub Headers ...................................................................................................................................... 14
Links ................................................................................................................................................... 14
Add/Edit Landing Page Elements ....................................................................................................... 15
Text Block Element ........................................................................................................................... 16
Image Block Element ....................................................................................................................... 18
Caption Left/Right/Below Elements ............................................................................................... 19
Social Following Element ................................................................................................................. 21
Social Sharing Element .................................................................................................................... 23
Slideshow Element ........................................................................................................................... 24
Video Element ................................................................................................................................... 26
Form Element .................................................................................................................................... 28
PayPal Element ................................................................................................................................. 29
Call to Action Element ...................................................................................................................... 31
HTML Element ................................................................................................................................... 33
Divider Element ................................................................................................................................ 33
Creating a Template Block .............................................................................................................. 34
Add Content to Slideshow Element ............................................................................................... 35
Default Styles Tab ............................................................................................................................. 36
Text Editor ......................................................................................................................................... 37
Add an Image ........................................................................................................................................ 40
Image Info .......................................................................................................................................... 41
Link ..................................................................................................................................................... 43
Upload ................................................................................................................................................ 44
Advanced ........................................................................................................................................... 44
Add a Hyperlink .................................................................................................................................... 45
Link Info ............................................................................................................................................. 45
Target ................................................................................................................................................. 46

Copyright © 2018 SimplyCast
Landing Page User Guide
iv
Upload ................................................................................................................................................ 47
Advanced ........................................................................................................................................... 47
Landing Page Settings .............................................................................................................................. 47
Choose Your Conversion Events ........................................................................................................ 47
Enter a Page Name ............................................................................................................................... 48
Add Tags ................................................................................................................................................ 48
Insert a Description .............................................................................................................................. 48
Upload a Favicon .................................................................................................................................. 49
Add Google Analytics ........................................................................................................................... 49
Landing Page Summary ........................................................................................................................... 50
Obtain the Landing Page Link ............................................................................................................. 50
Create a Custom Link ........................................................................................................................... 50
Turn On Auto Publish .......................................................................................................................... 50
Enable A/B Split..................................................................................................................................... 51
View List of Project Pages .................................................................................................................... 51
Find Pages Further in List .................................................................................................................... 52
Search/Sort Landing Pages ................................................................................................................. 52
Edit a Page ............................................................................................................................................. 53
Disable/Enable a Page ......................................................................................................................... 53
Determine Page Traffic Strategy ........................................................................................................ 53
Traffic Regions Editor ....................................................................................................................... 54
Continue to Publish .............................................................................................................................. 55
Back to Pages ........................................................................................................................................ 55
Landing Page Crosscheck ........................................................................................................................ 55
Reports ....................................................................................................................................................... 56
View the List of Reports ....................................................................................................................... 57
Find Older Reports ............................................................................................................................... 57
Search/Sort Reports ............................................................................................................................. 58
View a Report ........................................................................................................................................ 58
Campaign ........................................................................................................................................... 58
Pages .................................................................................................................................................. 59
Forms ................................................................................................................................................. 60

Copyright © 2018 SimplyCast
Landing Page User Guide
v
Views .................................................................................................................................................. 60
Conversions ....................................................................................................................................... 61
Search/Sort Responses .................................................................................................................... 62
Bounce Rate ...................................................................................................................................... 62
Average Time on Page ..................................................................................................................... 63
User Agent ......................................................................................................................................... 64
Compare Reports ................................................................................................................................. 64
Download List of Reports .................................................................................................................... 65
IP Filtering .................................................................................................................................................. 65
IP Block ....................................................................................................................................................... 66
Copyright © 2018 SimplyCast
Landing Page User Guide
1
Overview The Landing Page tool allows users to create and design landing pages that can be used as a
means of providing information or gathering signups for the system. Landing pages are a way
to provide the general public with a means to receive communications from you.
With the Landing Page Builder you are able to embed forms you have previously created in the
Form Builder or create new ones specific to your page. Use the drag-and-drop editor to
customize your pages; use the A/B split test feature to determine whether one landing page is
more successful than the other; and then have the winner become the final version of your
page.
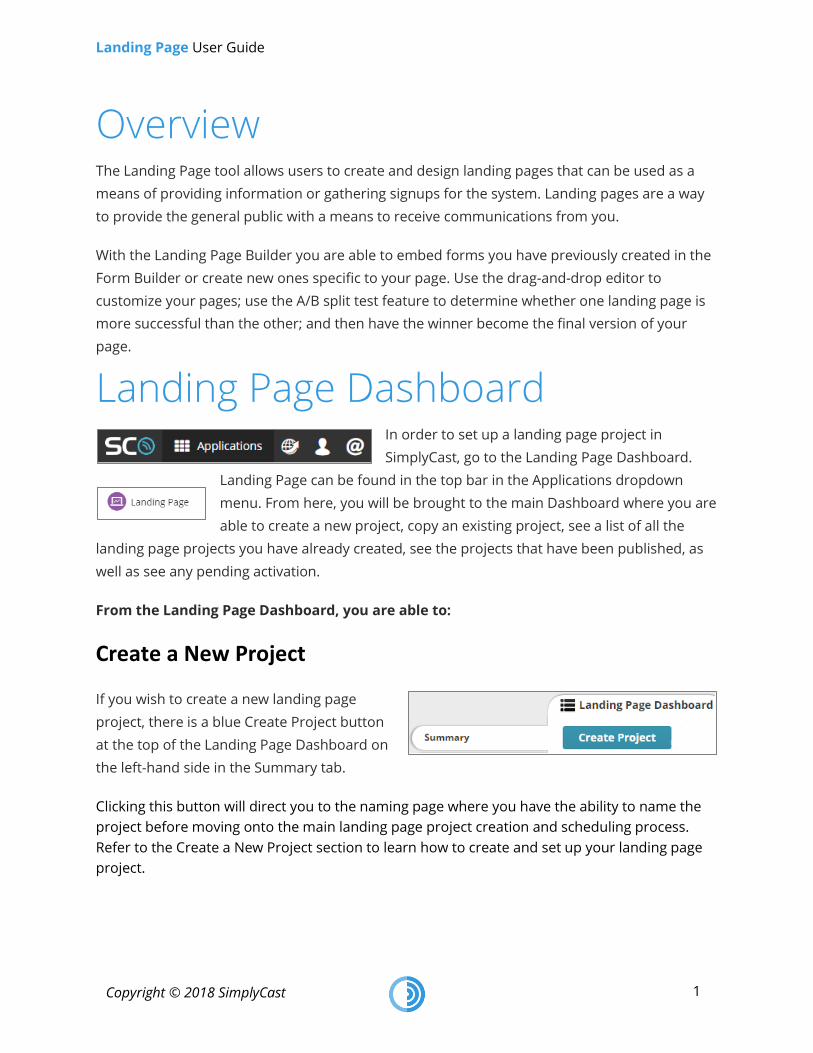
Landing Page Dashboard In order to set up a landing page project in
SimplyCast, go to the Landing Page Dashboard.
Landing Page can be found in the top bar in the Applications dropdown
menu. From here, you will be brought to the main Dashboard where you are
able to create a new project, copy an existing project, see a list of all the
landing page projects you have already created, see the projects that have been published, as
well as see any pending activation.
From the Landing Page Dashboard, you are able to:
Create a New Project
If you wish to create a new landing page
project, there is a blue Create Project button
at the top of the Landing Page Dashboard on
the left-hand side in the Summary tab.
Clicking this button will direct you to the naming page where you have the ability to name the
project before moving onto the main landing page project creation and scheduling process.
Refer to the Create a New Project section to learn how to create and set up your landing page
project.

Copyright © 2018 SimplyCast
Landing Page User Guide
2
View the List of Projects
Below the Create Project button, you will see a list of
all of the landing page projects you have created,
with the most recent appearing at the top. If there
are no projects listed, this means you have not yet
created one.
There are six columns of information:
· Project Name: The name you gave your landing page project
· Status: The current project status (e.g. Incomplete, Approved)
· Published: Whether or not the landing page project has been published
· Created On: The date the project was created
· Last Modified: The date the project was last modified
· Actions: Buttons to edit, retrieve links, publish, or delete the landing page project
Find Older Landing Page Projects
To view a project that does not immediately appear in the list:
· Navigate to the bottom of your screen where you will find the page
numbers indicating the total number of landing page projects you have
created.
· If there are more projects than can be displayed at once, look to the right
side of the list to find a scroll bar.
· Click and drag the scroll bar to view older projects.
Search/Sort Landing Page Projects
If you are looking for a particular landing page project you have already created, you can
easily search through your projects in the list on the Dashboard by:
· Selecting the search box that appears in the top right-hand corner of the page.
· Typing in the text you would like to search for.
· Clicking the blue magnifying glass button to search.
· To remove the search filter, click the “X” button that appears in the search box button and
click the blue magnifying glass button again to return to the full list of projects.

Copyright © 2018 SimplyCast
Landing Page User Guide
3
You are also able to sort your landing pages by any table column by clicking on the name of the
column in the Landing Page Dashboard. Once clicked, your list of projects will reorder
automatically.
Edit / Delete Landing Page Projects
Once you have created landing page projects, they appear in a list below the blue Create
Project button on the main Dashboard.
To edit a landing page project:
· Click the blue Edit button located at the far right of the
screen across from the corresponding project name and
underneath the Actions column.
· Make your edits in the project editor and click Save at the bottom of the page to save your
edits. Or, click Dashboard to return to the main Landing Page Dashboard without making
any changes.
To delete a landing page project:
· Click the red Delete button that appears to the left of the project name in the list,
underneath the Actions column.
· Delete multiple projects at once by clicking the red Multiple Delete
button located at the top of the list of landing
pages.
· A new checkbox column will appear in the list of
projects to the left of the Project Name. Check off
all the boxes next to the projects you wish to
delete and click the blue Confirm button at the top
of the list. A pop-up window will appear asking you
to confirm the deletion. Click the blue OK button to finish deleting the project, or click the
Cancel button to close the pop-up without deleting the project.
[Note: Click the black Cancel Delete button that appears in place of the Multiple Delete
button if you do not want to delete any projects.]

Copyright © 2018 SimplyCast
Landing Page User Guide
4
Get Link for Landing Page Project
The permalink refers to the URL you can take to use in emails or other communication methods
so users can access your landing page.
To obtain the permalink for a landing page project:
· Locate and click on the blue Links button that appears to the right of the project name in the
list in the Actions column of the table and between the Edit and Publish buttons.
· Once this button is clicked, a pop-up window will appear with two fields:
> Permalink: The link to the landing page that can be used to embed the landing page on
your website or in an email
> Custom URL: Contain any custom link ending that you set up during your
landing page project creation. This custom ending serves as a replacement for the string
of letters appearing at the end of the autogenerated link. Refer to the Create a Custom
Link section for more information on custom URLs
· Copy the link you wish to use and click the “X” button appearing in the top right corner of the
pop-up to close the window.
Copy Existing Landing Page Project
You can also copy the template of a landing page to create a new project.
To copy a project:
· Click on the blue Copy Existing button
that will appear next to the Create Project button at the top of the list once you have created
a landing page project.
· A new column will appear in the list of projects to the left of the
Project Name with blue Copy buttons. Click the Copy button
appearing next to the project you wish to copy.
· Enter the name of your new landing page project in the black box
appearing on the page and click Save in the bottom right corner,
which will let you proceed to the landing page setup process. Refer to Create a New Project
section for more information.
· Or, click Dashboard to return to the main Landing Page Dashboard without copying a
project.

Copyright © 2018 SimplyCast
Landing Page User Guide
5
Publish/Unpublish a Landing Page Project
Once you have created a landing project and it is Approved, you are able to publish it to the
web, meaning users are able to access the page through the permalink you were provided
upon completion of the setup.
To publish/unpublish a project:
· Click on the blue Publish button that appears between the Links button and Delete button in
the Actions column.
· A pop-up window will appear saying that the landing page has been published successfully.
[Note: The landing page will not be able to be published if setup isn’t complete.]
· To unpublish the landing page, click on the Unpublish button you will see in place of the
Publish button.
Access Landing Page Reports
You can view reports for any landing page project that has been created within the account. To
enter the main Landing Page Reporting page in the SimplyCast Reporting interface, navigate to
the list of tabs on the left-hand side of the screen in the Landing Page Dashboard. Click the
Reports tab, which will take you to the Reporting page where all the information received for
that particular project will be displayed. For more information about reports, refer the Reports
section.
Create a New Project Once you have clicked on the blue Create Project button in the Landing Page Dashboard, you
will be directed to the first page of the landing page setup process.

Copyright © 2018 SimplyCast
Landing Page User Guide
6
First, you must name your project in the field in the black box to the left of your screen. Once
you have entered a name into the field, click the blue Next button
at the bottom side of your screen.
After naming your new landing page project and clicking the blue
Next button, you will be directed to the Landing Page setup page. This step in the process
allows you to create the different pages that will be a part of your landing page project.
[Note: You must create at least one landing page, however you are able to create as many as
you like within the same Landing Page project. The multiple pages will serve as either an A/B
split test (with only one of them randomly generating when someone clicks on the link to the
landing page), or part of regional traffic settings (a specific page will appear depending on
where the clicker is located). These settings will be configured later on in the Landing Page
setup process. Refer to the Landing Page Settings section more information.]
On the setup page in the Landing Page project, you are able to:
Name and Create a New Page
In the first section on this page you will see the Page
Name field where you are asked to provide a title for
the landing page you are about to create. Once you
have entered a name, click on the blue Create Page
button located below this field. Refer to the Landing
Page Editor section to learn how to configure your landing page.
View the List of Created Pages
In the second section of the page, you will see a table listing all of the landing pages (if any) you
have created within this project. In this table there are four columns of information:
· Page Name: The title you gave your page in the first section of the setup process
· Created On: The date and time the particular page was created
· Last Modified: The date and time the particular page
was last edited
· Actions: Contains four buttons allowing for specific
actions to be taken on a particular page: Edit, Duplicate,
Preview, or Delete

Copyright © 2018 SimplyCast
Landing Page User Guide
7
Edit a Page
To make changes to a page in your landing page project, navigate to the Actions column in the
table containing your created pages. In this column you will see a blue Edit button you can
select to proceed to the Editor for the page. Refer to the Landing Page Editor section for more
information. Once you have finished making changes to the page, click through the rest of the
setup process by clicking the blue Next button in the bottom right-hand corner of your screen
to return to the project’s setup page.
Duplicate a Page
In order to create a copy of one of your pages, locate the blue Duplicate button in the Actions
column of the table containing all your created pages. Upon clicking this button, a pop-up
window will appear asking you to confirm whether you would like to create a duplicate of the
page. Click the blue OK button to confirm the duplication or Cancel to close the pop-up without
duplicating the page.
[Note: There is a message in this pop-up window that warns if the Strategy is set as fixed for
this page, the page’s traffic settings will be split between the original page and the duplicated
one. Refer to the Determine Page Traffic Strategy section for more information on traffic
strategies.]
Preview a Page
To preview how your page will look when it
has been published, locate the blue Preview
button in the Actions column in the list of
created pages. Clicking this button will cause
a pop-up window to appear showing the
content of the landing page as it will appear
once the page is published.
Delete a Page
To delete a page from your landing page project, navigate to the Actions column located in the
table of created pages. You will see the red Delete button next to the Preview button. Clicking
the Delete button will cause a pop-up window to appear asking you to confirm the deletion of

Copyright © 2018 SimplyCast
Landing Page User Guide
8
the page. Click the blue OK button to delete the page or Cancel to close the pop-up without
deleting the page.
Search/Sort Pages
If you are looking for a particular page created in the
landing page project, search through your pages in the table by:
· Selecting the search box that appears in the top right-hand corner of the section
· Typing in the text you would like to search
· Clicking the blue magnifying glass button to search
· To remove the search filter, click on the “X” button that appears in the search box button and
click the blue magnifying glass button again to return to the full list of available pages
You are also able to sort your pages by any table column by clicking on the name of the column
in the list of pages in the landing page project.
Go to Summary
In the black box on the left side of your screen, you will see a blue Go to Summary button,
which when clicked, will direct you to the next step in the Landing Page setup process where
you are able to configure the landing page’s link as well as enable or disable the various pages
created as part of the project. Refer to page 30 for more information on the Summary page.
Landing Page Editor To configure the appearance and settings for your landing page, you must first create a page
within the landing page project. This can be done by entering a name for the page in the first
section on the Setup page and clicking the blue Create Page
button that will lead you to the Landing Page Editor. Alternatively,
if you have already created a landing page within the project, you
can enter the editor by clicking the blue Edit button found in the Actions column.
Upon arriving in the Landing Page Editor for the first time when creating a page, the first page
you will encounter is the Template page where you are able to select a template to use as a
base for your landing page. Select the template you wish to use from the available options, then
click the Use This Template button to proceed to the next

Copyright © 2018 SimplyCast
Landing Page User Guide
9
stage of the editor, or click Cancel to choose another template
The next step in the Editor is the Landing Page Setup page where you can take your template
and modify it however you like using different elements and settings (or begin building your
landing page from the ground up).
On this page of the Landing Page setup process, you must:
Configure the Project Settings
The project settings section can be found in the Project tab
in the black box on the left-hand side of your screen. At
the top of the black box, the Project tab is located on the
left side of the three tabs. The first thing you see in this tab
is the name of your landing page project. Make sure to
select the entire landing page project and not just a single
element by clicking on the gray area outside of the landing page template so the entire
perimeter of the page is highlighted by a dotted line.
Below the name in the Project tab, there are seven items you can configure:
Publish as a Template
The first button is the blue Publish as Template button. This button will allow you to add your
completed landing page to the list of templates you can choose from when creating a new
landing page.
When you click the Publish as Template button:
· A pop-up will appear where you will be asked to
name your template
· The second field in the pop-up allows you to type in
the name of the category you want the template to
appear under when choosing a new landing page
template. Create a new category by entering a new
name in this field
· To publish your landing page template, click the blue Publish or button found at the bottom
of the pop-up. Alternatively, click the gray Cancel button to close the pop-up without creating

Copyright © 2018 SimplyCast
Landing Page User Guide
10
the template
· To remove the template from the list appearing on the template selection page, click the
Unpublish button appearing in this pop-up window
Preview
The second button in the Project tab is the blue Preview button. Clicking this button will open a
new window in your browser that will display your landing page exactly how it will appear once
it has been published.
Edit Header
The third button in the Project tab is the blue Edit Header
button. Clicking this button will open up a pop-up window
you can use to edit the top header portion of the landing
page using <link> and <meta> tags.
[Note: This feature is recommended for advanced users
only. Modifying the header may cause your landing page
to stop working.]
Autosave
The Autosave checkbox appears directly below the three blue buttons. Checking off this box will
save your progress about every 30 seconds.
Default Background
The field located below the Autosave field in the
black box to the left-hand side of your screen in the
Landing Page Editor is where you are able to set the
default background color of any landing page
element you drag into your landing page after the
default is set.
To choose a color:
· Click on the color dropdown menu in this field and a color selector will appear, or enter the

Copyright © 2018 SimplyCast
Landing Page User Guide
11
HEX code of the color in the field next to the dropdown.
· Or, choose your desired color from the pre-set swatches on the left side of the selector
dropdown or use the right side to manually choose a color.
• Click the Choose button at the bottom right side of the color selector to lock in your color or
click Cancel to close the selector dropdown without picking a new color
Image Background
The field below the Default Background field in the black box to the left-hand side of your
screen in the Landing Page Editor is where you are able to set the default background color of
any image element you drag into your landing page that will show up if the image cannot be
displayed to the recipient. Refer to the above section to learn how to use the color selector tool.
Default Padding
The last field to look at in the left-hand black box on the Landing Page Editor screen is the
Default Padding field. This field lets you determine how much spacing you would like between
your landing page content and the outside edges of the page. Click and move the blue slider
either to the right or left to change the number of pixels for padding, or simply enter the pixel
number in the textbox to the right of the slider.
Configure Main Element Settings
After you have configured your Project Settings, you can move onto altering some general
settings for the appearance of the background behind the main landing page. These settings
can be found in the Element Settings tab at the top of the black box.
In this tab there are four options:
· Background Color: This field allows you to change the color of the background screen
behind the landing page. You can do this by entering the code for the desired color (if
known) into the field provided or click on the dropdown button to bring up a selection of
colors to choose from. You can also choose a custom color by using the color selector tool
on the right side of the dropdown. Refer to the Default Background section to learn how.
· Border Color: This field allows you to change the color of the border that appears around
the outside of the landing page. You can do this by entering the code for the desired color (if
known) into the field provided or click on the dropdown button to bring up a selection of
colors to choose from. You can also choose a custom color by using the color selector tool

Copyright © 2018 SimplyCast
Landing Page User Guide
12
on the right side of the dropdown. Refer to the Default Background section to learn how.
· Border Width: This field refers to how wide
you would like the landing page’s border to be
in terms of pixels. Select whether you would
like your border to be one, two, three, or zero
pixels wide from the dropdown list in this field
· Body Width: This field refers to the total width of your landing page. Use the slider next to
the field in the black box to the left of your screen to increase or decrease the maximum
width of the landing page body in pixels
Configure Project’s Default Styles
The third tab found in the left-hand black box is the Default
Styles tab. This tab allows you to set the styles that are applied
when using the Style dropdown located in some of the
elements’ editors. This tab is useful if you would like to easily set
up a block style format for your entire landing page instead of
manually formatting each individual section.
[Note: Should you wish to alter any of the following settings
once you have added elements to your page, simply click your
mouse outside of the main landing page body to be able to
change these main project settings. Make sure to select the
entire landing page project and not just a single element by
clicking on the gray area outside of the landing page template so
the entire perimeter of the page is highlighted by a dotted line.]
There are 5 sections in this tab:
Text
The first section in the main project’s Default Styles tab is
the Text section where you can configure some of the
default text style formatting for the main body text in the
landing page.
There are 6 fields in this section:

Copyright © 2018 SimplyCast
Landing Page User Guide
13
· Text Color: This option allows you to set a default color for the main body text of your page.
Enter the code for the desired color (if known) or click the dropdown button to bring up
a selection of colors to choose from. You can also choose a custom color by using the tool
on the right side of the dropdown. Refer to the Default Background section to learn how.
Check off the Default checkbox if you would like to make dark gray the default text color for
your landing page
· Font Family: This option allows you to set a standard
font for the page by choosing from a selection of
options in the corresponding dropdown menu.
Choosing the Default option from the dropdown means
the page font will be set according to each recipient’s
browser text default and therefore could appear different depending on the application they
use to access the landing page
· Font Size: This option allows you to determine a
standard size for the main text of your landing
page. Choose your desired font size in pixels from the
field’s dropdown menu. The Default option that is
available means the text size will be set according to
each recipient’s browser default and therefore could differ depending on the application
they use to access the page
· Font Weight: This option allows you to
determine whether the standard appearance of
the landing page body text should be bolded or
normal. Choose your desired option from the dropdown menu provided. The Default option
available means the font weight will be set according to recipients’ browser default. There
could be differences in appearance depending on the application they use to access the
landing page
· Line Height: This option allows you to set a
standard line spacing format for the body text
of your page. You are able to choose from the
dropdown menu in this field whether your text
should be spaced normally (1.0), at 1.5, or double-spaced by default. Or, you can choose the
Default option in the dropdown, which will set the text spacing according to each recipient’s
browser default
· Text Align: This option allows you to set the
standard positioning of the main landing page text.
Choose whether you would like the page text to

Copyright © 2018 SimplyCast
Landing Page User Guide
14
align to the right, left, or center of the landing page from the dropdown menu provided.
[Note: In terms of the Default option available with some of these fields, due to the varied
nature of web and email browsers, it is recommended you limit the use of this option in order
to avoid formatting inconsistencies in your landing page.]
Header
Whereas the Text section of the main project’s
Default Styles tab deals with the text in the main
body of the landing page, the second section is
the Header section where you can configure the
default text style formatting for any
headers/section titles that may appear on the
page. The same six options are available in this
section as the above Text section.
Sub Headers
The third section of the main project’s Default Styles
tab is the Sub Headers section where you can
configure some of the default text style formatting
for any of the smaller headers/titles that may
appear on the landing page. The same six options
are available in this section as the above Text and
Header sections.
Links
The Links section of the main project’s Default Styles tab is where you can set the default color
of any of the hyperlinks that may appear in the landing page. Enter the code for your desired
color (if known) or click on the dropdown button to bring up the selection of colors to choose
from. You can also choose a custom color by using the tool on the right side of the dropdown.

Copyright © 2018 SimplyCast
Landing Page User Guide
15
Add/Edit Landing Page Elements
After you have configured your Project Settings, you can move onto altering the elements and
content of your landing page. To begin, drag and drop any of the landing page elements found
in the top bar of the Editor into the landing page template.
These elements are:
· Text Block: Add some text content to the landing page using formatting tools
· Image Block: Add an image to your page
· Caption Left: Insert a right-aligning image into your landing page with the ability to add a
caption on the left-hand side
· Caption Right: Insert a left-aligning image into your landing page with the ability to add a
caption on the right-hand side
· Caption Below: Insert a centered image into your landing page with the ability to add a
caption underneath
· Social Following: Add a bar of buttons you can configure to allow landing page recipients to
follow you on social media sites
· Social Sharing: This element allows you to add a bar of buttons you can configure to allow
recipients to share the landing page on social media sites
· Slideshow: Add a slideshow comprised of images and video with customizable options and
transitions. Refer to section Add Content to Slideshow Element to learn how to add images to
your slideshow
· Video: Embed videos onto your landing page from Vimeo or YouTube
· Form: Add a form to your landing page that you can create using the Form Builder. Refer to
the Form Builder User Guide for more information application and embed onto the landing
page
[Note: You can only have one form element on your landing page.]
· PayPal: Add a PayPal button to your landing page to link an item you would like to sell
through PayPal
· Call to Action: Place a button on your page for recipients to click
in order to perform an action such as signing up for more messages
· HTML Element: Add custom HTML coding to your landing page

Copyright © 2018 SimplyCast
Landing Page User Guide
16
[Note: Click on the red arrow buttons that appear on the far right and left sides of the elements
in the top bar to view other elements that may not be immediately visible.]
[Note: To hide the element selection bar at the top of your workspace, click on the smaller,red
arrow located on the far right of the bar.]
After you select at least one of these elements to add to your landing page, you can configure
them in the black box, which you will find to the left of your screen. In this black box, you will
see different fields depending on the element you choose. These are located in the Element
Settings tab and the Default Styles tab that is also available with some elements.
Here are the fields broken down by element:
Text Block Element
After adding a Text Block element, configure its Element Setting in the black box on the left-
hand side of the screen. To configure the Text Block element, you have the following options
broken down into three categories: Text Block, Column, and Row.
In the first category, Text Block, you have the following options:
· Edit Text: A blue button at the top of the
black box on the left side of your screen
and allows you to open up the text editor
from the right side of your screen where you can type in your desired content for the
element. In the editor you are provided with some basic formatting tools to use
while creating your content. Refer to the following chapters to learn more about the Text
Editor.
· Edit HTML: A blue button at the top of the black box to the left of your screen. When clicked,
it opens up the HTML editor pop-up where you can edit the HTML code for the landing
page content. This button is recommended for use by more experienced users.
· Padding Top/Right/Bottom/Left: The amount of
extra space that appears between each side of a
particular element’s content and the edges of the
element. Click and drag the slider appearing next
to any of these fields to increase or decrease the
amount of space.
· Padding Lock: Force the Padding Top/Left/Bottom/Right sliders to move in unison, ensuring
an equal amount of space on each side of the element’s content. Click the checkbox in this
field to lock the element’s padding, or uncheck this option if you do not want to lock padding
for all sides.

Copyright © 2018 SimplyCast
Landing Page User Guide
17
· Background Color: Change the color of the
element’s background. You can do this by
entering the code for the desired color (if known) into
the field provided or click of the dropdown button to
bring up a selection of colors. You can also choose a
custom color by using the tool on the right side of the
dropdown. To revert to the default background color,
click the Default checkbox to the right of the
dropdown .
· Create Template Block: A blue button in the black box on the left side of your screen and
allows you to create a template of the chosen landing page
element you can re-use in future projects. To learn how to use this
option, refer to the Creating a Template Block section.
In the next category, Column, you have the following options:
· Width Locked: Prevent the width of a particular
element on the landing page from changing with
the addition or removal of other elements to the
page. Click on the checkbox in this field to lock the
width of the element. You are not able to lock the
width of all of the columns in a row. You must
unlock at least one other column before checking
off this checkmark.
· Column Width: Determine the width of the landing page. When an element is selected on
your page, there will be blue boxes located around the edges of the element. On the left and
right sides of the element you will see two boxes with two arrows in each. Click and
drag either of these boxes to the left or right to change the width of the page. You will notice
the toggle in the left-hand black box next to this corresponding field will move to the left or
right depending on which way you are dragging the page.
[Note: To add a new column to your landing page, refer again to the blue boxes that appear on
the outside of an element when it is selected. You will see one with a table image on it with a “+”
sign. Clicking this button will add a new column to your page.]
· Border Color: The color of the edges of the particular element on your landing page. Change
this by entering the code for the desired color (if known) into the field provided or click on
the dropdown button to bring up the selection
of colors to choose from. You can also choose
a custom color by using the tool on the right
side of the dropdown.
· Border Width: How wide you would like the element’s border to be in terms of pixels. This
field may also be referred to as Box Border Width depending on the element selected. Select
whether you would like your border to be one, two, three or zero pixels wide from the
dropdown list in this field.

Copyright © 2018 SimplyCast
Landing Page User Guide
18
In the Row category, you have the following options:
· Equalize Columns: A blue button in the black box allowing you to ensure any columns in
your landing page are equal in width. The Equalize Column Button looks at columns in the
row of content and make their width equal. Click the
button to activate.
· Row Height: The vertical height of the element you
are editing. Click and drag the slider that appears in
this field to make the element taller or shorter as
necessary, or enter the desired number of pixels in the number field to the right of the
slider.
Image Block Element
After adding an Image Block element, configure its Element Setting in the black box on the left-
hand side of the screen.
To configure the Image Block element, you have the following options:
· Padding: The amount of extra space that appears between the edges and content of the
element, or between any text and images in the element. To set the padding for the element,
click and drag the slider located in the left-hand
black box in the corresponding field.
· Alignment: Choose where you wish the text, image,
or video to sit on your page depending on the
element. Select your position (left/right/center) from
the dropdown list located in the left-hand black box.
· Background Color: Change the color of the
image element’s background. You can do this
by entering the code for the desired color (if
known) into the field provided or click on the dropdown button to bring up a selection of
colors. You can also choose a custom color by using the tool on the right side of the
dropdown. To revert to the default background color, click the Default checkbox to the right
of the dropdown.
· Border Color: The color of the edges of the particular element on your landing page.
You change this by entering the code for the desired color (if known) into the field provided
or click on the dropdown button to bring up the
selection of colors to choose from. You can also
choose a custom color by using the tool on the
right side of the dropdown.
· Border Width: How wide you would like the element’s border to be in terms of pixels. Select
whether you would like your border to be one, two, three or zero pixels wide from
the dropdown list in this field.

Copyright © 2018 SimplyCast
Landing Page User Guide
19
· Hide on Mobile: Make your landing page more mobile friendly by blocking the element it is
associated with from appearing on mobile devices. Click this checkbox in the left-hand
black box if you would like the element not to
show up in the mobile version of your landing
page.
· Change Image: Choose an image from your device to add to the element. Click on the blue
Choose Image button located in this field and a pop-up will appear where you can search
through your files and choose the image you
wish to upload. Click Select at the bottom right
corner of the pop-up to add the image to the
page. To delete an image from the page, click on
the “X” button to the right of the Choose Image
button.
· Image Width/Height: Modify the vertical and
horizontal sizing of an image. Click and drag
the sliders located in the corresponding fields in
the black box to the left of your screen to change
the width and height of the image
· Lock Aspect Ratio: Ensure the original proportions
of any images in the element are maintained even
if you decide to modify the image height or width.
Click this checkbox to lock the image’s original
proportions.
· Alt Text: The text that will be displayed on the landing page if the recipient’s browser does
not allow them to view the images in the element. This text is also what will be read by
screen readers for the visually impaired. Type the text you would like to use in the
textbox located in the left-hand black box on the side of your screen
· Link URL: Add a hyperlink to the image you've added,
directing those who click on the image to a web address
of your choosing. Click on the textbox in this field located
in the left-hand black box and type in the URL of the site you wish to be associated with this
image
· Create Template Block: A blue button in the black box on the left side of your screen and
allows you to create a template of the chosen landing page element you can re-use in future
projects. To learn how to use this option, refer to the Creating a
Template Block section.
Caption Left/Right/Below Elements
After adding a Caption Left/Right/Below element, configure its Element Settings in the black box
on the left-hand side of the screen.
To configure the Caption Left/Right/Below element, you have the following options:
Copyright © 2018 SimplyCast
Landing Page User Guide
20
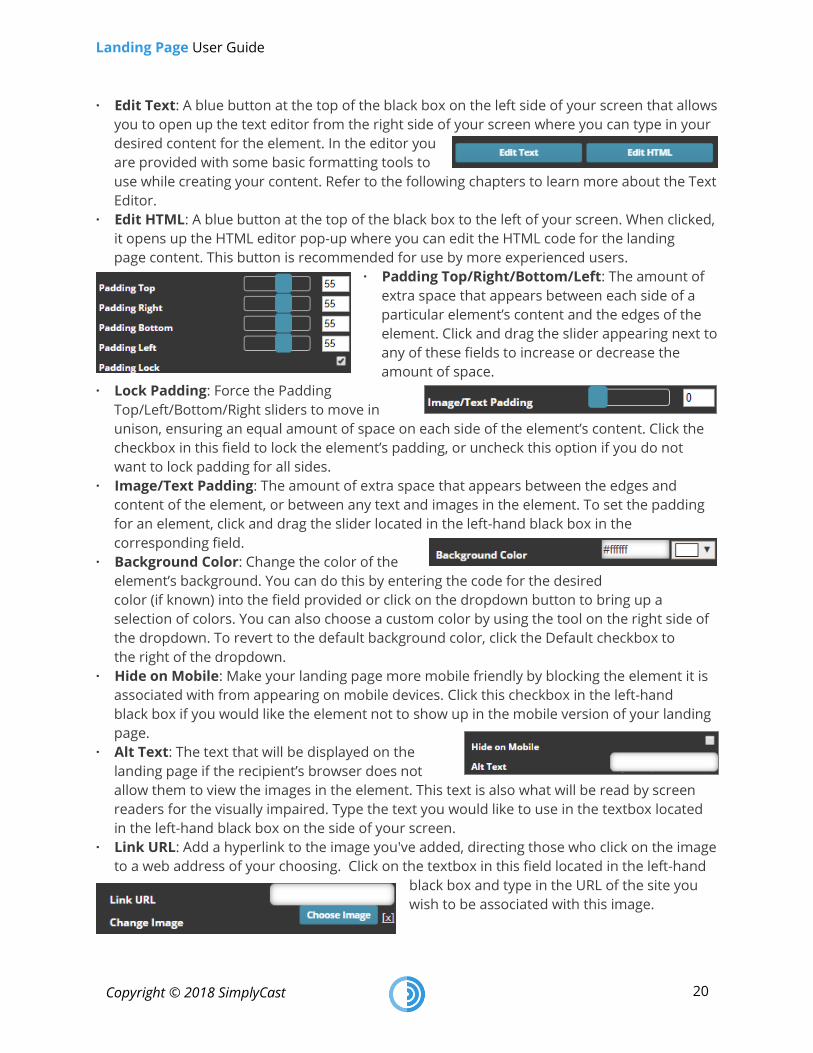
· Edit Text: A blue button at the top of the black box on the left side of your screen that allows
you to open up the text editor from the right side of your screen where you can type in your
desired content for the element. In the editor you
are provided with some basic formatting tools to
use while creating your content. Refer to the following chapters to learn more about the Text
Editor.
· Edit HTML: A blue button at the top of the black box to the left of your screen. When clicked,
it opens up the HTML editor pop-up where you can edit the HTML code for the landing
page content. This button is recommended for use by more experienced users.
· Padding Top/Right/Bottom/Left: The amount of
extra space that appears between each side of a
particular element’s content and the edges of the
element. Click and drag the slider appearing next to
any of these fields to increase or decrease the
amount of space.
· Lock Padding: Force the Padding
Top/Left/Bottom/Right sliders to move in
unison, ensuring an equal amount of space on each side of the element’s content. Click the
checkbox in this field to lock the element’s padding, or uncheck this option if you do not
want to lock padding for all sides.
· Image/Text Padding: The amount of extra space that appears between the edges and
content of the element, or between any text and images in the element. To set the padding
for an element, click and drag the slider located in the left-hand black box in the
corresponding field.
· Background Color: Change the color of the
element’s background. You can do this by entering the code for the desired
color (if known) into the field provided or click on the dropdown button to bring up a
selection of colors. You can also choose a custom color by using the tool on the right side of
the dropdown. To revert to the default background color, click the Default checkbox to
the right of the dropdown.
· Hide on Mobile: Make your landing page more mobile friendly by blocking the element it is
associated with from appearing on mobile devices. Click this checkbox in the left-hand
black box if you would like the element not to show up in the mobile version of your landing
page.
· Alt Text: The text that will be displayed on the
landing page if the recipient’s browser does not
allow them to view the images in the element. This text is also what will be read by screen
readers for the visually impaired. Type the text you would like to use in the textbox located
in the left-hand black box on the side of your screen.
· Link URL: Add a hyperlink to the image you've added, directing those who click on the image
to a web address of your choosing. Click on the textbox in this field located in the left-hand
black box and type in the URL of the site you
wish to be associated with this image.

Copyright © 2018 SimplyCast
Landing Page User Guide
21
· Change Image: Choose an image from your device to add to the element. Click on the blue
Choose Image button located in this field and a pop-up will appear where you can search
through your files and choose the image you wish to upload. Click Select at the bottom right
corner of the pop-up to add the image to the page. To delete an image from the page, click
on the “X” button to the right of the Choose Image button.
· Image Width/Height: Modify the vertical and horizontal sizing of an image by clicking and
dragging the sliders located in the corresponding fields in the black box to the left of your
screen to change the width and height of the image.
· Lock Aspect Ratio: Ensure the original
proportions of any images in the element are
maintained even if you decide to modify the
image height or width. Click this checkbox
to lock the image’s original proportions
· Create Template Block: A blue button in the black box on the left side of your screen and
allows you to create a template of the chosen landing page
element you can re-use in future projects. To learn how to use this
option, refer to the Creating a Template Block section.
Social Following Element
After adding a Social Following element, configure its Element Settings in the black box on the
left-hand side of the screen.
To configure the Social Following element, you have the following options:
· Box Background Color: Change the background color of the box that contains the social
platform buttons on your landing page. You can do this by entering the code for the desired
color (if known) into the field provided or click on the dropdown button to bring up a
selection of colors. You can also choose a custom color by using the tool on the right side of
the dropdown.
· Background Color: Change the color of the
element’s background. You can do this by
entering the code for the desired color (if
known) into the field provided or click on the dropdown button to bring up a selection of
colors. You can also choose a custom color by using the tool on the right side of the
dropdown. To revert to the default background color, click the Default checkbox to the right
of the dropdown.
· Padding: The amount of extra space that appears between the edges and content of the
element, or between any text and images in the element. To set the padding for the element,
click and drag the slider located in the left-hand
black box in the corresponding field.

Copyright © 2018 SimplyCast
Landing Page User Guide
22
· Box Border Color: The color of the edges
surrounding the box containing the
social platform buttons. You can change this
by entering the code for the desired color (if
known) into the field provided or click on the dropdown button to bring up the selection of
colors to choose from. You can also choose a custom color by using the tool on the right side
of the dropdown.
· Box Border Width: How wide you would like the element’s border to be in terms of pixels.
This field may also be referred to as Box Border Width depending on the element selected.
Select whether you would like your border to be one, two, three or zero pixels wide from
the dropdown list in this field.
· Box Padding: The amount of extra space that appears between each side of the
box containing the social platform buttons and the edges of the element. Click and drag the
slider appearing next to this field to increase or decrease the amount of space
· Text: Add the text that will appear in the element by typing it into the corresponding textbox
found in the black box on the left side of your screen.
· Image Align: This field allows you to choose where
you wish text from the previous field to set on the Social
Following element box. Select your position
(top/middle/bottom) from the dropdown list located in
the left-hand black box.
· Alignment: This field allows you to choose where in the Social Following element box you
wish the social media icons to sit. Select your position (left/right/ center) from the dropdown
list located in the left-hand black box.
· Social Websites: Determine which social platforms you wish recipients to be able to follow
you on. The available options are: Facebook, Twitter, LinkedIn, Pinterest, Google+, Tumblr,
YouTube, and email. In this field located in the
black box on the left-hand side of your
screen, you will see the icons for each of
these platforms. By default, they will all be
enabled, so to disable/re-enable any of
these options simply click on the
corresponding icon. There is a blue Save Default button located underneath this field so you
can save the settings you select as a default. Should you choose to disable any channel, a
new option will appear below Social Websites. The
Other Sites option contains a dropdown menu that
contains the names of the social channels that have
been disabled. Select any option in this list and click
the blue Add button to re-enable this social site.

Copyright © 2018 SimplyCast
Landing Page User Guide
23
· Accounts: Allow recipients to follow you on certain social
media sites when they click on the appropriate option. The
dropdown for each option allows you to choose which account
on the particular social media platform you want to link the
landing page project to. If you do not have any Facebook or
Twitter account set up within the platform, the only option
available in this dropdown will be Custom where you can Insert
the URL of the page. If you have accounts set up within the
platform, they will be listed here for those social sites.
Social Sharing Element
After adding a Social Following element, configure its Element
Settings in the black box on the left-hand side of the screen.
To configure the Social Following element, you have the following options:
• Box Background Color: Change the background color of the box that contains the social
platform buttons on your landing page. You can do this by entering the code for the desired
color (if known) into the field provided or click on the dropdown button to bring up a
selection of colors. You can also choose a
custom color by using the tool on the right
side of the dropdown.
• Background Color: Change the color of the
element’s background. You can do this by entering the code for the desired color (if known)
into the field provided or click on the dropdown button to bring up a selection of colors. You
can also choose a custom color by using the tool on the right side of the dropdown. To
revert to the default background color, click the Default checkbox to the right of the
dropdown.
• Padding: The amount of extra space that appears between the edges and content of the
element, or between any text and images in the element. To set the padding for the element,
click and drag the slider located in the left-hand black box in the corresponding field
• Box Border Color: Refers to the color of the edges surrounding the box containing the
social platform buttons. You can change this by entering the code for the desired color (if
known) into the field provided or click
on the dropdown button to bring up
the selection of colors to choose from.
You can also choose a custom color by
using the tool on the right side of the
dropdown.
• Box Border Width: How wide you would like the element’s border to be in terms of pixels.
This field may also be referred to as Box Border Width depending on the element selected.
Select whether you would like your border to be one, two, three or zero pixels wide from
the dropdown list in this field.

Copyright © 2018 SimplyCast
Landing Page User Guide
24
• Box Padding: The amount of extra space that appears between each side of the
box containing the social platform buttons and the edges of the element. Click and drag the
slider appearing next to this field to increase or decrease the amount of space.
• Text: Add the text that will appear in the element by typing it into the corresponding textbox
found in the black box on the left side of your screen.
• Image Align: This field allows you to choose where you wish text from the previous field to
set on the Social Sharing element box. Select your position (top/middle/bottom) from the
dropdown list located in the left-hand black box.
• Alignment: This field allows you to choose where in the Social Sharing element box you wish
the social media icons to sit. Select your position (left/right/ center) from the dropdown list
located in the left-hand black box.
• Shared Subject: Enter a message that you
want to accompany the landing page
whenever a user shares it.
• Social Websites: Determine which social platforms you wish recipients to be able to share
the landing page on. The available options are: Twitter, LinkedIn, Pinterest, Google+, Tumblr,
and email. In this field located in the black box on the left-hand side of your screen, you will
see the icons for each of these platforms. By default, they will all be enabled, so to
disable/re-enable any of these options, simply click on the corresponding icon.
Slideshow Element
After adding a Slideshow element, configure its Element Settings in the black box on the left-
hand side of the screen.
To configure the Slideshow element, you have the following options:
• Padding Top/Right/Bottom/Left: The amount of extra space that appears between each
side of a particular element’s content and the edges of the element. Click and drag the
slider appearing next to any of these fields to increase or
decrease the amount of space.
• Padding Lock: Force the Padding Top/Left/Bottom/Right
sliders to move in unison, ensuring an equal amount of
space on each side of the element’s content. Click the
checkbox in this field to lock the element’s padding, or
uncheck this option if you do not want to lock padding for
all sides.
• Background Color: Change the color of the element’s background. You can do this by
entering the code for the desired color (if known) into the field provided or click on
the dropdown button to bring up a selection of colors. You can also choose a custom color
by using the tool on the right side of the dropdown. To revert to the default background
color, click the Default checkbox to the right of the dropdown.

Copyright © 2018 SimplyCast
Landing Page User Guide
25
• Create Template Block: A blue button in the black box on the left side of your screen and
allows you to create a template of the chosen landing page element you can re-use in future
projects. To learn how to use this option, refer to the following sections.
• Transition Type: How the images in the slideshow change out for new ones. In the
dropdown menu located in this field, you are able to select whether you wish the images to
transition horizontally, meaning the image will slide from one side of the panel out the
other with a new one replacing it, or if you wish the image to fade into the new one.
• Transition Speed (ms): How quickly the slideshow images change out in milliseconds.
Move the slider in this field to either side to determine how long you wish the transition
between images to last, or insert the number of milliseconds in the text field to the right of
the slider.
• Auto Transition: Whether or not you would like the transition between slideshow images
to be automatic or whether you want users to click through the images themselves. Click
the checkbox to enable or disable this feature.
• Auto Transition Direction: Whether you wish the slideshow images to transition from the
left or right of the element when the Auto Transition function is enabled. Make your
selection from the dropdown menu located in this field.
• Auto Transition Delay (ms): How long you wish the
automatic transition between slideshow images to take in
milliseconds. Use the slider in this field to determine how
many milliseconds you wish the transition to take or
enter the number of milliseconds desired into the textbox
found to the right of the slider.
• Slideshow Width/Height: Modify the vertical and
horizontal sizing of the slideshow on your landing page.
Click and drag the sliders located in the corresponding
fields in the black box to the left of your screen to change
the width and/or height of the slideshow.
• Slideshow Background Color: Change the element’s background color. You can do this by
entering the code for the desired color (if known) into the field provided or click on the
dropdown button to bring up a selection of colors. You can also create a custom color by
using the tool on the right side of the dropdown.
• Slideshow Border Color: The color of the edges surrounding the landing page’s Slideshow
element. You can do this by entering the code for the desired color (if known) into the
field provided or click on the dropdown button to bring up the selection of colors to choose
from. You can also choose a custom color by using the tool on the right side of the
dropdown.
• Slideshow Shadow Color: The color of the area behind the images in Slideshow element
(should all the included images not be the same size). You can do this by entering the code
for the desired color (if known) into the field provided or click on the dropdown button to
bring up the selection of colors to choose from. You can also choose a custom color by
using the tool on the right side of the dropdown.

Copyright © 2018 SimplyCast
Landing Page User Guide
26
• Add Content: Add image and video content to the slideshow carousel. For more
information on adding slideshow content, refer to section Add Content to Slideshow Element.
Video Element
After adding a Video element, configure its Element Settings in the black box on the left-hand
side of the screen. To configure the Video element, you have the following options broken
down into three categories: Video Block, Column, and Row.
In the first category, Video, you have the following options:
• Padding Top/Right/Bottom/Left: The amount of extra space that appears between each
side of a particular element’s content and the edges
of the element. Click and drag the slider appearing
next to any of these fields to increase or decrease
the amount of space.
• Padding Lock: Force the Padding
Top/Left/Bottom/Right sliders to move in unison,
ensuring an equal amount of space on each side of the element’s content. Click the
checkbox in this field to lock the element’s padding, or uncheck this option if you do not
want to lock padding for all sides.
• Background Color: Change the color of the element’s background. You can do this by
entering the code for the desired color (if known) into the field provided or click on
the dropdown button to bring up a selection of colors. You can also choose a custom color
by using the tool on the right side of the dropdown. To revert to the default background
color, click the Default checkbox to the right of the dropdown.
• Create Template Block: A blue button in the black box on the left side of your screen and
allows you to create a template of the chosen landing page element you can re-use in future
projects. To learn how to use this option, refer to the following sections.
• Video Type: Choose whether your video is from
YouTube or Vimeo through the dropdown menu.
• Video Link: Insert the URL for the YouTube or Vimeo
video that you wish to embed onto your landing
page.
• Video Align: Choose where you wish the video to sit on your page depending on the
element. Select your position (left/right/center) from the dropdown list located in the left-
hand black box.
• Video Width/Height: Modify the vertical and horizontal sizing of a video. Click and drag the
sliders located in the corresponding fields in the black box screen to change the width and
height of the video.
In the next category, Column, you have the following options:
Copyright © 2018 SimplyCast
Landing Page User Guide
27
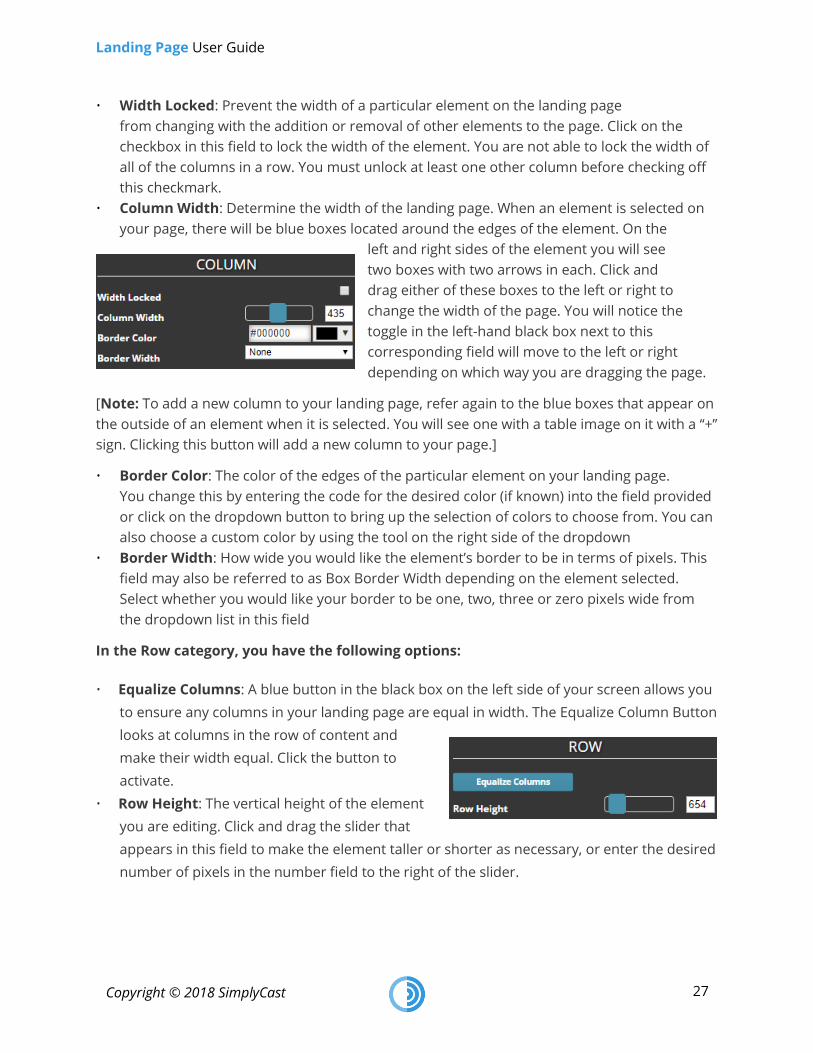
• Width Locked: Prevent the width of a particular element on the landing page
from changing with the addition or removal of other elements to the page. Click on the
checkbox in this field to lock the width of the element. You are not able to lock the width of
all of the columns in a row. You must unlock at least one other column before checking off
this checkmark.
• Column Width: Determine the width of the landing page. When an element is selected on
your page, there will be blue boxes located around the edges of the element. On the
left and right sides of the element you will see
two boxes with two arrows in each. Click and
drag either of these boxes to the left or right to
change the width of the page. You will notice the
toggle in the left-hand black box next to this
corresponding field will move to the left or right
depending on which way you are dragging the page.
[Note: To add a new column to your landing page, refer again to the blue boxes that appear on
the outside of an element when it is selected. You will see one with a table image on it with a “+”
sign. Clicking this button will add a new column to your page.]
• Border Color: The color of the edges of the particular element on your landing page.
You change this by entering the code for the desired color (if known) into the field provided
or click on the dropdown button to bring up the selection of colors to choose from. You can
also choose a custom color by using the tool on the right side of the dropdown
• Border Width: How wide you would like the element’s border to be in terms of pixels. This
field may also be referred to as Box Border Width depending on the element selected.
Select whether you would like your border to be one, two, three or zero pixels wide from
the dropdown list in this field
In the Row category, you have the following options:
• Equalize Columns: A blue button in the black box on the left side of your screen allows you
to ensure any columns in your landing page are equal in width. The Equalize Column Button
looks at columns in the row of content and
make their width equal. Click the button to
activate.
• Row Height: The vertical height of the element
you are editing. Click and drag the slider that
appears in this field to make the element taller or shorter as necessary, or enter the desired
number of pixels in the number field to the right of the slider.

Copyright © 2018 SimplyCast
Landing Page User Guide
28
Form Element
After adding a Form element, configure its Element Settings in the black box on the left-hand
side of the screen. To configure the Form element, you have the following options broken down
into three categories: Form, Column, and Row.
In the first category, Video, you have the following options:
• Padding Top/Right/Bottom/Left: The amount of extra space that appears between each
side of a particular element’s content and the edges of the element. Click and drag the
slider appearing next to any of these fields to increase or decrease the amount of space.
• Padding Lock: Force the Padding Top/Left/Bottom/Right sliders to move in unison, ensuring
an equal amount of space on each side of the element’s content. Click the checkbox in this
field to lock the element’s padding, or uncheck this option if you do not want to lock
padding for all sides.
• Background Color: Change the color of the element’s background. You can do this by
entering the code for the desired color (if known) into the field provided or click on
the dropdown button to bring up a selection of colors. You can also choose a custom color
by using the tool on the right side of the dropdown. To revert to the default background
color, click the Default checkbox to the right of the dropdown.
• Embedded Form: Determine whether you wish
to embed an existing Form project onto your
landing page or create a brand new one. Select
your preferred option from the dropdown menu
that appears in this field. Choosing an existing form option will generate the corresponding
form onto the landing page whereas choosing the new form option will maintain the Form
icon that currently appears on the page. In order to create your new form, double click on
the Form icon on the landing page and this will cause a pop-up window to appear asking
you whether you wish to proceed to the Form Editor. Click the blue OK button to confirm, or
Cancel to close the window without entering the editor. Refer to the Form Builder User
Guide to learn how to set up your form.
In the next category, Column, you have the following options:
• Width Locked: Prevent the width of a particular element on the landing page
from changing with the addition or removal of other elements to the page. Click on the
checkbox in this field to lock the width of the element. You are not able to lock the width of
all of the columns in a row. You must unlock at least one other column before checking off
this checkmark.

Copyright © 2018 SimplyCast
Landing Page User Guide
29
• Column Width: Determine the width of the landing page. When an element is selected on
your page, there will be blue boxes located around the edges of the element. On the
left and right sides of the element you will see two boxes with two arrows in each. Click and
drag either of these boxes to the left or right to change the
width of the page. You will notice the toggle in the left-hand
black box next to this corresponding field will move to the
left or right depending on which way you are dragging the
page.
[Note: To add a new column to your landing page, refer again to the blue boxes that appear on
the outside of an element when it is selected. You will see one with a table image on it with a “+”
sign. Clicking this button will add a new column to your page.]
• Border Color: The color of the edges of the particular element on your landing page.
You change this by entering the code for the desired color (if known) into the field provided
or click on the dropdown button to bring up the selection of colors to choose from. You can
also choose a custom color by using the tool on the right side of the dropdown.
• Border Width: How wide you would like the element’s border to be in terms of pixels. This
field may also be referred to as Box Border Width depending on the element selected.
Select whether you would like your border to be one, two, three or zero pixels wide from
the dropdown list in this field.
In the Row category, you have the following options:
• Equalize Columns: A blue button in the black box on the left side of your screen allows you
to ensure any columns in your landing page are equal in width. The Equalize Column Button
looks at columns in the row of content and make their width equal. Click the button to
active.
• Row Height: The vertical height of the element you are editing. Click and drag the
slider that appears in this field to make the element taller or shorter as necessary, or enter
the desired number of pixels in the number field to the right of the slider.
PayPal Element
After adding a PayPal element, configure its Element Settings in the black box on the left-hand
side of the screen.
To configure the PayPal element, you have the following options:

Copyright © 2018 SimplyCast
Landing Page User Guide
30
• PayPal Email: Allows you to insert the email address
associated with the proper PayPal account you wish to
use. Enter the email address into this field.
• Item Name: Requires you to enter a name for the
item you wish to sell from your landing page. Enter a
name for the item into this field.
• Item Number: Allows you to enter a number that will be associated with the specific
product the buyer is able to purchase via the landing page. Enter the item number into the
textbox provided.
• Item Amount: Allows you to enter a price for the product you are selling via the landing
page. Enter the appropriate cost for the item in the textbox provided.
• Currency: Choose the currency in which you are selling a particular item via your landing
page. Select the desired currency from the dropdown menu provided in the field.
• Button Style: Choose what you would like a
button on your page to look like. Select from the
dropdown menu appearing in the field located in
the black box on the left side of your screen
whether you wish the button to be an
uploaded image or a custom button that you
have some control over its appearance.
• Button Text: Enter a label for a button that may appear on your landing page. Click on
the textbox in this field that appears in the black box on the left side of your screen and
type the label you would like to appear on the button.
• Button Height/Width: Modify the vertical and horizontal sizing of a button on your landing
page. Click and drag the sliders located in the corresponding fields in the black box to the
left of your screen to change the width and height of the button.
• Button Position: Choose where you wish a button to be aligned. Select your position (left,
right, or center) from the dropdown list located in the left-hand black box to determine
where you want the button.
• Rounded Corners: Make the corners of the buttons in your
landing page either more rounded or more angular. Move the
slider in this field to the left or right to determine how rounded
you would like your button corners.
• Button Color: Change the color of a button appearing in the
element. You can do this by entering the code for the desired
color (if known) into the field provided or click on the
dropdown button to bring up the selection of colors to choose from. You can also choose a
custom color by using the tool on the right side of the dropdown.
• Text Color: Change the color of the text appearing in the element. You can do this by
entering the code for the desired color (if known) into the field provided or click on the
dropdown button to bring up the selection of colors to choose from. You can also choose a
custom color by using the tool on the right side of the dropdown.

Copyright © 2018 SimplyCast
Landing Page User Guide
31
• Text Size: Modify the size of the lettering that appears in the buttons. Move the slider
located in this field to the left or right to change the size of the button text or simply insert
the number of the text size you desire into the textbox to the right of the slider.
• Border Size: How wide you would like a button’s border to be in terms of pixels. Move the
slider located in this field to the left or right to change the number of pixels in the button’s
border. The border can be up to 10 pixels wide.
• Border Color: The color of the edges of the particular element on your landing page.
You change this by entering the code for the desired color (if known) into the field provided
or click on the dropdown button to bring up the selection of colors to choose from. You can
also choose a custom color by using the tool on the right side of the dropdown.
• Background Color: Change the color of the element’s background. You can do this by
entering the code for the desired color (if known) into the field provided or click on
the dropdown button to bring up a selection of colors. You can also choose a custom color
by using the tool on the right side of the dropdown. To revert to the default background
color, click the Default checkbox to
the right of the dropdown.
• Vertical Padding: Determine how much space is above and below the buttons associated
with these elements. Use the slider found in this field to increase or decrease the amount of
space located above and below the button.
• Horizontal Padding: Determine how much space is to the left and right of the buttons
associated with these elements. Use the slider found in this field to increase or decrease the
amount of space located on either side of the button.
Call to Action Element
After adding a Call to Action element, configure its Element Settings in the black box on the left-
hand side of the screen.
To configure the Call to Action element, you have the following options:
• Destination URL: Make the CTA button that appears on
the landing page a hyperlink, directing those who click on
the image or button to a web address of your
choosing. Click on the textbox in this field located in the left-hand black box and type in the
URL of the site you wish to be associated with the button.
• Button Style: Choose what you would like a button on your page to look like. Choose from
the dropdown menu appearing in the field located in the black box on the left side of your
screen whether you wish the button to be an uploaded image or a custom button that you
have some control over its appearance.
• Button Text: Enter a label for a button that may appear on your landing page. Click on
the textbox in this field that appears in the black box on the left side of your screen and
type the label you would like to appear on the button.

Copyright © 2018 SimplyCast
Landing Page User Guide
32
• Button Height/Width: Modify the vertical and
horizontal sizing of a button on your landing
page. Click and drag the sliders located in the
corresponding fields in the black box to the left of
your screen to change the width and height of
the button.
• Button Position: Choose where you wish a button to be aligned. Select your position (left,
right, or center) from the dropdown list located in the left-hand black box to determine
where you want the button.
• Rounded Corners: Make the corners of the buttons in your landing page either more
rounded or more angular. Move the slider in this field to the left or right to determine how
rounded you would like your button corners.
• Button Color: Change the color of a button appearing in the element. You can do this by
entering the code for the desired color (if known) into the field provided or click on the
dropdown button to bring up the selection of colors to choose from. You can also choose a
custom color by using the tool on the right side of the dropdown.
• Text Color: Change the color of the text appearing in the element. You can do this by
entering the code for the desired color (if known) into the field provided or click on the
dropdown button to bring up the selection of colors to choose from. You can also choose a
custom color by using the tool on the right side of the dropdown.
• Text Size: Modify the size of the lettering that appears in the buttons. Move the slider
located in this field to the left or right to change the size of the button text or simply insert
the number of the text size you desire into the textbox to the right of the slider.
• Border Size: How wide you would like a button’s border to be in terms of pixels. Move the
slider located in this field to the left or right to change the number of pixels in the button’s
border. The border can be up to 10 pixels wide.
• Border Color: The color of the edges of the particular element on your landing page.
You change this by entering the code for the desired color (if known) into the field provided
or click on the dropdown button to bring up the selection of colors to choose from. You can
also choose a custom color by using the tool on the right side of the dropdown.
• Background Color: Change the color of the element’s background. You can do this by
entering the code for the desired color (if known) into the field provided or click on
the dropdown button to bring up a selection of colors. You can also choose a custom color
by using the tool on the right side of the dropdown. To revert to the default background
color, click the Default checkbox to the right
of the dropdown.
• Vertical Padding: Determine how much space is above and below the buttons associated
with these elements. Use the slider found in this field to increase or decrease the amount of
space located above and below the button.
• Horizontal Padding: Determine how much space is to the left and right of the buttons
associated with these elements. Use the slider found in this field to increase or decrease the
amount of space located on either side of the button.

Copyright © 2018 SimplyCast
Landing Page User Guide
33
HTML Element
After adding an HTML element, configure its Element Settings in the black box on the left-hand
side of the screen.
To configure the HTML element, you have the following options:
• HTML Code: Add your custom HTML code to your
landing page by inserting the code in the field
provided.
• Background Color: Change the color of the
element’s background. You can do this by entering
the code for the desired color (if known) into the field
provided or click on the dropdown button to bring up a selection of colors. You can also
choose a custom color by using the tool on the right side of the dropdown. To revert to the
default background color, click the Default checkbox to the right of the dropdown.
Divider Element
After adding a Divider element, configure its Element Settings in the black box on the left-hand
side of the screen.
To configure the Divider element, you have the following options:
• Padding: The amount of extra space that
appears between the edges and content of the element, or between any text and images in
the element. To set the padding for the element, click and drag the slider located in the left-
hand black box in the corresponding field.
• Background Color: Change the color of the element’s background. You can do this by
entering the code for the desired color (if known) into the field provided or click on
the dropdown button to bring up a selection of colors. You can also choose a custom color
by using the tool on the right side of the dropdown. To revert to the default background
color, click the Default checkbox to the right of the dropdown.
• Line Color: Change the color of the divider line. You can do this by entering the code for the
desired color (if known) into the field provided or click on the dropdown button to bring up
a selection of colors. You can also choose a custom color by using the tool on the right side
of the dropdown. To revert to the default background color, click the Default checkbox to
the right of the dropdown.
• Hide on Mobile: Make your landing page more
mobile friendly by blocking the element it is associated with from appearing on mobile
devices. Click this checkbox in the left-hand black box if you would like the element not to
show up in the mobile version of your landing page.

Copyright © 2018 SimplyCast
Landing Page User Guide
34
Creating a Template Block
This field appears as a blue button in the black box on the left side of your screen and allows
you to create a template of the selected landing page element you can re-use in future projects.
This field is available for the Text Block, Image Block, Caption Left/Right/Below, Slideshow, and
Video elements.
Template blocks are useful if you have a certain content block that appears on all your landing
pages, for example, so you don’t have to recreate this block every time you create a new
landing page.
To create a template block, once you have the landing page element designed and
configured the way you like:
· Click the blue Create Template Block button and a pop-up will appear with two fields asking
for a template name and a template category.
· Type in a name for your template into the first field.
· Type a category name into the second field to determine
where the new template will be stored. If you already have
a category created that you would like to add this template
block to, type in the name of that category. Typing a new
name into this field will add a new category to the
Category dropdown.
· Click OK and the pop-up will close, with the template block
being added to the category without duplicating the
category name.
To use an existing template block in your landing page:
· Locate the Category dropdown menu that appears at the top right of the screen above the
drag-and-drop elements bar.
· Clicking this dropdown menu will open a list containing
any template block categories you may have created.
Click on the category your desired template block is
located in and the drag-and-drop elements bar will be replaced with any template block
elements you have created within that category.
· Choose which of your template blocks you wish to insert into the landing page and click
and drag it onto the page. Once the template block has been inserted into the landing page,
it can then be customized to suit the page using the available fields in the left-hand black box.

Copyright © 2018 SimplyCast
Landing Page User Guide
35
Add Content to Slideshow Element
The Add Content option appears as a blue button for the Slideshow element and allows you to
add either image or video content to the slideshow carousel.
When you click this button:
· A new section will appear at the bottom of the left-hand
black box called Slide 1. The first option in this section is
where you can choose your content type from the
provided dropdown menu, either an image or a video.
· If you select Image from this dropdown menu, you will
see four more fields:
> Choose Image: This option is a blue Choose Image button that, when clicked, will
open up the image selector pop-up window where you can upload an image file from
your device or choose an image that has already been uploaded to the window. Refer to
the Add an Image section for more information. Click the Select button at the bottom
right-hand side of the pop-up to choose the image or click the “X” button at the top right
corner to close the window without selecting an image.
> Original Size: This option is a checkbox you can click if you would like to lock the
image to its original file size, preventing the landing page from being decreased in size
any further than the size of the image.
> Image Size Percentage: This option contains a slider you are able to use to modify
the size of the slideshow image by percentage amount. Move the slider to the left or
right to increase or decrease the image size, or enter in the desired value in the field
beside the slider.
[Note: If you have checked off the Original Size checkbox, moving the slider will have no effect
on the image size as it has been locked.]
> Remove Content: This is a blue button that allows you to remove the specific slide and
its contents.
· If you select Video from this dropdown menu, you will see four more fields:
> Video Type: A dropdown menu where you can choose whether the video you are adding
to your slideshow is from YouTube or Vimeo.

Copyright © 2018 SimplyCast
Landing Page User Guide
36
> Video Link: A textbox where you can enter the URL for
the video you wish to add to the Slideshow element.
> Video Width Percentage: A slider that allows you to
modify how wide the slideshow video will appear by
percentage amount. Move the slider to the left or right to
increase or decrease the video width, or enter the
desired value in the field next to the slider.
> Video Height Percentage: A slider you can use to modify
how tall the slideshow video will appear by percentage amount. Move the slider to the
left or right to increase or decrease the video height, or entered the desired value in the
field next to the slider.
> Remove Content: A blue button that allows you to remove the specific slide and its
contents.
· To add more slides to your landing page element, click on the blue Add Content button to
create a Slide 2 section where you can repeat step 2 or 3. Create as many slides as you want
this way. View a specific slide by clicking any of the dots located underneath the content on
the landing page element (If you have already added content to the slideshow).
Default Styles Tab
There are six options located in this tab that are available for the Text Block, Caption
Left/Right/Below, Slideshow, Video, Form, and PayPal elements:
· Text Color: This option allows you to set a default color for the text in this section of your
page. Enter the code for the desired color (if known) or click on the dropdown button to
bring up the selection of colors to choose from. You can also choose a custom color by using
the tool on the right side of the dropdown (refer to the Default Background section for more
information). Check off the Default checkbox if you want to make gray the automatic default
text color for just that element.

Copyright © 2018 SimplyCast
Landing Page User Guide
37
· Font Family: This option allows you to set a standard font for this section of the page by
choosing from a selection of options in the corresponding dropdown menu. Choosing the
Default option from the dropdown means the font will be set according to recipients’
browser text default and therefore could appear different depending on the application
they use to access the landing page.
· Font Size: This option allows you to determine a standard size for the text in this section of
your page. Choose your desired font size in pixels from the field’s dropdown menu. The
Default option means the font size will be set according to recipients’ browser default and
therefore could differ depending on the application they use to access the landing page.
· Font Weight: This option allows you to determine whether the standard appearance of the
text in this section of the landing page should be bolded or normal. Choose your desired
option from the dropdown menu provided. The Default option available means the font
weight will be set according to recipients’ browser default, and therefore could appear
differently depending on the application they use to access the page.
· Line Height: This option allows you to set a standard line spacing format for the text in this
section of your page. You are able to choose from the dropdown menu in this field whether
your text should be spaced normally (1.0), at 1.5, or double-spaced by default. Or, you can
choose the Default option in the dropdown which will set the text spacing to whatever the
recipients’ browser default happens to be.
· Text Align: This option allows you to set the standard positioning of the text in this section
of your page. Choose whether you would like the text to align to the right, left, or center of
the page from the dropdown menu provided. Or, you can choose the Default option in the
dropdown, which will set the alignment to whatever the recipient’s browser default happens
to be.
[Note: In terms of the Default option available with these fields, due to the varied nature of
web and email browsers, it is recommended you limit the use of this option in order to avoid
formatting inconsistencies in your landing page.]
Text Editor
There is a text
editor available
with the Text Block, Caption Left, Caption Below, and Caption Right elements. When you double
click on the element in the landing page project or click on the blue Edit Text button that
appears at the top of the left-hand black box. The text editor will appear from the right side of
the page.

Copyright © 2018 SimplyCast
Landing Page User Guide
38
This text editor is similar to most you would see, with the generic formatting tools such as copy
and paste, image uploading, bulleted lists, etc.
Here is the full list of available tools:
· Source · Unlink · Center
· {Merge} · Anchor · Align Right
· Cut · Bold · Justify
· Copy · Italicize · Text Direction Left>Right
· Paste · Underline · Text Direction Right>Left
· Paste as Plain Text · Strike Through · Find
· Undo · Subscript · Check Spelling
· Redo · Superscript · Style Dropdown
· Image · Remove Format · Paragraph Format
· Edit Image Map · Insert/Remove Numbered List · Font
· Table · Insert/Remove Bulleted List · Size
· Insert Horizontal Line · Decrease Indent · Text Color
· Insert Special Character · Increase Indent · Save
· Link · Align Left · Done
There are six tools that may require further explanation:
· Source: This button appears at the top left of the text editor toolkit and, when
clicked, will open a pop-up window where you are able to modify the HTML
code of the element. Using the buttons at the top of the pop-up, you can search within
the code, find and replace a bit of HTML, format a selection of HTML, or add or
remove comments from the source code. It is advised this feature only be used by those
who are experienced with HTML. Click the green OK button at the bottom right of the pop-up
to apply the HTML changes or the gray Cancel button to close the pop-up without making
any changes.
· {Merge}: This button allows you to add merge tags to the text. Merge
tags allow you to personalize pages to each user by adding individual
names, titles, cities, as well as any other information found in a contact’s
CRM profile. To add a merge tag to the element, click the button located
to the right of the Source button in the editor toolkit to reveal a
dropdown with your merge tag options. Select your desired merge tag
and it will be added to the text element where you currently have your
cursor. The tag will appear in the message with two percentage symbols on either side (ex.
%%NAME%%).

Copyright © 2018 SimplyCast
Landing Page User Guide
39
[Note: For example, if you wish to include the landing page user’s name in the salutation,
choose the Name option in the Merge dropdown. The tag will be added to the page and will
look something like this: “Hello %%NAME%%.” When a contact accesses the page, the message
will include the contact’s name in place of the merge tag. This will only appear for users with a
profile in the CRM. It will be blank for all others.]
[Note: You can also add merge tags without using the {Merge} button by simply typing out the
tag with the two % symbols on either side. This will only work if the merge tags have already
been set up in the CRM for the column you choose to use. Refer to the SimplyCast CRM User
Guide for more information.]
· Anchor: This button located at the top right of
the editor toolkit allows you to place anchors in
your text that will allow page users to jump to
that location on your page when clicking a link placed
elsewhere on the same page. To insert an anchor, place
your cursor where you would like recipients to jump to and click the Anchor button. Insert a
name for the anchor in the pop-up that comes up and click OK to place the anchor. Then, go
to the location on your landing page you would like to give users the opportunity to jump
from to the anchored text (whether in this
same element or not) and place your
cursor where you would like to add a link to the anchor. Click
the Link button found two buttons to the left of the Anchor
button and you will receive a pop-up with a Link Type
dropdown that, when clicked, will give you the option to
choose to “Link to an anchor in the text.” When you have
selected this option, you will be asked to choose the anchor
you wish to link to either by the anchor name (the name given
to the anchor starting point) or element ID (an HTML tag that can be assigned to elements in
the landing page. Generally, this option will not be used by non-HTML users). Choose from
either dropdown provided, then decide whether you wish the anchor link to be tracked using
SimplyCast’s web tracking software. Refer to the SimplyCast Sonar Guide for more
information about tracking links. Click the green OK button to create the link to the anchor,
or Cancel to close the pop-up without creating a new link.

Copyright © 2018 SimplyCast
Landing Page User Guide
40
· Image: This button, found eighth from the right in the text editor toolkit, allows you
to insert an image into the text body of your landing page. Clicking this button will
open a pop-up window, which will allow you to upload an image from the server, modify its
size, determine the alignment, and more. Refer to the Add an Image section for more
information on the Image Uploader.
· Link: This button, located third from the right in the text editor toolkit, allows you to
insert a hyperlink onto your landing page to an outside source. First, you must
highlight the section of text or image you would like to turn into a hyperlink and click on the
Link button to bring up a pop-up with options for adding the hyperlink. Refer to the Add a
Hyperlink section for more information about adding hyperlinks to your landing page.
· Style Dropdown: This button found at the bottom left of the text editor toolkit allows you to
easily apply some standard styles to the text in this element. These standards can be
configured in the Default Styles tab in the main Project Settings section (Refer
to the Configure Project’s Default Settings section for more information). After
these style standards have been configured to your liking, you can implement
them using the text editor by selecting the appropriate option from the
dropdown when writing your landing
page text.
[Note: For example, if you wanted each of the headers
in the various sections of your page to conform with
each other, you could configure the Header section in
the Default Styles tab of the Project Settings section to your liking and every time you wish to
add a header somewhere on the landing page, simply click on the Styles dropdown in the text
editor toolkit and choose the Header option. This will cause the next text you type out to follow
the style you had set. You can also apply a style by highlighting text and choosing an option
from the style dropdown menu.]
Add an Image
In order to add an image to the text body of the landing page (including image
captions), you must first make sure your mouse cursor is where you wish the image
to be located. Then, click the Image button located eight from the right in the text editor toolkit.
Upon clicking the Image button, the Image Properties pop-up window will appear with
four tabs:
· Image Info

Copyright © 2018 SimplyCast
Landing Page User Guide
41
· Link
· Upload
· Advanced
Image Info
The first tab in the Image Uploader pop-up window is the
Image Info tab. In this tab, you are able to select an image
from the server or upload an image from your device.
To do this:
· The first field in this tab is the URL field. If you know the
URL of your desired image offhand, type it into the field. If
not, click on the gray Browse Server button located to the
right of this field.
· Clicking the Browse Server button will open a secondary Image Finder pop-up window where
you will see a list of all images you have previously uploaded to the platform (if any). If you
see the image you would like to use in
this list, click on it and click Select in
the bottom right-hand corner of the
pop-up to continue the process of
adding it to your landing page.
· If you do not see an image you would
like to use, or there are no images to
choose from, click the green Upload
button found at the top of the pop-up, which will open another window where you can
search through your device to choose an image to upload. Once you have found an image,
click the Open button at the bottom right of the pop-up to add the image to the list in the
Image Finder window.
· Use the Refresh button located to the right of the Upload button at the top of the Image
finder window to refresh the list of images if new ones have been added.
· The Settings button next to the Refresh button at the top of the window will display some
organizational options when clicked. Choose whether to view added images
in thumbnail or list view, determine what information to display with each image (Name,
Size, and/or Date), whether they will be ordered by image name, type, size, or date, and
whether or not the images are displayed in descending order.
· Repeat Step 2 to continue adding the image to your landing page.

Copyright © 2018 SimplyCast
Landing Page User Guide
42
[Note: In the section on the left side of the Image Finder window, you will see an Images folder.
By default, all added images will be placed in this folder, but for organizational purposes, you
are able to create subfolders by right-clicking on the folder and selecting the Add New
Subfolder option. You are able to create as many subfolders as you like.]
· Once you have clicked the Select button, you will be brought back to the Image Info tab in
the Image Properties pop-up window. You will see the image you selected appear in the
Preview window in this tab as well as the image URL appearing automatically in the URL
field.
· If you wish, type in a brief description of the image in the Alternative Text field located
below the URL field. This text is what
will appear in place of the image if the
image is unable to be rendered in a recipient’s browser, and will be what a screen reader will
use to describe the image for the visually impaired.
· Modify the size of the image by entering values into the Height and Width fields to the left of
the Preview window. Use the Lock button to lock the size ratio to your specifications, or click
the Refresh button to reset the image size to the default dimensions.
· If you would like to give the selected image a border, insert a value into the Border field. The
value inputted will reflect the number of pixels the border will contain (e.g. If the Border field
contains the digit 3, the border will consist of three pixels).
· In the HSpace and VSpace fields, located below the Border field, is where you can determine
the amount of horizontal space between the left and right or top and bottom edges of the
image and any surrounding text. Enter a value into either of these fields, which will reflect
the amount of space in pixels (e.g. If the HSpace contains a value of 4, there will be four
pixels of space added to the left and right edges of the image).
· Change the location of the image on the landing page by selecting an option from the
Alignment dropdown. Choose whether you would like the image to rest on the left or right
side of the landing page body, or leave this setting as <not set> (meaning the image will be
automatically placed onto the landing page where it fits best).
If you are satisfied with the image settings in this tab, you can insert the image into the landing
page by clicking the green OK button at the bottom right of this pop-up window. If you would
no longer like to add the image to the page, click the gray Cancel button instead. This will close
the pop-up window without saving your changes.

Copyright © 2018 SimplyCast
Landing Page User Guide
43
Link
The second tab in the Image Uploader pop-up window is the Link tab. In this tab, you are able
to make the image a hyperlink which, when clicked, will direct the user to an external webpage
or even another image. To do this:
· The first field in this tab is the URL field. This is the field
where you can input the URL of the webpage or image
that you would like to attach to the image in the email so
that when a user clicks on the image, they will be directed
to this link destination. Enter the URL of your desired site
into this field. If you would like to link to another image
but don’t know the image URL, click on the gray Search
Browser button located to the right of the URL field.
· Clicking the Browse Server button will open a secondary
Image Finder pop-up window where there is a list of all
images previously uploaded onto landing pages (if any). If
you see the image you would like to use in this list, click on it and then click Select in the
bottom right-hand corner of the pop-up to continue the process of adding it to your page.
· If you do not see an image you would like to use or there are no images to choose from, click
on the green Upload button found at the top of the pop-up, which will open another pop-up
where you are able to search through your device to choose an image to upload. Follow the
steps in the Add an Image section to add a new photo.
· After you have added or selected your photo, you will be brought back to the Link tab in the
Image Properties pop-up window. You will see the image URL appearing automatically in the
URL field.
· The other field in this tab is the Target dropdown, which is where you must select how you
would like the page user to see the link once the image is clicked on. The options to choose
from are: having the link open up in a new window, the top-most window, the same window,
or a parent window.
If you are satisfied with the image settings in this tab, you can now insert the link into the image
onto the page by clicking the green OK button at the bottom right of this pop-up window. If you
would no longer like to add a link to the image, click the gray Cancel button instead, and this will
close the pop-up window without saving your changes.

Copyright © 2018 SimplyCast
Landing Page User Guide
44
Upload
The third tab in the Image Uploader pop-up window is the Upload tab. In this tab, you are able
to choose an image from your device to upload to the image server in the Image Uploader. To
do this:
· The first button in this tab is the Choose File button. This
is the button you must click to open up another pop-up
where you are able to search through your device to
choose an image to upload. Once you have found an
image, click the Open button at the bottom right of the
pop-up to add the image file name next to the Choose
File button in the Upload tab in the Image Properties
pop-up window.
· Once you have chosen an image from your device and
have added it to the tab, you must add the image to the
server in the Image Uploader so it can be chosen to be
inserted onto the landing page. The second button in the Upload tab is the Send it to the
Server button. Click this button to add your chosen image to the Image Uploader server.
You are now able to choose this image from the server to add to your landing page. Finish the
upload process by clicking the green OK button at the bottom right of this pop-up window. If
you would no longer like to upload an image to the server,
click the gray Cancel button instead, and this will close the
pop-up window without saving your changes.
Advanced
The fourth tab in the Image Properties pop-up window is the
Advanced tab. In this tab you are able to make modifications
to the HTML attributes of an image.
This section does not need to be used by anyone who does
not possess any knowledge of HTML.

Copyright © 2018 SimplyCast
Landing Page User Guide
45
Add a Hyperlink
In order to add a link to some text on your page, you must first highlight the text you would like
to transform into the hyperlink. Then you must click on the Link button located three from the
right in the text editor toolkit.
Upon clicking the Link button, a pop-up window will appear with four tabs:
· Link Info
· Target
· Upload
· Advanced
Link Info
The first tab in the Link pop-up window is the Link Info tab. In
this tab you are able to modify a portion of your landing page
text so it becomes a hyperlink directing users to an external
website. To create a link:
· The first field in this tab is the Link Type dropdown. Here,
you can choose what kind of link you wish to insert into your
text from the following options:
> URL: This option means the link is a website or image URL that will direct recipients to a
third party source.
> Link to Anchor in the Text: This option means the link will direct recipients to another
part of the page. Refer to page 22 for more information on how to create an anchor.
> Email: This option means the link being inserted into the text body is an email address.
When a recipient clicks on the link, their email browser will open with the To: email
address automatically filled in.
· The second field in the Link pop-up window is the Protocol dropdown menu, which is where
you must choose the protocol or system of rules that will define the URL. The options
available are:
> http:// : This option stands for Hyper Text Transfer Protocol, a common form of data
communication
> https:// : This option stands for Hyper Text Transfer Protocol Secure, and is the secure

Copyright © 2018 SimplyCast
Landing Page User Guide
46
form of http
> ftp:// : This option stands for File Transfer Protocol, a standard network protocol for the
transfer of files from server to client
> news:// : This option is also known as nntp:// (Network News Transfer Protocol), and is
used for transporting net news articles between news servers and for reading and
posting articles
> <other> : This option refers to any other link protocol that is none of the above
· Next, in the URL field next to the Protocol dropdown, enter in the URL of the website or
image file, if known. If you do not know the URL of the image, click on the gray Browse
Server button found beneath these fields.
· Clicking the Browse Server button will open a secondary Image Finder pop-up window where
you’ll see a list of all images you have previously uploaded onto pages (if any). If you see the
image you would like to use in this list, click on it and then click Select in the bottom right
corner of the pop-up to continue the process of adding it to your link, see page 23 to see
how to upload a new image.
· Once you have selected your image, you will be brought back to the Link Info tab in the Link
pop-up window. You will see the image URL appearing automatically in the URL field.
· Below the Browse Server button in the Link Info tab, there is a Do Not Track checkbox you
can click if you do not want the system to track the link clicks, opens, or other engagements.
If you are satisfied with the link settings in this tab, you can now insert the hyperlink into the
text on the landing page by clicking the green OK button at the bottom right of this pop-up
window. If you no longer want to add a link to the text, click the gray Cancel button instead. This
will close the pop-up window without saving your changes.
Target
The second tab in the Link pop-up window is the Target
tab. Here is where you can decide how you would like the
page user to see the link once the landing page image is
clicked on.
The only field in this tab is the Target dropdown menu
with the following options: having the link open up in a
frame, pop-up window, new window, the top-most
window, the same window, or a parent window. Or, you can choose to leave this field as <not
set>. Click the green OK button at the bottom right of this pop-up window if you are satisfied
Copyright © 2018 SimplyCast
Landing Page User Guide
47
with the Target settings or click the gray Cancel button to close the pop-up. window without
saving your changes.
Upload
The third tab in the Link pop-up window is the Upload tab. In this tab, you are able to choose an
image from your device to upload to the image server so it can be chosen to attach to a
hyperlink.
Refer to the Add an Image section to learn how to upload an image to the server.
Advanced
The fourth tab in the Link pop-up window is the Advanced tab. In this tab you are able to make
modifications to the HTML attributes of a link.
This section does not need to be used by anyone who does not possess any knowledge of
HTML.
Landing Page Settings Once you have finished designing and configuring your landing page in the editor, save the
page by clicking on the blue Save button located at the bottom right-hand side of the screen.
Then, you are able to click the blue Next button found beside the Save button to proceed to the
next page in the setup process where you are able to configure more settings for the landing
page.
Once on this page, you are able to:
Choose Your Conversion Events
Upon arriving at the Settings page in the landing page setup process, the first section you will
see is where you must determine the conversion events you wish to include on your landing
page. A conversion event is an action that a user does on the page, such as filling out a form,
clicking on a link, etc. These actions can then be tracked using web tracking software, or they
can be used in order to start sending the user through a 360 workflow. Refer to the Sonar User
Guide for more information on trackers and refer to the SimplyCast 360 User Guide for more
information about workflows.

Copyright © 2018 SimplyCast
Landing Page User Guide
48
To choose an action/event on your landing page you would like to be used as a
conversion event:
· Choose an event from those
available in the left-hand gray
box located on the Settings
page. The form you have
associated with the landing
page as well as any links you
have inserted will be included in the list of available conversion events
· Click and drag the chosen event from the left box over to the gray box located directly to the
right of it, labeled Selected Conversion Events
· Repeat these steps until you have dragged over all the events you wish to be used as
conversions
Enter a Page Name
Below the Conversion table, you will see a Page Name field. This is where you must enter a title
for the landing page that will be visible to users who are looking at the page. This is a required
field.
Add Tags
To the right of the Page Name field is the Tags field, where you have the option to add any
number of keywords that will help your landing page become more searchable by web search
engines. Simply type in your tags, leaving a space between each one.
Insert a Description
The section that appears below the Page Name and Tags fields is the Meta Description textbox.
This is where you can type in a description for your landing page that will be used by search
engines to find the page online.
[Note: The page’s meta
description is restricted to a
maximum length of 160
characters.]

Copyright © 2018 SimplyCast
Landing Page User Guide
49
Upload a Favicon
The next section on the Landing Page Settings page is where you can upload a favicon for the
page. A favicon is the little image that appears at the top of your screen in the page’s browser
tab. If you already have a favicon uploaded to your page, you will see it in the space provided in
this section. Otherwise you will see a gray square in its place.
To upload a favicon for the landing page:
· Locate the blue Upload button located below the favicon square.
· Clicking this button will bring up the pop-up window. Here you are able to search through
your files and choose the image you wish to upload. Refer to the Image Info section in the
Add an Image section for more information about image uploading.
[Note: The favicon image will automatically be resized to 32x32 pixels.]
[Note: To remove a favicon image that has already been uploaded, click the blue remove
button located underneath the Upload button.]
Add Google Analytics
Below where you upload a favicon, you have the option to add tracking IDs from Google
Analytics. This is helpful if you wish to track your landing page’s progress with your other web
stats. If you want to add Analytics to your landing page:
· Generate a tracking ID in Google Analytics.
· Paste the tracking ID into the field.
If done correctly, the landing page data will appear in your Google Analytics. You can also add a
tracking ID for your form Thank You page if you created one by pasting in another tracking ID
into the second field.
Once you have finished configuring the page’s settings, click the blue Next button at the bottom
right of your screen to save your progress and exit the Editor. You will be directed back to the

Copyright © 2018 SimplyCast
Landing Page User Guide
50
landing page project’s setup page where you are able to create, edit, or delete other landing
pages within the project.
Landing Page Summary
If you are satisfied with the page(s) in your project, you can proceed to the Summary page
where you can finish setting up the landing page project before publishing.
On the Summary Page, you can:
Obtain the Landing Page Link
The Permalink field is the first field you can see when you reach the Summary page. The link
that appears here is a link that will direct users to one of the landing pages created within this
project depending on your traffic settings. Refer to the Traffic Strategy section on page 33 for
more information.
Create a Custom Link
The Create Custom Link
button appears directly
below the Permalink
field and allows you to
add a custom ending to
the permalink provided to replace the autogenerated ending that contains a random mix of
letters. Clicking the Create Custom Link button will cause a new field to appear below that
includes the base path of the custom link (the part of the link that cannot be changed) as well as
another field to the right of the first where you are able to enter the link ending you wish to be
used. Click the blue Create button once you have added your custom link ending to save the
changes.
Turn On Auto Publish
Below the Permalink and/or Custom Link fields, you will see a checkbox you can click if you
would like the project to be published automatically. Checking off the Auto Publish Project box
means that upon completing the project setup, the landing page URL can be searched for and
accessed by users.

Copyright © 2018 SimplyCast
Landing Page User Guide
51
Enable A/B Split
The Enable A/B Split checkbox appears below the Auto Publish Project checkbox. Choosing to
enable the A/B Split option means if you created multiple pages as part of your landing page
project, you can test which page is the most well received. The Permalink URL provided above
will direct users to one of these pages automatically, depending on the traffic settings you have
configured.
When you check off this box, two new fields will appear below:
· Winning Factor: This field refers to the method the system will use to determine which of
the landing pages in your project is the most successful, therefore becoming the only
landing page accessible via the Permalink URL. The field contains a dropdown with three
options for determining the winning landing page:
> Bounce Rate: This option refers to the number users who access the landing page but
do not interact with any of your conversion events (e.g. forms, links, etc.). The page with
the lowest bounce rate will be the winner of the A/B split test.
> Total Conversions: This option refers to the number of users who interacted with the
conversion events on the landing page (e.g. forms, links, etc.). The page users interacted
with the most will be the winner in the A/B split test.
> Time on Page: This option refers to how much time users spent on the landing page. The
page users spent the most amount of time on will be the winner in the A/B split test.
· A/B Split Decision Date: This field refers to
the date and time when the A/B split test
winner will be chosen. Clicking on this field will
open up a dropdown calendar in which you
can choose when you would like the A/B split
test to done.
View List of Project Pages
In the second section of the Summary page, you will see a table listing all of the landing pages
you have created within this project. In this table there are up to seven pieces of
information in this section:
· Page Name: This refers to the title you gave to your page in the first section of the setup
Process.

Copyright © 2018 SimplyCast
Landing Page User Guide
52
· Active: This refers to whether the landing page is active (accessible to users via the URL) or
Not.
· Actions: This (unnamed) column contains two buttons allowing for specific actions to be
taken on a particular page: Disable and Edit.
· Traffic Percentage: This column appears in the table (only when the Traffic Strategy is Fixed
as per section Determine Page Traffic Strategy). It shows the percentage of total users who
click on the Permalink URL will be directed to each landing page,
· Edit Traffic: This button appears only when the Traffic Strategy is set to Fixed (as per section
Determine Page Traffic Strategy) and allows you to change the percentage split between all
your available landing page options,
· Edit Regions: This button appears only when the Traffic Strategy is set to Regional (as per
the Traffic Regions Editor section) and allows you to configure which landing page contacts
in specific regions will see when they click the URL.
Find Pages Further in List
To view a project that does not immediately appear in the list:
· Navigate down to the bottom of your screen where you will find the page numbers.
indicating the total number of landing pages you have created within the project.
· If there are more pages than can be displayed at once, look to the right side of the list to find
a scroll bar.
· Click and drag the scroll bar to view older projects.
Search/Sort Landing Pages
If you are looking for a particular landing page you have
created within this project, you can easily search through
the pages in the list on the Summary page by:
· Selecting the search box that appears in the top
right-hand corner of the page.
· Typing in the text you would like the system to search for.
· Clicking the blue magnifying glass button to narrow down the list of pages.
· To remove the search filter, click on the “X” button that appears in the search box button and
click the blue magnifying glass button again to return to the full list of pages.

Copyright © 2018 SimplyCast
Landing Page User Guide
53
You are also able to sort your landing pages by any table column by clicking on the name of the
column in the Landing Page Summary page. Once clicked, your list of pages will reorder
automatically.
Edit a Page
To make changes to a page in your landing page project, navigate to the third column in the
table containing your project’s pages. In this column you will see a blue Edit button you can click
to proceed into the Editor for the page. Once you have finished making your changes to the
page, click through the rest of the setup process by clicking the blue Next button in the bottom
right-hand corner of your screen to return to the Summary page.
Disable/Enable a Page
To disable a page in your landing page project (make inaccessible via the landing page URL
provided), navigate to the third column in the table containing your project’s pages. In this
column you will see a blue Disable button you can click to deactivate the page. If you would like
to reactivate the page, click on the black Enable button that appears in place of the Disable
button.
Determine Page Traffic Strategy
The Traffic Strategy field appears in the black box at the left side of the screen on the Summary
page. This field allows you to determine how the multiple pages that are part of your landing
page project are distributed between the users who access the URL as each user will be
presented with just one of the options even though they are clicking on the same URL. There
are three possible options in the dropdown menu provided in this field:
· Random: This traffic option means the page distribution among users is completely
arbitrary. There is no rule dictating which page will appear to a specific user when he or she
clicks on the Permalink URL.
· Fixed: This traffic option means the page
distribution among users is restricted by
rules specifying that each page must appear
to a certain percentage of users. To modify
these percentages click on the blue Edit
Traffic button that appears above the list of landing pages when this option is selected.
When clicked, the Traffic Percentage Editor pop-up window will appear. Use the sliders that

Copyright © 2018 SimplyCast
Landing Page User Guide
54
appear next to each of the available landing page option’s names to determine how many
users you wish to take part in the A/B split test. The percentage of total users you have
chosen between all of your page options will appear to the right of the number of users
selected. Click the Submit button of the pop-up window to save your settings, or click Cancel
to close the Editor without saving your settings.
· Regional: This traffic option means the page distribution among users is restricted
depending on where the user is located. To configure the region settings, click on the blue
Edit Regions button found above the list of landing pages when this option is selected. When
clicked, the Traffic Regions Editor pop-up window will appear.
Traffic Regions Editor
The Traffic Regions Editor allows you to specify which users will see which landing page when
they click on the Permalink URL based on location.
To configure the settings in this pop-up:
· Choose the page for which you would
like to configure the region settings
from the dropdown menu appearing
in the Select Page field at the top left
of the Traffic Regions Editor.
· Next, choose what type of region you
would like to use from the Select Type
dropdown menu. The three available
options in this dropdown menu are City, Region, and Country.
· After you have chosen a region type, you must select a parameter in the Select condition
dropdown menu. The available options here are “Is” and “Is not”.
· The next field is the Region field. Clicking on this field will open up a world map pop-up
where you can click anywhere on the map to choose a city, region, or country. Or, type in the
name of the location you desire in the field below the map. Click the blue OK button to make
your selection, or click Cancel to close the window without choosing a location.
· Once you have determined the location for your Region Traffic Strategy (or chosen what
location to restrict), click the blue Add button appearing below the Region field. This will add
your chosen location setting to the table at the bottom of the Traffic Regions editor.
· The table at the bottom of the Editor contains four columns: the type of region selected; the
condition selected; the location chosen from the map, and a column containing a blue
Remove button.

Copyright © 2018 SimplyCast
Landing Page User Guide
55
· Click the remove button if you would like to delete that particular location setting you
Configured.
· If you have created multiple location settings and wish to find one that isn’t immediately
visible, either use the scroll bar located on the right side of the table or use the search bar
above the table on the right. Type in the text you would like the system to search for and
click the blue magnifying glass button to narrow down the location settings.
· When you are satisfied with your locations settings, click on the gray OK button at the very
bottom of the Traffic Regions Editor to save the settings and close the pop-up window.
[Note: When creating multiple settings for your different landing pages, switching between
pages using the Select Page dropdown menu will cause the table at the bottom of the window
to populate with the settings you configured for that particular page. Switching back to another
page option will show any previous settings you created for that page.]
Continue to Publish
In the black box on the left side of your screen, you will see a blue Continue to Publish button,
which, when clicked, will direct you to the next step in the Landing Page
setup process where you are able to review the crosscheck page for the
project. Refer to the next section in this guide for more information on
the Review page.
Back to Pages
In the black box on the left side of your screen, you will see a blue Back to
Pages button, which when clicked, will direct you to the previous step in the Landing Page setup
process where you are able to create, edit, and delete pages in the project. Refer to the Landing
Page Summary section for more information.
Landing Page Crosscheck Once you have finished configuring the settings on the Summary page, you can click the blue
Next button appearing at the bottom right of your screen, or the blue Continue to Publish
button in the black box on the left side of your screen to proceed to the Crosscheck page of the
landing page setup process where you can review the settings made to the pages and ensure
there are no errors before publishing the project.

Copyright © 2018 SimplyCast
Landing Page User Guide
56
On this page, the Pages section will have a checkbox beside it, with one of three
colors displayed in it:
· Green with a checkmark: If the checkbox is colored green with a checkmark, this section of
your project has been configured correctly and will function as it is supposed to when
published.
· Yellow with an exclamation point: If the checkbox is colored yellow with an exclamation
point something is not ideal in this section of your project. An explanation will appear below
the section detailing the potential issue. However, you are still able to publish a project that
has a yellow checkbox.
· Red with an “X”: If the checkbox is colored red with an “X” there is an error within that
section of the project and you are unable to complete your setup without dealing with it.
Details concerning the error(s) are noted beneath the section.
Once you reviewed the crosscheck page and have made any necessary changes to your project,
you are able to click the blue Complete Project button found either at the bottom right-hand
side of your screen or in the black box on the left.
When you click this button, a pop-up window will appear saying you have successfully
published your landing page project and will ask you to complete a quick feedback survey
about your process.
Click the “X” button at the top right corner of the pop-up to close it and be directed back to the
Landing Page Reports page, or simply click anywhere outside of the pop-up window and be
directed to the Reports.
Reports To view a report for any of your live surveys, you must navigate to the SimplyCast Reporting
interface.
To do this:
· Go to the main Landing Page Dashboard.
where you will see four tabs on the left-hand side of your screen: Summary, Reports, IP

Copyright © 2018 SimplyCast
Landing Page User Guide
57
Filtering, and IP Block.
· Click the Reports option to be directed to the Reports page.
[Note: You are automatically directed to the Reporting interface once you complete a landing
page project.]
Once in the Landing Page Reporting Dashboard, you are able to:
View the List of Reports
When you enter the Landing Page Reports Dashboard, you should see a list of all the landing
pages you have enabled with the most recent page being at the top of the list. If there are no
landing pages in the list, you have not yet created any or none have been enabled.
Each report in the list is broken down into six columns:
· Project Name: The name you gave to the landing page project when you created it
· Date Created: The date and time the landing page was created
· Date Published: The date and time the landing page was published. If the page hasn’t
been published, you will see “Not Published” in this column
· Permalink: The URL of the landing page you or users can use to access the page
· Custom URL: The custom ending you gave to the landing page project URL (if any)
· Actions: Contains blue Open and Compare buttons next to each report in the list, allowing
you to view the details of the individual report for that project or compare multiple landing
page projects. Refer to the View a Report section for more information about an individual
landing page report and the Compare Reports section for more information about
comparing reports.
Find Older Reports
To view a landing page project report that does not immediately appear in the list:
· Navigate down to the bottom of your screen where you will find the page numbers

Copyright © 2018 SimplyCast
Landing Page User Guide
58
indicating the total number of projects you have created.
· If there are more projects than can be displayed at once, look to the right
side of the list to find a scroll bar.
· Click and drag the scroll bar to view older landing page project reports.
Search/Sort Reports
If you are trying to find a particular project for which to view the report, you can:
· Select the search box that appears in the top right-hand corner of the page
· Typing in the text you would like the system to search for
· Clicking the blue magnifying glass button to narrow down the list of reports
· To remove the search filter, click the “X” button that appears in the search box button and
click the blue magnifying glass button again to return to the full list of reports
You are also able to sort your landing pages by any table column by clicking on the name of the
column in the Landing Page Summary page. Once clicked, your list of pages will reorder
automatically.
View a Report
To view the report of a particular landing page project:
· Select the landing page project you would like to see the report for
· Click the blue Open button located in the Actions column for your desired report and you
will be directed to the report for that specific project
Campaign
The first section you will see in the report for your particular landing page project is the
Campaign section. Here you will see six boxes containing an overview of the data collected
from your project:
· Publisher: This box displays the name and email of the landing page publisher
· Unique Views: This box displays the number of page views by different users
· Bounce Rate: This box displays the percentage of users who left your page without
interacting with any of the conversion events on your landing page
· Total Views: This box displays the number of total views of your landing page, including

Copyright © 2018 SimplyCast
Landing Page User Guide
59
repeat visitors
· Avg. Time on Page: This box displays the average amount of time (in seconds) users spent
on the landing page
· Conversions: This box displays the number of users who interacted with any of the
conversion events in your landing page (such as forms, links, etc.)
Pages
The second section you will see in the report for your particular landing page project is the
Pages section. When clicking on this section, a table will appear containing information
regarding all the pages you have created as part of this landing page project.
There are eight information columns in this table:
· Landing Page: The internal name of the landing page when created as part of the project
· Title: The publicly viewable name given to the landing page that appears in the user’s
browser tab
· Active: Whether or not
the page is currently
active (accessible via
the URL)
· Date Created: The date
and time the landing page was first created
· Date Active: The date and time the landing page was last active
· Visits: Total number of visits received by the landing page, including repeat visitors
· Unique Visits Total number of visits by different users
· Heatmap: A link you can click to view an image of your landing
page showing heat signatures where users spent most of their
time
At the top of the Pages section in the Landing page project report,
you will see a blue View Group Page Report button. This button
will allow you to view the report for the project broken down by
the various pages you chose to include. To use this function,

Copyright © 2018 SimplyCast
Landing Page User Guide
60
choose which landing pages you would like to view in the group report, check off the box
located to the left of your chosen landing pages’ names and click on the View Group Pages
Report button, which will direct you to the broken-down report.
[Note: You can also view the report breakdown for a single landing page in the project using
this button by simply checking off one landing page and clicking the button to view the report.]
[Note: The Group Page Report contains the same information as the overall project report,
except the data is divided up among the different pages.]
Forms
The third section you will see in the report for your landing page project is the Forms section.
When clicking on this section, a table will appear containing information regarding the forms
appearing on the various pages you have created as part of this landing page project.
There are four information columns in this table:
· Form Name: The name given to the form when it was created
· Source Page: The particular landing page the form is found on within the project. To view
the report for the page that a particular form is embedded on, click the link appearing in this
field
· Date Created: The date and time the form was first created
· Submissions: Total number of submissions received from the form
Views
The fourth section you will see in the report for your landing page project is the Views section.
When clicking on this section, a timeline graph will appear containing information regarding the
number of views received by the pages in your project over the course of their active lifetimes.

Copyright © 2018 SimplyCast
Landing Page User Guide
61
Hovering your mouse over a specific point in the graph will produce a box indicating the
particular date as well as the total number of views and unique views received that day. The
blue line on the graph indicates the number of views while the black line represents the
number of unique views.
Use the scroll bar found at the bottom of this section to view more of the timeline. Click and
drag the edges of the scroll bar to modify the date range visible in the timeline. Zoom to a
specific section of the graph (if the project has been active long enough) by locating the Zoom
function underneath the Views header on the left side of the page and clicking on the amount
of time you would like to view on the graph.
To download or print the timeline or a portion of it, click on the three-barred button at the top
right of the timeline and choose whether you would like to print the graph or download it as
either a PNG or JPEG image, a PDF document, or a SVG vector image.
Conversions
The fourth section you will see in the report for your landing page project is the Conversions
section. When clicking on this section, a timeline graph will appear containing information
regarding the number of conversions received by the pages in your project over the course of
their active lifetimes.
Hovering your mouse over a specific point in the graph will produce a box indicating the
particular date as well as the total number of conversions received that day.
Use the scroll bar found at the bottom of this section to view more of the timeline. Click and
drag the edges of the scroll bar to modify the date range that is visible on the timeline. Zoom

Copyright © 2018 SimplyCast
Landing Page User Guide
62
into a specific section of the graph (if the project has been active long enough) by locating the
Zoom function underneath the Conversions header on the left side of the page and clicking on
the amount of time you would like to view on the graph.
To download or print the timeline or a portion of it, click on the three-barred button at the top
right of the timeline and choose whether you would like to print the graph or download it as
either a PNG or JPEG image, a PDF document, or a SVG vector image.
Search/Sort Responses
If you are trying to find a particular live survey responder or response, you can use the search
bar that appears directly underneath the Responses tab at the top right of your screen. As you
type in your query, the responses will automatically filter.
You are also able to sort your live survey reports according to the selected column by name by
clicking on the name of any of the columns in the Responses list. Once clicked, your list of
reports will re-order automatically.
Bounce Rate
The fifth section you will see in the report for your landing page project is the Bounce Rate
section. When clicking on this section, a timeline graph will appear containing information
regarding the number of bounces received by the pages in your project over the course of their
active lifetimes (percentage of users who did not interact with any of the conversion events on
the pages).
Hovering your mouse over a specific point in the graph will produce a box indicating the
particular date as well as the total bounce percentage for that day.
Use the scroll bar
found at the
bottom of this
section to view
more of the
timeline. Click
and drag the
edges of the
scroll bar to
modify the date

Copyright © 2018 SimplyCast
Landing Page User Guide
63
range that is visible in the timeline. Zoom into a specific section of the graph (if the project has
been active long enough) by locating the Zoom function underneath the Bounce Rate header
on the left side of the page and clicking on the amount of time you would like to view on the
graph.
To download or print the timeline or a portion of it, click the three-barred button at the top
right of the timeline and choose whether you would like to print the graph or download it as
either a PNG or JPEG image, a PDF document, or a SVG vector image.
Average Time on Page
The sixth section you will see in the report for your landing page project is the Average Time on
Page section. When clicking on this section, a timeline graph will appear containing information
regarding the average number of seconds users spent on the pages in your project over the
course of their active lifetimes.
Hovering your mouse over a specific point in the graph will produce a box indicating the
particular date as well as the length of page visits for that day.
Use the scroll bar found at the bottom of this section to view more of the timeline. Click and
drag the edges
of the scroll bar
to modify the
date range that
is visible in the
timeline. Zoom
into a specific
section of the
graph (if the
project has been
active long enough) by locating the Zoom function underneath the Average Time on Page
header on the left side of the page and clicking on the amount of time you would like to view on
the graph.
To download or print the timeline or a portion of it, click the three-barred button at the top
right of the timeline and choose whether you would like to print the graph or download it as
either a PNG or JPEG image, a PDF document, or a SVG vector image.

Copyright © 2018 SimplyCast
Landing Page User Guide
64
User Agent
The last section you will see in the report for your landing page project is the User Agent
section. When clicking on this section, a pie chart will appear containing information regarding
the devices used to view the landing page project. The chart will be divided into up to four
sections: mobile, desktop, unknown, and other.
To download or print this chart, click on the three-barred button at the top right of this section
and choose whether you would like to print the chart or download it as either a PNG or JPEG
image, a PDF document, or a SVG vector image.
To the right of the device pie chart, you will see the Browser/Operating System graphic that
includes a blue View button that, when clicked, will open up a table underneath where you are
able to see three columns of information:
· Browser: This column refers to the
internet browser that was used to
view the landing page.
· Operating System: This column
refers to the device operating system
used to view the landing page.
· Open Time: This column refers to the
date and time the user accessed the
landing page.
To download this table to your device,
click on the blue Download button at
the top left of this section.
Compare Reports
To compare the reports of multiple landing page projects:
· Locate the blue Compare button found in the Actions column in the list of projects in the
main Landing Page Reporting interface
[Note: Clicking this button will change the button into a gray Uncompare button you can click if
you do not wish to compare this report to any others.]
· Next, click the blue Compare button for another landing page report, which will open a new

Copyright © 2018 SimplyCast
Landing Page User Guide
65
page in your browser where you can view the merged report containing the data collected
from the two landing page projects.
Download List of Reports
To download the list of reports found on the
Reports Dashboard:
· Locate the blue Download button found at the top.
of the list of projects in the main Landing Page Reporting interface
· Clicking this button will immediately download the list of reports to your device as a CSV file.
IP Filtering The third tab in the menu on the left side of the Landing Page dashboard is the IP Filtering tab.
This tab allows you to filter out specific IP addresses from the ones used to visit your landing
pages. These filtered IPs can still view your landing pages, but no conversions or metrics will be
recorded in the reports. This is useful for when you would like to view or test your landing
pages without skewing the reporting metrics.
There are two columns in the table that appears on this page:
· IP: This column contains the full IP addresses added to the filtered list (if any)
· Date Added: This column contains the date and time the IP addresses were added to the
filtered list
· Remove: This button (that appears in the third column only after there have been IP
addresses added to the list) allows you to remove the IP address from the list
To add a new IP address to be filtered out from being reported:
· Locate the IP Address field found at the bottom of the table containing all previously added
IPs.
· In this field, enter the full IP address you would like the system to filter out of the generated
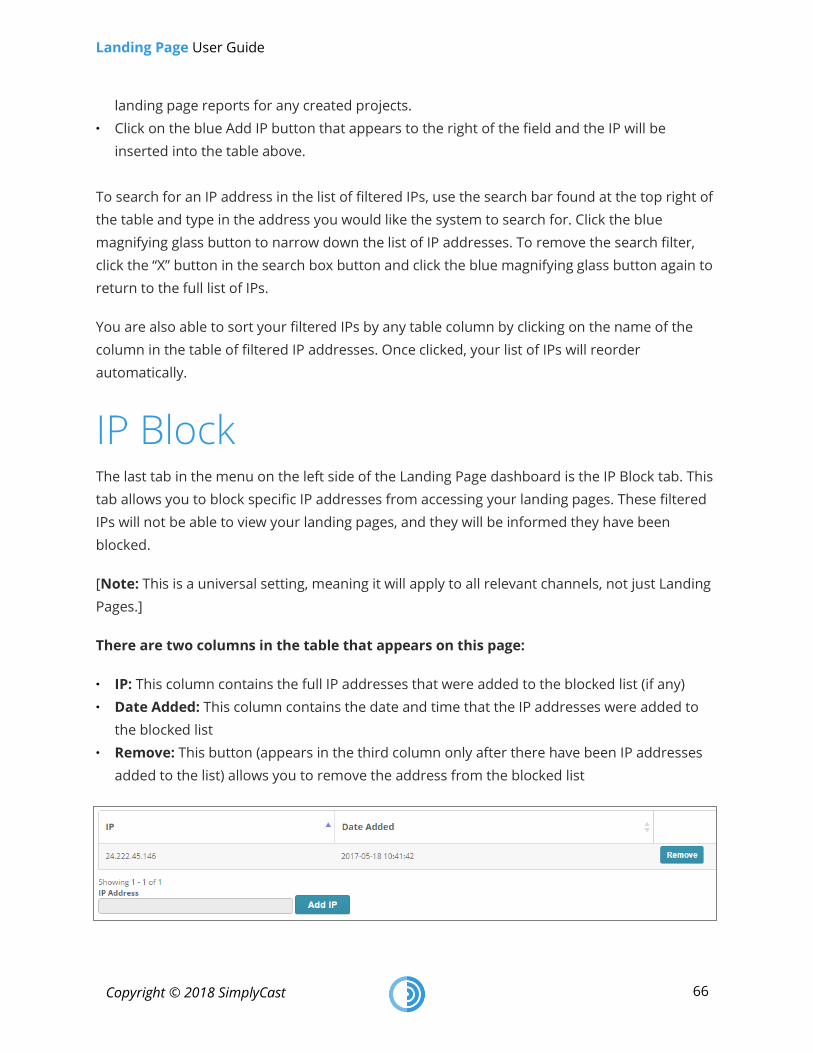
Copyright © 2018 SimplyCast
Landing Page User Guide
66
landing page reports for any created projects.
· Click on the blue Add IP button that appears to the right of the field and the IP will be
inserted into the table above.
To search for an IP address in the list of filtered IPs, use the search bar found at the top right of
the table and type in the address you would like the system to search for. Click the blue
magnifying glass button to narrow down the list of IP addresses. To remove the search filter,
click the “X” button in the search box button and click the blue magnifying glass button again to
return to the full list of IPs.
You are also able to sort your filtered IPs by any table column by clicking on the name of the
column in the table of filtered IP addresses. Once clicked, your list of IPs will reorder
automatically.
IP Block The last tab in the menu on the left side of the Landing Page dashboard is the IP Block tab. This
tab allows you to block specific IP addresses from accessing your landing pages. These filtered
IPs will not be able to view your landing pages, and they will be informed they have been
blocked.
[Note: This is a universal setting, meaning it will apply to all relevant channels, not just Landing
Pages.]
There are two columns in the table that appears on this page:
· IP: This column contains the full IP addresses that were added to the blocked list (if any)
· Date Added: This column contains the date and time that the IP addresses were added to
the blocked list
· Remove: This button (appears in the third column only after there have been IP addresses
added to the list) allows you to remove the address from the blocked list

Copyright © 2018 SimplyCast
Landing Page User Guide
67
To add a new IP address to be blocked from accessing your landing pages:
· Locate the IP Address field found at the bottom of the table containing all previously added
IPs.
· In this field, enter the full IP address you would like the system to block from accessing any
landing pages.
· Click on the blue Add IP button to the right of the field and the IP will be inserted into the
table above.
To search for an IP address in the list of blocked IPs, use the search bar found at the top right of
the table and type in the text you would like the system to search for. Click the blue magnifying
glass button to narrow down the list of IP addresses. To remove the search filter, click the “X”
button in the search box and click the blue magnifying glass button again to return to the full
list of IPs.
You are also able to sort your blocked IPs by any table column by clicking on the name of the
column in the table of blocked IP addresses. Once clicked, your list of IPs will reorder
automatically.