LABORATORY II ELECTRIC FIELDS AND …visual.physics.tamu.edu/vp208/LabManual/Lab_2.pdfLABORATORY II...
22
LABORATORY II ELECTRIC FIELDS AND POTENTIALS In this laboratory, you will learn how to calculate and measure the electric potentials and electric fields in a region of space. The potentials and fields are produced by charges and conductors in the region. Each charge is a source of electric field, and each conductor creates a boundary of constant potential – an equipotential. The electric field is a vector field ) (r E r r - a vector whose magnitude and direction are defined for every point of space r r in the vicinity of the source. The pattern of this vector field is visualized by drawing lines of force, a pattern of lines that are everywhere parallel to the electric field, and whose transverse density is proportional to the magnitude of the electric field. Figure 1. Lines of force and equipotentials near an electric dipole. As an example of these concepts, Figure 1 shows the equipotentials and lines of force in the vicinity of an electric dipole – a pair of equal and opposite charges separated by a distance. While it is possible to measure electric field directly, it is frequently easier to measure the potential difference between two points. The device used to measure potential differ- ence is a voltmeter. The voltmeter measures the potential difference between its two ter- minals. By attaching conducting leads to these terminals and then touching the other ends of the two leads to two points in a region, you can measure the potential difference, or voltage, between those points. In the first problem, you will first learn to calculate the distribution of potential in a re- gion of space, using the relaxation technique. While you will use this powerful technique to divide up a two-dimensional region into a finite-element grid, the same technique can also be used in three dimensions, and even in four dimensions to calculate time-changing electric fields and potentials. In the succeeding problems, you will learn to actually measure the potential distribu- tion in a 2-dimensional array of charges and conductors.
Transcript of LABORATORY II ELECTRIC FIELDS AND …visual.physics.tamu.edu/vp208/LabManual/Lab_2.pdfLABORATORY II...

LABORATORY II
ELECTRIC FIELDS AND POTENTIALS
In this laboratory, you will learn how to calculate and measure the electric potentials and electric fields in a region of space. The potentials and fields are produced by charges and conductors in the region. Each charge is a source of electric field, and each conductor creates a boundary of constant potential – an equipotential. The electric field is a vector field )(rE rr
- a vector whose magnitude and direction are defined for every point of space rr in the vicinity of the source. The pattern of this vector field is visualized by drawing lines of force, a pattern of lines that are everywhere parallel to the electric field, and whose transverse density is proportional to the magnitude of the electric field.
Figure 1. Lines of force and equipotentials near an electric dipole.
As an example of these concepts, Figure 1 shows the equipotentials and lines of force in the vicinity of an electric dipole – a pair of equal and opposite charges separated by a distance.
While it is possible to measure electric field directly, it is frequently easier to measure the potential difference between two points. The device used to measure potential differ-ence is a voltmeter. The voltmeter measures the potential difference between its two ter-minals. By attaching conducting leads to these terminals and then touching the other ends of the two leads to two points in a region, you can measure the potential difference, or voltage, between those points.
In the first problem, you will first learn to calculate the distribution of potential in a re-gion of space, using the relaxation technique. While you will use this powerful technique to divide up a two-dimensional region into a finite-element grid, the same technique can also be used in three dimensions, and even in four dimensions to calculate time-changing electric fields and potentials.
In the succeeding problems, you will learn to actually measure the potential distribu-tion in a 2-dimensional array of charges and conductors.

2
Objectives: Successfully completing this laboratory should enable you to:
• Use Gauss’ Law and Coulomb’s Law to predict the distribution of potential in the space around two-dimensional distributions of electric charge.
• Use the method of relaxation to numerically calculate the potential distribution resulting from example 2-dimensional charge distributions.
• Extract the electric field distribution from the potential distribution by numeri-cal and graphical techniques.
• Experimentally map the distribution of electric potential using conductive lines on resistive paper.
• Measure the potential distribution inside a closed conductor boundary, and the shielding of electric field within a closed conductor arising from external charges.
• Experimentally track the equipotentials in the space around charge distributions using a potential balance.
Preparation: Read Chapter 21-23. Note that you will be using the concept of electric potential be-
fore it is introduced in lecture. You may obtain background for this purpose by reading Chapter 23.

Problem 1. Calculation of potential distributions using the Method of Relaxation
Your team is assigned to develop a piece of software that will use the technique of re-laxation to calculate electric potential distributions in 2 dimensions of space near charges and conductors.
Electric potential is the work per unit charge that must be exerted to move a charge from one location to another. The electric field is the force per unit charge exerted upon a charge due
You will create an EXCEL spreadsheet, using each cell to represent a patch of area in the problem. The number contained in each cell will represent the potential at that loca-tion. You will encode the relaxation technique in the formulae of each cell that calculates its electric potential.
The method of relaxation The potential )(rV r in a region of empty space (a region containing no net electric
charges) varies smoothly – the potential at one spot is the average of the potentials at nearby spots surrounding it. This simple property makes it possible to calculate the poten-tial distribution by the technique of relaxation.
To understand this property, divide a region of empty space into a 2-D grid as shown in Error! Reference source not found.. The grid elements have side length a in both x and y. Of course this grid is just a 2-D slice of a 3-D region of space. Each grid element is ac-tually a rectangular prism, extending a distance L into the plane of the problem, of size (a × a × L)
Figure 2. Connection of electric field and potential to the adjacent elements in a finite-
element grid.

Problem 1. Calculation of potential distributions using the Method of Relaxation
4
aEVV
aEVV
yb
yt
−=−
−=−
1222
2223aEVVaEVV
xl
xr
−=−−=−
1222
2232
Consider the nine contiguous grid elements shown above, placed in an electric field Er
as shown. We will develop a technique for calculating the potential in the center grid ele-ment (V22) in terms of the potentials in the neighboring grid elements. In order to connect
potential to electric field, we will use the definition of potential and Gauss’ Law. The definition of potential difference is
rdErVrVr
r
rrrrr
r⋅−≡− ∫
2
1
)()( 12 (1)
Gauss’ Law states that
0εQSdE =⋅∫
rr (2)
So how do we use these connections in a finite grid in space?
Let’s apply the principle of superposition, and examine the effects on the potential dis-tribution from the x- and y-components of E
r separately. The component Ex (red in Error!
Reference source not found.) can only affect the differences between potentials in cells that differ in their x position. The component Ey (blue in Error! Reference source not found.) can only affect the differences between potentials in cells that differ in their y posi-tion.
(3)
Exr and Exl refer to the x-component of electric field evaluated at the right and left boundaries of the center cell, indicated in green in Error! Reference source not found.. Eyt and Eyb refer to the y-component of electric field evaluated at the top and bottom boundaries of the center cell, as indicated in green in Error! Reference source not found..
Now we can apply Gauss’ Law to relate these potentials:
⎥⎦
⎤⎢⎣
⎡ +++−=
−−−
+−−
+−−−
+−−
=
−+−++=⋅∫
2123123222
1222222312222232
4
)()(
)()(
)()(
)()(
)()()()(
VVVVVL
aLaVV
aLaVV
aLaVV
aLaVV
aLEaLEaLEaLESdE ybxlytxr
rr
(4)
Now suppose these cells do not contain any net charge: Q = 0 in Eq. 2. Then potential V22 is the average of the potentials in its neighbors:
421231232
22VVVV
V+++
= (5)
Problem 1. Calculation of potential distributions using the Method of Relaxation
5
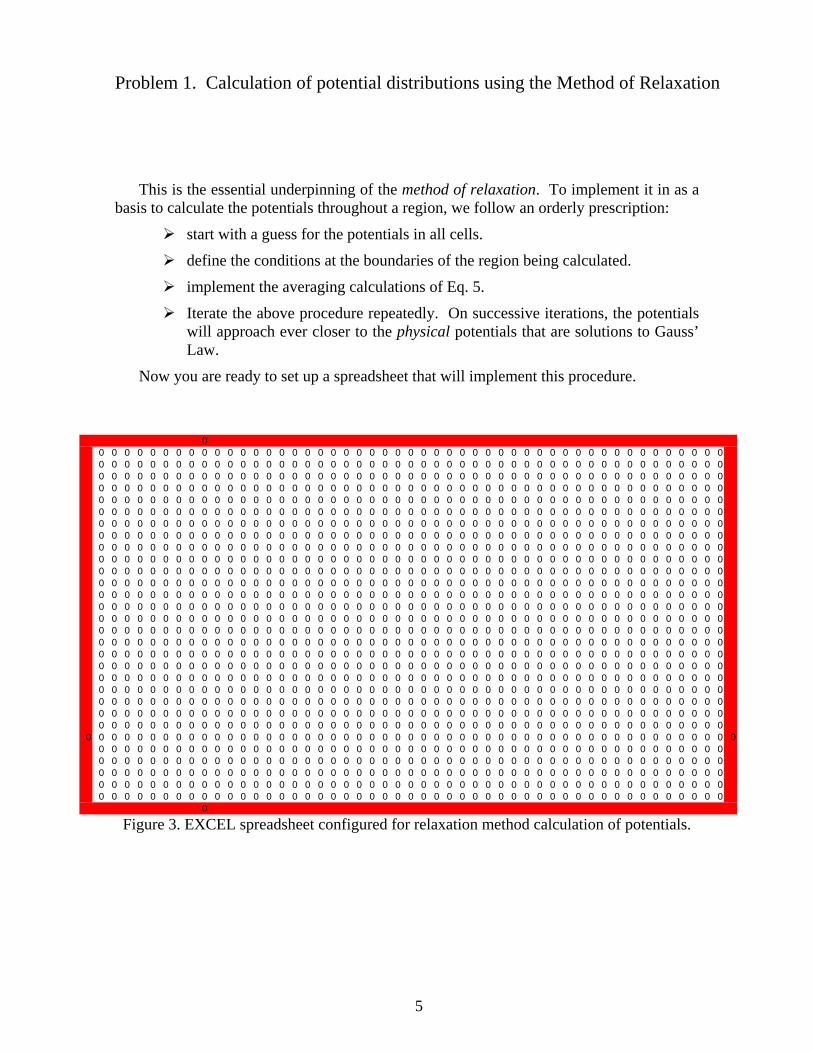
This is the essential underpinning of the method of relaxation. To implement it in as a basis to calculate the potentials throughout a region, we follow an orderly prescription:
start with a guess for the potentials in all cells.
define the conditions at the boundaries of the region being calculated.
implement the averaging calculations of Eq. 5.
Iterate the above procedure repeatedly. On successive iterations, the potentials will approach ever closer to the physical potentials that are solutions to Gauss’ Law.
Now you are ready to set up a spreadsheet that will implement this procedure.
Figure 3. EXCEL spreadsheet configured for relaxation method calculation of potentials.
00 0 0 0 0 0 0 0 0 0 0 0 0 0 0 0 0 0 0 0 0 0 0 0 0 0 0 0 0 0 0 0 0 0 0 0 0 0 0 0 0 0 0 0 0 0 0 0 00 0 0 0 0 0 0 0 0 0 0 0 0 0 0 0 0 0 0 0 0 0 0 0 0 0 0 0 0 0 0 0 0 0 0 0 0 0 0 0 0 0 0 0 0 0 0 0 00 0 0 0 0 0 0 0 0 0 0 0 0 0 0 0 0 0 0 0 0 0 0 0 0 0 0 0 0 0 0 0 0 0 0 0 0 0 0 0 0 0 0 0 0 0 0 0 00 0 0 0 0 0 0 0 0 0 0 0 0 0 0 0 0 0 0 0 0 0 0 0 0 0 0 0 0 0 0 0 0 0 0 0 0 0 0 0 0 0 0 0 0 0 0 0 00 0 0 0 0 0 0 0 0 0 0 0 0 0 0 0 0 0 0 0 0 0 0 0 0 0 0 0 0 0 0 0 0 0 0 0 0 0 0 0 0 0 0 0 0 0 0 0 00 0 0 0 0 0 0 0 0 0 0 0 0 0 0 0 0 0 0 0 0 0 0 0 0 0 0 0 0 0 0 0 0 0 0 0 0 0 0 0 0 0 0 0 0 0 0 0 00 0 0 0 0 0 0 0 0 0 0 0 0 0 0 0 0 0 0 0 0 0 0 0 0 0 0 0 0 0 0 0 0 0 0 0 0 0 0 0 0 0 0 0 0 0 0 0 00 0 0 0 0 0 0 0 0 0 0 0 0 0 0 0 0 0 0 0 0 0 0 0 0 0 0 0 0 0 0 0 0 0 0 0 0 0 0 0 0 0 0 0 0 0 0 0 00 0 0 0 0 0 0 0 0 0 0 0 0 0 0 0 0 0 0 0 0 0 0 0 0 0 0 0 0 0 0 0 0 0 0 0 0 0 0 0 0 0 0 0 0 0 0 0 00 0 0 0 0 0 0 0 0 0 0 0 0 0 0 0 0 0 0 0 0 0 0 0 0 0 0 0 0 0 0 0 0 0 0 0 0 0 0 0 0 0 0 0 0 0 0 0 00 0 0 0 0 0 0 0 0 0 0 0 0 0 0 0 0 0 0 0 0 0 0 0 0 0 0 0 0 0 0 0 0 0 0 0 0 0 0 0 0 0 0 0 0 0 0 0 00 0 0 0 0 0 0 0 0 0 0 0 0 0 0 0 0 0 0 0 0 0 0 0 0 0 0 0 0 0 0 0 0 0 0 0 0 0 0 0 0 0 0 0 0 0 0 0 00 0 0 0 0 0 0 0 0 0 0 0 0 0 0 0 0 0 0 0 0 0 0 0 0 0 0 0 0 0 0 0 0 0 0 0 0 0 0 0 0 0 0 0 0 0 0 0 00 0 0 0 0 0 0 0 0 0 0 0 0 0 0 0 0 0 0 0 0 0 0 0 0 0 0 0 0 0 0 0 0 0 0 0 0 0 0 0 0 0 0 0 0 0 0 0 00 0 0 0 0 0 0 0 0 0 0 0 0 0 0 0 0 0 0 0 0 0 0 0 0 0 0 0 0 0 0 0 0 0 0 0 0 0 0 0 0 0 0 0 0 0 0 0 00 0 0 0 0 0 0 0 0 0 0 0 0 0 0 0 0 0 0 0 0 0 0 0 0 0 0 0 0 0 0 0 0 0 0 0 0 0 0 0 0 0 0 0 0 0 0 0 00 0 0 0 0 0 0 0 0 0 0 0 0 0 0 0 0 0 0 0 0 0 0 0 0 0 0 0 0 0 0 0 0 0 0 0 0 0 0 0 0 0 0 0 0 0 0 0 00 0 0 0 0 0 0 0 0 0 0 0 0 0 0 0 0 0 0 0 0 0 0 0 0 0 0 0 0 0 0 0 0 0 0 0 0 0 0 0 0 0 0 0 0 0 0 0 00 0 0 0 0 0 0 0 0 0 0 0 0 0 0 0 0 0 0 0 0 0 0 0 0 0 0 0 0 0 0 0 0 0 0 0 0 0 0 0 0 0 0 0 0 0 0 0 00 0 0 0 0 0 0 0 0 0 0 0 0 0 0 0 0 0 0 0 0 0 0 0 0 0 0 0 0 0 0 0 0 0 0 0 0 0 0 0 0 0 0 0 0 0 0 0 00 0 0 0 0 0 0 0 0 0 0 0 0 0 0 0 0 0 0 0 0 0 0 0 0 0 0 0 0 0 0 0 0 0 0 0 0 0 0 0 0 0 0 0 0 0 0 0 00 0 0 0 0 0 0 0 0 0 0 0 0 0 0 0 0 0 0 0 0 0 0 0 0 0 0 0 0 0 0 0 0 0 0 0 0 0 0 0 0 0 0 0 0 0 0 0 00 0 0 0 0 0 0 0 0 0 0 0 0 0 0 0 0 0 0 0 0 0 0 0 0 0 0 0 0 0 0 0 0 0 0 0 0 0 0 0 0 0 0 0 0 0 0 0 00 0 0 0 0 0 0 0 0 0 0 0 0 0 0 0 0 0 0 0 0 0 0 0 0 0 0 0 0 0 0 0 0 0 0 0 0 0 0 0 0 0 0 0 0 0 0 0 0
0 0 0 0 0 0 0 0 0 0 0 0 0 0 0 0 0 0 0 0 0 0 0 0 0 0 0 0 0 0 0 0 0 0 0 0 0 0 0 0 0 0 0 0 0 0 0 0 0 0 00 0 0 0 0 0 0 0 0 0 0 0 0 0 0 0 0 0 0 0 0 0 0 0 0 0 0 0 0 0 0 0 0 0 0 0 0 0 0 0 0 0 0 0 0 0 0 0 00 0 0 0 0 0 0 0 0 0 0 0 0 0 0 0 0 0 0 0 0 0 0 0 0 0 0 0 0 0 0 0 0 0 0 0 0 0 0 0 0 0 0 0 0 0 0 0 00 0 0 0 0 0 0 0 0 0 0 0 0 0 0 0 0 0 0 0 0 0 0 0 0 0 0 0 0 0 0 0 0 0 0 0 0 0 0 0 0 0 0 0 0 0 0 0 00 0 0 0 0 0 0 0 0 0 0 0 0 0 0 0 0 0 0 0 0 0 0 0 0 0 0 0 0 0 0 0 0 0 0 0 0 0 0 0 0 0 0 0 0 0 0 0 00 0 0 0 0 0 0 0 0 0 0 0 0 0 0 0 0 0 0 0 0 0 0 0 0 0 0 0 0 0 0 0 0 0 0 0 0 0 0 0 0 0 0 0 0 0 0 0 0
0

Problem 1. Calculation of potential distributions using the Method of Relaxation
6
Setting up the spreadsheet The condition for empty space is that its potential is an average of the potentials in the
neighboring cells. You can achieve that condition in cell C3, for example, by entering the expression
=( B3 +C2+C4+D3)/4
You should format the cells of the spreadsheet so that they are square as they appear on the screen (that way the simulation of 2-D space will not be distorted). You can then enter the expression for neighbor averaging in any one cell, and copy the expression into all the other cells of the array. EXCEL will increment the cell indices correctly so that the neighbor relation will be preserved in all cells.
Keep clearly in mind that you are actually modeling a 3-D problem, which has planar symmetry: the distribution of charge and potential in any x-y slice of the problem region is exactly the same. So if you place into the problem region a straight line equipotential, it actually represents a planar equipotential surface extending back into the paper. And if you place a point charge, it actually represents a line of uniform charge density.
Boundaries of the problem region The cells that form the 4 boundaries of the problem region must be treated in a way
that does not require knowledge of the potentials outside the problem region. There are 3 ways you can treat boundary regions:
Neumann boundaries. You can set a boundary region to a constant fixed po-tential. To do this, just enter the desired value into the cells along that bound-ary region.
You can require the potential to be constant along the boundary region, but let the potential attain a value that is determined by the potentials in the interior cells. To do this, set up a cell outside the boundary region, give it a name (for example right), and enter as its formula the average of the row or column of cells that are inside the problem region, directly adjacent to the boundary cells of the equipotential. If you want the column Z4-Z50 to be an equipotential, you might set up AA25 to be your cell for averaging, name it right, and enter the formula
=SUM(Y4:Y50)/47 for the formula of cell AA25, and then enter
= right in the formulae of cells Z4-Z50.
Dirichlet boundaries. You can require that the electric field along a boundary be parallel to that boundary. This is the same as requiring that the potential on each boundary cell be the same as the potential on the cell one step in from it. For example, if you want the column Z4-Z50 to have electric field parallel to that boundary, you would enter =Y4 as the formula of cell Z4, and copy that formula to the entire column. EXCEL again maintains the indexing so that the condition requires parallel field along that columnar boundary.

Problem 1. Calculation of potential distributions using the Method of Relaxation
7
Charges in the interior Now you are set up to enter objects into your problem region. Suppose you want to
simply place a charge in the interior and find the potential distribution that it creates in the space around it. You need to first choose what kind of boundaries you want to have. If there are no other charges in the problem, then you probably would want to impose Neu-mann boundaries (equipotentials). Note that the result will be the potential distribution of a charge in a metal box. Unless you tie the 4 sides to a common equipotential, each boundary will float to a different potential according to how close the charge is to that boundary.
Now select a spot where you want to place the charge. In the contents of its cell, you want to add a term that generates potential appropriate to that charge.
We must take care about units of measure at this point. You are assuming some units for the unit size h of the physical cells that each EXCEL cell represents, and units for the potentials you put into the cells for equipotentials, and now you need units for charges that you want to place within the problem region. Suppose that you want to insert a net charge Q in the cell (m,n). The correspondence of units for charge requires a more careful analy-sis of the mathematics of the relaxation method. This analysis is provided in Appendix A. The bottom line is that you should add a term equal to
hQV
02ε=∆ .
With Q[C], h[m], and ε0 = 8.9x10⁻¹², the potential offset ∆V will have the units of volts. Note that this offset is added together with the expression for the averaging of the neighbor potentials in the cell where the charge is placed.
Now suppose that you want to distribute charge uniformly within a region inside your problem. You can do this most easily by naming a cell outside the problem region currit, adding the above term using the named variable currit for the potential offset ∆V (note that the charge you use in calculating the value to put in the variable currit is the charge that will be placed in each cell of the charge distribution). Then enter the added term to the formula in one element in the charged region, and copy it to all the elements in the region. You can keep track of which cells contain charge by coloring those cells.
Now you need to set up the spreadsheet so that it iteratively applies all formulae one time each time you hit the F9 key. You can do that by going to
Tools→Options→Calculation: check Iterations, and enter 1 in the box for maximum it-erations. Each time you hit the F9 key, EXCEL will execute one iteration of all calcula-tions throughout the array, and then stop.
Now hit F9 and observe how the contents of the cells in your array change. Each itera-tion brings the relaxation closer to the physical potential distribution that obeys the laws of electrostatics. You will probably need to hit F9 many times before the cell contents all set-tle to equilibrium values.
Now take a piece of tracing paper and trace the equipotentials that are produced by your charge in a box.

Problem 1. Calculation of potential distributions using the Method of Relaxation
8
Try changing the location of the charge in the box, for example place it near one boundary, then out in the center. See how the potential distribution changes. Is the distri-bution sensible in each case?
Now try putting a dipole in your box. Again relax the potentials, and trace the equipo-tentials. Explain the pattern that you obtain.
Equipotentials in the interior Now try modeling a parallel plate capacitor. Select two parallel strips of cells, prefera-
bly ending at a boundary. Make the boundaries on the side where the strips end, and the opposite boundary, into Dirichlet boundaries. You probably want the other two boundaries to be Neumann boundaries. Now set the potentials on the two plates to equal and opposite values, and iterate to obtain the potential distributions.
Displaying the equipotentials You can use the graphing functions of EXCEL to nicely display the equipotentials in
your problem. After the problem has converged, cursor-select all the cells in your problem region in the spreadsheet, and then select Chart Wizard→Surface. Under the surface chart option, there are 4 styles available. Select the lower right option, which produces contours of constant cell value in a 2-D plot. Adjust scales, binning, and colors as you wish.
Clearing the spreadsheet After you work each problem, it is a good idea to clear the values in all elements of the
spreadsheet. You can make provision for this by choosing a cell somewhere outside the bounds of your problem, and naming it clearit. Then in the algorithm in each interior cell, just multiply the whole term for the averaging of cells by clearit. When you put a 0 in the cell named clearit and iterate the spreadsheet, all cells will be set to 0. Then put 1 in the cell named clearit, and proceed with your next problem.
Limitations of the relaxation method All finite element techniques have the limitation that you must bound the problem with
one of the above two conditions. In any given problem, you should choose the boundary conditions to best approximate what you expect the potential distribution at the boundary to be. You can minimize the effect of the boundaries in a region of interest by simply making the entire domain of the problem (the array in EXCEL) larger, so the boundaries are further away from the region you want to study.

Problem 1. Calculation of potential distributions using the Method of Relaxation
9
Use the tool to explore! Use your spreadsheet engine to calculate the potential distribution in each of the fol-
lowing configurations:
Line charge of +10-6 C/m.
Line dipole: two line charges ±10-6 C/m.
Parallel plate capacitor: plates extending to boundary on one side, ending in center region.
Two charged tubes, one problem with same sign charges and one with opposite sign.
Line of charge between two opposite parallel conducting plates. Can you use the method of images discussed in class to connect the potential distribution in this case with that of a dipole?
Potentials inside a closed conducting boundary. Calculate the potentials inside a closed hollow conductor when there is a charge located somewhere outside. This is a called a Faraday cage.
Follow your nose – study some distributions that you are curious about.

Problem 1. Calculation of potential distributions using the Method of Relaxation
You have calculated the potential distribution in a number of configurations of charges and conductors. Now you would like to plot the equipotentials – the contours along which the potential is constant. For an insolated point charge, for example, the equipotentials are concentric spherical surfaces centered on the charge. For a charge distributed uniformly along a straight line, the equipotentials are concentric cylinders centered on the line.
Now look at your EXCEL spreadsheets of the charge configurations that you calcu-lated in Problem 1. You can trace visually the contours along which the potential is con-stant. We have devised a tool with which you can do this with more visual effect. It is an application in LabView, which calculates the iso-value contours in a 2-D table of data and plots it in a 3-D ‘mountain range’ display.
Here is how to use the application.
1. First you need to prepare an image of your spreadsheet that does not contain the formulae that generated it. To do this, you cursor-select the entire spreadsheet and COPY it to the clipboard. Then you open a new spreadsheet, give it a name. Use a standard format: your last name, Lab3, then a name describing the problem. For example: mcintyre-lab3-dipole.xls. Now select PASTE SPE-CIAL, select VALUES, and paste only the values from your spreadsheet into the new one.
2. Now open the application ‘3dvi’ from your desktop. A query box will open, and you then select the spreadsheet that you just created.
The application will then display your data in either of two fashions.
This mode displays the data in a ‘mountain range’ display, in which x and y are the co-
ordinates of your spreadsheet, and z is the value of the potential.

Problem 1. Calculation of potential distributions using the Method of Relaxation
11
This mode displays the ‘mountain range and overlays equipotential contours. The contours are calculated in intervals of potential difference. You can control the interval by right-clicking the mouse while in this display, and selecting a desired value for contour spacing, as shown below.

Problem 1. Calculation of potential distributions using the Method of Relaxation
12
Now use these tools to make equipotential plots of each of the charge/conductor con-figurations that you calculated in Problem 1.
Discuss the equipotential distributions in terms of the limiting cases, close to a charge distribution or conductor, and far from it.
Lines of force are continuous lines drawn parallel to the electric field vector in the space of a problem. Everywhere that a line of force crosses an equipotential, they are al-ways at right angles to one another. You can easily see that this is the case from the rela-tionship
VE ∇−=rr
On each of your 2-D spreadsheets, sketch in red pen the equipotentials and the lines of force. Note that such a graphic construction does not work as well on the ‘mountain range’ plots from the LabView application, because the z-axis is not a space dimension but rather an enhancement for visualization.

PROBLEM 2: Mapping potential distribution using resistive paper
You have calculated the potential distribution and the equipotentials produced by vari-ous distributions of charges. Now you will experimentally map the potential distribution near charge distributions and compare with your calculations.
You will use two equivalent but quite different techniques to map potentials. The first technique relies upon the fat that currents in a sheet of uniformly resistive paper flow in precisely the same way that electric flux flows.
Lines of flow follow lines of force: When charged bodies of different potentials are located in a medium in which some flow of charge can occur, the electric fields in the me-dium will cause the charges to be transported from one body to the other. Flowing charge is called current. As current flows, the potential drops along the direction of current flow. By measuring the potential distribution in the plane of the resistive paper, the pattern is therefore exactly that of the equipotentials due to the charged conductors even if there were no resistive paper there and no current flowing! The resistive paper provides a convenient means to map the potential distribution in the vicinity of charged conductors. The method is however restricted to modeling two-dimensional problems, in which the conductors are extended into the third dimension (out of the paper) so that any cross-section parallel to the paper would show the same cross-cut of conductors.
To maintain the difference of potential while current flows in the resistive paper, the con-ducting regions must be connected to a source of electromotive force – a battery or d.c. power supply. The flow lines of the current follow the paths of the lines of force, that is, they are also at all points perpendicular to the equipotential surfaces.
If you draw a line or shape upon a sheet of resistive paper using a conductive ink, the region of ink forms an equipotential: the electric potential is the same at all points of the region covered by the ink.
If you now draw a second such region on the paper, it will form a second equipotential.
Now if you connect a source of potential difference V (a battery or d.c. power supply) with its + terminal to one conductive region and its – terminal to the other region, you will create a potential difference V between the two equipotentials.
EQUIPMENT
You are provided with sheets of uniformly resistive paper, on which a 2-dimensional grid is marked on 1 cm spacing. This grid provides you with a convenient map with which to measure the distribution of electric potential everywhere around conductive regions.
You are also provided with conductive ink (an aromatic solvent containing a silver powder). You can apply this ink to the paper by clearing the opening in the end of the tube and then squeezing gently as you move the tip over the region you wish to define as a con-ductor. You are also provided with stencils with which you can make conductor patterns.
PROBLEM 2: Mapping potential distribution using resistive paper
14
You are equipped with a battery that sustains a potential difference between two loca-tions, sourcing current to flow between its leads as necessary to sustain that potential dif-ference. Please do not leave the battery connected to the resistive load for long periods of time, as it will drain the battery’s capacity.
You are also equipped with a direct current (d.c.) power supply, which operates exactly like a battery, but enables you to control the potential difference at any value from 0 to the maximum capacity of the supply (20 V).
You are equipped with a digital multimeter (DMM), which is an electronic instrument that can be used to measure the potential difference between two probe leads connected between its + and - input terminals. It can also be used to measure the resistance to current flow along a resistive path, and the current that flows along a current path that includes the meter as a series element. Your TA will instruct you in the operation of the instrument.
PREDICTIONS
You will be studying the potential distributions produced by the charge distributions that you studied in Problem 1. In each case you should reason what you expect from the physics of electrostatics and from your calculations.
METHOD QUESTIONS
It is useful to have an organized problem-solving strategy. The following procedures should help with the analysis of your data:
1. You should prepare yourself to make the patterns of silver paint shown in Figure 4 on resistive paper. In each case, you should plan a) what connections of the battery or power supply you will make to each pattern.
2. If you want to study the potential distribution due to two identical charged cyl-inders, with the same sign of charge on both, how would you design a conduc-tor geometry to simulate it. Remember, your power supply enables you to ap-ply a potential difference between two objects, but you want to create the same potential on both cylinders, with respect to some third object (what should it be?)

PROBLEM 2: Mapping potential distribution using resistive paper
15
Figure 4. Conductor patterns for study using resistive paper modeling.
MEASUREMENT
For each distribution to be studied, you should prepare the pattern of conductors on a clean sheet of resistive paper, and then affix the paper onto the cork board. Insert a metal pin into the conducting region, and use the resistance function of the DMM to verify that the metal pin is in good contact with all regions of that conducting region.
Attach electrical leads to the metal pins between which you wish to create a potential difference. Attach the other end of the leads to the + and – terminals of the battery or power supply. You are now generating a potential difference between those points, and current is now flowing through the resistive paper.
Set up the DMM for its voltmeter function and attach the – terminal of the DMM to the

PROBLEM 2: Mapping potential distribution using resistive paper
16
– terminal of the battery or power supply. If you now touch the + terminal of the DMM to any point on the resistive paper, it will read the potential difference between that point and the – terminal of the voltage source.
Prepare an EXCEL spreadsheet in which you will use a region of x-y cells to record the potentials at every point of the 1 cm grid of cross-hairs on the resistive paper. Measure the potential at each point and record it in the appropriate cell in the spreadsheet.
ANALYSIS
Use the same LabView tools as in Problem 1 to analyze the equipotentials and electric fields in the region of each of your conductor geometries. Compare with the calculations from Problem 1 and with your predictions.
For the last distribution shown in Figure 4, if you apply a potential difference between a hollow closed conductor and an external conductor, what is the potential distribution in-side the hollow conductor? Explain it in terms of Gauss’ Law.

PROBLEM 3: Mapping equipotentials using the Overbeck apparatus
When a test charge is moved along an equipotential line or over an equipotential surface, no work is done. Since no work is done in moving a charge over an equipotential surface it follows that there can be no component of the electric field along an equipotential sur-face. Thus the electric field or lines of force must be everywhere perpendicular to the equi-potential surface. Equipotential lines or surfaces in an electric field are more readily lo-cated experimentally than lines of force, but if either is known the other may be con-structed as shown in Figure 1. The two sets of lines must everywhere be normal to one an-other.
EQUIPMENT
The Overbeck apparatus is shown in Figure 5. It consists of a resistive film and a pattern of conductors that is trapped within an insulating plastic lamination. By placing a conduct-ing probe in contact at a location on the plastic surface, the probe attains the potential at that point on the resistive film beneath.
Figure 5. Overbeck apparatus for mapping equipotentials.
The Overbeck apparatus consists of a field-mapping board, a U-shaped probe, six field plates (pictured in Figure 6), and two plastic templates. The patterns on the two templates are a composite of the patterns on the six field plates. Any one of the six field plate pat-terns can be reproduced with the templates. Eight similar resistors are connected in series between the two binding posts on the fieldmapping board to eight points separated by the same difference of potential.
You will use a galvanometer to follow equipotentials on the surface. The galvanome-ter is a sensitive current meter, which is instantaneously connected across two points A and B in a circuit by pressing a contact button. Current flows in the galvanometer, from the contact with higher potential to the contact with lower potential. The deflection of the needle indicates which way current flows and therefore which contact has higher potential.

Problem 3. Mapping equipotentials using the Overbeck apparatus
18
Figure 6. Conductor patterns to be studied using the Overbeck apparatus.
METHOD QUESTIONS
You will set up an electrical circuit as shown in Figure 5. You have four conductor patterns, as shown in Figure 6. As an example, the conductor geometry in Figure 5 is a reproduction of an actual test made in designing a part for a high voltage generator. The solid lines are the equipotential lines and the dashed lines are the equipotentials and the lines of force for a field existing between a blade electrode and a plane.
MEASUREMENT
Turn the field mapping board over and notice the two metal bars. Each bar has two threaded holes. Two of these holes hold plastic-headed thumb screws with knurled lock nuts. Remove the thumb screws and center any one of the field plates so the holes in the plate coincide with holes in the metal bars. Insert a thumb screw into each hole and turn it until it touches the board below. Turn the knurled lock nut to hold the field plate securely in place. Binding posts marked “Bat.” and “Osc.” are located on the upper side of the board. Con-nect the potential source to the appropriate binding post. Fasten a sheet of 8.5 x 11-inch graph paper to the upper side of the board. Secure the paper by depressing the board on

Problem 3. Mapping equipotentials using the Overbeck apparatus
19
either side and slipping the paper under the four rubber bumpers. Select the design tem-plate containing the field plate configuration you have chosen. Place the design template on the two metal projections (template guides) above the paper edge and let the two holes on top of the template slide over the projections. Trace the design corresponding to the field plate pattern in place on the underside of the mapping board and remove the template.
Place the Field Mapping Board and the U-shaped probe on a lecture table or laboratory bench. Carefully slide the U-shaped probe onto the mapping board with the ball end fac-ing the underside of the filed mapping board. Connect one lead of the null-point detector (galvanometer or headphones) to the U-shaped probe and one to one of the banana jacks, numbered E1 through E7. Notice the knurled knob on top of the probe (next to the spot-ting hole) and the screw below the probe that acts as a support leg.
To make tracings, guide the probe with one finger of one hand resting lightly on the knurled knob, and a finger on the other hand lightly touching the nut of the leg. The leg slides on the table top and stabilizes the probe. Do not apply pressure to the probe, and avoid squeezing its jaws. This causes unnecessary wear on the plates. Although some wear is inevitable, the plates will last longer if proper care is taken.
Using the selected banana jack, move the U-shaped probe over the paper until you ob-tain a null reading on the galvanometer when it is momentarily connected. The circular hole in the top arm of the probe is directly above the contact point that touches the graph-ite-coated paper. Record the location of the equipotential point using a pencil through the hole directly on the paper. Move the probe to another null-point position and record it. Continue this procedure until you have generated a series of these points across the paper. Connect the equipotential points with a smooth curve to show the equipotential line of the banana jack.
Connect the detector to a new banana jack and plot its equipotential line. Repeat until equipotential lines are plotted for all banana jacks E1 through E7. Since the potential dif-ference is the same across each similar resistor, the equipotential lines will be spaced to show an equal potential drop between successive lines.
The lines of force are perpendicular to these equipotential lines at every point. Using dashed lines, draw in the lines of force of the electric field being studied. After completion, select a different field plate and repeat the above procedure until all electric fields from the six field plates (shown in Figure 6) are drawn.

Problem 3. Mapping equipotentials using the Overbeck apparatus
20
ANALYSIS
Compare the equipotentials obtained in this manner to those for similar charge distribu-
tions with the resistive paper and the distributions calculated using the Relaxation Method. Discuss the limitations of each method and how they may explain differences. 1. Why are the equipotential lines near conductor surfaces parallel to the surface and why perpendicular to the insulator surface mapped?
2. Is it possible for two different equipotential lines or two lines of force to cross? Explain.
3. Explain, with the aid of a diagram, why lines of force must be at right angles to equipo-tential lines.
4. Under what conditions will the field between the plates of a parallel plate capacitor be uniform?
5. How does the electric field strength vary with distance from an isolated charged parti-cle?
6. Sketch the equipotential lines for an isolated negatively charged particle, spacing the lines to show equal difference of potential between lines.
7. Compare the sketch in answer to Question 6 with the mapped field of the parallel-plate capacitor. Account for the difference.
8. Show that the electric field strength is equal to the potential gradient.
9. What conclusions can you draw about the field strength and the current density at vari-ous parts of sheet II, Figure 6.
10. How much work is done in transferring an electrostatic unit of charge from the one terminal to the other terminal in this experiment?
11. Explain the lack of symmetry in the field of sheet I, Figure 6.
12. Sketch the field pattern of two positively charged small spheres placed a short distance from each other.
13. Explain the pattern of the field found inside a Faraday Ice Pail.

Appendix A. The Method of Relaxation
We want to develop a method to numerically calculate the potential Φ(x,y) in a 2-D geometry. We will implement it in a 2-D spreadsheet of cells (m,n).
Cartesian coordinates. Let’s first develop the method for Cartesian coordinates (x,y). We will make a Taylor expansion of the Φ near a point (x0, y0):
K+⎟⎟⎠
⎞⎜⎜⎝
⎛∂∂Φ∂
⋅+∂Φ∂
+∂Φ∂
⋅+∂Φ∂
+∂Φ∂
+Φ=++Φ dxdyyx
dyy
dxx
dyy
dxx
yxdyydxx2
22
22
2
2
0000 2)()(21),(),(
We put hdydx ±== (h is the mesh size) and add all 8 combinations ),0,( hhdx −= and ),0,( hhdy −= of the neighboring cells to obtain
K+⋅⎟⎟⎠
⎞⎜⎜⎝
⎛∂Φ∂
+∂Φ∂
⋅+Φ⋅=±±Φ∑−=−=
22
2
2
2
00,0,;,0,
00 28),(8),( h
yxyxdyydxx
hhdyhhdx
or dividing by 8
K+⋅⎟⎟⎠
⎞⎜⎜⎝
⎛∂Φℑ
+∂Φ∂
⋅+Φ=±±Φ∑−=−=
222
2
00,0,;,0,
00 21),(),(
81 h
yxyxdyydxx
hhdyhhdx
(1)
Now we are developing a technique to calculate Φ in a 2-D region of space, in which Φ
is independent of the third coordinate z: 0=∂Φ∂z
We can therefore equate the expression in brackets to the Laplacian operator
2
2
2
2
2
22
zyx ∂Φ∂
+∂Φ∂
+∂Φ∂
=Φ∇
If the cell of interest (x0,y0) contains a net charge Q, then we must connect this operator to charge, using Gauss’ theorem, which relates the flux of a vector F
rout of a closed sur-
face to a volume integral of the divergence of the vector inside the surface:
dVFSdF ∫∫ ⋅∇=⋅rrrr
We can then use Gauss’ Law to relate the bracketed expression in Eq. (1) to the en-closed charge:
∫∫∫ ∫ −=⋅−=⋅∇−=Φ∇⋅∇=Φ∇0
2 )(εQSdEdVEdVdV
rrrrrr
Relating the first to the last expression, we obtain for a cubic cell of side h:

22
300
2
hQ
εερ
−=−=Φ∇
We can then solve Eq. (1) for the potential in the cell of interest:
( )h
Qnmnmnmnmnmnmnmnmnm
01,1,1,11,11,11,1,11,, 2
181
ε+Φ+Φ+Φ+Φ+Φ+Φ+Φ+Φ=Φ ++++−++−−−−−
Spreadsheet lapcart.xls embodies this algorithm. You will add boundary conditions, equipotentials, and charges appropriate to your problem.
Cylindrical coordinates. In cylindrical coordinates (r,ϑ,z), the Laplacian operator has the form
2
2
2
2
2
22 1
ϑ∂Φ∂
+∂Φ∂
+∂Φ∂
⋅+∂Φ∂
=Φ∇zrrr
Now we will model this cylindrical space in a mesh (r, z) – one boundary of the meshed problem will be the axis of rotation of the cylindrical geometry. We will assume
that Φ is independent of ϑ: 0=∂Φ∂ϑ
Let’s take the boundary m=0 to be the axis. Then r = mh and z = nh. We can make a Taylor expansion in the variables r,z and again obtain Eq. (1) with the substitutions
x→r, y→z. The expression in brackets is however no longer the Laplacian operator:
rrrrzr ∂Φ∂
⋅−−=∂Φ∂
⋅−Φ∇=∂Φ∂
+∂Φ∂ 11
0
22
2
2
2
ερ
The new term can be expressed in terms of the potentials in the neighboring cells at larger and smaller radius from (r0,z0):
( )( )hmhrrnmnm
21 ,1,1 −+ Φ−Φ
=∂Φ∂
⋅
We will now solve for Φ(r0,z0) as before, but adding this extra term:
Spreadsheet lapcyl.xls embodies this algorithm. As before you will insert boundary conditions, equipotentials, and charges appropriate to your problem.
( )mh
Q nmnmnmnmnmnmnmnmnmnmnm 42
181 ,1,1
01,,11,11,11,11,11,,1,
−++++++−+−−−−−
Φ−Φ++Φ+Φ+Φ+Φ+Φ+Φ+Φ+Φ=Φ
ε