Laboratory guide for metabolomics experiments - BioSpec · SOP 9 - Collection of serum for...
37
1 Laboratory Guide for Metabolomics Experiments
Transcript of Laboratory guide for metabolomics experiments - BioSpec · SOP 9 - Collection of serum for...

1
Laboratory Guide for
Metabolomics Experiments

MIB BioSpec Group
2
Contents
Contact details ............................................................................................................................ 3
SOP 1 - Bio-COSHH and GM paperwork ................................................................................. 4
SOP 2 - Plasticware and reagents for LC-MS and GC-MS experiments .................................. 5
SOP 3 - Sample collection, storage and transport...................................................................... 7
SOP 4 - Quenching & extraction of adherent & suspension cells for metabolomic analysis .... 9
SOP 5 - Preparation of cell media for metabolomics analysis................................................. 12
SOP 6 - Quenching and extraction of microbial cells in media for metabolomic analysis ..... 13
SOP 7 - Extraction of tissue for metabolomic analysis ........................................................... 17
SOP 8 - Collection of blood plasma for metabolomic analysis ............................................... 19
SOP 9 - Collection of serum for metabolomic analysis ........................................................... 22
SOP 10a - Quenching and extraction of serum metabolome ................................................... 25
SOP 10b - Quenching and extraction of serum metabolome for GC-MS analysis ................. 26
SOP 11a - Quenching and extraction of urinary metabolome for LC-MS analysis ................ 27
SOP 11b - Quenching and extraction of urinary metabolome for GC-MS analysis ................ 28
SOP 12 - Extraction of lipidome from mammalian cell samples for LC-MS analysis ............ 29
SOP 13 - Extraction of lipidome from microbial samples for LC-MS analysis ...................... 30
SOP 14 - FT-IR sample preparation protocol .......................................................................... 32
SOP 15 - Preparation of internal standards and retention index for GC-MS........................... 34
SOP 16 - The GC-MS derivatization process .......................................................................... 36

MIB BioSpec Group
3
Contact details
Professor Roy Goodacre
Email: [email protected]
Tel: 0161 306-4480
Address: John Garside Building-2.027
School of Chemistry
The University of Manchester
Manchester Institute of Biotechnology
131 Princess Street
Manchester
q M1 7DN
David Ellis
Senior Experimental Officer
Email: [email protected]
Katherine Hollywood
Research Associate
Email: [email protected]
Drupad Trivedi
Research Associate
Email: [email protected]
Howbeer Muhamadali
Research Associate
Email: [email protected]
Group webpage: http://www.biospec.net

MIB BioSpec Group
4
SOP 1 - Bio-COSHH and GM paperwork
This SOP is designed to guide the user through various protocols for metabolomic analysis of
different types of samples. Before starting any protocol all ethical approval MUST be
considered/completed, signed and sent to us whilst appropriate material transfer agreements
MUST be in place before we can receive and work on your samples. If in doubt please feel
free to ask and we shall advise on the appropriate course of action.
At the MIB we are committed to the safest of working environments for all of our staff and
visiting researchers. It is therefore vitally important that prior to any samples being sent and
work being carried out on our premises we have a fully completed biological safety
assessment on any materials that are to be analysed.
Correctly completed Bio-COSHH/GM legislation should cover biological agents which are
defined as any microorganism, cell culture, prion or human endoparasite which may cause
infection, allergy, toxicity, or otherwise create a hazard to human health. This also includes
blood, urine and human tissues. The general requirements and completion of COSHH i.e. risk
assessment and prevention or controls of exposure apply to work with biological agents and it
is the collaborator that generally assumes this duty.
Within our lab we have a selection of previously completed Bio-COSHH/GM forms that can
be applied to certain sample types, such as human serum, plasma or urine but in general this
must be completed when any biological material is to be used, or when the use of an
approved biological agent is to be changed in such a way that the risk might be increased.
Once we have received an Application to Handle Biological Materials or Bio-COSHH Risk
Assessment related to the proposed work it will be assessed by the MIB GM/Bio committee
where upon a decision will be made as to the suitability of the proposal. This process can
take several weeks to complete so it is important to submit all documentation as soon as
possible for assessment.
For general University of Manchester guidance on Bio-COSHH/GM health and safety please
follow this link:
http://www.healthandsafety.manchester.ac.uk/handsdocs/?firstchar=B
The link will take you to the main University website, which has the most up-to-date Bio-
COSHH and GM forms. Please use the Guidance when completing the application form for
GM and Bio-COSHH risk assessment, we will discuss which aspects have to be filled in and
if you have any queries please direct them to the point of contact staff member.
Back to list of contents

MIB BioSpec Group
5
SOP 2 - Plasticware and reagents for LC-MS and GC-MS
experiments
Due to the inherent sensitivity of all mass spec equipment, it is imperative that only the
highest quality plastics and reagents/solvents are used in the preparation and execution of any
metabolomics based experiment. Plastic contaminants can be very misleading within a
dataset and it is important that these are eradicated.
Previous research carried out within our group has shown that specific plasticware and
reagents are of higher purity and contains far less contaminants than others and we advise
that as a minimum, blank samples of all plastics used within an experiment (be it growing
cells, tissue extraction, plant work or serum/blood analysis) to be sent for examination and
that all solvents used are AT LEAST LC-MS grade. We would prefer that the following
types of plastics/reagents are used:
General Plasticware
Plastic Type Manufacturer Part Number
2 mL Tubes Colourless Safe-Lock Eppendorf 0030 120.094
15 mL Falcon Tubes Greiner Bio-one CellStar 188261
50 mL Falcon Tubes Greiner Bio-one CellStar 227261
0.5 – 10 µL tips Fisher Brand Clear FB34521
1 - 200 µL tips Fisher Brand Yellow FB34531
200 - 1000 µL tips Fisher Brand Blue FB34611
Reagents and vial for LCMS
Reagent/Vial/Column Manufacturer Part Number
HPLC grade Water Sigma Aldrich 34877
LC-MS grade Methanol Fisher 10767665
HPLC grade Acetonitrile Sigma Aldrich A/0626/17
HPLC grade Propan-2-ol Fisher A461-1
LC-MS grade Formic Acid Sigma Aldrich (VWR) 1.11670.1000
Ammonium Bicarbonate Sigma Aldrich A6141
Ammonium Hydroxide Sigma Aldrich 320145
300 µL vials (suitable for Thermo Acela AS) Thermo 60180-707
Vial Caps Thermo 60180-516
Hypersil Gold C18 Column Thermo 25002-102130

MIB BioSpec Group
6
Reagents and vials for GCMS
Reagent/Vial Manufacturer Part Number
Pyridine Acros 131780010
MSTFA Acros 221580250
Methoxyamine Acros 210490250
Urease (for Urine Protein Crash) Sigma Aldrich U1500-20KU
Retention Index Reagents
Decane Sigma Aldrich 30540
Dodecane Sigma Aldrich 44010
Pentadecane Sigma Aldrich 76509
Nonadecane Sigma Aldrich 74158
Docosane Sigma Aldrich 43942
Hexane Sigma Aldrich 34859
Internal Standards
d4-lysine Cambridge Isotopes
d4-succinic acid Sigma Aldrich 14493-42-6
d5-glycine Cambridge Isotopes DLM-280-5
d5-benzoic acid Sigma Aldrich 1079-02-3
GC Vial Caps Chromacol 500x9-SC(B)TST1
GC Vial Inserts Chromacol 1000x02-MTVWG
GC Vial Feet Chromacol 500xMTS-1
GC Column VF5-ms Agilent CP8943
Notes
Sigma Aldrich/Acros Website – http://www.sigmaaldrich.com/united-kingdom.html
Cambridge Isotopes Website - http://www.isotope.com/cil/index.cfm
Agilent Website - http://www.home.agilent.com/agilent/home.jspx?cc=GB&lc=eng
Chromacol Website - http://www.chromacol.com/
Back to list of contents

MIB BioSpec Group
7
SOP 3 - Sample collection, storage and transport
Initial discussions regarding sample logistics are important to make sure samples not only
arrive in our lab safely but to also assist us in the efficient running of our instrumentation
and lab space.
Samples are generally collected in 2 mL Eppendorf tubes or 15/50 mL Falcon tubes
and safely stored at -80 ˚C for a considerably long time in the case of some large
studies (n = 1000s) this can be years.
If samples are labelled or bar-coded please provide an Excel sheet with as much
metadata (sample information) as possible in order to carry out significant statistical
post run analysis on the data.
Clinical samples must be BMI, age and gender matched.
If a large sample number is proposed it is vital that notice is given as far in advance,
as we will have to arrange suitable storage and schedule our instrument analysis time.
Sample collection:
Please collect and keep samples on ice (or approx. 4 ˚C) if replicates are being
collected from patients and/or duration of sample labelling and recording.
Clearly label tubes with a unique labelling system, on both lids and sides of the tubes,
with water resistant markers.
Samples must be collected using specific plasticware as detailed in BioSpec SOP 2
(pipette tips, storage tubes, falcon tubes) only.
Sample storage:
Use 100 well storage rack/boxes as shown below for storing your collected samples.
Make a record of each box, i.e. the rows and columns in which samples are stored in a
separate Excel spreadsheet,

MIB BioSpec Group
8
Sample transport
Samples must be transported on dry ice and securely packaged. They must NOT
be sent BEFORE all the necessary Bio-COSHH and regulatory forms
(individually emailed) are completed and in place. Please refer to our BioSpec
SOP 1 that mentions where all these forms (and instructions) can be found.
Samples should in general be sent to an appropriate point-of-contact staff member
to the following address:
Manchester Institute of Biotechnology STORES
Drover Lane (off Sackville Street)
Manchester
M1 6NG
To be safe it is best that samples are sent next day delivery via a reliable courier
(such as FedEx or TNT) only on a Monday, Tuesday or Wednesday. The sending
of samples on a Thursday is not advisable due to the increased risk of delayed
arrival due to the early Friday closure of MIB stores and the corresponding
consequences of the weekend.
Back to list of contents
MIB BioSpec Group
9
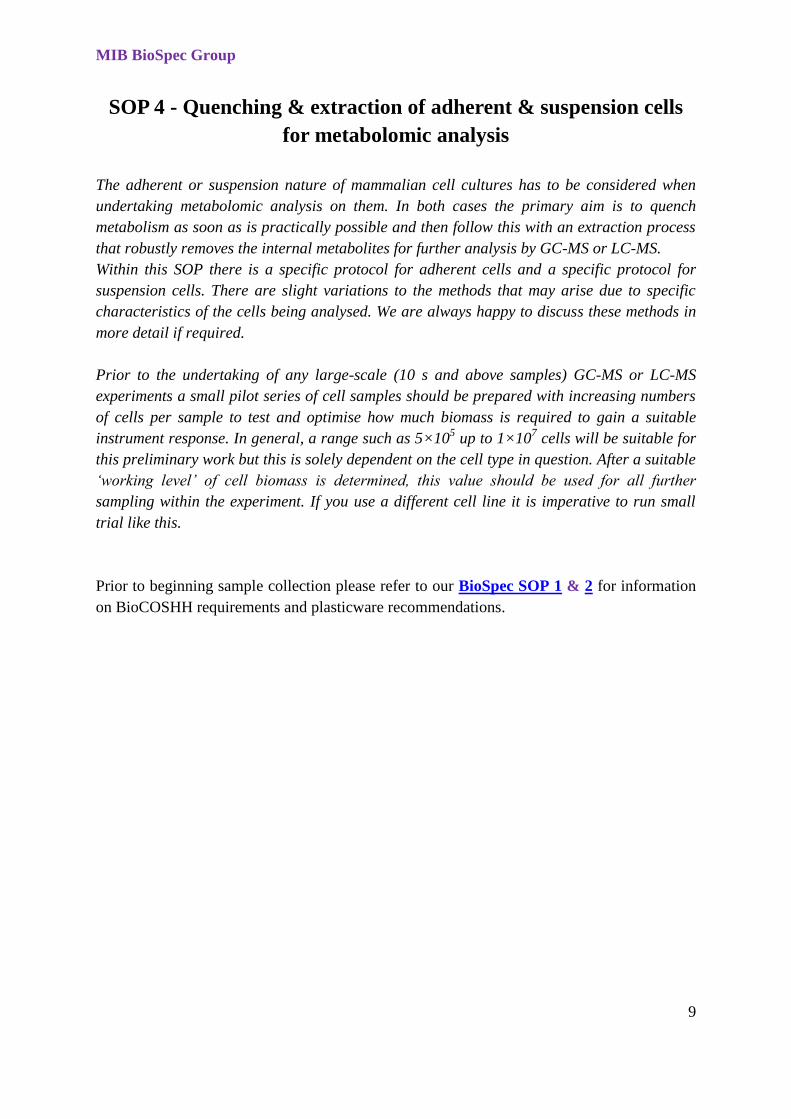
SOP 4 - Quenching & extraction of adherent & suspension cells
for metabolomic analysis
The adherent or suspension nature of mammalian cell cultures has to be considered when
undertaking metabolomic analysis on them. In both cases the primary aim is to quench
metabolism as soon as is practically possible and then follow this with an extraction process
that robustly removes the internal metabolites for further analysis by GC-MS or LC-MS.
Within this SOP there is a specific protocol for adherent cells and a specific protocol for
suspension cells. There are slight variations to the methods that may arise due to specific
characteristics of the cells being analysed. We are always happy to discuss these methods in
more detail if required.
Prior to the undertaking of any large-scale (10 s and above samples) GC-MS or LC-MS
experiments a small pilot series of cell samples should be prepared with increasing numbers
of cells per sample to test and optimise how much biomass is required to gain a suitable
instrument response. In general, a range such as 5×10⁵ up to 1×10
7 cells will be suitable for
this preliminary work but this is solely dependent on the cell type in question. After a suitable
‘working level’ of cell biomass is determined, this value should be used for all further
sampling within the experiment. If you use a different cell line it is imperative to run small
trial like this.
Prior to beginning sample collection please refer to our BioSpec SOP 1 & 2 for information
on BioCOSHH requirements and plasticware recommendations.
MIB BioSpec Group
10
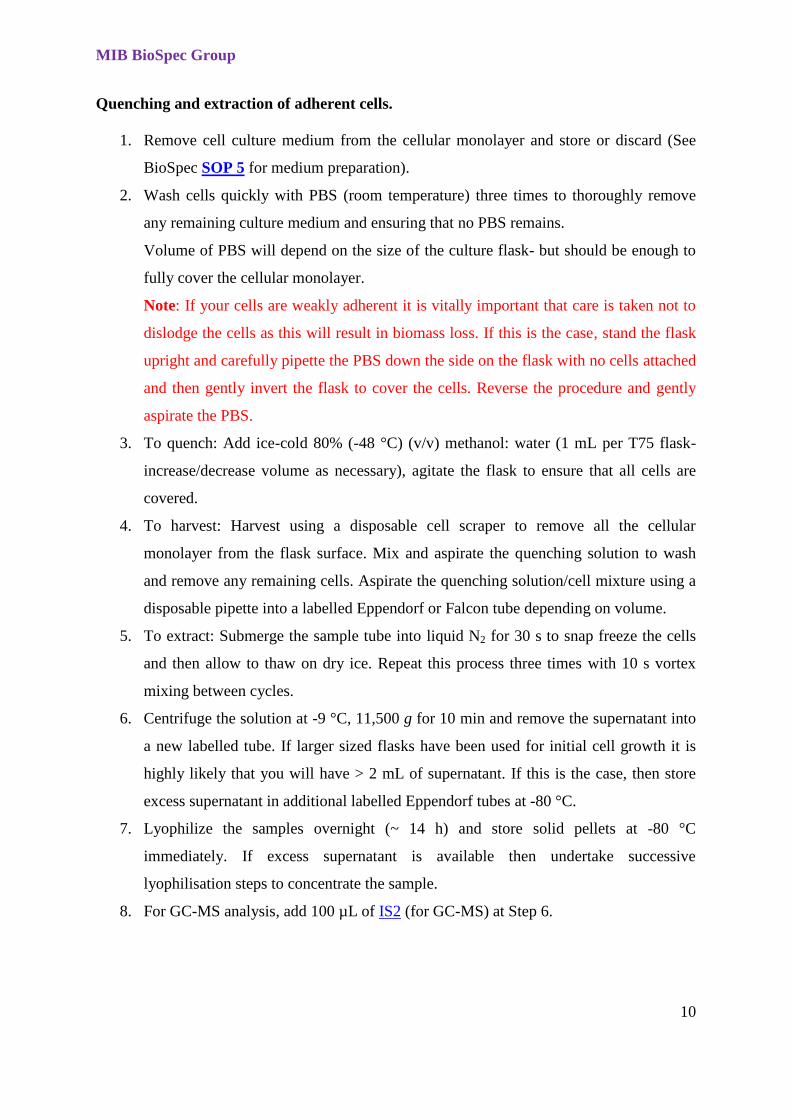
Quenching and extraction of adherent cells.
1. Remove cell culture medium from the cellular monolayer and store or discard (See
BioSpec SOP 5 for medium preparation).
2. Wash cells quickly with PBS (room temperature) three times to thoroughly remove
any remaining culture medium and ensuring that no PBS remains.
Volume of PBS will depend on the size of the culture flask- but should be enough to
fully cover the cellular monolayer.
Note: If your cells are weakly adherent it is vitally important that care is taken not to
dislodge the cells as this will result in biomass loss. If this is the case, stand the flask
upright and carefully pipette the PBS down the side on the flask with no cells attached
and then gently invert the flask to cover the cells. Reverse the procedure and gently
aspirate the PBS.
3. To quench: Add ice-cold 80% (-48 °C) (v/v) methanol: water (1 mL per T75 flask-
increase/decrease volume as necessary), agitate the flask to ensure that all cells are
covered.
4. To harvest: Harvest using a disposable cell scraper to remove all the cellular
monolayer from the flask surface. Mix and aspirate the quenching solution to wash
and remove any remaining cells. Aspirate the quenching solution/cell mixture using a
disposable pipette into a labelled Eppendorf or Falcon tube depending on volume.
5. To extract: Submerge the sample tube into liquid N2 for 30 s to snap freeze the cells
and then allow to thaw on dry ice. Repeat this process three times with 10 s vortex
mixing between cycles.
6. Centrifuge the solution at -9 °C, 11,500 g for 10 min and remove the supernatant into
a new labelled tube. If larger sized flasks have been used for initial cell growth it is
highly likely that you will have > 2 mL of supernatant. If this is the case, then store
excess supernatant in additional labelled Eppendorf tubes at -80 °C.
7. Lyophilize the samples overnight (~ 14 h) and store solid pellets at -80 °C
immediately. If excess supernatant is available then undertake successive
lyophilisation steps to concentrate the sample.
8. For GC-MS analysis, add 100 µL of IS2 (for GC-MS) at Step 6.

MIB BioSpec Group
11
Quenching and extraction of suspension cells.
1. Remove an aliquot of cells and conduct a cell count.
2. Remove the cell medium and cells from the culture flask and transfer into a labelled
Falcon tube.
3. To harvest and quench: Centrifuge the cells at low speed (5 min, 800 g, RT) to gently
pellet the cells. Aspirate and discard the culture medium and immediately add 1 mL
of ice-cold (-48 °C) 80% (v/v) methanol: water per 2x10⁶ cells (calculated from cell
count-Step 1) to simultaneously re-suspend and quench the cells.
4. To extract: Snap freeze the cells in liquid N2 for 30 s and then allow thawing on dry
ice. Repeat this three times with 10 s vortex mixing between cycles.
5. Centrifuge the solution at -9 °C, 11,500 g for 10 min and remove the supernatant into
a new labelled tube. If larger sized flasks have been used for initial cell growth it is
highly likely that you will have > 2 mL of supernatant. If this is the case, then store
excess supernatant in additional labelled Eppendorf tubes.
6. Lyophilize the samples overnight (~ 14 h) and store solid pellets at -80 °C
immediately. If excess supernatant is available then undertake successive
lyophilisation steps to concentrate the sample.
7. For GC-MS analysis add 100 µL of IS2 (for GC-MS) at Step 6.
Pooled biological QCs are recommended strongly to monitor instrument health.
Back to list of contents

MIB BioSpec Group
12
SOP 5 - Preparation of cell media for metabolomics analysis
Prior to the undertaking of any large-scale (10 s and above) GCMS or LCMS experiment a
small pilot series of samples should be prepared with increasing amounts of cell medium
present to test and optimise how much medium is required to get a suitable instrument
response. In general, a range such as 10, 20, 50, 100 and 200 µL will be suitable for this
preliminary work but this is solely dependent on the ingredients of the medium in question.
After a suitable ‘working level’ of cell medium is determined, this value should be used for all
further sampling within the experiment.
Prior to beginning sample collection please refer to our BioSpec SOP 1 & 2 for information
on BioCOSHH and plasticware.
1. Remove cell medium from cell samples (1-2 mL is sufficient) (either adherent or
suspension pellet) and transfer to clearly labelled Eppendorf tubes and centrifuge at
13,500 g for 5 min. This step removes any cell debris and suspended cells. At this step
you can also filter using a 0.45 µm syringe filter but this is not always practical if you
have many samples- due to increased time.
2. Aliquot the supernatant into new, labelled Eppendorf tubes. 200 µL is sufficient for
routine LC and GC-MS analysis.
3. Place an appropriate amount of cell medium (100-200 µL) in a 2 mL Eppendorf tube,
add 100 µL of IS2 (for GC-MS) and lyophilise samples overnight (~14 h) until
dryness.
4. At this stage samples can be stored at -80°C until analysis.
Back to list of contents

MIB BioSpec Group
13
SOP 6 - Quenching and extraction of microbial cells in media for
metabolomic analysis
The process of metabolite extraction from suspended microbial cells involves a quenching
step that freezes metabolic processes within the cells followed by an extraction step that
removes internal metabolites into the extraction solution.
Above is a diagram that highlights both steps with the initial quenching process in blue and
the extraction process in red whilst also including an OD determination via UV in order to
normalise for biomass differences between experimental samples.
Prior to undertaking any large-scale (10 s of samples and above) experiment on GCMS or
LCMS a small pilot series of samples should be prepared using this protocol with a range of

MIB BioSpec Group
14
culture media volumes (as a guide start with 1, 5, 10, 20 & 50 mL) present to test and
optimise how much biomass is required to get a suitable instrument response.
Step 1 – Quenching
1. Initially grow experimental samples in triplicate and measure OD600nm for biomass
normalisation.
2. Add an appropriate volume of cell culture (as determined by an initial pilot
experiment) to a suitable falcon tube and quench by adding twice the amount of cold
(-48 °C) 60% methanol. This will quench internal cellular processes but not leech
metabolites in to the cell medium. Please note that alternative quenching solutions can
be used and this is determinant to the cells, please see notes.
3. Centrifuge samples at 4800 g for 10 min at -8 °C to pellet cellular mass.
4. Remove cell media and re-centrifuge at 4800 g for 10 min at -8 °C and remove
residual quenching media. This step is required if the cell pellet is not compact and all
the supernatant is not removed after the first centrifugation step (step 3), otherwise
proceed to step 5.
5. The pellet is now ready for subsequent extraction or storage at -80 °C until extraction
can be performed.
Step 2 - Extraction
6. Suspend the biomass pellets in 1 mL of cold (-48 °C) 80% methanol. It is also
possible to use other extraction solvent systems, this is a general system that extracts
both polar and non-polar metabolites. Please see notes for more information.

MIB BioSpec Group
15
7. Transfer the dissolved pellet in to a chilled 2 mL Eppendorf tube, snap freeze in
liquid N2 for 1 min then allow the solution to melt on wet ice. Upon thawing, vortex
for 30 s and then repeat the snap freezing 2 more times.
8. Centrifuge the solution at -9 °C, 14,500 g for 5 min and transfer the supernatant into a
fresh 2 mL Eppendorf.
9. Add 500 µL of extraction solvent and repeat steps 8 and 9, followed by adding the
extracted solution to the same final 2 mL Eppendorf.
10. Normalise the extracts using the extraction solvent according to the recorded OD600nm
for each sample. Prepare QC samples and add 100 µL of IS2 to all the samples.
Lyophilize all samples and store solid pellets at -80 °C immediately.
Notes
Due to the diversity of cell membrane structures no individual quenching or extraction
solution can cover all possible microbe types. Below is a summary of some good alternatives:
Alternative quenching solution
60:40 (v/v) methanol water containing ammonium hydrogen carbonate to a final
concentration of 0.85% (w/v) at -48°C with a sample to quenching solution ratio of 1 volume
sample to 4 volumes quenching solution. Use the same volumes as indicated in the main
SOP. This is a gentler quenching system that can minimise cellular leakage.
Methanol/Chloroform
1mL of 66:34 v/v chloroform/methanol solution at -48°C added to 250 µL ice cold 0.5 mM
tricine acts as the initial extraction solution in step 7. The samples are then mixed, step 8 is
carried out and the different phases are allowed to separate, the upper (aqueous) phase was
removed and stored on ice. A further aliquot of tricine is added to the sample and the phase
separation procedure is repeated. The upper layer is added to the first and the solution is
centrifuged at 11,500 g, 0 ˚C, for 5 min to remove any cell debris. The supernatant is then
transferred to a fresh tube and the samples stored on ice for further analysis.

MIB BioSpec Group
16
Perchloric acid
An aliquot (1 mL) of ice cold 0.25 M PCA is first added to the biomass. Three freeze / thaw
cycles are then performed on the re-suspended biomass as described above. The sample is
centrifuged to remove the biomass from the samples and the supernatant was neutralised with
KOH. The resulting precipitate (KClO4) is then removed by centrifugation and the
supernatant was stored on ice for further analysis.
Ethanol
An aliquot (1 mL) boiling absolute ethanol (90˚C) is first added to the pellet, the solutions are
then heated in a closed tube for 10 min at 90˚C. The samples are cooled on ice for 5 min and
the cell debris removed by centrifugation. The retained supernatant is then stored on dry ice
for further analysis.
Potassium hydroxide
The biomass is first re-suspended in 1 mL 0.25M KOH (80˚C), samples are then heated at
80˚C for 10 min and then cooled on ice for 5 min. The cell debris is subsequently removed
by centrifugation and the supernatant neutralised with PCA. The samples are then
centrifuged to remove the resulting precipitate (KClO4) and the supernatant stored on ice for
further analysis.
Back to list of contents

MIB BioSpec Group
17
SOP 7 - Extraction of tissue for metabolomic analysis
This SOP is designed to guide the user through the safe extraction of polar and lipid based
metabolites from animal tissue for subsequent metabolomic analysis via GCMS and LCMS
respectively. Before starting this protocol all ethical approval MUST be
considered/completed, signed and sent to us whilst appropriate material transfer agreements
MUST be in place before we can receive and work on your samples. If in doubt please feel
free to ask and we shall advise on the appropriate course of action.
Prior to beginning sample collection please refer to our BioSpec SOP 1 & 2 for information
on all ethical/safety issues and the use of appropriate plasticware.
GENERAL REQUIREMENTS
Gloves must be worn at all times when handling tissue specimens. This includes
during removal of lids from Eppendorf tubes, centrifugation, pipetting, disposal of
contaminated tubes, and cleanup of any spills. All plasticware must be properly
disposed of in biohazard containers, in accordance with institutional requirements.
All other institutional requirements and local procedures on H & S for working with
tissue samples should be followed, including gloves, eye protection or working in a
biosafety cabinet for subsequent processing.
All equipment and samples (during storage and shipping) must be labelled as
biohazard.
It is important to take steps to prevent thawing of samples during transportation (i.e.
keeping on dry-ice during transportation). In general, it is better to NOT send samples
to us on a Thursday or Friday as if the consignment is late samples can sometimes
have to wait over weekend and thaw out.
Metabolite Extraction
1. If sample is frozen, initially defrost in fridge prior to exposure to room temperature.
2. Take 100 mg of tissue and place in a 2 mL Eppendorf Safe-Lock Tube.
3. Add 0.6 mL of Methanol: Chloroform (2:1) and 1 ball bearing per tube.
4. Homogenise using lab shaker for 3 min.
5. Subsequently, sonicate in water-bath for 15 min.
6. Add 0.4 mL of Chloroform:Water (1:1) .

MIB BioSpec Group
18
7. Centrifuge at 13500 g for 15 min at ambient temperature
8. Transfer organic and aqueous layers to separate 1.5 mL Eppendorf tubes (The lower
layer is the organic chloroform layer containing lipophilic compounds for LCMS
analysis. Conversely, the upper layer is aqueous and used for GCMS).
9. Dry aqueous fractions in Speedvac and organic extracts in a fume-hood on a hotplate
(35°C).
10. Check that all aliquot vial caps are secure and that all vials are labelled.
11. Place all aliquots upright in a specimen box or rack in a -80 ºC, or colder, freezer. All
specimens should remain at -80 ºC or colder prior to shipping. The samples should
not be thawed prior to shipping. (All samples should be shipped on dry ice. Refer to
SOP 3 for “Shipping” instructions).
12. IT IS ESSENTAIL THAT WE RECEIVE A SPREADSHEET DETAILING ALL
SAMPLES THAT WILL BE SENT TO OUR LABS. This is to guarantee we have
organised appropriate storage facility well in advance of receiving samples.
Notes
Freeze-thaw cycles should be minimised as this can degrade metabolites.
Freezers need to have a back-up generator or other emergency system Options: Create
emergency management plan, such as moving to a new freezer or adding dry ice in
the event of a freezer failure.
Back to list of contents
MIB BioSpec Group
19
SOP 8 - Collection of blood plasma for metabolomic analysis
This SOP is designed to guide the user in the safe collection of blood Plasma for subsequent
metabolomic analysis. Before starting this protocol all ethical approval MUST be completed
and signed along with appropriate patient permissions and material transfer agreements
MUST be in place.
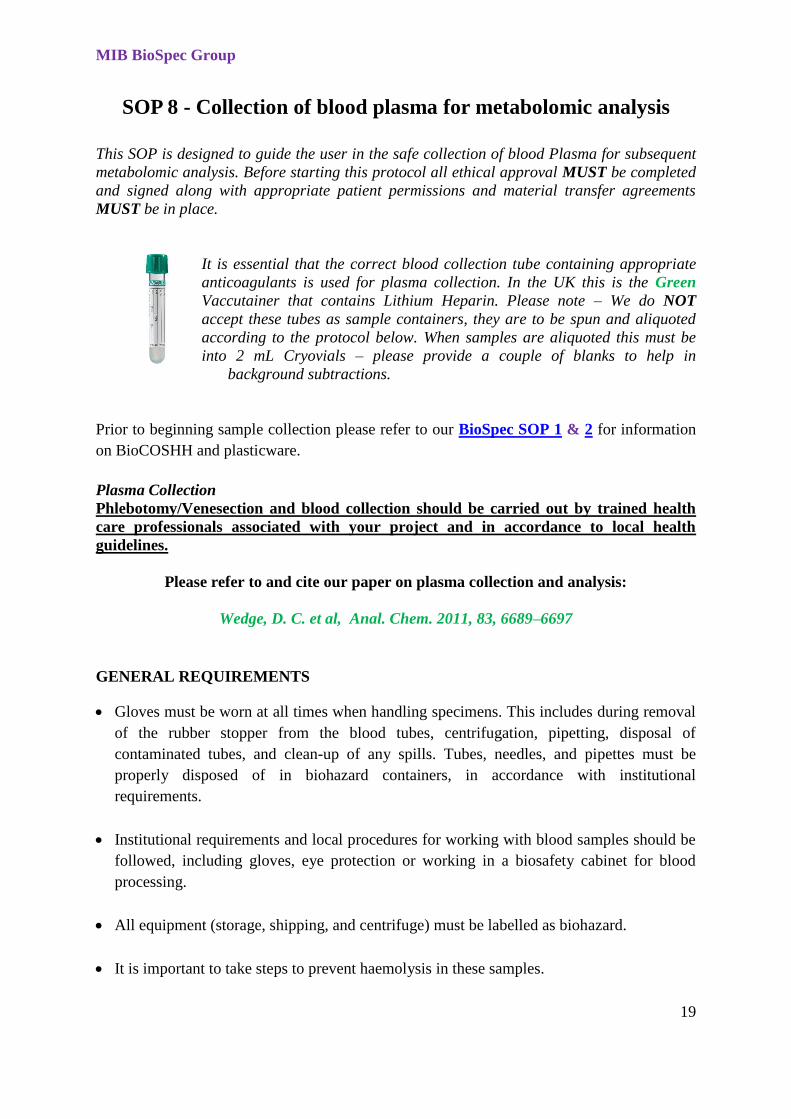
It is essential that the correct blood collection tube containing appropriate
anticoagulants is used for plasma collection. In the UK this is the Green
Vaccutainer that contains Lithium Heparin. Please note – We do NOT
accept these tubes as sample containers, they are to be spun and aliquoted
according to the protocol below. When samples are aliquoted this must be
into 2 mL Cryovials – please provide a couple of blanks to help in
background subtractions.
Prior to beginning sample collection please refer to our BioSpec SOP 1 & 2 for information
on BioCOSHH and plasticware.
Plasma Collection
Phlebotomy/Venesection and blood collection should be carried out by trained health
care professionals associated with your project and in accordance to local health
guidelines.
Please refer to and cite our paper on plasma collection and analysis:
Wedge, D. C. et al, Anal. Chem. 2011, 83, 6689–6697
GENERAL REQUIREMENTS
Gloves must be worn at all times when handling specimens. This includes during removal
of the rubber stopper from the blood tubes, centrifugation, pipetting, disposal of
contaminated tubes, and clean-up of any spills. Tubes, needles, and pipettes must be
properly disposed of in biohazard containers, in accordance with institutional
requirements.
Institutional requirements and local procedures for working with blood samples should be
followed, including gloves, eye protection or working in a biosafety cabinet for blood
processing.
All equipment (storage, shipping, and centrifuge) must be labelled as biohazard.
It is important to take steps to prevent haemolysis in these samples.

MIB BioSpec Group
20
PLASMA COLLECTION
10 mL GREEN Top Vacutainer (NOT SST tubes)
Centrifuge with swinging bucket rotor, pipette and small ice bucket
15 mL polypropylene conical tubes (for example, Corning 430052, Fisher cat #05-538-
53D)
Sterile cryovials with writing surface (for example, Simport T311-2 or Fisher #05-669-57)
2 mL, 5 mL and 10 mL pipettes (for example, Fisher cat #13-678-11C, 13-678-11D, 13-
678-11E)
Disposable transfer pipettes (for example, Fisher cat #13-711-20)
Upon successful blood collection, there are several steps required to extract the plasma within
the sample successfully:
1. Spin the blood samples for 10-15 min at 2000 g at 4 °C in a refrigerated centrifuge to
move the blood cells to the bottom of the tube.
2. Immediately transfer 500 µL aliquots of the Plasma in to fresh 2 mL labelled
cryovials using a pipette with appropriate filter tip. When removing the Cryovial tube
cap care should be taken to avoid disturbing the pellet or causing splashing of the
blood.
3. Care should also be taken to avoid taking any red blood cells over into the plasma.
4. Aliquots should be filled in the order 1-10 with volumes indicated. Special care
should be made to ensure that the identification on each vial is legible. Make sure that
the pen you use is permanent ink and will not wash off upon thawing.
5. Samples should be stored at -80 °C until analysis and all transportation should be
carried out under dry ice.
At no point should a patient’s identity be put on any sample we receive. It is up to you
to document the ID of each sample and give us a unique identifier not linked to their
name. It is imperative that patient confidentiality is not broken.
Sample Storage
MIB BioSpec Group
21
The cryovials should be placed into labelled cryoboxes (10x10). The cryobox will be filled
from the left hand corner (A1) with aliquots being filled left to right top to bottom.
An Excel spreadsheet should be completed for the samples contained within each labelled
cryobox, the file should be saved with the unique identifying box number incorporated into
the name. The cryobox is placed immediately into -80 ºC storage.
Back to list of contents

MIB BioSpec Group
22
SOP 9 - Collection of serum for metabolomic analysis
This SOP is designed to guide the user in the safe collection of blood sera for subsequent
metabolomic analysis. Before starting this protocol all ethical approval MUST be completed
and signed along with appropriate patient permissions and material transfer agreements
MUST be in place.
It is essential that the correct blood collection tube containing clotting
factors is used for serum. In the UK this is always a red topped Vacutainer.
Please note – We do NOT accept these tubes as sample containers, they
are to be spun and aliquoted according to the protocol below. When
samples are aliquoted this must be into 2 mL Cryovials (preferably 500 µL
aliquots) – please provide a couple of blanks to help in background
subtractions.
Prior to beginning sample collection please refer to our BioSpec SOP 1 & 2 for information
on BioCOSHH and plasticware.
Phlebotomy and blood collection should be carried out by trained health care
professionals associated with your project and in accordance to local health guidelines.
Please refer to and cite our papers on serum collection and analysis:
Dunn, W. B. et al. Nature Protocols, 2011, 6, 1060-1081
Begley, P. et al. Anal. Chem. 2009, 81, 7038–7046
GENERAL REQUIREMENTS
Gloves must be worn at all times when handling specimens. This includes during removal
of the rubber stopper from the blood tubes, centrifugation, pipetting, disposal of
contaminated tubes, and cleanup of any spills. Tubes, needles, and pipettes must be
properly disposed of in biohazard containers, in accordance with institutional
requirements.
Institutional requirements and local procedures for working with blood samples should be
followed, including gloves, eye protection or working in a biosafety cabinet for blood
processing.
All equipment (storage, shipping, and centrifuge) must be labelled as biohazard.
It is important to take steps to prevent haemolysis in these samples.

MIB BioSpec Group
23
SERUM COLLECTION
10 mL Red Top Vacutainer (NOT SST tubes) (for example, BD vacutainers
catalog#366430)
Centrifuge with swinging bucket rotor, pipette and small ice bucket
15 mL polypropylene conical tubes (for example, Corning 430052, Fisher cat #05-538-
53D)
Sterile cryovials with writing surface (for example, Simport T311-2 or Fisher #05-669-57)
2 mL, 5 mL and 10 mL pipettes (for example, Fisher cat #13-678-11C, 13-678-11D, 13-
678-11E)
Disposable transfer pipettes (for example, Fisher cat #13-711-20)
Upon successful blood collection, there are several steps required to extract the serum within
the sample successfully
13. Filled 10 mL red top blood collection tubes (“vacutainers”) should sit upright after the
blood is drawn at room temperature for a minimum of 30 min to a maximum of
60 min to allow clot formation. Note: Use red top (serum) tubes (silicon-coated)—no
additives and not SST (serum separator tubes). These tubes, without additives, allow
the red blood cells to form a clot. The clot also includes white blood cells, platelets
etc. After centrifuging, the clot is at the bottom of the tube, and the serum is on top of
the clot). The red top tubes do not have to be full to be used.
14. Centrifuge the blood sample at the end of the clotting time (after 30 min and no longer
than 60 min) in a horizontal rotor (swing-out head) for 20 min at 1100-1300 g at
ambient temperature. If the blood is not centrifuged immediately after the clotting
time (30 to 60 min at room temperature), the tubes should be refrigerated (4ºC) for no
longer than 4 h. Warning: Excessive centrifuge speed (over 2000 g) may cause tube
breakage and exposure to blood and possible injury. If needed, RCF for a centrifuge
can be calculated. For an on-line calculator tool, please refer to:
http://www.changbioscience.com/cell/rcf.html
15. Use a pipette to transfer 500 µL aliquots of the serum into separate appropriately
labelled cryotubes. Ideally we should receive at least 2 of these from each subject in
order to have a backup sample for any potential repeat analysis.
16. Close the caps on the vials tightly. This process should be completed within 1 h of
centrifugation. Note: Be very careful not to pick up red blood cells when aliquoting.
This can be done by keeping the pipette above the red blood cell layer and leaving a
small amount of serum in the tube.
MIB BioSpec Group
24
17. Check that all aliquot vial caps are secure and that all vials are labelled.
18. Place all aliquots upright in a specimen box or rack in an -80 ºC, or colder, freezer.
All specimens should remain at -80 ºC or colder prior to shipping. The samples
should not be thawed prior to shipping. (Serum will be shipped on dry ice. Refer to
SOP 3 for “Shipping” instructions).
19. IT IS ESSENTAIL THAT WE RECEIVE A SPREADSHEET DETAILING ALL
SAMPLES THAT WILL BE SENT TO OUR LABS. This is to guarantee we have
organised appropriate storage facility well in advance of receiving samples.
Notes
• Sterile, disposable droppers, pipetman, pipet aid, Eppendorf repeater are examples of ways
to aliquot. The method used depends on size of aliquots, volume of plasma, and volume of
aliquots.
• Freeze-thaw cycles should be minimised as this can degrade metabolites. Please choose
aliquot volume carefully (usually 0.5 mL per aliquot)
• Freezers need to have a back-up generator or other emergency system Options: Create
emergency management plan, such as moving to a new freezer or adding dry ice in the event
of a freezer failure.
Back to list of contents

MIB BioSpec Group
25
SOP 10a - Quenching and extraction of serum metabolome
It is assumed for this SOP that serum samples were collected by following BioSpec SOP 1, 2,
3 as well as 9 and immediately stored on ice for no longer than 2 hours, after which they
were stored at -80C.
1. Thaw serum samples on ice at 4 C or lower (it is recommended not to thaw more
than 24 samples at any single point – any more may not be manageable by a single
person as directed by this SOP).
2. Take 100 L of each serum sample in a 2 mL Eppendorf tube (recommended in
BioSpec SOP 2) and deproteinized by adding 400 L ice cold methanol.
3. Close the Eppendorf tube tightly and vortex it at maximum speed for 10 s.
4. Centrifuge samples at 13500 g for 15 min.
5. Pipette out the supernatant and lyophilise in a vacuum centrifuge at temperature lower
than 10 C.
6. The resultant pellet after 12 h of lyophilisation should be stored at -80 C until
analysis.
Back to list of contents
MIB BioSpec Group
26
SOP 10b - Quenching and extraction of serum metabolome for
GC-MS analysis
It is assumed for this SOP that serum samples were collected by following BioSpec SOP 1, 2,
3 as well as 9 and immediately stored on ice for no longer than 2 hours, after which they
were stored at -80C.
1. Thaw serum samples on ice at 4 C or lower (it is recommended not to thaw more
than 24 samples at any single point – any more may not be manageable by a single
person as directed by this SOP).
2. Take 100 L of each serum sample in a 2 mL Eppendorf tube (recommended in
BioSpec SOP 2).
3. Add 100 μL of internal standard solution (0.75 mg mL-1
succinic acid d5, 0.73 mg
mL-1
malonic
acid d5, 0.59 mg mL-1
glycine d5
in water) to the sample.
4. Deproteinize serum by adding 400 L ice cold methanol.
5. Close the Eppendorf tube tightly and vortex it at maximum speed for 10 s.
6. Centrifuge samples at 13500 g for 15 min.
7. Pipette out the supernatant and lyophilise in a vacuum centrifuge at temperature lower
than 10 C.
8. The resultant pellet after 12 h of lyophilisation should be stored at -80 C until
analysis.
Back to list of contents
MIB BioSpec Group
27
SOP 11a - Quenching and extraction of urinary metabolome for
LC-MS analysis
It is assumed for this SOP that urine samples were collected and immediately stored on ice
for no longer than 2 hours, after which they were stored at -80C.
1. Thaw urine samples on ice at 4 C or lower (it is recommended not to thaw more than
24 samples at any single point – any more may not be manageable by a single person
as directed by this SOP).
2. Take 100 L of each urine sample in a 2 mL Eppendorf tube (recommended in
BioSpec SOP 2) and deproteinize by adding 200 L ice cold methanol.
3. Close the Eppendorf tube tightly and vortex it at maximum speed for 10 s.
4. Centrifuge samples at 13500 g for 15 min.
5. Pipette out the supernatant and lyophilise in a vacuum centrifuge at temperature lower
than 10 C.
6. The resultant pellet after 12 h of lyophilisation should be stored at -80 C until
analysis.
Back to list of contents

MIB BioSpec Group
28
SOP 11b - Quenching and extraction of urinary metabolome for
GC-MS analysis
It is assumed for this SOP that urine samples were collected and immediately stored on ice
for no longer than 2 hours, after which they were stored at -80C.
1. Thaw urine samples on ice at 4 C or lower (it is recommended not to thaw more than
24 samples at any single point – any more may not be manageable by a single person
as directed by this SOP).
2. Add 100 μL of internal standard solution (0.75 mg mL-1
succinic acid d5, 0.73 mg
mL-1
malonic
acid d5, 0.59mg mL-1
glycine d5
in water) to 200 μL of urine sample in
a 2 mL Eppendorf tube (recommended in BioSpec SOP 2).
3. Vortex the mixture for 15 s.
4. Add 150 μL urease (Sigma Aldrich, catalogue number U1500) to this mixture and
heat it on a heat block at 37 °C for 30 min. This is done to remove urea.
5. Deproteinize the sample by adding 200 L ice cold methanol.
6. Close the Eppendorf tube tightly and vortex it at maximum speed for 15 s.
7. Centrifuge samples at 13500 g for 15 min.
8. Pipette out the supernatant and lyophilise in a vacuum centrifuge at temperature lower
than 10 C.
9. The resultant pellet after 12 h of lyophilisation should be stored at -80 C until
analysis.
Back to list of contents
MIB BioSpec Group
29
SOP 12 - Extraction of lipidome from mammalian cell samples for
LC-MS analysis
It is assumed that cells are quenched as described in SOP 4
Sample extraction for LC-MS
1. Mix the pellets with 2 mL of (2:1) chloroform and methanol 20 oC.
2. Shake the mixtures for 15 min.
3. Add 1 mL of HPLC grade water to the mixture.
4. Centrifuge the mixture for 3 min at 5000 g and -9 ºC.
5. From the bi-phasic system created, the bottom organic layer contains lipids. Transfer this
layer into another 2 mL Eppendorf tube.
6. Evaporate solvents at 40 o
C on a heat block, in a fume cabinet - to complete dryness prior
to transferring pellets to -80 oC storage.
LC-MS analysis
Reconstitute pellet in 8:2 (methanol: HPLC water (v/v)), based on cell counts.
Back to list of contents

MIB BioSpec Group
30
SOP 13 - Extraction of lipidome from microbial samples for LC-
MS analysis
Sample collection and quenching for LC-MS lipid profiling
1. Measure the optical density (OD) for each culture of bacteria (required for LC-MS
normalisation).
2. Suspension of bacterial culture: Take 15 mL from each culture and quench in 30 mL of 60%
cold methanol (-48ºC, chilled on dry ice) – vortex mix quickly. (see bacteria preparation
following standard protocol not available in house)
3. This should be followed by centrifugation of the quenched culture for 10 min at 5000 g,
-9 ºC.
4. Remove supernatant quickly leaving the pellet in the centrifuge tube.
5. Flash-freeze the pellets in liquid nitrogen
6. Store the at -80 ºC if extraction is not followed immediately (not recommended).
Sample extraction for LC-MS
7. Mix the pellets with 2 mL of (2:1) cold (-20 oC) chloroform and methanol.
8. Shake the mixtures for 15 min.
9. Add 1 mL of HPLC water to the mixture.
10. Centrifuge the mixture for 3 min at 5000 g and -9 ºC.
11. From the bi-phasic system created, the bottom organic layer contains lipids. Transfer
this layer into another Eppendorf tube.
12. Evaporate solvents at 40 o
C on a heat block, in fume cabinet - to complete dryness
prior to transferring pellets to -80 o C storage.
LC-MS analysis
All samples reconstituted in 8:2 (methanol: HPLC water), based on OD.
Supplementary bacterial preparation steps
1. Using striles plastic loops the bacteria should be cultured on the nutrient agar three times.
2. A single colony from the Petri dish should then be incoulated into nutrient broth and
incubated for 24 h at 37 °C for 200 rpm.

MIB BioSpec Group
31
3. This should then be followed by measuring the optical density (OD) of 100 µL culture [OD
of 0.1 measured at 600 nm]
4. For each species at least 5 biological replicates should be prepared.
Back to list of contents

MIB BioSpec Group
32
SOP 14 - FT-IR sample preparation protocol
FT-IR plate preparation:
1. Carefully wash the Si plate with 5% SDS solution (repeat this step twice)
2. Wash the plate with 2-propanol
3. Finally rinse the plate three times with DI water and dry at 55 °C
FTIR sample preparation from solid media:
1. Add 2 mL of sterile physiological saline (0.9% NaCl in DI water) to the surface of the
agar plates and carefully scrape the colonies off the surface using a sterile plastic
microbiological loop. Alternatively you can scrape the biomass from the surface using
a sterile microbiological loop and resuspend in a 2 mL Eppendorf tube containing
1 mL physiological saline solution, and proceed to step 3.
2. Collect the bacterial slurry and transfer to pre-labelled microcentrifuge tubes.
3. Centrifuge the samples at 5000 g for 5 min at 4 °C and remove the supernatant.
4. Resuspend the bacterial pellet in 1.5 mL of physiological saline and centrifuge again
using previous settings
5. Remove the supernatant
6. Repeat the washing steps again (4-5)
7. Resuspend the bacterial pellet in 300 µL of physiological saline
8. Measure OD600nm of all samples
9. Normalise sample to a final OD600nm= 15 (The optimum OD value is entirely sample
dependent)
10. Spot different volumes (5 - 40 µL) of sample on the plate and dry in the oven at 55-
60°C for 15-30 min (heat until dryness, this step is also sample dependent). This step
is to optimise the sample volume to acquire the optimum data (within the Beer-
Lambert range)
11. Run samples on the instrument following recommended protocol
12. Prepare all the other samples according to the data acquired from the optimisation
steps following the standard protocol

MIB BioSpec Group
33
FTIR sample preparation from liquid media:
1. Harvest the bacterial cells by centrifuging appropriate volume of liquid media at
5000 g for 5 min at 4 °C (The volume is dependent on the initial OD600nm of the
samples)
2. Wash the pellet twice as described above (steps 3 – 5) using physiological saline
3. Follow sample preparation steps 8-12
Back to list of contents
MIB BioSpec Group
34
SOP 15 - Preparation of internal standards and retention index
for GC-MS
It is important to prepare an internal standard solution and retention index solution prior to
sample derivatization for GC-MS. The internal standard allows for normalization of ion-
count across samples within a run, this helps during subsequent statistical analysis. The
retention index allows us to use our in house compound library alongside the NIST library
for compound ID. As every individual compound within our in house library (over 2000
chemicals) has been run through our GC-MS system, this system allows for a far higher
confidence in ID upon comparison to NIST fragmentation patterns.
This SOP is a precursor to BioSpec SOP 16 – GC-MS derivatization and it is important to
follow this first! Also, prior to beginning sample collection please refer to our BioSpec SOP
1 and 2 for information on BioCOSHH, plasticware and appropriate reagents/solvents to use.
Please refer to and cite our methods paper on GCMS metabolomics:
Begley, P. et al. Anal. Chem. 2009, 81, 7038–7046
Preparation of Retention Index
Dissolve each of the following in to 10 mL of Hexane:
Decane 40 µL
Dodecane 40 µL
Pentadecane 40 µL
Docosane 30 mg (+/- 2 mg)
Nonadecane 30 mg (+/- 2 mg)
This solution is labelled retention index (RI1) and is the stock solution used for all samples
within an experiment.
Subsequently dilute 1 mL of retention index (RI1) with 9 mL of pyridine. It is
essential that the pyridine used within this experiment is anhydrous as any water can
compete with the silination procedure. It is suggested to add desiccant beads to the
solvent AT LEAST 24 h prior to making the retention index
Label this as retention index (RI2) and this is the working stock that is to be added to
your samples. Please store both (RI1) & (RI2) at 4°C and use within one month.
MIB BioSpec Group
35
Preparation of Internal Standard
Dissolve each of the following in 30 mL water and vortex/shake for 10 min. It can
sometimes prove difficult to dissolve the Benzoic acid so this can be left out.
30 mg Succinic-d4 acid
30 mg Glycine-d5
30 mg Benzoic d5 acid
30 mg Lysine d4
This solution is labelled as internal standard (IS1) and is the stock solution used for all
samples within an experiment
Subsequently dilute 2 mL of internal standard (IS1) with 10mL of water. This water
will be evaporated off during the full derivatization process.
Label this as internal standard (IS2) and this is the working stock that is to be added
to your samples. Please store both (IS1) & (IS2) at 4°C and use within one month.
Notes
The retention index that we use is specific to the chromatography setup within the LECO
Pegasus 3/4 GC-ToF-MS system we have in our group. It is possible to use other
combination of straight chain alkanes that might be more suitable to different machines.
The same applies to the internal standard system we also use. Other deuterated compounds
can also be used and it is best to test the instrument response of all retention index and
internal standard chemicals prior to running a full experiment.
Back to list of contents

MIB BioSpec Group
36
SOP 16 - The GC-MS derivatization process
The process of derivatization modifies metabolites not volatile enough to be analyzed within
a GC-MS system with methoxy and trimethylsilyl groups (TMS). These groups help analytes
to remain in the gas phase and enable separation on a GC column. The methoxy group is
used to protect carbonyl moieties, such as ketones, and to reduce sugars in order to open
cyclic ring structures. The relative chemical inertness and lack of presence within nature
allows the TMS grouping to act as an efficient GC derivatization agent within the two step
process:
Please refer to the following publications for information on the derivatization process:
Begley, P. et al. Anal. Chem. 2009, 81, 7038–7046
Roessner, U. et al. Plant J. 2000, 23, 131-142
Fiehn, O. et al. Anal. Chem. 2000, 72, 3573-3580
MIB BioSpec Group
37
The whole derivatization process is run over two days and prior to starting this procedure
please refer to BioSpec SOP 15 as it contains information on preparation of stock solutions
of internal standard and retention index whilst also referring to BioSpec SOP 2 for
information on plasticware and appropriate reagents.
Depending on extraction method used, be aware if an internal standard (IS 2) has been added
in a previous step, the start of this SOP will assume it has NOT! If IS 2 has been added
already, go to DAY 2 – Derivatization.
DAY 1 - Addition of Standard
1) Take frozen pellet, reconstitute in 1-1.5 mL MeOH.
2) Add 100 µL of IS 2
3) Vortex for 10 s
4) Put samples on for at least 8 hrs on concentrator to remove solvent.
5) You will need some dry pyridine for derivatization, now is the time to check there is
an appropriate amount drying over molecular sieves!
DAY 2 - Derivatization
PLEASE NOTE – If you already have your sample stored in the -80 °C freezer with internal
standard 2 added, make sure you put them on the concentrator for 2 h before you
derivatize…..moisture can creep in to the sample during thawing and compete with the
silination process.
1) Make up an appropriate amount of O-methoxyamine • HCl in pyridine (20 mg per mL
working stock). From this add 50 µL to each sample. This forms form oxime
derivatives of keto-functional groups -
e.g. If you have 70 samples to derivatize, weigh out 80 mg of methoxyamine and
dissolve in 4 mL of pyridine. This gives 70 x 50 = 3500 µL with a bit left over for
error.
2) Vortex for 10 s then heat samples on heating block at 65 °C for 40 min. Whilst
waiting, prepare you GC vials with the appropriate labeling.
3) Add 50 µL of MSTFA to each sample, vortex for 10 s then put on heating block for
40 min.
4) Add 20 µL of RI2, vortex for 10 s then put on centrifuge for 15 min at 17,000 g.
5) Add 100 µL of each sample to the appropriately labeled GC vial taking care to only
take the liquid portion and double check you are adding to the correct vial.
Back to list of contents