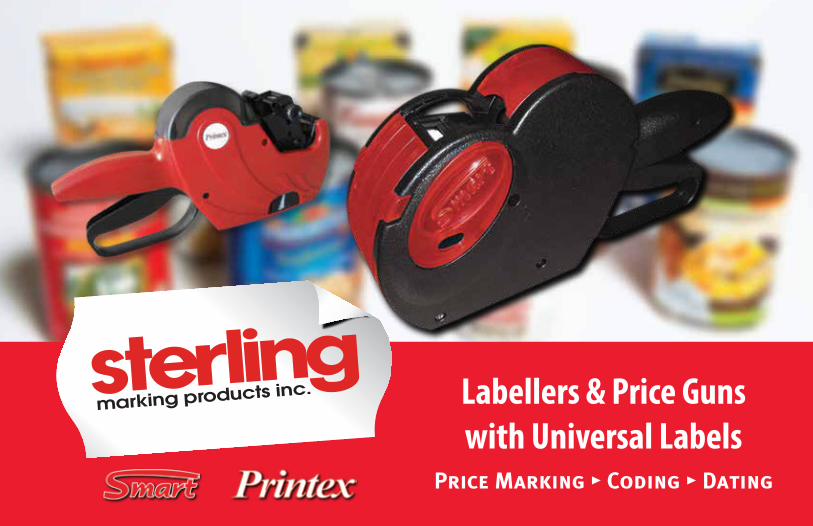
Labellers & Price Guns with Universal Labels - Sterling · Labellers & Price Guns with Universal...
12
Labellers & Price Guns with Universal Labels Price Marking • Coding • Dating
-
Upload
trinhthien -
Category
Documents
-
view
218 -
download
0
Transcript of Labellers & Price Guns with Universal Labels - Sterling · Labellers & Price Guns with Universal...
Labellers & Price Gunswith Universal Labels
Price Marking • Coding • Dating

Sterling WelcomesSmart & Printex to Canada!
Sterling is excited to be the Canadian Master distributor of the Smart & Printex lines of labellers & price guns, and universal adhesive labels. Printex is an Italian company that has long been known for its quality, dependability, and design in Europe and the Middle East.
• Fast and easy loading of labels• 2 year warranty• Lightweight, ergonomic design and simple operation• 8 band open code dater has universal date layout, can be YYYYMMDD or DDMMYY• Standard 7 bands o�er more �exibility than the 6 bands, can be $0.00 or 0,00$• Universal adhesive labels for all temperatures -30°C to 80°C
Price Marking • Coding • Dating
• European quality, made in Italy• All labellers are sold as starter kit, includes labeller and ink roll, 10 rolls of labels, 1 replacement ink roller - great value!• Made of durable, high quality engineered polymer frame• Unexposed label rolls prevent the labels from being crushed or contaminated• Snap in/out ink roller means no messy replacement• Self correcting feed mechanism, virtually jam-proof
About Smart & Printex Labellers:
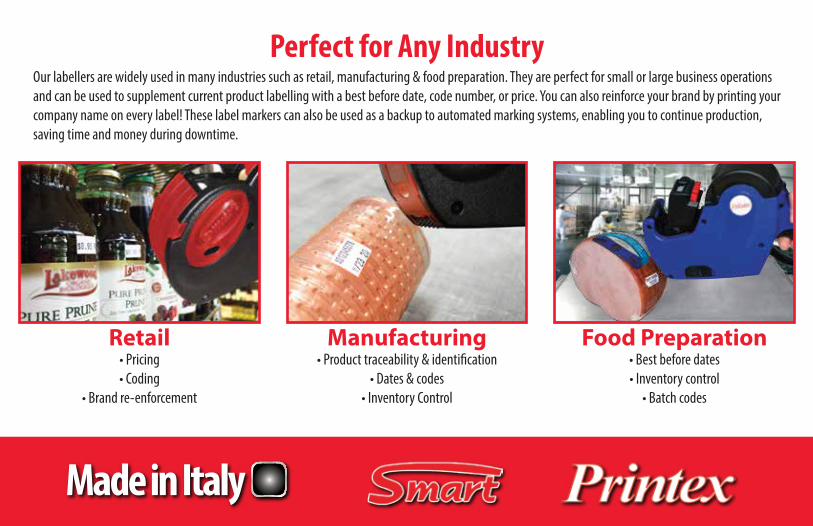
Perfect for Any IndustryOur labellers are widely used in many industries such as retail, manufacturing & food preparation. They are perfect for small or large business operations and can be used to supplement current product labelling with a best before date, code number, or price. You can also reinforce your brand by printing your company name on every label! These label markers can also be used as a backup to automated marking systems, enabling you to continue production, saving time and money during downtime.
Retail• Pricing• Coding
• Brand re-enforcement
Food Preparation• Best before dates• Inventory control
• Batch codes
Manufacturing• Product traceability & identi�cation
• Dates & codes• Inventory Control

lines
1 7 22 x 12 mmlabel sizebands lines
1 8 22 x 12 mmlabel sizebands
• 7 bands instead of 6 o�ers more �exibility• Universal layout, can be $0.00 or 0,00$• Special 10+ quantity pricing
Smart 8
• 8 band open code dater• Universal date layout can be YYYYMMDD or DDMMYY• Special 10+ quantity pricing
Smart 7
Ink roll for Smart 7Part #: SMIR
Comes as a Kit:Labeller with ink roll
10 rolls of labels1 replacement ink roll
Ink roll for Smart 8Part #: SMIR
Comes as a Kit:Labeller with ink roller
10 rolls of labels1 replacement ink roll
Actual label size Actual label size
SUPERVALUE KIT
SUPERVALUE KIT

SMART 8 DATEROPEN CODE BAND LAYOUT
Part #: SM8KNumber of Bands 8Width of Characters 1.5 mmHeight of Characters 4.8 mm
SMART 7 BAND LAYOUTPart #: SM7K
Number of Bands 7Width of Characters 2.0 mmHeight of Characters 4.8 mm
*band layouts shown larger

• Top line has 10 bands for longer codes or part numbers• Bottom line has 7 bands with a universal layout,can be $0.00 or 0,00$• Special 10+ quantity pricing
lines
2 10 26 x 16 mmlabel sizetop
bands
7bottombands
Ink roll for Smart 10+7Part #: SMIR
Printex Z S+7lines
2 slug 26 x 12 mmlabel sizetop
band
7bottombands
Ink roll for Printex Z S+7Part #: ZIR
• Top line is an interchangeable slug, fully customizable• Save time and money on pre-printed labels• Bottom 7 bands have universal layout,can be $0.00 or 0,00$• Special 10+ pricing
Smart 10+7
Interchangeable Slug:• Use 1 price marker
for multiple messages• Create your own
custom slug• 18 x 4 mm max
dimension
Comes as a Kit:Labeller with ink roll
10 rolls of labels1 replacement ink roll
Actual label size
Comes as a Kit:Labeller with ink roll
10 rolls of labels • 1 replacement ink roll3 interchangeable slugs:SPECIAL • SALE! • VENTE
SUPERVALUE KIT
SUPERVALUE KIT
Stock slug or Custom slugActual Size

SMART 10+7 BAND LAYOUTPart #: SM10+7K
Number of Bands 7Width of Characters 2.0 mmHeight of Characters 4.8 mm
Number of Bands 10Width of Characters 1.4 mmHeight of Characters 4.8 mm
TOP LINE BOTTOM LINE
Custom Slug Example
Printex Z S+7 Label Gun Kitincludes these 3 Stock Slugs
PRINTEX Z S+7 BAND LAYOUTPart #: ZS+7K
Number of Bands 7Width of Characters 2.0 mmHeight of Characters 4.8 mm
Custom Slug Insert Part #: ZCSMaximum Area 4 x 18 mm
TOP LINE BOTTOM LINE
Custom slug actual size example
*band layouts shown larger

80° C to -30° C
• Permanent labels for price marking, coding, and dating
• To be applied at room temperature
• Very clear and straight-forward bilingual packaging
• Comes in resealable clamshell packs of 10-12 rolls
• Fits most labellers that takes the given size
Universal Adhesive Labels
Custom colours and labels available!Call today!
Freezer Labels StandardReduce your inventory
knowning that our labels are for all temperatures
(including freezing) at no extra cost!

SM2612W
SM2212Y SM2212-BBSM2212W
rollsrouleaux
12 1500 18,000
total labelsétiquettes totales
per rollpar rouleau
22 x 12 mm labels
rollsrouleaux
10 1500 15,000
total labelsétiquettes totales
per rollpar rouleau
26 x 12 mm labels
rollsrouleaux
10 1000 10,000
total labelsétiquettes totales
per rollpar rouleau
26 x 16 mm labels SM2616W
Alternating message
Fits Smart 7 & Smart 8Also �ts Garvey and Contact labellers
Fits Smart 10+7
Fits Printex Z+7

How to reload labels - Printex only1. Open the bottom assembly by sliding the two side locks back. You may have to press the handle for it to open.2. Now open the top label cover by pulling up. Feed a strip of labels straight down the middle of the labeller so that it comes out the botton, making sure that the label is facing forward/up. Drop the roll into the top and close the label cover.3. Pull an 8” strip of the labels out from the labeller and close the bottom assembly until it snaps.4. Feed labels straight down into the bottom drive assembly. Now squeeze the labeler handle to advance the strip of labels through the bottom assembly. It may stick a bit at �rst, but within a few cycles, the labeller will align itself to print in the proper area of the label.
1 2
3 4
How to reload labels - Smart only1. Open the bottom assembly by pulling up on the rounded end.2. Now open the top label cover by pulling up on it.3. Feed a strip of labels straight down the middle of the machine so that it comes out the botton, making sure that the label is facing forward/up. Put the roll on the roll holder and close the label cover. Pull an 8” strip of the labels out from the labeller.4. Close the smaller back bottom assembly �rst, then with the labels running straight back, snap close the larger bottom assembly. Squeeze the labeller handle to advance the strip of labels through the bottom assembly. The handle may stick a bit at �rst, but within a few cycles, the labeller will align itself to print in the proper area of the label.
1 2
3 4

How to set the print impression1. Move the indicator marker to the position you desire to change by pulling the setting knob out to the right.2. The white portion of the band must be visible in the display window (not the dark negative side).3.After setting the characters, the knob must be returned to the print position by pushing it all the way left.
How to change ink roll1. When changing the ink roll, you should wear rubber gloves to avoid getting ink on your hands or work area. Do not work over material you would not want ink on.2. Access the ink roller by opening the front door. For Smart labeller, pull the front door down and out (A). For Printex labeller, pull the front door up and out (B). 3. Pinch the sides of the roller and forcefully pull the ink roll out to unsnap it. For Smart pinch the sides of the roll (C), for Printex pinch the clips (D). For an easier release, unsnap one side at a time with a twisting motion. Dispose of the used ink roller.4. Snap the new ink roll into the label labeller and close the front door.5. Never re-ink an ink roller. The rollers are not designed to absorb ink and will drip ink inside your labeller and damage it.
How to change the print calibration1. Gently loosen the screws on both sides of the print head. 2. Move the print head forward or back as needed to make the print locationhigher or lower on the labels.3. Tighten screw.
CalibrationWRONG
CalibrationRIGHT
A
B
Smart Ink RollC
Printex Ink RollD

VANCOUVER119-408 East Kent Ave. S.
Vancouver, BCV5X 2X7
Phone: 604-321-3282Fax: 604-321-3603
TORONTO155 West Beaver Creek Rd., Unit #9
Richmond Hill, ONL4B 1E1
Phone: 416-425-4140Fax: 905-763-2846
KITCHENER96 Frederick Street
Kitchener, ONN2H 2L7
Phone: 519-571-0882Fax: 519-571-0524
WINDSOR1505 Ottawa Street
Windsor, ONN8X 3G3
Phone: 519-253-7211Fax: 519-253-0320
OTTAWA2487 Kaladar Ave., Suite 213
Ottawa, ONK1V 8B9
Phone: 613-234-8077Fax: [email protected]
MONTREAL3850 Jean-Talon Ouest, Suite 100
Montréal, QCH3R 2G8
Tél: 514-906-0698Télé: 514-906-0697
LONDON - HEAD OFFICE349 Ridout Street N., P.O. Box 5055London, ONN6A 5S4Phone: 519-434-5785Fax: [email protected]
SP0697A SEP15