Lab 9 – ASP.NET Basic Website and controlsLab 9 – ASP.NET Basic Website and controls Tasks...
13
Lab 9 – ASP.NET Basic Website and controls Tasks illustrated in this walkthrough include: Creating a file system Web Forms application project. Familiarizing yourself with Visual Studio. Creating an ASP.NET page. Adding controls. Adding event handlers. Running and testing a page from Visual Studio. Creating a Web application project and a Page In this part of the walkthrough, you will create a Web application project and add a new page to it. You will also add HTML text and run the page in your browser. To create a Web application project 1. Open Microsoft Visual Studio. 2. On the File menu, select New Project. The New Project dialog box appears. 3. Select the Templates -> Visual C# -> Web templates group on the left. 4. Choose the ASP.NET Web Application template in the center column.
Transcript of Lab 9 – ASP.NET Basic Website and controlsLab 9 – ASP.NET Basic Website and controls Tasks...

Lab 9 – ASP.NET Basic Website and controls
Tasks illustrated in this walkthrough include:
Creating a file system Web Forms application project.
Familiarizing yourself with Visual Studio.
Creating an ASP.NET page.
Adding controls.
Adding event handlers.
Running and testing a page from Visual Studio.
Creating a Web application project and a Page
In this part of the walkthrough, you will create a Web application project and add a new page to it.
You will also add HTML text and run the page in your browser.
To create a Web application project
1. Open Microsoft Visual Studio.
2. On the File menu, select New Project.
The New Project dialog box appears.
3. Select the Templates -> Visual C# -> Web templates group on the left.
4. Choose the ASP.NET Web Application template in the center column.

5. Name your project BasicWebApp and click the OK button.
6. Next, select the Web Forms template and click the OK button to create the project.
Visual Studio creates a new project that includes prebuilt functionality based on the Web
Forms template. It not only provides you with a Home.aspx page, an About.aspx page, a
Contact.aspx page, but also includes membership functionality that registers users and saves
their credentials so that they can log in to your website. When a new page is created, by default
Visual Studio displays the page in Source view, where you can see the page's HTML elements.
The following illustration shows what you would see in Source view if you created a new Web

page named BasicWebApp.aspx.
A Tour of the Visual Studio Web Development Environment
Before you proceed by modifying the page, it is useful to familiarize yourself with the Visual Studio
development environment. The following illustration shows you the windows and tools that are
available in Visual Studio and Visual Studio Express for Web.
Note:This diagram shows default windows and window locations. The View menu allows you to
display additional windows, and to rearrange and resize windows to suit your preferences. If changes
have already been made to the window arrangement, what you see will not match the illustration.
The Visual Studio environment

Familiarize yourself with the Web designer
Examine the above illustration and match the text to the following list, which describes the most
commonly used windows and tools. (Not all windows and tools that you see are listed here, only those
marked in the preceding illustration.)
Toolbars. Provide commands for formatting text, finding text, and so on. Some toolbars are
available only when you are working in Design view.
Solution Explorer window. Displays the files and folders in your Web application.
Document window. Displays the documents you are working on in tabbed windows. You can
switch between documents by clicking tabs.
Properties window. Allows you to change settings for the page, HTML elements, controls, and
other objects.
View tabs. Present you with different views of the same document. Design view is a near-
WYSIWYG editing surface. Source view is the HTML editor for the page. Split view displays
both the Design view and the Source view for the document. You will work with the Design
and Source views later in this walkthrough. If you prefer to open Web pages in Design view,
on the Tools menu, click Options, select the HTML Designer node, and change the Start
Pages In option.
ToolBox. Provides controls and HTML elements that you can drag onto your page. Toolbox
elements are grouped by common function.
Server Explorer. Displays database connections. If Server Explorer is not visible, on the View
menu, click Server Explorer.
Creating a new ASP.NET Web Forms Page
When you create a new Web Forms application using the ASP.NET Web Application project
template, Visual Studio adds an ASP.NET page (Web Forms page) named Default.aspx, as well as
several other files and folders. You can use the Default.aspx page as the home page for your Web
application. However, for this walkthrough, you will create and work with a new page.
To add a page to the Web application
1. Close the Default.aspx page. To do this, click the tab that displays the file name and then click
the close option.
2. In Solution Explorer, right-click the Web application name (in this tutorial the application
name is BasicWebSite), and then click Add -> New Item.
The Add New Item dialog box is displayed.
3. Select the Visual C# -> Web templates group on the left. Then, select Web Form from the
middle list and name it FirstWebPage.aspx.
4. Click Add to add the web page to your project.
Visual Studio creates the new page and opens it.
Adding HTML to the Page
In this part of the walkthrough, you will add some static text to the page.
To add text to the page
1. At the bottom of the document window, click the Design tab to switch to Design view.
Design view displays the current page in a WYSIWYG-like way. At this point, you do not have
any text or controls on the page, so the page is blank except for a dashed line that outlines a
rectangle. This rectangle represents a div element on the page.
2. Click inside the rectangle that is outlined by a dashed line.
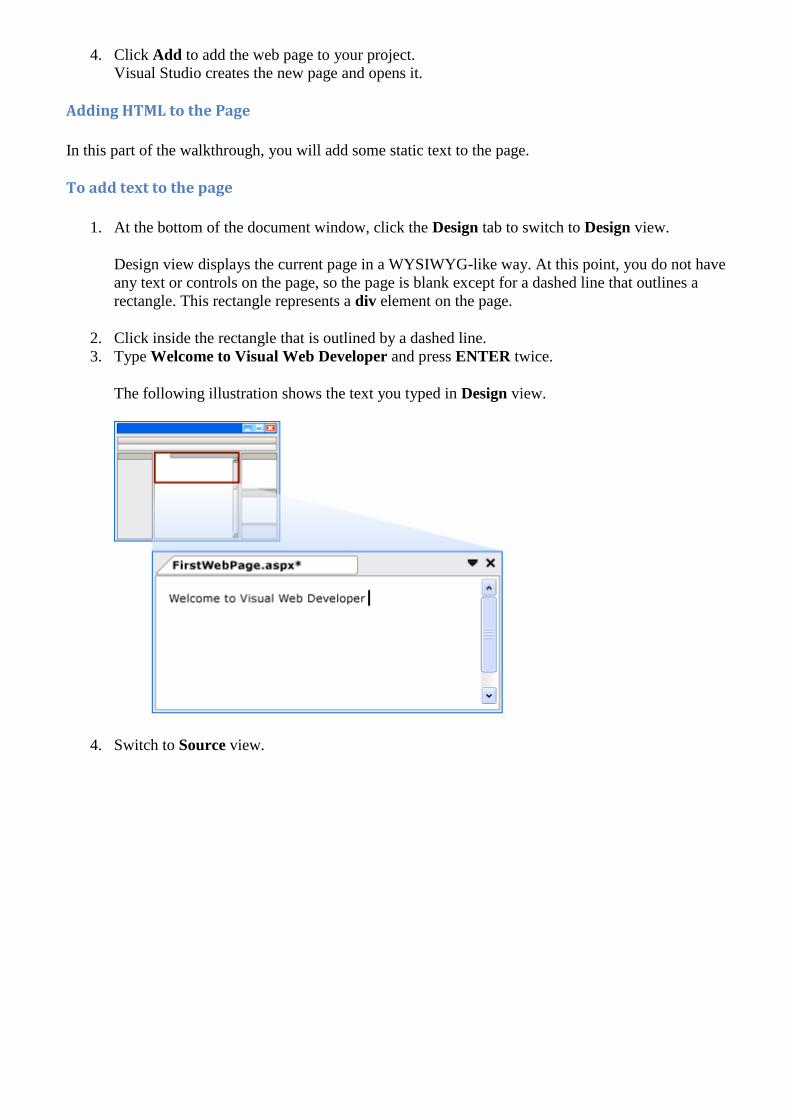
3. Type Welcome to Visual Web Developer and press ENTER twice.
The following illustration shows the text you typed in Design view.
4. Switch to Source view.

You can see the HTML in Source view that you created when you typed in Design view.
Running the Page
Before you proceed by adding controls to the page, you can first run it.
To run the page
1. In Solution Explorer, right-click FirstWebPage.aspx and select Set as Start Page.
2. Press CTRL+F5 to run the page.
The page is displayed in the browser. Although the page you created has a file-name extension
of .aspx, it currently runs like any HTML page.
To display a page in the browser you can also right-click the page in Solution Explorer and
select View in Browser.
3. Close the browser to stop the Web application.
Adding and Programming Controls
You will now add server controls to the page. Server controls, such as buttons, labels, text boxes, and
other familiar controls, provide typical form-processing capabilities for your Web Forms pages.
However, you can program the controls with code that runs on the server, rather than the client.
You will add a Button control, a TextBox control, and a Label control to the page and write code to
handle the Click event for the Button control.

To add controls to the page
1. Click the Design tab to switch to Design view.
2. Put the insertion point at the end of the Welcome to Visual Web Developer text and press
ENTER five or more times to make some room in the div element box.
3. In the Toolbox, expand the Standard group if it is not already expanded.
Note that you may need to expand the Toolbox window on the left to view it.
4. Drag a TextBox control onto the page and drop it in the middle of the div element box that has
Welcome to Visual Web Developer in the first line.
5. Drag a Button control onto the page and drop it to the right of the TextBox control.
6. Drag a Label control onto the page and drop it on a separate line below the Button control.
7. Put the insertion point above the TextBox control, and then type Enter your name:.
This static HTML text is the caption for the TextBox control. You can mix static HTML and
server controls on the same page. The following illustration shows how the three controls
appear in Design view.
Setting Control Properties
Visual Studio offers you various ways to set the properties of controls on the page. In this part of the
walkthrough, you will set properties in both Design view and Source view.
To set control properties
1. First, display the Properties windows by selecting from the View menu -> Other Windows ->
Properies Window. You could alternatively select F4 to display the Properties window.
2. Select the Button control, and then in the Properties window, set the value of Text to Display
Name. The text you entered appears on the button in the designer, as shown in the following
illustration.
3. Switch to Source view.

Source view displays the HTML for the page, including the elements that Visual Studio has
created for the server controls. Controls are declared using HTML-like syntax, except that the
tags use the prefix asp: and include the attribute runat="server".
Control properties are declared as attributes. For example, when you set the Text property for
the Button control, in step 1, you were actually setting the Text attribute in the control's
markup.
Note
All the controls are inside a form element, which also has the attribute runat="server". The
runat="server" attribute and the asp: prefix for control tags mark the controls so that they are
processed by ASP.NET on the server when the page runs. Code outside of <form
runat="server"> and <script runat="server"> elements is sent unchanged to the browser,
which is why the ASP.NET code must be inside an element whose opening tag contains the
runat="server" attribute.
4. Next, you will add an additional property to the Label control. Put the insertion point directly
after asp:Label in the <asp:Label> tag, and then press SPACEBAR.
A drop-down list appears that displays the list of available properties you can set for a Label
control. This feature, referred to as IntelliSense, helps you in Source view with the syntax of
server controls, HTML elements, and other items on the page. The following illustration shows
the IntelliSense drop-down list for the Label control.
5. Select ForeColor and then type an equal sign.
IntelliSense displays a list of colors.
Note: You can display an IntelliSense drop-down list at any time by pressing CTRL+J when
viewing code.

6. Select a color for the Label control's text. Make sure you select a color that is dark enough to
read against a white background.
The ForeColor attribute is completed with the color that you have selected, including the
closing quotation mark.
Programming the Button Control
For this walkthrough, you will write code that reads the name that the user enters into the text box and
then displays the name in the Label control.
Add a default button event handler
1. Switch to Design view.
2. Double-click the Button control.
By default, Visual Studio switches to a code-behind file and creates a skeleton event handler
for the Button control's default event, the Click event. The code-behind file separates your UI
markup (such as HTML) from your server code (such as C#).
The cursor is positioned to added code for this event handler.
Note
Double-clicking a control in Design view is just one of several ways you can create event
handlers.
3. Inside the Button1_Click event handler, type Label1 followed by a period (.).
When you type the period after the ID of the label (Label1), Visual Studio displays a list of
available members for the Label control, as shown in the following illustration. A member
commonly a property, method, or event.

4. Finish the Click event handler for the button so that it reads as shown in the following code
example.
C#
protected void Button1_Click(object sender, System.EventArgs e)
{
Label1.Text = TextBox1.Text + ", welcome to Visual Studio!";
}
5. Switch back to viewing the Source view of your HTML markup by right-clicking
FirstWebPage.aspx in the Solution Explorer and selecting View Markup.
6. Scroll to the <asp:Button> element. Note that the <asp:Button> element now has the attribute
onclick="Button1_Click".
This attribute binds the button's Click event to the handler method you coded in the previous
step.
Event handler methods can have any name; the name you see is the default name created by
Visual Studio. The important point is that the name used for the OnClick attribute in the
HTML must match the name of a method defined in the code-behind.
Running the Page
You can now test the server controls on the page.
To run the page
1. Press CTRL+F5 to run the page in the browser. If an error occurs, recheck the steps above.
2. Enter a name into the text box and click the Display Name button.
The name you entered is displayed in the Label control. Note that when you click the button,
the page is posted to the Web server. ASP.NET then recreates the page, runs your code (in this
case, the Button control's Click event handler runs), and then sends the new page to the
browser. If you watch the status bar in the browser, you can see that the page is making a round
trip to the Web server each time you click the button.
3. In the browser, view the source of the page you are running by right-clicking on the page and
selecting View source.
In the page source code, you see HTML without any server code. Specifically, you do not see
the <asp:> elements that you were working with in Source view. When the page runs,
ASP.NET processes the server controls and renders HTML elements to the page that perform
the functions that represent the control. For example, the <asp:Button> control is rendered as
the HTML <input type="submit"> element.
4. Close the browser.
Working with Additional Controls
In this part of the walkthrough, you will work with the Calendar control, which displays dates a month
at a time. The Calendar control is a more complex control than the button, text box, and label you have
been working with and illustrates some further capabilities of server controls.
In this section, you will add a System.Web.UI.WebControls.Calendar control to the page and format it.

To add a Calendar control
1. In Visual Studio, switch to Design view.
2. From the Standard section of the Toolbox, drag a Calendar control onto the page and drop it
below the div element that contains the other controls.
The calendar's smart tag panel is displayed. The panel displays commands that make it easy for
you to perform the most common tasks for the selected control. The following illustration
shows the Calendar control as rendered in Design view.
3. In the smart tag panel, choose Auto Format.
The Auto Format dialog box is displayed, which allows you to select a formatting scheme for
the calendar. The following illustration shows the Auto Format dialog box for the Calendar
control.

4. From the Select a scheme list, select Simple and then click OK.
5. Switch to Source view.
You can see the <asp:Calendar> element. This element is much longer than the elements for
the simple controls you created earlier. It also includes subelements, such as
<WeekEndDayStyle>, which represent various formatting settings. The following illustration
shows the Calendar control in Source view. (The exact markup that you see in Source view
might differ slightly from the illustration.)

Programming the Calendar Control
In this section, you will program the Calendar control to display the currently selected date.
To program the Calendar control
1. In Design view, double-click the Calendar control.
A new event handler is created and displayed in teh code-behind file named
FirstWebPage.aspx.cs.
2. Finish the SelectionChanged event handler with the following code.
C#
protected void Calendar1_SelectionChanged(object sender, System.EventArgs e)
{
Label1.Text = Calendar1.SelectedDate.ToLongDateString();
}
The above code sets the text of the label control to the selected date of the calendar control.
Running the Page
You can now test the calendar.
To run the page
1. Press CTRL+F5 to run the page in the browser.
2. Click a date in the calendar.
The date you clicked is displayed in the Label control.
3. In the browser, view the source code for the page.
Note that the Calendar control has been rendered to the page as a table, with each day as a td
element.
4. Close the browser.