Kyoto, Japan, 2455 AD Daikatana - ToastedNETdk.toastednet.org/walkthrough_ign.pdf · Kyoto, Japan,...
65
this guide downloaded from ignguides.com this guide downloaded from ignguides.com Daikatana Daikatana Kyoto, Japan, 2455 AD Ancient Greece, 1200 BC Medieval Norway, 560 AD San Francisco, USA, 2030 AD Introduction Items Introduction Kyoto, Japan, 2455 AD Ancient Greece, 1200 BC Medieval Norway, 560 AD San Francisco, USA, 2030 AD Far in the future a young Japanese man named Hiro Miyamoto, while alone in his dojo, is paid a visit. His caller this particular stormy evening tells him a story of a mighty sword named Daikatana. This legendary weapon, forged by one of Hiro's own ancestors, Usagi Miyamoto, has been stolen from its rightful owners and used by the ever-controlling Emperor of Japan, Kage Mishima, to travel back in time and alter history. Hiro is begged to help save the man's daughter, Mikiko Ebihara, who has been captured during her own attempts at retaking the sword. Shortly, Kage's minions move in and although Hiro is quick to slay them, it is too late for the old man. Following the rich tradition of his clan, Hiro vows to rescue Mikiko and retake the Daikatana. Daikatana, by Eidos with Ion Storm, is a first-person shooter unlike any other. The rich detail in the scenery and sounds of the four time periods you journey to, combined with a healthy dose of puzzle solving and a creative "sidekick" feature, help this game to stand out from the crowd. If that wasn't enough, throw in several multi-player features such as "Capture the Flag" and "Death Tag" and you have a game with tremendous replay value. The single-player version of the game will take you on a journey through four different time periods, or "Episodes" as they are dubbed. Each episode in Daikatana has a number of missions that logically progress to your final confrontation with Mishima. Throughout your adventure you will need to locate save gems to save your progress. Also on each mission are numerous "secrets" that, when found, reveal items that will increase your chances of survival. Those who explore most thoroughly will be rewarded. Due to the vast differences in weaponry and items throughout the game (there were no Glocks in Ancient Greece!) this strategy guide is set up by episode. Each section will provide a walkthrough of each mission in that episode, including where to find the save gems and secrets. Also, a brief description of those who will try to stop you, as well as the weapons you use to kill them, is given at the beginning of each section. By: Doug Walsh The Marsh Sewer System Solitary Crematorium Icelab The Vault Processing Lemnos Isle Catacombs Athens Acropolis Lair of Medusa Plague Village Passage Dungeon Wyndrax Tower Gharroth’s Throne Crypt of Nharre Alcatraz Beneath the Rock The Tower Mishima Labs SEAL Training Center Mishima’s Hideout
Transcript of Kyoto, Japan, 2455 AD Daikatana - ToastedNETdk.toastednet.org/walkthrough_ign.pdf · Kyoto, Japan,...
this
guid
e d
ow
nlo
aded f
rom
ignguid
es.c
om
this
guid
e d
ow
nlo
aded f
rom
ignguid
es.c
om
DaikatanaDaikatanaKyoto, Japan, 2455 AD
Ancient Greece, 1200 BC
Medieval Norway, 560 AD
San Francisco, USA, 2030 AD
Introduction
Items
Introduction
Kyoto, Japan, 2455 AD Ancient Greece, 1200 BC Medieval Norway, 560 AD San Francisco, USA, 2030 AD
Far in the future a young Japanese man named Hiro Miyamoto, while alone in his dojo, is paid a visit. His caller this particular stormy evening tells him a story of a mighty sword named Daikatana. This legendary weapon, forged by one of Hiro's own ancestors, Usagi Miyamoto, has been stolen from its rightful owners and used by the ever-controlling Emperor of Japan, Kage Mishima, to travel back in time and alter history. Hiro is begged to help save the man's daughter, Mikiko Ebihara, who has been captured during her own attempts at retaking the sword. Shortly, Kage's minions move in and although Hiro is quick to slay them, it is too late for the old man. Following the rich tradition of his clan, Hiro vows to rescue Mikiko and retake the Daikatana.
Daikatana, by Eidos with Ion Storm, is a first-person shooter unlike any other. The rich detail in the scenery and sounds of the four time periods you journey to, combined with a healthy dose of puzzle solving and a creative "sidekick" feature, help this game to stand out from the crowd. If that wasn't enough, throw in several multi-player features such as "Capture the Flag" and "Death Tag" and you have a game with tremendous replay value.
The single-player version of the game will take you on a journey through four different time periods, or "Episodes" as they are dubbed. Each episode in Daikatana has a number of missions that logically progress to your final confrontation with Mishima. Throughout your adventure you will need to locate save gems to save your progress. Also on each mission are numerous "secrets" that, when found, reveal items that will increase your chances of survival. Those who explore most thoroughly will be rewarded.
Due to the vast differences in weaponry and items throughout the game (there were no Glocks in Ancient Greece!) this strategy guide is set up by episode. Each section will provide a walkthrough of each mission in that episode, including where to find the save gems and secrets. Also, a brief description of those who will try to stop you, as well as the weapons you use to kill them, is given at the beginning of each section.
By: Doug Walsh
The Marsh
Sewer System
Solitary
Crematorium
Icelab
The Vault
Processing
Lemnos Isle
Catacombs
Athens
Acropolis
Lair of Medusa
Plague Village
Passage
Dungeon
Wyndrax Tower
Gharroth’s Throne
Crypt of Nharre
Alcatraz
Beneath the Rock
The Tower
Mishima Labs
SEAL Training Center
Mishima’s Hideout

this
guid
e d
ow
nlo
aded f
rom
ignguid
es.c
om
this
guid
e d
ow
nlo
aded f
rom
ignguid
es.c
om
DaikatanaDaikatanaKyoto, Japan, 2455 AD
Ancient Greece, 1200 BC
Medieval Norway, 560 AD
San Francisco, USA, 2030 AD
Introduction
Items
Items for All TimeBefore launching into the first episode, it should be noted that several items will pop up throughout the entire game. These "boosts" and power-ups are an instrumental part of your success. And for that reason, they are usually kept hidden in the game's many "Secrets".
Save Gem - Varying numbers of Save Gems are scattered throughout each mission. Although your progress is saved at each map change, Save Gems allow you to save at any point in the game. You may only carry up to 3 at a time.
Goldensoul - Adds 100 health points to character's health total.
Mega Shield - Brings character's armor total up to 400 points. A very good find indeed!
Mana Skull - This item makes Hiro invincible for 30 seconds.
Wraith Orb - This item makes Hiro partly invisible for 30 seconds. A sharp-eyed enemy may catch a glimpse if Hiro is moving.
Skill Boosts - Although increasing your frag count will help boost your stats (provided you are not using the Daikatana), these items will instantly bring the corresponding skill to level 5 for 30 seconds.
Power green: Increases destructive force of weapons.Attack red: Increases firing rate of weaponSpeed yellow: Increases speed of characterAcro - blue: Increases jumping abilityVitality purple: Increases maximum health limit

this
guid
e d
ow
nlo
aded f
rom
ignguid
es.c
om
this
guid
e d
ow
nlo
aded f
rom
ignguid
es.c
om
DaikatanaDaikatanaKyoto, Japan, 2455 AD
Ancient Greece, 1200 BC
Medieval Norway, 560 AD
San Francisco, USA, 2030 AD
Introduction
Items
Episode 1: Kyoto, Japan - 2455 ADThe player will notice from their first encounter in the marsh that the future is very different indeed. The majority of carbon-based lifeforms have gone the way of the dinosaur and have been replaced with a robotic facsimile. Whether it's the Robocrox or the Battle Boar you're facing, don't expect to see a lot of gore in this landscape. Here, it's a trail of scrap metal and spare parts that you'll leave.
Disruptor Glove This is the weapon you begin your journey with and default to whenever out of ammo. It packs quite a punch in the water and excels with close targets.
Ion Blaster - The blast from this gun ricochets off of objects so its best to shoot at an angle. Also, keep this one out of the water as it will discharge right in your hands.
C4 Vizatergo - This gun sends C4 plastic explosive arcing through the air. The explosives then detonate whenever anything comes in close proximity.
Shotcycler - The first semi-automatic introduced in the game. This gun will fire 6 shots at a click but takes a while to reload. Devastating with close targets.
Sidewinder - A powerful over the shoulder missile launcher. Perfect for making quick work of distant enemies. Beware the explosion at close range!
Shockwave - The gang killer. Fire this explosive sphere into a crowd and run like hell. After its initial explosion, a rippling shock wave expands outward, bringing down anything in its reach.
Chromatic Armor - Despite providing a mere 100 points of armor protection, it absorbs 50% of all damage and 90% of damage due to hits with the Ion Blaster.
Plasteel Armor - Provides 200 points of armor protection and reduces damage by 75%.
Berry Bush - Nature's energy bar. Eat a fruit to gain 10 health points.
Health Packs - The small packs give you 25 health points. The large ones give 50.
Weaponry
Armor
Special Items
this
guid
e d
ow
nlo
aded f
rom
ignguid
es.c
om
this
guid
e d
ow
nlo
aded f
rom
ignguid
es.c
om
DaikatanaDaikatanaKyoto, Japan, 2455 AD
Ancient Greece, 1200 BC
Medieval Norway, 560 AD
San Francisco, USA, 2030 AD
Introduction
Items
Hosportal - Step up to the Hosportal for a big dose of medicine. Place your hands on the pads when they are green to get a large health boost. Unfortunately, this bonus is only for Hiro. Superfly and Mikiko need not apply.
Roboskeet - A mechanized version of the mosquito. Although its sting can be deadly, the loud buzzing noise it produces can be heard well before it attacks. Picking them off from a distance with the Ion Blaster is your best bet.
Froginator - A deadly robotic frog that delights in poisoning its victims. Move around to avoid their poisoned spit and fatal licks and take them out with either the Ion Blaster or Disruptor Glove.
Protopod - This is the egg from which the Roboskeets hatch. Smash them to prevent a massive swarm from attacking later.
Robocrox - A robotic crocodile with speed and ferocity. Destroy them from a distance with the Ion Blaster or get in the water with them and run, run, run.
Rockgat - A well camouflaged automatic gun hidden among the Marsh's boulders. When encountered, the Rockgat will rise up and fire steadily at anything within range. Approach slowly and destroy the Rockgat's power supply from a safe distance.
Cambot - This hovering sentry poses no offensive threat, yet is best let alone. If you happen within its search lights it automatically signals enemy forces to converge on you.
Thunderskeet - The "Queen Bee" of the Roboskeet clan. This bird-size bug fires poisonous streams at you during battle and causes every Protopod to hatch at the time of its death. Often a special item can be found in its carnage.
The old man's plan almost worked. Almost. Now, instead of successfully making it into the Mishima fortress by way of the bone collector's wagon, you find yourself stuck outside in the rain. With Mikiko Ebihara's life in the balance, Hiro must not waste time.
E1M1: Marsh
Enemies
Walkthrough
this
guid
e d
ow
nlo
aded f
rom
ignguid
es.c
om
this
guid
e d
ow
nlo
aded f
rom
ignguid
es.c
om
DaikatanaDaikatanaKyoto, Japan, 2455 AD
Ancient Greece, 1200 BC
Medieval Norway, 560 AD
San Francisco, USA, 2030 AD
Introduction
Items
Walk ahead and pick up the Ion Blaster. With it as your weapon wade cautiously through the stream to your right. A couple of Froginators and Roboskeets will attack as you make your way to the pond ahead. This is a good place to practice luring enemies into your sights one at a time. Keep them at bay with the Ion Blaster, but if they get in close be sure and switch to the Glove. Once free of attackers and able to enter the open area, head to the waterfall on the right. Behind the cascading water, against the rock is a ladder. Climb this ladder and proceed down the path to the door on the left. Enter the small room to pick up the Goldensoul. You found your first secret.
Leave the secret room and proceed back to the ladder. Leave the fruit where it is in case you need it later. Descend the ladder and cross the pond to the Ion Blaster ammo. Grab the ammo and head up the stone steps near the Mishima Industries sign. Take a left at the top and grab the Save Gem and berries from on top of the
rocks. Head out the way you came and continue straight ahead to the other cave. Shoot the Froginator that approaches with your Ion Blaster and walk towards the puddle on your right. Dive in and swim to the bottom to grab the red Attack Boost. Quickly swim to the surface and continue on your path.
As you approach the ledge two Roboskeets and several Froginators will attack. Shoot down the 'Skeets and then pick off the Froginators one by one as they try to
climb up the slippery rocks. Grab some fruit from the tree behind you and then drop down into the water. Make your way across this larger pond towards the stepped waterfalls on your right. Leap onto the lower ledge of the waterfalls and take a close look behind the water. Similar to the earlier secret, climb the ladders behind the water to the top of the falls and enter the alcove. Grab the Chromatic Armor and descend back to the pond. Continue on through the cave to the left of the falls.
Here you will encounter your first Rockgat. Approach the far wall slowly and begin to shoot at the control box with the red light to the right. If you get too close and get detected, simply run backwards while weaving to avoid the Rockgat's impressive firepower. Once he retreats to the rocks, continue your assault on the power box. Once the coast has been cleared, grab the health boxes and continue on to the left.
As you approach the large body of water ahead, be sure and destroy all of the Froginators and Robocrox from a safe distance. Once in the water, switch to your Disruptor Glove and head for the two berry bushes. Head to the right just beyond the trees and shoot down the incoming Roboskeets. Continue on slowly and destroy the Rockgat as it comes into view. Before heading off to the right, go left around the stone arch and
grab the Save Gem. Destroy the Froginator beyond the Rockgat and head for the water on the right. Blow up the Robocrox from the shore and make a dash across the water towards the sign ahead. Make your way up the path to the large boulder at the bend in the cave. Jump up onto the rocks and push against the boulder. Proceed down the path hidden by the boulder to the next Secret. After grabbing the goodies, return to the cave and continue ahead towards the red light.
this
guid
e d
ow
nlo
aded f
rom
ignguid
es.c
om
this
guid
e d
ow
nlo
aded f
rom
ignguid
es.c
om
DaikatanaDaikatanaKyoto, Japan, 2455 AD
Ancient Greece, 1200 BC
Medieval Norway, 560 AD
San Francisco, USA, 2030 AD
Introduction
Items
To your right, as you exit the cave is a red-lettered "Private" sign. Blow apart the sign and step onto the rock ledge beyond it. Hug the rock wall and proceed across the ledge to the hidden Mana Skull near the platform. Double back to the cave exit and walk out onto the platform and collect the health. Run across the bridge before it explodes and draw your Ion Blaster. With your back to the wall, aim to the sky. A squad of Roboskeets led by a solitary Thunderskeet will attack. After taking out your winged foes, try and pick off the Robocrox and Froginators in the water below before jumping in. Pick up the ammo in the corner and, if necessary, climb the ladder to get the remaining health boxes. Wade through the water to the cave exit and follow the path to the next map area.
Ahead, to the right of the pipes, is a berry bush and another Save Gem. Make your way onto the lower pipes and destroy the Froginators swimming below. To the left of where you entered is a locked door. To unlock the door , turn your back to it and walk up the lower pipe on the right. Cross over to the other pipe via the connection and turn around back towards the door. Make a running leap to the other pipe and then up onto the top platform over the door. Take out the two Froginators standing watch and then destroy the red-lit control box for the door below. Jump back down to the lower platform and enter through the door. Turn left to grab the ammo and then battle the many Roboskeets on your way to the Control Center.
The worker you see to your right is actually standing over a secret hatch. Take him out and then enter the hatch to find the Mega Shield and Power Boost. Back on the surface, cautiously walk around the right of the Control Center and destroy the Rockgat hiding in the rocks. With the Rockgat demolished, destroy the control box in the upper right corner of the Control Center. Head back around front to the now open door. Shoot down the Roboskeet and Froginators and enter.
Head immediately to the large Mishima computer terminal and use the keyboard to open the hatch to the sewer system. With a way out of the marsh, step onto the lift and ascend to the upper level of the room. Ride the lift at the end of the catwalk to the marsh below. Step out into the water, kill the Roboskeets and head towards the waterfall ahead. Jump down and head to the right. Grab the berries in the corner and climb the ladder to the helipad. Leap over the rocks in the right hand corner, kill the Froginators and continue ahead to the secret Goldensoul. Double-back to the ladder down off of the helipad and re-enter the stream.
Before exiting the area, let the stream carry you past the sewer entrance, towards the fallen column of rock at the end of the stream. As you swim towards the secret area, be sure and grab the Save Gem. Don't be tempted to shoot the Thunderskeet just yet. Climb up the stone steps ahead of you to the right and walk to the top of the rock ledge and jump down to the illuminated staircase. Run up the stairs to grab the C4 Vizatergo. Turn around and run ahead to grab the C4 explosives. Now, return to the top of the ledge from where you jumped and launch some C4 towards the Protopods ahead. Leap across to the platform, and destroy the Thunderskeet. Return to the yellow-lit staircase. Before pulling the lever on the left, drop down into the water and swim under the platform to grab the Shockwave ammo and ascend the ladder. Now ride the lift to the helipad. Drop back into the stream and head for the sewer.

this
guid
e d
ow
nlo
aded f
rom
ignguid
es.c
om
this
guid
e d
ow
nlo
aded f
rom
ignguid
es.c
om
DaikatanaDaikatanaKyoto, Japan, 2455 AD
Ancient Greece, 1200 BC
Medieval Norway, 560 AD
San Francisco, USA, 2030 AD
Introduction
Items
E1M2: Sewer System
Enemies
Walkthrough
Roboskeet - A mechanized version of the mosquito. Although its sting can be deadly, the loud buzzing noise it produces can be heard well before it attacks. Picking them off from a distance with the Ion Blaster is your best bet.
Froginator - A deadly robotic frog that delights in poisoning its victims. Move around to avoid their poisoned spit and fatal licks and take them out with either the Ion Blaster or Disruptor Glove.
Protopod - This is the egg from which the Roboskeets hatch. Smash them to prevent a massive swarm from attacking later.
Sludge Minion - A hulking robot with a deadly shot. Luckily, an audible signal alerts you to the oncoming fire. Strafe side to side and use your C4 to take him out.
Mishima Guard - The first human enemies you encounter. They can fire a rapid stream of bullets but don't take much to put them away.
With the help of Usagi's spirit, Hiro is granted access into the sewer system. Head directly up the staircase and ride the lift up. Open the door to the mixing chamber with the keypad on your right. Shoot down the two Roboskeets from the opening and then enter the mixing room. Dive down in between the paddles to grab the hidden Vitality Boost. Wait for the opening and then swim to the surface and enter the tunnel marked #1.
Blast the Froginator and proceed to the top of the stairs. Before heading down the staircase in the next room, leap over the railing to the landing below. Make quick work of the Sludge Minion and grab the Chromatic Armor and health. From the ledge, shoot the Robocrox and Froginator and then jump in. Crawl through the small opening across the room. Head immediately to your left and jump out onto the metal walkway. In the next room climb the staircase to the computer, blast the Froginator and then use the
keyboard to open the gates to tunnel #2. Step back from the computer and shoot out the grating to your left. Blast away the metal pistons and flip the lever inside this small area. Now, descend the stairs in the middle of the room to the sewer water below. Wade to the corner to grab the Save Gem and then crawl into the opening directly behind it. Climb the ladder and step out onto the pipe high above the room. Crawl along the pipe to the Goldensoul.

this
guid
e d
ow
nlo
aded f
rom
ignguid
es.c
om
this
guid
e d
ow
nlo
aded f
rom
ignguid
es.c
om
DaikatanaDaikatanaKyoto, Japan, 2455 AD
Ancient Greece, 1200 BC
Medieval Norway, 560 AD
San Francisco, USA, 2030 AD
Introduction
Items
Descend back to the metal walkway and follow it through the small corridor to the edge of the water you climbed out of earlier. Use the button to summon the lift and ride it back to the next room. Climb the stairs and the ramp back to the mixing chamber. Use the C4 Vizatergo to destroy the Sludge Minion in tunnel #2
before entering. With the path cleared, proceed into the next tunnel and make your way to the Hosportal and computer on the right. Shoot the grated floor in front of the Hosportal to reveal a secret area. Descend the ladder to find the next Save Gem.
From the Hosportal, begin down the tunnel, destroying several Froginators and two Sludge Minions as you go. Beyond the door on your left are more Froginators and a Sludge Minion so have your weapon drawn. Proceed down the ramp to the left of
the spillway and take out all the Roboskeets from a distance. Cross behind the drain to the Mishima computer and use the keyboard to open the door out of the room. Run back across the walkway and up the ramp to exit the room before the door re-closes. Destroy the Sludge Minion on the other side of the door and head towards the next tunnel.
As you head down this next sewer pipe a mini earthquake ruptures the pipe. Walk around to the left of the broken tunnel, kill the Froginator and grab the health packs as well as the Gas Hands attachment for your Glove. Dive into the water and swim through the corridor using your Gas Hands to destroy any lurking Froginators. Climb out of the water and use the keypad to extract the steps of the ladder. Climb the ladder to the pipe above, kill the Froginator, and continue on to the next map change.
Drop into the next pipe and immediately destroy the two Froginators that attack. Jump out of the break in the pipe ahead and cross the room to your right. Kill the Protopods and Roboskeets that lie in between the pipes and grab the health and ammo before taking on the Sludge Minion. Use your Ion Blaster from across the room to destroy the Sludge Minion and Froginator in the distance and then jump down into the current below. Equip yourself with the Gas Hands and pass through the door into the water below. Quickly swim to the next room, going over the large paddles in the center. Swim into the glass room beyond the paddles, grab the health, and press the button on the wall to lower the water. Without stopping for even a breath of air you must swim back over the paddles towards the tunnel on your left.
Arm yourself with the C4 Vizatergo and pass through the circular hatch. In the mixing chamber ahead are three Sludge Minions. Fire plenty of C4 at them and retreat to the other side of the room. When they are down climb the ladder to the ledge high above. You will step off the ladder directly onto a Protopod so be ready with either your Ion Blaster or Disruptor Glove. Make your way around the ledge past the locked sewer gate and onto the I-beams. Climb the ladder ahead onto the ledge and go to your right to get the Save Gem and health that await you. Walk the ledge to the other side of the room and duck into the small alcove. Take out the worker and the Roboskeet and then turn the wheel to open the large gate. With the gate open, jump down to the ledge on the right and then run through the gate before it closes. Just watch out for the Sludge Minion in the next tunnel.
this
guid
e d
ow
nlo
aded f
rom
ignguid
es.c
om
this
guid
e d
ow
nlo
aded f
rom
ignguid
es.c
om
DaikatanaDaikatanaKyoto, Japan, 2455 AD
Ancient Greece, 1200 BC
Medieval Norway, 560 AD
San Francisco, USA, 2030 AD
Introduction
Items
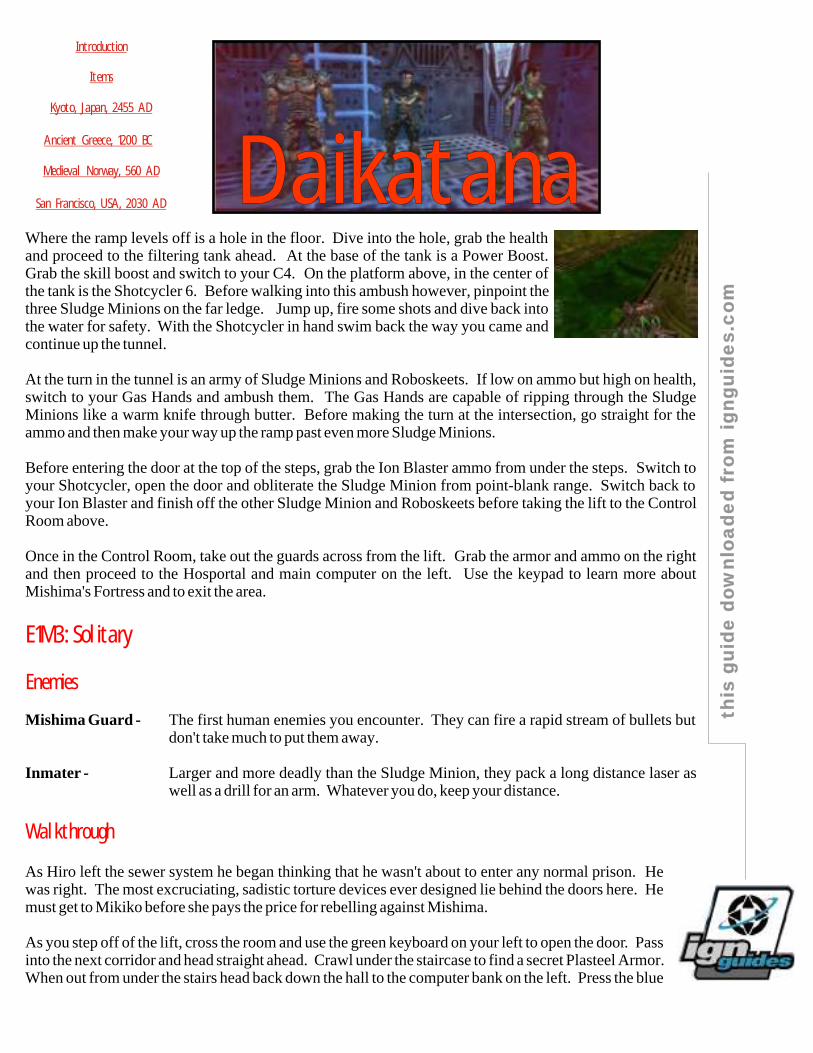
Where the ramp levels off is a hole in the floor. Dive into the hole, grab the health and proceed to the filtering tank ahead. At the base of the tank is a Power Boost. Grab the skill boost and switch to your C4. On the platform above, in the center of the tank is the Shotcycler 6. Before walking into this ambush however, pinpoint the three Sludge Minions on the far ledge. Jump up, fire some shots and dive back into the water for safety. With the Shotcycler in hand swim back the way you came and continue up the tunnel.
At the turn in the tunnel is an army of Sludge Minions and Roboskeets. If low on ammo but high on health, switch to your Gas Hands and ambush them. The Gas Hands are capable of ripping through the Sludge Minions like a warm knife through butter. Before making the turn at the intersection, go straight for the ammo and then make your way up the ramp past even more Sludge Minions.
Before entering the door at the top of the steps, grab the Ion Blaster ammo from under the steps. Switch to your Shotcycler, open the door and obliterate the Sludge Minion from point-blank range. Switch back to your Ion Blaster and finish off the other Sludge Minion and Roboskeets before taking the lift to the Control Room above.
Once in the Control Room, take out the guards across from the lift. Grab the armor and ammo on the right and then proceed to the Hosportal and main computer on the left. Use the keypad to learn more about Mishima's Fortress and to exit the area.
Mishima Guard - The first human enemies you encounter. They can fire a rapid stream of bullets but don't take much to put them away.
Inmater - Larger and more deadly than the Sludge Minion, they pack a long distance laser as well as a drill for an arm. Whatever you do, keep your distance.
As Hiro left the sewer system he began thinking that he wasn't about to enter any normal prison. He was right. The most excruciating, sadistic torture devices ever designed lie behind the doors here. He must get to Mikiko before she pays the price for rebelling against Mishima.
As you step off of the lift, cross the room and use the green keyboard on your left to open the door. Pass into the next corridor and head straight ahead. Crawl under the staircase to find a secret Plasteel Armor. When out from under the stairs head back down the hall to the computer bank on the left. Press the blue
E1M3: Solitary
Enemies
Walkthrough

this
guid
e d
ow
nlo
aded f
rom
ignguid
es.c
om
this
guid
e d
ow
nlo
aded f
rom
ignguid
es.c
om
DaikatanaDaikatanaKyoto, Japan, 2455 AD
Ancient Greece, 1200 BC
Medieval Norway, 560 AD
San Francisco, USA, 2030 AD
Introduction
Items
button in the far right corner to unlock some doors in the next sector. Head back to where you began the mission, using the keyboard to open the door.
Now leave this first room down the steps in the far right corner. Grab the C4 and the Ion Blaster ammo and cross the computer room on your left. Take out the guards and head up the stairs into Cell Block 1. Use the C4 to take out the two Inmaters around the corner. Run past the cells and turn to the left at the end of the
corridor. Crawl, yet again, under the steps to grab the health. Turn to your right and to blow up the motor for the generator behind the screen. This turns off the force field for the cells in Cell Block 1. On the platform above you, an Inmater is released to take care of the offending party. Arm yourself with the C4 Vizatergo, crawl out from under the stairs and fire a couple of quick shots to take him out. Head past the escaping prisoners to the last cell on your right and grab the Ion Blaster ammo from the bunk. Then, return to the far end of the hall.
Grab the Sidewinder Rockets from the right and then head up the small staircase to the door. Open the door and take out the Mishima Guard and Inmater in the next room. Enter the yellow-lit corridor on the far side. Make your way past the Inmater and Guard to the end of the corridor. Press the button near the observation window and take advantage of the Hosportal behind you. Make your way back to the large blue room, grabbing any necessary health and ammo along the way.
Board the lift in the center of the room and press the button on the column to ride it up. Take out the two Guards and then enter the room ahead of you. Make your way through the next room past the Inmater being sure to grab the Shotcycler ammo. Take out the Guard on the floor and the two in the rafters and head towards the mal-functioning door to Cell Block 2 (you thought that noise was an approaching Inmater, didn't you?). Put the Worker out of his misery and then fix the door for him by blasting the short-circuiting wires overhead. Crawl through the jammed door.
Take out the guard in the next room and grab the health in the corner. The main door to Cell Block 2 is locked so you must find an alternative route. Walk towards the green Mishima sign in the corner. A hidden door is located just to the right of that sign. Open the door and shoot the barrel of explosives just inside. This will blow a hole in the wall. Step to where the barrel was and shut the door behind you. With the door
shut, shoot at the crack in the far wall. Crawl into the opening you make and grab the hidden Goldensoul. Return to where the barrel was and crawl into the red-lit room ahead. Make your way around all of the pipes to the ladder in the rear. Climb the ladder onto the upper pipe and make your way back around. Jump down to grab the Acro Boost and then leap back up onto the pipe and from there, onto the platform above through the opening ahead. Crawl back along the platform, staying low to avoid the fans. Grab the health if you need it and then jump over
the lowest pipe. Jump into the pipe ahead to enter Cell Block 2.

this
guid
e d
ow
nlo
aded f
rom
ignguid
es.c
om
this
guid
e d
ow
nlo
aded f
rom
ignguid
es.c
om
DaikatanaDaikatanaKyoto, Japan, 2455 AD
Ancient Greece, 1200 BC
Medieval Norway, 560 AD
San Francisco, USA, 2030 AD
Introduction
Items
From where you exit the pipe, take out the Guards and head straight ahead to the first Save Gem. Descend the lift to the torture room below. Use the C4 to take out the two Inmaters standing guard and hell, blow up the sick pups at the operating table in the corner too. Proceed to the far end of the hall, past the cells. Enter the room in the corner and use the Hosportal to rejuvenate. Press the keys on the computer to open the next area and extend the platform. As you head back to the lift, use the keypads on the right wall to deactivate the force fields for the cells and grab the Plasteel Armor. Ride the lift back up and head to the door you opened down the hall to the left.
Cross the platform over the torture chamber and enter through the door. Have the Shotcycler ready to take down the Guards at the top of the stairs. Use the blue button to enter the next room. Clear the room of Mishima forces and then shoot at the large Green Mishima panel on the wall. Blast it apart to grab the Goldensoul hidden behind it. Use the keyboard opposite the secret to unlock the gates to Cell Block 3. Board the lift left of the computer and follow the catwalk around to the blue room. Blast the Guards and descend the staircase to the next map area.
Descend the second set of steps to the room below. Kill the Guards and approach the computer near the steps. Fire at the screened panel and then at the machinery to reveal a secret. Crawl in and work your past the hot pipes to the Wraith Orb and ammo that lies beyond. Crawl out and use the keypad on the computer to unlock the next door. While invisible, enter the ha l lway and blow apart the Inmater in the distance. Next focus your fire on the red power box in the top right corner to turn off the laser detectors. Jump inside the hatch that opened and follow the corridor to the health and ammo. Use the button on the wall to exit the secret area. Return to where the lasers were and proceed.
After passing the laser trap you will find yourself in a large blue room with a tower in the center. Destroy the Inmater by the Mishima panel and then follow the ledge to where he just stood. Shoot at the green panel to reveal a hidden Save Gem and ammo. Use the Save Gem here in case you fall to your death. Stand on the ledge, facing the open door across the gap. Walk off the ledge and plummet through the air to a small walkway below. Still facing the tower, walk the ledge around to your left and enter the tower. Grab the ammo and climb the ladder to the armor above. Continue up the ladder into the control room. Kill the Guards and grab the health, ammo and Save Gem.
Use the keyboard in the control room to open the vault that is Cell Block 4. Follow the walkway to the left, taking out any Guards that get in your way. Climb the ladder to the small platform on your left and pull the lever next to the computer. This short-circuits the wires and causes a small explosion. Jump into the wreckage and turn the wheel to manually open the door below. Grab the ammo from the other ledge and then kneel down by the door and shoot the Guards before you crawl under the door. Take care of the Inmater and continue on into the hallway. Before boarding the lift, turn and perform a Shotcycler jump over the yellow
this
guid
e d
ow
nlo
aded f
rom
ignguid
es.c
om
this
guid
e d
ow
nlo
aded f
rom
ignguid
es.c
om
DaikatanaDaikatanaKyoto, Japan, 2455 AD
Ancient Greece, 1200 BC
Medieval Norway, 560 AD
San Francisco, USA, 2030 AD
Introduction
Items
railing to acquire the ammo and Mega Shield. This jump is performed by simultaneously jumping and firing a high-recoil weapon at the ground. Practice this technique as you will do it again in the other time periods with different weapons.
Summon the lift with the blue button and ride it up to the next area. While on the lift, get in a crouch and draw your Shotcycler to make quick work of the Inmater and Guards that wait for you at the top. Switch to the C4 and blast the Inmater directly ahead and the two in the hall on the left. Proceed to the end of the corridor to meet your new friend, Superfly. To free Superfly from his entanglement, follow the power supply from the Mishima panel to the power box in the top right corner of that wall. Blast the box and return to the panel to grab the Keycard. Bring the Keycard to Superfly to let him down.
With your new sidekick being unarmed, he is more of a liability than an asset at this point in the game. Have him stay in Cell Block 4 while you head through the open doors on the left to Cell Block Death. Clear a path for Superfly through the many Inmaters and Guards that lurk here. Return to Superfly and have him follow you to the exit.
Mishima Guard - The first human enemies you encounter. They can fire a rapid stream of bullets but don't take much to put them away.
Cambot - This hovering sentry poses no offensive threat, yet is best let alone. If you happen within its search lights it automatically signals enemy forces to converge on you.
Lasergat - This "eye in the sky" has the ability to kill and kill quick. A rotating gun mounted to the ceiling fires deadly laser shots at you from quite a distance. Their small size and relative durability make them a strong opponent.
Ragemaster - This guy is more bark than bite if you keep your distance. His only weapon is his punishing punch. Backpedal while firing the Sidewinder and you shouldn't have any problem with him.
Roboskeet - A mechanized version of the mosquito. Although its sting can be deadly, the loud buzzing noise it produces can be heard well before it attacks. Picking them off from a distance with the Ion Blaster is your best bet.
Froginator - A deadly robotic frog that delights in poisoning its victims. Move around to avoid their poisoned spit and fatal licks and take them out with either the Ion Blaster or Disruptor Glove.
E1M4: Crematorium
Enemies

this
guid
e d
ow
nlo
aded f
rom
ignguid
es.c
om
this
guid
e d
ow
nlo
aded f
rom
ignguid
es.c
om
DaikatanaDaikatanaKyoto, Japan, 2455 AD
Ancient Greece, 1200 BC
Medieval Norway, 560 AD
San Francisco, USA, 2030 AD
Introduction
Items
Walkthrough
With a brief moment to talk, you learn a bit about Superfly's horrid past. You sense his determination and decide that not only is he trustworthy, but he may provide some much needed firepower. Hiro and Superfly enter the Crematorium, with just one question on their mind: Why does Mishima need a crematorium in his fortress? Unfortunately, the answer is somewhat unsettling.
From where you begin, run up the ramp and enter the lobby of the crematorium. Have Superfly grab the Ion Blaster while you collect the ammo. Put down the Ragemaster and proceed to the waiting room on the left. Take out the Lasergat on the wall and cross the room to grab the Save Gem. Turn and shoot the top off the coffee table in the center. Climb down the ladder to the Power Boost. Return to the main lobby and enter through the door on the far side of the room.
Battle through the Guards and Ragemasters towards the loading area ahead. Before heading to the truck however, be sure and jump over the railing to collect the ammo and berries near the tree. With Superfly in tow, travel across the parking area towards the chain link fence on the far side. Collect the health and Ion Blaster ammo and turn to the left to find a secret Hosportal behind two Guards. From the Hosportal, head directly ahead towards the gate. Crawl under it and take out the Lasergat high above. Follow the path to the right and over the catwalk to the control room ahead. Kill the Roboskeets and Guards and enter the room. Use the keyboard on the left to open the
bay doors to the loading dock. The other two keyboards are of no real use to you. Leave the room.
Before heading to the loading dock take a leap off of the walkway into the swamp below. Smack down the Froginator with your glove and swim under the arch and around to your right. Grab the Plasteel Armor from behind the column and swim back around to the ladder hanging down from above. Climb the ladder and shoot through the barbed-wire fencing to regain the walkway. Meet back up with Superfly and head across the lot to the loading dock entrance.
Destroy the Ragemaster and Guards on the loading dock entrance ramp. Use the keypad on the right to open the door and enter the bee's nest in the next room. Avoid hitting Superfly while you battle the Ragemaster, Lasergat, and Guards simultaneously. Enter the small control room on the right, kill the Guard, and collect the Sidewinder and any ammo that you need. Use the keyboard to witness how the loading mechanism
works. Pay close attention to the leak in the pipe near the ladder. Leave the room and descend the ladder into the pit below. Shoot out the grate behind the ladder and have Superfly grab the Armor. Climb the ladder and, from near the conveyor, shoot a missile right at the leaky pipe. Once the automated door has been blown open, board the lift with Superfly and get ready for a firefight.
this
guid
e d
ow
nlo
aded f
rom
ignguid
es.c
om
this
guid
e d
ow
nlo
aded f
rom
ignguid
es.c
om
DaikatanaDaikatanaKyoto, Japan, 2455 AD
Ancient Greece, 1200 BC
Medieval Norway, 560 AD
San Francisco, USA, 2030 AD
Introduction
Items
Descend the incline conveyor to the floor, firing the Sidewinder nonstop. With the room secure, grab the ammo from the right hand wall and head to the lift near the racking of coffins. Superfly volunteers to wait
while you ride the lift to the second level of racking. Grab the Save Gem and then climb the ladder on the beam to reach the vent in the wall. Drop down into the ductwork. Take out the Lasergat at the turn and drop down again. You emerge under the walkway on which Superfly is standing. He may greet you with a WAZZZZUPPP as you crawl by but pay him no mind. Grab the health on the left and then make your way around the two fans to the far corner of the crawlspace. Drop down to the lower level and immediately begin firing at the Lasergat ahead.
Beyond the Lasergat is a large pit with only a small angled beam to jump from. Save the game here before attempting the leap over the pit.
After leaping the pit, turn to the right and crawl through the opening. Two Mishima Guards await you around the bend. Take them out and crawl into the next section of ductwork. A Lasergat is positioned immediately after the first turn so be ready with your Sidewinder. Climb the ladder ahead and carefully approach the opening. A couple of shots of C4 through the opening into the room below will do more than clear the room for your entrance. Just be aware of the edges of the vent. One misguided shot of that stuff and you'll be sent head over heels backwards down the ladder.
Jump down to the room below and shoot out the control box in the ceiling to open the door to your left. Enter the loading room to rejoin Superfly. At the far end of the room, a previously locked closet has been opened. Enter the room and shoot out the gate below the bottom shelf. Crawl in to acquire the Shockwave weapon. Leave the closet and head to the door on the far side. Enter the computer control room ahead. Destroy the Ragemaster and Guards and grab the Save Gem.
From the computer room, enter the next hallway and destroy the Ragemaster and Guard. Continue on through the corridor till you come to a door on your left. Attempt to lure the Ragemaster from this next room into the corridor so as to eliminate him in relative safety. The hallway beyond the door contains several Guards, a Ragemaster, and a Lasergat in each corner. Proceed with caution through the next hallway to the door at the end.
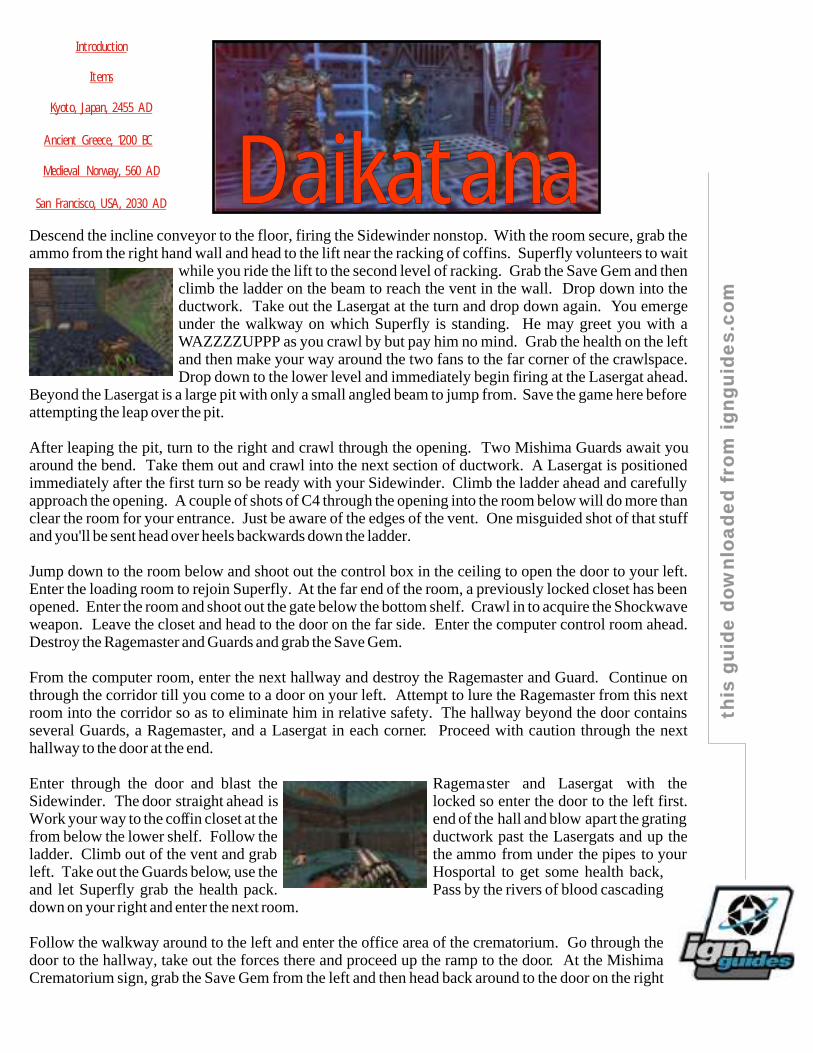
Enter through the door and blast the Ragemaster and Lasergat with the Sidewinder. The door straight ahead is locked so enter the door to the left first. Work your way to the coffin closet at the end of the hall and blow apart the grating from below the lower shelf. Follow the ductwork past the Lasergats and up the ladder. Climb out of the vent and grab the ammo from under the pipes to your left. Take out the Guards below, use the Hosportal to get some health back, and let Superfly grab the health pack. Pass by the rivers of blood cascading down on your right and enter the next room.
Follow the walkway around to the left and enter the office area of the crematorium. Go through the door to the hallway, take out the forces there and proceed up the ramp to the door. At the Mishima Crematorium sign, grab the Save Gem from the left and then head back around to the door on the right

this
guid
e d
ow
nlo
aded f
rom
ignguid
es.c
om
this
guid
e d
ow
nlo
aded f
rom
ignguid
es.c
om
DaikatanaDaikatanaKyoto, Japan, 2455 AD
Ancient Greece, 1200 BC
Medieval Norway, 560 AD
San Francisco, USA, 2030 AD
Introduction
Items
side of the hallway. Take out the Guard and the Cambot and then leap into the water below. Grab the Plasteel Armor for Hiro and let Superfly get the Chromatic Armor. Use the ramp in the corner to regain the walkway. Follow the walkway around to the door on the left. Take out the Ragemaster and the Guard and continue on to the viewing room. Have Superfly stand back while you fire the Shockwave into the room. Grab the health from the rear of the room and continue on to the next room.
After extinguishing the room of the Mishima Guards shoot out the grate near the ceiling. Carefully jump from desk to sign to bookcase to access the vent. Crawl along the ductwork and drop down into the incinerator room. Kill the attacking Guards and crawl under the incinerator. Before exiting the room to the left, crawl around to the right to grab the health boxes and Chromatic Armor. Now leave the room to the left.
Blast your way past the Mishima Guard and the worker and board the lift to the right. Once off the lift enter the door marked Authorized Personnel Only to complete the mission.
Mishima Guard - The first human enemies you encounter. They can fire a rapid stream of bullets but don't take much to put them away.
Cambot - This hovering sentry poses no offensive threat, yet is best let alone. If you happen within its search lights it automatically signals enemy forces to converge on you.
Lasergat - This "eye in the sky" has the ability to kill and kill quick. A rotating gun mounted to the ceiling fires deadly laser shots at you from quite a distance. Their small size and relative durability make them a strong opponent.
Roboskeet - A mechanized version of the mosquito. Although its sting can be deadly, the loud buzzing noise it produces can be heard well before it attacks. Picking them off from a distance with the Ion Blaster is your best bet.
Froginator - A deadly robotic frog that delights in poisoning its victims. Move around to avoid their poisoned spit and fatal licks and take them out with either the Ion Blaster or Disruptor Glove.
Robocrox - A robotic crocodile with speed and ferocity. Destroy them from a distance with the Ion Blaster or get in the water with them and run, run, run.
E1M5: Processing
Enemies

this
guid
e d
ow
nlo
aded f
rom
ignguid
es.c
om
this
guid
e d
ow
nlo
aded f
rom
ignguid
es.c
om
DaikatanaDaikatanaKyoto, Japan, 2455 AD
Ancient Greece, 1200 BC
Medieval Norway, 560 AD
San Francisco, USA, 2030 AD
Introduction
Items
Venomvermin - Not just a rat, but a rat with a rocket launcher. This wily foe lets out a piercing scream right before firing. If close, his poisonous bite could do you in. Use the Sidewinder for long-range shots or the Shotcycler for up close.
Deathsphere - A floating ball of hurt. The 'Sphere's powerful lasers can hit from any distance. Jump out of hiding while they recharge to fire some quick shots with the Sidewinder, then get back. They often attack in pairs, so be sure and have Superfly watch your back.
Hiro and Superfly notice on their way out of the Crematorium that the coffins were never actually incinerated, and neither were their contents. Filled with disgust, as well as fear for what they may encounter, the two proceed into the Processing area of the fortress.
Enter the area through the door ahead. Grab the ammo and health in the room and proceed through the door on the left. Go up the stairs to meet your first Venomvermin and Deathsphere. Continue down the hall, mindful of the Lasergats and Cambots lurking about. Along the back section of the hallway, shoot the blue light near the floor just prior to crossing the grate. The grate opens, reveling a hidden Megashield. Climb out of the hole and shoot out the glass window and jump into the swamp below.
Grab the Save Gem ahead, and swim to the far left to gather some more goodies. Head back to where you grabbed the Save Gem and climb out of the water onto the rock ledge. Rock-hop to the drainpipe on the left and enter the tank behind it. Grab the ammo and health and climb the ladder to the vent ahead. Make your way past the space-age rats to the grating. Quickly bust out of the vent and open the door ahead to let Superfly in. Together, you will be able to destroy the Deathsphere, Lasergat, and Guard in the room. Take a break from the action to witness the disturbing sights and sounds on the other side of the glass. Meatloaf anyone?
Head through the door on the far end, use the Hosportal if you need to and continue down the hall. Shoot at the Mishima Worker and control box while walking by, It may not be necessary, but try having the fan cut him in half. Now that's entertainment! Keep moving down the hallway to the next map area, taking out any Deathspheres along the way.
Open the door marked "Authorized Personnel Only" and put down the Guard on the steps. At the bend in the walkway fire the Shockwave at the laser-toting 'bots down the hall and flee back to the entrance to the room. Forge ahead through the door to the stairway and descend past the Guards to the room below. Equip yourself with the Sidewinder to take down the Deathspheres that float above. Face the pipes, to the right of the entrance. Descend the small ladder and crawl out onto the pipes beneath the
Walkthrough
this
guid
e d
ow
nlo
aded f
rom
ignguid
es.c
om
this
guid
e d
ow
nlo
aded f
rom
ignguid
es.c
om
DaikatanaDaikatanaKyoto, Japan, 2455 AD
Ancient Greece, 1200 BC
Medieval Norway, 560 AD
San Francisco, USA, 2030 AD
Introduction
Items
floor to grab the Save Gem. Ascend back up the ladder and head to the Hosportal. Walk out onto the thin metal ledge next to the aid station and follow it around to the Chromatic Armor. Cross the room and go through the door.
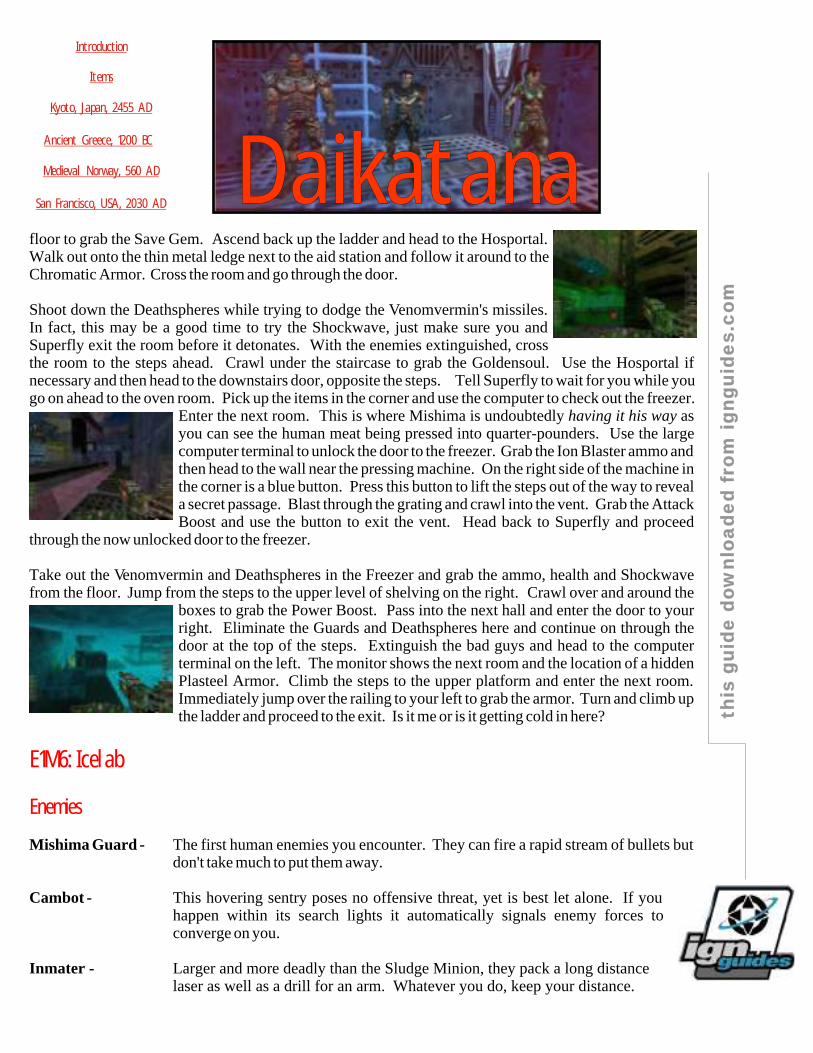
Shoot down the Deathspheres while trying to dodge the Venomvermin's missiles. In fact, this may be a good time to try the Shockwave, just make sure you and Superfly exit the room before it detonates. With the enemies extinguished, cross the room to the steps ahead. Crawl under the staircase to grab the Goldensoul. Use the Hosportal if necessary and then head to the downstairs door, opposite the steps. Tell Superfly to wait for you while you go on ahead to the oven room. Pick up the items in the corner and use the computer to check out the freezer.
Enter the next room. This is where Mishima is undoubtedly having it his way as you can see the human meat being pressed into quarter-pounders. Use the large computer terminal to unlock the door to the freezer. Grab the Ion Blaster ammo and then head to the wall near the pressing machine. On the right side of the machine in the corner is a blue button. Press this button to lift the steps out of the way to reveal a secret passage. Blast through the grating and crawl into the vent. Grab the Attack Boost and use the button to exit the vent. Head back to Superfly and proceed
through the now unlocked door to the freezer.
Take out the Venomvermin and Deathspheres in the Freezer and grab the ammo, health and Shockwave from the floor. Jump from the steps to the upper level of shelving on the right. Crawl over and around the
boxes to grab the Power Boost. Pass into the next hall and enter the door to your right. Eliminate the Guards and Deathspheres here and continue on through the door at the top of the steps. Extinguish the bad guys and head to the computer terminal on the left. The monitor shows the next room and the location of a hidden Plasteel Armor. Climb the steps to the upper platform and enter the next room. Immediately jump over the railing to your left to grab the armor. Turn and climb up the ladder and proceed to the exit. Is it me or is it getting cold in here?
Mishima Guard - The first human enemies you encounter. They can fire a rapid stream of bullets but don't take much to put them away.
Cambot - This hovering sentry poses no offensive threat, yet is best let alone. If you happen within its search lights it automatically signals enemy forces to converge on you.
Inmater - Larger and more deadly than the Sludge Minion, they pack a long distance laser as well as a drill for an arm. Whatever you do, keep your distance.
E1M6: Icelab
Enemies

this
guid
e d
ow
nlo
aded f
rom
ignguid
es.c
om
this
guid
e d
ow
nlo
aded f
rom
ignguid
es.c
om
DaikatanaDaikatanaKyoto, Japan, 2455 AD
Ancient Greece, 1200 BC
Medieval Norway, 560 AD
San Francisco, USA, 2030 AD
Introduction
Items
Lasergat - This "eye in the sky" has the ability to kill and kill quick. A rotating gun mounted to the ceiling fires deadly laser shots at you from quite a distance. Their small size and relative durability make them a strong opponent.
Deathsphere - A floating ball of hurt. The 'Sphere's powerful lasers can hit from any distance. Jump out of hiding while they recharge to fire some quick shots with the Sidewinder, then get back. They often attack in pairs, so be sure and have Superfly watch your back.
Cryotech - The first workers you encounter in the fortress that actually don't cower in a corner at the sound of your footsteps. Although slow and awkward, their blasts of nitrogel can do serious damage. Take them out from across the room.
Battle Boar - The treaded Battle Boar careens around the corridors of the Icelab. With wicked speed, he's on you in a flash. Break out the Disruptor Glove and give it an old fashioned beat down.
Ragemaster - This guy is more bark than bite if you keep your distance. His only weapon is his punishing punch. Backpedal while firing the Sidewinder and you shouldn't have any problem with him.
The Icelab is where the game begins to up the difficulty. The majority of the mission is spent on walkways suspended over deadly nitrogel baths. As if that wasn't enough, a legion of Deathspheres and Lasergats await you at every bend.
Walk ahead to the "T' and turn left. Tell Superfly to wait while you go ahead. Open the door by using the control panel on the right and fire the Shockwave into the crowd on the other side. When the blast has gone by continue down the hall and fire the Shockwave again. Bring Superfly back and together grab the health
and proceed to the left corner of the room to grab the Blue Keycard. Open the large door to the right and enter the next room. Beware the noxious gases from the Cryotechs as you engage them. Grab the Save Gem and descend the ladder. Take out the three Cryotechs before leaping the pit. Walk ahead and turn the large valve to lower the level of nitrogel. Facing the valve, squeeze between it and the wall to the right and drop to the ledge below. Crawl into the vent on the right and ascend the ladder. Grab the Vitality Boost and C4 ammo and climb the
next ladder. Drop through the opening onto the pipe and collect the Goldensoul in the alcove behind you. Take out the Deathspheres and return to the control room to get Superfly.
Walkthrough

this
guid
e d
ow
nlo
aded f
rom
ignguid
es.c
om
this
guid
e d
ow
nlo
aded f
rom
ignguid
es.c
om
DaikatanaDaikatanaKyoto, Japan, 2455 AD
Ancient Greece, 1200 BC
Medieval Norway, 560 AD
San Francisco, USA, 2030 AD
Introduction
Items
Go back through the corridor to the lift. Use the keyboard at the computer in the upstairs room to briefly open the door and pass through to the next room. Take out the Guards and open the heavily barred door to en te r th e ne xt area. Walk to the end of the path and turn left at the wall. Proceed all the way to the last room on the right. Kill the Guards and grab the ammo and Shotcycler. Visit the Hosportal to c u r e y o u r maladies before descending the ladder in the corner to g r a b t h e Megashield. Exit the room and walk straight ahead off of the walkway and onto the pipe below. Jump to the platform in the center, grab the Sidewinder ammo and climb the ladder. Slaughter the Guards in the room above and open the main door to let Superfly catch up. Board the lift and ride it up. Grab the health and pass through the large silver door. First head to the cafeteria at the end of the hall to your left. Grab the armor and return to explore the hallway to the right of the intersection.
Enter the next room and eliminate the Cryotechs and other assorted baddies that lurk there. Grab the Save Gem and continue down the path to the lift room with the purple glow. Take the lift upstairs and kill the
Cryotechs and Guards that dwell there. Make use of the Hosportal behind the screen and then head to the blue-lettered "SciCo" door across the way. Head out the door across the room but beware of the Inmaters at the top of the ramp. The Mishima forces add to the fun with an all out assault by Ragemasters, Inmaters, and Deathspheres. With the opposition laid to rest turn your eye to the green field in the center of the room. Inside there appears to be a young woman in a state of inanimation. Could that be
Mikiko?
Continue along the walkway, grabbing items as you go. In the next corridor you will face several Inmaters and Deathspheres, but don't fret, you're near the end. Grab the Save Gem and march on to the end of the mission and the completion of your first objective rescuing Mikiko Ebihara.
Mishima Guard - The first human enemies you encounter. They can fire a rapid stream of bullets but don't take much to put them away.
Cambot - This hovering sentry poses no offensive threat, yet is best let alone. If you happen within its search lights it automatically signals enemy forces to converge on you.
Sludge Minion - A hulking robot with a deadly shot. Luckily, an audible signal alerts you to the
E1M7: Vault
Enemies

this
guid
e d
ow
nlo
aded f
rom
ignguid
es.c
om
this
guid
e d
ow
nlo
aded f
rom
ignguid
es.c
om
DaikatanaDaikatanaKyoto, Japan, 2455 AD
Ancient Greece, 1200 BC
Medieval Norway, 560 AD
San Francisco, USA, 2030 AD
Introduction
Items
oncoming fire. Strafe side to side and use your C4 to take him out.
Lasergat - This "eye in the sky" has the ability to kill and kill quick. A rotating gun mounted to the ceiling fires deadly laser shots at you from quite a distance. Their small size and relative durability make them a strong opponent.
Deathsphere - A floating ball of hurt. The 'Sphere's powerful lasers can hit from any distance. Jump out of hiding while they recharge to fire some quick shots with the Sidewinder, then get back. They often attack in pairs, so be sure and have Superfly watch your back.
Battle Boar - The treaded Battle Boar careens around the corridors of the Icelab. With wicked speed, he's on you in a flash. Break out the Disruptor Glove and give it an old fashioned beat down.
Venomvermin - Not just a rat, but a rat with a rocket launcher. This wily foe lets out a piercing scream right before firing. If close, his poisonous bite could do you in. Use the Sidewinder for long-range shots or the Shotcycler for up close.
Ragemaster - This guy is more bark than bite if you keep your distance. His only weapon is his punishing punch. Backpedal while firing the Sidewinder and you shouldn't have any problem with him.
Brains - Don't fret, they are merely part of a defense system for the Daikatana. Shattering their glass enclosures and thereby exposing them to the atmosphere is enough to kill them. Kill all three to meet Psyclaw.
Psyclaw - The guardian of the Daikatana, the Psyclaw is a not only a sight to behold, but can be hazardous to your health. The brain-shaped creature has razor-sharp claws and the power to make you delirious. Use the BFG on this one.
Two's company but three's … You guessed it, you now have to escort two mildly intelligent characters throughout the rest of the game. What Mikiko lacks between the ears is easily overshadowed by her moody, sometimes downright foul, attitude. Resist the urge to unload you arsenal on her!
Divide up the armor and weaponry in the first room of the Vault and then head up the steps. Shoot down the Cambot and let your sidekicks pick up the Ion Blaster near the large door at the top of the steps. Use the keyboard to access the next room and blow out the Ragemasters that leap out of the hatches. Shoot apart the grating on the wall to the right and follow the passage past the
Walkthrough
this
guid
e d
ow
nlo
aded f
rom
ignguid
es.c
om
this
guid
e d
ow
nlo
aded f
rom
ignguid
es.c
om
DaikatanaDaikatanaKyoto, Japan, 2455 AD
Ancient Greece, 1200 BC
Medieval Norway, 560 AD
San Francisco, USA, 2030 AD
Introduction
Items
Venomvermin. Grab the health and the Save Gem from across the way and return to the large room ahead. Jump down into the pit in the rear of the room. Use the keypad in the alcove to extract the ladder on the wall and ride the lift to the main level. Use the ladder to the right to reach the door to the next room.
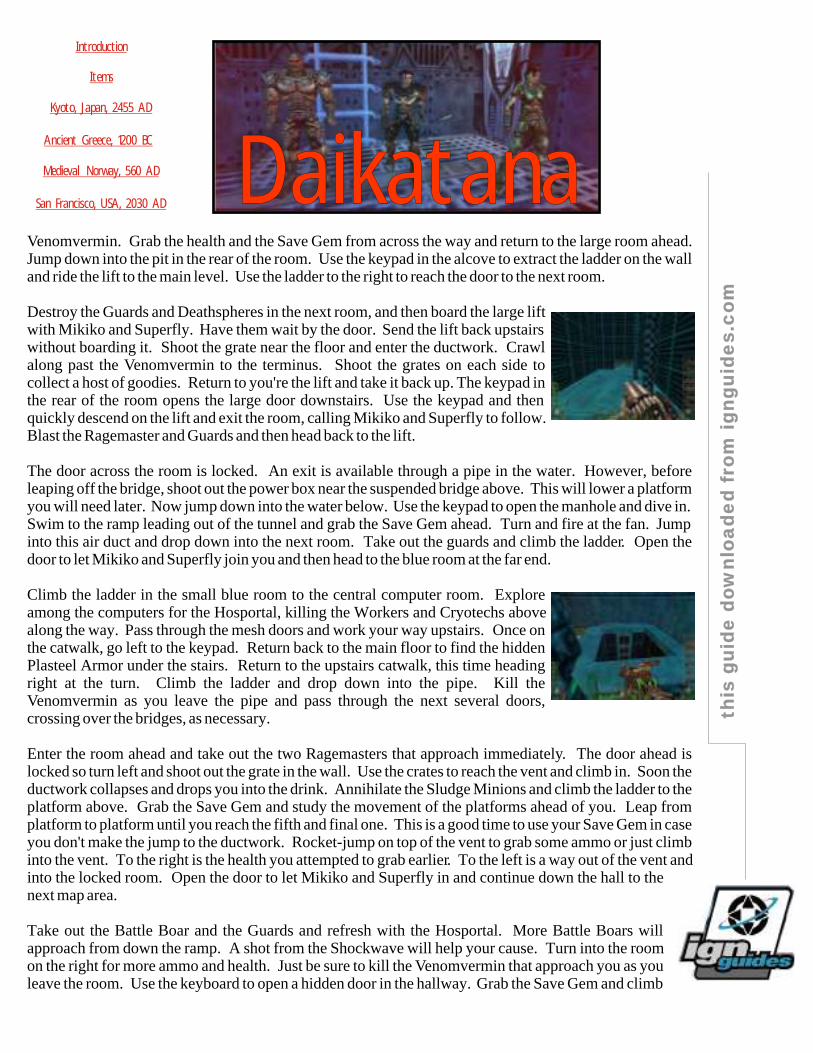
Destroy the Guards and Deathspheres in the next room, and then board the large lift with Mikiko and Superfly. Have them wait by the door. Send the lift back upstairs without boarding it. Shoot the grate near the floor and enter the ductwork. Crawl along past the Venomvermin to the terminus. Shoot the grates on each side to collect a host of goodies. Return to you're the lift and take it back up. The keypad in the rear of the room opens the large door downstairs. Use the keypad and then quickly descend on the lift and exit the room, calling Mikiko and Superfly to follow. Blast the Ragemaster and Guards and then head back to the lift.
The door across the room is locked. An exit is available through a pipe in the water. However, before leaping off the bridge, shoot out the power box near the suspended bridge above. This will lower a platform you will need later. Now jump down into the water below. Use the keypad to open the manhole and dive in. Swim to the ramp leading out of the tunnel and grab the Save Gem ahead. Turn and fire at the fan. Jump into this air duct and drop down into the next room. Take out the guards and climb the ladder. Open the door to let Mikiko and Superfly join you and then head to the blue room at the far end.
Climb the ladder in the small blue room to the central computer room. Explore among the computers for the Hosportal, killing the Workers and Cryotechs above along the way. Pass through the mesh doors and work your way upstairs. Once on the catwalk, go left to the keypad. Return back to the main floor to find the hidden Plasteel Armor under the stairs. Return to the upstairs catwalk, this time heading right at the turn. Climb the ladder and drop down into the pipe. Kill the Venomvermin as you leave the pipe and pass through the next several doors, crossing over the bridges, as necessary.
Enter the room ahead and take out the two Ragemasters that approach immediately. The door ahead is locked so turn left and shoot out the grate in the wall. Use the crates to reach the vent and climb in. Soon the ductwork collapses and drops you into the drink. Annihilate the Sludge Minions and climb the ladder to the platform above. Grab the Save Gem and study the movement of the platforms ahead of you. Leap from platform to platform until you reach the fifth and final one. This is a good time to use your Save Gem in case you don't make the jump to the ductwork. Rocket-jump on top of the vent to grab some ammo or just climb into the vent. To the right is the health you attempted to grab earlier. To the left is a way out of the vent and into the locked room. Open the door to let Mikiko and Superfly in and continue down the hall to the next map area.
Take out the Battle Boar and the Guards and refresh with the Hosportal. More Battle Boars will approach from down the ramp. A shot from the Shockwave will help your cause. Turn into the room on the right for more ammo and health. Just be sure to kill the Venomvermin that approach you as you leave the room. Use the keyboard to open a hidden door in the hallway. Grab the Save Gem and climb

this
guid
e d
ow
nlo
aded f
rom
ignguid
es.c
om
this
guid
e d
ow
nlo
aded f
rom
ignguid
es.c
om
DaikatanaDaikatanaKyoto, Japan, 2455 AD
Ancient Greece, 1200 BC
Medieval Norway, 560 AD
San Francisco, USA, 2030 AD
Introduction
Items
the ladder to the vent above. Drop down onto the platform below and begin attacking the Deathspheres as you ascend. Duck through the first three hole in the wall and then leap onto the ledge on the wall to collect the health. In the bottom of this shaft is a vent leading out of this trap. You will emerge in the line of fire from a Battle Boar, take him out and descend the ladder to return down the hall to Mikiko and Superfly.
With Mikiko and Superfly in tow, return to where the Battle Boar was. Press the keypad to unlock a door above and ascend the ladder. Put away the Ragemasters
and continue into the next room. Fire a Shockwave into the corridor to your left. After its force dissipates, continue on to get the Save Gem ahead. The door to your right leads directly into the crossfire of two Battle Boars, use caution as you proceed. Turn the corner and put down a couple more Battle Boars.
Soon you will find yourself in the room holding the Daikatana. To the left of the entrance is an electric force. As the moving objects reach the floor, a jolt of electricity will be spread across the room. Be sure to be standing on one of the corner platforms when this occurs. Your first step is to destroy the yellow cylinders near the ceiling. This helps to remove a shield from the Brains. With the Brains visible, shoot at their glass cases. One by one, as they explode Lasergats will begin firing on you. With the Lasergats and the Brains only a memory, the Psyclaws will appear. Avoid their claws and fire the Sidewinder and C4 at them until they're dead.
As Hiro grabs the Daikatana, Mishima shows up to teach the youngsters the history of the sword and of the power it holds. Witness to the power of the Daikatana, Mishima has the threesome banished to the far reaches of time.
this
guid
e d
ow
nlo
aded f
rom
ignguid
es.c
om
this
guid
e d
ow
nlo
aded f
rom
ignguid
es.c
om
DaikatanaDaikatanaKyoto, Japan, 2455 AD
Ancient Greece, 1200 BC
Medieval Norway, 560 AD
San Francisco, USA, 2030 AD
Introduction
Items
Episode 2: Ancient Greece - 1200 BCStaying true to his word, Mishima casts you to a far away place in time. Hiro stands in amazement that he has been transferred to Ancient Greece. Alone. Your objectives in this Episode are clear. You must reunite with Superfly and Mikiko and re-energize the Daikatana to transfer back to 2455 AD.
Daikatana The namesake weapon of the game. A powerful sword capable of being powered-up the more you use it. Press the "Tab" key to check the current level of the sword's power.
Discus - This razor sharp throwing disc can be used to slice away at close range or thrown at distant enemies. Very accurate and quick, the disc will return to Hiro with its boomerang-esque properties. You are capable of carrying and throwing up to 10 at a time.
Venomous - A staff that spits streams of venom at its opponents. Best for close attacks, but beware, this one can damage its user as well.
Sunflare - A ceramic pot of boiling oil. When thrown, it erupts into a wall of fire.
Hades Hammer - A massive sledge hammer capable of being charged up the longer you hold the "attack" key. When unleashed, seismic waves ripple your enemies and shake them to death. A great aid to your jumping ability as well.
Trident - Three simultaneous shots emitted from this elongated weapon. Very accurate and strong, this is the weapon of choice for distant enemies in Greece.
Eye of Zeus - Capable of destroying all nearby enemies with a powerful lightning bolt. Keep this one stocked for your battle with Medusa.
Silver Armor - Provides its wearer with 200 armor points and is able to absorb 50% of enemy attacks.
Gold Armor - Like the Silver, it provides 200 points of armor protection but reduces 75% of enemy-inflicted damage.
Weaponry
Armor

this
guid
e d
ow
nlo
aded f
rom
ignguid
es.c
om
this
guid
e d
ow
nlo
aded f
rom
ignguid
es.c
om
DaikatanaDaikatanaKyoto, Japan, 2455 AD
Ancient Greece, 1200 BC
Medieval Norway, 560 AD
San Francisco, USA, 2030 AD
Introduction
Items
Special Items
E2M1: Lemnos Isle
Enemies
Walkthrough
Life Vase - The yellow and blue pitcher gives you 25 health points.
Lifewater Fountain - The "Hosportal" of Ancient Greece. Drink from it for large health boosts. Once again, Superfly and Mikiko aren't worthy of this mighty beverage.
Drachna - The currency of Ancient Greece. Find the coin to give to the Ferryman for a ride off the island.
Charon's Horn - Ala "Clash of the Titans" use the horn to summon Charon the Ferryman out of the mist.
Antidote - This vial will protect you from the rivers of poison for 30 seconds. Drink up!
Greek Runes - To leave the Acropolis, you must collect the five Runes that spell out the Greek word "Aegis".
Small Spider - Capable of giving you a poisonous bite on the ankle, these little fellas are quick and agile. Put your back against the wall and cut 'em to pieces.
Large Spider - The overweight big brother. These guys can be outrun, but why? Carve them up with the Daikatana for a nice splash of gore.
Skeleton - This aggressive defender of all things Greek is best kept at a distance. His sword thrust is quick and deadly. Throw a couple of Discus' at him to take him down before he gets too near.
You may have always wanted to visit Greece and marvel at the ruins, but let me tell you, this is no time for sight-seeing. You are stranded alone on an island with a weakened sword in hand and have no idea how to return your own time and place. Get moving, this one isn't going to work itself out.

this
guid
e d
ow
nlo
aded f
rom
ignguid
es.c
om
this
guid
e d
ow
nlo
aded f
rom
ignguid
es.c
om
DaikatanaDaikatanaKyoto, Japan, 2455 AD
Ancient Greece, 1200 BC
Medieval Norway, 560 AD
San Francisco, USA, 2030 AD
Introduction
Items
Run ahead around the cliffs to find the Discus in the wheel barrow. Using the Discus and some fancy footwork, take down the three Skeletons that approach near the ruins. Descend the steps on the left and proceed straight ahead to grab the life vases there. Turn around and go either left or right into the next hallway and follow it outside. Enter the doorway into the next building. Run the length of the hall to the outside courtyard in the rear. Descend the steps to the ground level and jump into the water to collect an Attack Boost under the walkway. Climb out of the water and head into the downstairs level of the building you just exited. Destroy the band of Skeletons that attack, grab the Save Gem and use the Lifewater Fountain to regain some health.
Dive into the fountain in the center of the room and press the two buttons on the wall to reveal a hidden passageway. Drop down into the pool below and immediately climb out of the water to grab the Silver Armor. Return to the water and swim through the shallow tunnel to the next area. Pass through the doorway and head up the corridor mindful of the army of spiders that will attack. Enter the next building through the large golden doors .
As you enter the building, jump into the fountain on the left to grab another Discus. Climb out of the fountain and take a swan dive off of the platform into the water below. Kill the Skeletons and then throw a couple of Discus at the crack in the ceiling to find a hidden Goldensoul along with a couple of spiders. Turn and head through the doors to the next courtyard. An army of Skeletons and Spiders will attack. Once you put them away grab the health from the center of the yard and proceed up the steps in the rear to the next building.
Pass through either door to the main corridor and jump in the fountain to collect the Save Gem. Walk the grating over the aqueduct and enter the door down the hall to the left. Grab the life vases here and return to enter through the doors at the other end of the hall. Grab the life from the statue in the center and jump into the water that flows under the statue from behind it. Swim through the channel, grabbing the armor, and out into the aqueduct. Wade through the water, eventually plunging off a ledge and into a pool below.
Climb up the stairs and enter the next map area through the doors. Run ahead and grab Charon's Horn and pass through the doors on the left. Approach the stand for the Horn and summon Charon. He wants some money for his services and tells you to return with the Drachna. No problem. Reenter the building and proceed through the now open door on the left.
Once outside, head to the left of the stairs to the next building. Attack the crack in the foundation and crawl inside. Grab the Save Gem and dive into the water. Swim out of the water and bust down the boards across the door to enter the next room. Beware the hole in the center of the floor and pass through the door to the right as the two at the ends are barricaded. Battle your way up the staircases to the gold doors at the top.

this
guid
e d
ow
nlo
aded f
rom
ignguid
es.c
om
this
guid
e d
ow
nlo
aded f
rom
ignguid
es.c
om
DaikatanaDaikatanaKyoto, Japan, 2455 AD
Ancient Greece, 1200 BC
Medieval Norway, 560 AD
San Francisco, USA, 2030 AD
Introduction
Items
Climb the steps to the right and grab the Drachna. Descend the steps and battle the hoard of Skeletons as you make your way out the door on the right. The chirping of the seagulls alerts you that you are near the water. Head down the sandy path past the Skeletons and Spiders, stopping only to grab the Gold Armor near the statue on the left. Give the Drachna to Charon and let him ferry you to Catacombs.
Small Spider - Capable of giving you a poisonous bite on the ankle, these little fellas are quick and agile. Put your back against the wall and cut 'em to pieces.
Large Spider - The overweight big brother. These guys can be outrun, but why? Carve them up with the Daikatana for a nice splash of gore.
Skeleton - This aggressive defender of all things Greek is best kept at a distance. His sword thrust is quick and deadly. Throw a couple of Discus' at him to take him down before he gets too near.
Griffon - The mythological winged beast. This oversized foe has no ranged attack and can be knocked out of the air with a few good hits from the Discus.
Thief - Thieves, by nature, are sneaky and these guys are no exception. Their knives will be thrown at you from afar and stabbed in your gut from up close. Keep moving and hitting, moving and hitting, or it's your life they'll steal next.
Catacomb, meaning underground passageway, is where Charon deposits you. Alone still. Off of the island and back on the mainland, Hiro can't be too far from civilization. Could the city of Athens be near?
Starting on the beach, grab the Discus to your left and head into the slot canyon ahead. Battle past the spiders to the opening near the waterfall. Use your arsenal of Discus' to slay the Griffon and Skeleton that approach. Grab the Life Vase from the right of the pool and then enter the cave on the left. Follow the cave to the next opening and crawl inside the passage to grab some health and a Sunflare. The path is blocked so you must find another way. Climb into the tunnel in the canyon wall to the right.
Ascend the ledges in a switchback fashion to the top and jump into the water below. Swim through the tunnel in the rock and emerge on a ledge, back outside. Hop over the waterfall and onto the ledge
E2M2: Catacomb
Enemies
Walkthrough
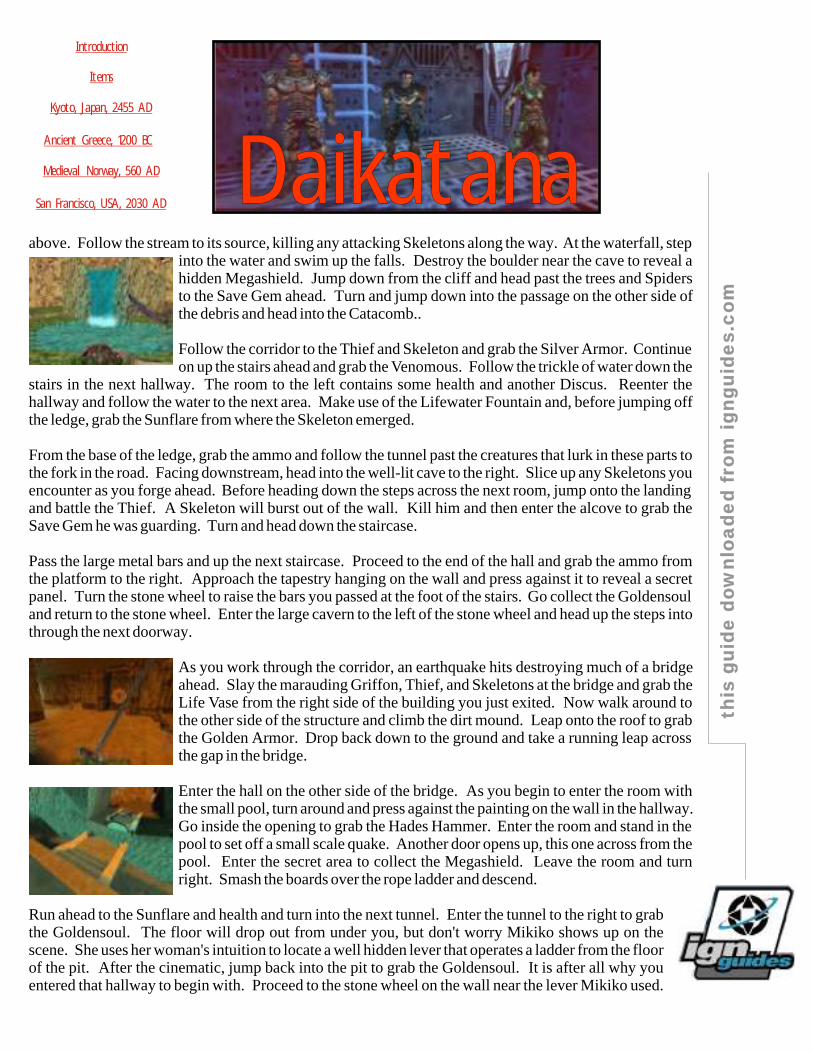
this
guid
e d
ow
nlo
aded f
rom
ignguid
es.c
om
this
guid
e d
ow
nlo
aded f
rom
ignguid
es.c
om
DaikatanaDaikatanaKyoto, Japan, 2455 AD
Ancient Greece, 1200 BC
Medieval Norway, 560 AD
San Francisco, USA, 2030 AD
Introduction
Items
above. Follow the stream to its source, killing any attacking Skeletons along the way. At the waterfall, step into the water and swim up the falls. Destroy the boulder near the cave to reveal a hidden Megashield. Jump down from the cliff and head past the trees and Spiders to the Save Gem ahead. Turn and jump down into the passage on the other side of the debris and head into the Catacomb..
Follow the corridor to the Thief and Skeleton and grab the Silver Armor. Continue on up the stairs ahead and grab the Venomous. Follow the trickle of water down the
stairs in the next hallway. The room to the left contains some health and another Discus. Reenter the hallway and follow the water to the next area. Make use of the Lifewater Fountain and, before jumping off the ledge, grab the Sunflare from where the Skeleton emerged.
From the base of the ledge, grab the ammo and follow the tunnel past the creatures that lurk in these parts to the fork in the road. Facing downstream, head into the well-lit cave to the right. Slice up any Skeletons you encounter as you forge ahead. Before heading down the steps across the next room, jump onto the landing and battle the Thief. A Skeleton will burst out of the wall. Kill him and then enter the alcove to grab the Save Gem he was guarding. Turn and head down the staircase.
Pass the large metal bars and up the next staircase. Proceed to the end of the hall and grab the ammo from the platform to the right. Approach the tapestry hanging on the wall and press against it to reveal a secret panel. Turn the stone wheel to raise the bars you passed at the foot of the stairs. Go collect the Goldensoul and return to the stone wheel. Enter the large cavern to the left of the stone wheel and head up the steps into through the next doorway.
As you work through the corridor, an earthquake hits destroying much of a bridge ahead. Slay the marauding Griffon, Thief, and Skeletons at the bridge and grab the Life Vase from the right side of the building you just exited. Now walk around to the other side of the structure and climb the dirt mound. Leap onto the roof to grab the Golden Armor. Drop back down to the ground and take a running leap across the gap in the bridge.
Enter the hall on the other side of the bridge. As you begin to enter the room with the small pool, turn around and press against the painting on the wall in the hallway. Go inside the opening to grab the Hades Hammer. Enter the room and stand in the pool to set off a small scale quake. Another door opens up, this one across from the pool. Enter the secret area to collect the Megashield. Leave the room and turn right. Smash the boards over the rope ladder and descend.
Run ahead to the Sunflare and health and turn into the next tunnel. Enter the tunnel to the right to grab the Goldensoul. The floor will drop out from under you, but don't worry Mikiko shows up on the scene. She uses her woman's intuition to locate a well hidden lever that operates a ladder from the floor of the pit. After the cinematic, jump back into the pit to grab the Goldensoul. It is after all why you entered that hallway to begin with. Proceed to the stone wheel on the wall near the lever Mikiko used.

this
guid
e d
ow
nlo
aded f
rom
ignguid
es.c
om
this
guid
e d
ow
nlo
aded f
rom
ignguid
es.c
om
DaikatanaDaikatanaKyoto, Japan, 2455 AD
Ancient Greece, 1200 BC
Medieval Norway, 560 AD
San Francisco, USA, 2030 AD
Introduction
Items
Turn the wheel to open the gates leading from the Catacomb to Athens. Turn and head down the hallway in the other direction.
As you follow the pathway, break into each of the tombs to allow Mikiko to collect some weaponry and health. You will emerge from the passage into a large rock cavern. Mikiko and Hiro use a boulder to bust through a stone wall and gain access to the city of Athens.
Small Spider - Capable of giving you a poisonous bite on the ankle, these little fellas are quick and agile. Put your back against the wall and cut 'em to pieces.
Large Spider - The overweight big brother. These guys can be outrun, but why? Carve them up with the Daikatana for a nice splash of gore.
Skeleton - This aggressive defender of all things Greek is best kept at a distance. His sword thrust is quick and deadly. Throw a couple of Discus' at him to take him down before he gets too near.
Griffon - The mythological winged beast. This oversized foe has no ranged attack and can be knocked out of the air with a few good hits from the Discus.
Thief - Thieves, by nature, are sneaky and these guys are no exception. Their knives will be thrown at you from afar and stabbed in your gut from up close. Keep moving and hitting, moving and hitting, or it's your life they'll steal next.
Caryatid - These guys blend into the landscape as stunning pieces of sculpture. Then they come to life. The pure size of their sword is enough to cause you to run and hide. Instead, shatter them with the Hades Hammer, it's your only hope.
Centurion - The "Elite Guard" of ancient times. These soldiers possess deadly accuracy and unyielding determination. They will toss spears from a distance and then stab repeatedly as they draw near. Use the Greek equivalent of a BFG on them.
E2M3: Athens
Enemies

this
guid
e d
ow
nlo
aded f
rom
ignguid
es.c
om
this
guid
e d
ow
nlo
aded f
rom
ignguid
es.c
om
DaikatanaDaikatanaKyoto, Japan, 2455 AD
Ancient Greece, 1200 BC
Medieval Norway, 560 AD
San Francisco, USA, 2030 AD
Introduction
Items
Walkthrough
With a boulder blocking the exit, Mikiko and Hiro have no choice other than to make their way through the great city of Athens. Before setting off however, an apparition appears to Hiro. Could it be the spirit of his lost ancestor, Usagi Miyamoto? Hiro says nothing of this to Mikiko and the two continue on.
Climb the ladders to the ledge above, alongside the aqueduct. Walk the ledge past the attacking Centurions and jump then wade through the water out into the courtyard. Head through the water to the right towards the stone building. Exit the water, kill the Skeleton and approach the block with engraving of grapes on it. Press against the block to reveal a secret passage. Enter the passage and grab the Save Gem ahead. Kill the Skeletons that appear and descend the steps.
Enter the room with the altar and press the button on the column directly across from the altar. This will open a secret room on the other side of the altar. Enter the room and proceed to the far end. Press the button to the right of the door to move the stone blocks back into place, allowing you to grab the Silver Armor. Exit through the new opening by the button. Climb the ladder to the ledge and follow it around to the next area. Before exiting the building, turn and run and leap across the gap to grab the Vitality Boost on the ledge. Jump back and head for the small yellow-lit block. Press against it to go outdoors. Grab the ammo from the courtyard and cross the bridge to enter the
next building.
Make the first left turn and emerge on a balcony facing a statue of Poseidon. Begin down the walkway but turn into the first door on your left, picking up the Sunflare on the way. Head down the stairs and turn to the right. Have Mikiko grab the Venomous while you slaughter the Centurions. Grab the health from behind the wooden doors before heading downstairs. Once downstairs, proceed past the exit to the end of the hall. Turn and enter the doors on the right. Kill the Centurions and grab the Mana Skull. Leave the room and head up the small set of steps to the right and then entering the wood trimmed room on the left. Battle the Thieves and Centurions as you cross the room and head out into the courtyard.
Head towards the temple at the end opposite Poseidon. Grab the Hades Hammer and turn and enter either of the doors on the left side of the courtyard. Kill the attacking Skeletons and make your way into the sunken room on the ground floor. Grab the Save Gem and use the Lifewater Fountain. Exit the building and head into either of the doors along the wall behind the large statue. Destroy the army of Centurions near the waterfall and turn the wheel mounted on the wall to open the tomb in the temple. Leave the room and cross the courtyard to the temple. Mikiko will wait for you while you dive into the water and climb the ladder to the second level. Directly behind you when you get off the ladder is a Life Vase. After grabbing the health, continue along the ledge and enter the first door.
Bypass the stairway and turn right at the rear hallway. Proceed all the way to the end of hall, ultimately

this
guid
e d
ow
nlo
aded f
rom
ignguid
es.c
om
this
guid
e d
ow
nlo
aded f
rom
ignguid
es.c
om
DaikatanaDaikatanaKyoto, Japan, 2455 AD
Ancient Greece, 1200 BC
Medieval Norway, 560 AD
San Francisco, USA, 2030 AD
Introduction
Items
coming out in a new courtyard area. Use your Discus' to take out the Griffons from under the protection of the awning. Drop down into the water and duck under the walkway to emerge over the waterfalls room you stood in moments earlier. Jump down to grab the Save Gem and then jump down again to the base of the main cascade. Face the water and duck under to find a hidden room with Silver Armor. Exit the room and return to Mikiko at the temple.
Have Mikiko follow you into the door on the left. Proceed past the stairs to the bronze gate. Kill the Thieves and Skeleton with the Sunflare and have Mikiko stay here. Return to the temple and jump into the secret passage once more. Enter the first door, but this time descend the stairs and head to the next set of stairs on
the left. Switch the lever at the top of the stairs and call for Mikiko to join you. Climb back up the stairs and proceed down the long corridor to the next courtyard. Rather than jumping into the water, cross the bridge and enter the next building.
Go around the grand staircase to the corridor in the rear. Kill the pair of Centurions and grab the Speed Boost. Turn and run up the staircase. Grab the Save Gem and enter the room to the left. Locate the square stone with seahorse engravings on it.
Step onto it to unveil a hidden passage. Leave the room and enter the passage across the stairs. Enter the room on the right and dive into the water. Press against the column with the seahorses on it to locate yet another hidden passage. Swim through the tunnel and then through a vent into a locked room. Grab the Trident from the floor and exit the room. Mikiko will meet up with you near the aqueduct.
Pass through the two sets of double doors to the next courtyard outside the Acropolis. Grab the health and ammo scattered about and then climb to the top of the fountain in the center. Dive in to grab the Wraith Orb. Pass through the two sets of double golden doors to the next outdoor area.
Use the Discus to pick off the Harpies and Centurions from high above. Ascend the stone ramp on the left to the ladder and climb it. Walk across the wooden planking and kill the two Centurions standing watch. Flip the two levers and descend the ladder back to the main walkway.
As you begin to enter through the doors the Ca ry at id comes to life. Smash him with the Hammer a n d
proceed around the wall to the next area. Ascend the ramps to the A c r o p o l i s , slashing the Skeletons that swarm with the Daikatana. When Mikiko catches up enter the Acropolis together.

this
guid
e d
ow
nlo
aded f
rom
ignguid
es.c
om
this
guid
e d
ow
nlo
aded f
rom
ignguid
es.c
om
DaikatanaDaikatanaKyoto, Japan, 2455 AD
Ancient Greece, 1200 BC
Medieval Norway, 560 AD
San Francisco, USA, 2030 AD
Introduction
Items
E2M4: Acropolis
Enemies
Walkthrough
Small Spider - Capable of giving you a poisonous bite on the ankle, these little fellas are quick and agile. Put your back against the wall and cut 'em to pieces.
Large Spider - The overweight big brother. These guys can be outrun, but why? Carve them up with the Daikatana for a nice splash of gore.
Skeleton - This aggressive defender of all things Greek is best kept at a distance. His sword thrust is quick and deadly. Throw a couple of Discus' at him to take him down before he gets too near.
Griffon - The mythological winged beast. This oversized foe has no ranged attack and can be knocked out of the air with a few good hits from the Discus.
Thief - Thieves, by nature, are sneaky and these guys are no exception. Their knives will be thrown at you from afar and stabbed in your gut from up close. Keep moving and hitting, moving and hitting, or it's your life they'll steal next.
Caryatid - These guys blend into the landscape as stunning pieces of sculpture. Then they come to life. The pure size of their sword is enough to cause you to run and hide. Instead shatter their marbleized body with the Hades Hammer, it's your only hope.
Centurion - The "Elite Guard" of ancient times. These soldiers possess deadly accuracy and unyielding determination. They will toss spears from a distance and then stab repeatedly as they draw near. Use the Greek equivalent of a BFG on these guys.
Harpy - A winged creature with a range attack. Often attacking in groups, they are best countered with the Discus. Just beware of their deadly arrows.
Satyr - Sort of like a human but more like a farm animal, the Satyr can deliver you a severe beat-down if cornered. Backpedal while hitting him with the Discus or Trident.
Hiro and Mikiko successfully enter what is known as the Acropolis. This collection of enormous structures make up the largest and most time consuming mission in Daikatana. Confusing puzzles and the need to repeatedly search four buildings for Greek Runes will leave you happy to meet Cerberus, the three-headed guardian of the Parthenon. However, follow the path laid out in this guide, and you'll be on to Medusa's Lair in no time.

this
guid
e d
ow
nlo
aded f
rom
ignguid
es.c
om
this
guid
e d
ow
nlo
aded f
rom
ignguid
es.c
om
DaikatanaDaikatanaKyoto, Japan, 2455 AD
Ancient Greece, 1200 BC
Medieval Norway, 560 AD
San Francisco, USA, 2030 AD
Introduction
Items
Begin by crossing the bridge and grabbing the Sunflare from near the lantern. Turn around and jump down into the water below. Wade through the water past the tree to grab the secret Mega Shield. Head back up the rocky ledge to where you began and battle your way up the sandy path to the door ahead. Enter the room with the fountain and approach the statue on the left. Attack the corner of the statue that is cracked to reveal a hidden Mega Shield. Now dive into the fountain and swim down through the opening and into the passageway. Follow it to a secret Goldensoul. Return the way you came and climb out of the water.
Begin up the stairs to the golden doors at the top. Before leaving this room, stop to get the Save Gem from the middle tier of the fountain. Pass through the doors at the top to exit the temple. Grab the Venomous ammo from the left, kill the two Centurions and the Thief and follow the path around the temple to the right. Continue past more Centurions to the door on the left. Cross the courtyard to collect the Trident. Return to the other side of the courtyard and enter the door.
Follow the steps to the top and battle your way around the walkway into the next room. From the top of the stairs, kill the assaulting Satyrs, Skeletons, Thieves, and Spiders. Jump over the railing into the drainage area and collect the Save Gem from amidst the water. Use a fully charged Hades Hammer to blast you up and over the railing and back onto the walkway. Head through the door into the next room. Grab the weaponry and ammo from the left and cross the room past the statue. Attack the off-colored section of wall left of the exit to reveal a secret Power Boost. Leave the room and battle through the creatures on your way up the stairs.
Descend the series of ramps to the floor of the room and jump into the spider shaped pool. Grab the Save Gem and turn around to grab the Letter "A" Rune. Leap out of the water and head back up the bronze ramp to the catwalk and head to the right into the next corridor. Jump down from between the columns into the small courtyard below. Grab the Mana Skull and rejoin Mikiko on the steps. Continue on, following the walkway to the floor. In the corner is a sunlit alcove with a large button on the floor. Have Mikiko stand on the button to hold the large gates open. Return to the room with the spider shaped pool and exit the building through the gates behind it. Turn the wheel to the left to hold the door open while you return to get Mikiko. Together leave the building and head up the sandy path to the right.
Enter the large temple at the top of the hill and go left down the hall to the courtyard. Kill the attacking Centurions and Thieves. Walk the perimeter of the room to collect the Life Vases, ammo, and Letter "S" Rune. Now approach the large stone wheel and turn it to lower a boulder to your right. Exit the building the way you came in and head down the hill past the waterfall and around to the right. Follow the stream to the next building. Cross the bridge, grab the Trident Tips and enter the temple.
Walk through the opening on the left to the main room. Grab the Letter "E" Rune from the pedestal in the far right corner and then cross the room to the stone wheel on the wall. Turn the wheel to lower

this
guid
e d
ow
nlo
aded f
rom
ignguid
es.c
om
this
guid
e d
ow
nlo
aded f
rom
ignguid
es.c
om
DaikatanaDaikatanaKyoto, Japan, 2455 AD
Ancient Greece, 1200 BC
Medieval Norway, 560 AD
San Francisco, USA, 2030 AD
Introduction
Items
another boulder. Leave the building the way you entered and head to the sandy path on the left as you descend the stairs.
Travel the length of the cave to the opening ahead. Turn to the right and skirt the building to the staircase on the other side. Destroy the Centurions and Skeletons that attack and ascend the stairs. Grab the Trident Tips and enter the building. Battle your way down the stairs to the pool below. Duck into the opening below the stairs to find a Mega Shield. Crawl out turn the stone wheel on the wall. Ascend the staircase and leave the building the way you entered.
Once on the porch, descend the stairs and head left around the perimeter of the building. Grab the Attack Boost from behind the last column near the rock wall. Now turn and enter the cave directly ahead. Battle your way through the cave and onto the rock ledge. Follow the path uphill to the building above. Drop down onto the ledge and grab the Trident Tips and Save Gem. Enter the building and proceed to the main room in the rear. Enter the hall in very back of the building and turn the stone wheel at its end. Return to the main room to grab the Gold and Silver Armors you made available. Leave the building the way you entered.
Head back down the rocky trail to the building below. Skirt around the building to the left and enter the cave explored earlier. Follow the trail to the building at the top of the hill and enter. As you enter the large room in the rear turn to your right and ascend the steps to the door on the left. Obliterate the two Caryatids that attack and go through the next couple of doors to the Save Gem on the porch. Head up the stairs to the left and walk the balcony to the end. Before passing through the door and out onto the porch, leap onto wooden ledge to grab the Golden Armor. Exit onto
the porch and follow the path around to the right and into through the door.
Have Mikiko grab the Life Vases while you drink from the Lifewater Fountain. Head up the stairs and out onto the balcony. Kill the Thief and Harpy and turn to grab the Save Gem and Venomous from the left. Cross the bridge into the cave ahead and make the running leap across the gorge near the waterfall. Follow the narrow ledge across the chasm and into the cave ahead. Bypass the ladder and head straight into the room ahead. Grab the Acro Boost and pass through the door ahead. Quickly kill the Satyr and jump onto the ledge to your right. Walk around the ledge to the right to find a secret Save Gem. Jump back off the ledge onto the porch, grab the Letter "G" Rune and reenter the building.
Now proceed through the door on the upper landing. Kill the attackers and grab the Save Gem from your left. Head up the ramp to the cave ahead. Follow the spiraling ledge up to the temples on top of the mountain. Use the Discus to keep your foes at bay along the ledge. Once outside the temple, be sure and collect the goodies from both entranceways before actually going inside. Sunflares, Life Vases, and ammo is important at this stage of the mission. Enter through either doorway.
Pass through the door to the right and descend the two flights of stairs. Ammo and a Life Vase is located on the sides of the stairs. Use the ladder to climb back onto the staircase if you go for them. Pass through the door into the next area. Descend the steps to the bronze gate and grab the Letter "I" Rune. Crawl under the staircase to find a secret Mega Shield. Now climb all of the stairs to the walkway

this
guid
e d
ow
nlo
aded f
rom
ignguid
es.c
om
this
guid
e d
ow
nlo
aded f
rom
ignguid
es.c
om
DaikatanaDaikatanaKyoto, Japan, 2455 AD
Ancient Greece, 1200 BC
Medieval Norway, 560 AD
San Francisco, USA, 2030 AD
Introduction
Items
leading into the next room. Grab the Save Gem from the bookshelf and continue on.
Once on the ledge outside, use the Daikatana to slay your enemies. Leap over the bronze railing to the water below and grab the Golden Armor. Climb back up and enter the cave ahead with Mikiko in tow. Walk the path to the next building and go inside the large doors. Follow the hallway to the left to the large stone wheel in the rear of the building. Turn the wheel to open a pair of large doors that you just walked past. Go through these doors onto a stone walkway high above a courtyard. Follow the walkway around and to the left. Cross over the bronze bridge to the next room. Get the Save Gem from the wooden shelves and then descend the stairs, killing all attackers along the way. Crawl under the stair case through a long dark passage to the Goldensoul. Get out from under the stairs and pass through the golden doors.
Kill the Satyr, Centurion, and spiders and then approach the Rune holders on the left. Press each letter and then turn the wheel to the right to open the gate. As you pass through the gates, leaving the Acropolis, the large bars of the Parthenon slam shut. To gain access to the Lair of Medusa you must enter the cave on your left and defeat Cerberus, the three headed mongrel. Arm yourself with the Trident and fire repeatedly as you move about his tight living space. Once slain, return to Mikiko and move on to the next part of your journey.
Small Spider - Capable of giving you a poisonous bite on the ankle, these little fellas are quick and agile. Put your back against the wall and cut 'em to pieces.
Large Spider - The overweight big brother. These guys can be outrun, but why? Carve them up with the Daikatana for a nice splash of gore.
Skeleton - This aggressive defender of all things Greek is best kept at a distance. His sword thrust is quick and deadly. Throw a couple of Discus' at him to take him down before he gets too near.
Griffon - The mythological winged beast. This oversized foe has no ranged attack and can be knocked out of the air with a few good hits from the Discus.
Thief - Thieves, by nature, are sneaky and these guys are no exception. Their knives will be thrown at you from afar and stabbed in your gut from up close. Keep moving and hitting, moving and hitting, or it's your life they'll steal next.
Centurion - The "Elite Guard" of ancient times. These soldiers possess deadly accuracy
E2M5: Lair of Medusa
Enemies
this
guid
e d
ow
nlo
aded f
rom
ignguid
es.c
om
this
guid
e d
ow
nlo
aded f
rom
ignguid
es.c
om
DaikatanaDaikatanaKyoto, Japan, 2455 AD
Ancient Greece, 1200 BC
Medieval Norway, 560 AD
San Francisco, USA, 2030 AD
Introduction
Items
and unyielding determination. They will toss spears from a distance and then stab repeatedly as they draw near. Use the Greek equivalent of a BFG on these guys.
Harpy - A winged creature with a range attack. Often attacking in groups, they are best countered with the Discus. Just beware of their deadly arrows.
Satyr - Sort of like a human but more like a farm animal, the Satyr can deliver you a severe beat-down if cornered. Backpedal while hitting him with the Discus or Trident.
Medusa - Hidden in the depths of the Parthenon is mythology's ugliest woman. This Medusa boasts the infamous entanglement of snakes on her head and is part serpent as well. If you get caught staring into her eyes when they turn red, you'll be turned into stone. Attack with the Eye of Zeus and avoid her spit attack and you will prevail.
At the sight of the statue of Athena, Mikiko grows uncomfortable. She rehashes the legend of Medusa to Hiro, successfully scaring them both. The Lair of Medusa is the last mission in this Episode, and for good reason. The layout, although not quite as large as Acropolis, is teeming with creatures waiting to take you out. As if that wasn't bad enough, the threat of being frozen in stone for all eternity should remind you to keep your senses honed as you move through this last Greek temple.
Walk ahead towards the statue of Athena and grab the Discus. Turn and enter the door to the right and proceed up the large staircase. Make your way around the balcony, slaughtering the Centurions, until you come face-to-face with the statue. Grab the Eye of Zeus staff on the bench and watch as lightning strikes down blowing a hole in the floor below. Turn and grab the ammo from the shelf in the wall and descend the stairs. Enter the hole where Athena's statue was.
Battle to the bank of the stream and jump across to grab the Trident Tips. Drop into the water and let the current carry you away over a waterfall and into a new area. Exit the room through the solitary door and head left. Kill the Skeleton and grab the Save Gem from the ledge on your left. Use the Discus to take out the Harpy and other assorted creatures that attack. Descend the steps straight ahead and bust through the boulders on your left. Go to the rear of the secret room and walk the ledge to find health, ammo, and a Golden Armor. Leave through the door across from the fire. Head up the steps and enter the corridor on the left.
Slay the many Harpies, Satyrs, and Skeletons that attack and then climb the ladder on the left. Follow the walkway to the right and through the door into the next area. You will emerge on a ledge above the waterfall you were carried over earlier. Attack the crack in the wall directly ahead to reveal a secret area. Crawl in and grab the Goldensoul before following the water upstream to an opening in the floor. Drop through back into the hallway just beyond the ladder.
Walkthrough

this
guid
e d
ow
nlo
aded f
rom
ignguid
es.c
om
this
guid
e d
ow
nlo
aded f
rom
ignguid
es.c
om
DaikatanaDaikatanaKyoto, Japan, 2455 AD
Ancient Greece, 1200 BC
Medieval Norway, 560 AD
San Francisco, USA, 2030 AD
Introduction
Items
Head down the hall to the large room ahead, grabbing all the ammo you can possibly carry from the ledge. Continue marching ahead until you reach the water. Mikiko will stay put as you swim through the passage to the right. Once in the large room full of decaying columns, climb out of the water onto the angled slab of marble and run ahead to the ledge. Kill the Harpy and Thief and turn and grab the Save Gem. Continue along the ledge to the door in the corner. Drop down the ladder into the water and swim into the next room. Pop up to the surface with the Trident drawn and knock the Harpy out of the sky. Swim on to the ledge at the end of the pool. Turn around and leap onto the platform to the left. Run to the rear of the room to grab the Mega Shield and follow the path around to the Lifewater Fountain. Jump back to the ledge you climbed out of the drink onto.
Grab the ammo and, most importantly, the antidote. Slosh through the green poisonous liquid and plunge over the falls to the area below. Jump out of the pool and use the Eye of Zeus to make quick work of the foes that attack. Use the Lifewater Fountain and grab another antidote. Dive into the tank and swim through the bronze grate at the bottom. At the "T", head to the right. Proceed all the way to the end of the passage and jump out to grab the Mana Skull. Reenter the water and start back the way you came. Head down the first tunnel to the left to an
area with three distinct ways up and out of the water. First, jump out of the water at the far left tunnel to grab the Wraith Orb. Reenter the water and climb up the ladder in the middle alcove.
Utilizing your invisibility status, take out the Harpy and spiders from the room and exit through the door to the right. Mikiko will rejoin you here. Together work your way through the next several corridors past an endless stream of assailants. Be sure and grab the health and ammo that hides in the corners, as well as the Attack Boost over the grating.
Eventually you will come to a metal gate on your left and a wooden lever to your right. Pull the lever to open the gate but do not enter yet! Continue ahead and descend the steps to the right. Work your way to the back corner of this path to find a Save Gem and several Sunflares. Return up the stairs and pass under the now opened archway.
Enter under the arch on the right and forge ahead past the Lair's guardians. Descend the stairs and enter the next area. As you work ahead, be sure to grab the health and ammo as you see need them. Use the Lifewater Fountain at the base of the second staircase. In the large room ahead, kill the Harpies and Satyr's and then explore the room to grab the many Eye's of Zeus and Trident Tips. Also, since you're close to Medusa, grab the Attack Boost from the pool to the right of the stairs. Leave the room through the hall in the far left corner on the ground floor.
Kill the spiders and Harpy and forge ahead to a large green-glowing room. Walk along the upper ledge to the ladder on the far side. Descend the ladder and use your Discus to kill the Thieves from a distance. Before you descend the spiraling ledge, jump across past the columns to where the Thieves were standing <Daikatana0380>. Grab the Save Gem and return to descend the ledge. Pick up the antidote on the way down as there are several Eye's of Zeus in the pool at the base of the poisonous falls. Head

this
guid
e d
ow
nlo
aded f
rom
ignguid
es.c
om
this
guid
e d
ow
nlo
aded f
rom
ignguid
es.c
om
DaikatanaDaikatanaKyoto, Japan, 2455 AD
Ancient Greece, 1200 BC
Medieval Norway, 560 AD
San Francisco, USA, 2030 AD
Introduction
Items
through the arch.
At the end of the hall you will emerge in Medusa's Lair. Arm yourself with the Eye of Zeus as it is her only weakness. Don't' look directly at her and strafe to dodge her spit attacks. After just three hits she should be dead. Superfly will rejoin you as he was frozen in stone before you got there. Unfortunately every other creature previously frozen comes back to life as well. Kill each and every last one of them to end the mission.
With a recharged Daikatana Hiro attempts to send the threesome back to the future. Mishima intervenes as usual, and after some heated discussion, our heroes find themselves in the Dark Ages.

this
guid
e d
ow
nlo
aded f
rom
ignguid
es.c
om
this
guid
e d
ow
nlo
aded f
rom
ignguid
es.c
om
DaikatanaDaikatanaKyoto, Japan, 2455 AD
Ancient Greece, 1200 BC
Medieval Norway, 560 AD
San Francisco, USA, 2030 AD
Introduction
Items
Once again Mishima has foiled your plans. Although Hiro is certainly an excellent swordsman, his unfamiliarity with the Daikatana shows. Mishima easily steps in the line of their time warp and has them deposited in Norway during the Dark Ages. It's cold, you don't know where you are, nor how you will return home. At least this time you're not alone.
Daikatana The namesake weapon of the game. A powerful sword capable of being powered-up the more you use it. Press the "Tab" key to check the current level of the sword's power.
Silverclaw - A glove of knives. The Silverclaw is only used for up close fights as it has no ranged effect. Buboids will continue coming back from the dead unless you gib them with the Silverclaw.
Bolter - A semi-automatic crossbow. The Bolter has an accurate shot that can travel far distances.
Ballista - A high octane version of the Bolter. The Ballista does heavy damage to whatever it is fired at. Use its recoil to your advantage in jumping situations.
Stave of Stavros - When used, the Stave calls upon the powers of the gods to have meteors rain down on your opponents. Avoid the explosions by using it from a distance.
Wyndrax's Wisp - The weapon utilizes the lightning-bearing properties of Wisps. Let a couple go in a room full of creatures and watch them get electrocuted.
Nharre's Nightmare - When used, this staff draws a pentagram out in front of you. Wherever it touches a
creature, you will gain the assistance of the living dead. Best in large rooms where you can stand back and watch.
Chain Mail - Rather weak, this armor provides you with 125 armor points and absorbs 33% of all damage.
Black Adamant - Stronger than the Chain Mail, it provides you 150 armor points and absorbs 50% of all damage.
Weaponry
Armor
Episode 3: Medieval Norway - 560 AD

this
guid
e d
ow
nlo
aded f
rom
ignguid
es.c
om
this
guid
e d
ow
nlo
aded f
rom
ignguid
es.c
om
DaikatanaDaikatanaKyoto, Japan, 2455 AD
Ancient Greece, 1200 BC
Medieval Norway, 560 AD
San Francisco, USA, 2030 AD
Introduction
Items
Special Items
E3M1: Plague Village
Enemies
Health Flasks - These vials will give you 25 hit points.
Health Crates - Large crates full of wholesomeness, they pack 50 health points back into your weakened body.
Purifier Shards - The five pieces of King Gharroth's broken sword. Reassembling his sword is your only hope of getting him to help you exit this time.
Keystones - Find the three geometrically shaped keys to unlock the gate leading out of Plague Village.
Chests - The wooden ones will most often contain a skill boost. However, the black chests have a 20% chance of exploding in your hands. Open them and run backwards as fast as you can. If it doesn't explode move in and reap the rewards for your bravery.
Ring of Fire - Wear this ring to take only 25% of all attacks from Stavros the Sorcerer or the Hellfire Paladin.
Ring of Lightning - Wear this ring to take only 25% of all attacks from Wyndrax the Wizard or the Voltaic Valkyrie.
Ring of the Undead - Wear this ring to only absorb 50% of the damage from Nharre's Nightmare
creatures.
Buboid - A once happy townsperson, the Buboid is what happens when the plague hits. They have no ranged attack so shoot them with the Bolter and gib them with the Silverclaw.
Doombat - A bat with tremendous claws. Stand your ground and kill them as they attack.
Plague Rat - The source of the disease, these agile creatures can poison you with its bite. The Daikatana is a good choice for these.

this
guid
e d
ow
nlo
aded f
rom
ignguid
es.c
om
this
guid
e d
ow
nlo
aded f
rom
ignguid
es.c
om
DaikatanaDaikatanaKyoto, Japan, 2455 AD
Ancient Greece, 1200 BC
Medieval Norway, 560 AD
San Francisco, USA, 2030 AD
Introduction
Items
Walkthrough
Standing outside in the cold, there is a sense of urgency overcoming the group. If they don't re-energize the Daikatana soon, they could be trapped in this primitive time. Or they may freeze to death, whichever comes first.
Begin the Episode by following the tunnel on your left down to the entrance to the village. Before entering the building, however, move the logs out of your way and continue down the path to the bridge. Let Superfly grab the Bolter and then return up the path to the building. Slay the Buboid and smash the barrels to get some health. Walk around to the right side of the building ahead and enter the door on the left. Climb the stairs, kill the Plague Rat and let Mikiko get the Bolter. Exit the house.
Head down the snowy path to the right until you come to the house by the river. Before entering the building, shatter the barrels around the side to collect the Acro Boost. Enter the house and use your enhanced jumping abilities to leap into the loft to find a Save Gem and armor. Leave the building and have your comrades follow you up the hilly path to the left.
Enter the first door on the left, using your Daikatana to slice up the Rats that attack. Go up the stairs to the balcony outside and grab the Health Flasks hiding in the barrels at the end. Leave the building through the downstairs door. Walk ahead to the "T" where the dragon statue sits. Break the ice at the base of the statue and dive in to find the Quadrangle Keystone. Quickly swim out before you get hypothermia.
Facing the statue, head to the right and climb the steps to the building ahead. Bash the barrel in the corner, and the Plague Rat for that matter, and grab the Attack Boost. Enter the next room to find some Buboids and health. Leave the building and enter Thor's Armory across the way. Carve up the Doombats and grab the Silverclaw from behind the bench.
Head to the right after leaving Thor's. Descend the steps and continue on until you come to the Dragon Claw Inn. After killing everything downstairs, climb the stairs to explore the bedrooms above. Plenty of health, ammo, a Save Gem, and a Mana Skull will go to thorough investigator. Descend the stairs and head through the door near the bar to the keg room downstairs. Shred the Buboids and then smash every barrel in the room to find some goodies. Before you exit, crawl under the staircase to find a Goldensoul. Ascend the stairs back to the main room. Before leaving however, duck inside the fireplace and fire your Bolter up at the rocks above. Along with some rocks, a Mega Shield will land in your lap. Exit the Inn back out into the cold.
Approach the torch ahead and on the right. Enter the hidden doorway to the next building. Climb the stairs and pass through the door to the outside walkway. Enter the next building and climb the ladder to access the loft and grab the Black Adamant Armor. Descend the way you came back outside the building near the Inn.

this
guid
e d
ow
nlo
aded f
rom
ignguid
es.c
om
this
guid
e d
ow
nlo
aded f
rom
ignguid
es.c
om
DaikatanaDaikatanaKyoto, Japan, 2455 AD
Ancient Greece, 1200 BC
Medieval Norway, 560 AD
San Francisco, USA, 2030 AD
Introduction
Items
Continue on to the iron gates in front of the church. Enter the church to meet the Priest, Mulside, and learn the story of the village. The gang decides that they have no options other than to help the old man and his village. Hiro gets right to it as you steer him to the far end of the church and through the door on the right.
Climb the ladder and rope to climb through the window above. From where you stand, carefully drop down onto the lower portion of roof and reenter the church through the open window in the middle. Tip toe across the rafters to grab the Ring of Fire Protection and to reach the ladder. Descend the ladder and approach the organ. A trapdoor opens and you instantly plummet into the basement. Hopefully, with a weapon on the ready. Cross the room, killing all that move on the way, to the Trigon Keystone in the corner. Use the lever to the left of the trapdoor to extract a
ladder. Climb the ladder and then leap out the window onto the church grounds. Enter the church to rejoin Superfly and Mikiko.
Together leave the church and follow the wall around to the rear of the grounds where the cemetery lies. Enter through the gates and slay the Buboids that approach. To open the gates to the tomb ahead you must move the centermost grave marker. Before entering the tomb, use the lever on the left to open yet another gate. Enter the small area to grab the armor and return to the tomb entrance. Enter the tomb, kill the Buboids and grab the Save Gem from the altar. Descend the staircase that appears. Have Mikiko and Superfly wait for you as you leap from rock ledge to rock ledge. In the rear of the room is a Shard of the Purifier. To your right is another area in the cavern. Enter this area to locate the Hexagonal Keystone. Leave the area with your sidekicks and return through the village to the dragon statue at the crossroads.
Head straight past the statue and descend the steps leading down to your right. Immediately turn and descend the next set of steps on your left. Follow the icy path to the building near the bridge. One last secret is found here, although you may want to save the game before attempting it. On the far side of the building is a black chest containing some nice goodies. To get there you must tiptoe across the ledge in front of the house and then leap to the landing on the other side. Either way, the door to the building is barricaded shut and you must exploit the crack in the wall behind the wheel barrow. Crawl inside the building and place each of the Keystones in their respective slots to open the exit gates.

this
guid
e d
ow
nlo
aded f
rom
ignguid
es.c
om
this
guid
e d
ow
nlo
aded f
rom
ignguid
es.c
om
DaikatanaDaikatanaKyoto, Japan, 2455 AD
Ancient Greece, 1200 BC
Medieval Norway, 560 AD
San Francisco, USA, 2030 AD
Introduction
Items
E3M2: Passage
Enemies
Walkthrough
Buboid - A once happy townsperson, the Buboid is what happens when the plague hits. With no ranged attack, its best to run and gun. Then, before they regenerate, move in and slice 'em up with the Silverclaw.
Doombat - A bat with tremendous claws, and a determination that doesn't quit. Stand your ground and take them out as they attack.
Plague Rat - The source of the disease, these agile creatures can poison you with its bite. The Daikatana is a good choice for these.
Fletcher - The archer of this land. His fire is quick and deadly so keep moving and get in close with the Daikatana.
Rotworm - Nasty little maggots. Actually they're not that little. They will drop down from the ceiling and begin spitting poisonous juices at you. Shoot them with the Bolter.
Out in the cold again, the threesome must make it through the mountains to search for the remaining Shards of the Purifier. From where you begin, exit the room and follow the rock path to the small bridge. Continue on through the caves ahead to the next clearing. Kill the Buboids and the Fletchers from the overlook ahead. As you push forward, a Buboid breaks loose from the rock wall. Once he's good and dead, enter his cave to find a Save Gem. Continue on to the "T" ahead. Turn left to gather the ammo at the end of the path. Return to the intersection and climb up the hill to the right. Open the wooden trunk to collect a Skill Boost and return down the hill and through the tunnel on the right.
As you approach the icy river turn right and collect the health at the end of the river bank. Turn around and head up the hill and over the river, killing the Buboids and Fletchers along the way. Pass under the
gatehouse and collect the ammo from either side of it alongside the wall. Step out onto the bridge and face the waterfall to your right. Jump onto the ledge near the falls and duck under the water to find the hidden Ballista. Leap back onto the bridge. An assortment of items, including a Save Gem, is positioned on top of the gatehouse. Utilize the powerful recoil of the Ballista to perform a Ballista-jump and leap onto the pitched part of the roof. Ballista-jump once more to leap onto the upper flat section of roof and to collect the items. More items are
secretly positioned on top of the castle walls across the way. Fire the Ballista while leaping backwards off of the gatehouse roof to propel yourself onto the castle walls. Collect the armor and ammo and leap down on to the bridge below.

this
guid
e d
ow
nlo
aded f
rom
ignguid
es.c
om
this
guid
e d
ow
nlo
aded f
rom
ignguid
es.c
om
DaikatanaDaikatanaKyoto, Japan, 2455 AD
Ancient Greece, 1200 BC
Medieval Norway, 560 AD
San Francisco, USA, 2030 AD
Introduction
Items
With Mikiko and Superfly in tow, head back to the bridge over the river. Leap down onto the river bank near the dead tree. Enter the house directly ahead with the water wheel. Kill the Plague Rats and divvy up the armor and ammo to whoever needs it most. Exit the house and walk to the edge of the bank near the water wheel. Facing the up-side of the wheel, leap onto the paddles as they come around and ride the wheel up to the second floor window of the building. Leap through the building to grab the Power Boost, Save Gem, and ammo. Doing this is not as easy as it sounds. Keep attempting it and try not to get too frustrated.
Once you've grabbed the items from upstairs, lead your group into the cave to the right of the house as you head back upstream. Cross the rock bridge over the lava and use your ranged weapons to put down the Fletcher and Buboid as they attack. Grab the Chain Mail Armor and ammo from near the rocks as you approach the door. Head down the path toward the lava below and grab the Ballista Logs. Retrace your steps halfway up the incline and jump down to the small landing on your left. Kill the Doombats and proceed over the bridge, stopping only to grab the Shard of the Purifier. Climb through the rocks ahead to enter the Dungeon.
Buboid - A once happy townsperson, the Buboid is what happens when the plague hits. With no ranged attack, its best to run and gun. Then, before they regenerate, move in and slice 'em up with the Silverclaw.
Doombat - A bat with tremendous claws, and a determination that doesn't quit. Stand your ground and take them out as they attack.
Plague Rat - The source of the disease, these agile creatures can poison you with its bite. The Daikatana is a good choice for these.
Dwarf - A little guy with a big axe, the Dwarf is capable of attacking from any distance. Take him out from a distance with the Bolter or Ballista.
Fletcher - The archer of this land. His fire is quick and deadly so keep moving and get in close with the Daikatana.
Rotworm - Nasty little maggots. Actually they're not that little. They will drop down from the ceiling and begin spitting poisonous juices at you. Shoot them with the Bolter.
Lycanthir - A wolf-man, the Lycanthir has ample speed and agility to make you dread
E3M3: Dungeon
Enemies

this
guid
e d
ow
nlo
aded f
rom
ignguid
es.c
om
this
guid
e d
ow
nlo
aded f
rom
ignguid
es.c
om
DaikatanaDaikatanaKyoto, Japan, 2455 AD
Ancient Greece, 1200 BC
Medieval Norway, 560 AD
San Francisco, USA, 2030 AD
Introduction
Items
seeing him. Keep him at bay with a ranged weapon.
Stavros the Sorcerer - The "Boss" of the Dungeon mission. Avoid the fireballs he throws and use the
Ballista against him. Slay this one and you will be the owner of the Stave.
As you enter the Dungeon, it becomes apparent that Mikiko is very ill. Superfly volunteers to carry her which, although noble, prevents both of them from helping during combat. Hiro must now escort his two Sidekicks through the enormous area known as the Dungeon.
Proceed ahead to the red-glowing cavern. Slice your way through the attacking creatures and grab the ammo. A hidden Wraith Orb can be found amongst the rubble to the left of where you slain the Dwarf. Follow the path to the stairs and climb to the upper level. Continue on ahead, clearing the way for you embattled partners. Grab the health and the ammo and ascend the concrete ramp ahead. Kill the Dwarf on
the platform to the left and then enter the cave to the right. Enter the first cell on the left by using the lever on the wall. Kill the Buboid and enlarge the hole in the wall with your Bolter. Crawl out onto the ledge and shoot the Dwarf on the far side of the lava. A Ring of Fire Protection can be obtained by jumping for the ledge across the pit and traveling to the left. If you decide to grab the Ring, crawl through the tunnel and return to the ledge outside the cell. Have Superfly (carrying Mikiko) follow you along the ledge to the right where you break through the wall into the
next cell. Have your buds wait in the cell while you climb up the piece of angled steel and crawl out over the grating in the next cell. Your supports collapse and you fall into the cell below. Kill the Buboids and grab the health from the corner. Exit the cell and open the door to the right to let Mikiko and Superfly out.
Pass through the large wooden door across the corridor. Grab the Health Flasks and enter the room to the right. Cross the room and grab the Save Gem. Now flip the lever to the left and enter the room ahead to grab the Chain Mail Armor. Leave the area and have Mikiko and Superfly follow you through the wooden door directly ahead into the next map area.
Use the lever to open the gates ahead. Pass into the central room and battle your way around the tower to the door on the other side. Enter each of the four cells along the rear hallway to collect the various items. Just be ready for the attacking Buboids and Lycanthirs in each of the cells. In the cell to the far right, be sure and grab the Mega Shield from underneath the platform in the rear of the cell. Return to the main hallway outside the room with the tower and work the lever to open the gates to the tower. Follow the path over the lava to the entrance to the tower and ascend the stairs.
Cross the walkway high above the lava to enter the next hallway. Facing the tapestry, turn to your left and enter the door at the end of the corridor. Carefully walk out along the iron bars to grab the Save Gem. Head back towards the tower. Save the game here in case you fall, but tiptoe along the wooden
Walkthrough

this
guid
e d
ow
nlo
aded f
rom
ignguid
es.c
om
this
guid
e d
ow
nlo
aded f
rom
ignguid
es.c
om
DaikatanaDaikatanaKyoto, Japan, 2455 AD
Ancient Greece, 1200 BC
Medieval Norway, 560 AD
San Francisco, USA, 2030 AD
Introduction
Items
ledge to the other side of the room to grab a secret Goldensoul. Return to the upstairs hallway near the tapestry.
Enter the large block of cells on the right. Battle through the attacking Dwarfs and Rats to the end of the room. Pull the lever on the right to access those cells. Enter through the door on the right, slicing the Buboids and Lycanthirs with your Silverclaw. Grab the health and ammo and exit the cells. Now open the door to the rest of the cells with the lever on the right. Battle through the prisoners and enter the hallway to the right. Use the lever in the next room to open the wooden gates. Proceed to the end of the hallway to grab another Shard of the Purifier. Turn the skull-shaped wheel on the wall and return the way you came.
As you make your way back down the hallway, make a left into the tunnel leading up the staircase. Clear the room of evil and collect the items found throughout. Be sure to check Superfly's health as he may be hurting at this point. Grab the armor from the rear of the room on the platform. Before leaving this room
attack the wooden panel with the Pentagram on it to reveal a Mana Skull. Enter through the large door to the next area of cells. Climb up the ledge to the right to the upstairs cells. Grab the health in the corner and then pass through the archway and descend the many flights of stairs. Continue through the corridor, collecting ammo and killing Dwarves until you approach a stairway on your right that has a built in guillotine. Have Superfly and Mikiko wait here for you. When the gate to the stairs open, follow the blade to the top and crawl under it at the last second. Grab
the armor and the use the lever to the right of the staircase to open the next gate. Drop down through the grating and let Superfly and Mikiko rejoin you.
Together, head through the door at the end of the hallway. A set of huge gates blocks you from the next room. To open them head up the staircase to the right. Turn the large wheel emblazoned with the skull and return to the gates downstairs. Now head up the staircase opposite from where you just emerged and turn a similar wheel there. A gate in the hallway outside where you now stand has been opened. Proceed through this hallway to a third and final wheel. Turn this one to gain access to the main chamber below.
As you walk out onto the platform in the center of the room, Stavros the Sorcerer appears. Run the perimeter of the room while firing the Ballista to best him. Once dead, a staircase spirals up out of the earth. Grab the Stave and climb the staircase to the top. Kill the Lycanthir and step onto the ledge that encircles the room. Grab the armor and follow the ledge to the very corner of the room. Duck into the hole in the wall to find the Black Adamant Armor. Walk the ledge back around and exit the area.
Kill the attackers in the next room and enter the hallway on the right. Hug the wall as you move down the corridor to avoid the large spikes that stab down from the ceiling. Before turning to the right crouch down and press against the wall under the flag on the left. Crawl through the secret opening and climb the staircase to find a Goldensoul behind a wooden door at the top. Retrace your steps back out into the hallway. Continue ahead, avoiding the spikes, as well as the holes in the floor. Forge ahead over the bridge, killing the Dwarf standing guard. Blast through the cell at the top of the next

this
guid
e d
ow
nlo
aded f
rom
ignguid
es.c
om
this
guid
e d
ow
nlo
aded f
rom
ignguid
es.c
om
DaikatanaDaikatanaKyoto, Japan, 2455 AD
Ancient Greece, 1200 BC
Medieval Norway, 560 AD
San Francisco, USA, 2030 AD
Introduction
Items
staircase to grab the Save Gem.
Leave the cell and head up the staircase on the right. Leap over the large pit and work the lever on the far side to lower a platform so Superfly can cross. Work through the next couple of rooms, being sure not to lose Superfly. An Attack Boost on a ledge below the walkway in the last room can be obtained by jumping down to the left. Otherwise, continue on up the stairs straight ahead to the entrance to Wyndrax Tower.
Doombat - A bat with tremendous claws, and a determination that doesn't quit. Stand your ground and take them out as they attack.
Plague Rat - The source of the disease, these agile creatures can poison you with its bite. The Daikatana is a good choice for these.
Fletcher - The archer of this land. His fire is quick and deadly so keep moving and get in close with the Daikatana.
Lycanthir - A wolf-man, the Lycanthir has ample speed and agility to make you dread seeing him. Keep him at bay with a ranged weapon.
Hellfire Paladin - A strong and powerful foe with no ranged attack. Use the Ballista to kill him from a distance.
WyndraxThe Wizard - This "Boss" is capable of releasing the power of lightning on you. Dodge
the bolts and move in to attack. Slay him in the courtyard while he's hurriedly collecting wisps.
E3M4: Wyndrax Tower
Enemies

this
guid
e d
ow
nlo
aded f
rom
ignguid
es.c
om
this
guid
e d
ow
nlo
aded f
rom
ignguid
es.c
om
DaikatanaDaikatanaKyoto, Japan, 2455 AD
Ancient Greece, 1200 BC
Medieval Norway, 560 AD
San Francisco, USA, 2030 AD
Introduction
Items
Walkthrough
Out from the fiery dungeon to the ice cold mountains of Norway, you must plod ahead to the Wyndrax the Wizard's lair. Superfly will still be carrying Mikiko as she is really coming down with the plague. Damn biting rats!
From where you exited the Dungeon, pass under the arch and around towards the campfire. Kill the Dwarf and follow the path out onto the ice ahead. Head to the tower on your right and climb its spiral staircase to the top. Grab the Shard of the Purifier on the right and watch as the barrel rolls off ledge to the ice below. Run back down the steps and dive into the hole in the ice that the falling barrel made. Quickly swim through the grate on the left and jump out of the water through the hole in the ice ahead. Climb the ladder and pull the lever to lower the drawbridge. Jump back into the water and, before exiting back through the grate, swim through the tunnel left of the grate and pop out to grab the Goldensoul. Climb out of the water where you first dove in and reenter the tower.
Cross the drawbridge where you earlier grabbed the Shard and grab the Save Gem ahead. Once inside, proceed to the room on the right and climb the stairs. Kill the Rats and press the triangular button to open the other door downstairs. Turn and head back down the stairs and enter the door to the right. Climb the staircase to the tower ahead with the spiraling stairs. Climb these steps to the top to grab another Save Gem.
Kill the Hellfire Paladin perched here as well. Walk towards the ledge and face the castle wall. Use the Ballista to exploit the crack in the wall. Jump across and enter the room to find the Ring of Lightning Protection. Jump back across the gap onto the roof. Step onto the ledge near the staircase and leap for the roof down below. Jump off of this roof to the area near the castle wall. Follow the walkway inside the small circular tower to grab a Power Boost. Leave the room and jump down into the water below.
Before climbing the ladder, duck into the alcove to grab the Attack Boost. Once you climb out of the water jump down onto the staircase below the flags. Enter the tower with the spiraling staircase and descend to the bottom. Get on the lift. Once off the lift, run through the corridor as quickly as you can go to avoid the lightning and pass through the door ahead. Grab the Crypt Key and return to the lift. Ascend the stairs to the landing where the door to the Crypt is. Kill the Paladin here and enter through the door.
Descend the steps on your right and battle your way across the room to the archway on the far left. Descend the next set of steps to find a Save Gem on a table. Now descend the ramp across the room past the Paladin and Fletcher. Collect the Spellbook and Wyndrax Key here. Blast a hole in the window behind where you found the Spellbook and jump down into the courtyard below. Grab the Speed Boost and climb the ladder to regain the room. Retrace your steps to where you entered the Crypt.
Standing at the main entrance proceed down the hall to the left. Use the Wyndrax Key in the lock to gain access to a secret room. Begin back down the hallway, this time entering the doorway to the left.
this
guid
e d
ow
nlo
aded f
rom
ignguid
es.c
om
this
guid
e d
ow
nlo
aded f
rom
ignguid
es.c
om
DaikatanaDaikatanaKyoto, Japan, 2455 AD
Ancient Greece, 1200 BC
Medieval Norway, 560 AD
San Francisco, USA, 2030 AD
Introduction
Items
Proceed to the altar on the left and use the Spellbook to summon Wyndrax. Have Superfly follow you back out into the hallway and down the stairs at the other end. Proceed through the doorway directly ahead and then through the tunnel and stairs to the right. Battle Wyndrax knowing that once he is half dead he will flee to his courtyard through a secret exit. Dodge his lightning attacks and follow him outside to finish him off.
Obtain Wyndrax's Wisp and follow the path through the rocky landscape to the mission's exit.
Doombat - A bat with tremendous claws, and a determination that doesn't quit. Stand your ground and take them out as they attack.
Plague Rat - The source of the disease, these agile creatures can poison you with its bite. The Daikatana is a good choice for these.
Dwarf - A little guy with a big axe, the Dwarf is capable of attacking from any distance. Take him out from a distance with the Bolter or Ballista.
Fletcher - The archer of this land. His fire is quick and deadly so keep moving and get in close with the Daikatana.
Lycanthir - A wolf-man, the Lycanthir has ample speed and agility to make you dread seeing him. Keep him at bay with a ranged weapon.
Voltaic Valkyrie - An electrifying woman, she has a powerful staff that blasts lightning at you from close range. Keep back and use the Ballista or Stave against her.
Rotworm - Nasty little maggots. Actually they're not that little. They will drop down from the ceiling and begin spitting poisonous juices at you. Shoot them with the Bolter.
NharreThe Necromancer - This mission's "Boss" is nothing without his magic staff. The staff allows him to
summon creatures of the dead. Once brought back to life, look out! They're coming for your blood.
After defeating Wyndrax in the courtyard, Hiro notices a trail leading up through some rather
E3M5: Crypt of Nharre
Enemies
Walkthrough
this
guid
e d
ow
nlo
aded f
rom
ignguid
es.c
om
this
guid
e d
ow
nlo
aded f
rom
ignguid
es.c
om
DaikatanaDaikatanaKyoto, Japan, 2455 AD
Ancient Greece, 1200 BC
Medieval Norway, 560 AD
San Francisco, USA, 2030 AD
Introduction
Items
impressive gates. He and his band of time travelers forge on into the unknown horror that is the Crypt of Nharre.
Although your instincts would have you enter the Crypt right away, double back to the gates to collect the Power Boost residing there. Now you may enter the Crypt. Descend the staircase to the room below. As you cross the bridge two Doombats will attack. Let a wisp loose to take them out of the air before they attack. Pick up the health and test the black crate in the corner for goodies that may be contained within. Descend the steps to a lower level.
Kill the Lycanthir and grab the Shard of the Purifier from the pedestal. A secret passage is revealed as the casket slides out of the way. Descend the stairs to the next area.
Once in the rocky cavern, use the Ballista to rid yourself of the three Dwarves that attack. Leap carefully from ledge to ledge to cross the gap. Walk around the side of the building and enter the door. Descend the stairs and proceed ahead through the next room, being sure to use the Wisps to take care of the Doombats flying down from above. A Goldensoul can be obtained by Ballista-jumping up to the beams overhead. Pass through the door into the next room.
Slay the Voltaic Valkyrie in the next room as well as the Doombats. Face the large tomb with the dragon statue perched on top, and press the two triangular buttons near the ground. The tomb will open revealing a hidden Ring of Undead Protection. You will need this when fighting Nharre. Go through the door on the right to the next room. Climb the stairs, being sure to pick up the Lava Rocks before you enter the next room. As soon as you enter, a flock of Doombats attack. If low on Wisps, use the Daikatana to slice them in half as they swoop down. Tiptoe across the beam high above the lava and pick up the Chain Mail Armor. Enter the next room and grab the Save Gem.
Walk to the end of the room and descend the spiral staircase to the site of Nharre the Necromancer. Kill the Buboids he summons and use the power of Wyndrax's Wisp or the Stave to kill him. Collect the Nightmare weapon from the ground and descend the steps in the rear of the Crypt. Grab the Hilt of the Purifier, the final piece of the sword, and proceed to the left of the area to exit the Crypt.
this
guid
e d
ow
nlo
aded f
rom
ignguid
es.c
om
this
guid
e d
ow
nlo
aded f
rom
ignguid
es.c
om
DaikatanaDaikatanaKyoto, Japan, 2455 AD
Ancient Greece, 1200 BC
Medieval Norway, 560 AD
San Francisco, USA, 2030 AD
Introduction
Items
E3M6: Gharroth's Throne
Enemies
Walkthrough
Doombat - A bat with tremendous claws, and a determination that doesn't quit. Stand your ground and take them out as they attack.
Plague Rat - The source of the disease, these agile creatures can poison you with its bite. The Daikatana is a good choice for these.
Fletcher - The archer of this land. His fire is quick and deadly so keep moving and get in close with the Daikatana.
Voltaic Valkyrie - An electrifying woman, she has a powerful staff that blasts lightning at you from close range. Keep back and use the Ballista or Stave against her.
Rotworm - Nasty little maggots. Actually they're not that little. They will drop down from the ceiling and begin spitting poisonous juices at you. Shoot them with the Bolter.
King Gharroth - Ruler of the land, owner of a severe case of dementia. He'll try and fight you, but don't worry too much. He's more character than enemy. You'll see.
With another nasty weapon at your disposal, and the Purifier complete, you're on your way to visit the King. Superfly volunteers to watch over Mikiko while you go ahead alone.
From the exit of the Crypt walk ahead to the lava flow and study the movement of the floating rocks. Leap from rock-to-rock towards the Chain Mail armor. Several of the rocks will dip under your weight so it is important to keep up a good rhythm without too much hesitation. You will be rewarded for making it to solid ground with the first Save Gem.
Grab the Lava Rocks and slay the Doombats. Work the lever to raise the lift out of the lava and ride the lift to the first stop. Enter the doorway blazing. Voltaic Valkyries and Fletchers will attack with abandon throughout much of this mission. Get used to it. Grab the health and armor and head up the stairs. Raise the lift by using the lever on the wall. Cross the lift to the door on the other side. Enter the doorway and battle up the next flight of stairs. The Daikatana is an excellent choice for these stairwells due to the tight surroundings. Summon the lift with the lever, walk out onto it and use the lever mounted on the wall to raise yourself up to the roof.
Dash for the horde of attackers waiting behind you and slice them up with the Daikatana. Once the

this
guid
e d
ow
nlo
aded f
rom
ignguid
es.c
om
this
guid
e d
ow
nlo
aded f
rom
ignguid
es.c
om
DaikatanaDaikatanaKyoto, Japan, 2455 AD
Ancient Greece, 1200 BC
Medieval Norway, 560 AD
San Francisco, USA, 2030 AD
Introduction
Items
coast is clear, use the lever in the corner to raise a lift with Superfly and Mikiko already on board. Together, follow the walkway around past the dragon statue to the torch-lit archway. Pass under the arch and climb the spiral staircase to the top. Kill the Paladins in the next room and grab the Save Gem. Standing where the gem was, step through the banner on the wall into a secret area. Grab the Goldensoul and jump out into the room. Cross the bridge to Gharroth's Throne Room.
Gharroth, in his demented state, will order a fight between the two of you. Fight him hard with the Daikatana and he will eventually surrender. In fact, he will even help you charge the Daikatana for another romp through time.

this
guid
e d
ow
nlo
aded f
rom
ignguid
es.c
om
this
guid
e d
ow
nlo
aded f
rom
ignguid
es.c
om
DaikatanaDaikatanaKyoto, Japan, 2455 AD
Ancient Greece, 1200 BC
Medieval Norway, 560 AD
San Francisco, USA, 2030 AD
Introduction
Items
Episode 4: San Francisco, USA - 2030 ADOnce again Mishima interferes with your safe return to the year 2455. On the bright side, King Gharroth
stpowered up the Daikatana enough to at least enter the 21 century. Our heroes have found themselves in the main cell block of Alcatraz, the infamous American prison. The trek to the final confrontation with Mishima will take you through the Rock, battles with Great Whites, and even deep inside a SEAL training base. You've come far, don't give up now.
Daikatana The namesake weapon of the game. A powerful sword capable of being powered-up the more you use it. Press the "Tab" key to check the current level of the sword's power.
Glock - A fast loading accurate gun, the Glock should be your all purpose weapon for the remainder of the game.
Slugger - The Slugger resembles a powerful sawed-off shotgun. Lethal damage at once, with a somewhat slower reload time.
Kineticore - This one fires a series of fragile, yet deadly, glass balls of liquid nitrogen. Like the Ion Blaster you used in Kyoto, each round will bounce off walls twice so be careful where you aim.
Ripgun - The game's true BFG. This one can literally cut enemies in half with its high speed, automatic capabilities.
Novabeam - There is nothing like burning the bad guy up with a powerful laser beam. One shot is all it takes, so be easy on the trigger button as ammo for this one is sparse.
Metamaser - A robotic land mine that uses powerful lasers to destroy any and everything that approaches. Its batteries will die eventually, at which time it self explodes. Watch where you put them!
Kevlar - Provides its wearer with 100 armor points and is able to absorb 40% of enemy attacks.
Ebonite - Provides 200 points of armor protection and reduces 60% of enemy-inflicted damage.
Weaponry
Armor
this
guid
e d
ow
nlo
aded f
rom
ignguid
es.c
om
this
guid
e d
ow
nlo
aded f
rom
ignguid
es.c
om
DaikatanaDaikatanaKyoto, Japan, 2455 AD
Ancient Greece, 1200 BC
Medieval Norway, 560 AD
San Francisco, USA, 2030 AD
Introduction
Items
Special Items
E4M1: Alcatraz
Enemies
Walkthrough
Health Boxes - The red and green health boxes give you 25 and 50 health points.Drug Boxes Green military-esque boxes give 60 health points.
Keycards - Assorted colors of these keys are necessary to advance to top secret areas of Mishima Labs.
Bottle, Saltpeter,Charcoal, & Sulfur - Collect these "Big House"-hold items to create a potent bomb and blast your way off
the Rock.
Envirosuit - A high tech version of a diving bell, the Envirosuit will not only keep you warm in the frigid waters of San Francisco Bay, but will allow you to breathe as well. No one ever accused oxygen of being overrated.
Prisoners - Are they armed? No. Are they tough? Hell yeah! The pushups you see them doing in their cell has given them the ability to knock you out with one punch. Shoot them before they hit you with a rock.
Pipe Rat - Quick little rats are located throughout much of the area. Open fire with the Glock before they sink their teeth into your leg.
Thirty years can bring a lot of change. The present-day tourist attraction known affectionately as "The Rock" is once again an operating prison. Sort of. In 2030 convicts are helicoptered in and left to fend for themselves. Unfortunately for you the guys are big enough to make Superfly look small. Get some guns and find a way through the walls ASAP.
After chatting with Ratchett Cassetti, grab the Glock from the floor and head to the last cell on your left. Grab the ammo and shoot out the grating on the wall and climb in. Immediately bust into the vent on your left to grab the bottle and the armor and crawl out. Continue on ahead through the ductwork. Shoot down the next grate you come to and enter. Work your way on top of the double pipes above and crawl to the ledge in the corner. Grab the Slugger and return back to the vent. Keep crawling on and enter the room ahead. Pull the lever on the wall to blow a hole in the wall. Jump down into the hole in

this
guid
e d
ow
nlo
aded f
rom
ignguid
es.c
om
this
guid
e d
ow
nlo
aded f
rom
ignguid
es.c
om
DaikatanaDaikatanaKyoto, Japan, 2455 AD
Ancient Greece, 1200 BC
Medieval Norway, 560 AD
San Francisco, USA, 2030 AD
Introduction
Items
the next room and crawl along the pipes to the manhole ahead.
Leap out of the manhole and pass through the door ahead. Enter the area to the left marked "Solitary Confinement" and blast the prisoners there. Use the lever to open the gates ahead so Mikiko and Superfly can rejoin you. Head back out into the cell block and enter the cell on the far right to find a Save Gem. Double back to the solitary confinement area and enter through the cell to the laundry room ahead. Detonate the barrel between the washing machines to open the dryer to the left. Climb in for the Ebonite Armor. Once the machine stops, climb out and exit the room to your left. Empty the Glock on the Prisoners that approach and pick up some ammo for the upcoming assault.
Head through the doors down the hall to the prison yard. Keep an eye on the Prisoners that approach and, together with Mikiko and Superfly, unload your weapons on them. Facing the doors you just came through, climb the small pipes on the left to the ledge above. Follow the ledge around to the window to the right. Climb into the room through the window and collect the Goldensoul and ammo. Carefully step back onto the ledge and continue on to the left. Jump the break in the ledge on to the wall ahead. From the wall, leap up into the guard tower in the corner and grab the supply of ammo and the Speed Boost. Leave the tower and head along the wall to the left. Drop down to the path below to find a Kineticore, as well as plenty of ammo and a Power Boost.
Drop back down to the yard and join the thugs playing basketball. Try your new weapon on them, collect the health, and then head to the small area near the guard tower to the right. Leap onto the air duct and from there through the window and into the mess hall. Blast any Prisoners that approach and head into the kitchen on the left. Grab the goodies from the cabinets and head back through the mess hall, guns a blazing. Leap from the table in the rear onto the board that hangs down. Battle your way through the hole in the wall over the slab of concrete and through
the open cell gate. Now upstairs, cross the cellblock and enter door on your left. Kill any Prisoners that aren't obscured and then aim your sights at the barrel upstairs. Climb the stairs and shoot the barrel near the support post to topple it on to the ledge. Climb up the concrete post on to the ledge, get the ammo on the left and then enter the duct work on the right. Shoot the rats that approach and proceed to the next grating. Blast through this one and descend the ladder.
Make your way to the ladder across the hallway, stopping only to grab the Mana Skull and to reload. Climb the ladder and drop into the cell on the other side of the wall. Now on the third floor cellblock, you must battle your way to the far end and enter the area to the right. Flip the lever to unlock the door and descend the staircase. Cross the cellblock to the far end and enter the cell on the opposite side. Climb through the wall to enter the small space behind the cell. Proceed to the right over the pipes to the ladder in the rear of the area. Climb the ladder to grab a Mega Shield and then return to where you entered the area. Now, crawl through the opening to your left and follow this path around to the right to find mass of Prisoners and another Save Gem.
In a scene that should look very familiar to movie buffs, flip the lever on the wall and peer down into the

this
guid
e d
ow
nlo
aded f
rom
ignguid
es.c
om
this
guid
e d
ow
nlo
aded f
rom
ignguid
es.c
om
DaikatanaDaikatanaKyoto, Japan, 2455 AD
Ancient Greece, 1200 BC
Medieval Norway, 560 AD
San Francisco, USA, 2030 AD
Introduction
Items
shower area. In fact, if you stare long enough you just might catch a glimpse of Sean Connery and Nicolas Cage. Kidding. Leap through the windows down to the shower area and be sure to grab the lump of coal from the corner. After the concrete platform collapses in the next room, run up it to the ledge to grab items on top, including some Kevlar Armor. Crawl under the concrete and out through the door ahead. Grab the Acro Boost and use its enhanced jumping powers to leap through the hole in the ceiling ahead to find the hidden Attack Boost. Forge ahead past the Prisoners to the concrete rubble that blocks the exit. Fire the Slugger at the concrete and descend the ladder. Swim through the water to the other side of the prison yard. Exit the yard through the door ahead.
Stand back and unload your Glock at all of the barrels in this room. Grab the items and enter the room ahead. Find the Wraith Orb and the all important Vial of Saltpeter and then head to the rear of the room. Leap from the barrel onto the ladder that hangs down in front of the furnace and climb up. From the ladder jump to the steel beam; and from there to the wire screen that hangs down. To continue up the tower you must shoot the latch for the ladder to drop it within reach. Continue climbing the ladders until you reach the top of the tower. Grab the Bag of Sulfur and kill the Prisoners. Open the gate in the center and descend the
ladder inside. Kill the Pipe Rats and crawl along the tight path until you reach the Envirosuit. Dive into the water and swim to the bottom. At the bottom of the tank are four valves. Turn valves #1 and #3 first. Swim upward through the center hole and into the side pipe. Turn the unnumbered valve and dive back down to turn valves #2 and #4. Now, swim back up and enter the pipe across from the valve you just turned. Climb the ladder to the top and drop into the current of water below.
You will be shot like a cork from a bottle out of the manhole in the prison yard. Have Mikiko and Superfly follow you to the large prison wall with the crack on it. Use the ingredients you collected throughout the mission to blast a hole in the wall. Climb through the hole and collect the Save Gem on the other side. It is recommended that you save the game here as several life or death jumps are right ahead.
Proceed down the cliff to the rocks below. Jump across the gap to the small ledge on the left and from there to the larger rock ledge below with the items on it. From the far edge of this landing, leap for the metal ladder above. Climb the ladder and leap to the area with the concrete platform. Continue on with Mikiko and Superfly to the exit near the guard tower.
Prisoners - Are they armed? No. Are they tough? Hell yeah! The pushups you see them doing in their cell has given them the ability to knock you out with one punch. Shoot them before they hit you with a rock.
Pipe Rat - Quick little rats are located throughout much of the area. Open fire with the
E4M2: Beneath the Rock
Enemies

this
guid
e d
ow
nlo
aded f
rom
ignguid
es.c
om
this
guid
e d
ow
nlo
aded f
rom
ignguid
es.c
om
DaikatanaDaikatanaKyoto, Japan, 2455 AD
Ancient Greece, 1200 BC
Medieval Norway, 560 AD
San Francisco, USA, 2030 AD
Introduction
Items
Glock before they sink their teeth into your leg.
Chaingunner - Not only is the Chaingunner armed with a fully automatic gun, but the jetpack on his back lets him fly around wherever he pleases. Hit him hard with the Slugger to knock him out of the air.
Rocketeer - Although he doesn't fly like his counterpart, the rocket launcher he carries is capable of huge damageeven when he misses you. As he drops to a knee before firing, unload on him. A few square hits with the Kineticore or Slugger is all it takes.
Shark - The real threat to Alcatraz escapees. The sharks in San Francisco Bay are quick and possess razor sharp teeth. Use a powerful gun like the Slugger or cut them up with the Ripgun.
After successfully breaching Alcatraz's walls you realize that only half of the "Rock's" fun is over. For now you must make it off the island. Beneath the Rock takes you through the old dilapidated structures that once housed the families of the prison guards. For an added thrill, several Great White's are lurking just beyond the water's edge for a tasty snack.
From where you begin the mission, drop off the platform and smash through the planks to the next area. Scale the boulders to your left and leap for the fence. Make your way ahead to nab the Kevlar Armor. Retrace your steps and proceed down the hill, stopping only to grab the Attack Boost, Kineticore, and Save Gem. Blast through the Prisoners and Chaingunners as you make your way down the switchbacks to the water below.
Once you reach the end of the trail, near the locked boat gates, tell Mikiko and Superfly to wait for you. Hopefully you will live to see them again. Head back up the path to the ledge on the left before the second tunnel. This is where you grabbed the Attack Boost earlier. Take a running leap across the gap to the small cave ahead. Drop into the stream but make every effort to not go over the falls. Grab the ammo on the banks and then follow the narrow path left of the falls to a small cave containing some well hidden health crates and a Mega Shield. Jump over the waterfalls, climb out and turn around to face the splash-down area. Jump through the water to the cave behind the falls. Keep your Slugger at the ready. Kill the Chaingunners that live in the cave and collect the Power Boost and Ripgun.
Exit the cave and practice your one and a half off the cliff into the tidal pool below. Blast any sharks that approach as you swim towards the opening in the building above the deteriorating staircase. Swim into the room on the right and climb out onto the concrete to grab the next Save Gem. Carefully
Walkthrough

this
guid
e d
ow
nlo
aded f
rom
ignguid
es.c
om
this
guid
e d
ow
nlo
aded f
rom
ignguid
es.c
om
DaikatanaDaikatanaKyoto, Japan, 2455 AD
Ancient Greece, 1200 BC
Medieval Norway, 560 AD
San Francisco, USA, 2030 AD
Introduction
Items
proceed around the wall to your right and slaughter the mass of Prisoners there. Go through the hallway and jump into the water at the end. Immediately turn to your right and climb the ladder. Battle your way up the stairs to the second level and grab another Save Gem.
Head up the stairs and exit the building onto the porch. Use the protruding steel re-bar to the left as a ramp to leap across the water onto the balcony ahead. Head through the door around the corner of the house to the left. Exploit the crack in the far wall to reveal a secret Vitality Boost and Ripgun. Leave the room and
scale the ladder to the loft. Detonate the barrels in the corner to blow a hole in the wall and enter the next room. Grab the ammo from the corner and shoot out the boarded windows. Step out onto the balcony and head to your right. Leap for the rocks below and head up the trail to grab some ammo and the Kevlar Armor. Return to the building and leap onto the lower balcony. Enter the building through the window and head into the rock passage ahead. Grab the Acro Boost on the left and return to where you had just grabbed the Kevlar Armor. Using the added "ups",
leap onto the ledge above to find a hidden Mega Shield. Return through the window and back into the tunnel.
Utilize the lever on the left. This opens a door into the locked docking area by the water. Board the cable car ahead of you and descend to where you left Mikiko and Superfly. Together, the three of you must run through the door towards the boats ahead. Watch out for the Rocketeers and Chaingunners that try to stop you!
One last secret is to be had before boarding the boats. Turn into the cave on the left and blast the barrels in the distance. Leap across the boxes to the rocks ahead and, eventually, to the screen door. Use the button above the ladder to operate a lift below. Once the box has been picked up, you can use it gain the ledge and grab the Power Boost. Exit the cave and board the boats.
Chaingunner - Not only is the Chaingunner armed with a fully automatic gun, but the jetpack on his back lets him fly around wherever he pleases. Hit him hard with the Slugger to knock him out of the air.
Rocketeer - Although he doesn't fly like his counterpart, the rocket launcher he carries is capable of huge damageeven when he misses you. As he drops to a knee before firing, unload on him. A few square hits with the Kineticore or Slugger is all it takes.
Uzi - Rapid deadly fire is his specialty. Strafe left to right while firing nonstop. If
E4M3: Tower of Crime
Enemies

this
guid
e d
ow
nlo
aded f
rom
ignguid
es.c
om
this
guid
e d
ow
nlo
aded f
rom
ignguid
es.c
om
DaikatanaDaikatanaKyoto, Japan, 2455 AD
Ancient Greece, 1200 BC
Medieval Norway, 560 AD
San Francisco, USA, 2030 AD
Introduction
Items
you happen on him at a close distance, slicing him in half with the Daikatana is the easiest thing to do.
Knifer - The Knifer is as quick as she is ugly. If you stand your ground, she's likely to carve you up before you can take your first swing. Instead, backpedal while firing one of your guns.
After an exciting boat chase in which you and Mikiko split from Superfly, you reach the mainland. As luck would have it, you're directly outside the entrance to Mishima's corporate tower. Move on with Mikiko; Superfly will catch up later.
From where you beached your stolen boat, proceed through the doorway into the toppled structure ahead. Continue on through the debris to the doorway on your left. Go up the steps ahead and grab the Save Gem on your way to the end of the walkway. Climb the steps around the corner and grab the Wraith Orb. Head back to where the gem was and fire your Glock at the explosives stacked below the blue neon sign. Leap down into the hole that forms from the collapse and wade through the water to the doorway in the far corner. Make the first left and head to the end of the corridor. Turn left again and then head to the red-lit room on the right.
Have Mikiko follow you up onto the crates and, from there, onto the pipes that run out of the room. Turn left at the intersection and make your way into the ductwork on the right. As soon as you can stand up in the ducts, jump out onto the floor above to find a hidden Vitality Boost. Step back down into the ductwork and continue on to the room at the end. Turn and run up the stairs at the end of the hall to the next Save Gem.
Walk around to the main room and let Mikiko grab the Ripgun from behind the desk. Open the elevator shaft in the corner and jump to the ladder on the left. Climb the ladder to the top and walk to the ledge around the shaft to the door. Battle through the next area to the staircase in the corner and ascend. Continue up the staircases bypassing the enemies on the lower floors to the top level. Proceed to the room on the far left and crawl through the fallen ductwork. Step out into a new area and climb the staircase on the right to another Save Gem.
Once again, ascend the steps to the upper level. Proceed through the door on the left and, from there, into the large room on the right. Carefully tiptoe across the wooden planks bridging the gaps in the floor. Enter the elevator and leap onto the ledge one floor below. Open the doors and grab the Novabeam on the floor. Reenter the elevator shaft and descend the ladder. Bust into the elevator through the roof and then shoot through the wooden boards to exit. Walk up the stairs on the far side of the tracks to the entrance to the tram car .
Walkthrough

this
guid
e d
ow
nlo
aded f
rom
ignguid
es.c
om
this
guid
e d
ow
nlo
aded f
rom
ignguid
es.c
om
DaikatanaDaikatanaKyoto, Japan, 2455 AD
Ancient Greece, 1200 BC
Medieval Norway, 560 AD
San Francisco, USA, 2030 AD
Introduction
Items
E4M4: Mishima Labs
Enemies
Walkthrough
Rocketeer - Although he doesn't fly like his counterpart, the rocket launcher he carries is capable of huge damageeven when he misses you. As he drops to a knee before firing, unload on him. A few square hits with the Kineticore or Slugger is all it takes.
Lab Monkey - The monkeys that roam the lower depths of the lab are quite creepy. Unarmed, but possessing a powerful uppercut, you can easily strafe about safely picking them off from a distance.
SEAL Commando - The Commando is a very worthy foe. Unlike many creatures, this one is smart enough to dodge your fire. Go heavy on the firepower when confronting them, as you'd hate to leave them standing.
SEAL Shotgunner - The counterpart to the Commando. Only female. Her gun is powerful so try and sneak shots at her from behind some cover.
SEAL Captain - Possibly the most difficult enemy to kill (not including Kage Mishima) in the game. His weapon of choice is a high-powered shotgun that he fires with devastating accuracy. Bring your BFG when you approach him, as his armor renders the Glock useless.
You've made it to Mishima's laboratories in one piece. The goal: to explore the compound and uncover the private offices in the research center. One of them should be Mishima's.
Before you enter the lab, scour the tram station for ammo. You and Mikiko should be able to stock up rather nicely here. Enter the lab through the shiny metal doors and grab the armor from the bench. Head to the right, unloading your Ripgun at the attacking SEAL soldiers. Proceed through the lengthy hall to the left and grab the Save Gem from the bench around the corner. Follow the path to the left and ride the escalator upstairs. As you reach the top, jump off to your right to find a Wraith Orb hidden amongst the
plants.
Enter the lobby and slay the SEAL Shotgunners behind the desk. Grab the mighty Novabeam and follow the corridor ahead to the waterfall room. Leap to the top of the falls for a Goldensoul and then plunge into the water near the center fall to collect a Green Keycard. Jump out of the water and ascend the
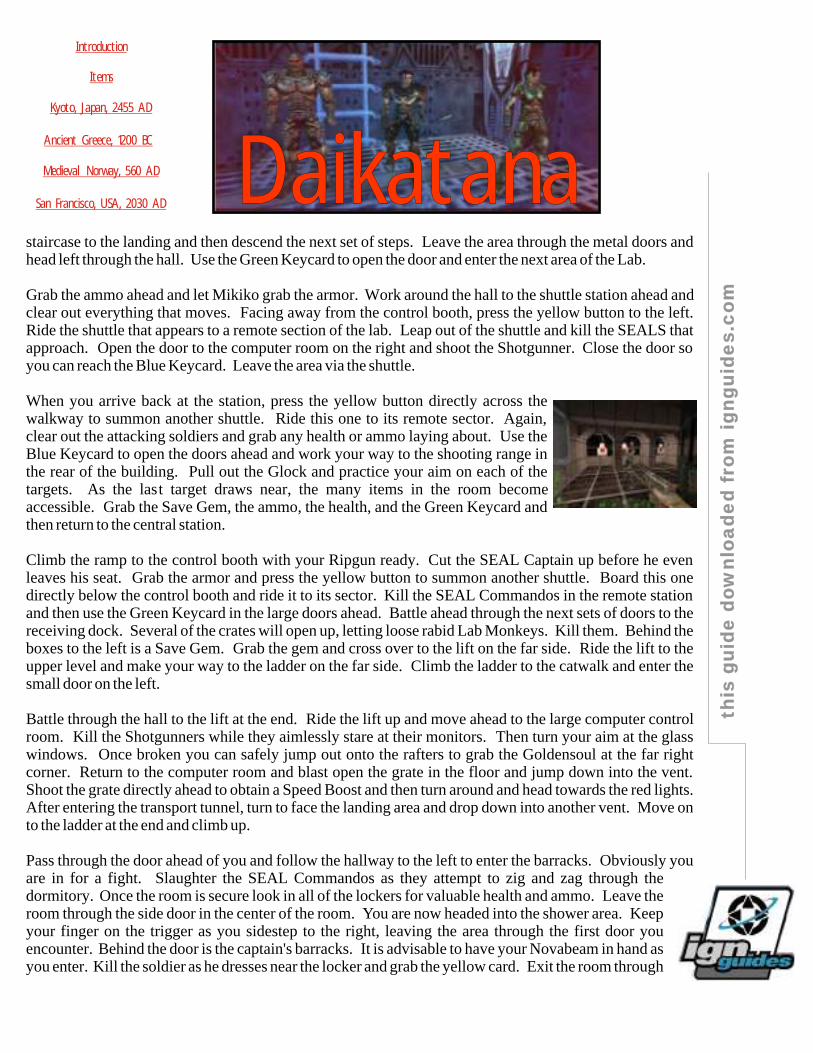
this
guid
e d
ow
nlo
aded f
rom
ignguid
es.c
om
this
guid
e d
ow
nlo
aded f
rom
ignguid
es.c
om
DaikatanaDaikatanaKyoto, Japan, 2455 AD
Ancient Greece, 1200 BC
Medieval Norway, 560 AD
San Francisco, USA, 2030 AD
Introduction
Items
staircase to the landing and then descend the next set of steps. Leave the area through the metal doors and head left through the hall. Use the Green Keycard to open the door and enter the next area of the Lab.
Grab the ammo ahead and let Mikiko grab the armor. Work around the hall to the shuttle station ahead and clear out everything that moves. Facing away from the control booth, press the yellow button to the left. Ride the shuttle that appears to a remote section of the lab. Leap out of the shuttle and kill the SEALS that approach. Open the door to the computer room on the right and shoot the Shotgunner. Close the door so you can reach the Blue Keycard. Leave the area via the shuttle.
When you arrive back at the station, press the yellow button directly across the walkway to summon another shuttle. Ride this one to its remote sector. Again, clear out the attacking soldiers and grab any health or ammo laying about. Use the Blue Keycard to open the doors ahead and work your way to the shooting range in the rear of the building. Pull out the Glock and practice your aim on each of the targets. As the last target draws near, the many items in the room become accessible. Grab the Save Gem, the ammo, the health, and the Green Keycard and then return to the central station.
Climb the ramp to the control booth with your Ripgun ready. Cut the SEAL Captain up before he even leaves his seat. Grab the armor and press the yellow button to summon another shuttle. Board this one directly below the control booth and ride it to its sector. Kill the SEAL Commandos in the remote station and then use the Green Keycard in the large doors ahead. Battle ahead through the next sets of doors to the receiving dock. Several of the crates will open up, letting loose rabid Lab Monkeys. Kill them. Behind the boxes to the left is a Save Gem. Grab the gem and cross over to the lift on the far side. Ride the lift to the upper level and make your way to the ladder on the far side. Climb the ladder to the catwalk and enter the small door on the left.
Battle through the hall to the lift at the end. Ride the lift up and move ahead to the large computer control room. Kill the Shotgunners while they aimlessly stare at their monitors. Then turn your aim at the glass windows. Once broken you can safely jump out onto the rafters to grab the Goldensoul at the far right corner. Return to the computer room and blast open the grate in the floor and jump down into the vent. Shoot the grate directly ahead to obtain a Speed Boost and then turn around and head towards the red lights. After entering the transport tunnel, turn to face the landing area and drop down into another vent. Move on to the ladder at the end and climb up.
Pass through the door ahead of you and follow the hallway to the left to enter the barracks. Obviously you are in for a fight. Slaughter the SEAL Commandos as they attempt to zig and zag through the dormitory. Once the room is secure look in all of the lockers for valuable health and ammo. Leave the room through the side door in the center of the room. You are now headed into the shower area. Keep your finger on the trigger as you sidestep to the right, leaving the area through the first door you encounter. Behind the door is the captain's barracks. It is advisable to have your Novabeam in hand as you enter. Kill the soldier as he dresses near the locker and grab the yellow card. Exit the room through
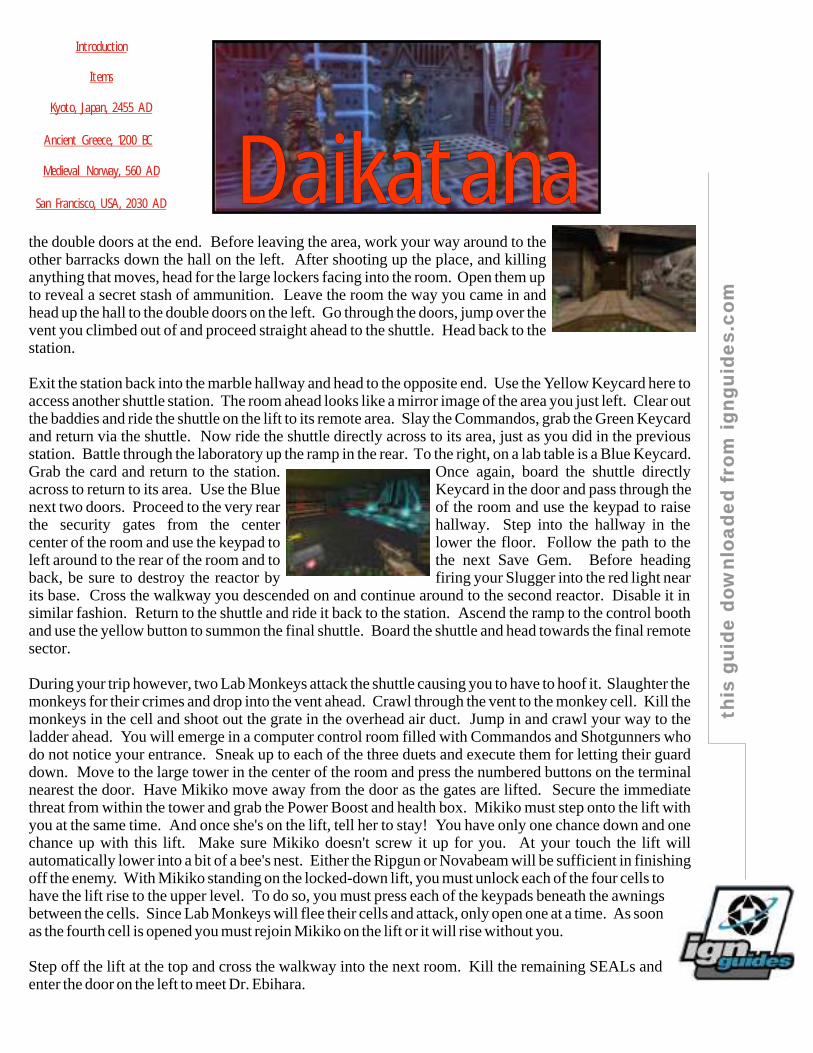
this
guid
e d
ow
nlo
aded f
rom
ignguid
es.c
om
this
guid
e d
ow
nlo
aded f
rom
ignguid
es.c
om
DaikatanaDaikatanaKyoto, Japan, 2455 AD
Ancient Greece, 1200 BC
Medieval Norway, 560 AD
San Francisco, USA, 2030 AD
Introduction
Items
the double doors at the end. Before leaving the area, work your way around to the other barracks down the hall on the left. After shooting up the place, and killing anything that moves, head for the large lockers facing into the room. Open them up to reveal a secret stash of ammunition. Leave the room the way you came in and head up the hall to the double doors on the left. Go through the doors, jump over the vent you climbed out of and proceed straight ahead to the shuttle. Head back to the station.
Exit the station back into the marble hallway and head to the opposite end. Use the Yellow Keycard here to access another shuttle station. The room ahead looks like a mirror image of the area you just left. Clear out the baddies and ride the shuttle on the lift to its remote area. Slay the Commandos, grab the Green Keycard and return via the shuttle. Now ride the shuttle directly across to its area, just as you did in the previous station. Battle through the laboratory up the ramp in the rear. To the right, on a lab table is a Blue Keycard. Grab the card and return to the station. Once again, board the shuttle directly across to return to its area. Use the Blue Keycard in the door and pass through the next two doors. Proceed to the very rear of the room and use the keypad to raise the security gates from the center hallway. Step into the hallway in the center of the room and use the keypad to lower the floor. Follow the path to the left around to the rear of the room and to the next Save Gem. Before heading back, be sure to destroy the reactor by firing your Slugger into the red light near its base. Cross the walkway you descended on and continue around to the second reactor. Disable it in similar fashion. Return to the shuttle and ride it back to the station. Ascend the ramp to the control booth and use the yellow button to summon the final shuttle. Board the shuttle and head towards the final remote sector.
During your trip however, two Lab Monkeys attack the shuttle causing you to have to hoof it. Slaughter the monkeys for their crimes and drop into the vent ahead. Crawl through the vent to the monkey cell. Kill the monkeys in the cell and shoot out the grate in the overhead air duct. Jump in and crawl your way to the ladder ahead. You will emerge in a computer control room filled with Commandos and Shotgunners who do not notice your entrance. Sneak up to each of the three duets and execute them for letting their guard down. Move to the large tower in the center of the room and press the numbered buttons on the terminal nearest the door. Have Mikiko move away from the door as the gates are lifted. Secure the immediate threat from within the tower and grab the Power Boost and health box. Mikiko must step onto the lift with you at the same time. And once she's on the lift, tell her to stay! You have only one chance down and one chance up with this lift. Make sure Mikiko doesn't screw it up for you. At your touch the lift will automatically lower into a bit of a bee's nest. Either the Ripgun or Novabeam will be sufficient in finishing off the enemy. With Mikiko standing on the locked-down lift, you must unlock each of the four cells to have the lift rise to the upper level. To do so, you must press each of the keypads beneath the awnings between the cells. Since Lab Monkeys will flee their cells and attack, only open one at a time. As soon as the fourth cell is opened you must rejoin Mikiko on the lift or it will rise without you.
Step off the lift at the top and cross the walkway into the next room. Kill the remaining SEALs and enter the door on the left to meet Dr. Ebihara.

this
guid
e d
ow
nlo
aded f
rom
ignguid
es.c
om
this
guid
e d
ow
nlo
aded f
rom
ignguid
es.c
om
DaikatanaDaikatanaKyoto, Japan, 2455 AD
Ancient Greece, 1200 BC
Medieval Norway, 560 AD
San Francisco, USA, 2030 AD
Introduction
Items
E4M5: Mishima's Hideout
Enemies
Walkthrough
SEAL Rocketeer - The most heavily armed creature in the game, the SEAL Rocketeer is not to be approached carelessly. Between his dual-rocket launchers and the razor sharp knife he bears, you're best strategy is to snipe with the Novabeam.
Lab Monkey - The monkeys that roam the lower depths of the lab are quite creepy. Unarmed, but possessing a powerful uppercut, you can easily strafe about safely picking them off from a distance.
SEAL Commando - The Commando is a very worthy foe. Unlike many creatures, this one is smart enough to dodge your fire. Go heavy on the firepower when confronting them, as you'd hate to leave them standing.
Chaingunner - Not only is the Chaingunner armed with a fully automatic gun, but the jetpack on his back lets him fly around wherever he pleases. Hit him hard with the Slugger to knock him out of the air.
SEAL Shotgunner - The counterpart to the Commando. Only female. Her gun is powerful so try and sneak shots at her from behind some cover.
SEAL Captain - Possibly the most difficult enemy to kill (not including Kage Mishima) in the game. His weapon of choice is a high-powered shotgun that he fires with devastating accuracy. Bring your BFG when you approach him, as his armor renders the Glock useless.
Dr. Ebihara, although not who you were hoping to encounter, proves to be a big help. He leads you past security to Kage's private penthouse. You're getting close.
Collect the health near the entrance to the building and then head through the doors. The Hideout has three areas: Gardens, Artifacts, and Chambers. Proceed initially through the arch to the left to enter the Gardens area. Climb the two flights of stairs, keeping an eye peeled for encroaching SEALs. Proceed through the doorway out onto the helipad. Strafe with your back against the wall as you take out the Chaingunners and SEAL Rocketeers. With the pad clear of enemy fire, divvy up the health and ammo between Hiro and Mikiko. Cross the roof to the door on the far side and descend the stairs. Go through the door and go down another flight of steps. Turn 180 degrees to find a Save Gem guarded by several Commandos. Continue moving, leaving the room through the door across from the staircase.

this
guid
e d
ow
nlo
aded f
rom
ignguid
es.c
om
this
guid
e d
ow
nlo
aded f
rom
ignguid
es.c
om
DaikatanaDaikatanaKyoto, Japan, 2455 AD
Ancient Greece, 1200 BC
Medieval Norway, 560 AD
San Francisco, USA, 2030 AD
Introduction
Items
Have Mikiko stand at the locked door across the garden and wait for you to return. Grab the ammo from the bottom of the smaller pond and then dive into the larger one. Shoot through the metal grate and then through the crack in the wall opposite where you enter. Jump through the waterfalls and catch the Rocketeers by surprise. Once the area is safe, open the door to your left to let Mikiko in. Cross the Gardens and enter the building ahead. At the turn in the hallway, face the wall across from the glass case and push against it. The wall will slide open revealing a hidden Power Boost. Continue on to the rock garden ahead.
Before climbing the ladder to the house above, you must press each of the four buttons hidden in the rock garden. This task seems unnecessary now, but the ladder you lowered is key in your completing the mission. Climb the ladder to the house above and walk the ledge around to the entrance. Enter through the
silk door first. Hurry past the descending wall to the far side of the room. Shoot up the blue power source in the corner and then flip the lever nearest the computers to lower another ladder. Leave the room and enter the area behind the wooden door. Battle your way through the next sequence of hallways and stairways. At the bottom of the second large staircase turn to the odd colored wall panel on the left. Press against it to reveal a hidden Save Gem. Leave the passage and continue on to the main entrance area.
Head through the arch labeled "Chambers". You can follow either hallway to the rear section leading to Mishima's bedroom. Pass between the gargoyles and enter the room. Walk towards the bed at the far end of the room and push the small button on the last post to the right of his bed. A ladder on the wall in front of you will rise up. Use the ladder to reach the ledge and walk around to the panel above the bed. Press against this panel to find a hidden Mega Shield. Jump off the ledge and walk to the far end of the bedroom. Press against the small button to reveal a trap door. Drop down into the pit and kill the Lab Monkeys that attack. Climb the ladder in the distance to the top and pull the lever to lower another ladder. Somewhere. Open the door to your side and run down the steps through the door ahead to return to the main entranceway.
Once again, enter the Chambers area of the complex. This time do not enter the bedroom. Instead, board the lift to the right. As the lift begins carrying you upward shoot at the yellow glass and jump onto the walkway that is revealed. Walk the length of the ledge collecting ammo and armor. Re-board the lift and ride it to the top and go through the door. Press the small button on the post to the left. A final ladder is lowered. With Mikiko in tow, ascend the series of ladders to the top of the Hideout. Unfortunately, Mishima escaped your wrath once more. While you stand there contemplating where he was headed, Superfly shows up. Apparently Mishima was headed to the SEAL Training Center.
And that is where you must go.

this
guid
e d
ow
nlo
aded f
rom
ignguid
es.c
om
this
guid
e d
ow
nlo
aded f
rom
ignguid
es.c
om
DaikatanaDaikatanaKyoto, Japan, 2455 AD
Ancient Greece, 1200 BC
Medieval Norway, 560 AD
San Francisco, USA, 2030 AD
Introduction
Items
E4M6: SEAL Training Center
Enemies
Walkthrough
SEAL Rocketeer - The most heavily armed creature in the game, the SEAL Rocketeer is not to be approached carelessly. Between his dual-rocket launchers and the razor sharp knife he bears, you're best strategy is to snipe with the Novabeam.
Shark - The real threat to Alcatraz escapees. The sharks in San Francisco Bay are quick and possess razor sharp teeth. Use a powerful gun like the Slugger or cut them up with the Ripgun.
SEAL Commando - The Commando is a very worthy foe. Unlike many creatures, this one is smart enough to dodge your fire. Go heavy on the firepower when confronting them, as you'd hate to leave them standing.
SEAL Shotgunner - The counterpart to the Commando. Only female. Her gun is powerful so try and sneak shots at her from behind some cover.
SEAL Captain - Possibly the most difficult enemy to kill (not including Kage Mishima) in the game. His weapon of choice is a high-powered shotgun that he fires with devastating accuracy. Bring your BFG when you approach him, as his armor renders the Glock useless.
Kage Mishima - You're not the only one with the Daikatana. Mishima's copy of the sword is just as every bit deadly as Hiro's. One hit from his sword and you have 1 health point left. A second hit and its good night. Don't stop moving and fire everything you got at him. Good luck!
The threesome is back together for one final mission. However, you will be on your own for all of the training exercises. Mikiko's charm(?) gets you in past security at the front gate. Now its just a matter of finding Kage and setting history straight for once and for all.
As you step off the lift into the first area of the training center you will see a ladder on your right. Climb this ladder to the walkway above, grab the ammo and climb the very tall ladder directly behind you. In a vent at the very top is a Goldensoul. Grab it and descend back to the bottom. Continue on to the hallway ahead. Ride the lift down and grab the Save Gem from the far side of the room. Enter the next room and walk around the center structure to the circular pad in the rear. This will open the door to your first training exercise.

this
guid
e d
ow
nlo
aded f
rom
ignguid
es.c
om
this
guid
e d
ow
nlo
aded f
rom
ignguid
es.c
om
DaikatanaDaikatanaKyoto, Japan, 2455 AD
Ancient Greece, 1200 BC
Medieval Norway, 560 AD
San Francisco, USA, 2030 AD
Introduction
Items
Although the exercises are different from one another they each have one commonality. That is, if you fall off and hit the floor, you will be teleported back to the starting point. Every exercise will require extreme patience as you must study the movements of the platforms and execute your jumps impeccably.
After passing exercise #1 you will immediately begin training exercise #2. As a reward for clearing the first two exercises, a Save Gem awaits you beyond the exit door. Using it is recommended. Proceed through training exercise #3 to the next room and collect another Save Gem. Pass through the door to the large area where the shark tanks are located. Once you grab the Envirosuit, jump into
the tank and kill the sharks. Swim down into the pipe at the bottom of the tank. Another shark will attack as you approach the first turn. Kill the shark and swim on to the next training area.
You will exit the water under heavy fire from SEAL Rocketeers on the far side of the room. Ready yourself for the onslaught by having the Kineticore or the Slugger drawn and by strafing side to side as you exit the pipe. Once the Rocketeers are put away, jump from platform to platform to complete training exercise #4. Grab the armor on the far side of the room and climb the ladder to grab another Save Gem.
The very next room contains the fifth and final training exercise. This one can prove deadly. You must jump from platform to platform, while dodging the razor edged swords that rotate above them. Clean the exercise and enter the next room with your trigger finger ready. A horde of attackers come out of seemingly nowhere. Push through to grab the Attack Boost in the center of the room and then duck back under some cover. After killing the last SEAL in the room, press the two buttons on the pillars in the center of the room. Ascend the lift in the center of the room.
Upstairs, step off the lift and fire your gun at the grating on the wall to the left. Jump down into the pool and press the button on the wall in the far left corner to create access for Mikiko and Superfly who have been waiting in the neighboring corridor. Have the two follow you up the ladder and descend the stairs to the next area. Keep pushing on through the next couple of rooms, being sure to grab any health or ammo you see.
Grab the two closely spaced Save Gems and descend the ladder to the submarine below. Mishima is here waiting for you. You must watch him disable your friends and then fight one on one. He is difficult to kill and therefore, you may want to use a Save Gem in the middle of a successful fight, in case it doesn't turn out in your favor in the end. The story does not end with the death of Mishima. For that, you will have to wait and find out on your own.