Java EE 5 Development using GlassFish Application Server · GlassFish application server was...
52
Java EE 5 Development using GlassFish Application Server The complete guide to installing and configuring the GlassFish Application Server and developing Java EE 5 applications to be deployed to this server David R. Heffelfinger Chapter No. 6 "JavaServer Faces"
Transcript of Java EE 5 Development using GlassFish Application Server · GlassFish application server was...

Java EE 5 Development using GlassFish Application Server The complete guide to installing and configuring the GlassFish Application Server and developing Java EE 5 applications to be deployed to this server
David R. Heffelfinger
Chapter No. 6 "JavaServer Faces"

For More Information:
www.packtpub.com/Java-EE-5-GlassFish-Application-Servers/book
In this package, you will find: A Biography of the author of the book
A preview chapter from the book, Chapter NO. 6 "JavaServer Faces"
A synopsis of the book’s content
Information on where to buy this book
About the Author David Heffelfinger has been developing software professionally since 1995; he has been using Java as his primary programming language since 1996. He has worked on many large-scale projects for several clients including Freddie Mac, Fannie Mae, and the US Department of Defense. He has a Masters degree in Software Engineering from Southern Methodist University. David is editor in chief of Ensode.net (http://www.ensode.net), a website about Java, Linux, and other technology topics.
First and foremost, I would like to thank my family for putting up with me spending several hours a day working on this book; without your support, I wouldn't have been able to accomplish this.
I would also like to thank the Packt Publishing staff for their help and support in getting this book published. I am especially grateful to Priyanka Baruah, who first contacted me regarding this book, Patricia Weir for her patience regarding the several changes to the book's outline, Sagara Naik for keeping track of the schedule. I would also like to thank the technical reviewers, Kim Lewis and Meenakshi Verma for providing excellent suggestions. Last but not least, I would also like to thank Douglas Paterson, who gave me the opportunity to get my first book published (and who wished to work on a second book with me) for supporting my decision to work on this book.

For More Information:
www.packtpub.com/Java-EE-5-GlassFish-Application-Servers/book
Java EE 5 Development using GlassFish Application Server
The complete guide to installing and configuring the GlassFish Application Server and developing Java EE 5 applications to be deployed to this server
Project GlassFish was formally announced at the 2005 JavaOne conference. Version one of the GlassFish application server was released to the public approximately a year later, at the 2006 JavaOne conference. GlassFish version one became the reference implementation for the Java EE 5 specification, and as such, was the first available application server compliant with this specification.
While releasing the first available Java EE 5 application server was a tremendous accomplishment, the first version of GlassFish lacked some enterprise features such as clustering and High Availability. GlassFish version 2, released in September 2007, added these and other enterprise features, in addition to other features such as an enhanced web based administration console.
This book will guide you through the development and deployment of Java EE 5-compliant application on GlassFish version 2. It also covers application development using frameworks that build on top of the Java EE 5 specification, including Facelets, Ajax4jsf, and Seam.

For More Information:
www.packtpub.com/Java-EE-5-GlassFish-Application-Servers/book
What This Book Covers Chapter 1 provides an overview of Glassfish, including how to install it, configure it, and verify the installation.
Chapter 2 covers how to develop server-side web applications using the Servlet API.
Chapter 3 explains how to develop web applications using JavaServer Pages (JSPs), including how to develop and use JSP custom tags.
Chapter 4 discusses how to develop Java EE applications that interact with a relational database system through the Java Persistence API (JPA) and through the Java Database Connectivity API (JDBC).
Chapter 5 explains how to use the JSP Standard Tag Library (JSTL) when developing JavaServer Pages.
Chapter 6 covers how to develop applications using the JavaServer Faces (JSF) component framework to build web applications.
Chapter 7 explains how to develop messaging applications though the Java Messaging Service (JMS) API.
Chapter 8 covers securing J2EE applications through the Java Authentication and Authorization Service (JAAS).
Chapter 9 discusses how to develop Enterprise Java Beans that adhere to the EJB 3 specification.
Chapter 10 explains how to develop and deploy web services that conform to the JAX-WS 2.1 specification.
Chapter 11 covers frameworks that build on top of the Java EE 5 specification, including Seam, Facelets, and Ajax4Jsf.
Appendix A covers sending email from Java EE Applications.
Appendix B covers IDE integration.
For More Information:
www.packtpub.com/Java-EE-5-GlassFish-Application-Servers/book
JavaServer Faces In this chapter, we will cover JavaServer Faces (JSF), the standard component framework of the Java EE platform. JSF applications consist of a number of JSPs for the user interface (other view technologies are supported, but JSP is the default), a series of managed beans that can serve to hold data entered in the JSPs and can also serve as controllers, and a confi guration fi le declaring all the managed beans and page navigation for the application.
Please note that JSF is a component framework that can use several different view technologies to generate the user interface. When using JSP as its view technology, tag libraries are used to render JSF components as HTML input fi elds. This chapter uses the terms "tag" and "component" interchangeably.
Developing Our First JSF Application To illustrate basic JSF concepts, we will develop a simple application consisting of two JSPs and a single managed bean.
As we mentioned in this chapter's introduction, the default view technology for JSF is JSP. A "JSF-enabled" JSP is nothing but a standard JSP using a number of JSF-specifi c tags. The following example shows what a typical JSF JSP looks like:
<%@ page language="java" contentType="text/html; charset=UTF-8" pageEncoding="UTF-8"%><%@ taglib uri="http://java.sun.com/jsf/core" prefix="f"%><%@ taglib uri="http://java.sun.com/jsf/html" prefix="h"%>
<!DOCTYPE html PUBLIC "-//W3C//DTD HTML 4.01 Transitional//EN" "http://www.w3.org/TR/html4/loose.dtd"><html><head><meta http-equiv="Content-Type" content="text/html; charset=UTF-8">

For More Information:
www.packtpub.com/Java-EE-5-GlassFish-Application-Servers/book
JavaServer Faces
[ 174 ]
<style type="text/css">.leftAlign { text-align: left;}.rightAlign { text-align: right;}</style><title>Enter Customer Data</title></head><body><f:view> <h:form> <h:messages></h:messages> <h:panelGrid columns="2" columnClasses="rightAlign,leftAlign"> <h:outputText value="First Name:"> </h:outputText> <h:inputText label="First Name" value="#{Customer.firstName}" required="true"> <f:validateLength minimum="2" maximum="30"></f:validateLength> </h:inputText> <h:outputText value="Last Name:"></h:outputText> <h:inputText label="Last Name" value="#{Customer.lastName}" required="true"> <f:validateLength minimum="2" maximum="30"></f:validateLength> </h:inputText> <h:outputText value="Email:"> </h:outputText> <h:inputText label="Email" value="#{Customer.email}"> <f:validateLength minimum="3" maximum="30"></f:validateLength> </h:inputText> <h:panelGroup></h:panelGroup> <h:commandButton action="save" value="Save"></h:commandButton> </h:panelGrid> </h:form></f:view></body></html>

For More Information:
www.packtpub.com/Java-EE-5-GlassFish-Application-Servers/book
Chapter 6
[ 175 ]
The following screenshot illustrates how this JSP renders in the browser.
T he above screenshot, of course, was taken after entering some data in every text fi eld; originally, each text fi eld was blank.
Pretty much any JSF-enabled JSP will include the two tag libraries illustrated in the example. The fi rst tag library (<%@ taglib uri="http://java.sun.com/jsf/core" prefix="f"%>) is the core JSF tag library, by convention, the prefi x "f" (for "faces") is used when using this tag library.
The second tag library (<%@ taglib uri="http://java.sun.com/jsf/html" prefix="h"%>) is for tags that render HTML components; by convention, the prefi x "h" (for "HTML") is used when using this tag library.
The example opposite contains some of the most frequently used JSF tags. The fi rst tag we see in the example is the <f:view> tag, which tells the container that JSF is used to manage the components inside of it. Any JSF tags (core, HTML, or custom) must be placed inside the <f:view> tag.
The next tag we see is the <h:form> tag. This tag generates an HTML form when the JSP is rendered. As can be seen in the example, there is no need to specify an action or a method attribute for this tag; as a matter of fact, there is no action attribute nor method attribute for this tag. The action attribute for the rendered HTML form will be generated automatically, and the method attribute will always be "post".
The next tag we see is the <h:messages> tag. As its name implies, this tag is used to display any messages. As we will see shortly, JSF can automatically generate validation messages; these will be displayed inside this tag. Additionally, arbitrary messages can be added programmatically via the addMessage() method defi ned in javax.faces.context.FacesContext.

For More Information:
www.packtpub.com/Java-EE-5-GlassFish-Application-Servers/book
JavaServer Faces
[ 176 ]
The next JSF tag we see is <h:panelGrid>. This tag is roughly equivalent to an HTML table, but it works a bit differently. Instead of declaring rows and columns, the <h:panelGrid> tag has a columns attribute; the value of this attribute indicates the number of columns in the table rendered by this tag. As we place components inside this tag, they will be placed in a row until the number of columns defi ned in the columns attribute is reached, and then the next component will be placed in the next row. In the example, the value of the columns attribute is two, therefore the fi rst two tags will be placed in the fi rst row, the next two will be placed in the second row, and so forth.
Another interesting attribute of <h:panelGrid> is the columnClasses attribute. This attribute assigns a CSS class to each column in the rendered table. In the example, two CSS classes (separated by a comma) are used as the value for this attribute. This has the effect of assigning the fi rst CSS class to the fi rst column, and the second one to the second column. Had there been three or more columns, the third one would have gotten the fi rst CSS class, the fourth one the second one, and so on, alternating between the fi rst one and the second one. To clarify how this works, the next code snippet illustrates a portion of the source of the HTML markup generated by our sample JSP.
<table> <tbody> <tr> <td class="rightAlign"> First Name: </td> <td class="leftAlign"> <input type="text" name="j_id_id18:j_id_id27" /></td> </tr> <tr> <td class="rightAlign"> Last Name: </td> <td class="leftAlign"> <input type="text" name="j_id_id18:j_id_id34" /> </td> </tr> <tr> <td class="rightAlign">Email:</td> <td class="leftAlign"> <input type="text" name="j_id_id18:j_id_id42" /> </td> </tr> <tr>
For More Information:
www.packtpub.com/Java-EE-5-GlassFish-Application-Servers/book
Chapter 6
[ 177 ]
<td class="rightAlign"></td> <td class="leftAlign"> <input type="submit" name="j_id_id18:j_id_id49" value="Save" /> </td> </tr> </tbody></table>
Notice how each <td> tag has an alternating CSS tag of "rightAlign" or "leftAlign"; we achieved this by assigning the value "rightAlign,leftAlign" to the columnClasses attribute of <h:panelGrid>.
At this point in the example, we start adding components inside <h:panelGrid>. These components will be rendered inside the table rendered by <h:panelGrid>. As we mentioned before, the number of columns in the rendered table is defi ned by the columns attribute of <h:panelGrid>. Therefore, we don't need to worry about columns (or rows); we just start adding components and they will be placed in the right place.
The next tag we see is the <h:outputText> tag. This tag is similar to the core JSTL <c:out> tag. It outputs the text or expression in its value attribute to the rendered page.
Next, we see the <h:inputText> tag. This tag generates a text fi eld in the rendered page; its label attribute is used for any validation messages. It lets the user know what fi eld the message refers to.
Although it is not required for the value of the label attribute of <h:inputText> to match the label displayed on the page, it is highly recommended to use this value. This will let the user know exactly what fi eld the message is referring to.
Of particular interest is the tag's value attribute. What we see as the value for this attribute is a value binding expression. What this means is that this value is tied to a property of one of the application's managed beans. In the example, this particular text fi eld is tied to a property called firstName in a managed bean called Customer. When a user enters a value for this text fi eld and submits the form, the corresponding property in the managed bean is updated with this value. The tag's required attribute is optional and valid values for it are true and false. If this attribute is set to true, the container will not let the user submit the form until the user enters some data for the text fi eld.
For More Information:
www.packtpub.com/Java-EE-5-GlassFish-Application-Servers/book
JavaServer Faces
[ 178 ]
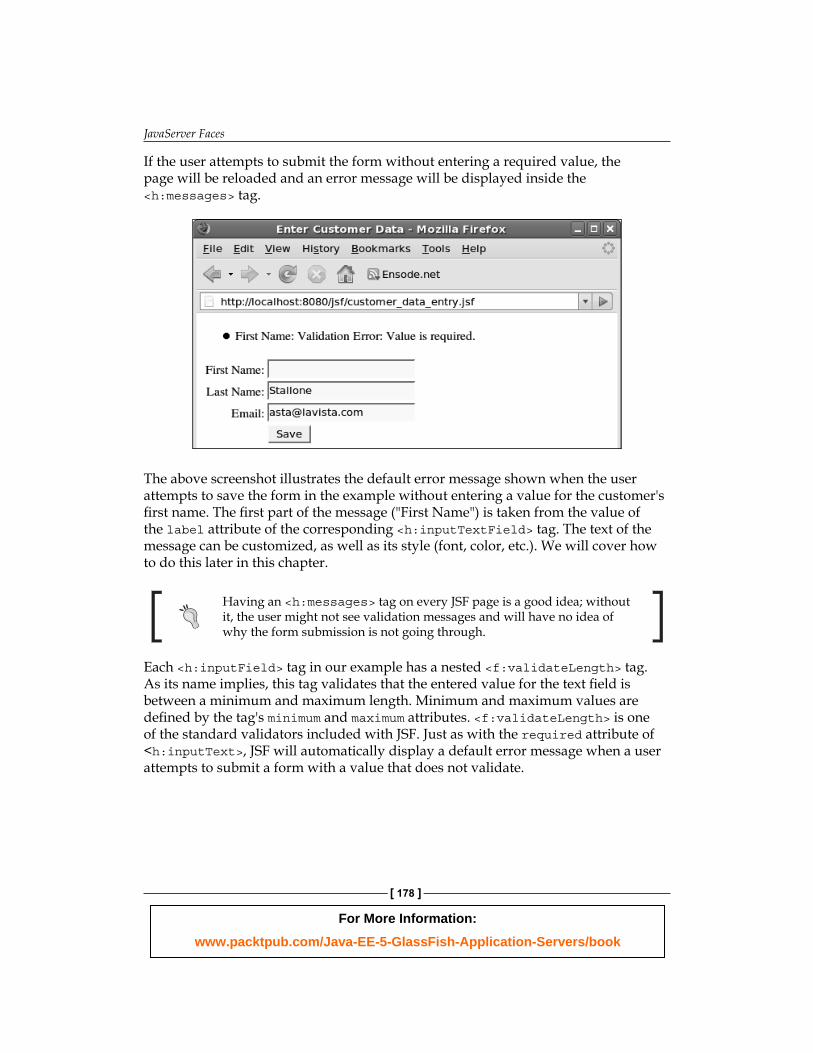
If the user attempts to submit the form without entering a required value, the page will be reloaded and an error message will be displayed inside the <h:messages> tag.
The above screenshot illustrates the default error message shown when the user attempts to save the form in the example without entering a value for the customer's fi rst name. The fi rst part of the message ("First Name") is taken from the value of the label attribute of the corresponding <h:inputTextField> tag. The text of the message can be customized, as well as its style (font, color, etc.). We will cover how to do this later in this chapter.
Having an <h:messages> tag on every JSF page is a good idea; without it, the user might not see validation messages and will have no idea of why the form submission is not going through.
Each <h:inputField> tag in our example has a nested <f:validateLength> tag. As its name implies, this tag validates that the entered value for the text fi eld is between a minimum and maximum length. Minimum and maximum values are defi ned by the tag's minimum and maximum attributes. <f:validateLength> is one of the standard validators included with JSF. Just as with the required attribute of <h:inputText>, JSF will automatically display a default error message when a user attempts to submit a form with a value that does not validate.

For More Information:
www.packtpub.com/Java-EE-5-GlassFish-Application-Servers/book
Chapter 6
[ 179 ]
Again, the default message and style can be overridden; we will cover how to do this in the next section.
In addition to <f:validateLength> JSF includes two other standard validators: <f:validateDoubleRange> validates that the value is a valid Double value between the two values specifi ed by the tag's minimum and maximum attributes, inclusive. <f:validateLongRange> validates that the value is a valid Long value between the values specifi ed by the tag's minimum and maximum attributes.
<h:panelGroup> is the next new tag in the example. Typically, <h:panelGroup> is used to group several components together so that they occupy a single cell in an <h:panelGrid>. This can be accomplished by adding components inside <h:panelGroup> and adding <h:panelGroup> to <h:panelGrid>. As can be seen in the example, this particular instance of <h:panelGroup> has no child components. In this particular case, the purpose of <h:panelGroup> is to have an "empty" cell and have the next component, <h:commandButton>, align with all other input fi elds in the form.
<h:commandButton> renders an HTML input fi eld in the browser, just as with standard HTML and JSPs; its purpose is to submit the form. Its value attribute simply sets the button's label. This tag's action attribute is used for navigation; the next JSP to show is based on the value of this attribute. The action attribute can have a String constant or Unifi ed Expression Language as its value; additionally it can have a method binding expression, mea ning that it can point to a method in a managed bean that returns a String. We will see an example of a <h:commandButton> tag whose action attribute is a method-binding expression later in this chapter.

For More Information:
www.packtpub.com/Java-EE-5-GlassFish-Application-Servers/book
JavaServer Faces
[ 180 ]
Even though the label for the button reads Save, clicking on the button won't actually save any data. Later in this chapter, we will see a more advanced version of this application that will actually implement this functionality.
Navigation rules and managed beans are defi ned in a confi guration fi le called faces-config.xml. This fi le must be placed in the WEB-INF folder of the application's WAR fi le. The faces-config.xml fi le for our example application looks like this:
<faces-config xmlns="http://java.sun.com/xml/ns/javaee" xmlns:xsi="http://www.w3.org/2001/XMLSchema-instance" xsi:schemaLocation="http://java.sun.com/xml/ns/javaee http:// java.sun.com/xml/ns/javaee/web-facesconfig_1_2.xsd" version="1.2">
<managed-bean> <managed-bean-name>Customer</managed-bean-name> <managed-bean-class> net.ensode.glassfishbook.jsf.Customer </managed-bean-class> <managed-bean-scope>request</managed-bean-scope> </managed-bean>
<navigation-rule> <from-view-id>/customer_data_entry.jsp</from-view-id> <navigation-case> <from-outcome>save</from-outcome> <to-view-id>/confirmation.jsp</to-view-id> </navigation-case> </navigation-rule></faces-config>
The <managed-bean> element defi nes a managed bean that can be used for value-binding and method binding expressions. Its nested <managed-bean-name> element defi nes a logical name for this managed bean. The <managed-bean-class> element must contain the fully qualifi ed name of the managed bean's class. The <managed-bean-scope> element indicates the scope of the bean. Valid values for this element include request, session, application, and none. The managed bean will be attached as an attribute of the specifi ed scope. Several managed beans can be declared in this manner. In our example application, there is only one managed bean. Its source code is shown in the following code listing:
package net.ensode.glassfishbook.jsf;
public class Customer{
For More Information:
www.packtpub.com/Java-EE-5-GlassFish-Application-Servers/book
Chapter 6
[ 181 ]
private String firstName;
private String lastName;
private String email;
public String getEmail() { return email; }
public void setEmail(String email) { this.email = email; }
public String getFirstName() { return firstName; }
public void setFirstName(String firstName) { this.firstName = firstName; }
public String getLastName() { return lastName; }
public void setLastName(String lastName) { this.lastName = lastName; }}
Notice that there is nothing special about this bean. It is a standard JavaBean with private properties and corresponding getter and setter methods.
The next tag we see in faces-config.xml is the <navigation-rule> tag. This tag defi nes where a page will navigate after a certain outcome. In this example, this navigation rule ties to the <h:commandButton> tag that had a value for its action attribute of "save". When the form is submitted, the container will look for an action of "save", as defi ned in the <from-outcome> element in the above faces-config.xml, and navigate to the JSP defi ned in the <to-view-id> element (/confirmation.jsp in this case). Each <navigation-rule> element must have only one <from-view-id> child element, but it can have several <navigation-case> elements, one for each outcome.
For More Information:
www.packtpub.com/Java-EE-5-GlassFish-Application-Servers/book
JavaServer Faces
[ 182 ]
Same page reloading when clicking on a button or link that should navigate to another page?When JSF does not recognize the value of a <to-view-id> element in faces-config.xml, it will by default navigate to the same page that was displayed in the browser when the user clicked on a button or link that is meant to navigate to another page.Notice that the values for <from-view-id> and <to-view-id> start with a slash and match the exact name and location of a JSP in the application. If there is a typo in the value for one or both of these elements, navigation will not work correctly. A common mistake is to forget to add the slash at the beginning of these values.
As can be seen in faces-config.xml, when the user clicks on the "save" button from the customer_data_entry.jsp, our application will navigate to a JSP called confirmation.jsp. The source for this JSP looks like this:
<%@ page language="java" contentType="text/html; charset=UTF-8" pageEncoding="UTF-8"%><%@ taglib uri="http://java.sun.com/jsf/core" prefix="f"%><%@ taglib uri="http://java.sun.com/jsf/html" prefix="h"%><!DOCTYPE html PUBLIC "-//W3C//DTD HTML 4.01 Transitional//EN" "http://www.w3.org/TR/html4/loose.dtd"><html><head><meta http-equiv="Content-Type" content="text/html; charset=UTF-8">
<title>Customer Data Entered</title></head><body><p>The following data was entered:</p><f:view> <h:panelGrid columns="2"> <h:outputText value="First Name:"></h:outputText> <h:outputText value="#{Customer.firstName}"></h:outputText> <h:outputText value="Last Name:"></h:outputText> <h:outputText value="#{Customer.lastName}"></h:outputText> <h:outputText value="Email:"></h:outputText> <h:outputText value="#{Customer.email}"></h:outputText> </h:panelGrid></f:view></body></html>
For More Information:
www.packtpub.com/Java-EE-5-GlassFish-Application-Servers/book
Chapter 6
[ 183 ]
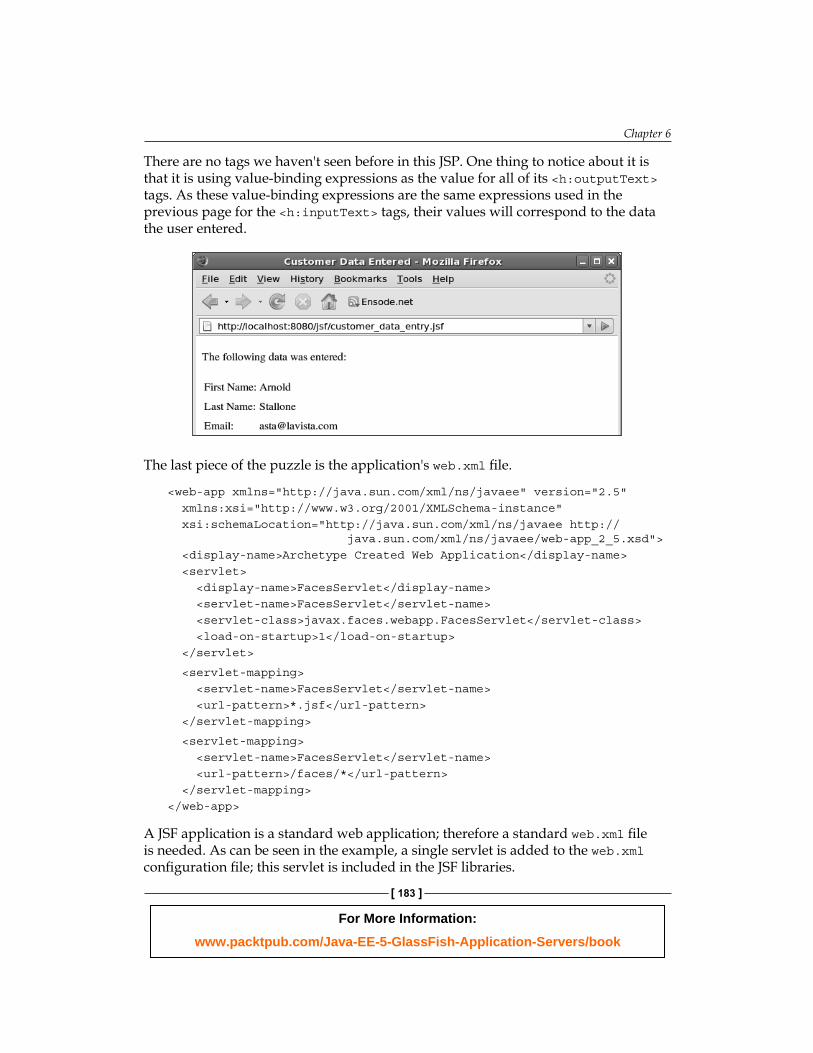
There are no tags we haven't seen before in this JSP. One thing to notice about it is that it is using value-binding expressions as the value for all of its <h:outputText> tags. As these value-binding expressions are the same expressions used in the previous page for the <h:inputText> tags, their values will correspond to the data the user entered.
The last piece of the puzzle is the application's web.xml fi le.
<web-app xmlns="http://java.sun.com/xml/ns/javaee" version="2.5" xmlns:xsi="http://www.w3.org/2001/XMLSchema-instance" xsi:schemaLocation="http://java.sun.com/xml/ns/javaee http:// java.sun.com/xml/ns/javaee/web-app_2_5.xsd"> <display-name>Archetype Created Web Application</display-name> <servlet> <display-name>FacesServlet</display-name> <servlet-name>FacesServlet</servlet-name> <servlet-class>javax.faces.webapp.FacesServlet</servlet-class> <load-on-startup>1</load-on-startup> </servlet>
<servlet-mapping> <servlet-name>FacesServlet</servlet-name> <url-pattern>*.jsf</url-pattern> </servlet-mapping>
<servlet-mapping> <servlet-name>FacesServlet</servlet-name> <url-pattern>/faces/*</url-pattern> </servlet-mapping></web-app>
A JSF application is a standard web application; therefore a standard web.xml fi le is needed. As can be seen in the example, a single servlet is added to the web.xml confi guration fi le; this servlet is included in the JSF libraries.
For More Information:
www.packtpub.com/Java-EE-5-GlassFish-Application-Servers/book
JavaServer Faces
[ 184 ]
It is customary to use a suffi x mapping of .jsf or a prefi x mapping of /faces/ to access the FacesServlet. This example declares both mappings.
Custom Data ValidationIn a ddition to providing standard validators for our use, JSF allows us to create custom validators. This can be done in one of two ways: by creating a custom validator class or by adding validation methods to our managed beans.
Creating Custom ValidatorsIn a ddition to the standard validators, JSF allows us to create custom validators by creating a Java class implementing the javax.faces.validator.Validator interface.
The following class implements an email address validator, which we will use to validate the email text input fi eld in our customer data entry screen.
package net.ensode.glassfishbook.jsfcustomval;
import javax.faces.application.FacesMessage;import javax.faces.component.UIComponent;import javax.faces.component.html.HtmlInputText;import javax.faces.context.FacesContext;import javax.faces.validator.Validator;import javax.faces.validator.ValidatorException;
public class EmailValidator implements Validator{
public void validate(FacesContext facesContext, UIComponent uiComponent, Object value) throws ValidatorException { org.apache.commons.validator.EmailValidator emailValidator = org.apache.commons.validator.EmailValidator .getInstance(); HtmlInputText htmlInputText = (HtmlInputText) uiComponent;
if (!emailValidator.isValid((String) value)) { FacesMessage facesMessage = new FacesMessage(htmlInputText.getLabel() + ": email format is not valid"); throw new ValidatorException(facesMessage); } }}

For More Information:
www.packtpub.com/Java-EE-5-GlassFish-Application-Servers/book
Chapter 6
[ 185 ]
As can be seen in the example, the only method we need to implement when implementing the Validator interface is a method called validate(). This method takes three parameters, an instance of javax.faces.context.FacesContext, an instance of javax.faces.component.UIComponent, and an object. Typically, application developers only need to be concerned with the last two. The second parameter is the component whose data we are validating; the third parameter is the actual value. In the example, we cast uiComponent to javax.faces.component.html.HtmlInputText; this way we get access to its getLabel() method, which we can use as part of the error message.
If the entered value is not a valid email address format, a new instance of javax.faces.application.FacesMessage is created, passing the error message to be displayed in the browser as its constructor parameter. We then throw a new javax.faces.validator.ValidatorException. The error message is then displayed in the browser; how it gets there is done behind the scenes by the JSF API. The next screenshot illustrates the above validator in action.
Apache Commons Validator The validator opposite uses Apache Commons Validator to do the actual validation. This library includes many common validations like dates, credit card numbers, ISBN numbers, and emails. When implementing a custom validator, it is worth investigating if this library already has a validator that we can use.
In order to use our validator in our page, we need to use the <f:validator> JSF tag. The following JSP is a modifi ed version of the customer data entry screen. This version uses the <f:validator> tag to validate email addresses.
<%@ page language="java" contentType="text/html; charset=UTF-8" pageEncoding="UTF-8"%><%@ taglib uri="http://java.sun.com/jsf/core" prefix="f"%><%@ taglib uri="http://java.sun.com/jsf/html" prefix="h"%>
<!DOCTYPE html PUBLIC "-//W3C//DTD HTML 4.01 Transitional//EN" "http://www.w3.org/TR/html4/loose.dtd"><html><head><meta http-equiv="Content-Type" content="text/html; charset=UTF-8"><style type="text/css">.leftAlign { text-align: left;}.rightAlign { text-align: right;}</style><title>Enter Customer Data</title></head><body>

For More Information:
www.packtpub.com/Java-EE-5-GlassFish-Application-Servers/book
JavaServer Faces
[ 186 ]
<f:view> <h:form> <h:messages></h:messages> <h:panelGrid columns="2" columnClasses="rightAlign,leftAlign"> <h:outputText value="First Name:"> </h:outputText> <h:inputText label="First Name" value="#{Customer.firstName}" required="true"> <f:validateLength minimum="2" maximum="30"></f:validateLength> </h:inputText> <h:outputText value="Last Name:"></h:outputText> <h:inputText label="Last Name" value="#{Customer.lastName}" required="true"> <f:validateLength minimum="2" maximum="30"></f:validateLength> </h:inputText> <h:outputText value="Email:"> </h:outputText> <h:inputText label="Email" value="#{Customer.email}"> <f:validator validatorId="emailValidator" /> </h:inputText> <h:panelGroup></h:panelGroup> <h:commandButton action="save" value="Save"></h:commandButton> </h:panelGrid> </h:form></f:view></body></html>
In addition to creating the Validator class and using the <f:validator> tag, the custom validator class must be declared in the application's faces-config.xml fi le.
<faces-config xmlns="http://java.sun.com/xml/ns/javaee" xmlns:xsi="http://www.w3.org/2001/XMLSchema-instance" xsi:schemaLocation="http://java.sun.com/xml/ns/javaee http:// java.sun.com/xml/ns/javaee/web-facesconfig_1_2.xsd" version="1.2">
<managed-bean> <managed-bean-name>Customer</managed-bean-name> <managed-bean-class> net.ensode.glassfishbook.jsfcustomval.Customer </managed-bean-class> <managed-bean-scope>request</managed-bean-scope> </managed-bean>
<navigation-rule> <from-view-id>/customer_data_entry.jsp</from-view-id>

For More Information:
www.packtpub.com/Java-EE-5-GlassFish-Application-Servers/book
Chapter 6
[ 187 ]
<navigation-case> <from-outcome>save</from-outcome> <to-view-id>/confirmation.jsp</to-view-id> </navigation-case> </navigation-rule>
<validator> <validator-id>emailValidator</validator-id> <validator-class> net.ensode.glassfishbook.jsfcustomval.EmailValidator </validator-class> </validator></faces-config>
The <validator-id> element contains an application-unique identifi er for the validator. The <validator-class> contains the fully qualifi ed name for the validator.
After performing all of these steps for our application, redeploying it, and pointing the browser to the appropriate URL, we can see our validator in action.
Validator MethodsT he second way we can implement custom validation is by adding validation methods to one or more of the application's managed beans. The following Java class illustrates the use of validator methods for JSF validation:
package net.ensode.glassfishbook.jsfcustomval;
import javax.faces.application.FacesMessage;import javax.faces.component.UIComponent;import javax.faces.component.html.HtmlInputText;import javax.faces.context.FacesContext;

For More Information:
www.packtpub.com/Java-EE-5-GlassFish-Application-Servers/book
JavaServer Faces
[ 188 ]
import javax.faces.validator.ValidatorException;
import org.apache.commons.lang.StringUtils;
public class AlphaValidator{ public void validateAlpha(FacesContext facesContext, UIComponent uiComponent, Object value) throws ValidatorException { if (!StringUtils.isAlphaSpace((String) value)) { HtmlInputText htmlInputText = (HtmlInputText) uiComponent; FacesMessage facesMessage = new FacesMessage(htmlInputText.getLabel() + ": only alphabetic characters are allowed."); throw new ValidatorException(facesMessage); } }}
In this example, the class contains only the validator method. We can give our validator method any name we want; however, its return value must be void, and it must take the three parameters illustrated in the example, in that order. In other words, except for the method name, the signature of a validator method must be identical to the signature of the validate() method defi ned in the javax.faces.validator.Validator interface.
As we can see, the body of the above validator method is nearly identical to the body of our custom validator's validate() method. We check the value entered by the user to make sure it contains only alphabetic characters and/or spaces, if it does not, then we throw a ValidatorException passing an instance of FacesMessage containing an appropriate error message String.
StringUtilsI n the example, we used org.apache.commons.lang.StringUtils to perform the actual validation logic. In addition to the method used in the example, this class contains several methods for verifying that a String is numeric or alphanumeric. This class, part of the Jakarta commons-lang library, is very useful when writing custom validators.

For More Information:
www.packtpub.com/Java-EE-5-GlassFish-Application-Servers/book
Chapter 6
[ 189 ]
As every validator method must be in a managed bean, we need to declare the bean containing the validator method(s) in the application's faces-config.xml fi le.
<faces-config xmlns="http://java.sun.com/xml/ns/javaee" xmlns:xsi="http://www.w3.org/2001/XMLSchema-instance" xsi:schemaLocation="http://java.sun.com/xml/ns/javaee http:// java.sun.com/xml/ns/javaee/web-facesconfig_1_2.xsd" version="1.2">
<managed-bean> <managed-bean-name>Customer</managed-bean-name> <managed-bean-class> net.ensode.glassfishbook.jsfcustomval.Customer </managed-bean-class> <managed-bean-scope>request</managed-bean-scope> </managed-bean>
<managed-bean> <managed-bean-name>AlphaValidator</managed-bean-name> <managed-bean-class> net.ensode.glassfishbook.jsfcustomval.AlphaValidator </managed-bean-class> <managed-bean-scope>application</managed-bean-scope> </managed-bean>
<navigation-rule> <from-view-id>/customer_data_entry.jsp</from-view-id> <navigation-case> <from-outcome>save</from-outcome> <to-view-id>/confirmation.jsp</to-view-id> </navigation-case> </navigation-rule>
<validator> <validator-id>emailValidator</validator-id> <validator-class> net.ensode.glassfishbook.jsfcustomval.EmailValidator </validator-class> </validator></faces-config>
The last thing we need to do to use our validator method is to bind it to our component via the tag's validator attribute.
<%@ page language="java" contentType="text/html; charset=UTF-8" pageEncoding="UTF-8"%><%@ taglib uri="http://java.sun.com/jsf/core" prefix="f"%><%@ taglib uri="http://java.sun.com/jsf/html" prefix="h"%>
<!DOCTYPE html PUBLIC "-//W3C//DTD HTML 4.01 Transitional//EN"

For More Information:
www.packtpub.com/Java-EE-5-GlassFish-Application-Servers/book
JavaServer Faces
[ 190 ]
"http://www.w3.org/TR/html4/loose.dtd"><html><head><meta http-equiv="Content-Type" content="text/html; charset=UTF-8"><style type="text/css">.leftAlign { text-align: left;}.rightAlign { text-align: right;}</style><title>Enter Customer Data</title></head><body><f:view> <h:form> <h:messages></h:messages> <h:panelGrid columns="2" columnClasses="rightAlign,leftAlign"> <h:outputText value="First Name:"> </h:outputText> <h:inputText label="First Name" value="#{Customer.firstName}" required="true" validator="#{AlphaValidator.validateAlpha}"> <f:validateLength minimum="2" maximum="30"></f:validateLength> </h:inputText> <h:outputText value="Last Name:"></h:outputText> <h:inputText label="Last Name" value="#{Customer.lastName}" required="true" validator="#{AlphaValidator.validateAlpha}"> <f:validateLength minimum="2" maximum="30"></f:validateLength> </h:inputText> <h:outputText value="Email:"> </h:outputText> <h:inputText label="Email" value="#{Customer.email}"> <f:validator validatorId="emailValidator" /> </h:inputText> <h:panelGroup></h:panelGroup> <h:commandButton action="save" value="Save"></h:commandButton> </h:panelGrid> </h:form></f:view></body></html>
For More Information:
www.packtpub.com/Java-EE-5-GlassFish-Application-Servers/book
Chapter 6
[ 191 ]
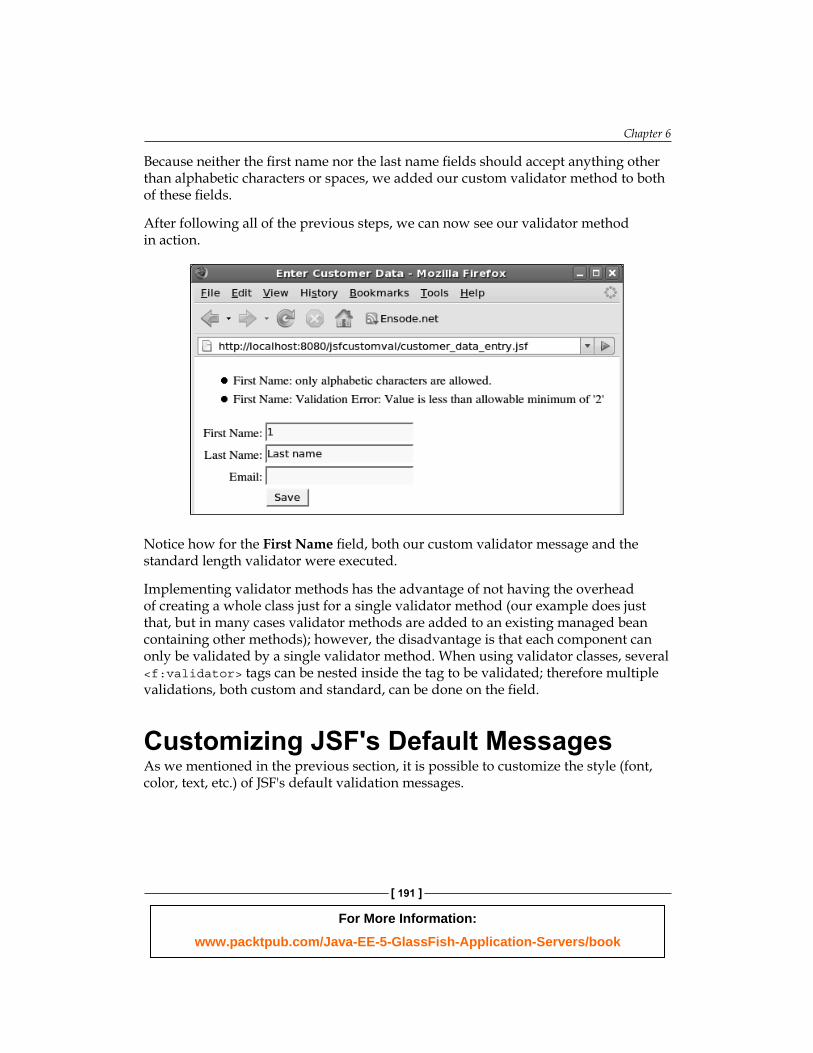
Because neither the fi rst name nor the last name fi elds should accept anything other than alphabetic characters or spaces, we added our custom validator method to both of these fi elds.
After following all of the previous steps, we can now see our validator method in action.
Notice how for the First Name fi eld, both our custom validator message and the standard length validator were executed.
Implementing validator methods has the advantage of not having the overhead of creating a whole class just for a single validator method (our example does just that, but in many cases validator methods are added to an existing managed bean containing other methods); however, the disadvantage is that each component can only be validated by a single validator method. When using validator classes, several <f:validator> tags can be nested inside the tag to be validated; therefore multiple validations, both custom and standard, can be done on the fi eld.
Customizing JSF's Default MessagesAs we mentioned in the previous section, it is possible to customize the style (font, color, text, etc.) of JSF's default validation messages.
For More Information:
www.packtpub.com/Java-EE-5-GlassFish-Application-Servers/book
JavaServer Faces
[ 192 ]
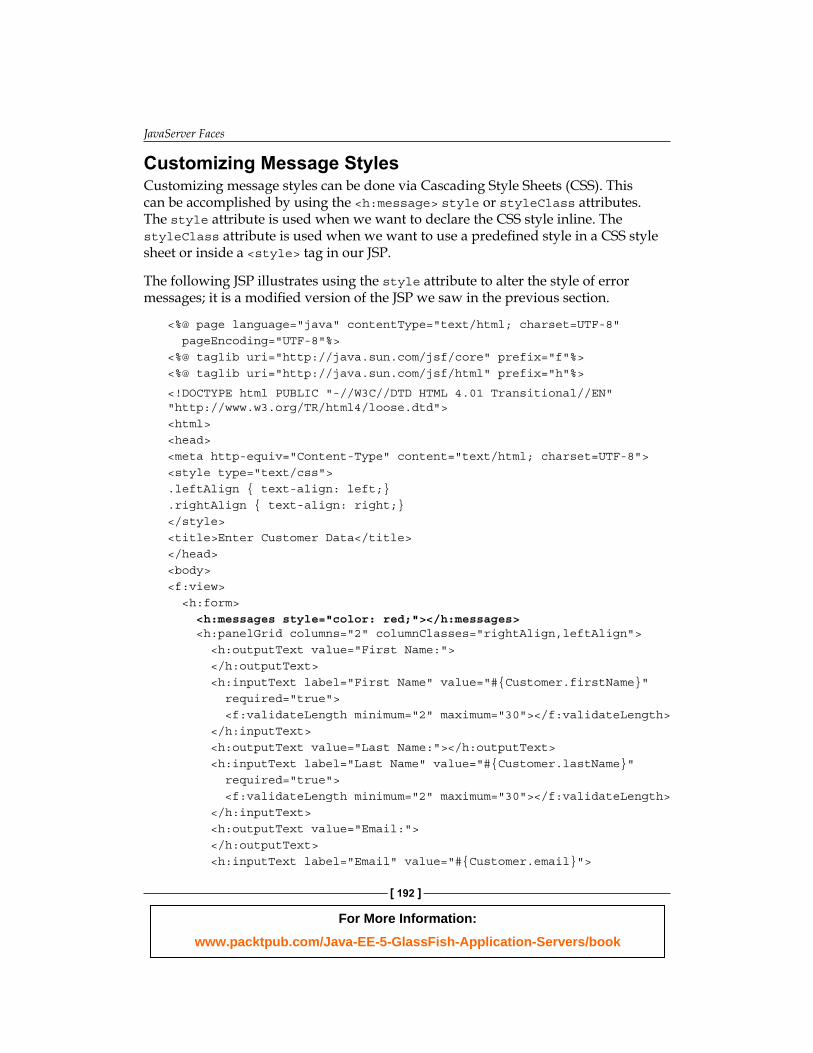
Customizing Message StylesCu stomizing message styles can be done via Cascading Style Sheets (CSS). This can be accomplished by using the <h:message> style or styleClass attributes. The style attribute is used when we want to declare the CSS style inline. The styleClass attribute is used when we want to use a predefi ned style in a CSS style sheet or inside a <style> tag in our JSP.
The following JSP illustrates using the style attribute to alter the style of error messages; it is a modifi ed version of the JSP we saw in the previous section.
<%@ page language="java" contentType="text/html; charset=UTF-8" pageEncoding="UTF-8"%><%@ taglib uri="http://java.sun.com/jsf/core" prefix="f"%><%@ taglib uri="http://java.sun.com/jsf/html" prefix="h"%>
<!DOCTYPE html PUBLIC "-//W3C//DTD HTML 4.01 Transitional//EN" "http://www.w3.org/TR/html4/loose.dtd"><html><head><meta http-equiv="Content-Type" content="text/html; charset=UTF-8"><style type="text/css">.leftAlign { text-align: left;}.rightAlign { text-align: right;}</style><title>Enter Customer Data</title></head><body><f:view> <h:form> <h:messages style="color: red;"></h:messages> <h:panelGrid columns="2" columnClasses="rightAlign,leftAlign"> <h:outputText value="First Name:"> </h:outputText> <h:inputText label="First Name" value="#{Customer.firstName}" required="true"> <f:validateLength minimum="2" maximum="30"></f:validateLength> </h:inputText> <h:outputText value="Last Name:"></h:outputText> <h:inputText label="Last Name" value="#{Customer.lastName}" required="true"> <f:validateLength minimum="2" maximum="30"></f:validateLength> </h:inputText> <h:outputText value="Email:"> </h:outputText> <h:inputText label="Email" value="#{Customer.email}">

For More Information:
www.packtpub.com/Java-EE-5-GlassFish-Application-Servers/book
Chapter 6
[ 193 ]
<f:validator validatorId="emailValidator" /> </h:inputText> <h:panelGroup></h:panelGroup> <h:commandButton action="save" value="Save"></h:commandButton> </h:panelGrid> </h:form></f:view></body></html>
As we can see, the only difference between this page and the previous one is the use of the style attribute of the <h:messages> tag. The following screenshot illustrates how the validation error messages look after implementing this change:
In this particular case, we just set the color of the error message text to red, but we are only limited by CSS capabilities in setting the style of the error messages.
Pretty much any standard JSF component has both a style and a styleClass attribute that can be used to alter its style. The former is used for predefi ned CSS styles, the latter is used for inline CSS.
Customizing Message TextSom e times it is desirable to override JSF's default validation errors. Default validation errors are defi ned in a resource bundle called Messages.properties. This fi le can be found inside the jsf-impl.jar fi le under [glassfish installation directory]/glassfish/lib. It can be found under the javax.faces folder inside the JAR fi le. The fi le contains several messages; we are only interested in validation errors at this point.

For More Information:
www.packtpub.com/Java-EE-5-GlassFish-Application-Servers/book
JavaServer Faces
[ 194 ]
The default validation error messages are defi ned as follows:
javax.faces.validator.NOT_IN_RANGE=Validation Error: Specified attribute is not between the expected values of {0} and {1}.javax.faces.validator.DoubleRangeValidator.MAXIMUM={1}: Validation Error: Value is greater than allowable maximum of "{0}"javax.faces.validator.DoubleRangeValidator.MINIMUM={1}: Validation Error: Value is less than allowable minimum of ''{0}''javax.faces.validator.DoubleRangeValidator.NOT_IN_RANGE={2}: Validation Error: Specified attribute is not between the expected values of {0} and {1}.javax.faces.validator.DoubleRangeValidator.TYPE={0}: Validation Error: Value is not of the correct typejavax.faces.validator.LengthValidator.MAXIMUM={1}: Validation Error: Value is greater than allowable maximum of ''{0}''javax.faces.validator.LengthValidator.MINIMUM={1}: Validation Error: Value is less than allowable minimum of ''{0}''javax.faces.validator.LongRangeValidator.MAXIMUM={1}: Validation Error: Value is greater than allowable maximum of ''{0}''javax.faces.validator.LongRangeValidator.MINIMUM={1}: Validation Error: Value is less than allowable minimum of ''{0}''javax.faces.validator.LongRangeValidator.NOT_IN_RANGE={2}: Validation Error: Specified attribute is not between the expected values of {0} and {1}.javax.faces.validator.LongRangeValidator.TYPE={0}: Validation Error: Value is not of the correct type.
In order to override the default error messages, we need to create our own resource bundle, using the same keys used in the default one, but altering the values to suit our needs. Here is a very simple customized resource bundle for our application:
javax.faces.validator.LengthValidator.MINIMUM={1}: minimum allowed length is ''{0}''
In this resource bundle, we override the error message for when the value entered for a fi eld validated by the <f:validateLength> tag is less than the allowed minimum. In order to let our application know that we have a custom resource bundle for message properties, we need to modify the application's faces-config.xml fi le.
<faces-config xmlns="http://java.sun.com/xml/ns/javaee" xmlns:xsi="http://www.w3.org/2001/XMLSchema-instance" xsi:schemaLocation="http://java.sun.com/xml/ns/javaee http:// java.sun.com/xml/ns/javaee/web-facesconfig_1_2.xsd" version="1.2"> <application> <message-bundle>net.ensode.Messages</message-bundle> </application>
<managed-bean>

For More Information:
www.packtpub.com/Java-EE-5-GlassFish-Application-Servers/book
Chapter 6
[ 195 ]
<managed-bean-name>Customer</managed-bean-name> <managed-bean-class> net.ensode.glassfishbook.jsfcustommess.Customer </managed-bean-class> <managed-bean-scope>request</managed-bean-scope> </managed-bean>
<navigation-rule> <from-view-id>/customer_data_entry.jsp</from-view-id> <navigation-case> <from-outcome>save</from-outcome> <to-view-id>/confirmation.jsp</to-view-id> </navigation-case> </navigation-rule>
<validator> <validator-id>emailValidator</validator-id> <validator-class> net.ensode.glassfishbook.jsfcustommess.EmailValidator </validator-class> </validator></faces-config>
As we can see, the only thing we need to do to the application's faces-config.xml fi le is to add a <message-bundle> element indicating the name and location of the resource bundle containing our custom messages.
After adding our custom message resource bundle and modifying the application's faces-config.xml fi le, we can see our custom validation message in action.

For More Information:
www.packtpub.com/Java-EE-5-GlassFish-Application-Servers/book
JavaServer Faces
[ 196 ]
As we can see, if we haven't overridden a validation message, the default will still be displayed. In our resource bundle, we only overrode the minimum length validation error message, therefore our custom error message is shown for the First Name text fi eld. As we didn't override the error message for data entry going over the maximum allowed length, the default error message is shown. The email validator is the custom validator we developed previously in this chapter; as it is a custom validator, its error message is not affected.
Integrating JSF and JPASo f ar we have covered most of the features of JSF; however, our example application does not actually save any data yet. In this section, we will cover how JavaServer Faces and the Java Persistence API can be easily integrated to save user input to a database.
As we have seen in this chapter, JSF managed beans are nothing but standard JavaBeans. In Chapter 4, we saw that JPA uses standard JavaBeans for object-relational mapping. As both JSF managed beans and JPA beans are standard JavaBeans, there is nothing stopping us from using JPA beans as JSF managed beans.
As we covered earlier, JSF tags can contain value-binding expressions, which are used to automatically populate managed beans when the form is submitted. If we use a JPA bean as a managed bean, the bean's properties are populated in this way. We can then simply call the EntityManager.persist() method to save the data into the database.
The fi rst thing we need to do is use a JPA bean as the managed bean to be used for value-binding expressions.
package net.ensode.glassfishbook.jsfjpa;
import java.io.Serializable;
import javax.persistence.Column;import javax.persistence.Entity;import javax.persistence.Id;import javax.persistence.Table;
@Entity@Table(name = "CUSTOMERS")public class Customer implements Serializable{ @Id @Column(name = "CUSTOMER_ID") private Long customerId;
@Column(name = "FIRST_NAME")
For More Information:
www.packtpub.com/Java-EE-5-GlassFish-Application-Servers/book
Chapter 6
[ 197 ]
private String firstName;
@Column(name = "LAST_NAME") private String lastName;
private String email;
public Long getCustomerId() { return customerId; }
public void setCustomerId(Long customerId) { this.customerId = customerId; }
public String getEmail() { return email; }
public void setEmail(String email) { this.email = email; }
public String getFirstName() { return firstName; }
public void setFirstName(String firstName) { this.firstName = firstName; }
public String getLastName() { return lastName; }
public void setLastName(String lastName) { this.lastName = lastName; }}
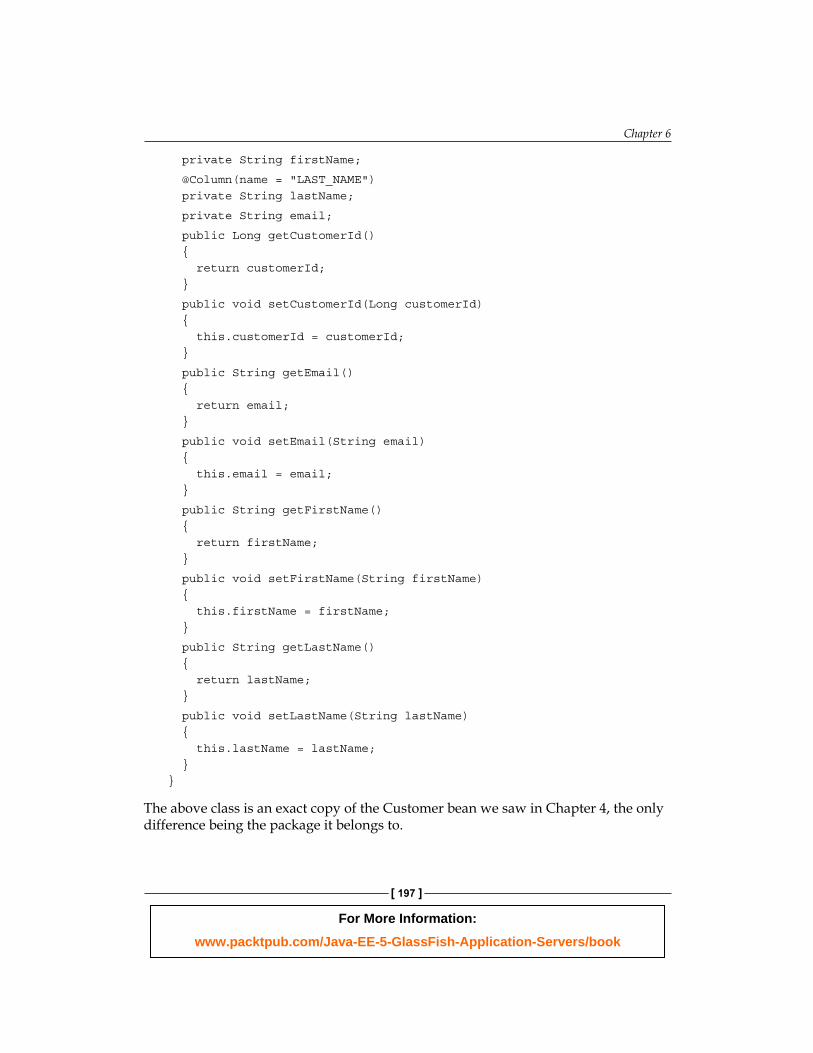
The above class is an exact copy of the Customer bean we saw in Chapter 4, the only difference being the package it belongs to.

For More Information:
www.packtpub.com/Java-EE-5-GlassFish-Application-Servers/book
JavaServer Faces
[ 198 ]
We then need to add an additional managed bean to be used as a controller, because it is always a good practice to follow the Model-View-Controller design pattern.
package net.ensode.glassfishbook.jsfjpa;
import java.sql.Connection;import java.sql.PreparedStatement;import java.sql.ResultSet;import java.sql.SQLException;
import javax.annotation.Resource;import javax.persistence.EntityManager;import javax.persistence.EntityManagerFactory;import javax.persistence.PersistenceUnit;import javax.sql.DataSource;import javax.transaction.UserTransaction;
public class CustomerController{ @Resource(name = "jdbc/__CustomerDBPool") private DataSource dataSource;
@PersistenceUnit(unitName = "customerPersistenceUnit") private EntityManagerFactory entityManagerFactory;
@Resource private UserTransaction userTransaction;
private Customer customer;
public String saveCustomer() { String returnValue = "success"; EntityManager entityManager = entityManagerFactory.createEntityManager();
try { userTransaction.begin();
Long customerId = getNewCustomerId(); customer.setCustomerId(customerId); entityManager.persist(customer);
userTransaction.commit(); } catch (Exception e) { e.printStackTrace(); returnValue = "failure"; }
return returnValue;
For More Information:
www.packtpub.com/Java-EE-5-GlassFish-Application-Servers/book
Chapter 6
[ 199 ]
}
private Long getNewCustomerId() { Connection connection; Long newCustomerId = null; try { connection = dataSource.getConnection(); PreparedStatement preparedStatement = connection .prepareStatement( "select max(customer_id)+1 as new_customer_id " + "from customers");
ResultSet resultSet = preparedStatement.executeQuery();
if (resultSet != null && resultSet.next()) { newCustomerId = resultSet.getLong("new_customer_id"); }
connection.close();
} catch (SQLException e) { e.printStackTrace(); }
return newCustomerId; }
public Customer getCustomer() { return customer; }
public void setCustomer(Customer customer) { this.customer = customer; }}
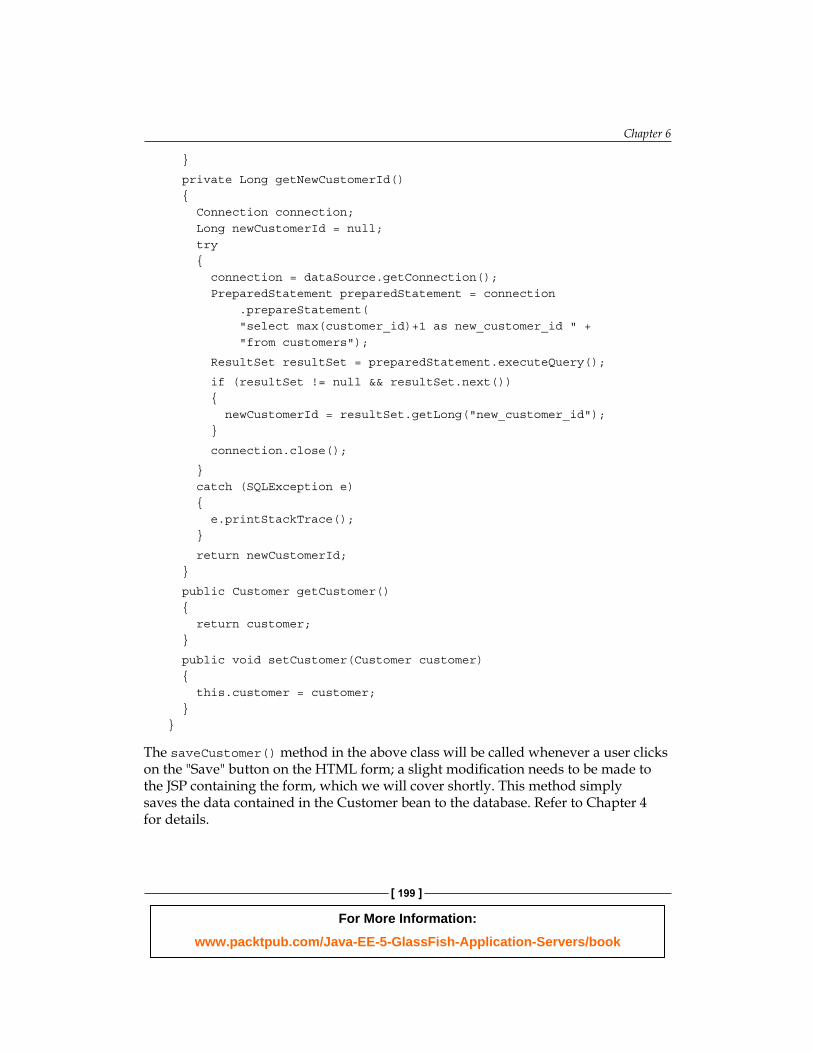
The saveCustomer() method in the above class will be called whenever a user clicks on the "Save" button on the HTML form; a slight modifi cation needs to be made to the JSP containing the form, which we will cover shortly. This method simply saves the data contained in the Customer bean to the database. Refer to Chapter 4 for details.

For More Information:
www.packtpub.com/Java-EE-5-GlassFish-Application-Servers/book
JavaServer Faces
[ 200 ]
Of special interest here are the setCustomer() and getCustomer() methods. These methods are not meant to be invoked directly by an application developer instead they should be invoked by GlassFish's JSF implementation with the appropriate instance of the Customer bean. We need to declare the customer property of this controller as a managed property. This can be accomplished by modifying the application's faces-config.xml fi le.
<faces-config xmlns="http://java.sun.com/xml/ns/javaee" xmlns:xsi="http://www.w3.org/2001/XMLSchema-instance" xsi:schemaLocation="http://java.sun.com/xml/ns/javaee http:// java.sun.com/xml/ns/javaee/web-facesconfig_1_2.xsd" version="1.2">
<managed-bean> <managed-bean-name>CustomerController</managed-bean-name> <managed-bean-class> net.ensode.glassfishbook.jsfjpa.CustomerController </managed-bean-class> <managed-bean-scope>request</managed-bean-scope> <managed-property> <property-name>customer</property-name> <property-class> net.ensode.glassfishbook.jsfjpa.Customer </property-class> <value>#{Customer}</value> </managed-property> </managed-bean>
<managed-bean> <managed-bean-name>Customer</managed-bean-name> <managed-bean-class> net.ensode.glassfishbook.jsfjpa.Customer </managed-bean-class> <managed-bean-scope>request</managed-bean-scope> </managed-bean>
<navigation-rule> <from-view-id>/save_customer.jsp</from-view-id> <navigation-case> <from-outcome>success</from-outcome> <to-view-id>/customer_saved.jsp</to-view-id> </navigation-case> <navigation-case> <from-outcome>failure</from-outcome> <to-view-id>/error_saving_customer.jsp</to-view-id> </navigation-case> </navigation-rule></faces-config>

For More Information:
www.packtpub.com/Java-EE-5-GlassFish-Application-Servers/book
Chapter 6
[ 201 ]
As can be seen in the example opposite, the <managed-property> tag contains a nested <property-name> tag that contains the name of the property to manage. Its value must match the bean's property name as declared in its Java code. The <property-class> element contains the fully qualifi ed class name of the property, and the <property-value> element contains a value-binding expression matching the <managed-bean-name> element for the bean corresponding to the property.
After we set up our faces-config.xml fi le in this way, the setCustomer() method of our controller class will automatically be called with the appropriate instance of the Customer bean.
Finally, in order for the saveCustomer() method to be called whenever the user submits the form and all fi elds validate correctly, we need to make a slight modifi cation to the customer data-entry JSP.
<%@ page language="java" contentType="text/html; charset=UTF-8" pageEncoding="UTF-8"%><%@ taglib uri="http://java.sun.com/jsf/core" prefix="f"%><%@ taglib uri="http://java.sun.com/jsf/html" prefix="h"%>
<!DOCTYPE html PUBLIC "-//W3C//DTD HTML 4.01 Transitional//EN" "http://www.w3.org/TR/html4/loose.dtd"><html><head><meta http-equiv="Content-Type" content="text/html; charset=UTF-8"><title>Save Customer</title></head><body><f:view> <h:form> <h:messages></h:messages> <table cellpadding="0" cellspacing="0" border="0"> <tr> <td align="right">First Name:</td> <td align="left"> <h:inputText label="First Name" value="#{Customer.firstName}" required="true"> <f:validateLength minimum="2" maximum="30"> </f:validateLength> </h:inputText></td> </tr> <tr> <td align="right">Last Name:</td> <td align="left"><h:inputText label="Last Name" value="#{Customer.lastName}" required="true"> <f:validateLength minimum="2" maximum="30">

For More Information:
www.packtpub.com/Java-EE-5-GlassFish-Application-Servers/book
JavaServer Faces
[ 202 ]
</f:validateLength> </h:inputText></td> </tr> <tr> <td align="right">Email:</td> <td align="left"><h:inputText label="Email" value="#{Customer.email}"> <f:validateLength minimum="2" maximum="30"> </f:validateLength> </h:inputText></td> </tr> <tr> <td></td> <td align="left"> <h:commandButton action="#{CustomerController.saveCustomer}" value="Save"></h:commandButton> </td> </tr> </table> </h:form></f:view></body></html>
The only signifi cant difference between this version of the JSP and previous versions is that the action attribute of the <h:commandButton> tag was changed to point to the saveCustomer() method of the CustomerController managed bean. As can be seen in the source code for this bean (shown earlier in this section), this method returns the String "success" if the data was saved successfully, or "failure" if there was any problem saving the data. These two values are used in the application's faces-config.xml fi le to decide what page to navigate to after this method ends: a confi rmation page if everything went well, or an error page if there was a problem. These navigation rules can be seen inside the <navigation-rule> element of the faces-config.xml fi le, which was also shown earlier in this section.
There are a few more changes made to this version of the data entry JSP, which are unrelated to the task at hand. First, for simplicity, we removed some of the features we covered earlier in the chapter (custom validators, error message styling, etc.). Additionally, and slightly more interestingly, we replaced the <h:panelGrid> component with a standard HTML table. Most JSP developers are very familiar with HTML, therefore using standard HTML components whenever possible leverages this knowledge and potentially makes the page markup more readable. In previous versions of the JSF specifi cation, it wasn't recommended to mix standard HTML and

For More Information:
www.packtpub.com/Java-EE-5-GlassFish-Application-Servers/book
Chapter 6
[ 203 ]
JSF tags inside the <f:view> tag, because doing so sometimes resulted in unexpected results. This restriction has been lifted in the latest version of the JSF specifi cation (JSF 1.2), which, of course, is part of the Java EE 5 specifi cation and is supported by GlassFish.
JSF Standard Components include several standard components; we have only covered a subset of these components so far. The following sections cover all available JSF components.
JSF Core Components JSF core components are components that are not tied to HTML rendering or any other rendering mechanism. They provide functionality like type conversion and validation, among others. In this section, we will cover all core JSF components.
<f:actionListener>This tag executes the processAction()method of the action listener defi ned by the tag's type attribute. The value of the type attribute must be the fully qualifi ed name of a class implementing the javax.faces.event.ActionListener interface. This tag is typically a child tag of <h:commandButton> or <h:commandLink>; when the user clicks on the parent component, the processAction() method of the declared ActionListener implementation is automatically executed. The following markup segment illustrates how this tag is typically used:
<h:commandButton action="save" value="Save"> <f:actionListener type="net.ensode.CustomActionListener"/></h:commandButton>
<f:attribute>This tag sets an attribute on the parent component, with a key defi ned by the tag's name attribute and a value defi ned by the tag's value attribute. All component attributes can later be programmatically retrieved as a Map by invoking the getAttributes() method of the appropriate instance of javax.faces.component.UIComponent. This tag is frequently used in conjunction with the <f:actionListener> class to pass parameters to the action listener.
The following markup segment illustrates typical use of this tag:
<h:commandButton action="save" value="Save"> <f:actionListener type="net.ensode.CustomActionListener"/> <f:attribute name="someAttribute" value="someValue"/></h:commandButton>

For More Information:
www.packtpub.com/Java-EE-5-GlassFish-Application-Servers/book
JavaServer Faces
[ 204 ]
The processAction() method of our CustomActionListener class would look something like this:
public void processAction(ActionEvent actionEvent){ String attribute = (String) actionEevent.getComponent().getAttributes(). get("attrname1"); //processing continues...}
<f:convertDateTime>This tag converts the value of the parent component into an instance of java.util.Date. This tag allows a correctly formatted user-entered string to be assigned to a date fi eld in a managed bean. The following segment of markup illustrates typical usage for this tag:
<h:inputText value="#{Customer.birthDate}"> <f:convertDateTime dateStyle="short"/></h:inputText>
<f:convertNumber>This tag converts the value of the parent component into an instance of java.lang.Number. This tag allows a correctly formatted user-entered string to be assigned to a numeric fi eld in a managed bean. As java.lang.Number is the parent class of java.lang.Integer, java.lang.Long, java.lang.Float, and java.lang.Double (among other numeric types), this tag can be used to convert pretty much any type of numeric data entry fi eld into the appropriate type.
The following markup segment illustrates typical usage for this tag:
<h:inputText value="#{Customer.age}"> <f:convertNumber/></h:inputText>
<f:converter>This tag registers the custom converter specifi ed by the tag's converterId attribute with the parent tag. The specifi ed converter must be a class implementing the javax.faces.convert.Converter interface and it must be registered in the application's faces-config.xml fi le via the <converter> tag.

For More Information:
www.packtpub.com/Java-EE-5-GlassFish-Application-Servers/book
Chapter 6
[ 205 ]
Suppose we have created a custom class named TelephoneNumber to store telephone numbers, and that a managed bean named Customer has a fi eld called telephone of type TelephoneNumber, we could create a custom validator to convert a user-entered telephone number into an instance of the TelephoneNumber class.
<h:inputText value="#{Customer.telephone}"> <f:converter converterId="TelephoneConverter"/></h:inputText>
As we explained, our custom converter would have to be registered in the application's faces-config.xml fi le.
<converter> <converter-id>TelephoneConverter</converter-id> <converter-class> net.ensode.TelephoneConverter </converter-class> </converter>
The TelephoneConverter class would have to implement javax.faces.convert.Converter.
<f:facet> This tag registers a facet on the parent component. A facet is a special child component that can be accessed via the UIComponent.getFacet() method. This method can be overridden for custom components; it allows components inside a facet to be treated differently. For example, the standard <h:dataTable> tag can have a facet named "header" that is used to render all components in the <f:facet> tag as the header of the rendered HTML table.
The following markup segment illustrates typical usage of this tag:
<h:dataTable value="{Order.items}" var="item"> <h:column> <f:facet name="header"> <h:outputText value="Item Number" /> </f:facet> <h:outputText value="#{item.itemNumber}" /> </h:column> <h:column> <f:facet name="header"> <h:outputText value="Item Description" /> </f:facet> <h:outputText value="#{item.itemShortDesc}" /> </h:column></h:dataTable>
For More Information:
www.packtpub.com/Java-EE-5-GlassFish-Application-Servers/book
JavaServer Faces
[ 206 ]
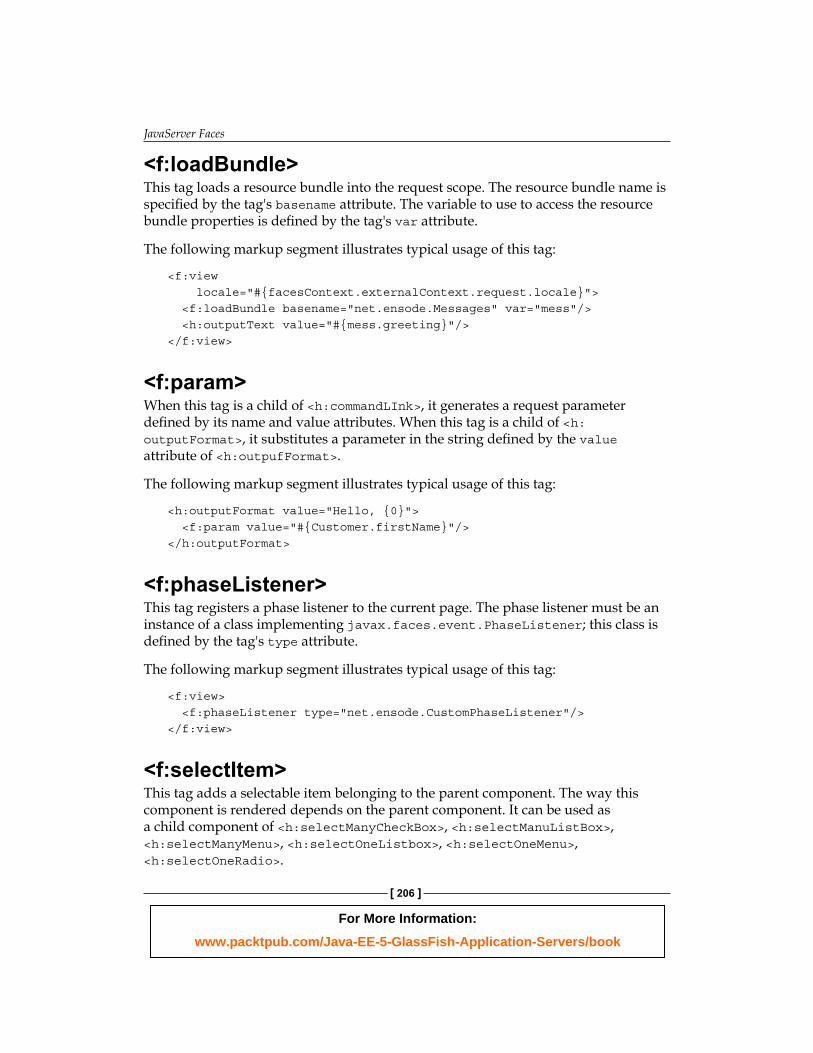
<f:loadBundle>This tag loads a resource bundle into the request scope. The resource bundle name is specifi ed by the tag's basename attribute. The variable to use to access the resource bundle properties is defi ned by the tag's var attribute.
The following markup segment illustrates typical usage of this tag:
<f:view locale="#{facesContext.externalContext.request.locale}"> <f:loadBundle basename="net.ensode.Messages" var="mess"/> <h:outputText value="#{mess.greeting}"/></f:view>
<f:param> When this tag is a child of <h:commandLInk>, it generates a request parameter defi ned by its name and value attributes. When this tag is a child of <h:outputFormat>, it substitutes a parameter in the string defi ned by the value attribute of <h:outpufFormat>.
The following markup segment illustrates typical usage of this tag:
<h:outputFormat value="Hello, {0}"> <f:param value="#{Customer.firstName}"/></h:outputFormat>
<f:phaseListener> This tag registers a phase listener to the current page. The phase listener must be an instance of a class implementing javax.faces.event.PhaseListener; this class is defi ned by the tag's type attribute.
The following markup segment illustrates typical usage of this tag:
<f:view> <f:phaseListener type="net.ensode.CustomPhaseListener"/></f:view>
<f:selectItem> This tag adds a selectable item belonging to the parent component. The way this component is rendered depends on the parent component. It can be used as a child component of <h:selectManyCheckBox>, <h:selectManuListBox>, <h:selectManyMenu>, <h:selectOneListbox>, <h:selectOneMenu>, <h:selectOneRadio>.

For More Information:
www.packtpub.com/Java-EE-5-GlassFish-Application-Servers/book
Chapter 6
[ 207 ]
The following markup segment illustrates typical usage of this tag.
<h:selectManyCheckBox value="#{Order.items}"> <f:selectItem itemValue="#{Item1}" itemLabel="Wireless keyboard"/> <f:selectItem itemValue="#{Item1}" itemLabel="Wireless mouse"/></h:selectManyCheckBox>
<f:selectItems> This tag adds a series to of selectable items belonging to the parent tag. This tag's value attribute must be a deferred-value expression resolving to an array or a List of javax.faces.model.SelectItem objects.
The following markup segment illustrates typical usage of this tag.
<h:selectManyCheckBox value="#{Order.items}"> <f:selectItems value="#{ValueContainer.allItems} "/></h:selectManyCheckBox>
<f:setPropertyActionListener> This tag can be a child tag of <h:commandLink> or <h:commandButton>. When the button or linked is clicked, this tag sets an attribute in a managed bean defi ned by the tag's target attribute with the value of the tag's value attribute.
The following markup segment illustrates typical usage of this tag.
<h:commandButton value="Save" action="#{Controller.save}"> <f:setPropertyActionListener target="#{Order.lastUpdUserId}" value="#{User.userId}"/></h:commandButton>
<f:subview> Any JSPs included via a <jsp:include> tag or JSTL's <c:import> tag must be inside an <f:subview> tag.
The following markup segment illustrates typical usage of this tag.
<f:view> <table> <tr> <td width="30%">

For More Information:
www.packtpub.com/Java-EE-5-GlassFish-Application-Servers/book
JavaServer Faces
[ 208 ]
<f:subview> <jsp:include page="menu.jsp"> </f:subview> </td> <td> Additional content here. </td> </tr> </table></f:view>
<f:validateDoubleRange>This tag validates that the value for the parent component is an instance of java.lang.Double that is between the values defi ned by the tag's minimum and maximum attributes.
The following markup segment illustrates typical usage of this tag.
<h:inputText value="#{Item.price}"> <f:validateDoubleRange minimum="1.0" maximum="100.0"/></h:inputText>
<f:validateLength>This tag validates that the value for the parent component is a string whose length is between the values defi ned by the tag's minimum and maximum attributes, inclusive.
The following markup segment illustrates typical usage of this tag.
<h:inputText label="First Name" value="#{Customer.firstName}" required="true"> <f:validateLength minimum="2" maximum="30"></f:validateLength></h:inputText>
<f:validateLongRange>This tag validates that the value for the parent component is an instance of java.lang.Long that is between the values defi ned by the tag's minimum and maximum attributes.
The following markup segment illustrates typical usage of this tag.
<h:inputText value="#{OrderItem.quantity}"> <f:validateDoubleRange minimum="1" maximum="100"/></h:inputText>

For More Information:
www.packtpub.com/Java-EE-5-GlassFish-Application-Servers/book
Chapter 6
[ 209 ]
<f:validator>This tag validates the value of the parent component against a custom validator implementing the javax.faces.validator.Validator interface. The custom validator must be declared in the application's faces-config.xml fi le.
The following markup segment illustrates typical usage of this tag.
<h:inputText label="Email" value="#{Customer.email}"> <f:validator validatorId="emailValidator" /></h:inputText>
<f:valueChangeListener>This tag registers an instance of a class implementing the javax.faces.event.ValueChangeListener interface with the parent component. The ValueChangeListener implementation will implement a processValueChange() method that can perform an action if the value of the parent component changes.
The following markup segment illustrates typical usage of this tag:
<h:inputText value="#{OrderItem.quantity}"> <f:valueChangeListener type="net.ensode.CustomValueChangeListener"/></h:inputText>
<f:verbatim> The content of this tag is passed "as-is" to the rendered page. Before JSF 1.2, it was not recommended to have HTML tags inside the JSF <f:view> tag, as they would sometimes not render properly. A common workaround to this limitation was to put standard HTML tags inside <f:verbatim> tags. As of JSF 1.2, this tag became somewhat redundant because it is now possible to safely place standard HTML tags inside the <f:view> tag.
The following markup segment illustrates typical usage of this tag:
<f:view> <f:verbatim><p></f:verbatim> This text will be rendered inside an HTML <p> tag. <f:verbatim></p></f:verbatim></f:view>
<f:view> This tag is the parent tag for all JSF tags, both standard and custom.
For More Information:
www.packtpub.com/Java-EE-5-GlassFish-Application-Servers/book
JavaServer Faces
[ 210 ]
The following markup segment illustrates typical usage of this tag:
<f:view> <h:outputText escape="true" value="All JSF components must be inside <f:view>"/></f:view>
JSF HTML Components In previous examples, we only covered a subset of the standard JSF HTML components. In this section, we will list all standard JSF HTML components.
<h:column> This tag is typically nested inside the <h:dataTable> tag. Any components inside this tag will be rendered as a single column inside the table rendered by <h:dataTable>.
The following markup segment illustrates typical usage of this tag.
<h:dataTable value="{Order.items}" var="item"> <h:column> <f:facet name="header"> <h:outputText value="Item Number" /> </f:facet> <h:outputText value="#{item.itemNumber}" /> </h:column> <h:column> <f:facet name="header"> <h:outputText value="Item Description" /> </f:facet> <h:outputText value="#{item.itemShortDesc}" /> </h:column></h:dataTable>
<h:commandButton>This tag renders an HTML submit button on the rendered page.
The following markup segment illustrates typical usage of this tag:
<h:form> <h:inputText label="First Name" value="#{Customer.firstName}"/> <h:commandButton action="save" value="Save"></h:commandButton> </h:form>

For More Information:
www.packtpub.com/Java-EE-5-GlassFish-Application-Servers/book
Chapter 6
[ 211 ]
<h:commandLink>This tag renders a link that will submit the form defi ned by this tag's parent <h:form> tag.
The following markup segment illustrates typical usage of this tag:
<h:form> <h:inputText label="First Name" value="#{Customer.firstName}"/> <h:commandLink action="save" value="Save"></h:commandLink> </h:form>
<h:dataTable>This tag builds a table dynamically based on the values of a Collection. The collection holding the values must be defi ned by the tag's value attribute.
The following markup segment illustrates typical usage of this tag:
<h:dataTable value="{Order.items}" var="item"> <h:column> <f:facet name="header"> <h:outputText value="Item Number" /> </f:facet> <h:outputText value="#{item.itemNumber}" /> </h:column> <h:column> <f:facet name="header"> <h:outputText value="Item Description" /> </f:facet> <h:outputText value="#{item.itemShortDesc}" /> </h:column></h:dataTable>
<h:form>This tag renders an HTML form on the generated page.
The following markup segment illustrates typical usage of this tag:
<h:form> <h:inputText label="First Name" value="#{Customer.firstName}"/> <h:commandLink action="save" value="Save"></h:commandLink></h:form>

For More Information:
www.packtpub.com/Java-EE-5-GlassFish-Application-Servers/book
JavaServer Faces
[ 212 ]
<h:graphicImage> This tag renders an HTML img tag.
The following markup segment illustrates typical usage of this tag:
<h:graphicImage url="/images/logo.png"></h:graphicImage>
<h:inputHidden> This tag renders an HTML hidden fi eld.
The following markup segment illustrates typical usage of this tag:
<h:inputHidden value="#{Customer.id}" />
<h:inputSecret> This tag renders an HTML input fi eld of type password.
The following markup segment illustrates typical usage of this tag:
<h:inputSecret redisplay="false" value="#{User.password}" />
<h:inputText> This tag renders an HTML input fi eld of type text.
The following markup segment illustrates typical usage of this tag:
<h:inputText label="First Name" value="#{Customer.firstName}"/>
<h:inputTextarea> This tag renders an HTML textarea fi eld.
The following markup segment illustrates typical usage of this tag:
<h:inputTextarea label="Comments" value="#{Order.comments}"/>

For More Information:
www.packtpub.com/Java-EE-5-GlassFish-Application-Servers/book
Chapter 6
[ 213 ]
<h:message> This tag renders messages for a single component. The component for which to render messages must use its id attribute to set an identifi er for itself. This identifi er then needs to be used as this element's for attribute.
The following markup segment illustrates typical usage of this tag:
<table> <tr> <td align="right"> <h:outputLabel
value="Login Name:" for="loginField"/></td> <td><h:inputText id="loginField" value="#{User.login}" required="true"/></td> <td><h:message for="loginField"/></td> </tr></table>
<h:messages>This tag outputs messages for all components or global messages. If the tag's globalOnly attribute is set to true, then only global messages (messages not specifi c to any component) will be displayed.
The following markup segment illustrates typical usage of this tag:
<f:view> <h:messages/> <h:form> <h:inputText label="First Name" value="#{Customer.firstName}"/> <h:commandButton action="save" value="Save"/> </h:form><f:view>
<h:outputFormat> This tag renders parameterized text. Parameters in this tag's value attribute are defi ned in a manner similar to the way they are defi ned in a resource bundle, that is, by placing integers between curly braces in the parameter locations. Parameters are substituted with values defi ned in any child <f:param> elements.

For More Information:
www.packtpub.com/Java-EE-5-GlassFish-Application-Servers/book
JavaServer Faces
[ 214 ]
The following markup segment illustrates typical usage of this tag:
<h:outputFormat value="Hello, {0}"> <f:param value="#{Customer.firstName}"/></h:outputFormat>
<h:outputLabel> This tag renders an HTML label fi eld.
The following markup segment illustrates typical usage of this tag:
<table> <tr> <td align="right"> <h:outputLabel value="Login Name:" for="loginField"/></td> <td><h:inputText id="loginField" value="#{User.login}" required="true"/></td> </tr></table>
<h:outputLink> This tag renders an HTML link as an anchor (a) element with an href attribute.
The following markup segment illustrates typical usage of this tag:
<h:outputLink value="http://ensode.net"> <h:outputText value="Ensode"/></h:outputLink>
<h:outputText> If the dir, lang, style, or styleClass attributes are defi ned, this tag renders an HTML span element containing the tag's value attribute. Otherwise, the value defi ned by the tag's value attribute is rendered, escaping any XML/HTML characters so that they are rendered properly. If the tag's escape attribute is set to false, then XML/HTML characters are not escaped.
The following markup segment illustrates typical usage of this tag:
<h:outputText value="#{Customer.firstName}"/>

For More Information:
www.packtpub.com/Java-EE-5-GlassFish-Application-Servers/book
Chapter 6
[ 215 ]
<h:panelGrid> This tag renders a static HTML table. The number of columns in the table is specifi ed in the tag's columns attribute. Child components are then added to a subsequent row once the number of elements defi ned in the columns attribute have been added for the current row.
The following markup segment illustrates typical usage of this tag:
<h:panelGrid columns="2" columnClasses="rightAlign,leftAlign"> <h:outputText value="First Name:"> </h:outputText> <h:inputText label="First Name" value="#{Customer.firstName}" required="true"> <f:validateLength minimum="2" maximum="30"></f:validateLength> </h:inputText> <h:outputText value="Last Name:"></h:outputText> <h:inputText label="Last Name" value="#{Customer.lastName}" required="true"> <f:validateLength minimum="2" maximum="30"></f:validateLength> </h:inputText> <h:outputText value="Email:"> </h:outputText> <h:inputText label="Email" value="#{Customer.email}"> <f:validateLength minimum="3" maximum="30"></f:validateLength> </h:inputText> <h:panelGroup></h:panelGroup> <h:commandButton action="save" value="Save"></h:commandButton> </h:panelGrid>
<h:panelGroup> This tag is used to group its child components together in a single cell of a parent <h:panelGrid> or <h:dataTable> tag. Can also be used to create an "empty" cell in a parent <h:panelGrid> tag.

For More Information:
www.packtpub.com/Java-EE-5-GlassFish-Application-Servers/book
JavaServer Faces
[ 216 ]
The following markup segment illustrates typical usage of this tag:
<h:panelGrid columns="2" columnClasses="rightAlign,leftAlign"> <h:outputText value="First Name:"> </h:outputText> <h:inputText label="First Name" value="#{Customer.firstName}" required="true"> <f:validateLength minimum="2" maximum="30"></f:validateLength> </h:inputText> <h:outputText value="Last Name:"></h:outputText> <h:inputText label="Last Name" value="#{Customer.lastName}" required="true"> <f:validateLength minimum="2" maximum="30"></f:validateLength> </h:inputText> <h:outputText value="Email:"> </h:outputText> <h:inputText label="Email" value="#{Customer.email}"> <f:validateLength minimum="3" maximum="30"></f:validateLength> </h:inputText> <h:panelGroup></h:panelGroup> <h:commandButton action="save" value="Save"></h:commandButton> </h:panelGrid>
<h:selectBooleanCheckbox>This tag renders a single HTML input fi eld of type checkbox. The value attribute for this tag is usually set to a value-binding expression mapping to a Boolean property in a managed bean.
The following markup segment illustrates typical usage of this tag:
<h:selectBooleanCheckbox value="#{Customer.newsletterOk}" /><h:outputText value="Would you like to receive our newsletter?"/>
For More Information:
www.packtpub.com/Java-EE-5-GlassFish-Application-Servers/book
Chapter 6
[ 217 ]
<h:selectManyCheckbox>This tag renders a series of related checkboxes. Values for the user to select are defi ned in any child <f:selectItem> or <f:selectItems> tags.
The following markup segment illustrates typical usage of this tag:
<h:selectManyCheckBox value="#{Order.items}"> <f:selectItems value="#{ValueContainer.allItems} "/></h:selectManyCheckBox>
<h:selectManyListbox>This tag renders an HTML select fi eld of variable size that allows multiple selections. Values for the user to select are defi ned in any child <f:selectItem> or <f:selectItems> tags. The number of elements displayed at the same time is set by the tag's size attribute.
The following markup segment illustrates typical usage of this tag:
<h:selectManyListBox value="#{Order.items}"> <f:selectItems value="#{ValueContainer.allItems} "/></h:selectManyListBox>
<h:selectManyMenu>This tag renders an HTML select fi eld that allows multiple selections. Values for the user to select are defi ned in any child <f:selectItem> or <f:selectItems> tags. This tag is identical to <h:selectManyListbox>, except that it always displays one element at a time, therefore it has no size attribute.
The following markup segment illustrates typical usage of this tag:
<h:selectManyMenu value="#{Order.items}"> <f:selectItems value="#{ValueContainer.allItems} "/></h:selectManyMenu>
<h:selectOneListbox>This tag renders an HTML select fi eld of variable size that does not allow multiple selections. Values for the user to select are defi ned in any child <f:selectItem> or <f:selectItems> tags. The number of elements displayed at the same time is set by the tag's size attribute, which is optional. If the size attribute is not set, then all elements are displayed at the same time.

For More Information:
www.packtpub.com/Java-EE-5-GlassFish-Application-Servers/book
JavaServer Faces
[ 218 ]
The following markup segment illustrates typical usage of this tag:
<h:selectOneListBox value="#{Order.selectedItem}"> <f:selectItems value="#{ValueContainer.allItems} "/></h:selectOneListBox>
<h:selectOneMenu>This tag renders an HTML "dropdown", which is to say it renders an HTML select fi eld that does not allow multiple selections. Only one element is displayed at a time. Values for the user to select are defi ned in any child <f:selectItem> or <f:selectItems> tags.
The following markup segment illustrates typical usage of this tag:
<h:selectOneMenu value="#{Order.selectedItem}"> <f:selectItems value="#{ValueContainer.allItems} "/></h:selectOneMenu>
<h:selectOneRadio> This tag renders a series of related radio buttons. Values for the user to select are defi ned in any child <f:selectItem> or <f:selectItems> tags.
The following markup segment illustrates typical usage of this tag:
<h:selectOneRadio value="#{Order.selectedItem}"> <f:selectItems value="#{ValueContainer.allItems} "/></h:selectOneRadio>
Additional JSF Tag Libraries In addition to the standard JSF tag libraries, there are a number of third-party JSF tag libraries available. The following table lists some of the most popular ones:
Tag Library Distributor License URLMyFaces Tomahawk
Apache Apache 2.0 http://myfaces.apache.org/tomahawk/
ICEfaces ICEsoft MPL 1.1 http://www.icefaces.org
RichFaces Red Hat/JBoss
LGPL http://labs.jboss.com/portal/jbossrichfaces/
Woodstock Sun CDDL https://woodstock.dev.java.net

For More Information:
www.packtpub.com/Java-EE-5-GlassFish-Application-Servers/book
Chapter 6
[ 219 ]
SummaryIn this chapter, we covered how to develop web-based applications using JavaServer Faces, the standard component framework for the Java EE 5 platform. We covered how to write a simple application by creating JSPs containing JSF tags and managed beans. We also covered how to validate user input by using JSF's standard validators and by creating our own custom validators or by writing validator methods. Additionally, we covered how to customize standard JSF error messages, both the message text and the message style (font, color, etc.). Finally, we covered how to write applications by integrating JSF and the Java Persistence API (JPA).
For More Information:
www.packtpub.com/Java-EE-5-GlassFish-Application-Servers/book
Where to buy this book You can buy Java EE 5 Development using GlassFish Application Server from the Packt Publishing website: http://www.packtpub.com/Java-EE-5-GlassFish-Application-Servers/bookFree shipping to the US, UK, Europe, Australia, New Zealand and India.
Alternatively, you can buy the book from Amazon, BN.com, Computer Manuals and most internet book retailers.
www.PacktPub.com