Irene-H - Prestige Fans · Irene-3H Irene-5H Irene-H CEILING FAN ... V = medium high speed VI =...
13
READ AND SAVE THESE INSTRUCTIONS Irene-3H Irene-5H Irene-H CEILING FAN Please do not use any electric or battery powered tools in the assembly and installation of this or any Matthews Fan Company product. FAN RATING AC 220-240V~, 50/60Hz AUSTRALIA ONLY
Transcript of Irene-H - Prestige Fans · Irene-3H Irene-5H Irene-H CEILING FAN ... V = medium high speed VI =...
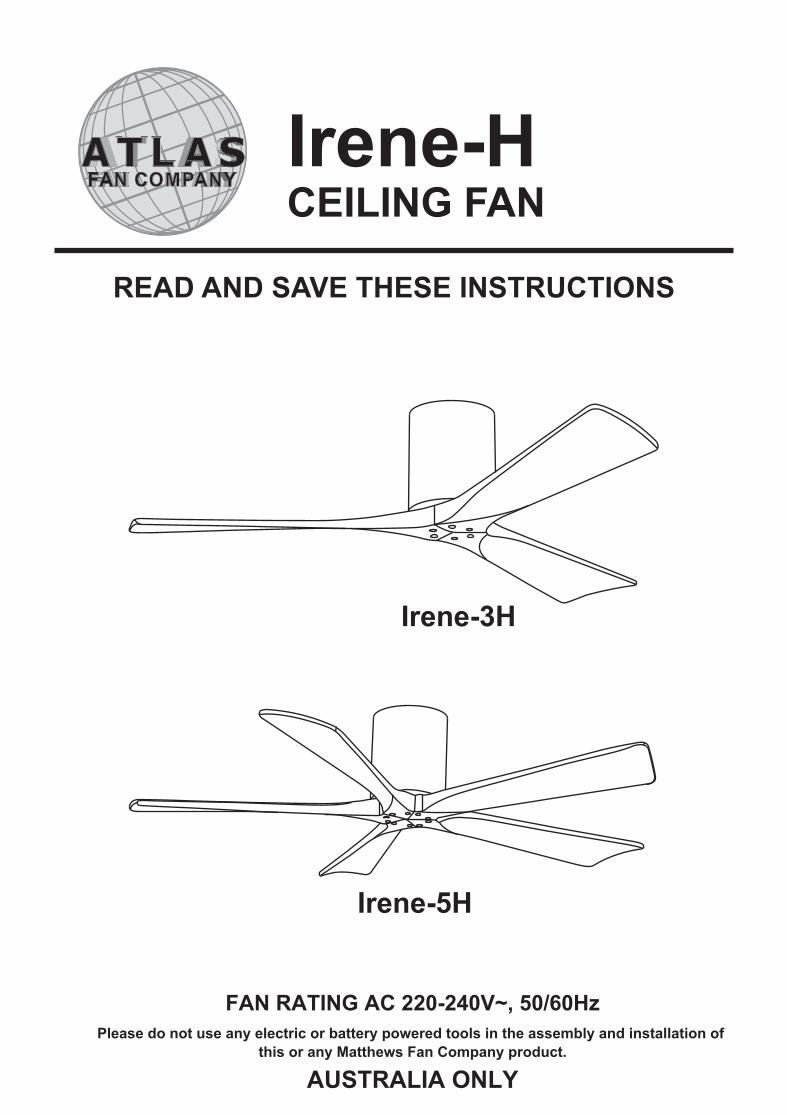
READ AND SAVE THESE INSTRUCTIONS
Irene-3H
Irene-5H
Irene-HCEILING FAN
Please do not use any electric or battery powered tools in the assembly and installation of this or any Matthews Fan Company product.
FAN RATING AC 220-240V~, 50/60Hz
AUSTRALIA ONLY
1
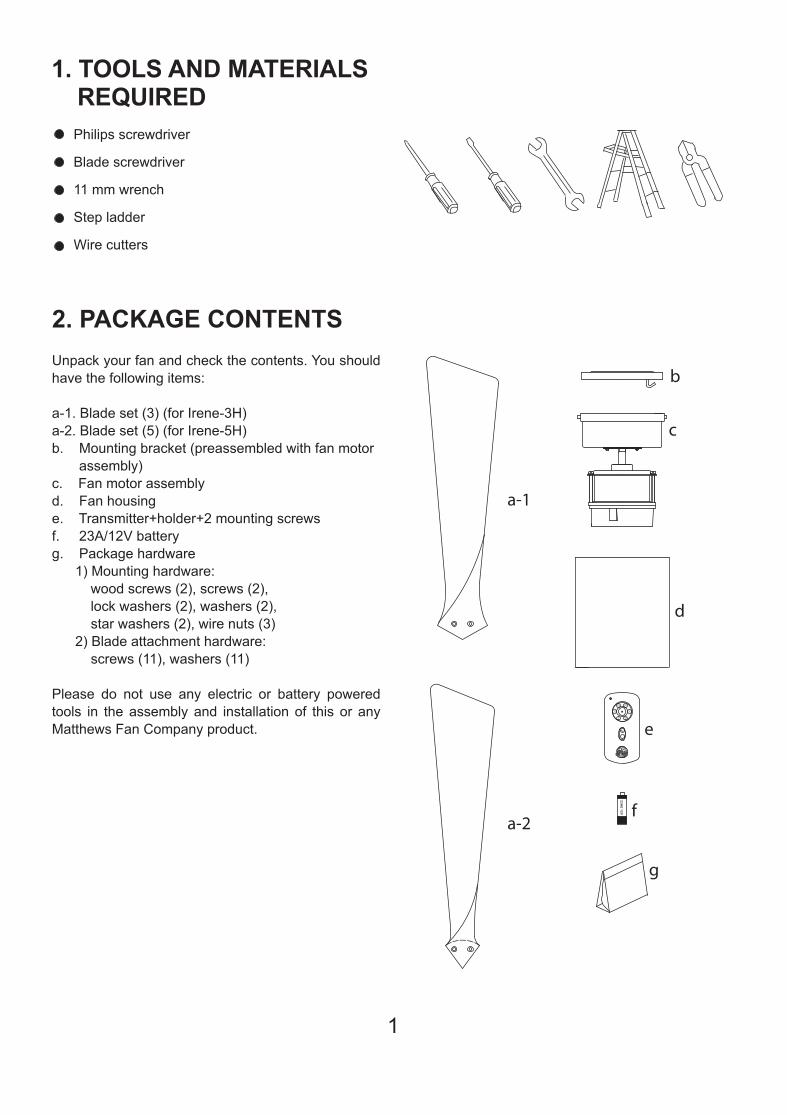
2. PACKAGE CONTENTSUnpack your fan and check the contents. You should have the following items:
a-1. Blade set (3) (for Irene-3H)a-2. Blade set (5) (for Irene-5H)b. Mounting bracket (preassembled with fan motor assembly)c. Fan motor assemblyd. Fan housinge. Transmitter+holder+2 mounting screws f. 23A/12V battery g. Package hardware 1) Mounting hardware: wood screws (2), screws (2), lock washers (2), washers (2), star washers (2), wire nuts (3) 2) Blade attachment hardware: screws (11), washers (11)
Please do not use any electric or battery powered tools in the assembly and installation of this or any Matthews Fan Company product.
a-1
a-2
b
c
d
e
f
g
Philips screwdriver
Blade screwdriver
11 mm wrench
Step ladder
Wire cutters
1. TOOLS AND MATERIALS REQUIRED

2
1. High voltage and moving parts around motors and motor driven equipment can cause serious or fatal injuries. Always disconnect power source at main switch before wiring, servicing or cleaning unit. Do not rely on fan control device to prevent unexpected start-up or electrical shock. In addition, power supply must have fuses or circuit breakers for short circuit protection.
2. All wiring must be in accordance with the AS/NZS 3000 wire rules. Electrical installation should be performed by a qualified licensed electrician.
3. WARNING - To reduce the risk of electrical shock and fire, do not use this fan with any solid-state fan speed control device.
4. Caution: to reduce the risk of injury to persons, install fan so that bottom edges of fan blades are to be at least 2.3m above the floor.
5. To operate the reverse function on this fan, press the reverse button while the fan is running.
6. Avoid placing objects in the path of the blades.
7. To avoid personal injury or damage to the fan and other items, be cautions when working around or cleaning the fan.
8. Do not use water or detergents when cleaning the fan or fan blades. A dry dust cloth or lightly dampened cloth will be suitable for most cleaning.
9. Electrical diagrams are reference only.
10. The appliance is not to be used by persons (including children) with reduced physical, sensory or metal capabilities, or lack of experience and knowledge, unless they have been given supervision or instruction. Concerning use of the applience by a person responsible for their safety. Children should be supervised to ensure that they do not play with the appliance.
READ AND SAVE THESE SAFETY AND INSTALLATION INSTRUCTIONS.
3. SAFETY RULES
WARNINGTO REDUCE THE RISK OF PERSONALL INJURY, DO NOT BEND THE BLADE ARMS
(ALSO REFERRED TO AS FLANGES), WHEN INSTALLING THE BRACKETS, BALANCING THE BLADES OR CLEANING THE FAN. DO NOT INSERT FOREIGN
OBJECTS IN – BETWEEN ROTATING FAN BLADES.

3
Motor
Figure 1
Figure 2
Washers
ScrewsMounting bracket
4. HANGING THE FANREMEMBER to turn off the power. Follow the steps below to hang your fan properly:
Step 1. Disassemble the mounting bracket from the fan motor assembly.
Step 2. Attach the mounting bracket to the ceiling. For best performance be sure the mounting bracket is level and secured firmly against the ceiling. You may need to insert additional washers (not provided) between the ceiling and mounting bracket to make it level. (Fig. 1).
Step 3. Lift fan into position by hanging the motor assembly onto the hook from the mounting bracket allowing it to hang freely (Fig. 2).

5. MAKE THE ELECTRIC CONNECTIONS
Remember to disconnect the power. Follow the steps below to connect the fan to your household wiring. Use the wire connecting nuts supplied with your fan. Secure the connectors with electrical tape. Make sure there are no loose strands or connections.
1. Connect the blue, neutral household neutral wire to the terminal block “N” hole. Connect the brown, Live/hot household Live/hot wire to the terminal block “L” hole. (Fig. 3)
2. Connect the green/ground wire from the household to the terminal block “ ” hole. (Fig. 3)
3. Be sure to snap together the male and female plugs. (Fig. 3)
Figure 3
4
Female plug
Male plug(from fan)
Green/Ground
BlueBrown
Blue (household)
Brown (household)
Green/Ground(household)

5
6. FINISHING THE INSTALLATION
Step 1. Move fan motor into position over the four mounting holes and secure with the four screws provided. (Fig. 4)
Step 2. An additional safety support is provided to prevent the fan from falling. Secure the safety cable to the ceiling joist with screw and washer. (Fig. 4)
Step 3. Raise the fan housing up against the mounting bracket. The four supports inside the fan housing should be placed against the four studs on the mounting bracket. Twist the fan housing clockwise until snug. (Fig. 5)
Figure 4
Figure 5
Screws
Motor
Fanhousing
Studs
Safety cable

6
Figure 6
7. ATTACHING THE FAN BLADES
1. Fasten blade to motor using the screws supplied. (Fig. 6)
2. Repeat process with other blades. Tighten each screw and make sure the blade is straight.
NOTE: This fan is supplied with two types of blades for installation. Follow the step below to installing your fan blade properly.
The inner holes are for 3 blades. (for Irene-3H)
The outer holes are for 5 blades. (for Irene-5H)
Blade
Screw

7
Figure 8
Figure 7
8. PROGRAMMING YOUR FAN AND OPERATING THE REMOTE CONTROL
Your DC brushless motor is equipped with a automatically learned type remote control.
Install one 23A/12V battery (included). To prevent damage to transmitter, remove the battery if not used for long periods of time (Fig. 7)
ON ECE
1 2 3 4
Restore power to ceiling fan and test for proper operation.
A. SET code setting button:Follow the below steps to use the SET button:
a) With the fan’s power off, arrange code switches to the desired setting. If installing only one fan, the factory setting is usually acceptable.
b) After installing the unit and restoring power to the fan, press and hold the “SET” button 1 - 5 seconds. You must press the “SET” button within 60 seconds of restoring power to the fan.
c) The fan will start to run and begin the control setting process. The fan will run in both directions for a total of approximately 5 minutes.
d) When the fan stops after approximately 5 minutes, the control and speed setting process is complete and the fan is ready for use.
IMPORTANT NOTE: If installing multiple fans in one location, ensure each fan has its own unique setting. Also ensure there is only power going to the fan being set, and power to any other fan must be turned off during initial prograrnming set up.
The receiver provides the following protective function:
1. Lock position: The DC motor has a built-in safety against obstruction during operation. If there is an obstruction, the motor will stop and then the power will automatically go off in 30 seconds. Remove the obstruction and reset.
2. Over 80W protection: When the receiver detects motor power consumption which is greater than 80W, the receiver power will be stopped and operation will immediately discontinue. Wait for 5 seconds and then turn the receiver power back on.
B. I, II, III, IV, V and VI button:These six buttons are used to set the fan speed as follows:I = minimum speedII = low speedIII = medium low speedIV = medium speedV = medium high speedVI = high speed
C. Button: This button turns the fan off.
D. Reverse button: This button is to control fan direction.

8
Figure 9
Figure 10
9. OPERATING YOUR FAN
Speed settings for warm or cool weather depend on factors such as the room size. Ceiling height, number of fans and so on.
NOTE: To operate the reverse function on this fan, press the reverse button while the fan is running.
Warm weather - (Forward) A downward airflow creates a cooling effect as shown in Fig. 9. This allows you to set your air conditioner on a warmer setting without affecting your comfort.
Cool weather - (Reverse) An upward airflow moves warm air off the ceiling area as shown in Fig. 10. This allows you to set your heating unit on a cooler setting without affecting your comfort.
10. CARE OF YOUR FANHere are some suggestions to help you maintain your fan
1. Because of the fan's natural movement, some connections may become loose. Check the support connections, brackets, and blade attachments twice a year. Make sure they are secure. (It is not necessary to remove fan from ceiling.)
2. Clean your fan periodically to help maintain its new appearance over the years. Use only a soft brush or lint-free cloth to avoid scratching the finish. The plating is sealed with a lacquer to minimize discoloration or tarnishing. Do not use water when cleaning. This could damage the motor, or the wood, or possibly cause an electrical shock.
3. You can apply a light coat of furniture polish to the wood blades for additional protection and enhanced beauty. Cover small scratches with a light application of shoe polish.
4. There is no need to oil your fan. The motor has permanently lubricated bearings.
IMPORTANT: MAKE SURE THE POWER IS OFF AT THE ELECTRICAL PANEL BOX BEFORE YOU ATTEMPT ANY REPAIRS. REFER TO THE SECTION "MAKING ELECTRICAL CONNECTIONS".

9
11. TROUBLESHOOTINGProblem
Fan will not start.
Fan sounds noisy.
Remote controlmalfunction.
Fan wobble.
Fan has jerkymovement
Fan has lost its programming repeatedly
Solution
1. Check circuit fuses or breakers.2. Check line wire connections to the fan and switch wire connections in the switch housing.
CAUTION: Make sure main power is off.3. Check that the battery of the remote is functional.4. Re-do steps for programming on page 8.
1. Make sure all motor housing screws are snug.2. Make sure the screws that attach the fan blade bracket to the motor hub is tight.3. Make sure wire nut connections are not rubbing against each other or the interior wall of
the switch housing. CAUTION: Make sure main power is off.4. Allow a 24-hour "breaking-in" period. Most noise associated with a new fan disappear
during this time.5. If using an optional light kit, make sure the screws securing the light plate are tight. 6. Some fan motors are sensitive to signals from solid-state variable speed controls. If you
have installed this type of control, choose and install another type of control.7. Make sure the upper canopy is a short distance from the ceiling. It should not touch the
ceiling.
1. Do not connect the fan with a wall mounted variable speed control(s).2. Make sure the dip switches are set correctly.
1. Check that all blade and blade arm screws are secure.2. Most fan wobbling problems are caused when blade levels are unequal. Check this level
by selecting a point on the ceiling above the tip of one of the blades. Measure this distance.Rotate the fan until the next blade is positioned for measurement. Repeat for each blade. The distance deviation should be equal within 1/8".
3. If the blade wobble is still noticeable, interchanging two adjacent (side by side) blades can redistribute the weight and possibly result in smoother operation.
WARNING: TO REDUCE THE RISK OF PERSONAL INJURY, DO NOT BEND THE BLADE ARM WHILE INSTALLING, BALANCING THE BLADES, OR CLEANING THE FAN. DO NOT INSERT FOREIGN OBJECTS BETWEEN ROTATING FAN BLADES.
1. Turn the AC power off to fan, and re-do steps for programming on page 8.
1. Turn the AC power off to fan, and re-do steps for programming on page 8. 2. Do not turn off fan from wall switch. Use only remote to regulate fan.

Manufacturer’s Warranty – Australia
“Our goods come with guarantees that cannot be excluded under the Australian Consumer Law. You are entitled to a replacement or refund for a major failure and for compensation for any other reasonably foreseeable loss or damage. You are also entitled to have the goods repaired or replaced if the goods fail to be of acceptable quality and the failure does not amount to a major failure.”
For the purpose of the above paragraph specific definitions for major failure are given in the ACL Act 2010. Atlas considers major failure to be when the original, unopened and new package is missing contents, contents are damaged or defective, or the fan, light, wall or remote control does not operate when initially installed.
The Atlas Fan Company (Atlas) warrants to the original consumer purchaser of each Atlas Fan ("You"), that if any part of the motor, excluding the wall controls, remote controls or pull cord mechanisms ("Controls”) fails due to a defect in material or workmanship ("Defect") during your lifetime while the Atlas Fan is still installed in the exact location in which it was originally installed following the original purchase, then Atlas will provide a replacement part to you free of charge.
If any part of the motor in your Atlas Fan fails due to a defect in material or workmanship ("Defect") within 12 months after the original date of purchase by you, while the fan is still installed in the exact location in which it was originally installed, and you report this defect to Atlas immediately, Atlas will provide the necessary labour to repair the defect free of charge.
If any part of the motor excluding the wall controls or remote controls ("Controls”) in your Atlas Fan fails due to a defect in material or workmanship ("Defect") more than 12 months after the original date of purchase by you, while the fan is still installed in the exact location in which it was originally installed, Atlas will provide the necessary parts only free of charge to repair the defect. You will be responsible for all labour costs incurred in repairing the defect.
MOTOR:
If the wall control fails at any time within 12 months after the original date of purchase due to a defect, Atlas will provide the necessary parts and labour to repair the defect free of charge.
If the remote control fails at any time within 12 months after the original date of purchase due to a defect, Atlas will provide the necessary parts to repair the defect free of charge (“D.I.Y. installation”). NB: Remote controls are not part of the fan, instead being a separately connected accessory device. The remote control receiver is often fitted into the fan mounting bracket for convenience but is not an integral part of the fan and not covered by the warranty provisions of the fan itself. Resetting/Changing of DIP switches in remote controls is not covered by warranty and a service call fee WILL apply. Batteries (if supplied), are done so as a complimentary (free) item only and are not covered by warranty.
CONTROLS:
Light Globes, (if supplied), are done so as a complimentary (free) item only and not covered by warranty. LIGHTS:
• Ceiling fans and fixed wiring products MUST ONLY be installed by qualified and suitably licensed person/s. A copy of your proof of qualified installation is required when claiming a warranty. (Electrical Safety Certificate)
• Warranty periods begin from the date of purchase only. A copy of your proof of purchase is required when claiming a warranty.
• When products are installed in a location requiring special access equipment (scaffolding, scissor lifts etc) the cost of providing, installing and operating special access equipment must be borne by the site owner. The need for, or use of such equipment must be stated when discussing a service call. Charges will be levied by Atlas to arrange special access equipment, and these must be paid in advance.
• If goods are found to be free of defects or the product is not functioning properly as a result of faulty installation then Atlas reserves the right to charge the customer a service fee.
Please discuss your needs with a sales professional who knows your local area and select your fan carefully. Proper performance relies on the right fan being correctly installed in the optimum location. If your fans that do not perform as expected though which are not faulty, you must refer to the retailer you bought the fan from, Atlas cannot replace or exchange under warranty.
NOTES:

The Atlas 12 month in-home warranty covers Atlas ceiling fans installed within the coverage of our network of service agents in cases where the product fails due to defective materials or workmanship. This warranty does not cover installation faults, house wiring faults, loose blades or fittings or damage of any kind. Claims regarding corrosion damage are subject to case by case appraisal. In areas outside coverage of the Atlas service agents, Atlas will reimburse consumers a standard fee of $82.50 (inc. GST) for using their own electrician. All service requests must be arranged with the warranty department before calling your electrician. Under no circumstances will reimbursement be made for call-out fees or other costs without prior approval. When installed as recommended by Atlas (using an isolation switch) a fan or remote control can be switched off at the wall in case of a fault. If the product cannot be turned off because an isolation switch is not fitted, any electrical costs involved in disconnecting the product while awaiting warranty service are to be borne solely by the consumer.
IN-HOME (ON-SITE) WARRANTY?
Atlas will supply parts only, shipped directly to the consumer. Please note the labour associated with installation of these parts, or associated electrical costs of removing and reinstalling the product to affect a repair is borne by the consumer.
PARTS ONLY WARRANTY?
These warranties will only apply where; • The fan was purchased and installed in Australia. • You notify Atlas of the alleged defect in the Atlas fan, its motor or its component parts immediately upon you
experiencing, noticing or learning of the alleged defect; • You provide to Atlas a copy of your ‘Proof of Purchase’ (Sales receipt) verifying when and from whom the Atlas
fan was purchased and a copy of your ‘Proof of Qualified Installation’ (Electrical Safety Certificate) verifying when and by whom the Atlas fan was installed.
WHERE THE WARRANTIES WILL APPLY
All rights, warranties, conditions and remedies implied by legislation or the common law that are able to be lawfully excluded in respect of Your Atlas fan are excluded. However nothing in this clause or the manufacturer’s warranties exclude, restrict or modify any condition, warranty, right or remedy, which is conferred on You by the ACL Act 2010 or any other applicable Australian consumer legislation ('Acts") or the common law and which is not lawfully able to be excluded, restricted or modified.
IMPLIED WARRANTY
In addition to any limitations set out above, the warranties are limited to, at Atlas’s sole option, the replacement of the Atlas fan or defective part or the supply of an equivalent product or part; the repair of the Atlas fan or defective part or the payment of the cost of having the Atlas fan or defective part repaired; or the payment of the purchase price of a replacement Atlas fan or defective part or an equivalent product or part.
Where Atlas or its authorised agents provide any services to you under or pursuant to the manufacturer’s warranties, the application of the manufacturer’s warranties to such services is limited, at Atlas 's sole option, to the supplying of those services again, or the payment of the cost of having those services supplied again.
LIMITATION OF WARRANTIES
The warranties above are void and Atlas disclaims any liability of whatsoever any nature where: • The Atlas fan is not purchased by you in Australia and installed in Australia;• The Atlas fan is not installed correctly in accordance with Atlas’s installation guide, or is installed in an
unsuitable location; • The Atlas fan is removed from the particular location in which it was originally installed following the original
purchase, except where that removal: > is expressly authorised by Atlas or Atlas’s authorised agent; and > does not cause, contribute to or result in, any further Defects to the Atlas fan or any of its component parts
or other parts; or • The Defect is caused by: > the improper, incorrect or incomplete installation: > the improper or incorrect use or adjustment of the Atlas fan by you or any third party; > any attempted or completed maintenance, repair or modification carried out on the Atlas fan or its
component parts or other parts by you or any unauthorized third party; > the direct or indirect acts of you or any third party; > normal wear and tear to the Atlas fan or any of its parts; > faulty or unsuitable wiring in the structure to which the Atlas fan is fixed or connected; > inadequate support in the structure to which the Atlas fan is fixed or connected; > blown fuses or damage caused by force-majeure, electrical surges, lightning, power grid fluctuations, or by
connection to alternative power supply sources (such as solar inverters etc) or > water damage and or moisture.
WHERE THE WARRANTY WILL NOT APPLY

Note: Signals sent through the power grid by the electricity supplier for the control of off peak hot water, street lights and other devices may cause an intermittent humming noise in your electrical appliances such as your ceiling fan. Filters are available in Australia at the customer's expense. These noises do not occur as a result of a faulty fan.
In no event shall Atlas be liable under its warranties for any consequential, incidental, direct or indirect loss, expense or damage suffered by you or any third party arising from or in relation to the Atlas fan, any of its Component Parts or other parts or any Defect.
Atlas will not be liable for any expenses incurred by you in making a claim under these express warranties, including without limitation, expenses incurred in disconnecting, reinstalling, transporting or packaging the Atlas fan where it, a Component Part or other part is to be repaired or replaced under any of these express warranties.
FOR ADDITIONAL INFORMATION REFER TO THE OWNER’S MANUAL PROVIDED WITH YOUR ATLAS FAN
CONSEQUENTIAL OR INCIDENTAL DAMAGES
To make a warranty claim, you must supply Prestige Fans with a copy of your proof of purchase, together with a copy of your proof of qualified installation (Installers invoice or electrical safety certificate). You must also explain exactly what the nature of the problem is, the address at which the fan is installed, the room in which the fan is installed, the type of wall or remote control being used, as well as any light globes used in attached light kits. You must also supply your name, address and contact phone numbers, and your claim will be dealt with.
Australian Agent: Prestige Fans Pty Ltd PO Box 5050 Ringwood VIC 3134 Ph: 03 9876 8287 (Extension 2) Fax: 03 9876 8282 Email: [email protected]
TO MAKE A WARRANTY CLAIM: