Introduction To IoT Reverse Engineering
56
Introduction To IoT Reverse Engineering with an example on a home router Valerio Di Giampietro Linux enthusiast since 1993 http://va.ler.io [email protected] @valerio ©Valerio Di Giampietro - This work is licensed under a Creative Commons Attribution 4.0 International License Hack In Paris 2019
Transcript of Introduction To IoT Reverse Engineering

Introduction To IoT Reverse Engineering
with an example on a home router
Valerio Di GiampietroLinux enthusiast since 1993
http://[email protected]@valerio
©Valerio Di Giampietro - This work is licensed under a Creative Commons Attribution 4.0 International License
Hack In Paris 2019

• Introduction
• Information gathering
• Emulation environment using QEMU
• Analyze how the device works
• Modify the firmware
What we will talk about …
Firenze, December 3rd 2018 – Pag. 2● ○ ○ ○ ○ - Introduction
Firenze, December 3rd 2018 – Pag. 2
http://va.ler.io – Pag. 2

● ○ ○ ○ ○ - Introduction
What is “engineering”? “the science of making things”• Define ”product requirements”• Design the product• Build or manufacture the product
Engineering
Requirements Design Blueprint Product
http://va.ler.io – Pag. 3

What is ”reverse engineering”?• It is the ”engineering” process done in reverse order
and, usually, with limited scopeWhat is this example project “limited scope”?• Understand how to modify the router firmware to
add features and additional programs
● ○ ○ ○ ○ - Introduction
Reverse Engineering
RequirementsDesign BlueprintProduct
http://va.ler.io – Pag. 4

• Who makes the device?
• Is there an ODM (Original Design Manufacturer)?
• Open the case
• Identify main device components
• Locate UART and possibly JTAG Interfaces
• Get the firmware and the root file system
○ ● ○ ○ ○ - Information Gathering
Information Gathering
D-Link DVA 5592example home router
http://va.ler.io – Pag. 5

○ ● ○ ○ ○ - Information Gathering
Mainboard Top
JTAG?
BCM6303 XDSL CPE
Line Driver
ZL88801 Telephone
Module
UART
http://va.ler.io – Pag. 6
○ ● ○ ○ ○ - Information Gathering
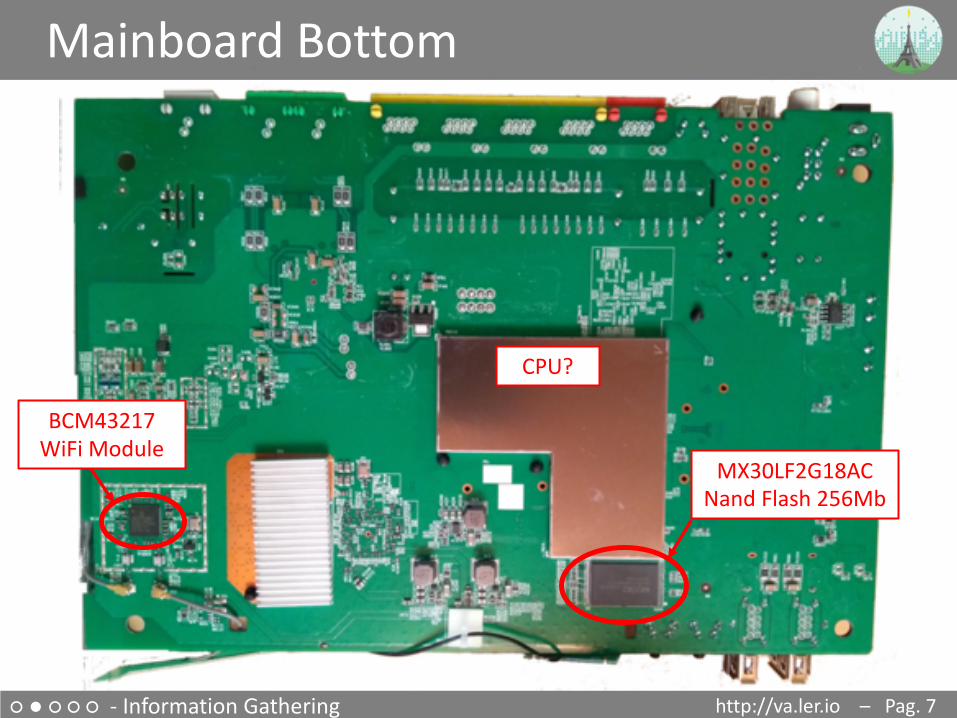
Mainboard Bottom
MX30LF2G18ACNand Flash 256Mb
BCM43217
WiFi Module
CPU?
http://va.ler.io – Pag. 7

○ ● ○ ○ ○ - Information Gathering
Locate the UART interface
• Search on Internet
• Identify potential serial headers candidates• Sometimes marked in the PCB’s silkscreen
• Usually 4 pins: Vcc, Gnd, Tx, Rx• Use a multimeter to find potential
candidates
• Locate pins on SOC and follow PCB traces• Use tools like Jtagulator
• Oscilloscope or Logic Analyzer to locate Tx (a little overkill)
UART on various boards
http://va.ler.io – Pag. 8
○ ● ○ ○ ○ - Information Gathering
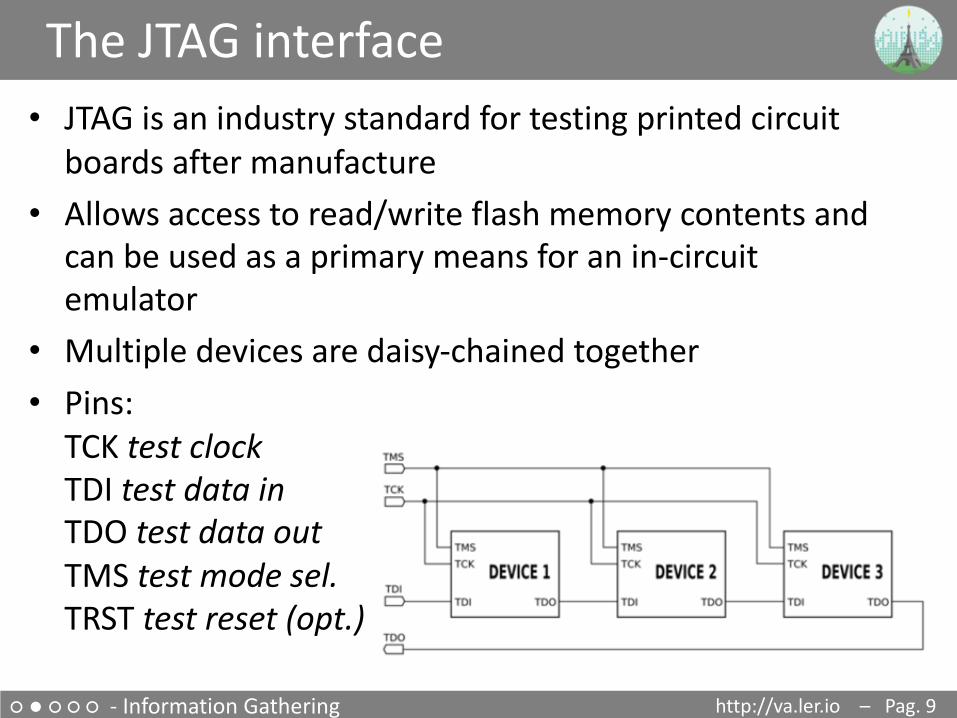
The JTAG interface• JTAG is an industry standard for testing printed circuit
boards after manufacture• Allows access to read/write flash memory contents and
can be used as a primary means for an in-circuit emulator
• Multiple devices are daisy-chained together• Pins:
TCK test clockTDI test data inTDO test data outTMS test mode sel.TRST test reset (opt.)
http://va.ler.io – Pag. 9

○ ● ○ ○ ○ - Information Gathering
Locate the JTAG interface• No standard pinout, but few popular
pinouts: http://www.jtagtest.com/pinouts/• Search on the Internet• Look for headers labeled TCK, TDI, TDO, TMS • Look for 1x5/6, 2x5, 2x7, 2x10 pin headers
– Look for GND and VCC with a multimeter and compare to popular pinouts
– Often there are pullups (1-100k) for TMS, TDI and TRST, TRST can also be pulled low
– TDO should be high impedance
• Locate pins on SOC and follow PCB traces• Use tools like Jtagulator
http://va.ler.io – Pag. 10

○ ● ○ ○ ○ - Information Gathering
Repopulate the interfaces
Connect the serial cable
http://va.ler.io – Pag. 11

○ ● ○ ○ ○ - Information Gathering
Why repopulate the interfaces?
• UART (Serial Interface)– Watch what is printed on the serial console during the boot cycle
and find bootloader and OS version– Watch the firmware upgrade cycle– Use a USB TTL serial adapter and a terminal emulator on the PC
• JTAG– Be able to read the firmware out of the flash eeprom– Be able to break into the boot cycle and use JTAG as a means to
do ”in circuit debugging”– Attach an interface board, like Bus Pirate, to the JTAG interface– Use software, as OpenOCD, to dump flash eeprom and to do ”in
circuit debugging”
http://va.ler.io – Pag. 12

○ ● ○ ○ ○ - Information Gathering
Getting the firmware file
• Follow the easiest path first
• If the supplier has a website with firmware updates
go and download the firmware file
• If the firmware update can be downloaded directly
only by the device, sniff the communication with
wireshark and get the firmware file
• If the above steps are not available, download the
eeprom image through the JTAG connector using Bus
Pirate and OpenOCD
http://va.ler.io – Pag. 13
○ ● ○ ○ ○ - Information Gathering
Get info from the firmware
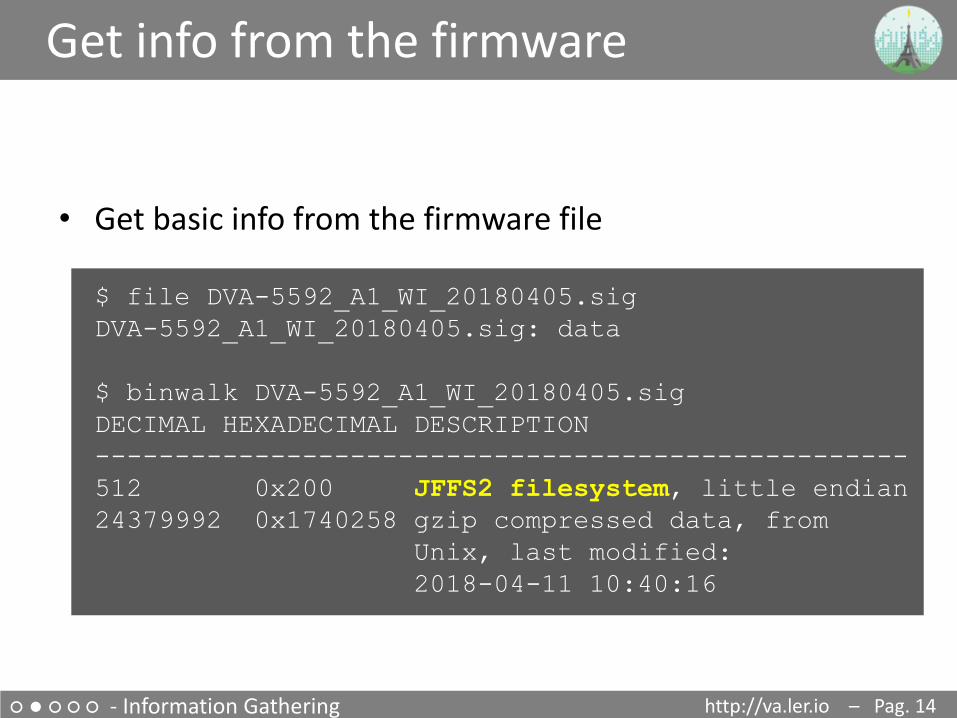
• Get basic info from the firmware file
$ file DVA-5592_A1_WI_20180405.sigDVA-5592_A1_WI_20180405.sig: data
$ binwalk DVA-5592_A1_WI_20180405.sigDECIMAL HEXADECIMAL DESCRIPTION---------------------------------------------------512 0x200 JFFS2 filesystem, little endian24379992 0x1740258 gzip compressed data, from
Unix, last modified:2018-04-11 10:40:16
http://va.ler.io – Pag. 14

○ ● ○ ○ ○ - Information Gathering
Extract content from firmware• Install Jefferson to extract files from JFFS2 file system• Use binwalk to extract content from firmware
$ binwalk -e DVA-5592_A1_WI_20180405.sig
$ ls -lh _DVA-5592_A1_WI_20180405.sig.extracted-rw-rw-r-- 1 val val 30K ott 21 13:28 1740258-rw-rw-r-- 1 val val 24M ott 21 13:27 200.jffs2drwxrwxr-x 5 val val 4,0K ott 21 13:28 jffs2-root
$ file 17402581740258: POSIX tar archive (GNU)
$ tar -tvf 1740258drwxr-xr-x l.fornalczyk/adb boards/drwxr-xr-x l.fornalczyk/adb boards/963138_VD5….ipk
http://va.ler.io – Pag. 15
○ ● ○ ○ ○ - Information Gathering
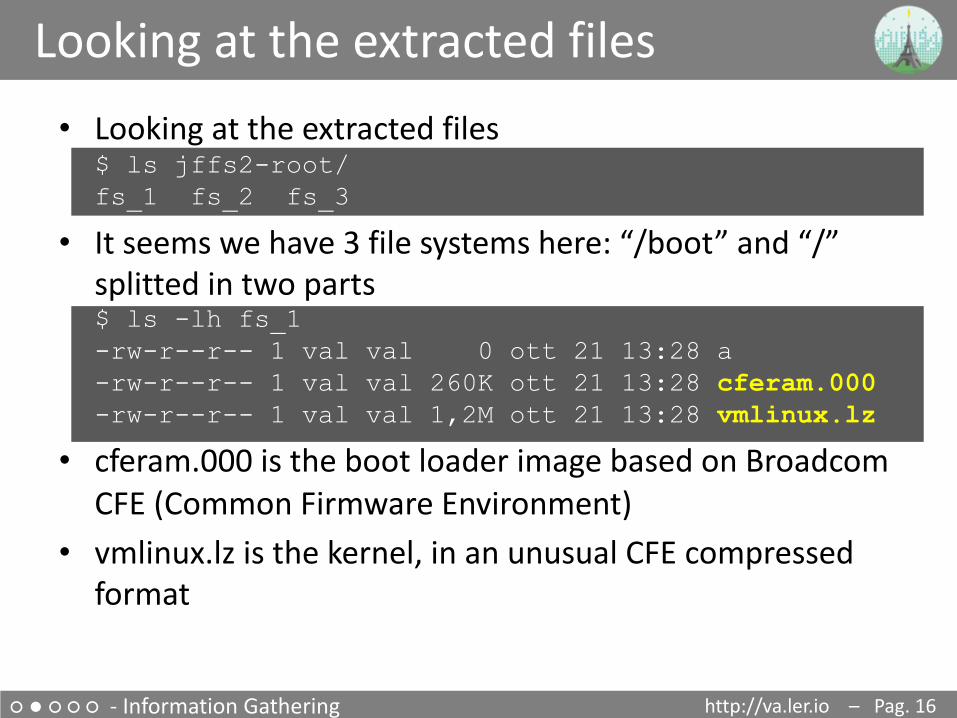
Looking at the extracted files• Looking at the extracted files
$ ls jffs2-root/fs_1 fs_2 fs_3
• It seems we have 3 file systems here: “/boot” and “/” splitted in two parts$ ls -lh fs_1-rw-r--r-- 1 val val 0 ott 21 13:28 a-rw-r--r-- 1 val val 260K ott 21 13:28 cferam.000-rw-r--r-- 1 val val 1,2M ott 21 13:28 vmlinux.lz
• cferam.000 is the boot loader image based on Broadcom CFE (Common Firmware Environment)
• vmlinux.lz is the kernel, in an unusual CFE compressed format
http://va.ler.io – Pag. 16

○ ● ○ ○ ○ - Information Gathering
Looking at other files• /sbin/init is missing (but it’s not true), busybox is there
$ ls -lh fs_2/bin/busybox-rwsr-sr-x 1 val val 382K fs_2/bin/busybox$ strings fs_2/bin/busybox…BusyBox v1.17.3 (2018-04-11 12:29:54 CEST)…
$ arm-linux-readelf -a fs_2/bin/busybox…… program interpreter: /lib/ld-uClibc.so.0]
$ ls -lh fs_2/lib/ld-uClibc*-rwxr-xr-x ld-uClibc-0.9.33.2.solrwxrwxrwx ld-uClibc.so.0 -> ld-uClibc-0.9.33.2.so
$ ls -l fs_3/lib/libgcrypt.so.11*lrwxrwxrwx libgcrypt.so.11 -> libgcrypt.so.11.5.3-rwxr-xr-x libgcrypt.so.11.5.3
http://va.ler.io – Pag. 17

○ ● ○ ○ ○ - Information Gathering
Boot output on serial console• Output on serial console during boot
...CFE version 1.0.38-118.3-S for BCM963138 (32bit,SP,LE) generic...Chip ID: BCM63136B0, ARM Cortex A9 Dual Core: 1000MHzTotal Memory: 268435456 bytes (256MB)NAND ECC BCH-4, page size 0x800 bytes, spare size 64 bytesNAND flash device: , id 0xc2da block 128KB size 262144KB...Linux version 3.4.11-rt19 (l.fornalczyk@quelo) (gcc version 4.5.4 20120306 (prerelease) (Linaro GCC 4.5-2012.03) )...CPU: ARMv7 Processor [414fc091] revision 1 (ARMv7)...jffs2: version 2.2 (NAND) (SUMMARY) (ZLIB) (LZMA) (RTIME)...
http://va.ler.io – Pag. 18

○ ● ○ ○ ○ - Information Gathering
Boot output on serial console
• Output on serial console during boot (part 2)...[2.502000] Found YAPS PartitionSplit Marker at 0x080FFF00[2.503000] Creating 8 MTD partitions on "brcmnand.0":[2.504000] 0x000000000000-0x000000020000 : "CFE”[2.506000] 0x000007f00000-0x000008100000 : "bootfs_1”[2.508000] 0x000008100000-0x00000fbc0000 : "rootfs_1”[2.510000] 0x000000020000-0x000007ce0000 : "upgrade”[2.512000] 0x00000fbc0000-0x00000fdc0000 : "conf_fs”[2.513000] 0x00000fdc0000-0x00000fe00000 : "conf_factory”[2.515000] 0x00000fe00000-0x000010000000 : "bbt”[2.517000] 0x000000000000-0x000010000000 : "flash”...Init started: BusyBox v1.17.3 (2018-04-11 12:29:54 CEST)starting pid 235, tty '': '/etc/init.d/rcS S boot’Starting boot.sh ...Restore passwd ....Restore group ....Starting /etc/rc.d/S11services.sh ...Starting Configuration Manager (B)
/etc/inittab::sysinit:/etc/init.d/rcS S boot::shutdown:/etc/init.d/rcS K shutdowntts/0::askfirst:/bin/loginttyS0::askfirst:/bin/login
http://va.ler.io – Pag. 19

○ ● ○ ○ ○ - Information Gathering
Boot output on serial console
• Output on serial console during boot (part 3)...CM TR-181 readyCM TR-98 readyEpicentro Software Version: DVA-5592_A1_WI_20180405Epicentro Platform Version: 6.0.0.0028...Starting /etc/rc.d/S13acsd.sh ...Starting /etc/rc.d/S20voip.sh ...Starting /etc/rc.d/S60ipsec.sh ...Starting /etc/rc.d/S70vpn.sh ...Starting /etc/rc.d/S94printkd.sh ...
Searching «Epicentro Software» on Internet gives the ODM (Original Design Manufacturer): ADB www.adbglobal.com
http://va.ler.io – Pag. 20

○ ● ○ ○ ○ - Information Gathering
What was found
• Processor ARMv7 Cortex-A9 Multicore• 256Mb NAND Flash• Linux version 3.4.11-rt19 (September 2012)• uClibc version 0.9.33.2 (May 2012)• BusyBox version 1.17.3 (October 2010)• Libgcrypt version 1.4.5 (December 2009)• Epicentro software by ADB (adbglobal.com)
http://va.ler.io – Pag. 21

○ ○ ● ○ ○ - Emulation Environment using QEMU
QEMU Emulation
• Choosing Board and CPU emulation in QEMU$ qemu-system-arm -M help|egrep Cortex-A9realview-pbx-a9 ARM RealView Platform for Cortex-A9vexpress-a9 ARM Versatile Express for Cortex-A9xilinx-zynq-a9 Xilinx Zynq Platform for Cortex-A9
$ qemu-system-arm -M vexpress-a9 -cpu help...cortex-a9...
http://va.ler.io – Pag. 22

○ ○ ● ○ ○ - Emulation Environment using QEMU
Choosing a Build System
• The Yocto Projectvery powerful, builds a root file system and create a custom Linux distribution. It's main drawback is that it has a steep learning curve
• Buildrootbuilds the root file system and the kernel, easy and fast to learn, very good user manual
• Openwrt/LEDE Build Systemtailored to build a replacement router firmware, documentation scattered in the web site, requires more time to learn compared to Buildroot
http://va.ler.io – Pag. 23

○ ○ ● ○ ○ - Emulation Environment using QEMU
Choosing a Buildroot version
• Based on uClibc 0.9.33.2• Gnu libgcrypt crypto library compatible with
version 1.5 (with library file: libgcrypt.so.11)• With custom kernel version 3.4.1-rt19• Other libraries with compatible versions• The version to use is: buildroot-2014.02• This version doesn’t run on Ubuntu 16.04 or
Ubuntu 18.04• Use Debian Wheezy (released in 2013) in a
docker Container
http://va.ler.io – Pag. 24

○ ○ ● ○ ○ - Emulation Environment using QEMU
The Dockerfile
• The Dockerfile builds a minimal Debian Wheezy
container to run BuildrootFROM debian:wheezy...RUN apt-get updateRUN apt-get upgradeRUN apt-get install -y -q \
bash \...RUN mkdir -p /src/miscADD startup.sh /src/misc/startup.shRUN chmod a+x /src/misc/startup.shENTRYPOINT cd /src/misc ; ./startup.sh
• Available at: https://github.com/digiampietro/buildroot-armv7
http://va.ler.io – Pag. 25

○ ○ ● ○ ○ - Emulation Environment using QEMU
The Docker run command• The Docker run maps user and user’s home
directory in the Docker Containerdocker run -h BRHOST \
--rm \-v /tmp/.X11-unix:/tmp/.X11-unix \-v $HOME:$HOME \-e DISPLAY=$GDISPLAY \-e GUSERNAME=$GUSERNAME \-e GUID=$GUID \-e GGROUP=$GGROUP \-e GGID=$GGID \-e GHOME=$GHOME \-e GSHELL=$SHELL \-e GRUNXTERM=$GRUNXTERM \-e GPWD=$GPWD \-it digiampietro/buildroot-armv7
http://va.ler.io – Pag. 26

○ ○ ● ○ ○ - Emulation Environment using QEMU
Docker run in actionvalerio@ubuntu-hp:~$ ls -ld brdrwxrwxr-x 6 valerio valerio 4096 ott 26 22:30 br
valerio@ubuntu-hp:~$ grep VERSION /etc/os-releaseVERSION="18.04.1 LTS (Bionic Beaver)"VERSION_ID="18.04"VERSION_CODENAME=bionicvalerio@ubuntu-hp:~$ br/..../docker/dockrun.sh
valerio@BRHOST:~$ ls -ld brdrwxrwxr-x 6 valerio valerio 4096 Oct 26 20:30 br
valerio@BRHOST:~$ grep VERSION /etc/os-releaseVERSION_ID="7"
VERSION="7 (wheezy)"
http://va.ler.io – Pag. 27

○ ○ ● ○ ○ - Emulation Environment using QEMU
Buildroot configuration
• Based on “qemu_arm_vexpress_defconfig”• With the following main modifications– Build packages and libraries with debugging
symbols, don’t strip binaries, no gcc optimization– Build gdb, gdbserver, ltrace, strace and cross gdb
for the host– Include mtd and jffs2 file system and tools also for
the host– Include main libraries used in the router
(libgcrypt, expat, roxml, libxml2, Mini-XML)
http://va.ler.io – Pag. 28

○ ○ ● ○ ○ - Emulation Environment using QEMU
Linux kernel configuration
• With the following additional settings– Versatile Express platform type with Device Tree
support– Preemptible Kernel– NAND Device Support and Support for NAND
Flash Simulator– JFFS2 file system with LZMA compression
http://va.ler.io – Pag. 29
○ ○ ● ○ ○ - Emulation Environment using QEMU
uClibc configuration
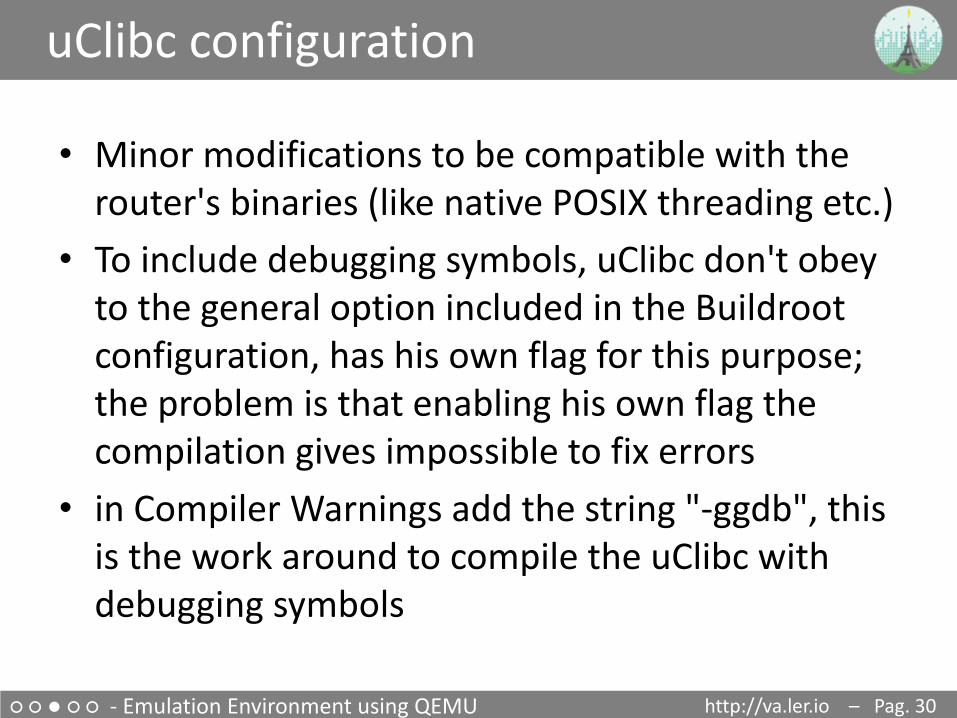
• Minor modifications to be compatible with the router's binaries (like native POSIX threading etc.)
• To include debugging symbols, uClibc don't obey to the general option included in the Buildrootconfiguration, has his own flag for this purpose; the problem is that enabling his own flag the compilation gives impossible to fix errors
• in Compiler Warnings add the string "-ggdb", this is the work around to compile the uClibc with debugging symbols
http://va.ler.io – Pag. 30

○ ○ ○ ● ○ - Analyze how the device works
The upgrade process
• Analyzing the upgrade process on the UART output (1 of 2)
Start pid 4 /usr/sbin/upgrade-prepare.sh cwmp.../usr/sbin/upgrade.shSignature OK.../usr/sbin/flash_eraseall \
-j -p 0 -l 8 /dev/mtd3...Writing boot & root filesystems...dd if=/tmp/upgrade/fw.bin bs=256 skip=514 count=94720 | /usr/sbin/nandwrite -s 524288 /dev/mtd3 –...[…] Found YAPS PartitionSplit Marker at 0x080FFF00[…] Creating 2 MTD partitions on "brcmnand.0":[…] 0x000007f00000-0x000008100000 : "bootfs_2”[…] 0x000008100000-0x00000fcc0000 : "rootfs_2"
Boot and
Root file
system
FIRMWARE FILE
514 * 256
(514+94720)*256
http://va.ler.io – Pag. 31

○ ○ ○ ● ○ - Analyze how the device works
The upgrade process• Analyzing the upgrade process on the UART output (2 of 2)Installing packages...opkg … -f /tmp/new_rootfs/etc/opkg.conf -o /tmp/new_rootfs install …Umount /tmp/new_rootfs...Writing first block of cferam...dd if=/tmp/upgrade/fw.bin bs=256 skip=2 count=512 | /usr/sbin/nandwrite /dev/mtd8 -...rebooting...
http://va.ler.io – Pag. 32

○ ○ ○ ● ○ - Analyze how the device works
The upgrade process - summary
• The upgrade script to analyze is /usr/sbin/upgrade.sh• The firmware is signed, signature is checked with sig_verify $file 2> /dev/null
• Boot and root file systems are written in a single nandwriteoperation
• A JFFS2 partition splitter proprietary kernel module is used to create the two partitions on the fly
• A JFFS2 end marker open source kernel module is used to delimit the end of the root file system partition
• Some additional packages are added, based on board type• The cferam boot loader is written with another nandwrite
operation
http://va.ler.io – Pag. 33

○ ○ ○ ● ○ - Analyze how the device works
Reverse engineering sig_verifysig_verify is a stripped binary, but calls library functions. We put breakpoints on these calls in the emulation environment$ arm-linux-readelf --sym -D sig_verifySymbol table for image:
Num Buc: Value Size Type Bind Vis Ndx Name16 0: 00008928 0 FUNC GLOBAL DEFAULT UND fseek29 1: 00008994 0 FUNC GLOBAL DEFAULT UND strcmp40 3: 000089dc 0 FUNC GLOBAL DEFAULT UND gcry_md_ctl38 11: 000089d0 0 FUNC GLOBAL DEFAULT UND fputs23 14: 00008964 0 FUNC GLOBAL DEFAULT UND fread1 15: 00008898 0 FUNC GLOBAL DEFAULT UND printf
44 16: 00008a0c 0 FUNC GLOBAL DEFAULT UND gcry_md_get_algo…41 16: 000089e8 0 FUNC GLOBAL DEFAULT UND close9 17: 000088e0 0 FUNC GLOBAL DEFAULT UND lseek7 19: 000088c8 0 FUNC GLOBAL DEFAULT UND gcry_md_open6 19: 000088bc 0 FUNC GLOBAL DEFAULT UND gcry_md_write3 20: 000088a4 0 FUNC GLOBAL DEFAULT UND gcry_check_version
...
http://va.ler.io – Pag. 34

○ ○ ○ ● ○ - Analyze how the device works
Running sig_verify in GDBStart gdb server in the emulation environment# gdbserver :9000 sig_verify --readonly \
DVA-5592_A1_WI_20180405.sig
Start gdb in the host machine$ arm-linux-gdb --ex="target remote :9000" \
--ex="set sysroot $SYSROOT"\--ex="directory $MYDIR" \--ex="directory $TOOLBIN" \
-x sv.gdb
http://va.ler.io – Pag. 35
○ ○ ○ ● ○ - Analyze how the device works
Running sig_verify in GDB
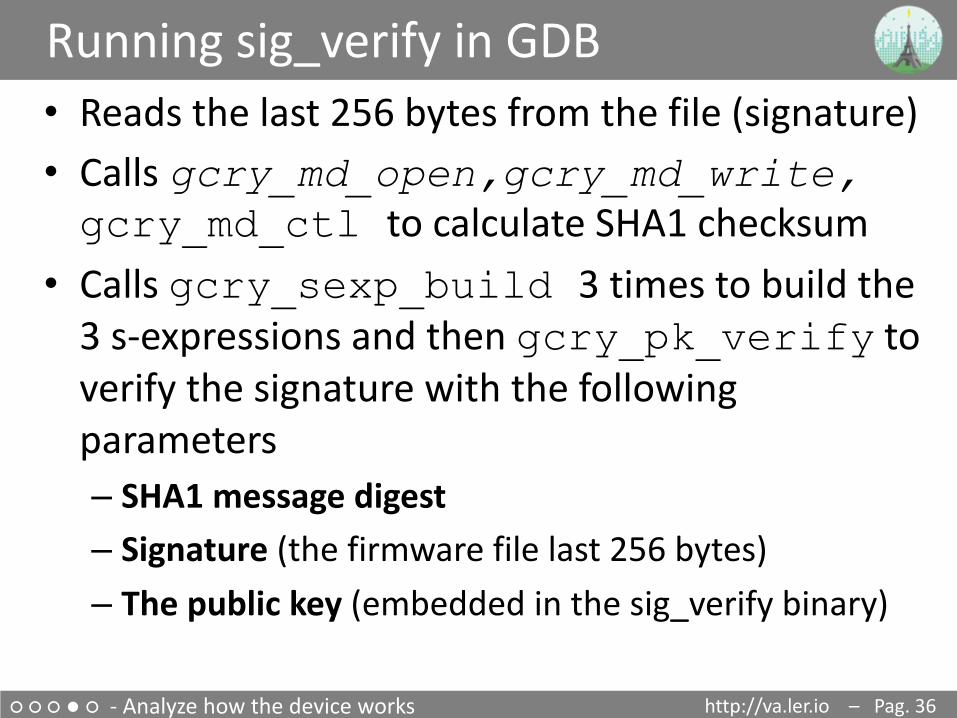
• Reads the last 256 bytes from the file (signature)
• Calls gcry_md_open,gcry_md_write, gcry_md_ctl to calculate SHA1 checksum
• Calls gcry_sexp_build 3 times to build the
3 s-expressions and then gcry_pk_verify to
verify the signature with the following
parameters
– SHA1 message digest– Signature (the firmware file last 256 bytes)
– The public key (embedded in the sig_verify binary)
http://va.ler.io – Pag. 36

○ ○ ○ ● ○ - Analyze how the device works
Running sig_verify in GDB
• The public key (MPI modulus and exponent) can be dumped from memory to recover the public key in the standard .pem format
• Unfortunately the private key remains unknown, it is not included in router’s certificates files in the folder /etc/certs
http://va.ler.io – Pag. 37
○ ○ ○ ● ○ - Analyze how the device works
Restricted shell
Firenze, December 3rd 2018 – Pag. 38
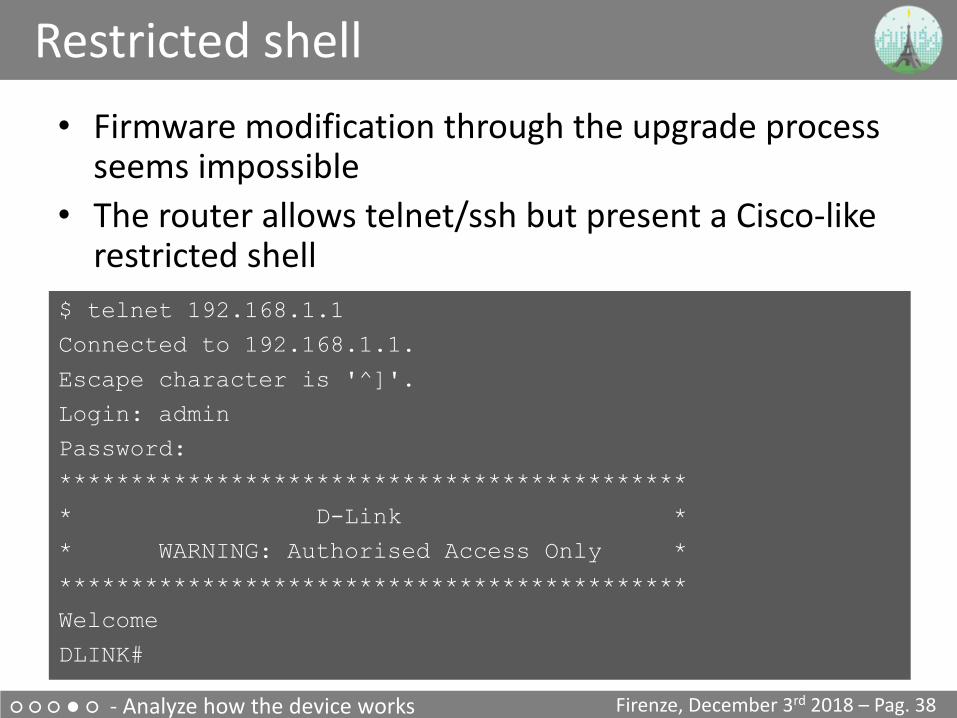
• Firmware modification through the upgrade process seems impossible
• The router allows telnet/ssh but present a Cisco-like restricted shell
$ telnet 192.168.1.1Connected to 192.168.1.1.Escape character is '^]'.Login: adminPassword:********************************************* D-Link ** WARNING: Authorised Access Only *********************************************WelcomeDLINK#

○ ○ ○ ● ○ - Analyze how the device works
Escaping the restricted shell
• /etc/shells suggests that the restricted shell is a Clish
(or Klish), open source, shell
• /bin/clish is a script:#!/bin/sh...exec /bin/clish.elf -l -x /tmp/clish
• In /etc/init.d/services.sh:#in factory modeln -s /etc/clish/prod /tmp/clish#in normal modeln -s /etc/clish /tmp/clash
• clish xml startup files are:
/etc/clish/prod/startup.xml/etc/clish/startup.xml
http://va.ler.io – Pag. 39

○ ○ ○ ● ○ - Analyze how the device works
Escaping the restricted shell• In /etc/clish/startup.xml:
<COMMAND name="factory-mode" help="hidden"><ACTION>cmclient DUMPDM FactoryData
/tmp/cfg/FactoryData.xml > /dev/nullnvramUpdate Feature 0x2 > /dev/nullcmclient REBOOT > /dev/null
</ACTION></COMMAND>
• ”factory-mode” is an hidden, not auto-completed command: it is a command to try:DLINK# factoryDLINK(factory)# factory-modeDLINK(factory)#DLINK(factory)# Connection closed by foreignhost.
http://va.ler.io – Pag. 40

○ ○ ○ ● ○ - Analyze how the device works
Escaping the restricted shell
• Factory mode is special mode: no normal WiFi, no Internet connection, no DHCP server, but it allows a non privileged shell login:
Login: admin• Password:• ********************************************• * D-Link *• * *• * WARNING: Authorised Access Only *• ********************************************• Welcome
DLINK# system shellBusyBox v1.17.3 built-in shell (ash)Enter 'help' for a list of built-in commands./root $
http://va.ler.io – Pag. 41

○ ○ ○ ● ○ - Analyze how the device works
The Quest for Root• Looking for processes running with root privileges/root $ ps -efPID USER VSZ STAT COMMAND
1 0 1184 S init261 0 724 S < /sbin/udevd --daemon274 1001 1328 S /bin/clish.elf -l -x /tmp/clish326 0 2332 S cm365 0 1800 S logd368 0 704 S ec2383 0 820 S dns2630 0 2480 S cwmp2631 0 1204 S inetd -f2633 0 736 S yamp -c /tmp/yamp.conf -p /tmp/…2658 0 664 S wpspbc3089 0 2316 S hostapd -B /tmp/wlan/config/ho…3090 65534 3560 S httpd -u nobody3647 0 1068 S chronyd -n -f /tmp/chrony.conf4191 0 696 S /sbin/rngd -r /dev/urandom -W 40004211 0 7136 S voip4404 1001 1176 S /bin/ash
http://va.ler.io – Pag. 42

○ ○ ○ ● ○ - Analyze how the device works
The Quest for Root - 1
• Identify each process and executable version using “strings” and/or running the executable with parameters “-v -V –version -h -h –help”• Identify open source executables• Search the internet for known
vulnerabilities for the specific executable version• Check if the vulnerability is exploitable in
the specific IoT device configuration
http://va.ler.io – Pag. 43

○ ○ ○ ● ○ - Analyze how the device works
The Quest for Root - 2• If no exploitable vulnerability has found
select a process candidate to reverse engineer to find vulnerabilities• Operating system binaries with no known
vulnerabilities are hard to crack• Lower level binaries (dns, voip …) are
more difficult to crack• Higher level executables with bigger
configuration files are less difficult to crack
http://va.ler.io – Pag. 44

○ ○ ○ ● ○ - Analyze how the device works
The Quest for Root - 3• The most interesting process is “cm”: router
configuration with root privileges is done by the “cm” process (add users, configure dhcpserver, set ip address etc.)
• “cm” uses shell scripts to carry out his duties• The “cmclient” command, running as normal
user, is used by restricted shell and web interface to talk to the “cm” process to configure the router
• “cmclient” is used, in startup scripts, to configure the “cm” process
http://va.ler.io – Pag. 45
○ ○ ○ ● ○ - Analyze how the device works
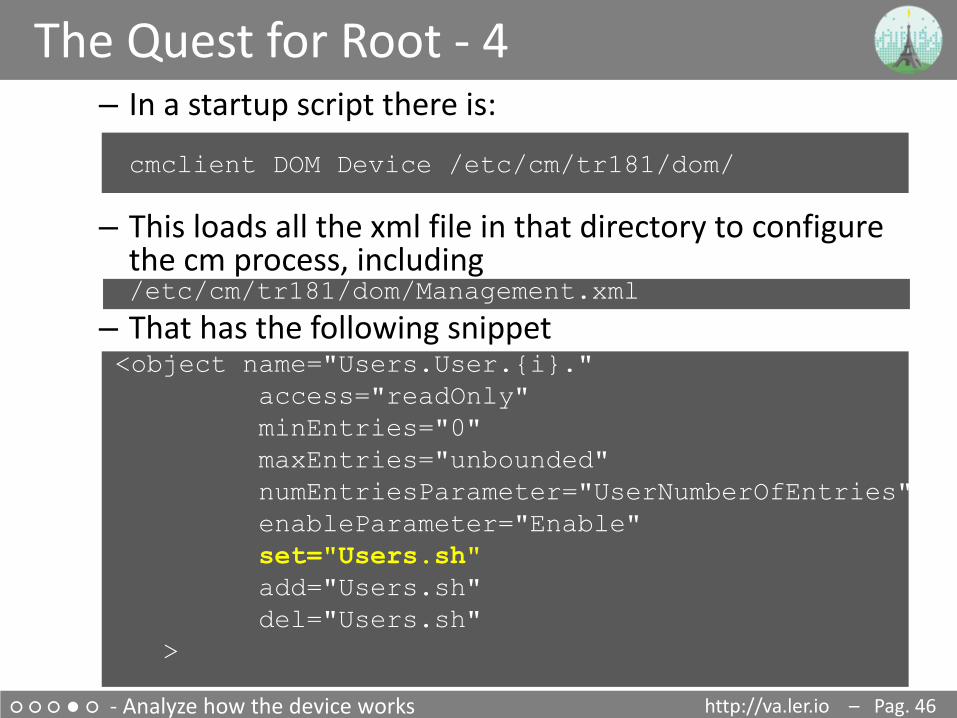
The Quest for Root - 4– In a startup script there is:
cmclient DOM Device /etc/cm/tr181/dom/
– This loads all the xml file in that directory to configure the cm process, including/etc/cm/tr181/dom/Management.xml
– That has the following snippet<object name="Users.User.{i}."
access="readOnly"minEntries="0"maxEntries="unbounded"numEntriesParameter="UserNumberOfEntries"enableParameter="Enable"set="Users.sh"add="Users.sh"del="Users.sh"
>
http://va.ler.io – Pag. 46

○ ○ ○ ● ○ - Analyze how the device works
The Quest for Root - 5– To trigger an execution of our script:
cmclient DOM Device /tmp/fakeManagement.xml
– It has the following snippet<object name="Users.User.{i}."
access="readOnly"minEntries="0"maxEntries="unbounded"numEntriesParameter="UserNumberOfEntries"enableParameter="Enable"set="../../tmp/fakeUsers.sh"add="../../tmp/fakeUsers.sh"del="../../tmp/fakeUsers.sh"
>
– Trigger the execution of the «fakeUsers.sh» script with– cmclient ADD Device.Users.User
http://va.ler.io – Pag. 47

○ ○ ○ ● ○ - Analyze how the device works
The Quest for Root - 7/root $ cat > /tmp/hack-script.sh
do a copy and paste of the scriptpress CTRL-D to terminate the copy
/root $ chmod a+x /tmp/hack-script.sh/root $ /tmp/hack-script.sh.../root $ su -BusyBox v1.17.3 (2018-04-11) built-in shell (ash)Enter 'help' for a list of built-in commands.r41358.07b1b3a7 .........................................................yet another solution by Advanced Digital Broadcast SA.........................................................root@localhost:~# iduid=0(root) gid=0(root) groups=0(root),19(remoteaccess),20(localaccess)
http://va.ler.io – Pag. 48

○ ○ ○ ○ ● - Create a Firmware Modification Kit
Firmware Modification Kit - 1• Based on firmware upgrade script analysis the
firmware file has the following structure:
MD5 CHECKSUMBOOT FILE SYSTEM
ROOTFILE
SYSTEM
PARTITION SPLITTER
END OF PARTITION MARKER
SIGNATURE
ORIGINAL FIRMWARE
http://va.ler.io – Pag. 49

○ ○ ○ ○ ● - Create a Firmware Modification Kit
Firmware Modification Kit - 2
• Extract the root file system, modify it
• Create the new root file system image
• Pad the file system image to the same size as the
original root file system image (the USB key will
be used for additional software)
• Reassemble the firmware file putting together all
the pieces, excluding the signature, using the
”dd” command
• The unsigned firmware file is ready
http://va.ler.io – Pag. 50
○ ○ ○ ○ ● - Create a Firmware Modification Kit
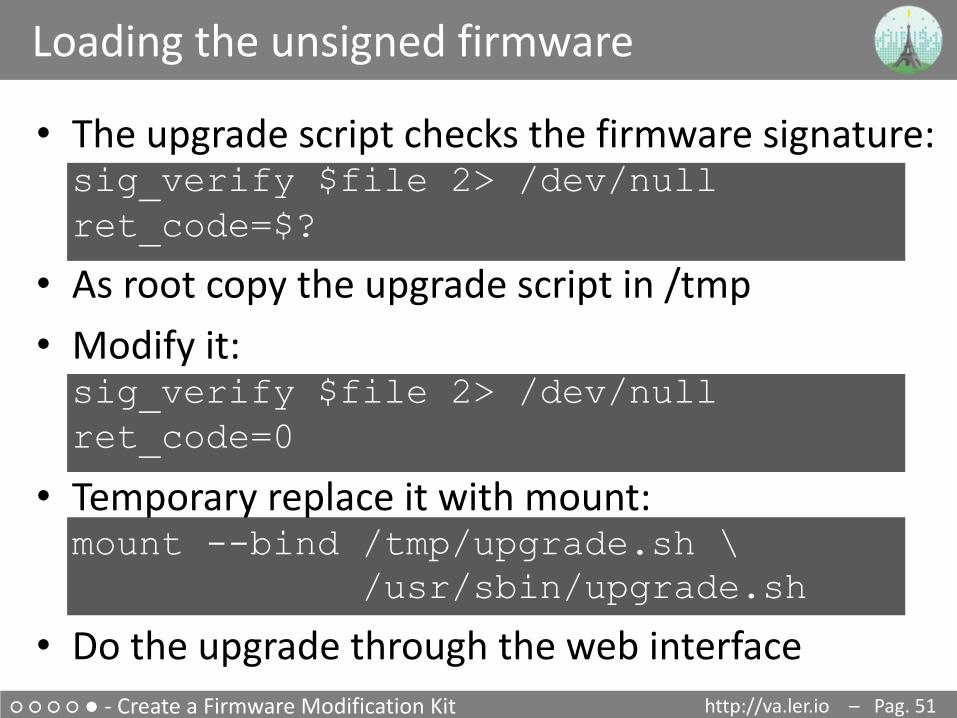
Loading the unsigned firmware
http://va.ler.io – Pag. 51
• The upgrade script checks the firmware signature:sig_verify $file 2> /dev/nullret_code=$?
• As root copy the upgrade script in /tmp• Modify it:sig_verify $file 2> /dev/nullret_code=0
• Temporary replace it with mount:mount --bind /tmp/upgrade.sh \
/usr/sbin/upgrade.sh
• Do the upgrade through the web interface

○ ○ ○ ○ ○ - Summary
Summary• Reverse engineering can be really challenging• Clearly define the limited scope of your reverse
engineering project• Start gathering information following the easiest
path first• If some information is missing or difficult to get
move forward, go back only if absolutely needed• Search on Internet for known vulnerabilities• Select to hack processes running as root and
with a large attack surface
http://va.ler.io – Pag. 52

○ ○ ○ ○ ○
Useful Links & DocumentationGitHub repositories related to the Home Router Example• Adbtools2, Tools for hacking ADB Epicentro routers, including firmware
modification: https://github.com/digiampietro/adbtools2• Buildroot-armv7: a set of scripts, configuration files and Buildroot external tree
to setup a Qemu emulation environment to run and reverse engineer the Netgear DVA 5592 executables: https://github.com/digiampietro/buildroot-armv7
Reverse engineering and physical disassembly• Introduction to reverse engineering, Mike Anderson, Embedded Linux
Conference 2018, slides and videos:https://elinux.org/images/c/c5/IntroductionToReverseEngineering_Anderson.pdfhttps://www.youtube.com/watch?v=7v7UaMsgg_c
Recommended Books• Chris Simmonds - Mastering Embedded Linux Programming - Second Edition -
Packt Publishing 2017• Norman Matloff , Peter Jay Salzman - The Art of Debugging with GDB , DDD and
Eclipse - NO STARCH PRESS 2008http://va.ler.io – Pag. 53

○ ○ ○ ○ ○
Useful Links & Documentation
Hardware tools• Bus Pirate: http://dangerousprototypes.com/docs/Bus_Pirate• Jtagulator: http://www.grandideastudio.com/jtagulator/• J-Link debug probes: https://www.segger.com/products/debug-probes/j-link/
JTAG and UART interfaces• Popular pinouts: http://www.jtagtest.com/pinouts/
Software• Buildroot: https://buildroot.org/
• Putty terminal emulator: https://www.putty.org/• OpenOCD (Open On-Chip Debugger) provides debugging, in-system
programming and boundary-scan testing for embedded target devices:
http://openocd.org/• Wireshark, network protocol analyzer: https://www.wireshark.org/• Binwalk, firmware analysis tool: https://github.com/ReFirmLabs/binwalk• Jefferson, JFFS2 filesystem extraction tool: https://github.com/sviehb/jefferson
http://va.ler.io – Pag. 54

○ ○ ○ ○ ○
Question Time
?Question Time
http://va.ler.io – Pag. 55

○ ○ ○ ○ ○
The End
Thank You
http://va.ler.io – Pag. 56
Valerio Di Giampietrohttp://va.ler.io
[email protected]@valerio