Intake Manifold Flap Linkage Pair, Billet Aluminum, B7 ...
12
Intake Manifold Flap Linkage Pair, Billet Aluminum, B7 Audi RS4 4.2L FSI The installation of your 034Motorsport Billet Aluminum Intake Manifold Flap Linkage Pair for the B7 Audi RS4 is an involved process that requires removal of the intake manifold as documented in your factory repair manual. Supplied Parts: Billet Aluminum Intake Manifold Flap Linkage Pair Intake Manifold Plug Removal/Installation Tool Tools Needed: All Tools Required for Factory Intake Manifold Removal Procedure Hands (Opposable Thumbs Are Required) T20 Torx Driver Hammer or Mallet Pliers or Vise-Grips Small Flathead Screwdriver Loctite (Green) 290 Step 0 – This installation document is meant to supplement the factory repair manual. Before beginning the installation of the 034Motorsport Billet Aluminum Intake Manifold Flap Linkage Pair for the B7 Audi RS4, you must remove the intake manifold as documented in the factory repair manual. Once you have removed the intake manifold from the cylinder head, you can proceed to Step 1. Please Note: We do not provide instructions for the removal of the B7 Audi RS4 Intake Manifold, as this is covered in factory repair manuals.
Transcript of Intake Manifold Flap Linkage Pair, Billet Aluminum, B7 ...

Intake Manifold Flap Linkage Pair, Billet Aluminum, B7 Audi RS4 4.2L FSI
The installation of your 034Motorsport Billet Aluminum Intake Manifold Flap Linkage Pair for the B7 Audi RS4 is an
involved process that requires removal of the intake manifold as documented in your factory repair manual.
Supplied Parts:
Billet Aluminum Intake Manifold Flap Linkage Pair
Intake Manifold Plug Removal/Installation Tool
Tools Needed:
All Tools Required for Factory Intake Manifold Removal Procedure
Hands (Opposable Thumbs Are Required)
T20 Torx Driver
Hammer or Mallet
Pliers or Vise-Grips
Small Flathead Screwdriver
Loctite (Green) 290
Step 0 – This installation document is meant to supplement the factory repair manual. Before beginning the installation
of the 034Motorsport Billet Aluminum Intake Manifold Flap Linkage Pair for the B7 Audi RS4, you must remove the
intake manifold as documented in the factory repair manual. Once you have removed the intake manifold from the
cylinder head, you can proceed to Step 1. Please Note: We do not provide instructions for the removal of the B7 Audi
RS4 Intake Manifold, as this is covered in factory repair manuals.

Step 1 – Locate the intake manifold plugs on each of the runners, and observe them in their natural habitat. Note that
there are two plugs on each runner, which means there are 16 of these plugs in total. Before they have a chance to
defend themselves, (but after you’ve screamed “This is Sparta!”) gently tap them out using the long end of the supplied
Intake Manifold Plug Removal Tool. Do not lose any of them!
Step 2 – Continue removing the intake manifold plugs until you’ve removed all 16 of them. Set the plugs aside for
reinstallation later. Pat yourself on the back – you deserve it!

Step 3 – Locate the T20 Torx screws that are now accessible through each of the holes for the plugs you removed. These
secure the intake manifold flaps to the rod, and need to be removed for installation of the billet linkages. Remove them
using a T20 Torx driver. There will be 2 for each flap, or 16 in total. Do not lose any of them!
Step 4 – Remove each of the intake manifold flaps through the intake manifold ports. There are 8 in total. Do not lose
any of them! You’re already keeping track of 40 things you don’t want to lose, so give yourself another pat on the back.
Excellent work!

Step 5 – Using needle-nose pliers, remove the intake manifold flap rod retaining plugs on each side of the intake
manifold. There is one on each bank between the two center intake ports. Do not lose either of them! These center the
rod in the intake manifold, and must be reinstalled.
Step 6 – Marvel at your work.
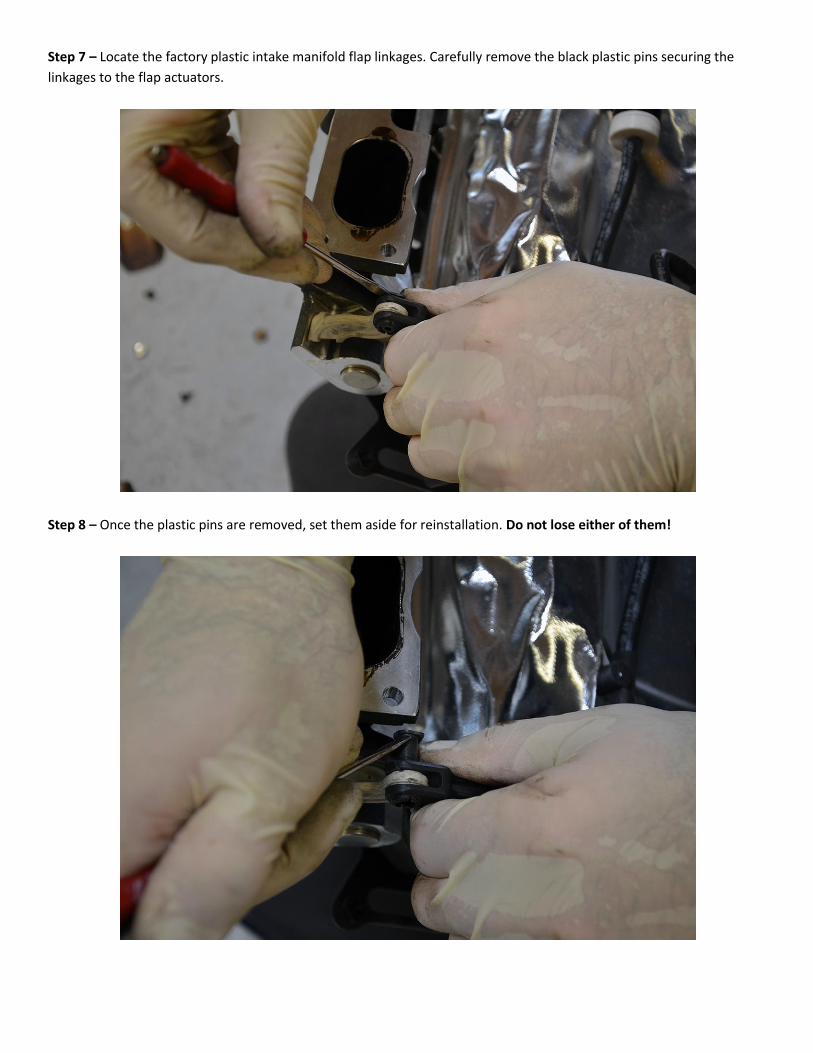
Step 7 – Locate the factory plastic intake manifold flap linkages. Carefully remove the black plastic pins securing the
linkages to the flap actuators.
Step 8 – Once the plastic pins are removed, set them aside for reinstallation. Do not lose either of them!

Step 9 – Remove the two T20 Torx screws securing each of the intake manifold flap sensors to the intake manifold.
Remove the sensors to access the intake manifold flap rods. Do not lose any of them!
Step 10 – The intake manifold flap rods can now be CAREFULLY pushed/pulled out towards the front of the car, away
from the throttle body. You may need to remove the small plugs opposite the flap position sensors for easier removal.

Step 11 – With the factory intake manifold flap linkages removed, you can begin the installation of your 034Motorsport
Billet Aluminum Intake Manifold Flap Linkage Pair.
Step 12 – Begin by installing the corresponding billet aluminum flap linkage to the correct intake manifold flap actuator,
as pictured below. Secure using the plastic pin.

Step 13 – A set of channel lock pliers may be used to ensure that the plastic pin is fully seated.
Step 14 – Align the large end of the intake manifold flap linkages with the slots on the intake manifold, and reinstall the
intake manifold flap rods, paying close attention to the orientation of each key to ensure it aligns with the machined
keyway on the corresponding linkage.
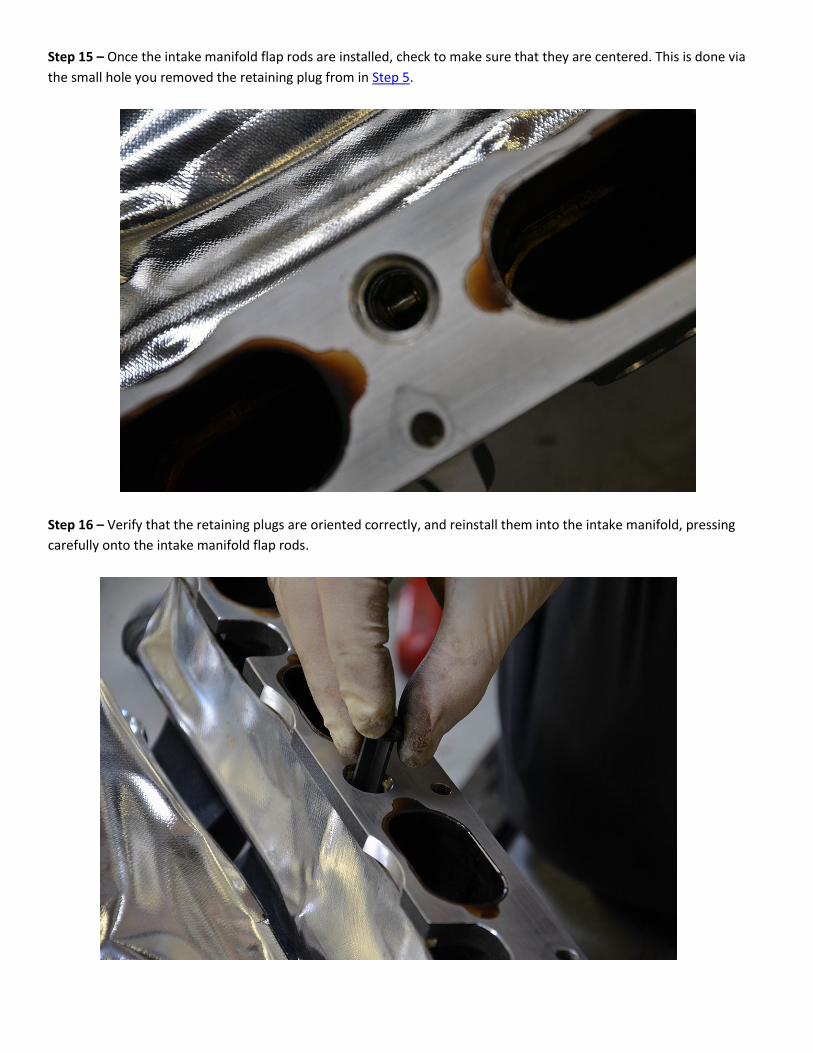
Step 15 – Once the intake manifold flap rods are installed, check to make sure that they are centered. This is done via
the small hole you removed the retaining plug from in Step 5.
Step 16 – Verify that the retaining plugs are oriented correctly, and reinstall them into the intake manifold, pressing
carefully onto the intake manifold flap rods.
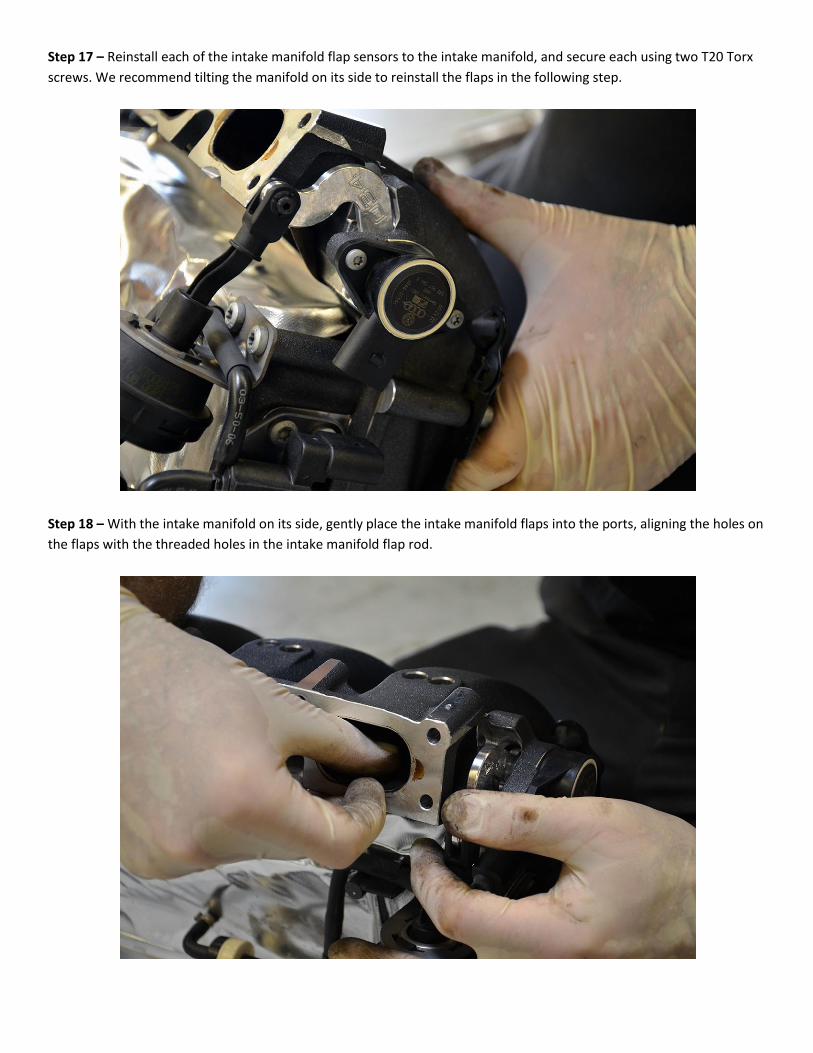
Step 17 – Reinstall each of the intake manifold flap sensors to the intake manifold, and secure each using two T20 Torx
screws. We recommend tilting the manifold on its side to reinstall the flaps in the following step.
Step 18 – With the intake manifold on its side, gently place the intake manifold flaps into the ports, aligning the holes on
the flaps with the threaded holes in the intake manifold flap rod.
Step 19 – Apply Loctite to the threads of the T20 Torx screws you removed from the intake manifold flaps/rods in Step 3,
and use them to secure the flaps to the rod.
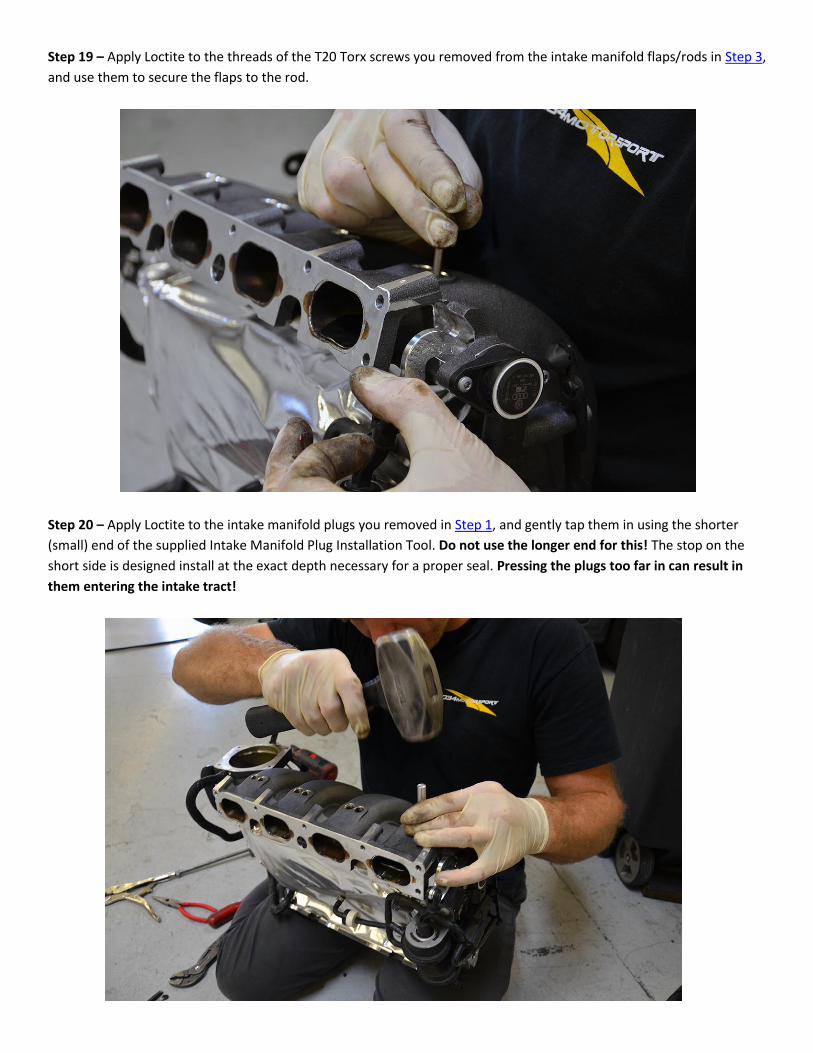
Step 20 – Apply Loctite to the intake manifold plugs you removed in Step 1, and gently tap them in using the shorter
(small) end of the supplied Intake Manifold Plug Installation Tool. Do not use the longer end for this! The stop on the
short side is designed install at the exact depth necessary for a proper seal. Pressing the plugs too far in can result in
them entering the intake tract!

Step 21 – Ensure that all plugs, caps, seals, pins, sensors, and screws are accounted for. Got everything? Pat yourself on
the back! Lie down next to the reassembled intake manifold, and snap a few artsy selfies that showcase both your
smiling mug and our billet aluminum linkages. We strongly recommend applying the Mayfair filter before uploading to
Instagram. Don’t forget #034motorsport!
Step 22 – Oh yeah, you should probably reinstall your intake manifold following the factory repair manual’s instructions
so that you can drive your car again and stuff.