Instructions for Use - Krell Industries · This owner’s reference manual contains important...
34
S–300i Remote Control Integrated Amplifier Instructions for Use Owner’s Reference
Transcript of Instructions for Use - Krell Industries · This owner’s reference manual contains important...
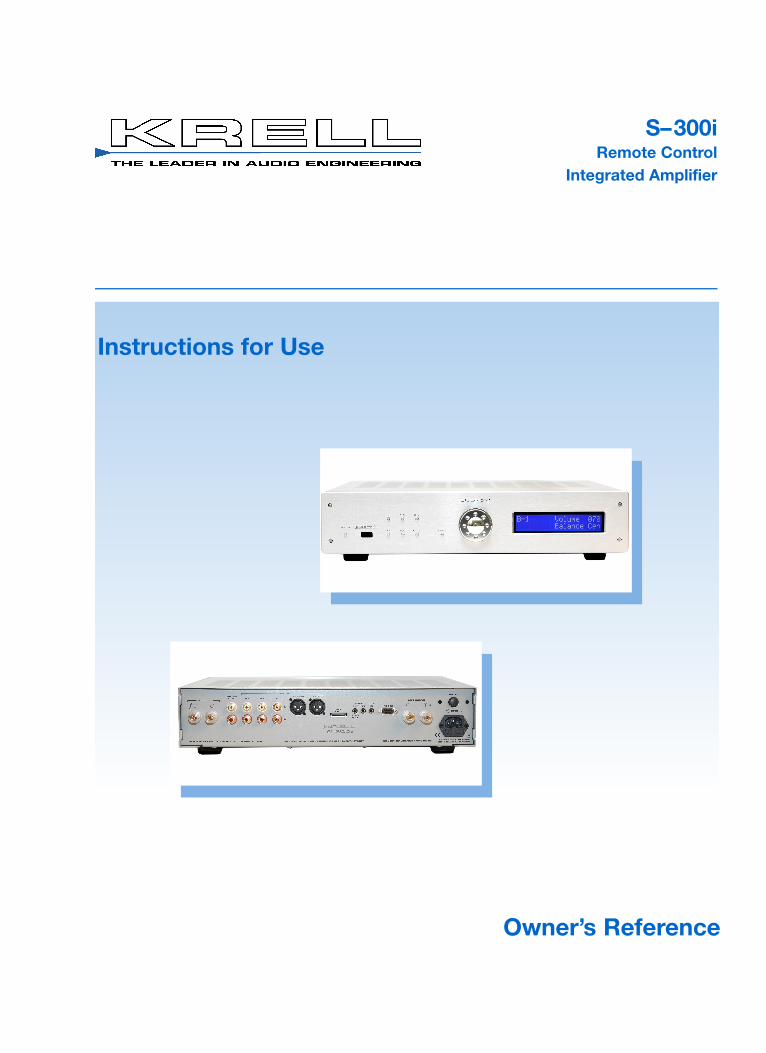
S–300i Remote Control
Integrated Amplifier
Instructions for Use
Owner’s Reference
K r e l l® is a registered trademark of Krell Industries, Inc., and is restricted for use by Krell Industries, Inc., itssubsidiaries, and authorized agents. Krell Current Mode™ and Theater Throughput™ are trademarks ofKrell Industries, Inc. All other trademarks and tradenames are registered to their respective companies.
© 2008 by Krell Industries, Inc. All rights reserved
Krell Industries, Inc.45 Connair RoadOrange, CT 06477-3650 USAT E L 2 0 3 - 7 9 9 - 9 9 5 4FAX 203-891-2028E - M A I L k r e l l @ k r e l l o n l i n e . c o mWEBSITE http://www. k r e l l o n l i n e . c o m
Do not place the integrated amplifier where it could be exposed to dripping ors p l a s h i n g .The ventilation grids on the top and bottom of the S-300i must be unobstructed atall times during operation. Do not place flammable material on top of or beneaththe component. When making connections to this or any other component, make sure all compo-nents are off. Turn off all systems’ power before connecting the S-300i to anyother component. Make sure all cable terminations are of the highest quality, freefrom frayed ends, short circuits, or cold solder joints.
THERE ARE NO USER-SERVICEABLE PA RTS INSIDE A N Y K R E L L P R O D U C T.
Please contact your authorized dealer, distributor, or Krell if you have any ques-tions not addressed in this reference manual.
S - 3 0 0 iRemote Control Integrated Amplifier Instructions for Usev 1.0
C O N TACT I N F O R M AT I O N
WA R N I N G S
Krell S-300i i i i
C o n t e n t sP a g e
I N T R O D U C T I O N 1
DEFINITION OF T E R M S 2
U N PACKING 4
P L A C E M E N T 5AC Power Guidelines 5Power Cord 5
F R O N T PA N E L / REMOTE CONTROL D E S C R I P T I O N 7
REMOTE CONTROL O N LY 9Battery Installation and Removal 9Remote Control Only Functions 9
BACK PA N E L D E S C R I P T I O N 1 2
CONNECTING THE S - 3 0 0 i TO YOUR SYSTEM 1 4Connection Steps 1 4
O P E R ATING YOUR S - 3 0 0 i 1 5Amplifier Operation 1 5
O P T I O N A L C O N F I G U R AT I O N S 1 7Configuring the S - 3 0 0 i 1 7Balance 1 8Input Balance Trim 1 8Input Level Trim 1 9Theater Mode 1 9Display 2 0Mute 2 1Input Trigger 2 1Output Trigger 2 2AC Mains 2 3Input Name 2 4Info 2 4
HOW TO T R O U B L E S H O O T SYSTEM NOISE 2 6
QUESTIONS AND A N S W E R S 2 7
WA R R A N T Y 2 8
RETURN A U T H O R I Z ATION PROCEDURE 2 9
S P E C I F I C AT I O N S 3 0
i v Krell S-300i
I l l u s t r a t i o n s
FIGURE 1 The S-300i Front Panel 6FIGURE 2 The S - 3 0 0 i Remote Control 6FIGURE 3 The S - 3 0 0 i Back Panel 11
P a g e
Krell S-300i 1
I n t ro d u c t i o n
Thank you for your purchase of the Krell S-300i Remote ControlIntegrated A m p l i f i e r. This fully integrated amplifier and preamplifierhas a discrete signal path from input to output and employs a widebandwidth design with low negative feedback for sonic accuracythroughout the frequency spectrum. All circuits up to the driverstage are balanced and pure Class A.
K r e l l ’s new surface mount technology (SMT) means that the S-300i is an integrated amplifier with big power—150 Watts perchannel—that does not require big space. SMT allows individualcircuit elements to be placed very close together. This shortenssignal paths and allows circuit elements to operate at the sametemperature, resulting in more accurate signal transfer andenhanced reliablilty.
The S-300i is easy to operate and integrate into your system. T h eremote control accesses all amplifier functions, and remote controlconnection options allow the S-300i to be easily connected withother components. The Theater Throughput feature provides easyintegration of the amplifier into a home theater s y s t e m .
This owner’s reference manual contains important information onthe placement, installation, and operation of the S-300i. Pleaseread this information carefully. A thorough understanding of thesedetails will help ensure satisfactory operation and long life for yourS-300i and related system components.

Definition of Te rm s
Following are the definitions of key terms used in your owner’s ref-erence manual.
Theater ThroughputTheater Throughput is a Krell configuration option that allows thesignal from a surround preamp/processor to pass through a Krellpreamplifier or integrated amplifier with no gain, for integrated vol-ume and balance management of Krell home theater systems.
Balanced A symmetrical input or output circuit that has equal impedancefrom both input terminals to a common ground reference point.The industry standard for professional and sound recording instal-lations, balanced connections have 6 dB more gain than single-ended connections and allow the use of long interconnect cables.Balanced connections are completely immune to induced noisefrom the system or the environment.
S i n g l e - e n d e dA two-wire input or output circuit. Use care when using single-ended connections as the ground connection is made last and broken first. Turn the system off prior to making or breaking single-ended connections. Single-ended connections are not recom-mended for connections requiring long cable runs.
i P o dA direct balanced input carried via a special termination utilizing a30-pin connector. This connection is designed specifically for iPodsand allows charging and control functions in addition to musicp l a y b a c k .
C O N F I G U R AT I O N S
INPUT AND OUTPUTC O N N E C T I O N S
2 Krell S-300i

Definition of Te rm s , c o n t i n u e d
O f fThe component is off when the rear panel button is not depressed.
Stand-by ModeA low power consumption status that keeps the audio circuits atidle. When you press the rear panel power button, the red stand-by LED illuminates. The component is now ready to be switched tothe operational mode. Krell recommends leaving the component inthe stand-by mode when it is not playing music.
Operational ModeWhen the component is in the stand-by mode, and you press thepower button on the front panel or the power key on the remotecontrol, the blue power LED illuminates. The component is in theoperational mode and is ready to play music.
Krell Current ModeA proprietary Krell circuit topology in which the audio gain stagesof a component operate in the current rather than voltage domain.This unique technology provides the component with exceptionalspeed and wide bandwidth capabilities.
T E C H N O L O G Y
Krell S-300i 3
O P E R AT I O N
4 Krell S-300i
U n p a c k i n g
Follow these steps to safely unpack the S-300i:
1 . Open the shipping box and remove the top layer of foam. T h eS-300i and the S-300i accessory kit containing the followingitems are visible:
1 AC power cord1 S-300i remote control1 30-Pin iPod connection cable1 packet containing the Quick Setup Guide
and the warranty registration card
2 . Grasp the underside of the amplifier and lift it straight out ofthe packing box.
3 . Place the amplifier in a safe location and remove the protectiveplastic wrapping.
If any of these items are not included please contact your authorizedKrell dealer.
Save all packing materials. If you must ship your S-300i in the future,repack the unit in its original packaging to prevent shipping damage.
N o t e s
Krell S-300i 5
P l a c e m e n t
Before you install the S-300i into your system, review the followingguidelines to choose the location for the S-300i. This will facilitatea clean, trouble-free installation. The S-300i does not require anytype of special rack or cabinet for installation. For the dimensionsof the S-300i, see S p e c i f i c a t i o n s, on the back cover.
Place the S-300i on a firm, level surface, away from excessiveheat, humidity, or moisture. The S-300i requires at least 1 inch(2.54 cm) of clearance on each side and at least two inches (5 cm)of clearance above the component to provide adequate ventilation.Installations inside cabinetry may need extra ventilation.
The S-300i is not hum-sensitive. Other components may beplaced on or around the S-300i (make sure ventilation gridsremain unobstructed).
Place the amplifier as close to the loudspeakers as possible andkeep loudspeaker cable lengths to a minimum. Loudspeaker cableadds impedance to the load the amplifier must drive, regardless ofthe cable’s gauge. All Krell amplifiers drive the lowest impedanceswith ease, but long loudspeaker cables reduce the maximumpower that can be delivered to the loudspeakers.
The S-300i has superb regulation and does not require a dedicat-ed AC circuit. Avoid connections through extension cords or multi-ple AC adapters. High quality 15 amp grounded AC strips areacceptable. High quality AC line conditioners or filters may beused if they are grounded and meet or exceed the unit’s maximumpower consumption of 1800 Wa t t s .
The S-300i should be operated with the power cord supplied and connected directly to the AC power outlet. Pleasecontact your authorized Krell dealer, distributor, or Krell beforeusing any devices designed to alter or stabilize the AC power forthe S-300i.
AC Power
G u i d e l i n e s
Power Cord

F i g u re 1 The S-300i Front Panel
F i g u re 2 The S-300i Remote Contro l
N o t e Some remote control keys listed above function with other current Krellcomponents. Consult the Krell reference manual for each model to reviewyour component’s full remote control capabilities.
6 Krell S-300i
P o w e r
1 Power BUTTON 2 Power LED3 Infrared Sensor
Input Devices5 S-1, S-2, S-3, B-1 and
iPod Buttons or Keys 7 Volume Level Knob or
Level / Navigation Keys Mode Control
6 MENU Button or Key8 ENTER Button or Key9 Display Wi n d o w
1 2 Direct iPod control keys
Volume Adjustment F u n c t i o n s
1 0 Bal (Balance) Keys( R e m o t e )
Buttons for other KRELL p r o d-u c t s
11 Amp option select 1 3 CD/ DVD transport control

F ront Panel/Remote Control DescriptionSee Figures 1 and 2 on page 6
Krell S-300i 7
P o w e r, analog input selections, and volume control accessed viathe front panel of the S - 3 0 0 i are described in the illustration legendb e l o w. The front panel display shows volume and balance levels,and Theater Throughput status. Most front panel features can alsobe activated via the keys on the remote. Descriptions of specialoperational features of the remote control are outlined on pages 9-1 0 :
1 Power Button or KeyUse this button to switch the S - 3 0 0 i between the stand-by and theoperational modes.
2 Stand-by LEDThe red stand-by LED illuminates when the S - 3 0 0 i is plugged intoa standard AC wall receptacle and the rear panel power button ispressed, indicating that the amplifier is in the stand-by mode andready to be switched to the operational mode.
3 Infrared SensorThe infrared sensor receives commands from the S-300i r e m o t econtrol. For proper remote control operation, make sure that noth-ing is obstructing the infrared sensor.
4 S-1, S-2, S-3, B-1 and iPod Buttons and KeysUse these buttons to select a balanced analog source component (B-1) via an XLR connector or a single-ended analog source com-ponent (S-1, S-2, or S-3) via single-ended RCA connectors or anIPod input via a special 30-pin connector.
5 Mute Button or Key
Use this button to interrupt the signal of the input you have select-ed. To unmute, press the mute button again.
6 Menu Button or KeyUse this button or key to access the menu functions of the S-300i.
PO W E R
A N A L O GS O U R C EC O M P O N E N T S
8 Krell S-300i
F ront Panel Description, c o n t i n u e d
7 Level Knob / Level KeysThe level knob on the front panel or the level keys on the remotecontrol adjust the amplifier output level. The output level is indicat-ed numerically on the front panel display, with a range from 0-151.
8 Level Control Knob / Enter KeyUse this button or key to configure the menu functions of the S-300i
9 Front Panel DisplayThe front panel display shows volume and balance levels andTheater Throughput status.
10 Bal (Balance) KeysUse these keys to shift the balance to the left or the right channel.Balance level is indicated in the front panel display (9). To displaybalance, push any key on the remote. The front panel display indicates:
“ C E N “when the system is balanced. If the system is not balanced, thefront panel display indicates that the balance is right or left of cen-ter and by how much, on a scale of 1 (least out of balance) to 5(most out of balance). Example: A display of:
“ R + 3 “means that the balance is moderately right of center. A display of:
“ L + 5 “means the balance is severely left of center.
11 Select (SEL) Key - for use with other KRELL P r o d u c t s
Used to select advanced meter or display functions on other CurrentK R E L L p r o d u c t s .
MODE INDICAT O R S
VOLUME ADJUSTMENT
F U N C T I O N S

Remote Control OnlySee Figure 2 on page 6
Krell S-300i 9
The S - 3 0 0 i remote control uses two A A A alkaline batteries, whichare included with the shipment.
To open the battery compartment on the back of the remote c o n t r o l :
1 . Place the remote face down on the table.
2 . Use T-8 Torx wrench to remove the bottom cover.
Do not use a knife or other sharp objects to open the battery compart -ment; they will scratch the remote control finish.
3 . Insert two A A A batteries with their flat (-) Ends touching the springs in the battery holder.
4 . Screw bottom cover back onto the remote
The remote control is ready for operation.
Replace batteries when remote control function becomes intermittent.
Remove batteries if the remote control is not used for a long period oftime. Battery leakage can damage the remote control.
The S - 3 0 0 i remote control accesses complete power amplifier andpreamplifier functions. A description of the functions unique to theS - 3 0 0 i f o l l o w :
N o t e
N o t e s
B a t t e ry
I n s t a l l a t i o n
and
R e m o v a l
Remote ControlOnly Functions
Remote Control Functions, continued
1 0 Krell S-300i
12 Direct iPod FunctionsWith an iPod connected to the special 30-pin connector, basic con-trol functions are available from the remote control.
Button Description from Left to Right:
Play/ pausePrevious Tr a c kNext Tr a c kNext List (Next playlist)Menu (accesses iPod Menu)Left wheel rotation (simulates iPod left circular motion)Enter (selects track or option)Right wheel rotation (simulates iPod right circular motion)Previous List (Previous playlist)
13 CD / DVD Transport Control - for use with other KRELL P r o d u c t s
Used to control basic CD/ DVD functions on other Current KRELLp r o d u c t s .
The remote control keys listed above function with the S-300i. Other keyson this remote control may activate other Krell components, for example,compact disc players. Consult the Krell owner’s reference manual foreach component to review your component’s full remote control capabili -ties.
VOLUME A D J U S T M E N TF U N C T I O N
N o t e

F i g u re 3 The S-300i Back Panel
Krell S-300i 11
Amplifier Channel
O u t p u t s
1 4 Left and Right Loudspeaker Outputs
Analog Inputs
1 5 Left and Right Balanced Analog Inputs
1 6 Left and Right Single-ended Analog Inputs
17 Direct iPod Input
Analog Outputs
1 9 Left and Right Preamp O u t p u t s
Remote Connections
1 8 RS-232 control Port 2 0 RC-5 In21 12 VDC Trigger In/O u t
P o w e r
22 IEC Connector23 Line Fuse24 Main Power Button

Back Panel DescriptionSee Figure 3 on page 11
1 2 Krell S-300i
The S - 3 0 0 i back panel provides connections for all inputs and out-puts, power on/off, and additional remote connections.
14 Left and Right Loudspeaker OutputsThe S - 3 0 0 i is equipped with standard binding posts for eachamplifier channel. These connectors accept bare wire, pins,banana plugs, or spade lugs. Use the red terminal for the positiveconnection and the black terminal for the negative connection.
15 Left and Right Balanced Analog InputsThe S - 3 0 0 i is equipped with one pair of balanced (B-1) inputs viaXLR connectors.
16 Left and Right Single-Ended Analog InputsThe S - 3 0 0 i is equipped with three pairs of single-ended (S-1, S-2, or S-3) inputs via RCA c o n n e c t o r s .
17 iPod InputThe S - 3 0 0 i is equipped with a balanced stereo input via a locking30-pin connector. The required 30-pin iPod cable is supplied.
18 RS-232The RS-232 port receives messages from a computer-based con-trol system, providing integrated control of all integrated functions.The RS-232 input uses a 9-pin D-subminiature connector.
The RS-232 port does not funtion with the iPod Input..
19 Left and Right Preamp Outputs
The S - 3 0 0 i is equipped with a pair of single-ended pre-amplifier outputs.
20 RC-5 InThe S - 3 0 0 i is equipped with an RC-5 input that makes custominstallation easy and secure by accepting baseband RC-5 inputcommands from a remote IR detector or hardwired remote con-t r o l l e r s .
21 12 VDC In/Out (12 V Tr i g g e r )The 12 V Trigger allows you to turn the S-300i on or off, or to andfrom stand-by, from other components.
AMPLIFIER CHANNEL
O U T P U T S
ANALOG INPUTS
ANALOG OUTPUTS
R E M O T E
C O N N E C T I O N S
N o t e

Back Panel Description, c o n t i n u e d
Krell S-300i 1 3
O u t . T h e output sends 12 VDC (12 V trigger) power on/off signalsto other Krell components and other devices that incorporate a 12V trigger.
I n .The input receives 12 VDC (12 V trigger) power on/off signalsfrom other Krell components and other devices that incorporate a12 V trigger.
The 12 VDC output current is limited to 30 ma.Consult the owner’s reference of the components used in a custominstallation to take full advantage of the remote capability of the S-300i.
22 IEC ConnectorThe connector is for use with the provided IEC standard 15 amppower cord.
23 Line FuseThe 50/60 Hz line fuse protects the S - 3 0 0 i in case of overload orm a l f u n c t i o n .
24 AC Power ButtonUse this button to change the S-300i from off to the stand-bym o d e .
Fuses must be replaced with the fuse value specified on the back panel.
P O W E R
N o t e s
N o t e
1 4 Krell S-300i
Krell recommends using balanced interconnect cables. Balancedinterconnect cables not only can minimize sonic loss but are alsoimmune to induced noise, especially with installations using longcables. Balanced connections have 6 dB more gain than single-ended connections. When level matching is critical, keep this gainvalue in mind.
Follow these steps to connect the S - 3 0 0 i to your system.
1 . Make sure all power sources and components are off before connecting inputs and outputs.
2 . Neatly organize the wiring between the S - 3 0 0 i and all systemcomponents. Separate AC wires from audio cables to prevent hum or other unwanted noises from being introduced into the system.
3 . Connect the left and right loudspeaker cables to the integrateda m p l i f i e r’s left and right loudspeaker output terminals (14).
The S-300i uses standard binding posts for each amplifierchannel. These connectors accept bare wire, pins, banannajacks or spade lugs. Use the red terminal for the positive con-nection and the black terminal for the negative connection.
4. Connect the left and right outputs of your source components tothe appropriate analog inputs (15, 16, 17) on the S-300i.
The S - 3 0 0 i is equipped with one balanced input (B-1), three sin-gle-ended inputs (S-1, S-2, or S-3), and one iPod input. The B-1, S-1, S-2, and S-3 inputs can be configured for T h e a t e rThroughput. See Optional Configurations, on page 17 forinformation on configuring an input for Theater Throughput.
5 . Use the preamp outputs (19) to connect to an additional powera m p l i f i e r.
6 . Plug the AC cord into the IEC connector (22) on the backpanel of the S-300i. Plug the remaining end into the AC wallreceptacle. Press the Power Button on the rear panel, The redstand-by LED (2) illuminates and the display shows the soft-ware version.
Pin 1 Shield (ground)Pin 2 Non-inverting (hot) (0°)Pin 3 Inverting (cold) (180°)
Connecting the S-300ito Your System
USING BALANCED C O N N E C T I O N S
C o n n e c t i o nS t e p s
Pin assignments for the
XLR connectors
Krell S-300i 1 5
This section provides information about operating the S - 3 0 0 i. T h eS-300i provides input selection,volume control operation and anyof the various menu functions via the front panel. The remote con-trol includes additional source, preamp and amplifier functions aswell. See Remote Control Only, on page 9, for more information.
After the S - 3 0 0 i is connected to AC power and in the stand-bymode, use the power button or key (1) to switch the component to the operational mode. The blue power LED (2) illuminates.
The S - 3 0 0 i Remote Control Integrated Amplifier is easy to operate.H o w e v e r, great care should be exercised when operating a systemthat includes the S - 3 0 0 i, because of the amplifier’s power output.Switching between active sources without muting the preamplifieroutput, or bumping/miscuing a device, can generate large tran-sients at low frequencies. The S - 3 0 0 i may generate enough powerwith these transients to damage most loudspeakers. To avoiddamage, be sure to switch all sources with the preamplifier leveleither muted or fully attenuated.
Krell amplifiers have large reserves of clean power and can safely driveloudspeakers to higher sound pressure levels than other amplifiers.H o w e v e r, use care when setting high playback levels and lower the vol -ume level at any sign of loudspeaker distress.
When powering up any system, always turn amplifiers on last.When powering down, always turn amplifiers off first.
1 . When the amplifier is in stand-by mode, with the red stand-byLED (2) illuminated, turn the amplifier on by pressing thepower button on the front panel or the power key on theremote control (1). There is an audible click. The blue powerLED (2) illuminates. The S-300i is now in the operationalm o d e .
2 . With the amplifier in the mute position, or the volume controlfully attenuated, select a source from the front panel or theremote control (4).
Operating Your S-300i
A m p l i f i e r
O p e r a t i o n
N o t e
ON/OFF AND S TA N D - B Y O P E R AT I O N

1 6 Krell S-300i
3 . Start playing the source. 4 . Set the volume to a comfortable listening level using the level
knob on the front panel or the level keys on the remote control( 7 ) .
5 . To turn the amplifier off, press the power button on the frontpanel or the power key on the remote control (1). The redstand-by LED (2) illuminates.It is now safe to turn off the rest of the system.
When changing sources, lower the volume to off or mute the output. Thisensures that the next source played does not damage your system with ahigh output transient.
Operating Your S-300i, c o n t i n u e d
N o t e
ON/OFF AND STA N D - B Y
O P E R ATION, c o n t i n u e d
The S - 3 0 0 i is equipped with a pair of single-ended preamplifieroutputs (19). These outputs enable the S - 3 0 0 i to be used as apreamplifier when it is connected to a separate amplifier.
The amplifier channel outputs are always active, even when the S-300i isbeing used only as a preamplifier.
N o t e
P re a m p l i f i e r
O u t p u t

Krell S-300i 1 7
Customizing the S-300i
The S-300i menu allows you to configure the following functions.You can also use the menu to review version information aboutthe software.
Navigation ConventionsNavigating the S-300i menu is straightforward and consistentthroughout.
(6) Menu Button or KeyTo enter the menu, press the menu button on the preamplifierfront panel or the menu key on the remote control. Once you arein the menu, you can press the menu button or key to exit themenu.(7) Volume Knob or Level KeysUse the level control knob on the preamplifier front panel or thevolume up and down keys on the remote control to scroll forwardand backward through the menu hierarchy. Each menu list is acontinuous loop.(8) Level Control Knob or KeyPress the level control knob on the preamplifier front panel or theenter key on the remote control to select a function or a configu-ration option, and to confirm a selection.(9) Front Panel DisplayThe display shows the active function and configurable options.
Optional Configurations
1 8 Krell S-300i
Optional Configurations, c o n t i n u e d
Menu Features and FunctionsBalanceThis function enables you to adjust the balance between the leftand right output channels. The options are: CENTER, Left 1-5dB,Right 1-5 dB,All Left, or All Right. The remote control has direct(10) keys to make these adjustments. For front panel adjustmentfollow the steps listed below.
Enter the menu, then:1. Use the level control knob on the preamplifier front panel or to
select: BALANCE.
2. Press the level control knob on the preamplifier front. The front panel display (9) shows the default mode: CENTER.
3. Use the level control knob to select the desired balance option from +1 to +5 dB, in 1dB increments, left or right.
4. Press the level control knob to confirm the selection. The front panel display reads: BALANCE.
5. Press Menu to Exit out.
Input Balance TrimThis function enables you to adjust the balance between the leftand right channels individually for each input. The options are:CENTER, L 1-6 dB, R 1-6 dB.
Enter the menu, then:1. Use the level control knob on the preamplifier front panel or
volume up and down keys (7) on the remote control to select: INPUT BALANCE TRIM.
2. Press the level control knob on the preamplifier front panel or the enter key (8) on the remote control. The front panel display (9) shows the default mode: S-1.
3. Use the level control knob or the up and down keys to select the desired input: S-1, S-2, S-3, B-1or iPod.
4. Press the level control knob or key. The display (3) shows the default mode: CENTER.
5. Use the level control knob or the volume up and down keys to select the desired balance trim from +1 to +6 dB, in 1 dB increments, left or right.

6. Press the level control knob or key to confirm the selection. Thefront panel display reads: INPUT BALANCE TRIM.
Input Level TrimThis function enables you to select a GAIN offset individually fora particular input. The options are: +/-6 dB, in 1 dB increments.
Enter the menu, then:1. Use the level control knob on the preamplifier front panel or the
up and down keys (7) on the remote control to select: INPUTLEVEL TRIM.
2. Press the level control knob on the preamplifier front panel or the enter key (8) on the remote control. The front panel display (9) shows the default mode: S-1
3. Use the level control knob or the up and down keys to select the desired input: S-1, S-2, S-3, B-1 or iPod.
4. Press the enter button or key. The front panel display shows thelevel trim last entered. The default mode is: 0 dB.
5. Use the level control knob or the up and down keys to select the desired trim option: +/-6 dB, in 1 dB increments.
6. Press the enter button or key to confirm the selection. The front panel display shows the selected input.
Theater ModeThis function enables you to select theater mode volume for aparticular input. Use this function when connecting the output of apreamp/processor to the S-300i for home theater applications.Configuring an input for theater mode sets that input for unitygain, and suspends the level control of the S-300i. Volumeadjustments are then made through the preamp/processor con-nected to the input configured for theater mode on the S-300i.The options are: ON, OFF.
Enter the menu, then:1. Use the level control knob on the preamplifier front panel or the
up and down keys (7) on the remote control to select THEATER.
2. Press the level control knob on the preamplifier front panel or the enter key (8) on the remote control. The front panel display (9) shows the default mode: None.
HOW TO ACTIVATE
AN INPUT FOR
T H E AT E R
T H R O U G H P U T
Krell S-300i 1 9
Optional Configurations, c o n t i n u e d
I M P O RTA N T
3. Use the level control knob or the Volume up and down keys to select the desired input: S-1, S-2, S-3 or B-1.
4. Press the enter button or key to confirm the selection.
S-1, S-2, S-3 or B-1The selected input is set to THEATER and the volume control is disen-gaged for that input on the S-300i.
OFFALL inputs are configured normally and the volume control is engagedfor all inputs on the S-300i.
NoteOnly one input on the S-300i can be in theater mode at a time. if theinput trigger is configured for THEATER, the S-300i selects the theaterinput automatically upon power on. See Input Trigger, on pages 35-36.
DisplayThis function enables you to turn the front panel display (9) on or offall the time, or turn it off after a time out. It also allows the adjust-ment of display brightness. The options are: ON, TIMED, or OFF.
Enter the menu, then:1 . Use the level control knob on the preamplifier front panel or the
volume up and down keys on the remote control (7) to select: D I S P L AY.
2 . Press the level control knob on the preamplifier front panel or the enter key (8) on the remote control. The front panel display (9) shows the default mode: M O D E .
3 . Press the level control knob or key (8) again. The front panel display shows the default mode: ON.
4 . Use the level control knob or the volume up and down keys to select the desired option: ON,Timed or OFF.
5 . Press the level control knob or key to confirm the selection. The front panel display reads: MODE.
6 . Use the level control knob or the volume up and down keys to select: BRIGHTNESS.
2 0 Krell S-300i
Optional Configurations, c o n t i n u e d

7 . Press the level control knob or key. The front panel display shows the default mode: HIGH.
8 . Use the level control knob or the volume up and down keys to select the desired brightness: LOW, MED, or HIGH.
9 . Press the level control knob or key to confirm the selection. The front panel display reads: BRIGHTNESS.
O NThe front panel display is always on.T I M E DThe front panel display turns off after 30 seconds.B R I G H T N E S SControls the brightness of the display. When the mode setting is OFF, thedisplay is at the brightness selected when in menu mode, and turns com-pletely off when you leave the menu mode.
MuteThis function enables you to control the mute mode. Options are:FULL, -20 dB.
Enter the menu, then:1. Use the level control knob, or the volume up and down keys (7)
to select: MUTE.
2. Press the level control knob on the preamplifier front panel or the enter key (8) on the remote control. The front panel display (9) shows the default mode: FULL.
3. Use the level control knob, or the up and down volume keys to select the desired option: FULL or -20 dB.
4. Press the level control knob or key to confirm the selection. Thefront panel display reads: MUTE.
FULLThe speaker and preamp outputs are completely silenced.-20dBThe speaker and preamp outputs are reduced by 20 dB and may still beaudible.
Input TriggerThis function enables you to configure the input trigger. Theoptions are: Off, Normal, Theater.
Krell S-300i 2 1
Optional Configurations, c o n t i n u e d

Enter the menu, then:1. Use the level control knob on the preamplifier front panel or the
up and down keys on the remote control to select: INPUTTRIGGER.
2. Press the level control knob on the preamplifier front panel or the enter key (8) on the remote control. The front panel display (9) shows the last input trigger setting. the default mode is: NORMAL.
3. Use the level control knob or the up and down keys to select the desired option: OFF, NORMAL, or THEATER.
4. Press the enter button or key to confirm the selection. The front panel display reads: INPUT TRIGGER.
OFFThe S-300i does not respond to 12 V input trigger commands. NORMALThe S-300i responds to 12 V input trigger commands. THEATERThe S-300i responds to 12 V input trigger commands, and the input forwhich theater mode is enabled is selected automatically. See TheaterMode, on page 19.
Output TriggerThis function enables you to turn the 12 Volt output trigger (24)on or off, or configure it with a delay of up to 30 seconds. Theoptions are: OFF, ON, DELAY.
Enter the menu, then:1. Use the level control knob on the preamplifier front panel or vol
ume up and down keys (7) on the remote control to select: OUTPUT TRIGGER.
2. Press the level control knob on the preamplifier front panel or the enter key (8) on the remote control. The front panel display (9) shows the default mode: TRIGGER.
3. Use the level control knob or volume up and down keys to select: OFF, ON, or DELAY.
2 2 Krell S-300i
Optional Configurations, c o n t i n u e d

4. Select DELAY. You are prompted to enter a delay time of 0-30 seconds.
5. Enter the delay time.
6. Press enter to confirm the selection. The display reads: DELAY.
7. Use the level control knob or volume up and down keys to scrollto: BACK.
ONThe 12 Volt trigger output is enabled at power on for the selected trigger(Trigger 1 or 2).OFFThe 12 Volt trigger output is disabled at power on for the selected trig-ger (Trigger 1 or 2). DELAYThe 12 volt trigger output is enabled at power on after a delay of 0-30seconds.
AC MainsThis function enables you to operate the S-300i from a switchedAC outlet. If AC Mains is set to On, the preamplifier turns on aftera brief delay, by-passing stand-by. Thereafter, you may switch thepreamplifier to and from stand-by, using the power button orpower key (1). The options are: OFF, ON
Enter the menu, then:1. Turn the level control knob on the preamplifier front panel or
up and down keys (10) on the remote control to select: AC MAINS.
2. Press the level control knob on the preamplifier front panel or the enter key (8) on the remote control. The front panel display (9) shows the default mode: OFF
3. Use the level control knob or the up and down keys to select the desired option: OFF or ON.
4. Press the enter button or key to confirm the selection. The front panel display reads: AC MAINS.
OFFThe S-300i remains in stand-by mode when AC power is applied.
Input Name Options
AUX, AUX1, AUX2, AUX3
B L U R AY, BYP, CABLE, CD, CD1, CD2, CD-
R, COMP
DAC, DAT, DCC, DISC, DISC 1, DISC 2,
DISC 3, DSS, DVD, DVD1, DVD2, DVD3,
DVD-A, DVR,EQ, GAME, HI-8, HD, HD-DVD,
IPOD, LD, LD1, LD2, LINE 1, LINE 2, LINE 3,
LINE, MDISC, MIXER, MON, MP3
PHONO, PHONO1, PHONO2, PROC
SACD, SAT, SAT1, SAT2, SRC1, SRC2,
SRC3, SURR,
S - V I D
TAPE1, TAPE2, TAPE3, TAPE, TEST, TUNER,
TUNER1, TUNER2, TV,
VCR, VCR1, VCR2, VCR3, VDISC, VIDEO,
VIDEO1, VIDEO2, VIDEO3, 8MM, 8TRK
Krell S-300i 2 3
Optional Configurations, c o n t i n u e d

ONThe S-300i turns on automatically, remaining in stand-by mode only fora brief warm-up period, when ac power is applied.
Input NameThis function enables you to select a device name for each input.The input name options are listed in the left margin, on this page.
Enter the menu, then:1. Use the level control knob on the preamplifier front panel or up
and down keys (14) on the remote control to select: INPUTNAME.
2. Press the level control knob on the preamplifier front panel or the enter key (8) on the remote control. The front panel display (9) shows the default mode: S-1.
3. Use the level control knob or the up and down keys to select the desired input: S-1, S-2, S-3 or B-1.
4. Press the enter button or key. The front panel display shows no characters.
5. Use the level control knob or the up and down keys to select the desired input name, from the input name options listed at left.
6. Press the enter button or key to confirm the selection and returnto the input list, in Step 3. The front panel display shows the input name.
To select input names for other inputs, repeat Steps 3 and 4.
Info This function enables you to access information about the pream-plifier software.
Enter the menu, then:
1. Use the level control knob on the preamplifier front panel or volume up and down keys (7) on the remote control to select: INFO.
2. Press the level control knob on the preamplifier front panel or the enter key (8) on the remote control. The front panel display (9) shows the software version number.
2 4 Krell S-300i
Optional Configurations, c o n t i n u e d

ConfigurationThis function enables you to access factory default settings oryour own saved settings. The options are: RECALL, SAVE, orFACTORY DEFAULT.
Enter the menu, then:
1. Use the level control knob on the preamplifier channel front panel or up and down keys (7) on the remote control to select: CONFIGURATION.
2. The front panel display (9) shows the default mode: FACTORYDEFAULT.
3. Use the level control knob or the volume up and down keys to select the desired option: FACTORY, RECALL or SAVE.
4. Press the enter button or key to confirm the selection. The front panel display reads: CONFIGURATION
FACTORYRecalls the factory settings.RECALLRecalls settings previously stored in memory using the SAVE function. SAVESaves the current settings in memory overwriting any previously savedsettings.
Krell S-300i 2 5
Optional Configurations, c o n t i n u e d

AC grounding becomes critical when connecting high performanceaudio components. When you mix and match audio components,each with its own ground potential, a low frequency hum mayoccur in one or both loudspeakers. This sometimes occurs whenintroducing a new component into a system.
If a low frequency hum emanates from the loudspeakers when youplace the S - 3 0 0 i amplifier into the system, follow these simpletroubleshooting steps:
1 . Check all cable terminations, making sure they have solid sol-der joints and are of sound construction.
2 . With the amplifier off, remove the interconnect cables, thenturn the amplifier on. If the hum disappears, turn the amplifiero ff and reinsert one of the interconnect cables. Turn the amplifier back on. If the hum reappears with one or bothcables reinserted, there may be a defective cable. Have theinterconnect cables checked before proceeding.
3 . If the interconnect cables are sound, you may be experiencinga ground loop. Please contact your authorized Krell dealer,d i s t r i b u t o r, or Krell for suggestions on how to solve this p r o b l e m .
How to Troubleshoot System Noise
2 6 Krell S-300i

Q . Should I leave my S - 3 0 0 i on at all times?A . Krell recommends leaving the amplifier in the stand-by mode,
ready to play music. If you are not going to play music for along time, you may turn off the rear panel power button.
Q . When I turn on the amplifier there is a loud hum through theloudspeakers. What should I do?
A . When a new component is introduced into a system, a low frequency hum may occur in one or both loudspeakers. Checkall input and output connections, making sure they are ofsound construction. See How to Troubleshoot System Noise,on page 19. If the interconnects and cables are sound, youmay be experiencing a ground loop. This can often be easilyeliminated. Please contact your authorized Krell dealer, distrib-u t o r, or Krell for suggestions on how to solve this problem.
Q . When I use the S - 3 0 0 i’s Theater Throughput capability with mysurround sound processor, where should I set thevolume on the S - 3 0 0 i?
A . You do not need to set the volume on the S - 3 0 0 i because thea m p l i f i e r’s volume and balance controls are not active in theTheater Throughput mode. When using the S - 3 0 0 i’s T h e a t e rThroughput capability, the surround sound processor controlsthe system volume. See Optional Configurations, on page 17.
Questions and Answers
Krell S-300i 2 7

This Krell product has a limited warranty of five years for parts and labor on circuitry fromdate of purchase or six years from date of original shipment from the Krell factory. Shouldthis product fail to perform at any time during the warranty, Krell will repair it at no cost tothe owner, except as set forth in this warranty.The warranty does not apply to damage caused by acts of God or nature.
The warranty on this page shall be in lieu of any other warranty, expressed or implied,including, but not limited to, any implied warranty of merchantability or fitness for a particular purpose. There are no warranties which exceed beyond those described in thisdocument. If this product does not perform as warranted herein, the owner’s sole remedyshall be repair. In no event will Krell be liable for incidental or consequential damages arising from purchase, use, or inability to use this product, even if Krell has been advised ofthe possibility of such damages.
Proof of purchase in the form of a bill of sale or receipted invoice substantiating that the unitis within the warranty period must be presented to obtain warranty service. The warrantybegins on the date of retail purchase, as noted on the bill of sale or receipted invoice froman authorized Krell dealer or distributor.The warranty for Krell products is valid only in the country to which they were originallyshipped, through the authorized Krell distributor for that country, and at the factory. T h e r emay be restrictions on or changes to Krell’s warranty because of regulations within a specific country. Please check with your distributor for a complete understanding of the warranty in your country.
If a unit is serviced by a distributor who did not import the unit, there may be a charge forservice, even if the product is within the warranty period.
Freight to the factory is your responsibility. Return freight within the United States (U.S.A.) isincluded in the warranty. If you have purchased your Krell product outside the U.S.A. andwish to have it serviced at the factory, all freight and associated charges to the factory areyour responsibility.
Krell will pay return freight to the U.S.A.-based freight forwarder of your choice. Freight andother charges to ship the unit from the freight forwarder to you are also your responsibility.
Krell is not responsible for any damage incurred in transit. Krell will file claims for damagesas necessary for units damaged in transit to the factory. You are responsible for filing claimsfor shipping damages during the return shipment.
Krell does not supply replacement parts and/or products to the owner of the unit.Replacement parts and/or products will be furnished only to the distributor performing service on this unit on an exchange basis only; any parts and/or products returned to Krellfor exchange become the property of Krell.
No expressed or implied warranty is made for any Krell product damaged by accident,abuse, misuse, natural or personal disaster, or unauthorized modification.
Any unauthorized voltage conversion, disassembly, component replacement, perforation ofchassis, updates, or modifications performed to the unit will void the warranty. The operating voltage of this unit is determined by the factory and can only be changed byan authorized Krell distributor or at the factory. The voltage for this product in the U.S.A.cannot be changed until six months from the original purchase date.
In the event that Krell receives a product for warranty service that has been modified in anyway without Krell authorization, all warranties on that product will be void. The product willbe returned to original factory layout specifications at the owner’s expense before it isrepaired. All repairs required after the product has been returned to original factory specifi-cations will be charged to the customer, at current parts and labor rates.
All operational features, functions, and specifications and policies are subject to change
Wa rr a n t y
To register your product
for warranty benefits,
please complete and re t u rn
the Wa rranty Registration
C a rd enclosed in the ship-
ping box within 15 days of
p u rchase. Thank you.
2 8 Krell S-300i

R e t u rn Authorization P ro c e d u re
If you believe there is a problem with your component, please con-tact your dealer, distributor, or the Krell factory to discuss the problem before you return the component for repair. To expediteservice, you may wish to complete and e-mail the Service RequestForm in the Service section of our website at:
h t t p : / / w w w. k r e l l o n l i n e . c o m
To return a product to Krell, please follow this procedure so thatwe may serve you better:1 . Obtain a Return Authorization Number (R/A number) and ship-
ping address from the Krell Service Department.2 . Insure and accept all liability for loss or damage to the product
during shipment to the Krell factory and ensure all freight (ship-ping) charges are prepaid.
The product may also be hand delivered if arrangements with theService Department have been made in advance. Proof of pur-chase will be required for warranty validation at the time of handd e l i v e r y.
Use the original packaging to ensure the safe transit of the productto the factory, dealer, or distributor. Krell may, at its discretion, returna product in new packaging and bill the owner for such packaging ifthe product received by Krell was boxed in nonstandard packagingor if the original packaging was so damaged that it was unusable. IfKrell determines that new packaging is required, the owner will benotified before the product is returned.
HOW TO RETURN
A PRODUCT
I M P O RTA N T
To purchase additional packaging, please contact your authorizedKrell dealer, distributor, or the Krell Service Department for assis-t a n c e .
HOW TO PURCHASE
ADDITIONAL PA C K I N G
To contact the Krell Service Department:
T E L 2 0 3 - 7 9 9 - 9 9 5 4M o n d a y - F r i d a y, 9:00 am to 5:00 pm EST
FA X 2 0 3 - 7 9 9 - 9 7 9 6E - M A I L s e r v i c e @ k r e l l o n l i n e . c o mW E B S I T E h t t p : / / w w w. k r e l l o n l i n e . c o m
HOW TO EXPEDITE
S E RV I C E
Krell S-300i 2 9
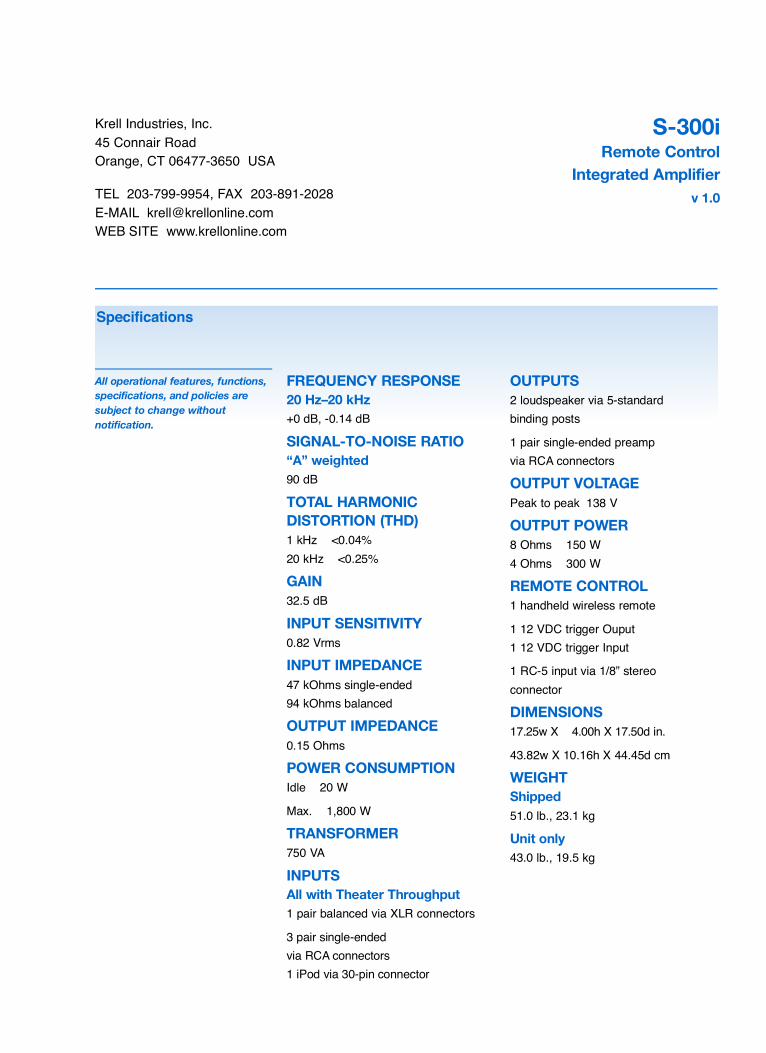
FREQUENCY RESPONSE
20 Hz–20 kHz
+0 dB, -0.14 dB
SIGNAL-TO-NOISE RAT I O
“A” weighted
90 dB
T O TAL HARMONIC
D I S T O RTION (THD)
1 kHz <0.04%20 kHz <0.25%
G A I N
32.5 dB
INPUT SENSITIVITY
0.82 Vr m s
INPUT IMPEDANCE
47 kOhms single-ended94 kOhms balanced
OUTPUT IMPEDANCE
0.15 Ohms
POWER CONSUMPTION
Idle 20 W
Max. 1,800 W
T R A N S F O R M E R
750 VA
I N P U T S
All with Theater Thro u g h p u t
1 pair balanced via XLR connectors
3 pair single-ended via RCA c o n n e c t o r s1 iPod via 30-pin connector
O U T P U T S
2 loudspeaker via 5-standard binding posts
1 pair single-ended preamp via RCA c o n n e c t o r s
OUTPUT VOLTA G E
Peak to peak 138 V
OUTPUT POWER
8 Ohms 150 W4 Ohms 300 W
REMOTE CONTROL
1 handheld wireless remote
1 12 VDC trigger Ouput1 12 VDC trigger Input
1 RC-5 input via 1/8” stereo c o n n e c t o r
D I M E N S I O N S
17.25w X 4.00h X 17.50d in.
43.82w X 10.16h X 44.45d cm
W E I G H T
S h i p p e d
51.0 lb., 23.1 kg
Unit only
43.0 lb., 19.5 kg
Krell Industries, Inc.45 Connair RoadOrange, CT 06477-3650 USA
TEL 203-799-9954, FAX 203-891-2028E-MAIL [email protected] SITE www.krellonline.com
S-300i Remote Contro l
Integrated Amplifier
v 1.0
S p e c i f i c a t i o n s
All operational features, functions,
specifications, and policies are
subject to change without
n o t i f i c a t i o n .