Installation of Winkhaus Locking Hardware of Winkhaus Locking Hardware ... box and the interior...
17
Installation of Winkhaus Locking Hardware Fiberglass Patio Doors
Transcript of Installation of Winkhaus Locking Hardware of Winkhaus Locking Hardware ... box and the interior...

Installation of Winkhaus Locking Hardware Fiberglass Patio Doors

Field Installation Instructions forWinkhaus Locking Hardware
Fiberglass Patio Doors
1
Layout your parts make to make sure everything is in the package
Handle set
INTERIOR EXTERIOR

Field Installation Instructions forWinkhaus Locking Hardware
Fiberglass Patio Doors
2
2. Screw the two pieces together until snug.
1. The spindle comes in two pieces; the part that has the washer on it comes in the exterior hardware box and the interior piece comes in the interior hardware box.
two piece spindle

Field Installation Instructions forWinkhaus Locking Hardware
Fiberglass Patio Doors
3
4. From the outside, install the spindle into the door.
• Make sure that the portion with the washer is on the outside.
• The washer MUST be tight against the lock box.
3. Rotate the two pieces backward until the two slots line up.
two piece spindle

Field Installation Instructions forWinkhaus Locking Hardware
Fiberglass Patio Doors
4
6a. You must get cam lined with the top of cylinder.
• Top picture is of the slot where you will have to use the pin tool to lift cam release.
• Bottom picture shows the use of the pin tool lifting up the cam release.
5. Put key into the cylinder.
installing tHe key cylinder into tHe door

Field Installation Instructions forWinkhaus Locking Hardware
Fiberglass Patio Doors
5
7. With the cam lined up, install the key cylinder into door from the exterior.
6b. Once the cam release is lifted, you can turn the cam to line up with the top so you can install the key cylinder into the door.
installing key cylinder
Field Installation Instructions forWinkhaus Locking Hardware
Fiberglass Patio Doors
6
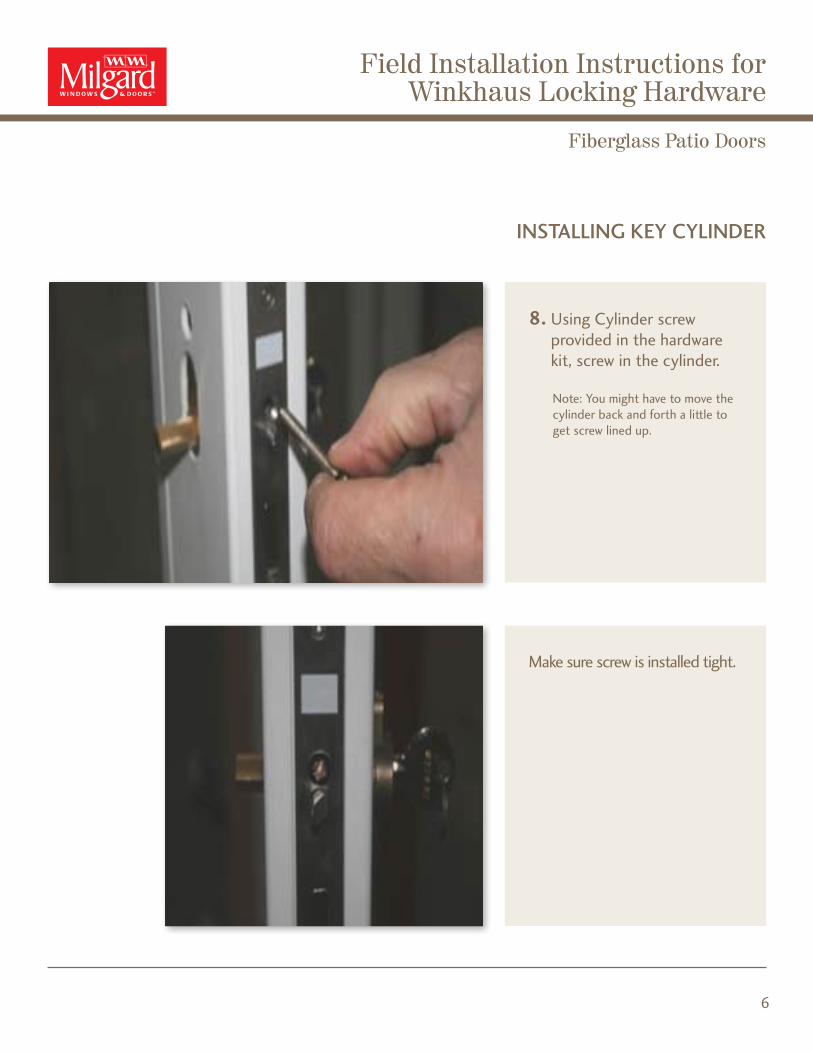
Make sure screw is installed tight.
8. Using Cylinder screw provided in the hardware kit, screw in the cylinder.
Note: You might have to move the cylinder back and forth a little to get screw lined up.
installing key cylinder
Field Installation Instructions forWinkhaus Locking Hardware
Fiberglass Patio Doors
7
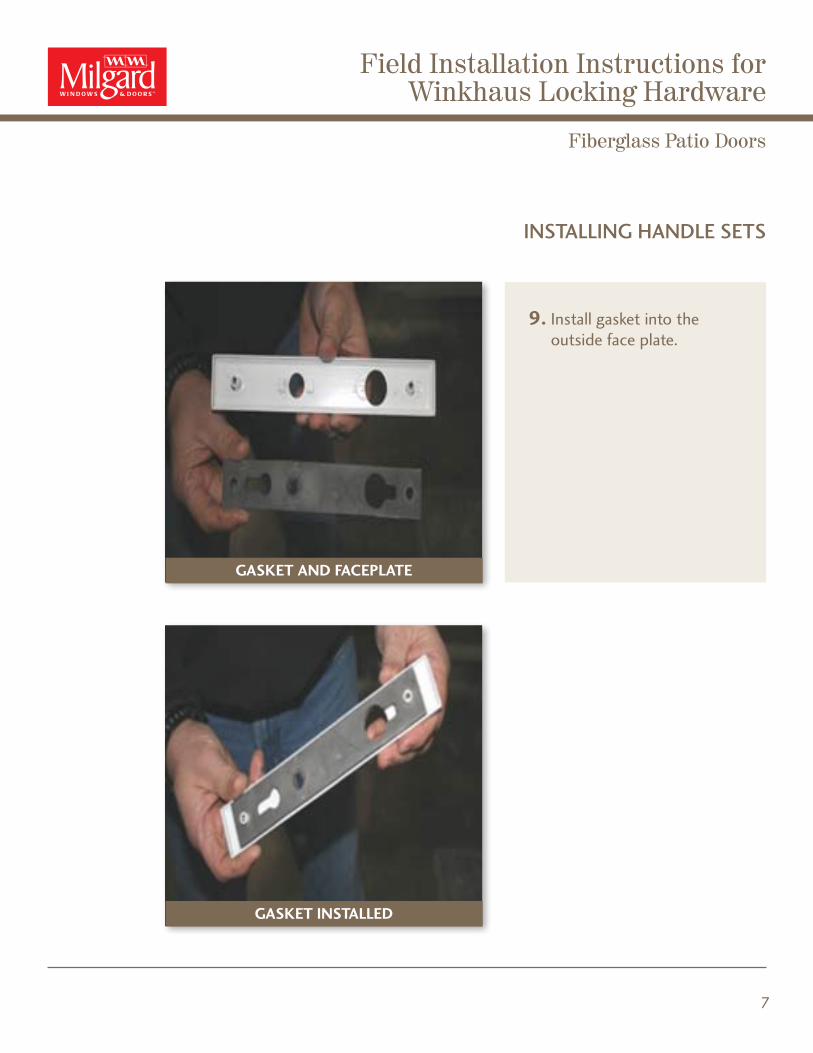
9. Install gasket into the outside face plate.
installing Handle sets
GaskET aNd FacEplaTE
GaskET INsTallEd

Field Installation Instructions forWinkhaus Locking Hardware
Fiberglass Patio Doors
8
10. Install Outside plate.
11. While holding outside plate in place, install inside plate lining thumb turn with cylinder.
• Install thumb turn in the vertical position.
installing Handle sets

Field Installation Instructions forWinkhaus Locking Hardware
Fiberglass Patio Doors
9
12. Using screws provided, screw both pieces together.
• DO NOT OVER TIGHTEN, just snug so the plate/style does not crush.
installing Handle sets

Field Installation Instructions forWinkhaus Locking Hardware
Fiberglass Patio Doors
10
13. Install set screw into handle.
14. Install Guide Ring onto handle.
installing Handle sets
Field Installation Instructions forWinkhaus Locking Hardware
Fiberglass Patio Doors
11
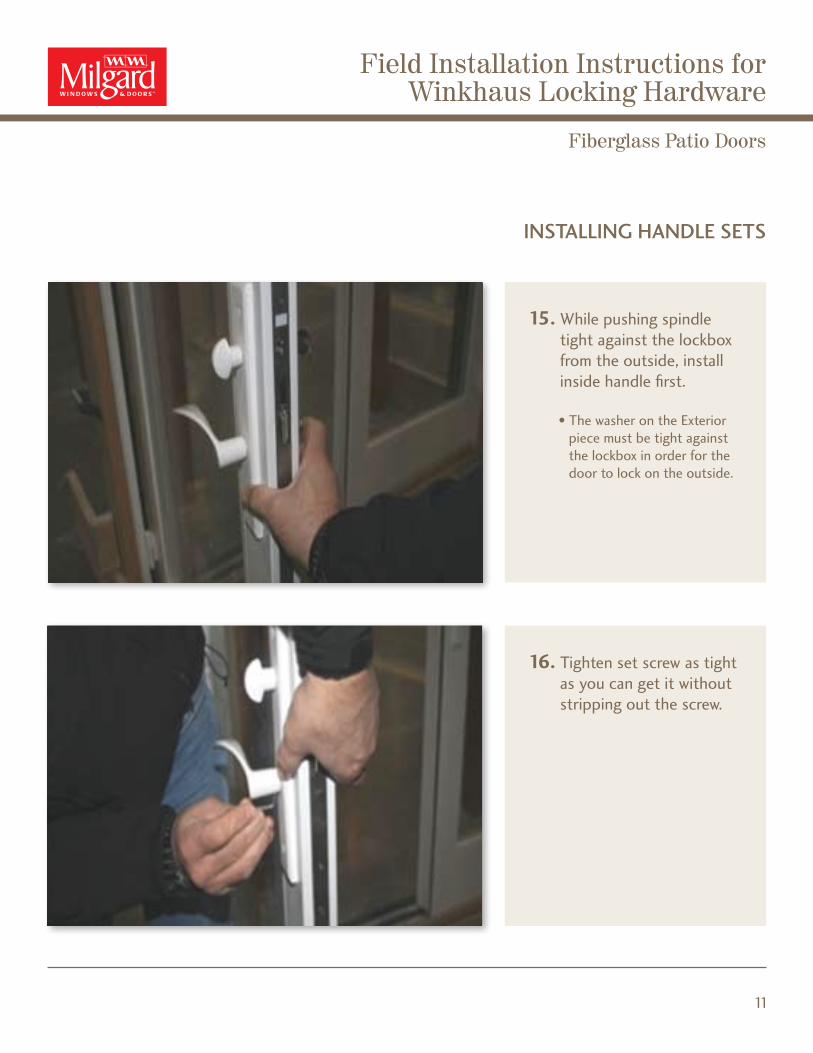
15. While pushing spindle tight against the lockbox from the outside, install inside handle first.
• The washer on the Exterior piece must be tight against the lockbox in order for the door to lock on the outside.
16. Tighten set screw as tight as you can get it without stripping out the screw.
installing Handle sets

Field Installation Instructions forWinkhaus Locking Hardware
Fiberglass Patio Doors
12
17. Install outside handle and tighten set screw.
• Now you can try locking door.
• Lift up on handle activating the hardware.
• Turn thumb turn.• Try outside handle to
make sure it is locked.
installing Hardware set
cHeck operation
• After hardware is installed you should be able to throw the bolts and lock the thumb turn. At this point you should not be able to open the door from the outside.
Q. With the door in the locked position, what if I can still jiggle the handle from the outside and open the door?
a. Make sure that the spindle is tight against the lockbox from the outside. If the spindle is not tight, the door will not lock from the outside.

Reverse Handing of Winkhaus Locking HardwareFiberglass Patio Doors

Field Installation Instructions for Reverse Handing of Winkhaus Locking Hardware
Fiberglass Patio Doors
1
2. Ensure the plastic film on the face and the side of the lockbox has been removed.
1. Ensure the black pin stop is removed prior to installing hardware.
reverse Handing

Field Installation Instructions for Reverse Handing of Winkhaus Locking Hardware
Fiberglass Patio Doors
2
4. After latch has popped out, turn latch and push back in, make sure it clicks into place.
3. Push latch in about 1/4” then push the flat plate on the back side and latch will pop out.
reverse Handing

Field Installation Instructions for Reverse Handing of Winkhaus Locking Hardware
Fiberglass Patio Doors
3
6. The final and most important step is to push the pin toward the same side that the flat portion of the latch is toward. (in-swing = inside)
Note: If this is not done, the Door will not lock from the outside.
5. Using a 6mm wrench turn the anti slam pin 180 degrees.
reverse Handing