INSTALL NEW WebEnabledMRO TOOLBAR
8
Toolbar Installation Guide as of: 03/12/14 Page 1 INSTALL NEW WebEnabledMRO TOOLBAR TIME: This process will take about five minutes. 1) The Web Enabled Toolbar is supported for use on Internet Explorer Browsers only, versions: IE8, IE 9, IE 10, IE 11. Also, installing software may require assistance and/or approval from your IT System Administrator before proceeding. 2) Open Internet Explorer 3) From the Class C Solutions Group web site, click on the Customer Order Center tab. 4) Next select the WebEnabledMRO Program (scanner & toolbar) option link. http://classccustomer.mscdirect.com/landing/toolbar.htm 5) Click ‘Install WebEnabledMRO Toolbar’
Transcript of INSTALL NEW WebEnabledMRO TOOLBAR
Toolbar Installation Guide as of: 03/12/14
Page 1
INSTALL NEW WebEnabledMRO TOOLBAR TIME: This process will take about five minutes.
1) The Web Enabled Toolbar is supported for use on Internet Explorer Browsers only,
versions: IE8, IE 9, IE 10, IE 11. Also, installing software may require assistance and/or approval from your IT System Administrator before proceeding.
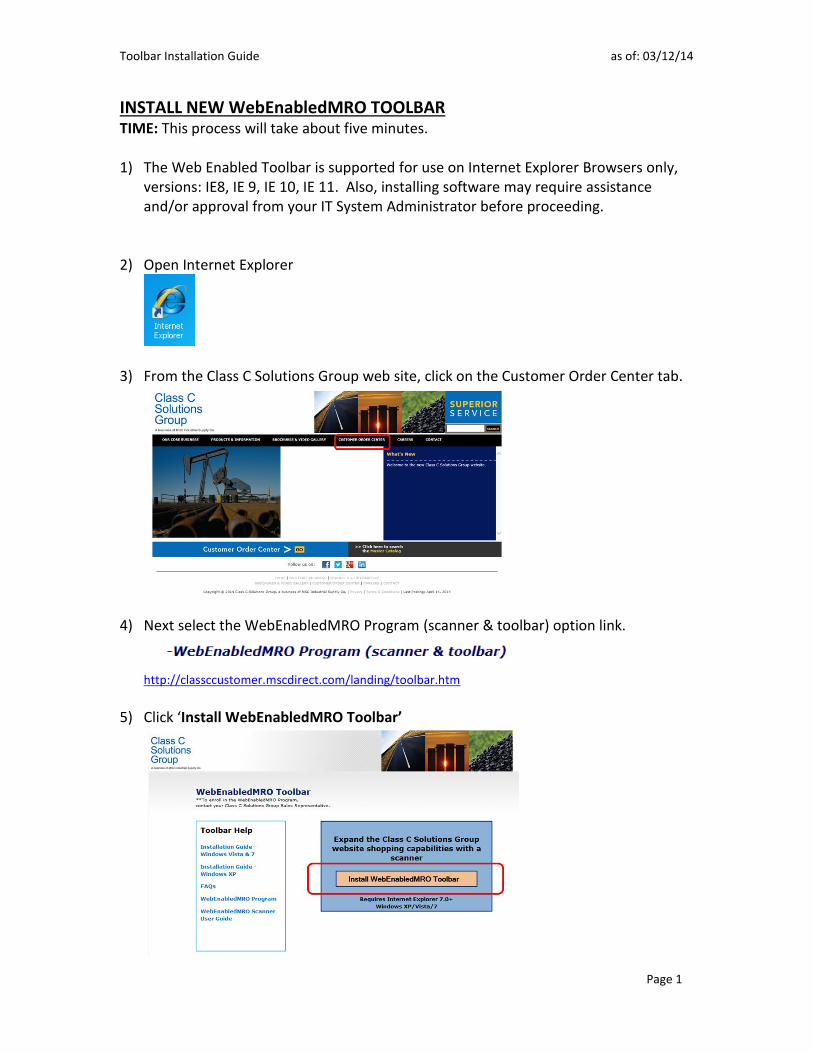
2) Open Internet Explorer
3) From the Class C Solutions Group web site, click on the Customer Order Center tab.
4) Next select the WebEnabledMRO Program (scanner & toolbar) option link.
http://classccustomer.mscdirect.com/landing/toolbar.htm
5) Click ‘Install WebEnabledMRO Toolbar’
Toolbar Installation Guide as of: 03/12/14
Page 2
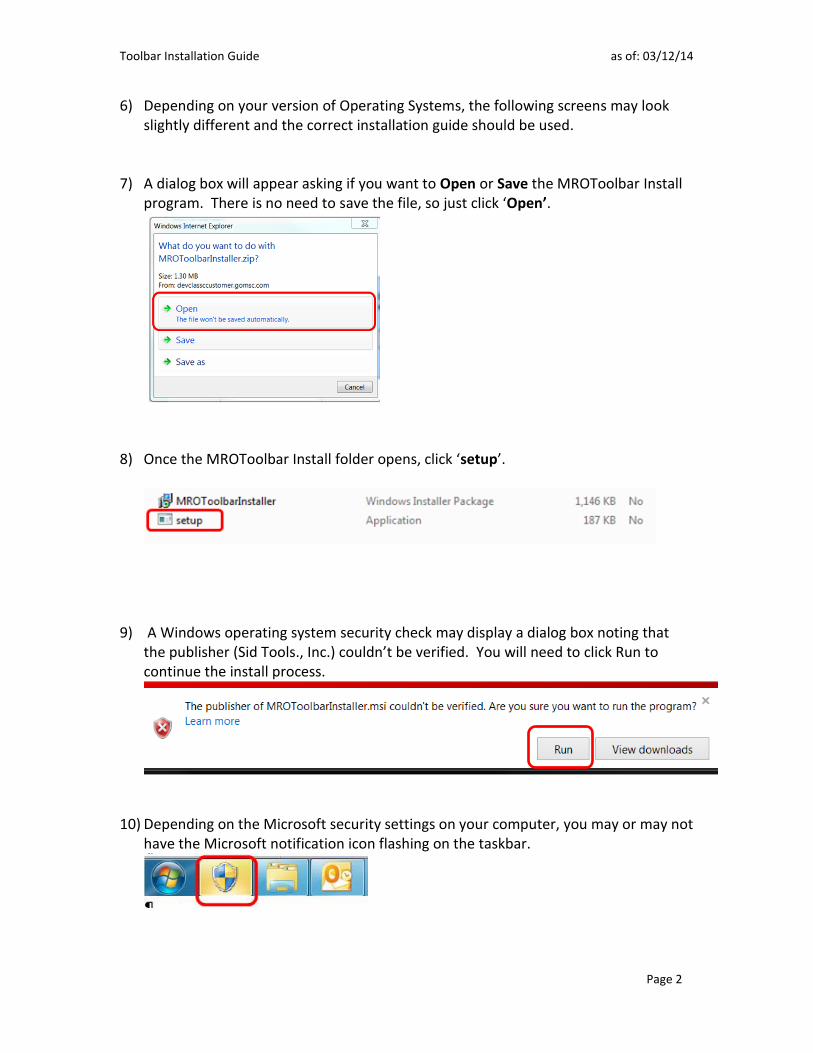
6) Depending on your version of Operating Systems, the following screens may look slightly different and the correct installation guide should be used.
7) A dialog box will appear asking if you want to Open or Save the MROToolbar Install program. There is no need to save the file, so just click ‘Open’.
8) Once the MROToolbar Install folder opens, click ‘setup’.
9) A Windows operating system security check may display a dialog box noting that the publisher (Sid Tools., Inc.) couldn’t be verified. You will need to click Run to continue the install process.
10) Depending on the Microsoft security settings on your computer, you may or may not
have the Microsoft notification icon flashing on the taskbar.

Toolbar Installation Guide as of: 03/12/14
Page 3
Click on the flashing Window Security Notification icon. This will display a dialog box and ask again “Do you want to allow the following program from an unknown publisher to make changes to this computer”. Click the Yes button.
11) Next the Welcome to Web-enabledMRO Toolbar Setup Wizard dialog box appears. At this point, pause and close all open Internet Explorer windows. Then, click the Next button to continue.

Toolbar Installation Guide as of: 03/12/14
Page 4
12) Next the Select Installation Folder dialog box will display. Leave default folder location provided as is and click ‘Next’
13) Next the Confirm Installation dialog box will display. Click ‘Next’

Toolbar Installation Guide as of: 03/12/14
Page 5
14) The Installing Web-enabledMRO dialog box will appear with a few seconds.
15) Next the Installing Web-enabledMRO Toolbar dialog box will display with a progress bar. The install should take from 10 seconds to a few minutes

Toolbar Installation Guide as of: 03/12/14
Page 6
16) Finally the Installation Complete dialog box will display indicating the installation was successful. Click ‘Close’
17) Re-open Internet Explorer. The first time the browser is opened, a dialog box indicating that Web-enabled MROadd-on is ready for use. Click Enable to activate the toolbar. If the add-on is not enabled it will not display as a Browser Toolbar. It can be enabled later on by changing the browser settings
18) If you see the Web-enabledMRO toolbar, then you have successfully installed the
application and enabled the add-on. The set-up process is complete.
Toolbar Installation Guide as of: 03/12/14
Page 7
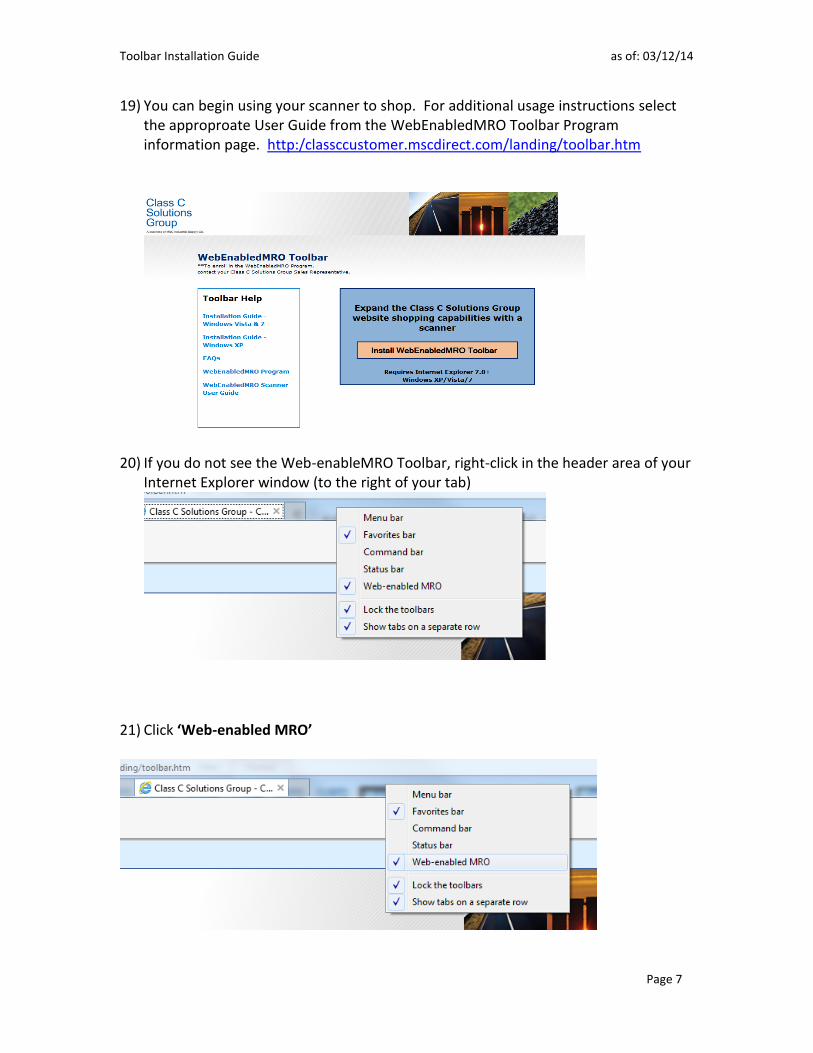
19) You can begin using your scanner to shop. For additional usage instructions select the approproate User Guide from the WebEnabledMRO Toolbar Program information page. http:/classccustomer.mscdirect.com/landing/toolbar.htm
20) If you do not see the Web-enableMRO Toolbar, right-click in the header area of your Internet Explorer window (to the right of your tab)
21) Click ‘Web-enabled MRO’
Toolbar Installation Guide as of: 03/12/14
Page 8
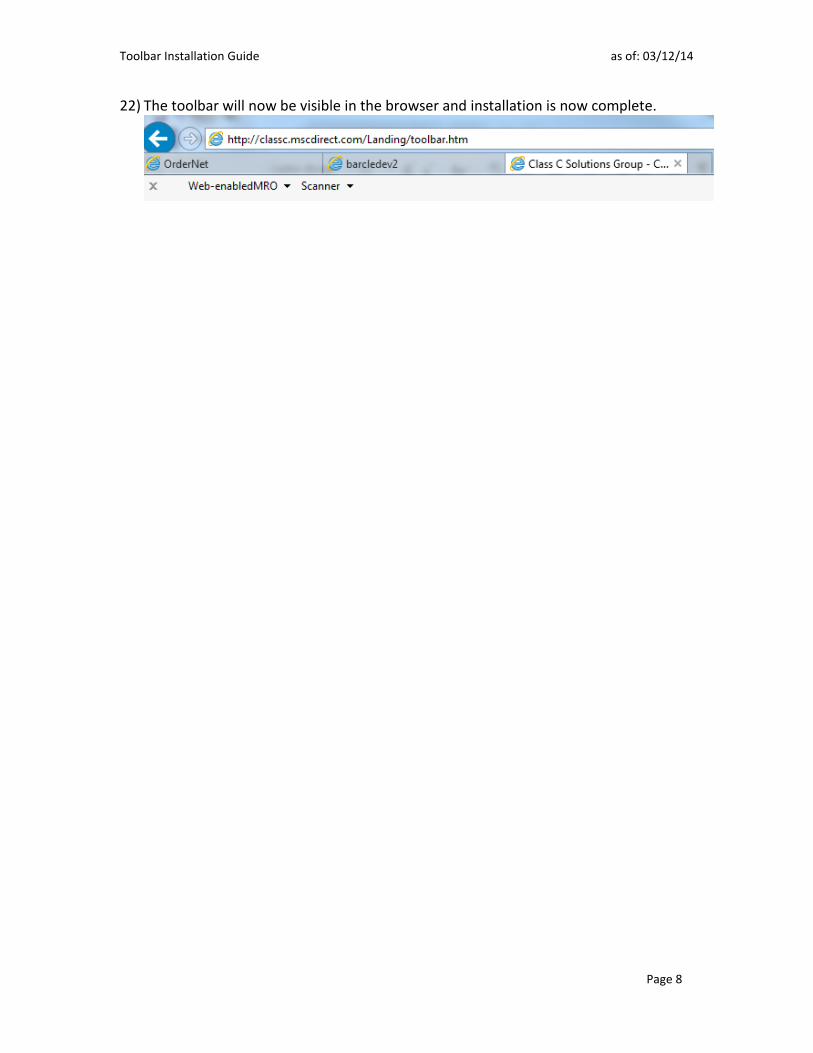
22) The toolbar will now be visible in the browser and installation is now complete.