Install MySQL 5.0 & MySQL GUI Tools from COMI-1260...
17
Install MySQL 5.0 & MySQL GUI Tools from COMI-1260 CD Install MySQL 5.0 Step 1. Create a temporary folder and download the two MySQL files into it. mysql-essential-5.0.27-win32.msi mysql-gui-tools-5.0-r8-win32.msi
Transcript of Install MySQL 5.0 & MySQL GUI Tools from COMI-1260...

Install MySQL 5.0 & MySQL GUI Tools from
COMI-1260 CD
Install MySQL 5.0
Step 1.
Create a temporary folder and download the two MySQL files into it.
mysql-essential-5.0.27-win32.msi
mysql-gui-tools-5.0-r8-win32.msi

Step 2.
Double click mysql-essential-5.0.27-win32 to begin installation. The
wizard will ask for the Setup Type, choose Complete.

Step 3.
You are now ready to install the program. Keep the destination folder
and click Install.
This will install MySQL on your machine; it may take a few minutes.

Step 4.
MySQL gives you an opportunity to create an account with
MySQL.com. Create an account if you wish, the safest option is to
choose Skip Sign-Up.
Step 5.
The setup for MySQL Server 5.0 is complete. Select the option to
Configure the MySQL Server now and click Finish.

Step 6.
This takes you to the MySQL Server Instance Configuration Wizard.
Choose Standard Configuration and proceed to the Instance
Configuration. Click on the option to Install as Window Service, use
list box option of MYSQL5 for Service Name, and click option to
Launch the MySQL Server automatically. You also want to click the
option to Include Bin Directory in Windows PATH.
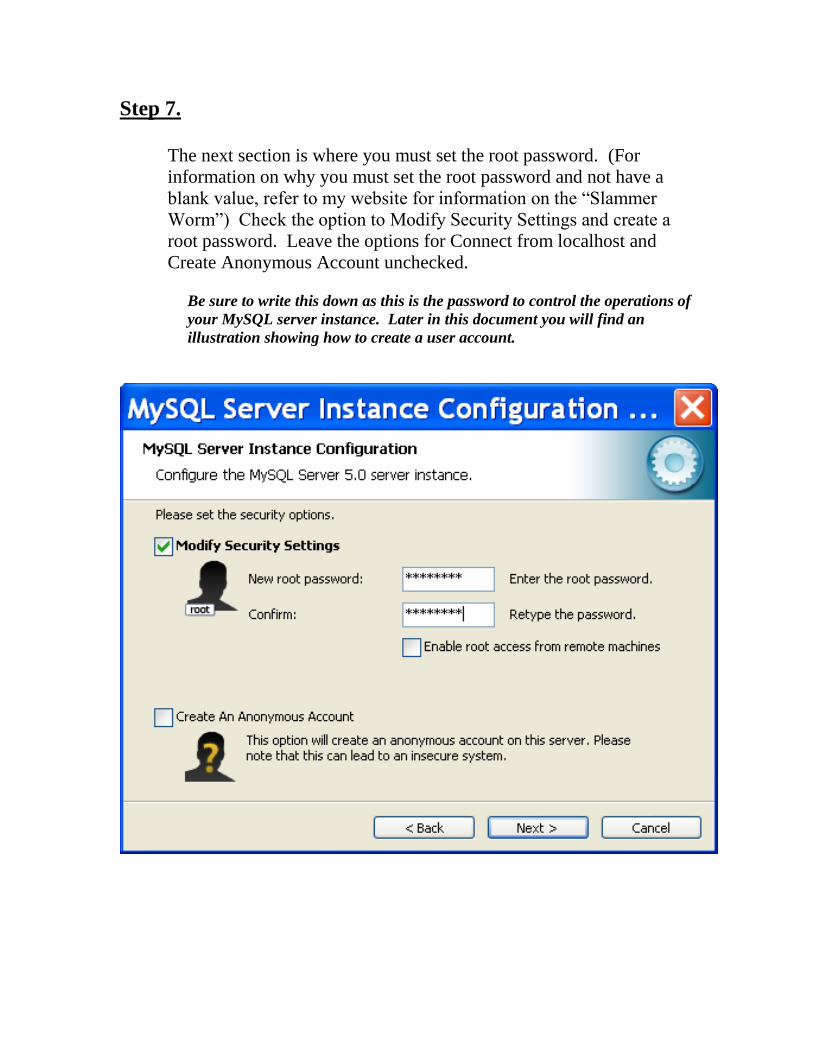
Step 7.
The next section is where you must set the root password. (For
information on why you must set the root password and not have a
blank value, refer to my website for information on the “Slammer
Worm”) Check the option to Modify Security Settings and create a
root password. Leave the options for Connect from localhost and
Create Anonymous Account unchecked.
Be sure to write this down as this is the password to control the operations of
your MySQL server instance. Later in this document you will find an
illustration showing how to create a user account.

Step 8.
The next dialog window will finalize your settings and complete the
install. Click Execute here.
** If there is a problem with your installation, this is the most likely place you
will encounter it. Uninstall MySQL via Add/Remove Programs, and delete the
MySQL folder from the Program Files folder before you re-try.
Most common causes for problems are firewall, and anti-virus software.

Install MySQL GUI Tools
Step 1.
Double click mysql-gui-tools-5.0-r8-win32 to begin installation. At
the first dialog window click Next.

Step 2.
Accept the license agreement and click Next.

Step 3.
Keep the default Destination Folder.
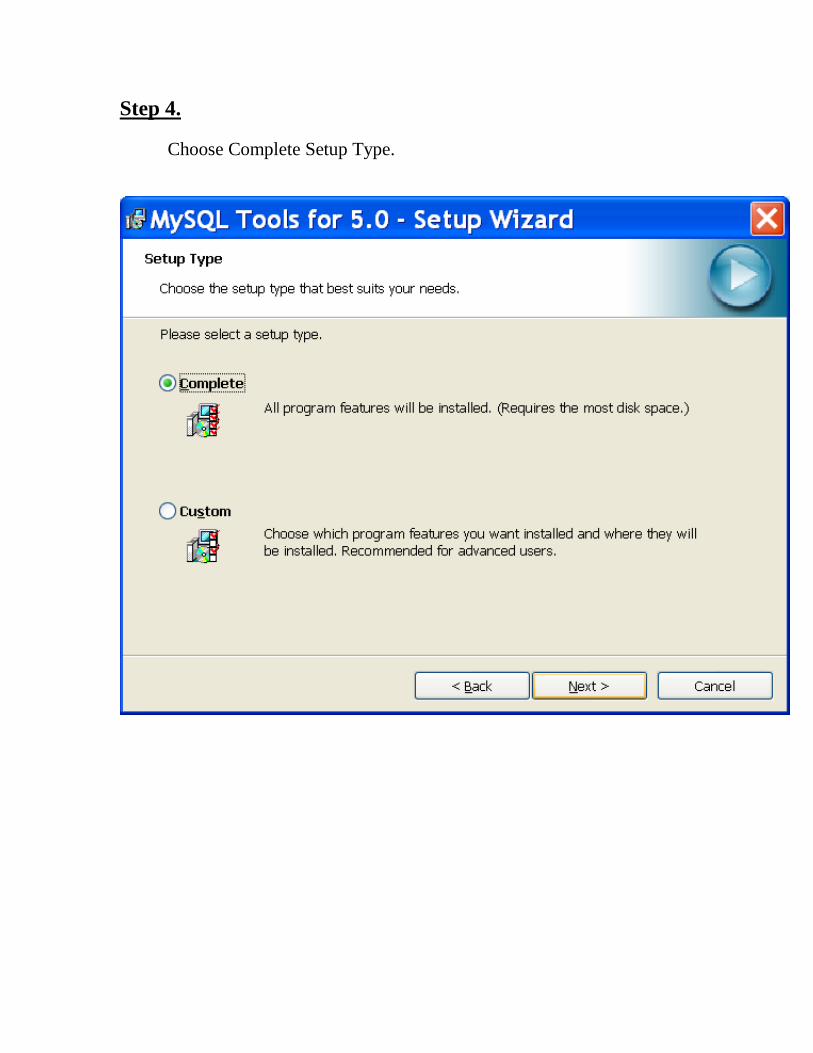
Step 4.
Choose Complete Setup Type.

Step 5.
Click Install to complete the Install process.
Test MySQL and Create a User Account
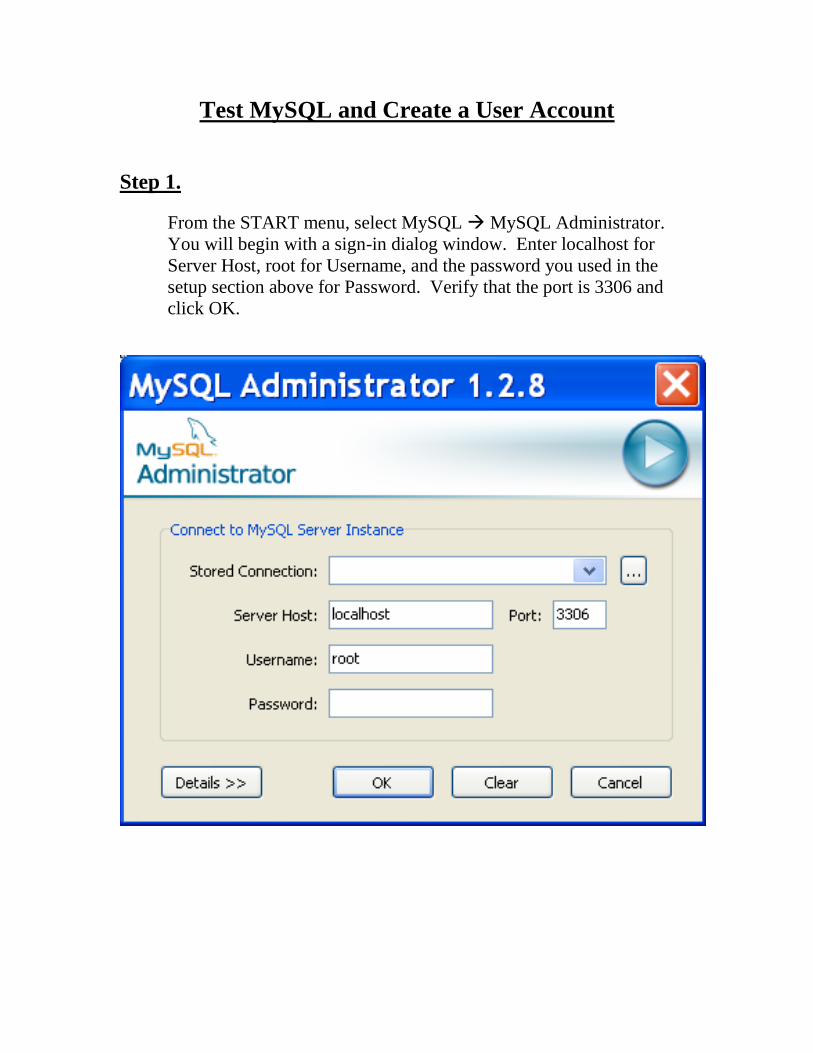
Step 1.
From the START menu, select MySQL MySQL Administrator.
You will begin with a sign-in dialog window. Enter localhost for
Server Host, root for Username, and the password you used in the
setup section above for Password. Verify that the port is 3306 and
click OK.
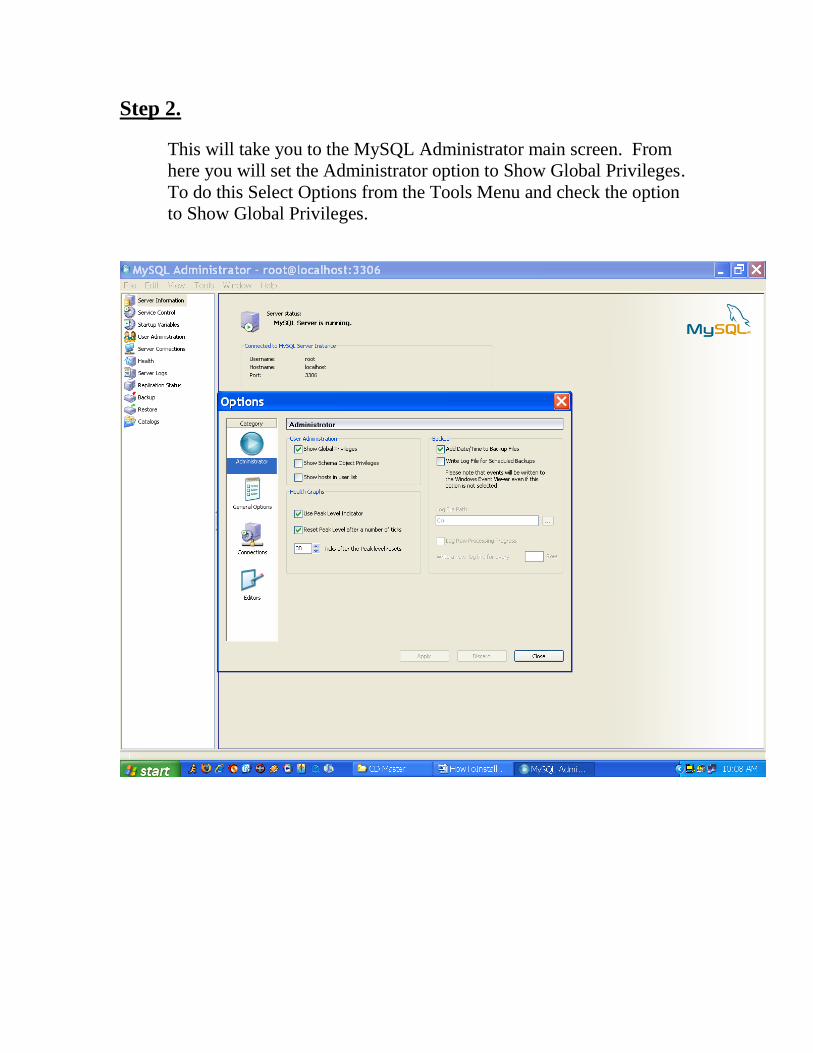
Step 2.
This will take you to the MySQL Administrator main screen. From
here you will set the Administrator option to Show Global Privileges.
To do this Select Options from the Tools Menu and check the option
to Show Global Privileges.

Step 3.
Now you can add a New User. From the MySQL Administrator main
screen click User Administration from the frame on the left, click the
User Information tab, and click the New User button from the bottom
of the screen. In the window, create a username and password for
yourself.
Be sure to write this down as this is the password you will use to work with
MySQL.

Step 4.
To complete the New User creation, click the Global Privileges tab
and click the << button to give yourself all available privileges and
click Apply Changes.
You are now ready to begin to use MySQL either by the MySQL
Administrator or at the command line.
You may now delete the temporary folder containing the installation files
you created at the beginning of the install process.