Install & Configure SSL VPN Client access in windows · Install & Configure SSL VPN Client access...
11
Install & Configure SSL VPN Client access in windows Step 1 Download& Install SSL VPN client access Go to the below link, follow the red arrow mark and download SSL VPN client. http://www.cyberoam.com/cyberoamclients.html
-
Upload
nguyenngoc -
Category
Documents
-
view
264 -
download
0
Transcript of Install & Configure SSL VPN Client access in windows · Install & Configure SSL VPN Client access...

Install & Configure SSL VPN Client access in windows
Step 1 Download& Install SSL VPN client access
Go to the below link, follow the red arrow mark and download SSL VPN client.
http://www.cyberoam.com/cyberoamclients.html

After completion of download, run that setup file and follow the screen shots below.
Please note, Windows Vista users need Administrator privileges to install the Client.


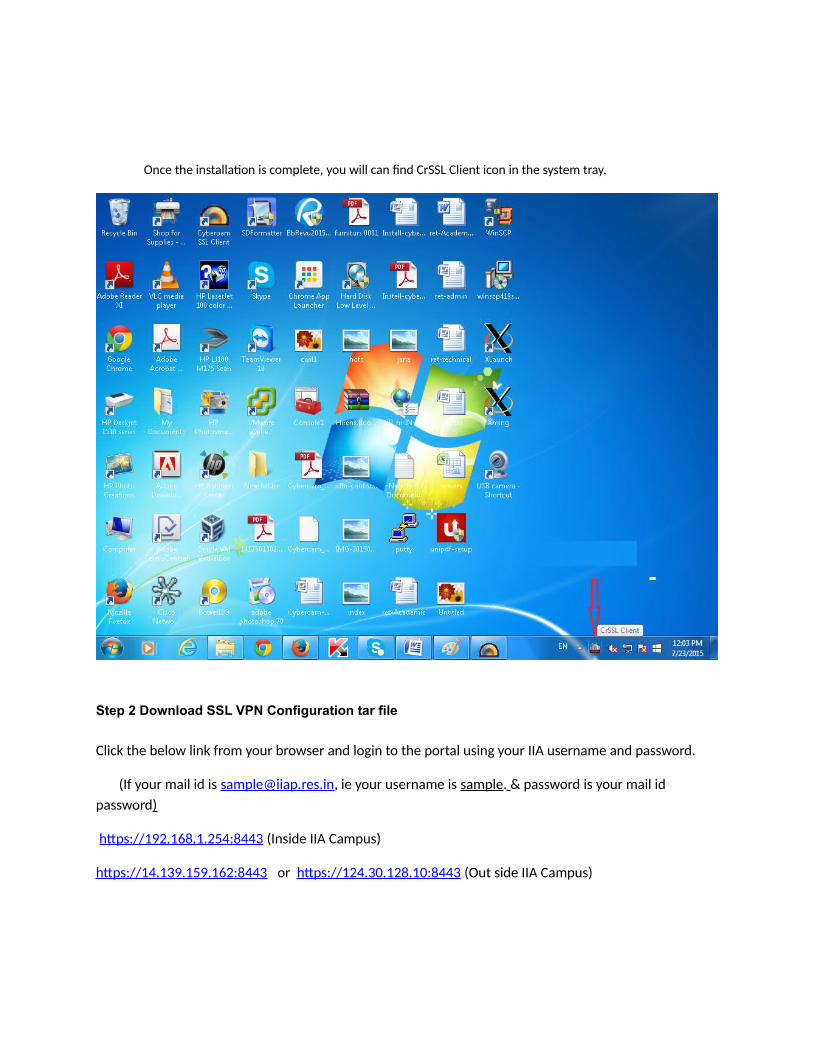
Once the installation is complete, you will can find CrSSL Client icon in the system tray.
Step 2 Download SSL VPN Configuration tar file
Click the below link from your browser and login to the portal using your IIA username and password.
(If your mail id is [email protected], ie your username is sample. & password is your mail id password)
https://192.168.1.254:8443 (Inside IIA Campus)
https://14.139.159.162:8443 or https://124.30.128.10:8443 (Out side IIA Campus)

Click on IPv4

Download tar file
Step 3 Import the configuration file
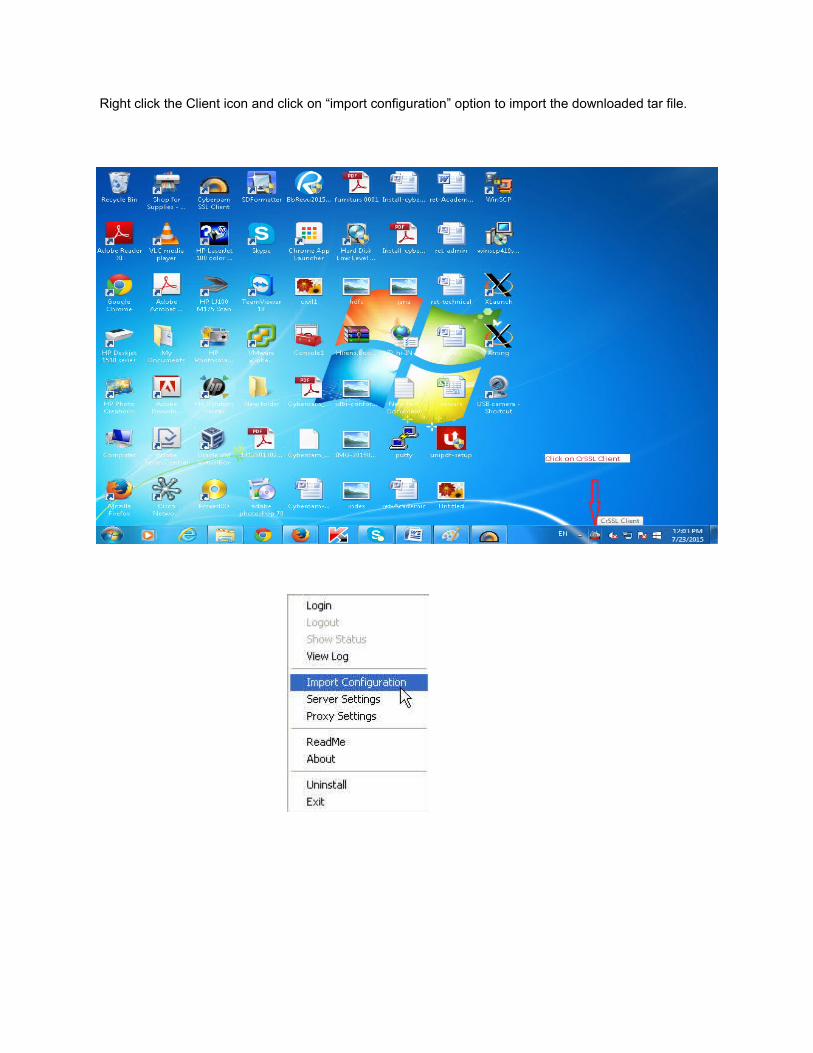
Right click the Client icon and click on “import configuration” option to import the downloaded tar file.

Configure server IP address Step 5 Configure SSL VPN server IP address
Right click the Client icon to configure the SSL VPN server IP address.
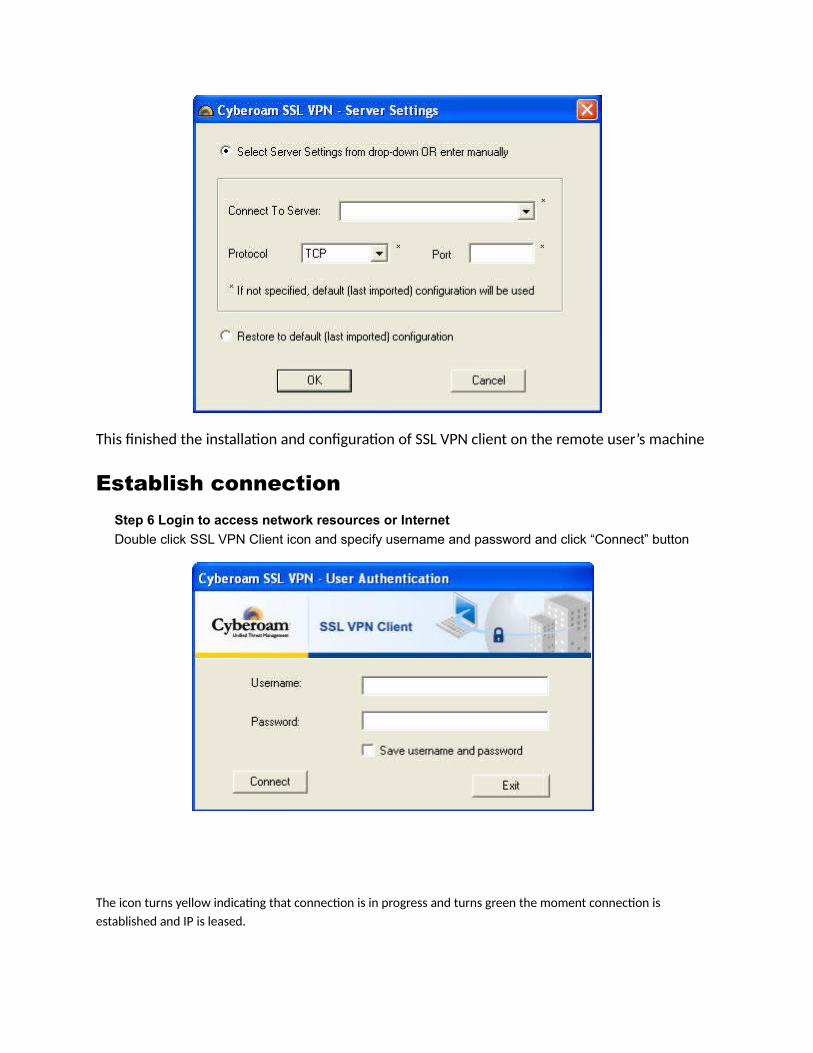
This finished the installation and configuration of SSL VPN client on the remote user’s machine
Establish connection Step 6 Login to access network resources or Internet
Double click SSL VPN Client icon and specify username and password and click “Connect” button
The icon turns yellow indicating that connection is in progress and turns green the moment connection is established and IP is leased.

Right click the Client icon and click “Disconnect” to disconnect the connection.
Note : The IP address should be 192.168.70.xxx ( xxx can be any number ).