
INSEL 8 - Getting Started · Gnuplot Gnuplot is not part of the INSEL distribution but must be...
25
insel 8 | Getting Started
Transcript of INSEL 8 - Getting Started · Gnuplot Gnuplot is not part of the INSEL distribution but must be...

insel 8 | Getting Started


Getting started with INSEL 8
c© 1986–2014 doppelintegral GmbH. All rights reserved.
Please visit us at www.insel.eu

iv
Bison is ...
Eclipse is a trademark of the Eclipse Foundation, Inc. and copyright protected by Eclipse
contributors and others.
GCC is copyright protected by Free Software Foundation, Inc.
Flexx is copyright protected by The Regents of the University of California and The Flex Project.
gfortran is copyright protected by Free Software Foundation, Inc.
gnuplot Copyright 1986 – 1993, 1998, 2004 Thomas Williams, Colin Kelley
HASP is ...
HP VEE is a registered trademark of Hewlett-Packard Co.
IISiBat is copyright protected (Centre Scientifique et Technique du Batiment CSTB)
INSEL is a registered trademark of doppelintegral GmbH, Stuttgart, Germany.
Java is...
LabVIEW is a registered trademark of National Instruments Corporation.
Linux is a registered trademark of Linus Torvalds.
Mac OS X is a registered trademark by Apple, Inc. in the United States and other countries.
MATLAB is a registered trademark of The MathWorks Inc.
Microsoft Windows and Visual Studio is a registered trademark of Microsoft Corporation in the
United States and other countries.
MiKTex-pdfTeX is copyright protected by D. E. Knuth and Han The Thanh
Ruby is copyright protected free software by Yukihiro Matsumoto
Sentinel HASP is copyrighted work of SafeNet, Inc. and/or Aladdin Knowledge Systems, Ltd.
Simulink is a registered trademark of The MathWorks Inc.
Subversion is ...
TeX is a trademark of the American Mathematical Society.
TRNSYS is copyright protected (S.A. Klein, F.L Alvarado).
VSEit is copyright protected by Kai Brassel.
Window Builder is ...
Getting Started

Contents

About this manual
This manual is thought as a first introduction to version INSEL 8 of the graphicalprogramming language INSEL. No knowledge about older versions or even theconcept of graphical programming is required.
The older versions INSEL 5, 6, and 7 made extensive use of the graphicalprogramming environment HP VEE Runtime by the Hewlett-Packard company.The interface of INSEL 8 is now completely based on VSEit, the VersatileSimulation Environment for the Internet (pronounced as ”use it”) by Kai Brassel.VSEit is a Java-based framework and therefore platform independent. In order toavoid confusion, this manual speaks of “INSEL features” although most of thegraphical concepts are in fact “VSEit features.”
The INSEL 8 software can be downloaded as Trialware under www.insel.eu in theINSEL 8Download area. It can be installed on a Microsoft Windows computer (32 or 64bit) and will run for 30 days. After this period the program must be uninstalledand deleted unless it has been activated by a valid license.
Editions running under Mac OS and several Linux distributions are available, too.
A full license agreement must be confirmed before the INSEL 8 software can beLicense agreementinstalled. All the terms in this license agreement apply to this document, too. Thelicense agreement can be read and printed before the installation of INSEL 8starts.

1 :: Quick start
INSEL is an acronym for the Integrated Simulation Environment Language ofdoppelintegral GmbH, a graphical programming language for the creation andexecution of simulation applications mainly used in the renewable energy sector.
This chapter starts with some installation hints and shows the basic ideas how touse the graphical user interface of INSEL can be used to create programs andexecute them.
1.1 System requirements
INSEL 8.2 can be installed on native Windows XP, Windows Vista, Windows 7,and Windows 8 computers with 32-bit or 64-bit architecture. Mac OS X andLinux distributions are also supported. Virtual machines are not supported.
For this document all screenshots were made using Windows 7. The use ofINSEL 8 with other operating systems and its appearance is very similar, however.
1.2 Installation
INSEL 8 is delivered with installation programs for each supported operatingsystem. The installation programs are
win32\setup_insel_8.2.1.833_32.exe
win64\setup_insel_8.2.1.833_64.exe
macOSX/insel_8.2.0.779_macOSX5.pkg (Snow Leoprad)
macOSX/insel_8.2.1.833_macOSX7.pkg (Mavericks)
linux32/insel_8.2.1.833_32.deb (Debian Linux)
linux32/insel-8.2.1.833-2.i386.rpm (Red Hat Linux)
linux64/insel_8.2.1.833_64.deb (Debian Linux)
linux64/insel-8.2.1.833-2.ia64.rpm (Red Hat Linux)
The setup program requires administrator rights in order to install the softwareAdministratorrights required properly in two phases.
1.2.1 Windows
All files, executables and dynamic link libraries which are required by INSEL 8 arePhase Onecopied to the INSEL installation directory, which is typically

4 1.2 Installation
C:\Program Files\INSEL 8.2 or C:\Program Files (x86)\INSEL 8.2 (whenthe 32-bit version is installed under 64-bit Windows)
The directory includes a copy of the Java Development Kit JDK Version 8 sincethe VSEit user-interface of INSEL depends fully on Java. Please note that JDK isnot installed in Windows’ sense, but only a copy of JDK is placed in theresources\jdk directory.
The resources directory of the INSEL installation is added to the Windowsenvironment variable %PATH%.
The Sentinel Runtime Environment including the Sentinel LDK License ManagerPhase Twoby SafeNet Ltd. is installed.
Phase one is a plain copy process, in particular, no registry entries are made.
The phase two installation of the Sentinel Runtime Environment viahaspdinst.exe places a copy of the Sentinel License Manager Servicehasplms.exe and the Sentinem EMS Service SentinelEMS in the Windowsdirectory C:\Windows\system32 and installs them as Windows services. Inaddition, a few registry entries are made.
The whole INSEL documentation is written in LATEX and supplied in .pdf format.DocumentationThe Windows version uses Adobe’s Acrobat Reader. In case, no Acrobat Readercan be found a fallback to the reader provided in the resources directory is used.
1.2.2 Mac OS X
The .pkg package can be installed by a double click on its icon. Concerning thedirectory structure and the Sentinel License Manager similar rules apply as for theWindows versions.
The whole application is installed as /Applications/INSEL.app Mac OS Xapplication bundle.
Symbolic links are created to all dynamic libraries ant two executables whichSymbolic linksINSEL uses. A complete list can be found in the shell scriptINSEL.app/Contents/_createRequiredSymbolicLinks.sh.
INSEL uses gnuplot as one standard for graphical output. A complete gnuplotGnuplotbundle is part INSEL.app. This relies on X11 however, which is not installed bydefault on newer Mac OS X versions. If it is not installed Mavericks displays adialog
Getting Started

1.2.3 Linux 5
It is recommended by Apple to install XQuartz which can be downloaded fromhttp://xquartz.macosforge.org for example. The latest version (August 2014)is XQuartz-2.7.6.dmg.
1.2.3 Linux
The Debian package installers for INSEL can be installed viaDebian
sudo dpkg -i insel_8.2.1.833_32.deb
for example. It is of course necessary to have the Debian package managementsystem dpkg installed which is the case for most Linux distributions.
Just in case, it can be installed via
sudo apt-get install dpkg
Gnuplot is not part of the INSEL distribution but must be found in the path. IfGnuplotnot installed, it can typically be found in the packages
gnuplot-nox
gnuplot-qt
gnuplot-x11
In order to use the INSEL Documentation support it is necessary to have aDocumentationdocument viewer for .pdf files installed. In most Debian distributions DocumentViewer is installed by default.
1.3 Starting and ending INSEL 8
In the Windows version the installation program has created an icon on yourdesktop. INSEL 8 can simply be started with a double click on the icon.
Another possibility is to start INSEL 8 via Windows’ Start button and the link tothe executable in the Programs list (group insel 8).
Yet another possibility is to browse to the installation directory (typicallyC:\Program Files\insel 8) with the Windows Explorer and double-click on theexecutable insel_8.exe.
Getting Started
6 1.3 Starting and ending INSEL 8
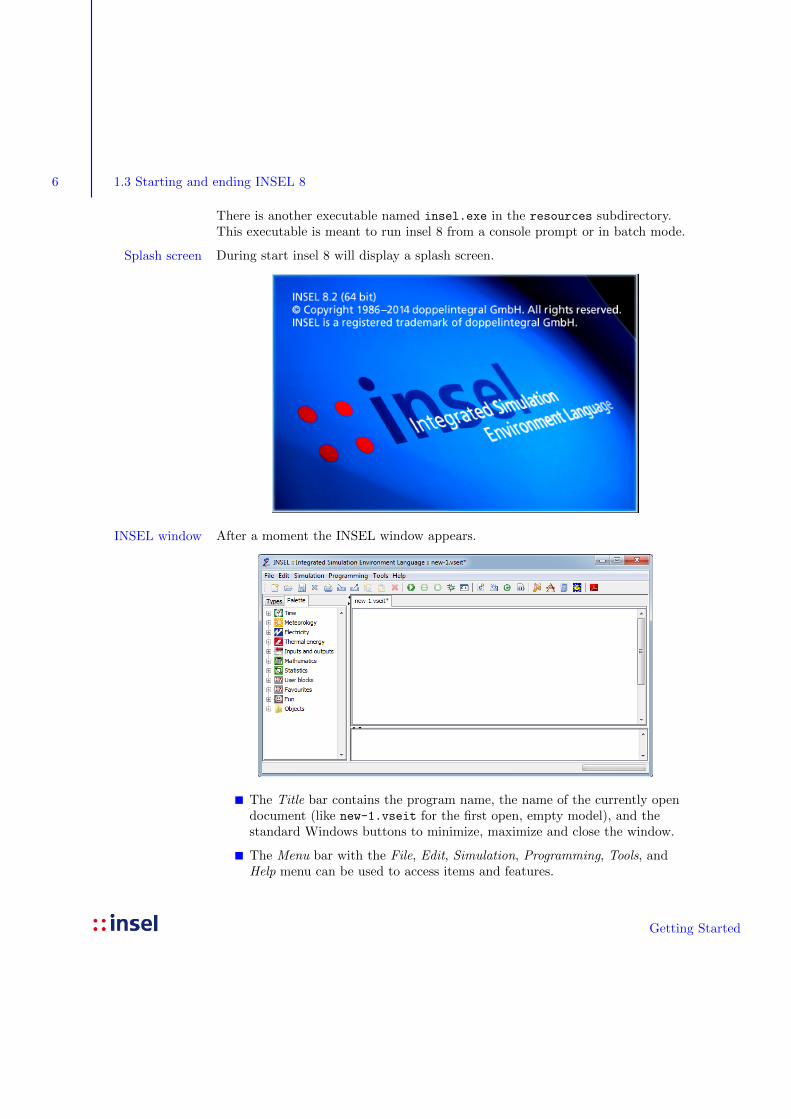
There is another executable named insel.exe in the resources subdirectory.This executable is meant to run insel 8 from a console prompt or in batch mode.
During start insel 8 will display a splash screen.Splash screen
After a moment the INSEL window appears.INSEL window
The Title bar contains the program name, the name of the currently opendocument (like new-1.vseit for the first open, empty model), and thestandard Windows buttons to minimize, maximize and close the window.
The Menu bar with the File, Edit, Simulation, Programming, Tools, andHelp menu can be used to access items and features.
Getting Started
7
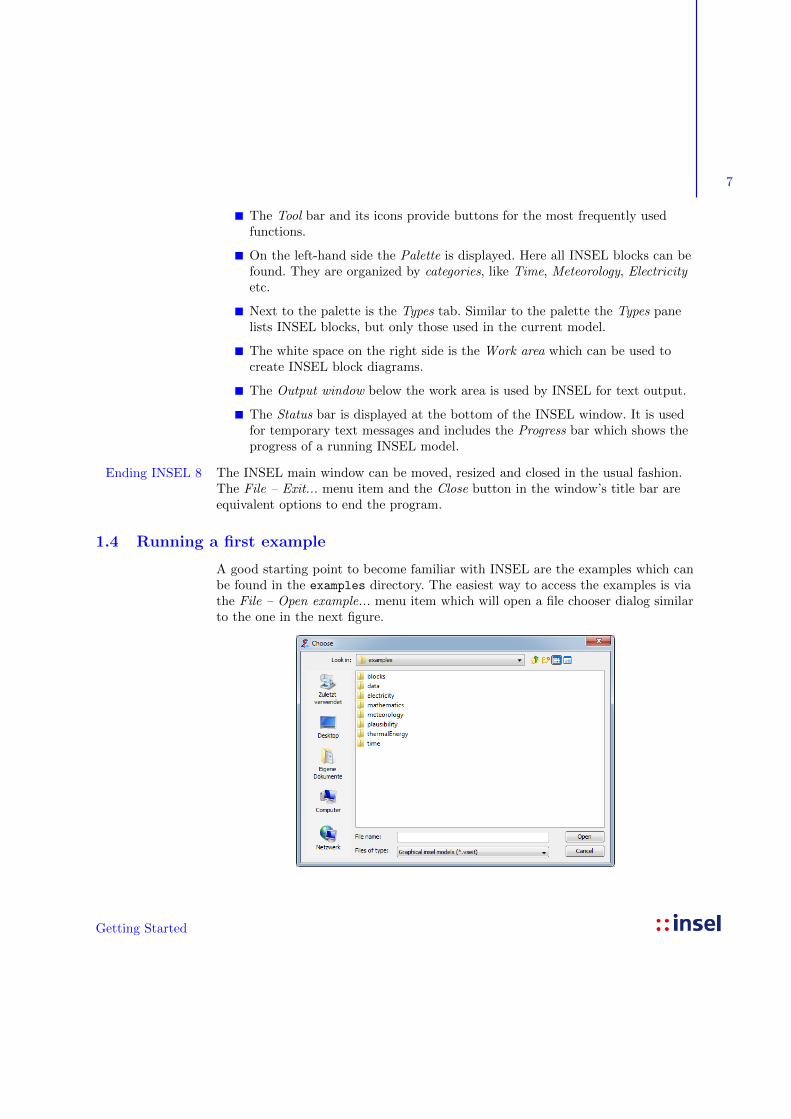
The Tool bar and its icons provide buttons for the most frequently usedfunctions.
On the left-hand side the Palette is displayed. Here all INSEL blocks can befound. They are organized by categories, like Time, Meteorology, Electricityetc.
Next to the palette is the Types tab. Similar to the palette the Types panelists INSEL blocks, but only those used in the current model.
The white space on the right side is the Work area which can be used tocreate INSEL block diagrams.
The Output window below the work area is used by INSEL for text output.
The Status bar is displayed at the bottom of the INSEL window. It is usedfor temporary text messages and includes the Progress bar which shows theprogress of a running INSEL model.
The INSEL main window can be moved, resized and closed in the usual fashion.Ending INSEL 8The File – Exit... menu item and the Close button in the window’s title bar areequivalent options to end the program.
1.4 Running a first example
A good starting point to become familiar with INSEL are the examples which canbe found in the examples directory. The easiest way to access the examples is viathe File – Open example... menu item which will open a file chooser dialog similarto the one in the next figure.
Getting Started
8 1.4 Running a first example
In the blocks directory one basic example for each INSEL block is available. It isblocks directorycertainly a good idea to browse through the subdirectories of the blocks directoryand get an overview which blocks are available in insel 8 and what their functionsare.
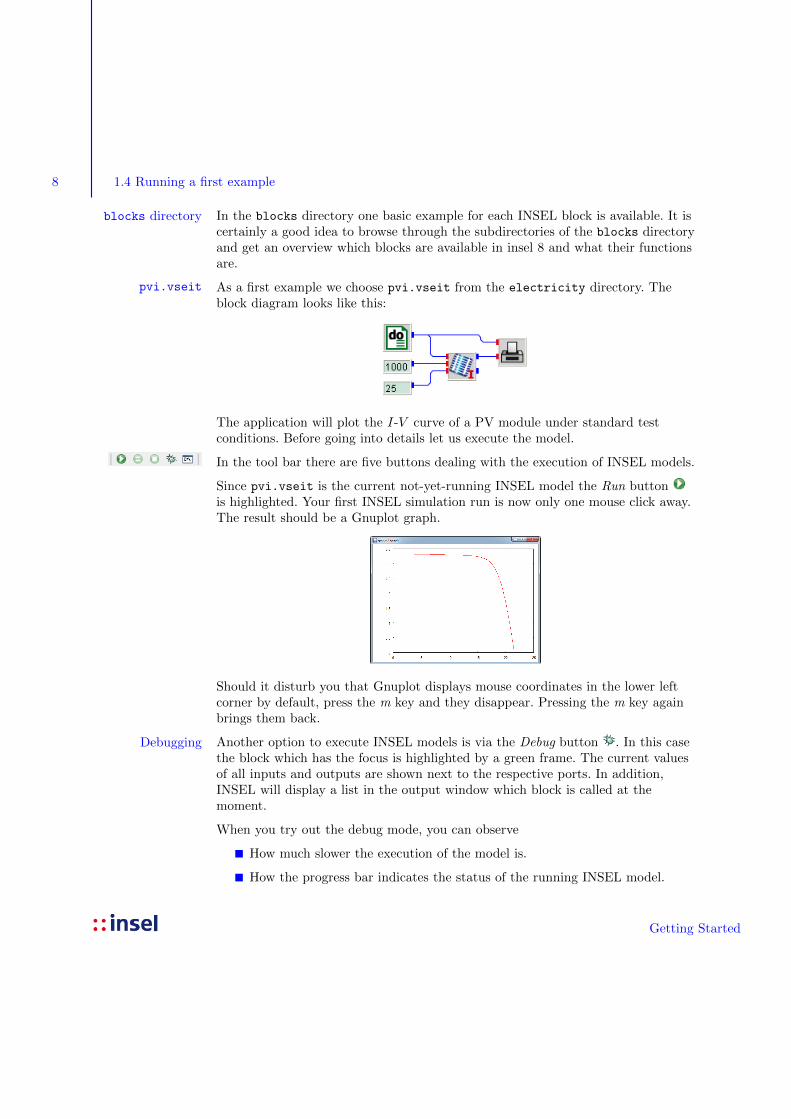
As a first example we choose pvi.vseit from the electricity directory. Thepvi.vseit
block diagram looks like this:
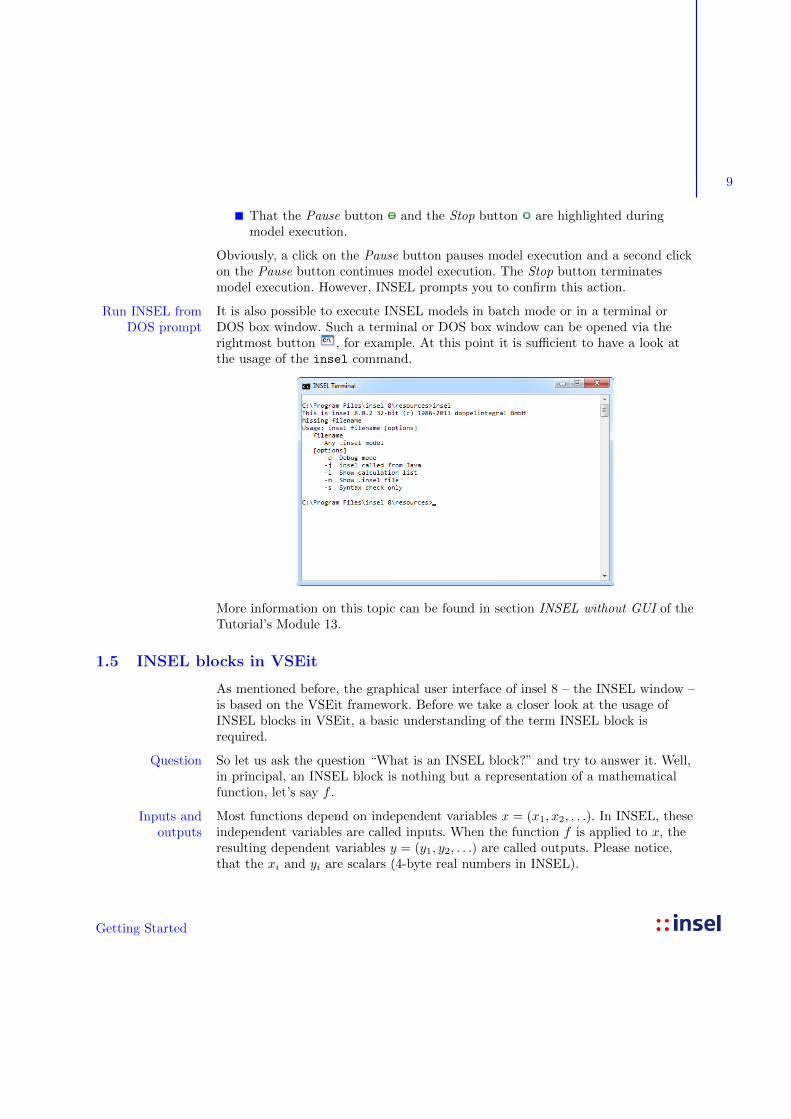
The application will plot the I-V curve of a PV module under standard testconditions. Before going into details let us execute the model.
In the tool bar there are five buttons dealing with the execution of INSEL models.
Since pvi.vseit is the current not-yet-running INSEL model the Run buttonis highlighted. Your first INSEL simulation run is now only one mouse click away.The result should be a Gnuplot graph.
Should it disturb you that Gnuplot displays mouse coordinates in the lower leftcorner by default, press the m key and they disappear. Pressing the m key againbrings them back.
Another option to execute INSEL models is via the Debug button . In this caseDebuggingthe block which has the focus is highlighted by a green frame. The current valuesof all inputs and outputs are shown next to the respective ports. In addition,INSEL will display a list in the output window which block is called at themoment.
When you try out the debug mode, you can observe
How much slower the execution of the model is.
How the progress bar indicates the status of the running INSEL model.
Getting Started
9
That the Pause button and the Stop button are highlighted duringmodel execution.
Obviously, a click on the Pause button pauses model execution and a second clickon the Pause button continues model execution. The Stop button terminatesmodel execution. However, INSEL prompts you to confirm this action.
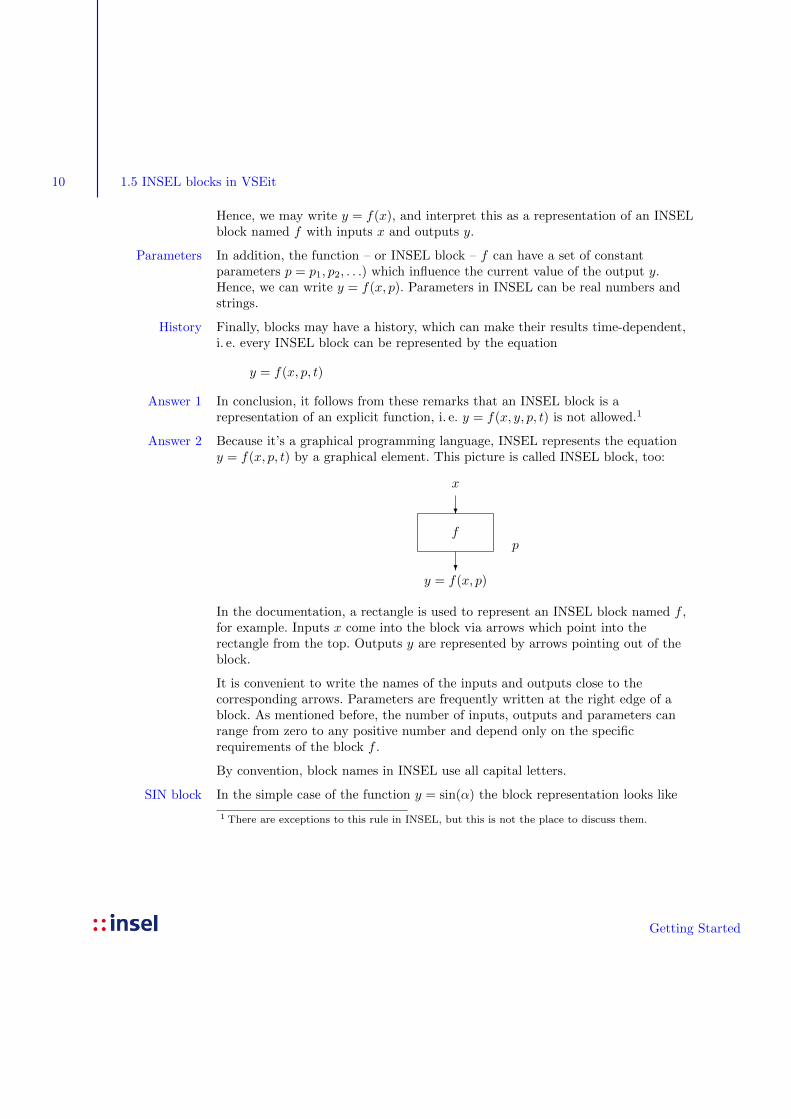
It is also possible to execute INSEL models in batch mode or in a terminal orRun INSEL fromDOS prompt DOS box window. Such a terminal or DOS box window can be opened via the
rightmost button , for example. At this point it is sufficient to have a look atthe usage of the insel command.
More information on this topic can be found in section INSEL without GUI of theTutorial’s Module 13.
1.5 INSEL blocks in VSEit
As mentioned before, the graphical user interface of insel 8 – the INSEL window –is based on the VSEit framework. Before we take a closer look at the usage ofINSEL blocks in VSEit, a basic understanding of the term INSEL block isrequired.
So let us ask the question “What is an INSEL block?” and try to answer it. Well,Questionin principal, an INSEL block is nothing but a representation of a mathematicalfunction, let’s say f .
Most functions depend on independent variables x = (x1, x2, . . .). In INSEL, theseInputs andoutputs independent variables are called inputs. When the function f is applied to x, the
resulting dependent variables y = (y1, y2, . . .) are called outputs. Please notice,that the xi and yi are scalars (4-byte real numbers in INSEL).
Getting Started
10 1.5 INSEL blocks in VSEit
Hence, we may write y = f(x), and interpret this as a representation of an INSELblock named f with inputs x and outputs y.
In addition, the function – or INSEL block – f can have a set of constantParametersparameters p = p1, p2, . . .) which influence the current value of the output y.Hence, we can write y = f(x, p). Parameters in INSEL can be real numbers andstrings.
Finally, blocks may have a history, which can make their results time-dependent,Historyi. e. every INSEL block can be represented by the equation
y = f(x, p, t)
In conclusion, it follows from these remarks that an INSEL block is aAnswer 1representation of an explicit function, i. e. y = f(x, y, p, t) is not allowed.1
Because it’s a graphical programming language, INSEL represents the equationAnswer 2y = f(x, p, t) by a graphical element. This picture is called INSEL block, too:
x
?
fp
?y = f(x, p)
In the documentation, a rectangle is used to represent an INSEL block named f ,for example. Inputs x come into the block via arrows which point into therectangle from the top. Outputs y are represented by arrows pointing out of theblock.
It is convenient to write the names of the inputs and outputs close to thecorresponding arrows. Parameters are frequently written at the right edge of ablock. As mentioned before, the number of inputs, outputs and parameters canrange from zero to any positive number and depend only on the specificrequirements of the block f .
By convention, block names in INSEL use all capital letters.
In the simple case of the function y = sin(α) the block representation looks likeSIN block
1 There are exceptions to this rule in INSEL, but this is not the place to discuss them.
Getting Started

1.5.1 The palette 11
α
?
SIN[p]
?sin(α)
The SIN block requires exactly one input, namely an angle α. It returns exactlyone output, the sine of α. The parameter [p] is written in square brackets, whichmeans that the parameter p is optional, i. e. not necessarily required.
Angles can be given in either degrees or radians. How does the SIN block knowwhat is meant? By default, the SIN block assumes that α is given in degrees. Thisis equivalent to not specifying p at all, or by setting the parameter p equal to zero.If you want the SIN block to recognize α in radians you have to set p equal to 1.Any other value for p will result in an error message.
1.5.1 The palette
The most convenient way to access and use INSEL blocks is from the palette.
A category (like Time, for instance) can be opened by a left-mouse click on thesmall + symbol next to the icon of the category. An open category can be closedby a left-mouse click on the small − symbol. The opened Time category with itstypes is shown in the margin.
It contains the DO block (type Do), the CLOCK block (type Clock), the DOYblock (type Day of the year) and so on.
There are three ways to insert INSEL blocks – or more precisely, entities of theblock – into an INSEL model.
A block2 can be dragged from the palette into the work area by keeping theleft mouse button pressed. INSEL displays a small + sign next to the mousepointer once the mouse is moved into the work area. When the mousebutton is released an entity of the block will be placed in the work area.
When a block (i. e. type) is selected from the palette by a left-mouse click,then a click in the work area places a new entity of the selected block whereyou like. The selection of the block in the palette disappears. More than oneentity of a marked block can be inserted in the work area as long as the Shiftkey on the keyboard is kept pressed. In this case, each mouse click in thework area will place one entity of the block in the work area.
2 It would be more precise to say type, but in many cases it is more convenient to simply speakof blocks when the context is clear enough.
Getting Started
12 1.5 INSEL blocks in VSEit
In order to create several copies of a block at once, select a type, the contextmenu of the palette can be opened by a right-mouse click in the palette area,and choose Create Entities.... In a dialog the number of required entities canbe specified.
The new entities will be placed in the work area, arranged according to thenumber of entities per row.
Customising the palette
In insel 8 each user of a computer has an own copy of the palette. The location,where the user palette is stored can be on the local machine or on a remotecomputer, depending on the user-profile settings.
Palettes can be fully customised. Categories and types can be dragged with aleft-mouse click to a different position within the palette. Keeping the ctrl keypressed (cmd on a Mac keyboard) creates a copy of the selected item instead ofmoving it.
The creation of new categories should be obvious. The position of the newNew categoriescategory depends on the current selection within the palette. If nothing isselected, the new category will be created at the root of the palette.
All other palette operations can be made via the context menu, shown above.New templatesWhen one or more entities are selected in the work area, the Create Template...item is enabled. Choosing it, opens a dialog in which the name for the newtemplate can be specified.
Please notice, that a template can contain more than just one block. Therefore, atemplate is not the same as a type.
The creation of new types is a very advanced option and is explained inNew typesModule 11 :: Programming INSEL blocks of the Tutorial.
Getting Started
1.5.2 Block entities 13
All user-defined categories, templates, and types can have user-defined icons, theyEtc.can be renamed and deleted at any time.
The factory setting of the palette can be rebuild. All user-made changes will beRebuild palettesaved in a category named SAVED ENTRIES. The rebuild process is initiatedonly after a confirmation dialog.
1.5.2 Block entities
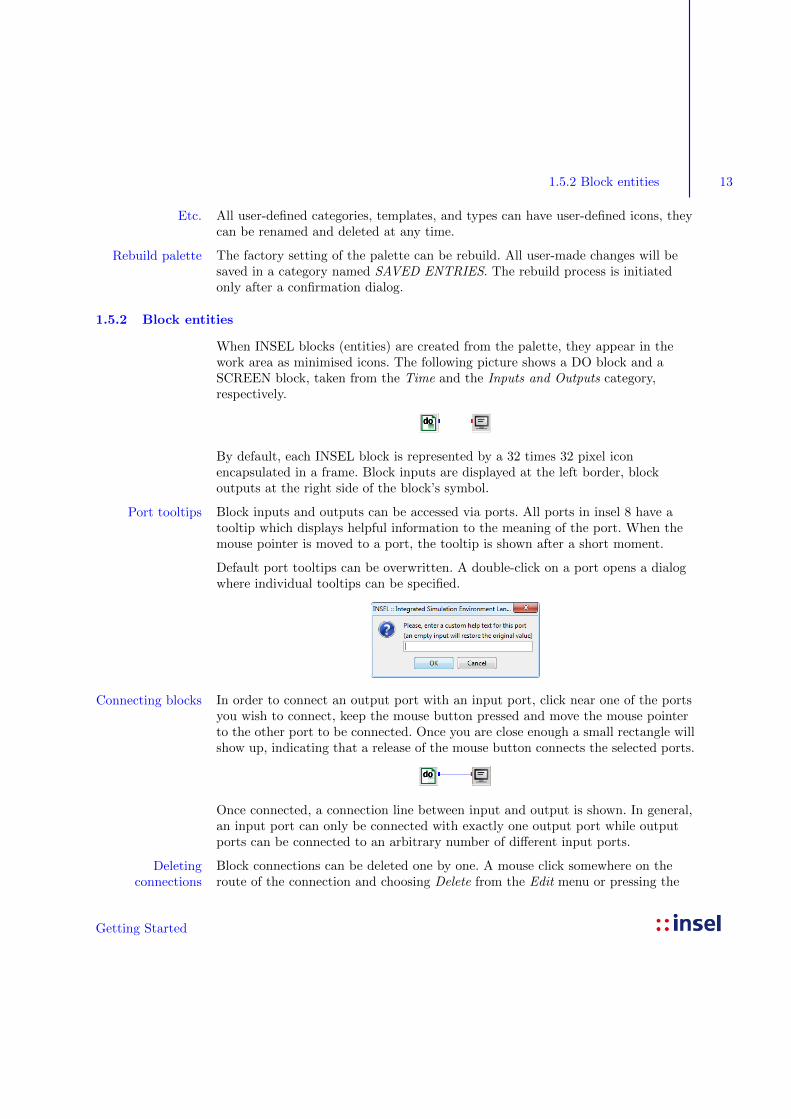
When INSEL blocks (entities) are created from the palette, they appear in thework area as minimised icons. The following picture shows a DO block and aSCREEN block, taken from the Time and the Inputs and Outputs category,respectively.
By default, each INSEL block is represented by a 32 times 32 pixel iconencapsulated in a frame. Block inputs are displayed at the left border, blockoutputs at the right side of the block’s symbol.
Block inputs and outputs can be accessed via ports. All ports in insel 8 have aPort tooltipstooltip which displays helpful information to the meaning of the port. When themouse pointer is moved to a port, the tooltip is shown after a short moment.
Default port tooltips can be overwritten. A double-click on a port opens a dialogwhere individual tooltips can be specified.
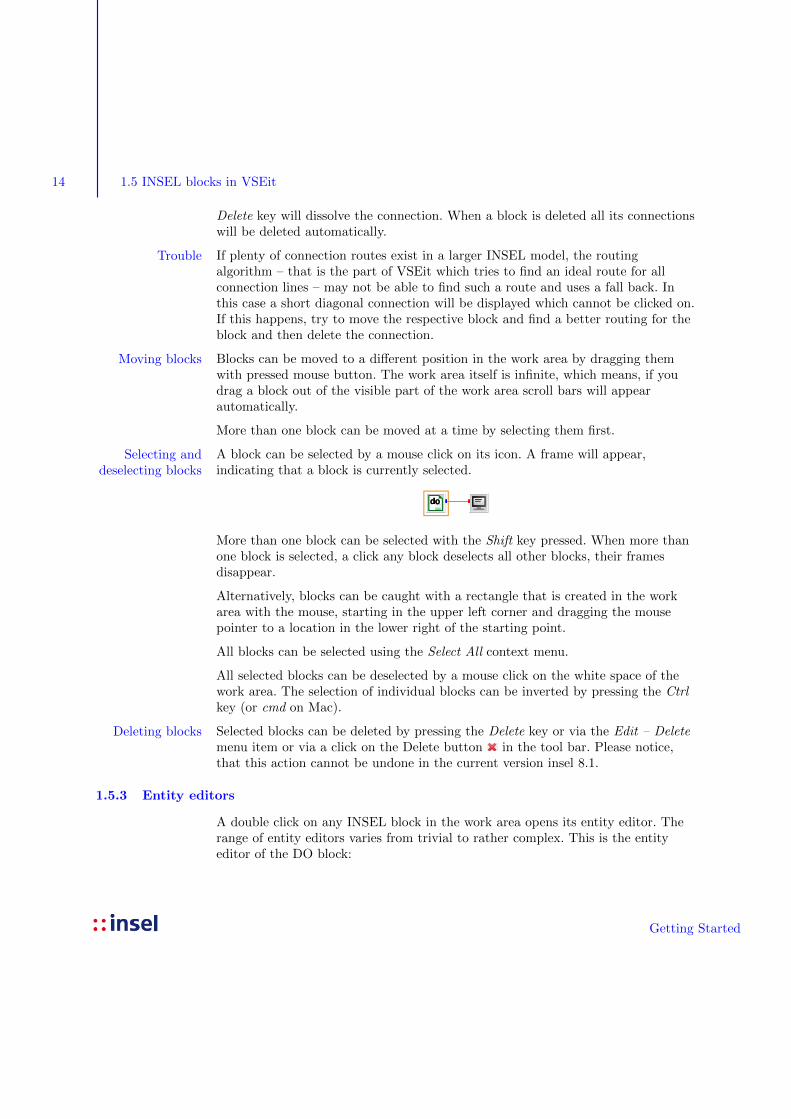
In order to connect an output port with an input port, click near one of the portsConnecting blocksyou wish to connect, keep the mouse button pressed and move the mouse pointerto the other port to be connected. Once you are close enough a small rectangle willshow up, indicating that a release of the mouse button connects the selected ports.
Once connected, a connection line between input and output is shown. In general,an input port can only be connected with exactly one output port while outputports can be connected to an arbitrary number of different input ports.
Block connections can be deleted one by one. A mouse click somewhere on theDeletingconnections route of the connection and choosing Delete from the Edit menu or pressing the
Getting Started
14 1.5 INSEL blocks in VSEit
Delete key will dissolve the connection. When a block is deleted all its connectionswill be deleted automatically.
If plenty of connection routes exist in a larger INSEL model, the routingTroublealgorithm – that is the part of VSEit which tries to find an ideal route for allconnection lines – may not be able to find such a route and uses a fall back. Inthis case a short diagonal connection will be displayed which cannot be clicked on.If this happens, try to move the respective block and find a better routing for theblock and then delete the connection.
Blocks can be moved to a different position in the work area by dragging themMoving blockswith pressed mouse button. The work area itself is infinite, which means, if youdrag a block out of the visible part of the work area scroll bars will appearautomatically.
More than one block can be moved at a time by selecting them first.
A block can be selected by a mouse click on its icon. A frame will appear,Selecting anddeselecting blocks indicating that a block is currently selected.
More than one block can be selected with the Shift key pressed. When more thanone block is selected, a click any block deselects all other blocks, their framesdisappear.
Alternatively, blocks can be caught with a rectangle that is created in the workarea with the mouse, starting in the upper left corner and dragging the mousepointer to a location in the lower right of the starting point.
All blocks can be selected using the Select All context menu.
All selected blocks can be deselected by a mouse click on the white space of thework area. The selection of individual blocks can be inverted by pressing the Ctrlkey (or cmd on Mac).
Selected blocks can be deleted by pressing the Delete key or via the Edit – DeleteDeleting blocksmenu item or via a click on the Delete button in the tool bar. Please notice,that this action cannot be undone in the current version insel 8.1.
1.5.3 Entity editors
A double click on any INSEL block in the work area opens its entity editor. Therange of entity editors varies from trivial to rather complex. This is the entityeditor of the DO block:
Getting Started

1.5.3 Entity editors 15
Most INSEL blocks (better: entities) have two tabs in common: a Parameters taband a Block tab.
The most important feature of the parameters pane is that you can access andParameters panemodify all parameters of the coresponding INSEL block here. In case of the DOblock these are the Inital value, Final value, and Increment parameters.
It is possible to use names of global variables (created with the DEFCON block)in any of the parameter fields. In the shown example, the DO block simply countsfrom one to ten.
A click on the Block tab displays the block pane.Block pane
The block pane of an entity editor shows some insight information for the INSELblock, like the “real” Block name (DO, in this case), the name of the exportedFortran subroutine or C function implemented in a dynamic library, and theso-called User block number u, fixed by the inselEngine during model compilation.
For each INSEL block entity a user-defined Editor title can be provided. The textEditor titlewill appear in the title bar of the entity editor and as a roll-over tooltip when themouse pointer is moved across the minimized block in the block diagram. If noeditor title is specified the roll-over tooltip displays the type name from thepalette (e. g. Do), by default. After the first compilation of the model the defaultroll-over tooltip will change to type: u.
The Number of inputs and the Number of outputs can be specified in the blockInput / outputinterface
Getting Started
16 1.5 INSEL blocks in VSEit
pane of the entity editor – within block-specific limits for the number of allowedinputs and outputs.
The buttons in the bottom of the entity editor can be used for the followingpurposes (from left to right).
The Help button gives direct access to the INSEL block reference page(Prerequisite: Adobe Reader must be installed).
The Clone button opens another copy of the current editor. Changes madeto any copy of an editor are synchronised whenever the Apply or the OKbutton is clicked.
The Info button toggles the display of information to the block parameters,usually the physical units of the corresponding parameters.
The Reset button rejects all unsaved changes made to the parameter settingsand resets all attributes to the recently stored values.
The Apply button saves the current values of all attributes without closingthe entity editor window.
The OK button saves the current values of all attributes and closes theentity editor window.
Well, when the model consisting of the DO block and the SCREEN block as usedExecutionin the discussion so far, is executed the result is displayed in the output window.
Compiling new-1.vseit ...
No errors or warnings
Running insel 8.1 ...
1.0000000
2.0000000
3.0000000
4.0000000
5.0000000
6.0000000
7.0000000
8.0000000
9.0000000
10.000000
Normal end of run
Not very spectacular, but this example shows that everything seems to work.
1.5.4 Errors in networks
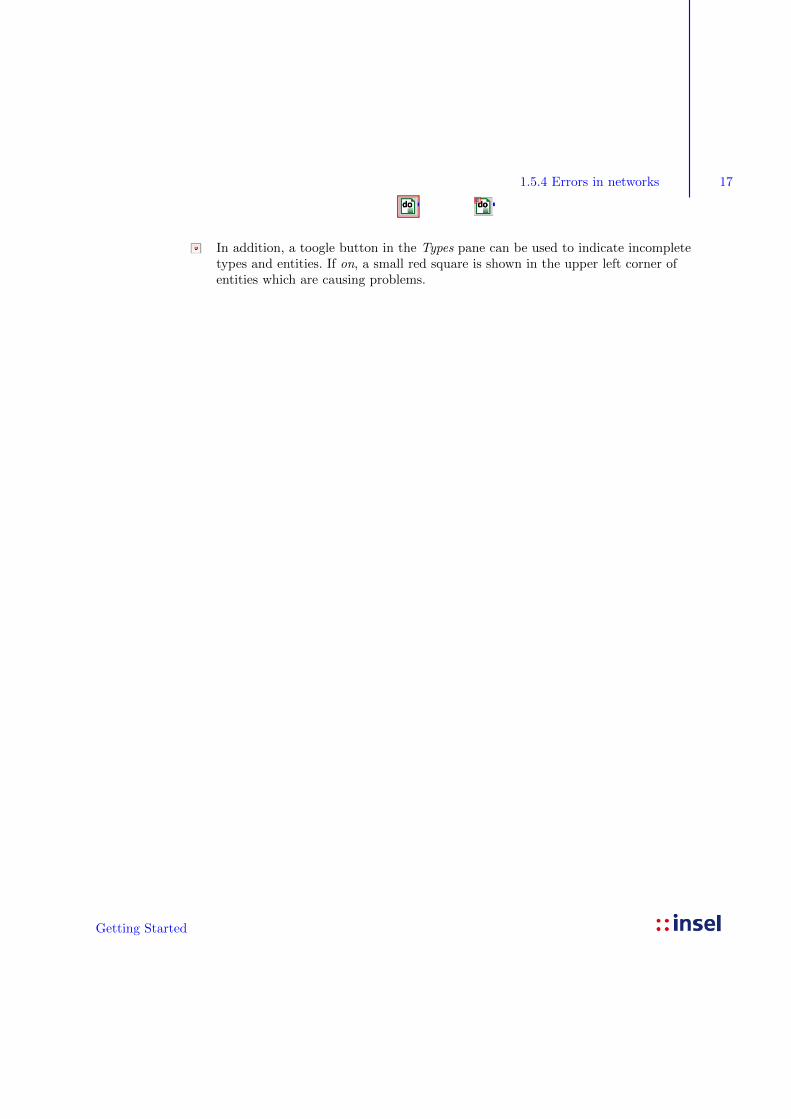
When a model has syntax errors like inconsistent number of inputs or parameters,for example, a red frame around the block indicates the block which causes theproblem.
Getting Started
1.5.4 Errors in networks 17
In addition, a toogle button in the Types pane can be used to indicate incompletetypes and entities. If on, a small red square is shown in the upper left corner ofentities which are causing problems.
Getting Started
18 1.6 Macros
1.6 Macros
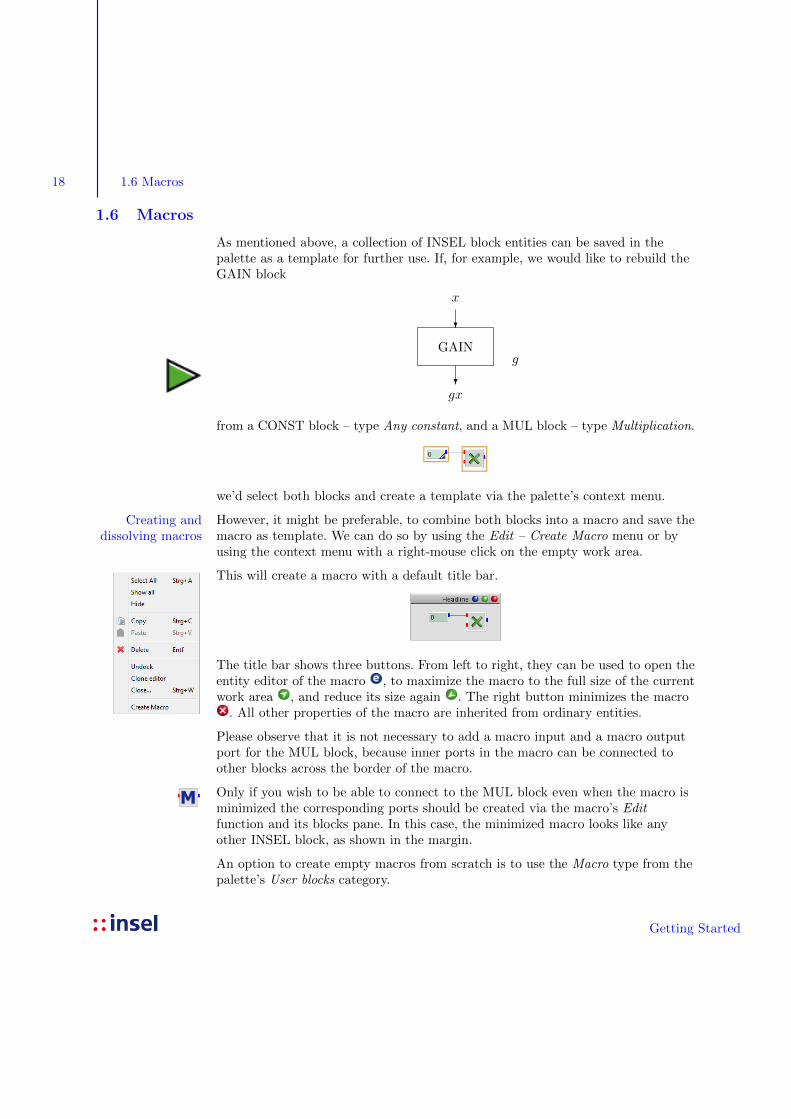
As mentioned above, a collection of INSEL block entities can be saved in thepalette as a template for further use. If, for example, we would like to rebuild theGAIN block
x
?
GAINg
?gx
from a CONST block – type Any constant, and a MUL block – type Multiplication.
we’d select both blocks and create a template via the palette’s context menu.
However, it might be preferable, to combine both blocks into a macro and save theCreating anddissolving macros macro as template. We can do so by using the Edit – Create Macro menu or by
using the context menu with a right-mouse click on the empty work area.
This will create a macro with a default title bar.
The title bar shows three buttons. From left to right, they can be used to open theentity editor of the macro , to maximize the macro to the full size of the currentwork area , and reduce its size again . The right button minimizes the macro
. All other properties of the macro are inherited from ordinary entities.
Please observe that it is not necessary to add a macro input and a macro outputport for the MUL block, because inner ports in the macro can be connected toother blocks across the border of the macro.
Only if you wish to be able to connect to the MUL block even when the macro isminimized the corresponding ports should be created via the macro’s Editfunction and its blocks pane. In this case, the minimized macro looks like anyother INSEL block, as shown in the margin.
An option to create empty macros from scratch is to use the Macro type from thepalette’s User blocks category.
Getting Started

19
Macros can be created within macros. There is practically no limit for the depthof nested macros in INSEL.
One or more selected macros can be dissolved via the Edit – Dissolve macrosmenu or the macro’s context menu.
In addition to using the buttons in the macro’s title bar, the size of an openedEditing macrosmacro can be modified by dragging its lower right corner with the mouse.
Macros can be moved by picking them up at the title bar or their frame, asindicated by a hand symbol of the mouse pointer.
Blocks can be moved from the work area into a macro by dragging them to themacro area. This is possible only if the target macro is opened. The drop option isindicated by a frame around the target macro. Please observe that any previousport connections will be conserved and that the ports are adapted accordingly.The same applies, when blocks are dragged out of a macro.
Getting Started


![Linear Algebra - Friedberg; Insel; Spence [4th E]](https://static.fdocuments.in/doc/165x107/55cf9ad1550346d033a38a8a/linear-algebra-friedberg-insel-spence-4th-e.jpg)