IMPOSSIBLE Polaroid 8x10 Creative Techniques
19
8×10 CREATIVE TECHNIQUES Thank you for your 8×10 photo, Tim Mantoani
-
Upload
dragosandriana -
Category
Documents
-
view
48 -
download
16
description
Polaroid 8x10 Creative Techniques
Transcript of IMPOSSIBLE Polaroid 8x10 Creative Techniques
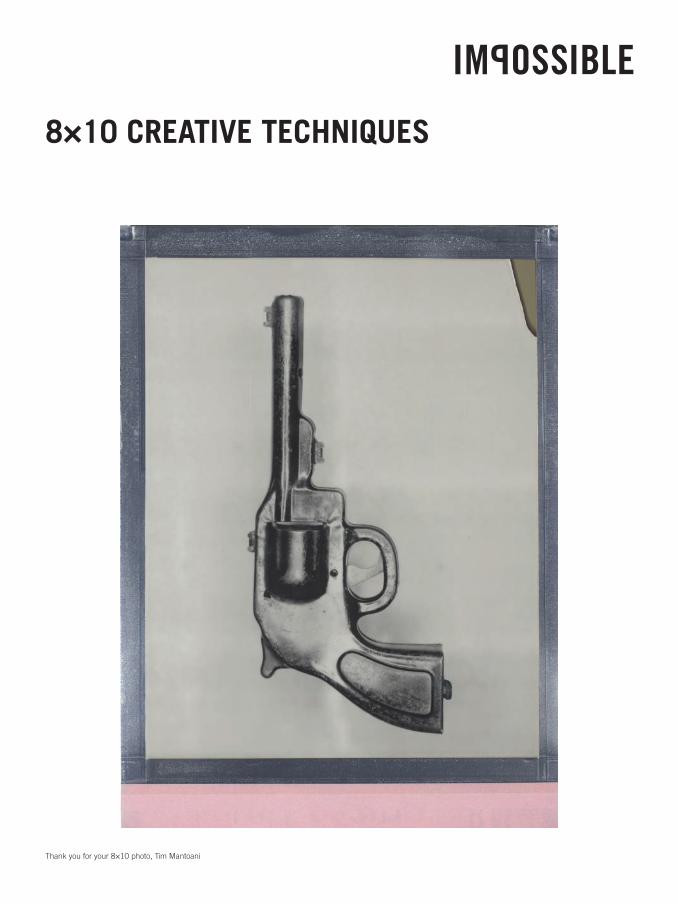
8×10 CREATIVE TECHNIQUES
Thank you for your 8×10 photo, Tim Mantoani
2
CONTENT
TRANSPARENCIES 3EMULSION LIFT 6IMAGE MANIPULATION 10BLEACHING THE NEGATIVE 12SHAPE SHIFTING 14PHOTOGRAPHY AS PRINTMAKING 16
! It is recommended to wear gloves when handling chemistry.
! Always keep towels and water close by.
! If you experience exposure of paste to your skin, wash immediately.
! Keep chemical waste away from children and animals.
! See doctor immediately if paste is ingested or gets into your eyes.
! Keep your processor and rollers clean to obtain highest quality results. Clean up any chemical paste residue while the chemistry is still wet, both on the rollers & inside the processor. Dust all surfaces and clean felt strips on the film hol-der and loading tray.
! Work in subdued light to lessen the risk of light leaks. Leaving your film in direct sunlight can raise the temperature thus affecting the quality of your results.
3
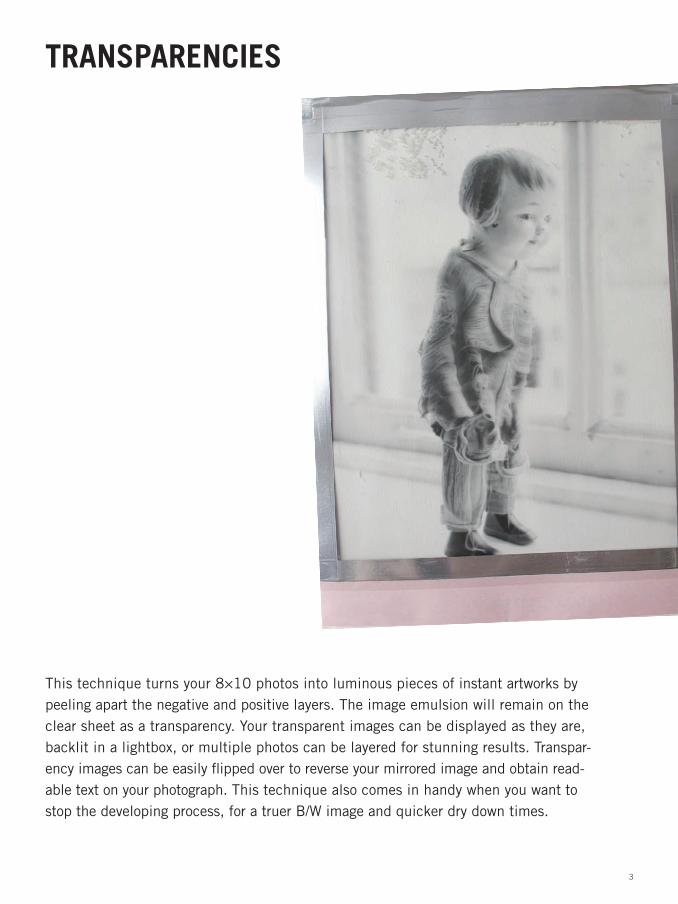
TRANSPARENCIES
This technique turns your 8×10 photos into luminous pieces of instant artworks by peeling apart the negative and positive layers. The image emulsion will remain on the clear sheet as a transparency. Your transparent images can be displayed as they are, backlit in a lightbox, or multiple photos can be layered for stunning results. Transpar-ency images can be easily fl ipped over to reverse your mirrored image and obtain read-able text on your photograph. This technique also comes in handy when you want to stop the developing process, for a truer B/W image and quicker dry down times.
4
WHAT YOU NEED
· An Impossible photo not older than 2 hours
· A hairdryer (recommended)
HOW IT WORKS
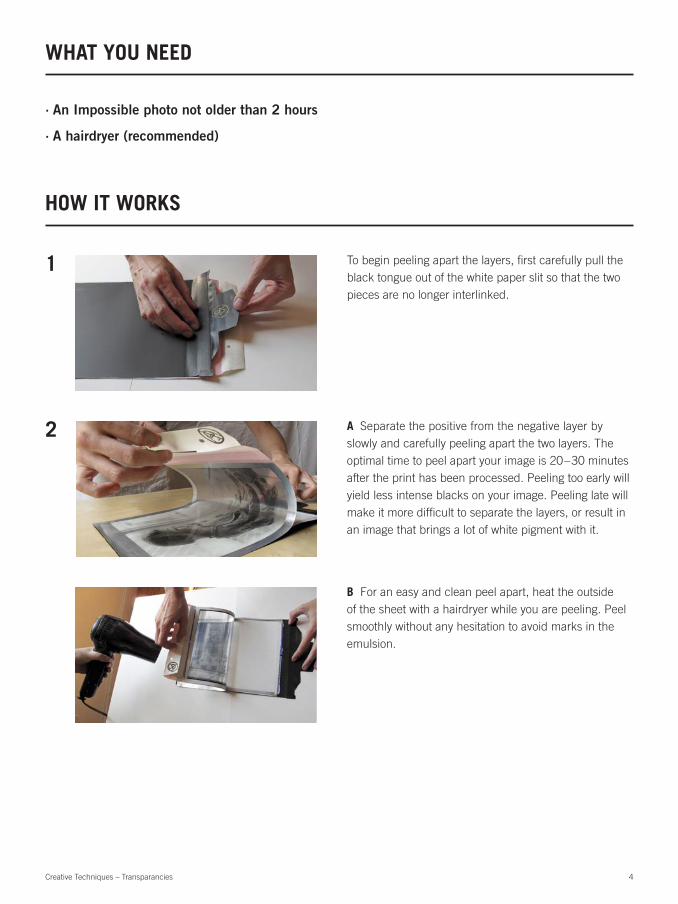
To begin peeling apart the layers, first carefully pull the black tongue out of the white paper slit so that the two pieces are no longer interlinked.
A Separate the positive from the negative layer by slowly and carefully peeling apart the two layers. The optimal time to peel apart your image is 20–30 minutes after the print has been processed. Peeling too early will yield less intense blacks on your image. Peeling late will make it more difficult to separate the layers, or result in an image that brings a lot of white pigment with it.
B For an easy and clean peel apart, heat the outside of the sheet with a hairdryer while you are peeling. Peel smoothly without any hesitation to avoid marks in the emulsion.
Creative Techniques – Transparancies
2
1
5
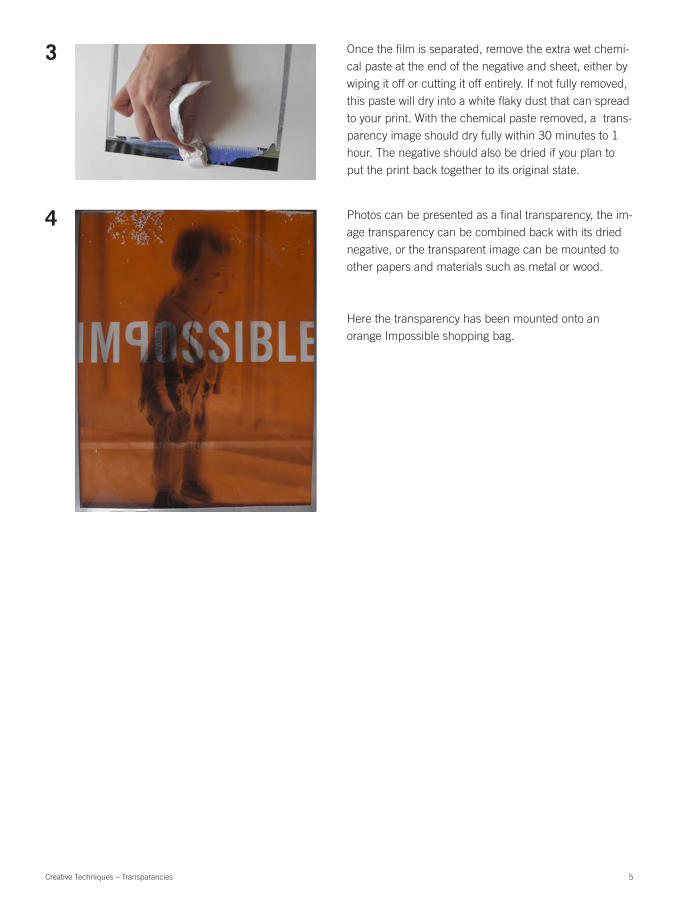
Photos can be presented as a final transparency, the im-age transparency can be combined back with its dried negative, or the transparent image can be mounted to other papers and materials such as metal or wood.
Here the transparency has been mounted onto an orange Impossible shopping bag.
Creative Techniques – Transparancies
4
3 Once the film is separated, remove the extra wet chemi-cal paste at the end of the negative and sheet, either by wiping it off or cutting it off entirely. If not fully removed, this paste will dry into a white flaky dust that can spread to your print. With the chemical paste removed, a trans-parency image should dry fully within 30 minutes to 1 hour. The negative should also be dried if you plan to put the print back together to its original state.
6
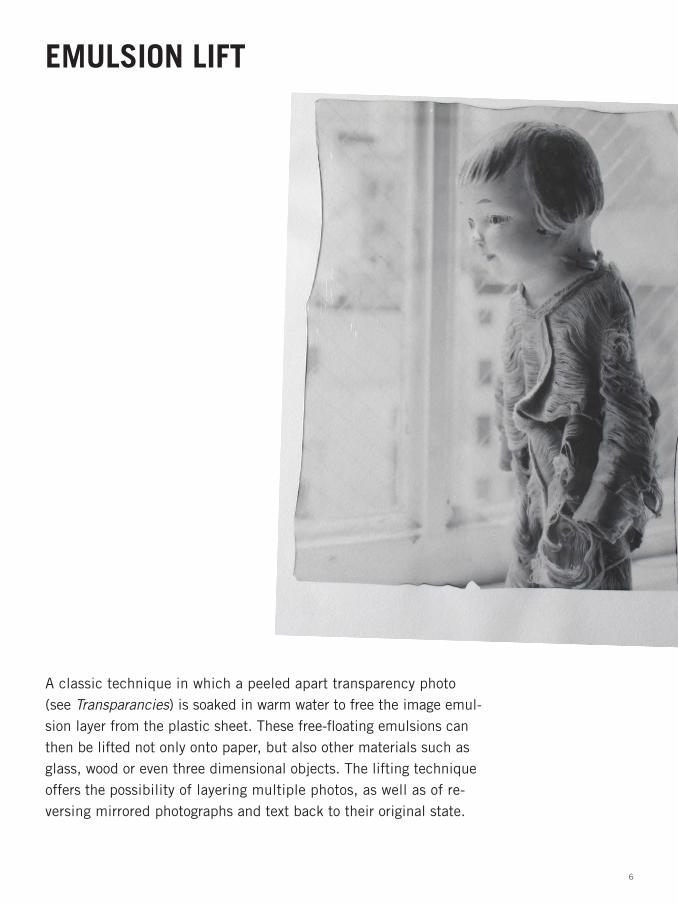
EMULSION LIFT
A classic technique in which a peeled apart transparency photo (see Transparancies) is soaked in warm water to free the image emul-sion layer from the plastic sheet. These free-floating emulsions can then be lifted not only onto paper, but also other materials such as glass, wood or even three dimensional objects. The lifting technique offers the possibility of layering multiple photos, as well as of re-versing mirrored photographs and text back to their original state.
7
WHAT YOU NEED
HOW IT WORKS
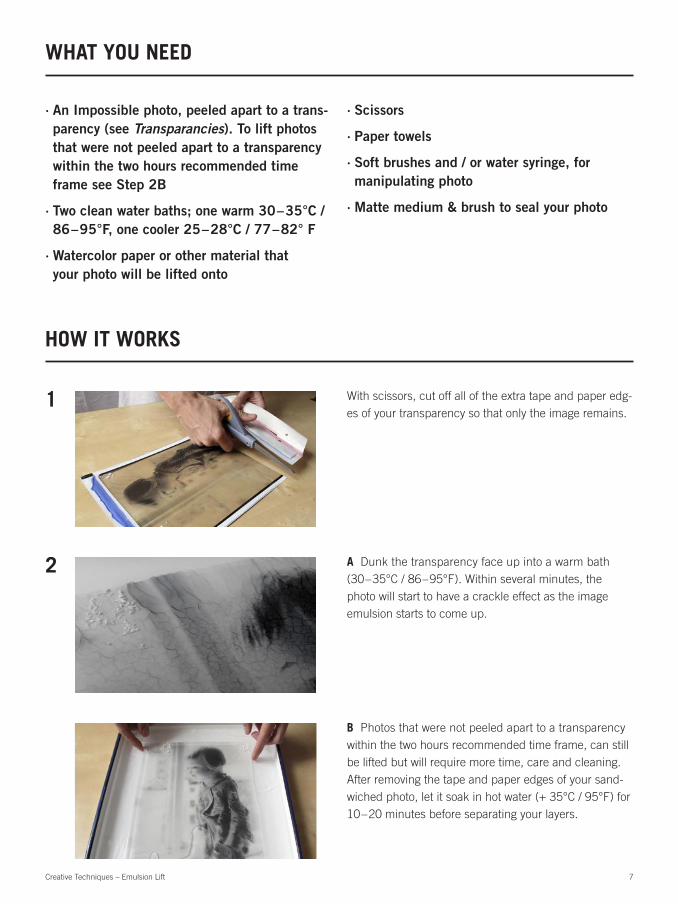
With scissors, cut off all of the extra tape and paper edg-es of your transparency so that only the image remains.
· An Impossible photo, peeled apart to a trans-parency (see Transparancies). To lift photos that were not peeled apart to a transparency within the two hours recommended time frame see Step 2B
· Two clean water baths; one warm 30–35°C / 86–95°F, one cooler 25–28°C / 77–82° F
· Watercolor paper or other material that your photo will be lifted onto
· Scissors
· Paper towels
· Soft brushes and / or water syringe, for manipulating photo
· Matte medium & brush to seal your photo
A Dunk the transparency face up into a warm bath (30–35°C / 86–95°F). Within several minutes, the photo will start to have a crackle effect as the image emulsion starts to come up.
Creative Techniques – Emulsion Lift
1
2
B Photos that were not peeled apart to a transparency within the two hours recommended time frame, can still be lifted but will require more time, care and cleaning. After removing the tape and paper edges of your sand-wiched photo, let it soak in hot water (+ 35°C / 95°F) for 10–20 minutes before separating your layers.
8
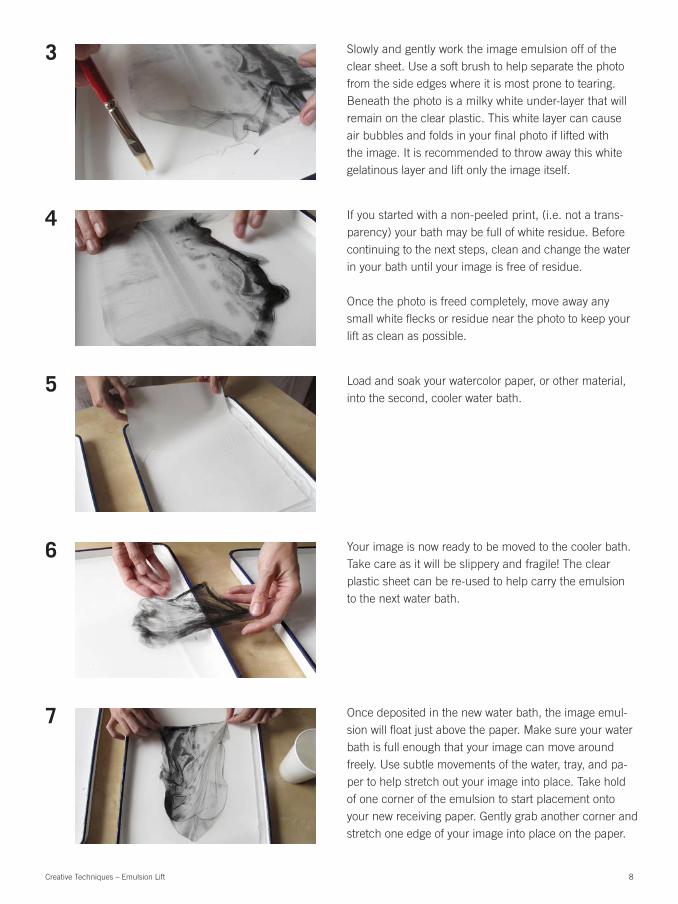
Slowly and gently work the image emulsion off of the clear sheet. Use a soft brush to help separate the photo from the side edges where it is most prone to tearing. Beneath the photo is a milky white under-layer that will remain on the clear plastic. This white layer can cause air bubbles and folds in your final photo if lifted with the image. It is recommended to throw away this white gelatinous layer and lift only the image itself.
If you started with a non-peeled print, (i.e. not a trans-parency) your bath may be full of white residue. Before continuing to the next steps, clean and change the water in your bath until your image is free of residue.
Once the photo is freed completely, move away any small white flecks or residue near the photo to keep your lift as clean as possible.
Load and soak your watercolor paper, or other material, into the second, cooler water bath.
Creative Techniques – Emulsion Lift
3
4
5
6
7
Your image is now ready to be moved to the cooler bath. Take care as it will be slippery and fragile! The clear plastic sheet can be re-used to help carry the emulsion to the next water bath.
Once deposited in the new water bath, the image emul-sion will float just above the paper. Make sure your water bath is full enough that your image can move around freely. Use subtle movements of the water, tray, and pa-per to help stretch out your image into place. Take hold of one corner of the emulsion to start placement onto your new receiving paper. Gently grab another corner and stretch one edge of your image into place on the paper.
9
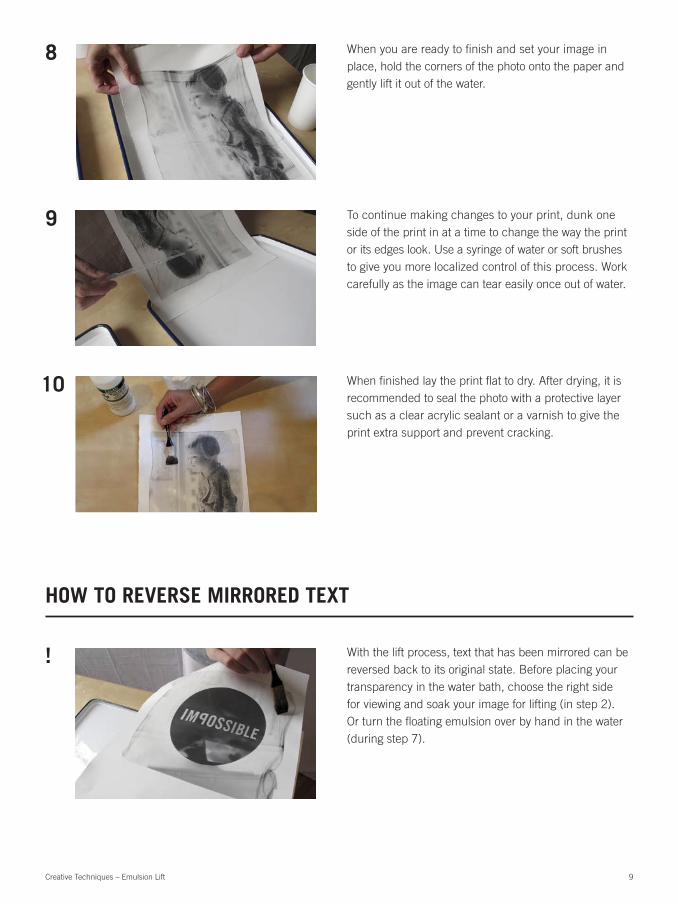
When you are ready to finish and set your image in place, hold the corners of the photo onto the paper and gently lift it out of the water.
To continue making changes to your print, dunk one side of the print in at a time to change the way the print or its edges look. Use a syringe of water or soft brushes to give you more localized control of this process. Work carefully as the image can tear easily once out of water.
Creative Techniques – Emulsion Lift
8
9
10
!
When finished lay the print flat to dry. After drying, it is recommended to seal the photo with a protective layer such as a clear acrylic sealant or a varnish to give the print extra support and prevent cracking.
With the lift process, text that has been mirrored can be reversed back to its original state. Before placing your transparency in the water bath, choose the right side for viewing and soak your image for lifting (in step 2). Or turn the floating emulsion over by hand in the water (during step 7).
HOW TO REVERSE MIRRORED TEXT
10
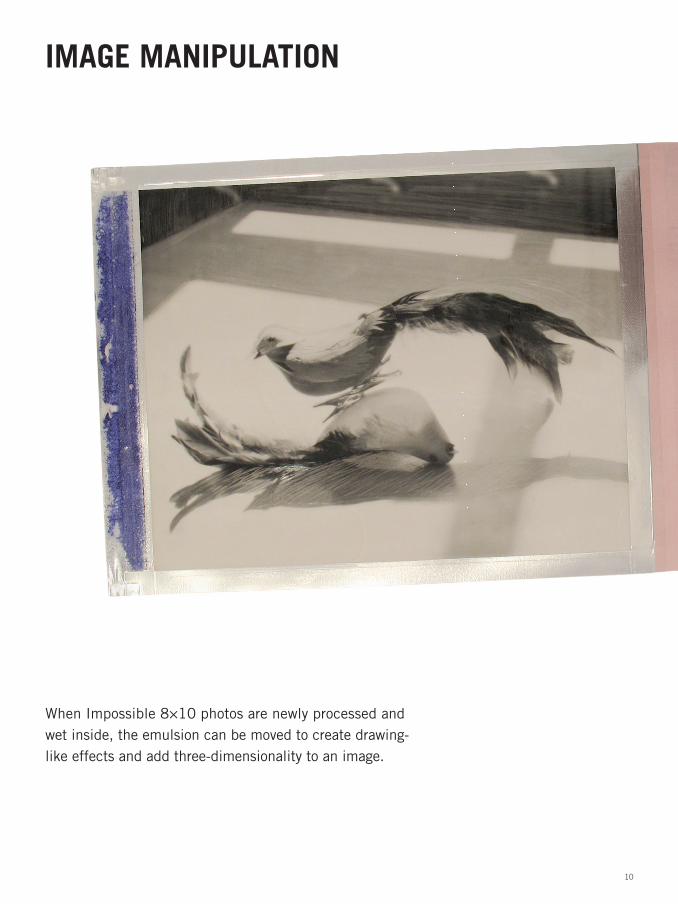
IMAGE MANIPULATION
When Impossible 8×10 photos are newly processed and wet inside, the emulsion can be moved to create drawing-like effects and add three-dimensionality to an image.

11
WHAT YOU NEED
HOW IT WORKS
· A photo no older than 2 hours. Photos ma-nipulated within the first twenty minutes will have stronger visible artifacts.
· A hairdryer (optional)
· A soft surface such as a paperback book or a kitchen towel
· A tool with a round tip, such as a blunt pen-cil, the non-business end of a paint brush, a non-working ball point pen or a spoon. For even more control try tools such as specially shaped wooden clay tools or a bookmakers bone tool.
With a round tip apply pressure directly on the surface of the photo to move around the emulsion. Take care to not press so hard that your scratch the clear surface of the sheet. Follow the contours of your subject to in-crease three-dimensionality. Heat and reheat the image with a hairdryer between manipulations to create new effects.
Take your processed photo and rest it on a softer surface such as a paperback book or a kitchen towel. When working with a photo older than 20 minutes, heat from a hair dryer can be used to soften the emulsion to manipulate it.
Creative Techniques – Image Manipulation
The photo should be dried in the Dry Age kits upon completion. Note that even with the help of a Dry Age Kit, photos that are given extra heat from a hair dryer and manipulated will shift sepia as they dry down.
1
3
2
12
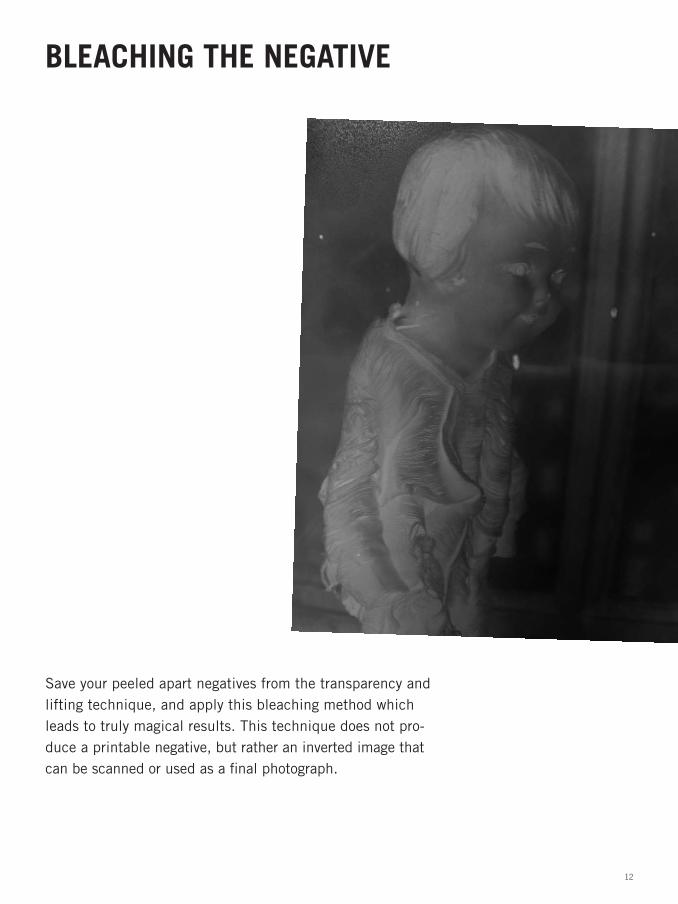
BLEACHING THE NEGATIVE
Save your peeled apart negatives from the transparency and lifting technique, and apply this bleaching method which leads to truly magical results. This technique does not pro-duce a printable negative, but rather an inverted image that can be scanned or used as a final photograph.
13
WHAT YOU NEED
HOW IT WORKS
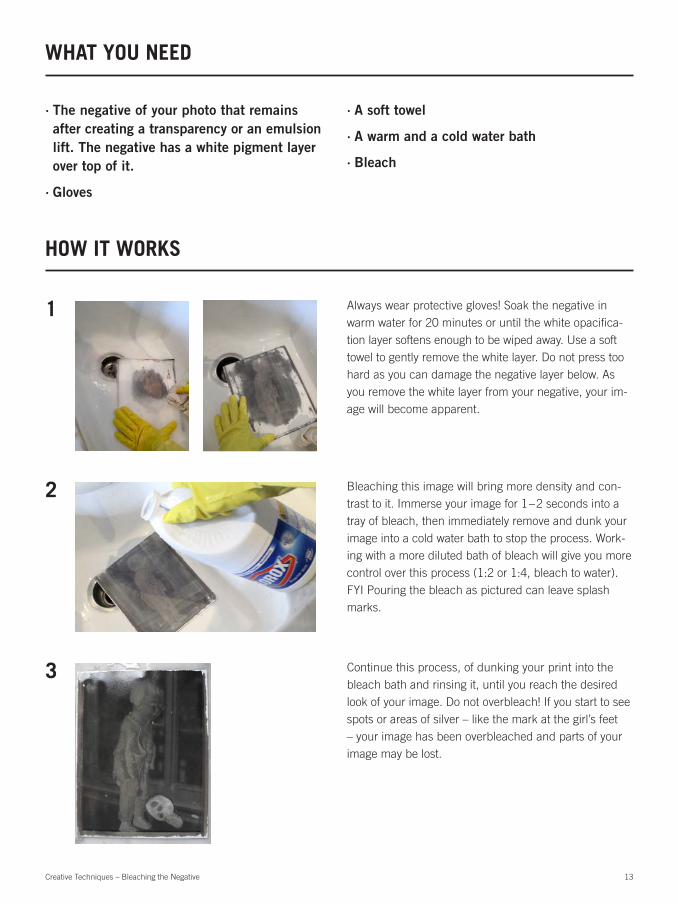
Bleaching this image will bring more density and con-trast to it. Immerse your image for 1–2 seconds into a tray of bleach, then immediately remove and dunk your image into a cold water bath to stop the process. Work-ing with a more diluted bath of bleach will give you more control over this process (1:2 or 1:4, bleach to water). FYI Pouring the bleach as pictured can leave splash marks.
Always wear protective gloves! Soak the negative in warm water for 20 minutes or until the white opacifica-tion layer softens enough to be wiped away. Use a soft towel to gently remove the white layer. Do not press too hard as you can damage the negative layer below. As you remove the white layer from your negative, your im-age will become apparent.
· The negative of your photo that remains after creating a transparency or an emulsion lift. The negative has a white pigment layer over top of it.
· Gloves
· A soft towel
· A warm and a cold water bath
· Bleach
Creative Techniques – Bleaching the Negative
Continue this process, of dunking your print into the bleach bath and rinsing it, until you reach the desired look of your image. Do not overbleach! If you start to see spots or areas of silver – like the mark at the girl’s feet – your image has been overbleached and parts of your image may be lost.
1
2
3
14
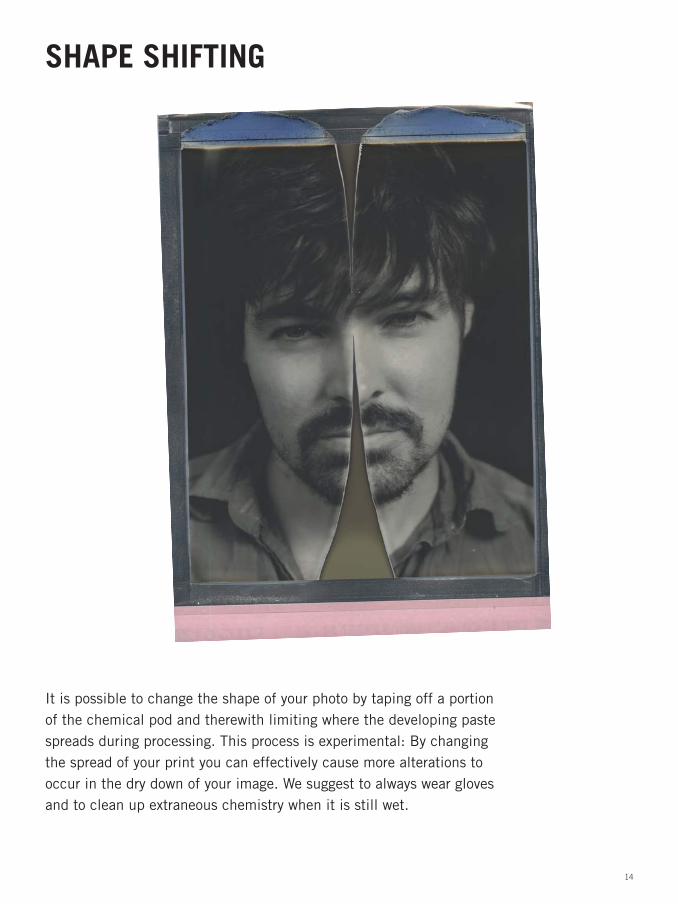
SHAPE SHIFTING
It is possible to change the shape of your photo by taping off a portion of the chemical pod and therewith limiting where the developing paste spreads during processing. This process is experimental: By changing the spread of your print you can effectively cause more alterations to occur in the dry down of your image. We suggest to always wear gloves and to clean up extraneous chemistry when it is still wet.
15
WHAT YOU NEED
HOW IT WORKS
· Tape, such as magic tape
· Gloves (recommended)
· Towels
· Water for cleaning
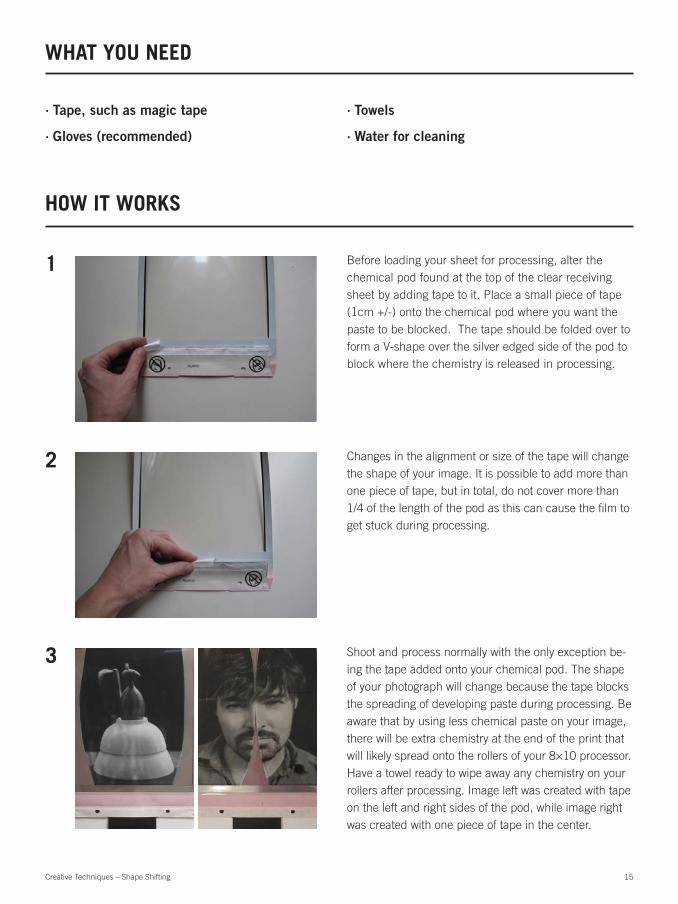
Before loading your sheet for processing, alter the chemical pod found at the top of the clear receiving sheet by adding tape to it. Place a small piece of tape (1cm +/-) onto the chemical pod where you want the paste to be blocked. The tape should be folded over to form a V-shape over the silver edged side of the pod to block where the chemistry is released in processing.
Creative Techniques – Shape Shifting
1
3
2
Shoot and process normally with the only exception be-ing the tape added onto your chemical pod. The shape of your photograph will change because the tape blocks the spreading of developing paste during processing. Be aware that by using less chemical paste on your image, there will be extra chemistry at the end of the print that will likely spread onto the rollers of your 8×10 processor. Have a towel ready to wipe away any chemistry on your rollers after processing. Image left was created with tape on the left and right sides of the pod, while image right was created with one piece of tape in the center.
Changes in the alignment or size of the tape will change the shape of your image. It is possible to add more than one piece of tape, but in total, do not cover more than 1/4 of the length of the pod as this can cause the film to get stuck during processing.
16
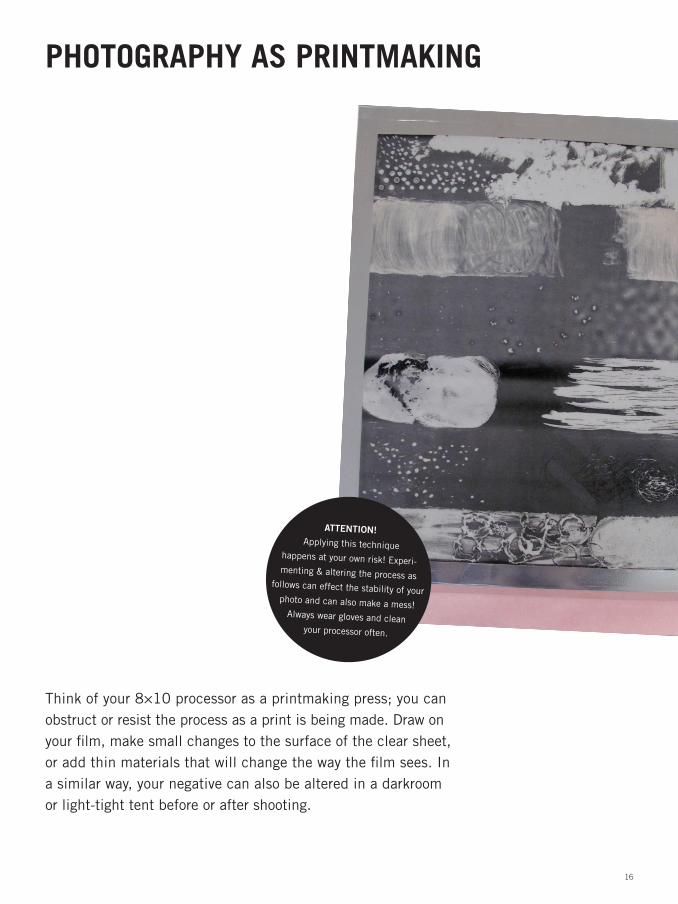
PHOTOGRAPHY AS PRINTMAKING
Think of your 8×10 processor as a printmaking press; you can obstruct or resist the process as a print is being made. Draw on your fi lm, make small changes to the surface of the clear sheet, or add thin materials that will change the way the fi lm sees. In a similar way, your negative can also be altered in a darkroom or light-tight tent before or after shooting.
ATTENTION! Applying this technique
happens at your own risk! Experi-menting & altering the process as
follows can effect the stability of your photo and can also make a mess!
Always wear gloves and clean your processor often.
17
WHAT YOU NEED
HOW IT WORKS
· Materials to add or make changes your sheet or negative. Some ideas to get you started: pencils & markers, sandpaper, vinegar, the oil from your fingerprints, foodcoloring, spray paint, a blunt tool to make marks, etc.
· Gloves
· Towel
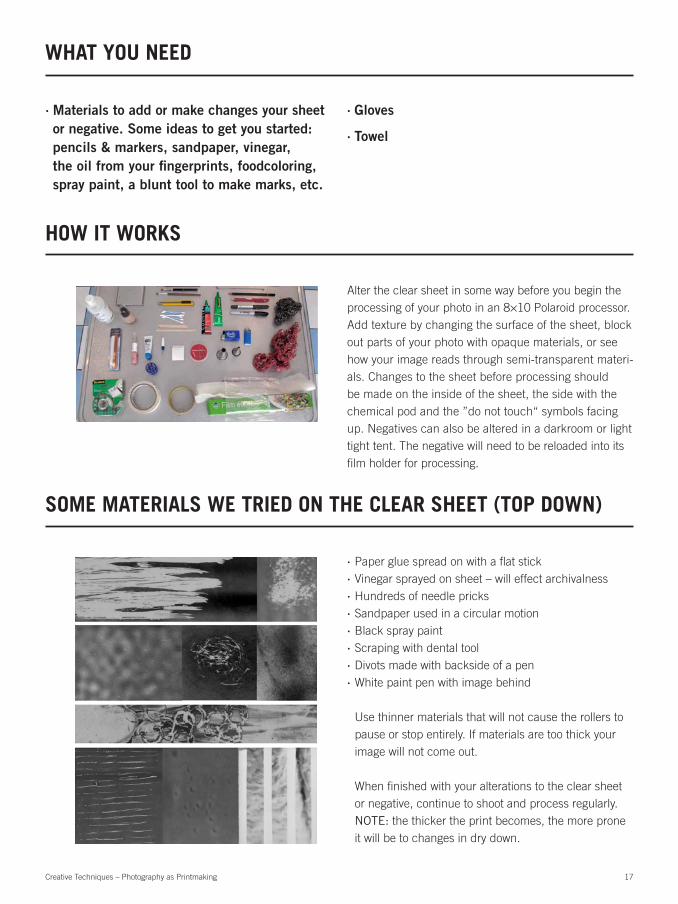
Alter the clear sheet in some way before you begin the processing of your photo in an 8×10 Polaroid processor. Add texture by changing the surface of the sheet, block out parts of your photo with opaque materials, or see how your image reads through semi-transparent materi-als. Changes to the sheet before processing should be made on the inside of the sheet, the side with the chemical pod and the ”do not touch“ symbols facing up. Negatives can also be altered in a darkroom or light tight tent. The negative will need to be reloaded into its film holder for processing.
Creative Techniques – Photography as Printmaking
SOME MATERIALS WE TRIED ON THE CLEAR SHEET (TOP DOWN)
· Paper glue spread on with a flat stick · Vinegar sprayed on sheet – will effect archivalness · Hundreds of needle pricks · Sandpaper used in a circular motion · Black spray paint · Scraping with dental tool · Divots made with backside of a pen · White paint pen with image behind Use thinner materials that will not cause the rollers to pause or stop entirely. If materials are too thick your image will not come out. When finished with your alterations to the clear sheet or negative, continue to shoot and process regularly. NOTE: the thicker the print becomes, the more prone it will be to changes in dry down.
18
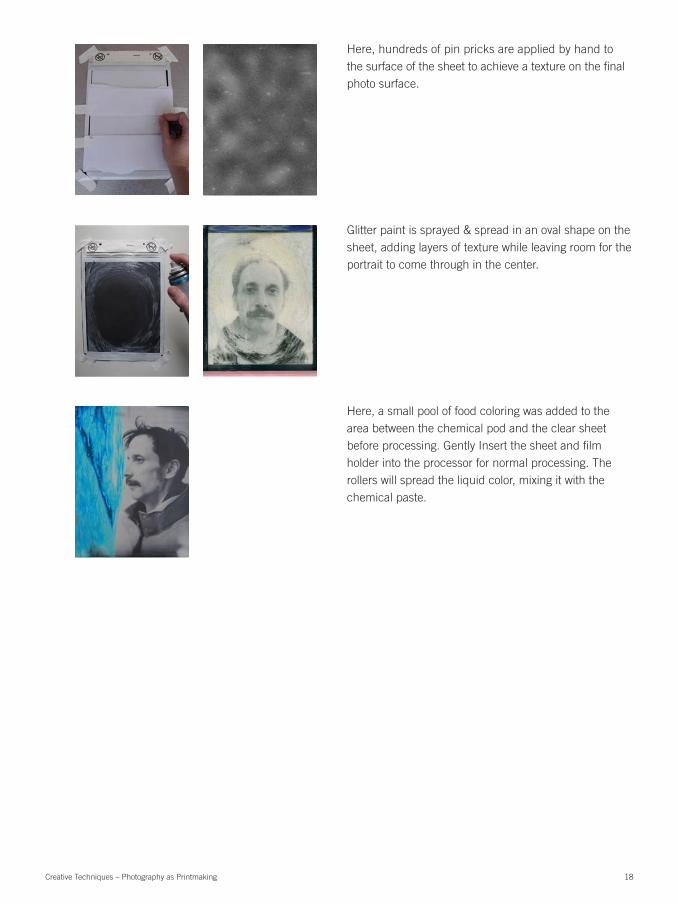
Here, hundreds of pin pricks are applied by hand to the surface of the sheet to achieve a texture on the final photo surface.
Creative Techniques – Photography as Printmaking
Here, a small pool of food coloring was added to the area between the chemical pod and the clear sheet before processing. Gently Insert the sheet and film holder into the processor for normal processing. The rollers will spread the liquid color, mixing it with the chemical paste.
Glitter paint is sprayed & spread in an oval shape on the sheet, adding layers of texture while leaving room for the portrait to come through in the center.
19
WE SUPPORT YOUTo learn all details on usage of 8×10 film and find all tutorials and updates please visit our website on www.the-impossible-project.com/8×10.If you have any further questions, please visit our Online Support Desk at http://support.the-impossible-project.com
TECHNICAL SPECIFICATIONSThe new Impossible 8×10 Silver Shade Film is a high speed, medium contrast, monochrome integral film with a beautiful tonal range and experimental character and possibilities.
Film speed: Nominally ISO 640. Suitable for daylight 5500K. The ASA can vary in response to extreme temperatures outside of the range of 13–28° C (55–82° F) and to different color tem-peratures of light, with flash slowing down the effective ASA. In direct sunlight, load holders in low light and do not pull off the protective envelope until you are about to shoot.Exposures: 10 exposures per boxDevelopment time: 4 minutes in the dark processing compart-ment with final development over approximately 25 minutes. Dimensions: Format: 8×10 inches, image area: 7.5×9.35 inch-es/19×24 cmFinish: glossyDry down: Peel Apart: 48 Hours, Dry Age: 3+ weeksPrints utilizing the Dry Age technique tend to dry down -2/3 stop darker noticeably in the mid to dark tones.Compatible hardware: 8×10 Polaroid Processor and any 8×10 camera equipped to accept an 8×10 Polaroid film holder.Additional equipment needed: Polaroid 8×10 Processor and film holders.
Film Storage Best used within 12 months of production date. Store unopened film pack in the fridge at 5–10° C/41–50° F. Do not freeze! Film Characteristics The development of this film is a sensitive chemical reaction, triggered by light and affected by various parameters such as temperature, age, time, mechanical manipulation and others. Therefore variations in results are not only possible but to be expected with this analog instant film. Limited Warranty Any film that does not show any photographic result due to defective manufacture, labeling or packaging will be replaced, provided representative samples as well as batch numbers are returned to Impossible customer service. This warranty excludes all consequential damages. Caution This film uses a caustic paste. Do not cut or take apart the film. Avoid contact of the paste to skin, eyes or mouth. If you get paste on your skin, eyes or mouth, wipe it off immediately, wash with water to avoid an alkali burn and consult a doctor. Keep discarded materials and paste away from children, animals, clothing and furniture.