ICP™ Application Submission - api.org · 1 | P a g e ICP™ Application Submission User Guide for...
23
1 | Page ICP™ Application Submission User Guide for API 571, 577 and 580 Applicants January 2018
Transcript of ICP™ Application Submission - api.org · 1 | P a g e ICP™ Application Submission User Guide for...
1 | P a g e
ICP™ Application Submission User Guide for API 571, 577 and 580 Applicants
January 2018
2 | P a g e
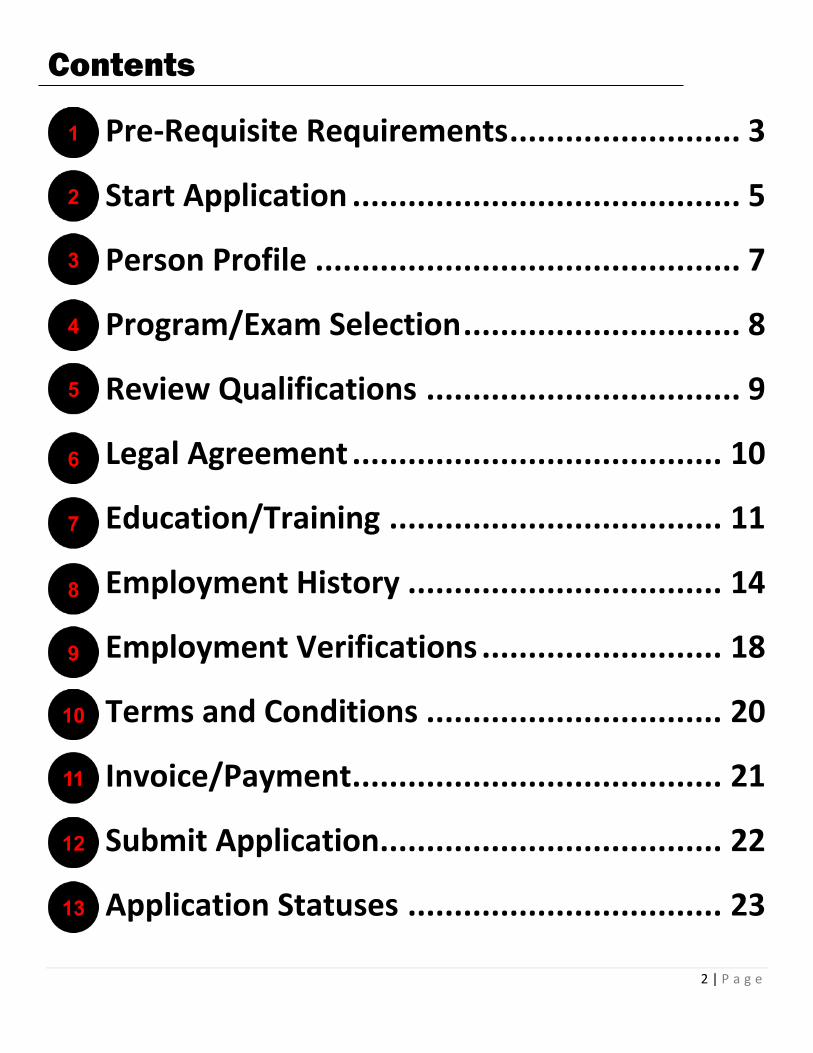
Contents
Pre-Requisite Requirements ......................... 3
Start Application .......................................... 5
Person Profile .............................................. 7
Program/Exam Selection .............................. 8
Review Qualifications .................................. 9
Legal Agreement ........................................ 10
Education/Training .................................... 11
Employment History .................................. 14
Employment Verifications .......................... 18
Terms and Conditions ................................ 20
Invoice/Payment ........................................ 21
Submit Application ..................................... 22
Application Statuses .................................. 23
3 | P a g e
Pre-Requisite Requirements
The first step before filling out your application is making sure you understand the qualification requirements for the
program you are applying. The qualification requirements for all certification programs can be found at ICP
Certifications. Use the drop down menu to select the program you are interested in.
Qualification requirements for the API 571, API 577 and API 580 are below:
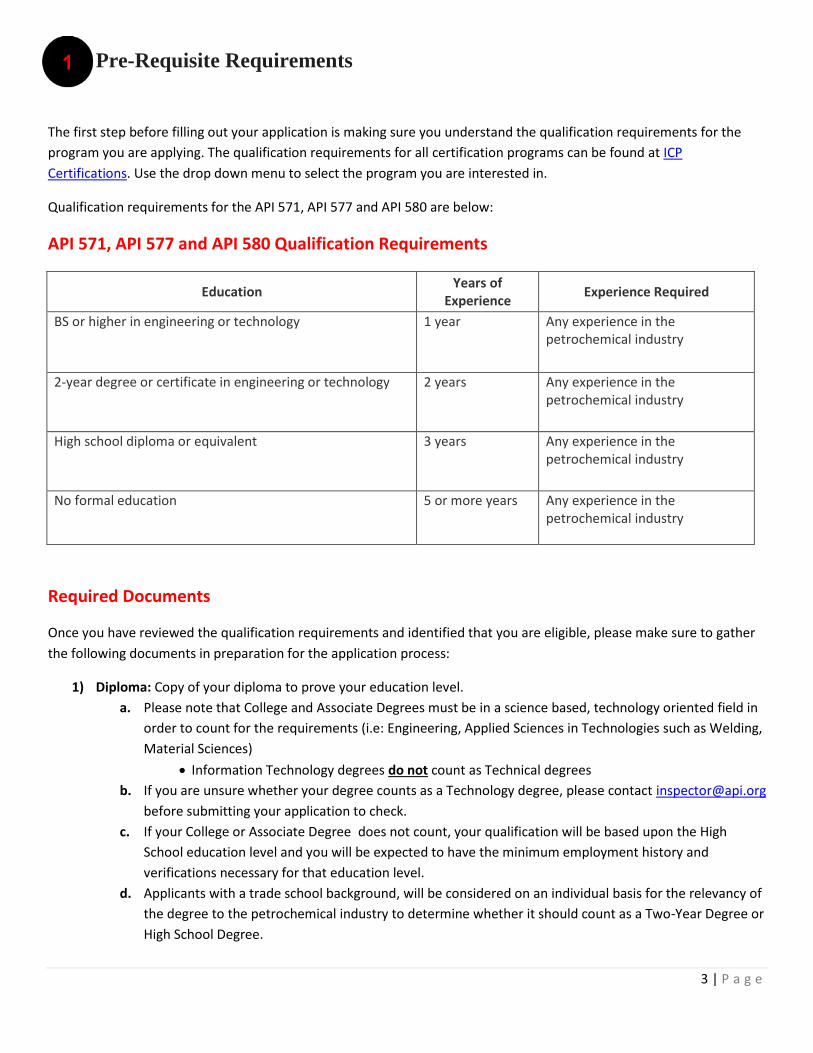
API 571, API 577 and API 580 Qualification Requirements
Education Years of
Experience Experience Required
BS or higher in engineering or technology 1 year Any experience in the petrochemical industry
2-year degree or certificate in engineering or technology 2 years Any experience in the petrochemical industry
High school diploma or equivalent 3 years Any experience in the petrochemical industry
No formal education 5 or more years Any experience in the petrochemical industry
Required Documents
Once you have reviewed the qualification requirements and identified that you are eligible, please make sure to gather
the following documents in preparation for the application process:
1) Diploma: Copy of your diploma to prove your education level.
a. Please note that College and Associate Degrees must be in a science based, technology oriented field in
order to count for the requirements (i.e: Engineering, Applied Sciences in Technologies such as Welding,
Material Sciences)
Information Technology degrees do not count as Technical degrees
b. If you are unsure whether your degree counts as a Technology degree, please contact [email protected]
before submitting your application to check.
c. If your College or Associate Degree does not count, your qualification will be based upon the High
School education level and you will be expected to have the minimum employment history and
verifications necessary for that education level.
d. Applicants with a trade school background, will be considered on an individual basis for the relevancy of
the degree to the petrochemical industry to determine whether it should count as a Two-Year Degree or
High School Degree.
4 | P a g e
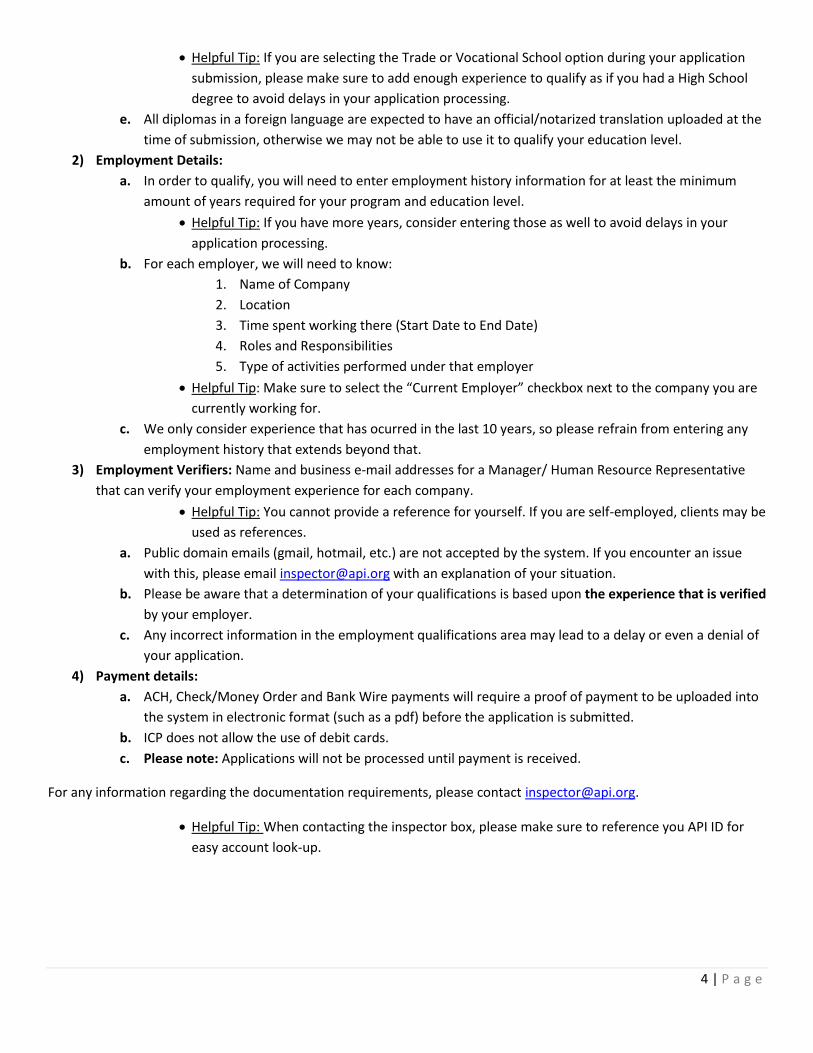
Helpful Tip: If you are selecting the Trade or Vocational School option during your application
submission, please make sure to add enough experience to qualify as if you had a High School
degree to avoid delays in your application processing.
e. All diplomas in a foreign language are expected to have an official/notarized translation uploaded at the
time of submission, otherwise we may not be able to use it to qualify your education level.
2) Employment Details:
a. In order to qualify, you will need to enter employment history information for at least the minimum
amount of years required for your program and education level.
Helpful Tip: If you have more years, consider entering those as well to avoid delays in your
application processing.
b. For each employer, we will need to know:
1. Name of Company
2. Location
3. Time spent working there (Start Date to End Date)
4. Roles and Responsibilities
5. Type of activities performed under that employer
Helpful Tip: Make sure to select the “Current Employer” checkbox next to the company you are
currently working for.
c. We only consider experience that has ocurred in the last 10 years, so please refrain from entering any
employment history that extends beyond that.
3) Employment Verifiers: Name and business e-mail addresses for a Manager/ Human Resource Representative
that can verify your employment experience for each company.
Helpful Tip: You cannot provide a reference for yourself. If you are self-employed, clients may be
used as references.
a. Public domain emails (gmail, hotmail, etc.) are not accepted by the system. If you encounter an issue
with this, please email [email protected] with an explanation of your situation.
b. Please be aware that a determination of your qualifications is based upon the experience that is verified
by your employer.
c. Any incorrect information in the employment qualifications area may lead to a delay or even a denial of
your application.
4) Payment details:
a. ACH, Check/Money Order and Bank Wire payments will require a proof of payment to be uploaded into
the system in electronic format (such as a pdf) before the application is submitted.
b. ICP does not allow the use of debit cards.
c. Please note: Applications will not be processed until payment is received.
For any information regarding the documentation requirements, please contact [email protected].
Helpful Tip: When contacting the inspector box, please make sure to reference you API ID for
easy account look-up.

5 | P a g e
Start Application
From the User Dashboard, click “Create New Application.” You will be directed to the New Application Overview
page.
If you have already started an application and have saved it for later, you can return to it by clicking on the
“Edit” button next to the corresponding application. The Edit and Delete button are only available before you
have submitted an application.
Please note: Once an application is submitted, it cannot be modified.

6 | P a g e
This page will display useful information and important documents you will need. When you are ready, click
“Start Application” and begin the application process.
7 | P a g e
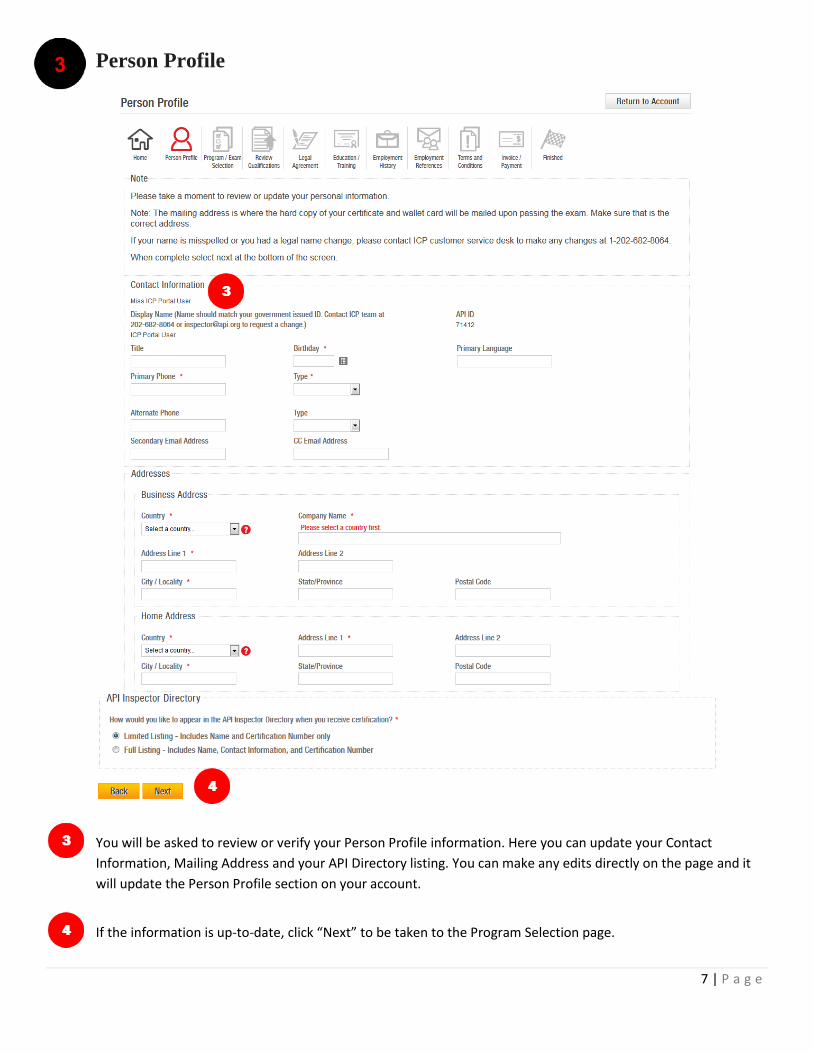
Person Profile
You will be asked to review or verify your Person Profile information. Here you can update your Contact
Information, Mailing Address and your API Directory listing. You can make any edits directly on the page and it
will update the Person Profile section on your account.
If the information is up-to-date, click “Next” to be taken to the Program Selection page.

8 | P a g e
Program/Exam Selection
Select a Certification Program from the menu in the left column.
After selecting a program, you must select an Exam Method from the menu on the right.
Computer Based Exam – Most exams will be administered at Prometric exam centers. There are over 500 locations available
around the world. Once approved, the applicant will receive an Exam Authorization Letter from API with further instructions
to schedule the exact date and time.
Special Site Exams – Special sites are set up in locations where computer centers are not available. In these cases, API has
worked with a designated Group Coordinator to set up a site. If the location has been approved, it will be available in the
Location drop-down menu.
Next, select a Date, Location and Language for your exam. CBT exams will only have the option for Any
Prometric Testing Center.
After verifying all data selected is correct click “Next.”
During the application process, the Next button will appear white until all required fields on the page have been filled in.
After completing required fields, the button will become yellow, allowing you to proceed to the next step of the application
process.
9 | P a g e
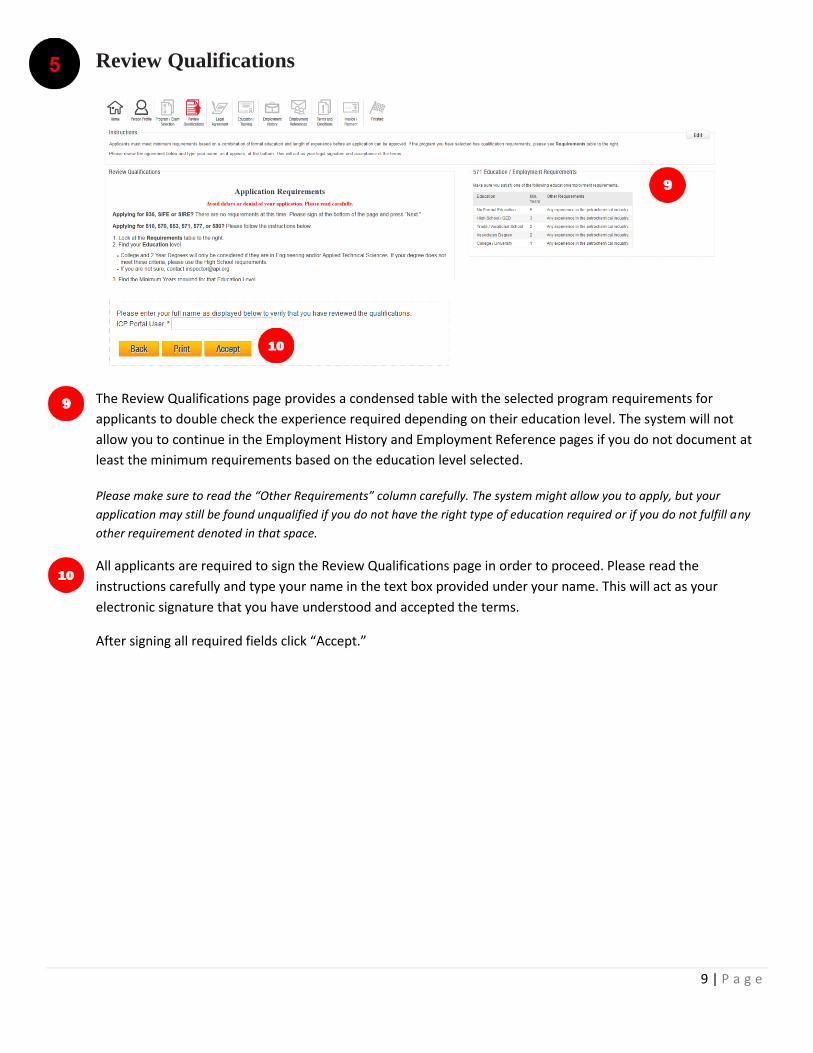
Review Qualifications
The Review Qualifications page provides a condensed table with the selected program requirements for
applicants to double check the experience required depending on their education level. The system will not
allow you to continue in the Employment History and Employment Reference pages if you do not document at
least the minimum requirements based on the education level selected.
Please make sure to read the “Other Requirements” column carefully. The system might allow you to apply, but your
application may still be found unqualified if you do not have the right type of education required or if you do not fulfill any
other requirement denoted in that space.
All applicants are required to sign the Review Qualifications page in order to proceed. Please read the
instructions carefully and type your name in the text box provided under your name. This will act as your
electronic signature that you have understood and accepted the terms.
After signing all required fields click “Accept.”
10 | P a g e
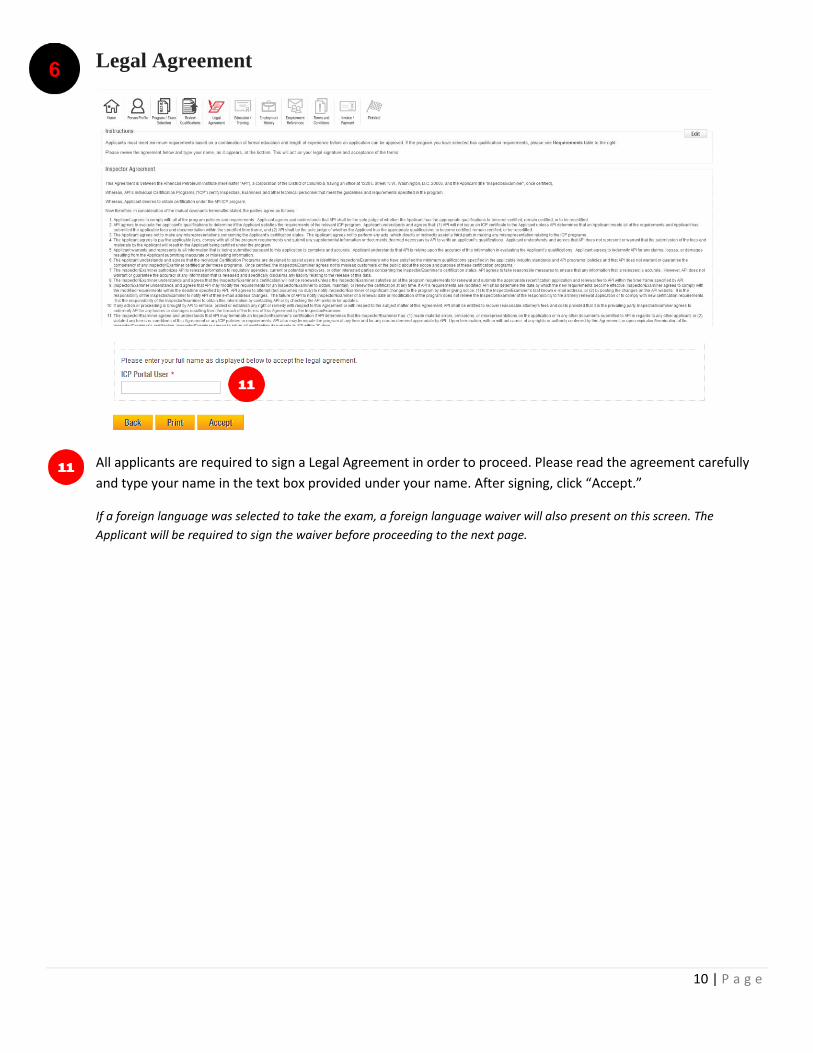
Legal Agreement
All applicants are required to sign a Legal Agreement in order to proceed. Please read the agreement carefully
and type your name in the text box provided under your name. After signing, click “Accept.”
If a foreign language was selected to take the exam, a foreign language waiver will also present on this screen. The
Applicant will be required to sign the waiver before proceeding to the next page.

11 | P a g e
Education/Training
On this page, you will fill out your Education/Training History. Formal education includes: High School/GED,
Trade/Vocational School, Associates Degree or College/University.
If you have no formal education, click the check-box labeled “No formal education?” and skip ahead to Step 17.
If you have formal education to add, click “Add Education.”
If you have filled in Education/Training from the Education History Tab, it will pre-populate here to be verified.

12 | P a g e
After clicking “Add Education,” a window will pop up on the screen, prompting you to fill in all the fields for
education and to upload diplomas or transcripts.
If you have previously submitted copies of diplomas or transcripts for other programs, ICP should have them on file, but if
you have them readily available please upload them to your account here.
Any diplomas or transcripts in a foreign language should be officially translated to English before being uploaded.
After all required information has been entered, click “Save.” This information will be saved in the system and
pre-populated for any subsequent applications. Repeat this step to enter another educational achievement.
To enter certifications, click “Add Certification.” If you have no certifications to add, click “Next” and skip ahead
to Step 20.

13 | P a g e
After clicking “Add Certification,” a window will pop up on the screen, prompting you to select from a drop-
down list. Once you select a record to add to your application, fill in all required fields associated with that
record and click “Save.” Repeat if necessary.
After you have finished entering all education and certifications click “Next.”

14 | P a g e
Employment History
15 | P a g e
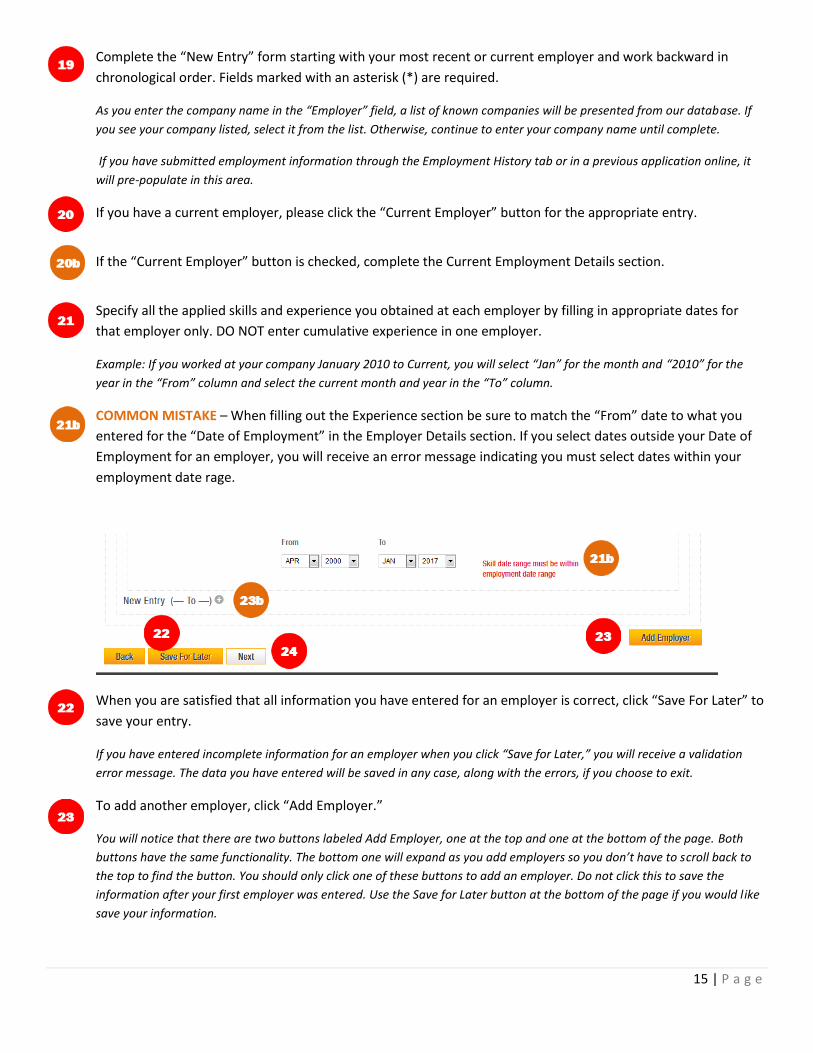
Complete the “New Entry” form starting with your most recent or current employer and work backward in
chronological order. Fields marked with an asterisk (*) are required.
As you enter the company name in the “Employer” field, a list of known companies will be presented from our database. If
you see your company listed, select it from the list. Otherwise, continue to enter your company name until complete.
If you have submitted employment information through the Employment History tab or in a previous application online, it
will pre-populate in this area.
If you have a current employer, please click the “Current Employer” button for the appropriate entry.
If the “Current Employer” button is checked, complete the Current Employment Details section.
Specify all the applied skills and experience you obtained at each employer by filling in appropriate dates for
that employer only. DO NOT enter cumulative experience in one employer.
Example: If you worked at your company January 2010 to Current, you will select “Jan” for the month and “2010” for the
year in the “From” column and select the current month and year in the “To” column.
COMMON MISTAKE – When filling out the Experience section be sure to match the “From” date to what you
entered for the “Date of Employment” in the Employer Details section. If you select dates outside your Date of
Employment for an employer, you will receive an error message indicating you must select dates within your
employment date rage.
When you are satisfied that all information you have entered for an employer is correct, click “Save For Later” to
save your entry.
If you have entered incomplete information for an employer when you click “Save for Later,” you will receive a validation
error message. The data you have entered will be saved in any case, along with the errors, if you choose to exit.
To add another employer, click “Add Employer.”
You will notice that there are two buttons labeled Add Employer, one at the top and one at the bottom of the page. Both
buttons have the same functionality. The bottom one will expand as you add employers so you don’t have to scroll back to
the top to find the button. You should only click one of these buttons to add an employer. Do not click this to save the
information after your first employer was entered. Use the Save for Later button at the bottom of the page if you would like
save your information.

16 | P a g e
COMMON MISTAKE – If you click on both “Add Employer” buttons or double-click on one, it will open up
multiple blank forms to enter employment information. These extra employment records will appear collapsed.
If you do not have any more employment history to add, click on the (+) sign next to the blank entry to expand
the record.
When the blank entry is expanded, click “Remove Employer” to delete the entry.
Repeat Steps 19 through 23 for each new entry. When you have added all employment history information click
“Next” to proceed.
Helpful Tip: To update employment history, click “Add Employer,” mark the new entry as the “Current Employer,” and then
return to the previous employer entry to add the appropriate end date. DO NOT overwrite previous employment history if
you have submitted another application before, as this will cause errors for previously verified information.
COMMON ERROR – After clicking “Next,” you might get a pop-up that says “Validation Errors.” Read the
directions in it carefully. It means that you have not entered enough employment experience in order to meet
the minimum qualification requirements for the program you are applying to and the level of education you
selected.
Select “OK” and you will be returned to the Employment History section. You will not be able to proceed until
you add enough Education and/or Employment History to meet the requirements. If you do not have any more
Education or Employment History to add, you most likely do not qualify for the program you are applying for and
the system will not allow you to submit an application.

17 | P a g e
After successfully filling out your employment history, you might get an Alert and be asked whether your
company is a Member Company.
If you are not sure if your company qualifies as a Member Company, please check the list of API Member Companies.
If you are a full time employee of a Member Company, you are entitled to the API Member Fee. Please click
“Yes” to continue. You will receive another alert that says the following:
The system is set up to recognize Member Companies that it can verify as being a Member. The validation
process sometimes does not work, depending on the way that the Member Company name was written. Please
contact ICP Program Support at [email protected] to receive some assistance inputting the correct Member
Company name as is required by the system.
Click “OK” and you will be taken back to the Employment History page.
If you are not a full time employee of a Member Company, please select “No” and proceed to the Employment
Verifications section.

18 | P a g e
Employment Verifications
API 571, 577 and 580 require employment verifications from a Management/HR Representative. On this page,
you must provide a Management/HR Representative’s Name, Company Email and Phone Number.
The email address field will only accept corporate/business domain email addresses. Applicants will not be able to continue
if a public domain email address is used. Example: Yahoo, Gmail, etc. will not be accepted.
Managers/Human Resource Representatives will be receiving an email with a link to verify the length of time and job title.
Once all fields are entered click “Next.”
Employers will have the ability to verify your experience as applicable to any/all certification programs. Employment
verification will be valid for a period of two years if you are applying for another certification program, or recertifying within
that period. This will minimize the employer’s need to fill out forms. However, if the Employer neglects to verify experience in
any other skill areas, they will be asked again to verify employment on the next application submission.

19 | P a g e
COMMON ERROR – After clicking “Next,” you might get a pop-up that says “Validation Errors.” Read the
directions in it carefully. It means that you have not entered enough employment verifiers in order to meet the
minimum qualification requirements for the program you are applying to and the level of education you
selected.
Select “OK” and you will be returned to the Employment Verification section. You will not be able to proceed
until you add enough verifiers to meet the requirements.
For Example: If you have a High School degree, you will need to record 3 years of employment history and enough verifiers
to cover those 3 years of employment.
20 | P a g e
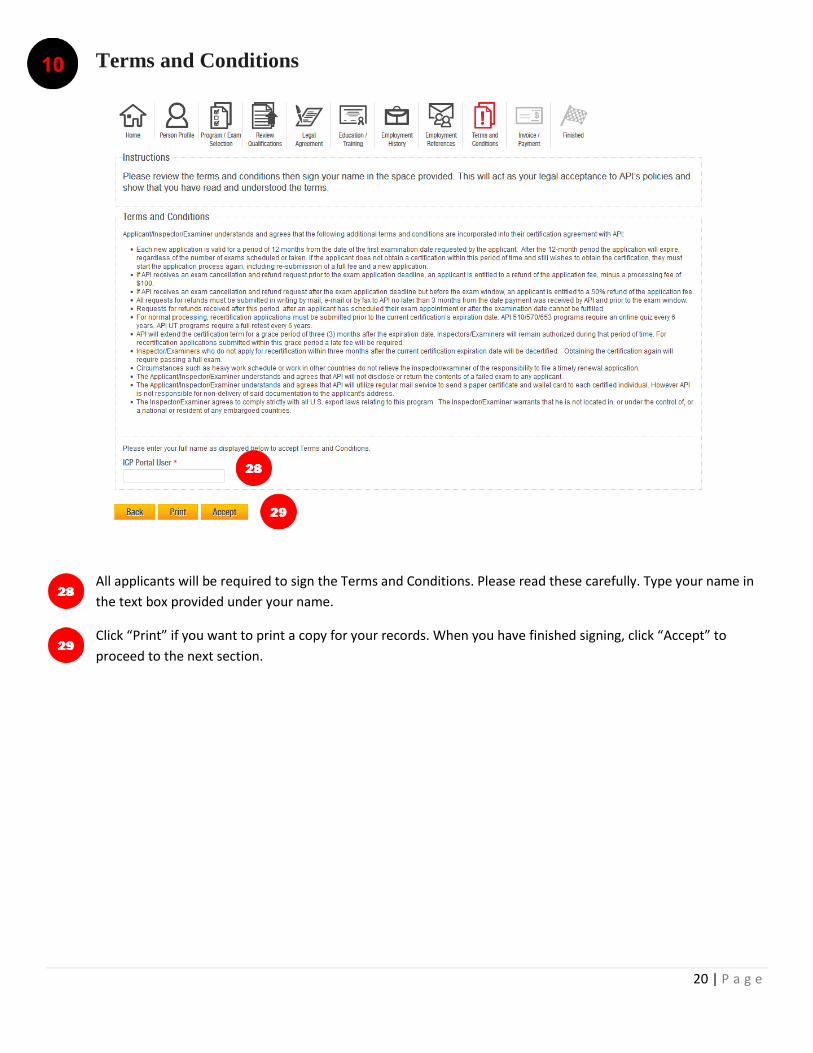
Terms and Conditions
All applicants will be required to sign the Terms and Conditions. Please read these carefully. Type your name in
the text box provided under your name.
Click “Print” if you want to print a copy for your records. When you have finished signing, click “Accept” to
proceed to the next section.
21 | P a g e
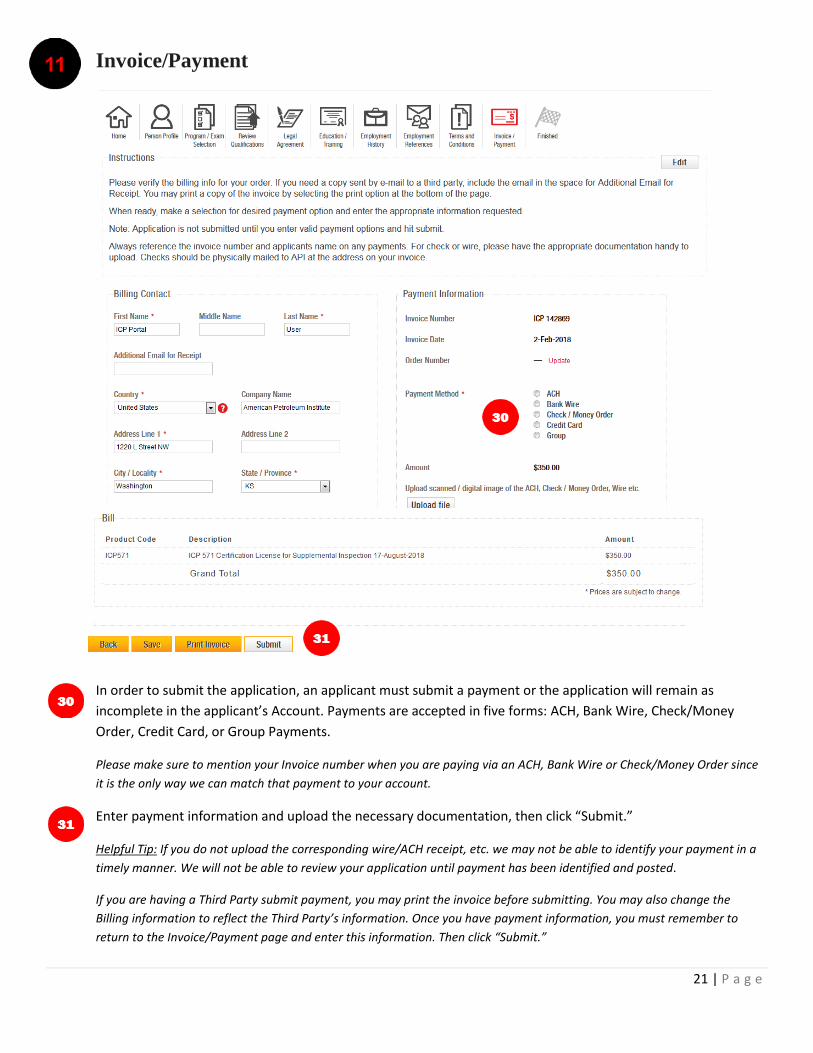
Invoice/Payment
In order to submit the application, an applicant must submit a payment or the application will remain as
incomplete in the applicant’s Account. Payments are accepted in five forms: ACH, Bank Wire, Check/Money
Order, Credit Card, or Group Payments.
Please make sure to mention your Invoice number when you are paying via an ACH, Bank Wire or Check/Money Order since
it is the only way we can match that payment to your account.
Enter payment information and upload the necessary documentation, then click “Submit.”
Helpful Tip: If you do not upload the corresponding wire/ACH receipt, etc. we may not be able to identify your payment in a
timely manner. We will not be able to review your application until payment has been identified and posted.
If you are having a Third Party submit payment, you may print the invoice before submitting. You may also change the
Billing information to reflect the Third Party’s information. Once you have payment information, you must remember to
return to the Invoice/Payment page and enter this information. Then click “Submit.”
22 | P a g e
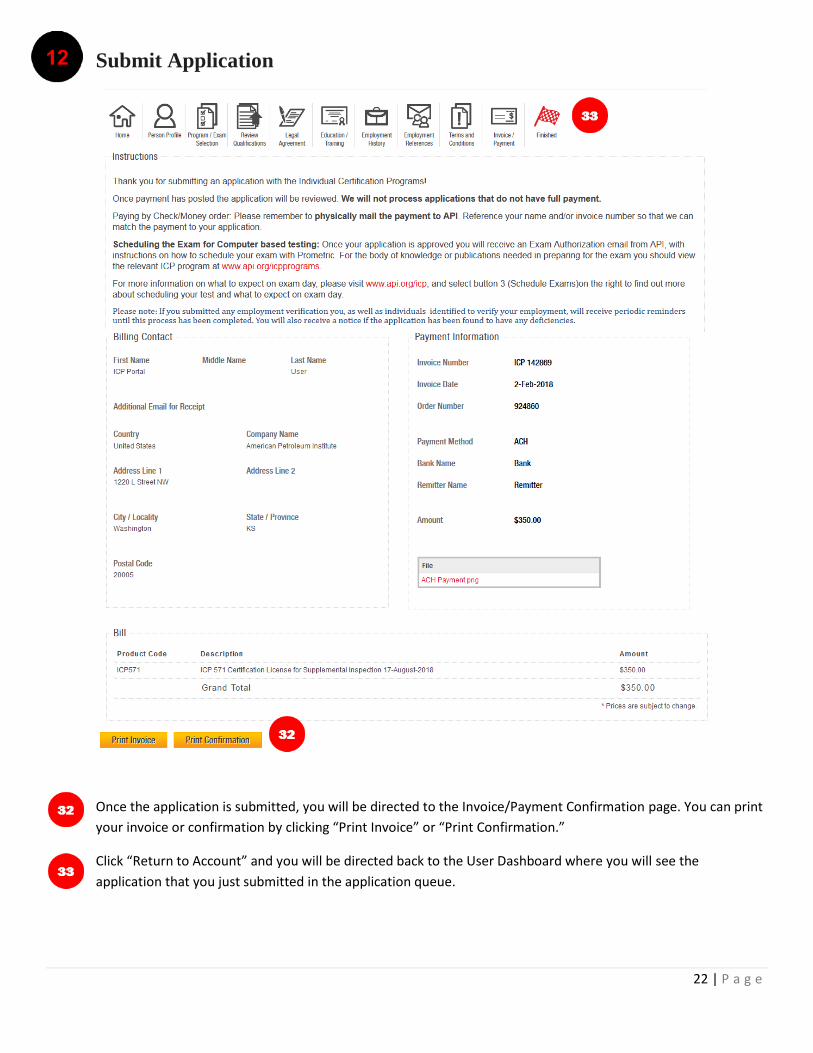
Submit Application
Once the application is submitted, you will be directed to the Invoice/Payment Confirmation page. You can print
your invoice or confirmation by clicking “Print Invoice” or “Print Confirmation.”
Click “Return to Account” and you will be directed back to the User Dashboard where you will see the
application that you just submitted in the application queue.
23 | P a g e
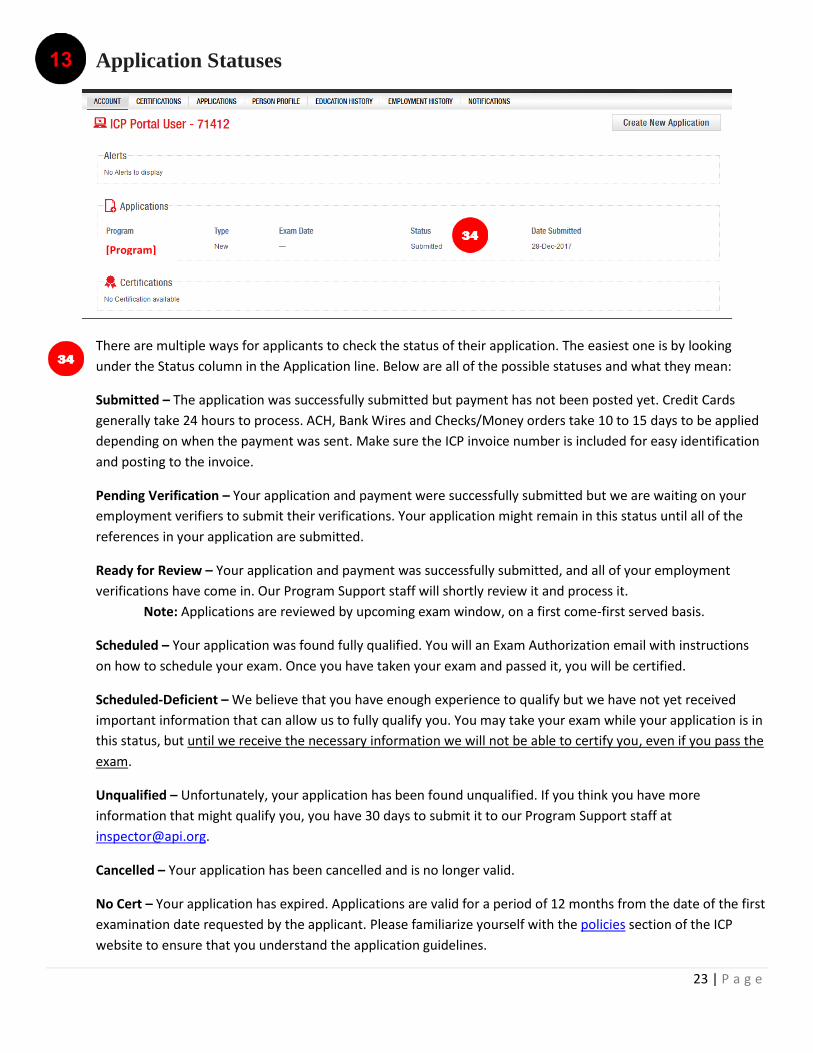
Application Statuses
There are multiple ways for applicants to check the status of their application. The easiest one is by looking
under the Status column in the Application line. Below are all of the possible statuses and what they mean:
Submitted – The application was successfully submitted but payment has not been posted yet. Credit Cards
generally take 24 hours to process. ACH, Bank Wires and Checks/Money orders take 10 to 15 days to be applied
depending on when the payment was sent. Make sure the ICP invoice number is included for easy identification
and posting to the invoice.
Pending Verification – Your application and payment were successfully submitted but we are waiting on your
employment verifiers to submit their verifications. Your application might remain in this status until all of the
references in your application are submitted.
Ready for Review – Your application and payment was successfully submitted, and all of your employment
verifications have come in. Our Program Support staff will shortly review it and process it.
Note: Applications are reviewed by upcoming exam window, on a first come-first served basis.
Scheduled – Your application was found fully qualified. You will an Exam Authorization email with instructions
on how to schedule your exam. Once you have taken your exam and passed it, you will be certified.
Scheduled-Deficient – We believe that you have enough experience to qualify but we have not yet received
important information that can allow us to fully qualify you. You may take your exam while your application is in
this status, but until we receive the necessary information we will not be able to certify you, even if you pass the
exam.
Unqualified – Unfortunately, your application has been found unqualified. If you think you have more
information that might qualify you, you have 30 days to submit it to our Program Support staff at
Cancelled – Your application has been cancelled and is no longer valid.
No Cert – Your application has expired. Applications are valid for a period of 12 months from the date of the first
examination date requested by the applicant. Please familiarize yourself with the policies section of the ICP
website to ensure that you understand the application guidelines.
[Program]