IB DP Chemistry Prescribed practicals lab manual · Web viewPrescribed practicals lab manual 2 IB...
33
Note to teachers: I’ve shared this lab manual in the hope that it will be useful for new (or old) teachers to give some ideas for the labs for the prescribed practicals. It is not a definite list by all means and if there are errors or omissions, then I’d be glad to hear of them. Teachers should feel free to edit this lab manual as they see fit. If I have violated any copyright, then let me know and I will make every effort to remedy it. IB DP Chemistry Prescribed practicals lab manual Michael Sugiyama Jones www.msjchem.com
Transcript of IB DP Chemistry Prescribed practicals lab manual · Web viewPrescribed practicals lab manual 2 IB...

Note to teachers: I’ve shared this lab manual in the hope that it will be useful for new (or old) teachers to give some ideas for the labs for the prescribed practicals.
It is not a definite list by all means and if there are errors or omissions, then I’d be glad to hear of them. Teachers should feel free to edit this lab manual as they see fit. If I have violated any copyright, then let me know and I will make every effort to remedy it.
It’s also worth mentioning that I take no responsibility for any of the experimental methods in this lab manual; it’s up to individual teachers to ensure that the methods are safe.
IB DP Chemistry Prescribed practicals lab manual
Michael Sugiyama Joneswww.msjchem.com

Prescribed practicals
Included in the “Applications and skills” sections of the guide are a series of practicals that students must cover either in a laboratory environment or as a simulation. The skills and general techniques associated with these common practicals may be assessed as part of the external assessment. The list of required practicals for chemistry is shown in the table below with suggested practicals.
Topic 1.2 Obtaining and using experimental data for deriving empirical formulas from reactions involving mass changes. Determine the formula of MgO Determine the formula of hydrated copper sulfate
Topic 1.3 Use of the experimental method of titration to calculate the concentration of a solution by reference to a standard solution. Preparation of a standard solution/acid base titration Determine the percentage CaCO3 in eggshells
Topic 1.3 Obtaining and using experimental values to calculate the molar mass of a gas from the ideal gas equation. Determine the molar mass of a gas (CO2) experimentally
Topic 5.1 A calorimetry experiment for an enthalpy of reaction should be covered and the results evaluated. Calculate enthalpy change of neutralisation (HCl and NaOH) Calculate enthalpy change Zn and CuSO4
Topic 6.1 Investigation of rates of reaction experimentally and evaluation of results. Sodium thiosulfate and hydrochloric acid reaction Iodine clock reaction
Topic 8.2 Candidates should have experience of acid–base titrations with different indicators. Covered in topic 1.3
Topic 8.3 Students should be familiar with the use of a pH meter and universal indicator. Reactions of acid and bases lab
Topic 9.2 Performance of laboratory experiments involving a typical voltaic cell using two metal/metal–ion half-cells. Voltaic cell with Zn and Cu half-cells
Topic 10.1 Construction of 3D models (real or virtual) of organic molecules. Molecular shapes simulation https://phet.colorado.edu/en/simulation/molecule-shapes Molymods http://www.molymod.com/ Chemdoodle https://www.chemdoodle.com/
Topic 19.1 Perform lab experiments which could include single replacement reactions in aqueous solutions. Displacement reactions
Prescribed practicals lab manual 1

Topic 1.2 Obtaining and using experimental data for deriving empirical formulas from reactions involving mass changes.
Title: Determine the empirical formula of MgO experimentally
Background: When magnesium is heated in air, it reacts with oxygen. During this oxidation reaction, magnesium oxide is produced. This increases the mass. If we know the mass of magnesium at the start, and the mass of magnesium oxide produced at the end, we can calculate the mass of oxygen which has been combined with the magnesium. We can use these masses to determine the empirical formula of magnesium oxide.
Procedure:1. Record the mass of the empty crucible with its lid, and write down the result in a
table.2. Clean the piece of magnesium ribbon with sandpaper, then coil it loosely around a
pencil. 3. Put the magnesium ribbon into the crucible and put the lid on. Record the mass of
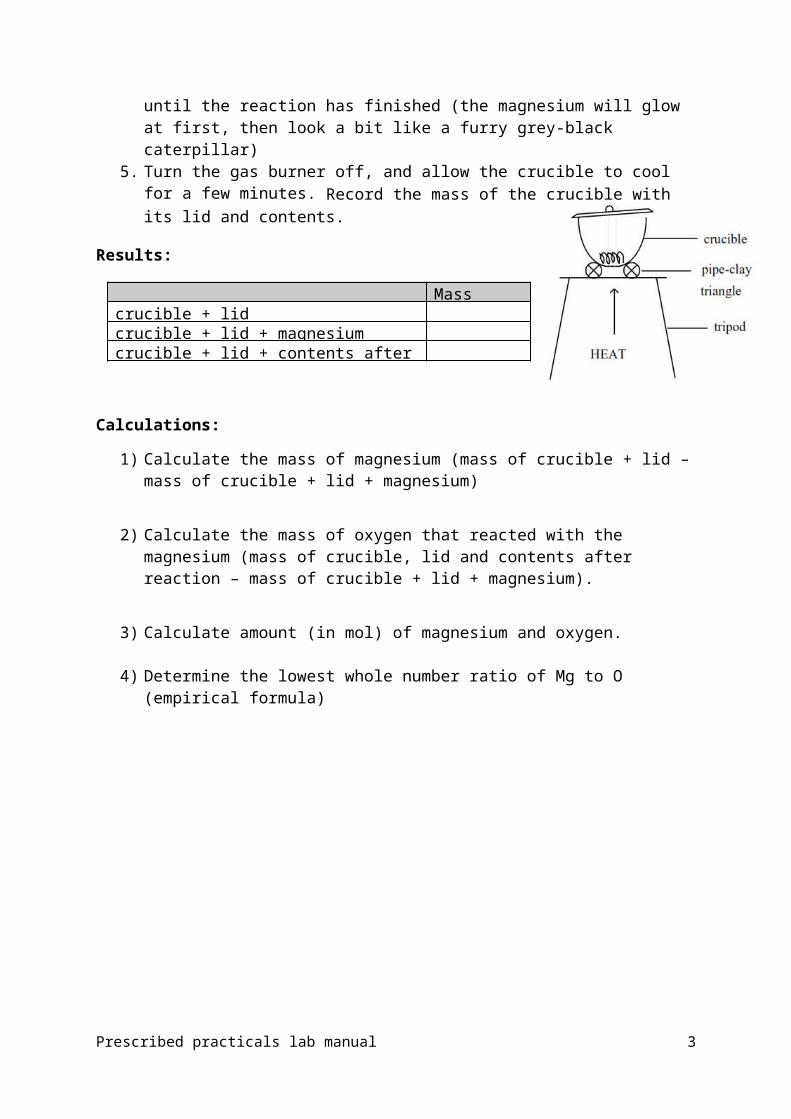
the crucible, lid, and magnesium together, and write down the result in your table.4. Put the crucible onto the pipe-clay triangle. Leave the lid slightly ajar to allow air
into the crucible. Heat gently for a minute, then strongly. Continue heating until the reaction has finished (the magnesium will glow at first, then look a bit like a furry grey-black caterpillar)
5. Turn the gas burner off, and allow the crucible to cool for a few minutes. Record the mass of the crucible with its lid and contents.
Results:
Mass (±0.01g)crucible + lidcrucible + lid + magnesiumcrucible + lid + contents after reaction
Calculations:
1) Calculate the mass of magnesium (mass of crucible + lid – mass of crucible + lid + magnesium)
2) Calculate the mass of oxygen that reacted with the magnesium (mass of crucible, lid and contents after reaction – mass of crucible + lid + magnesium).
3) Calculate amount (in mol) of magnesium and oxygen.
4) Determine the lowest whole number ratio of Mg to O (empirical formula)
Prescribed practicals lab manual 2
Title: Determine the formula of hydrated copper(II) sulfate
Background: Many crystals occur commonly in hydrated form, which means that they contain water molecules within the crystal structure in definite proportions. This water is called water of crystallization. The formula for these crystals shows the number of water molecules present per formula unit of crystal using a dot before the water. When these crystals are heated, they lose their water of crystallization and are then said to be anhydrous.
Procedure:
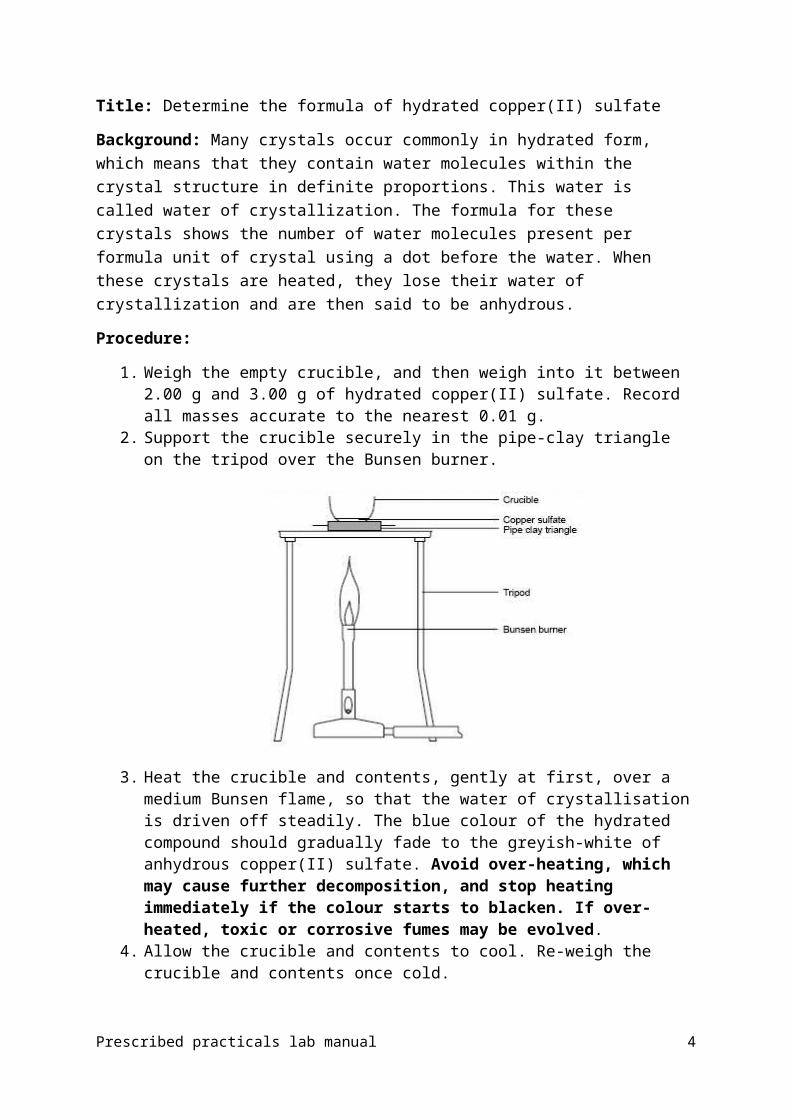
1. Weigh the empty crucible, and then weigh into it between 2.00 g and 3.00 g of hydrated copper(II) sulfate. Record all masses accurate to the nearest 0.01 g.
2. Support the crucible securely in the pipe-clay triangle on the tripod over the Bunsen burner.
3. Heat the crucible and contents, gently at first, over a medium Bunsen flame, so that the water of crystallisation is driven off steadily. The blue colour of the hydrated compound should gradually fade to the greyish-white of anhydrous copper(II) sulfate. Avoid over-heating, which may cause further decomposition, and stop heating immediately if the colour starts to blacken. If over-heated, toxic or corrosive fumes may be evolved.
4. Allow the crucible and contents to cool. Re-weigh the crucible and contents once cold.
5. ‘Heat to constant mass’ by repeating steps (iii) and (iv) until you get consistent readings.
Prescribed practicals lab manual 3
Results:
Mass (±0.01 g) ObservationsMass of crucible + lid
Mass of crucible + lid + CuSO4.xH2O before heating Mass of crucible + lid + CuSO4(anhydrous) after heating
Calculations:
1. Calculate the molar masses of H2O and CuSO4 (Relative atomic masses: H=1.01, O=16.00, S=32.06, Cu=63.55).
2. Calculate the mass of water driven off, and the mass of anhydrous copper(II) sulfate formed in your experiment.
3. Calculate the number of moles of anhydrous copper(II) sulfate formed4. Calculate the number of moles of water driven off.5. Calculate how many moles of water would have been driven off if one mole of
anhydrous copper(II) sulfate had been formed.6. Determine the formula for hydrated copper(II) sulfate.
Prescribed practicals lab manual 4

Topic 1.3 Use of the experimental method of titration to calculate the concentration of a solution by reference to a standard solution.
Title: Preparation of a standard solution
Background: Standard solutions are solutions with known concentrations, generally to four significant figures. There are two different ways to make a standard solution. We can make a primary or a secondary standard. A primary standard is prepared directly by dissolving a known mass of sample to make a known volume of solution. A secondary standard is prepared by dissolving an approximate amount of sample into a volume of solvent and determining its exact concentration through titration experiments. Primary standards are prepared from compounds that are at least 99.9% pure, have a definite composition, are water soluble, are easily weighed, and do not change composition on contact with air. Oxalic acid dihydrate (H2C2O4•2H2O) fits these criteria and therefore may be used as a primary standard. Sodium hydroxide absorbs water when it comes into contact with air and therefore it is difficult to obtain a pure, dry sample to weigh. For this reason, the sodium hydroxide solution will be titrated with the oxalic acid standard to become a secondary standard.
In the first part of this experiment you will prepare a solution of known concentration of oxalic acid. The oxalic acid crystallizes with two water molecules per oxalic acid in the crystalline network. For this reason, we will weigh out an appropriate amount of oxalic acid dehydrate to dissolve in water. The water molecules in the crystal network will become part of the water of solution once it is dissolved. The molar concentration of oxalic acid dihydrate will be the same as the molar concentration of oxalic acid.
Preparation of primary standard
Procedure:
1. Obtain a 100 cm3 beaker. 2. Measure between 1.25 g and 1.30 g of pure oxalic acid dehydrate crystals and place
into the beaker. 3. Add approximately 30 cm3 of deionized water to the beaker and dissolve the crystals. 4. Transfer the solution into a clean 100.00 cm3 volumetric flask.5. Rinse the beaker with 20 cm3 of deionized water and pour this solution into the
volumetric flask and repeat. This will ensure that all of the oxalic acid is transferred into the volumetric flask.
6. Fill the volumetric flask to within about 2 cm3 of the mark and allow it to sit for a minute. This will allow any water clinging to the edges of the neck to drain into the flask.
7. Using a pipette, fill the flask to the 100.00 cm3 mark with water. 8. Stopper the flask and mix the solution by repeated inversion and swirling.
Calculations:
Prescribed practicals lab manual 5

Mass of oxalic acid =
1. Calculate moles of oxalic acid
2. Calculate the concentration of the oxalic acid solution using the equation C= n/V (don’t forget the uncertainty)
Standardisation of sodium hydroxide solution
In order to standardize the sodium hydroxide solution, you will perform a titration. Sodium hydroxide reacts with oxalic acid according to the reaction below:
H2C2O4(aq) + 2NaOH(aq) 2H2O(l) + Na2C2O4(aq)
You will measure a 20.00 cm3 aliquot (an aliquot is an exact quantity of a substance or solution) of the oxalic acid solution into a flask and add an indicator. An indicator is a substance that changes colour when a solution changes from acidic to basic. The common indicator used for acid base titrations is phenolphthalein. Phenolphthalein is colourless in a solution that is acidic and bright pink in a solution that is basic. In this titration the oxalic acid solution is acidic and therefore phenolphthalein will be colourless. The sodium hydroxide solution will be added drop wise from a burette into the flask containing the oxalic acid and indicator. As the sodium hydroxide is added to the flask it will react with the oxalic acid and be neutralized. At the point where all of the oxalic acid is reacted, the next drop of sodium hydroxide will make the entire solution basic and it will turn pink. At this point you have completed the titration. In order to get the best precision possible, you should repeat each titration until you get 3 trials that are within 0.10 cm 3 of each other (concordant).
Results
Trial 1 (rough)
Trial 2 Trial 3 Trial 4
Volume of oxalic acid solution ± 0.08 cm3
20.00 20.00 20.00 20.00
NaOH buret, initial volume reading ± 0.05 cm3
NaOH buret, final reading ± 0.05 cm3
Volume of NaOH solution used ± 0.10 cm3
Calculations:
Prescribed practicals lab manual 6

1. Calculate the average volume of NaOH solution used (choose values within 0.10 cm3)
2. Calculate number of moles of oxalic acid in 20 cm3 of oxalic acid solution.
3. Use the ratio of NaOH to H2C2O4 to find number of moles of NaOH.
4. Use the equation C=n/V to find concentration of NaOH solution
Title: Determine the percentage of calcium carbonate in egg shells
Prescribed practicals lab manual 7

Background: In this experiment, you will determine the percentage of calcium carbonate in an egg shell. Calcium carbonate reacts with hydrochloric acid according to the following equation:
CaCO3(s) + 2HCl(aq) → CaCl2(aq) + CO2(g) + H2O(l)
It is difficult to determine exactly when all the solid calcium carbonate has reacted to one drop of standard hydrochloric acid solution if it is titrated directly. In this experiment a known amount of excess acid is added to the sample to ensure that all the calcium carbonate has reacted. The excess acid is then diluted and made up to a known volume. Aliquots of this diluted excess acid solution are then titrated with a standard solution of sodium hydroxide.
Procedure:
1. Clean and dry an eggshell, removing as much of the egg membrane as possible.2. Weigh 0.60 g of crushed eggshell and place in a conical flask.3. Slowly add 20.00 cm3 of 1.00 mol dm-3 HCl to the egg shell in the conical flask. 4. When the reaction has finished, add about 20 cm3 of distilled water to the solution.5. Transfer the solution to a 100.00 cm3 volumetric flask and make up to 100.00 cm3
with distilled water.6. Measure 10.00 cm3 of this solution and place in a clean conical flask.7. Add a few drops of phenolphthalein indicator and titrate with 0.100 mol dm-3 NaOH.
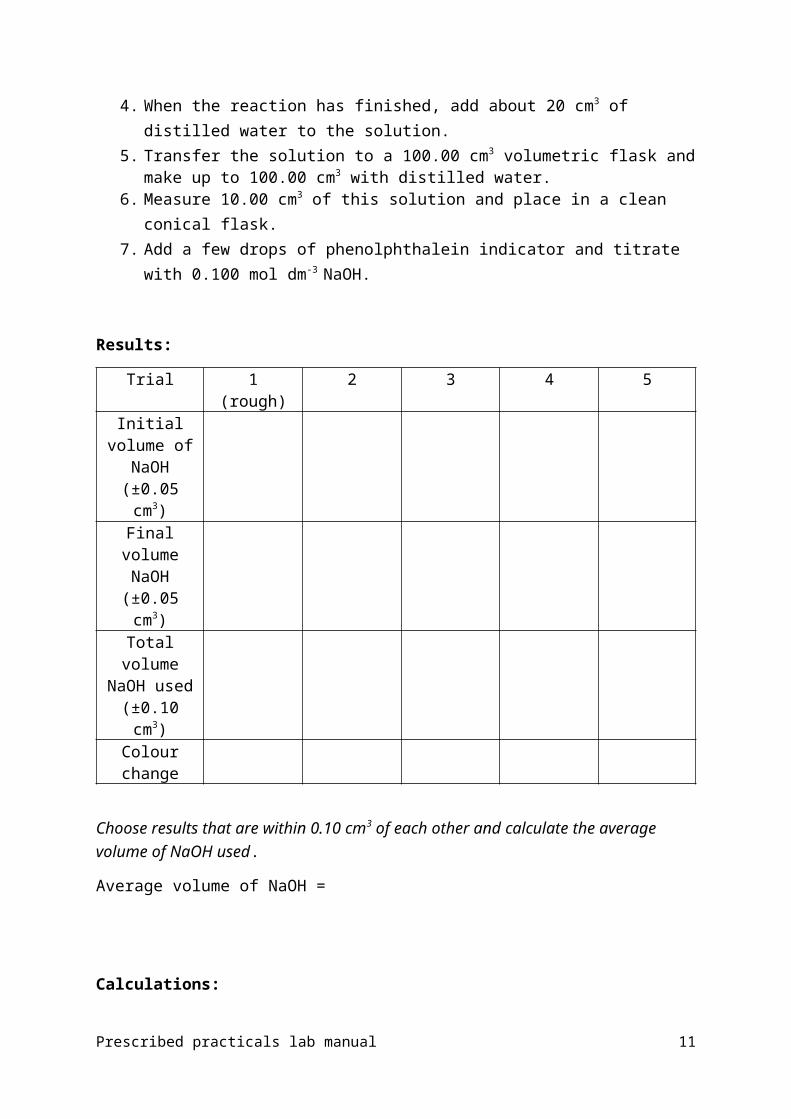
Results:
Trial 1 (rough) 2 3 4 5Initial volume
of NaOH (±0.05 cm3)
Final volume NaOH
(±0.05 cm3)Total volume NaOH used(±0.10 cm3)
Colour change
Choose results that are within 0.10 cm3 of each other and calculate the average volume of NaOH used.
Average volume of NaOH =
Prescribed practicals lab manual 8

Calculations:
1. Calculate the amount (in mol) of hydrochloric acid present initially in 20.00 cm3 of 1.00 mol dm-3 HCl(aq)
2. Calculate the amount of sodium hydroxide (in mol) present in the volume of 0.100 mol dm-3 NaOH(aq) used for the titration.
3. Determine the amount (in mol) of unreacted HCl(aq) present in the 10.00 cm3 sample.
4. Determine the amount (in mol) of unreacted HCl(aq) present in the 100 cm3 solution.
5. Determine the amount (in mol) of HCl(aq) that reacted with the egg shell.
6. Calculate the amount (in mol) of calcium carbonate present in the egg shell.
7. Calculate the mass of calcium carbonate present in the egg shell.
8. Determine the percentage by mass of calcium carbonate in the egg shell.
9. Determine the total percentage uncertainty associated with your result.
Prescribed practicals lab manual 9

Topic 1.3 Obtaining and using experimental values to calculate the molar mass of a gas from the ideal gas equation.
Title: Determine the molar mass of CO2 experimentally
Background: In this lab, we are going to determine the molar mass of CO2 experimentally. A simple calculation using a periodic table would give us the correct answer for the molar mass of CO2, however, you are going to conduct an experiment in the lab to see how close you can come to the accepted value. The ideal gas law equation (PV = nRT) can be rearranged to solve for n, the amount in moles:
n=PVRT
Molar mass (M), is expressed in units of grams per mole (gmol-1). The mass of the CO2 released from the pressurized container the volume of the gas will be measured. You can use the method of water displacement at room conditions and then substitute the measurements of volume, temperature, and pressure into the ideal gas law equation in order to find n, the number of moles of CO2. Once we know the mass, and the number of moles, we will divide the mass by the number of moles to calculate the molar mass (gmol-1).
Procedure:
1. Determine the initial mass for the CO2 canister provided by your instructor (± .01 gram).
2. Set up the water basin for collecting a gas in an inverted graduated
cylinder by water displacement. Use a 100 cm3 graduated cylinder.3. Release CO2 from the pressurized container and collect a sample of gas with
a volume of approximately 70.0 cm3 to 90.0 cm3. Colle ct e v e r y bubb l e t ha t l ea v e s t h e c ani st e r .
4. Adjust the cylinder up or down so that the water level inside the graduated cylinder is the same as the level outside the cylinder. THIS IS VERY IMPORTANT! If you miss this simple step, the pressures inside and outside the cylinder will not be equal, and you will have an inaccurate estimation of the pressure inside the cylinder where the gas is collected.
5. Record the volume of CO2 that was collected in the Observations and Data section.6. Measure and record the temperature of the water in the basin (±0.1 °C ). This will
be used to determine the vapour pressure of water H2O(g) in the graduated cylinder.7. Read the air pressure in the lab and convert this to Pa.8. Measure and record the mass of the CO2 canister after your experiment. (±0.01 g).
Prescribed practicals lab manual 10
Results and calculations:
Mass Initial mass of CO2 container (minitial) = _____________
Final mass of CO2 container (mfinal ) = _____________
Mass of CO2 collected (minitial - mfinal) = _____________
VolumeVolume of the gas collected (cm3) = ____________ Volume of CO2, converted to m3 (cm3 ÷ 106) = _____________
Temperature Temperature of water in basin (oC) = _____________Temperature of water in kelvin (K) = _____________(assume that the water and the CO2 are the same temperature)Temperature of CO2 (K) = _____________
Pressure Air pressure in the room (Pa) = ______________Vapour pressure of water = ______________The gas collected in the cylinder is a mixture of CO2 and H2OUse Dalton’s law of partial pressure to calculate the pressure of the CO2 in the mixturePtotal = PCO2 + Pwater vapour (Pa)_____________________
Pressure of dry CO2 (Pa) = _____________________
1. Calculate the amount (in mol) of CO2 collected using the equation:
n=PVRT
2. Determine the experimental molar mass of the CO2 using the equation M = m ÷ n
3. Determine the molar mass of CO2 using a periodic table.
4. Calculate the % error and suggest reasons for this error.
Prescribed practicals lab manual 11

Topic 5.1 A calorimetry experiment for an enthalpy of reaction should be covered and the results evaluated.
Title: Determine the enthalpy change for reaction of Zn and CuSO4
Background: Chemical reactions can be classified as exothermic or endothermic depending on whether they have a negative or positive enthalpy change. In this experiment, you will calculate the enthalpy change for the following reaction:
Zn(s) + CuSO4(aq) ZnSO4(aq) + Cu(s)
Procedure:
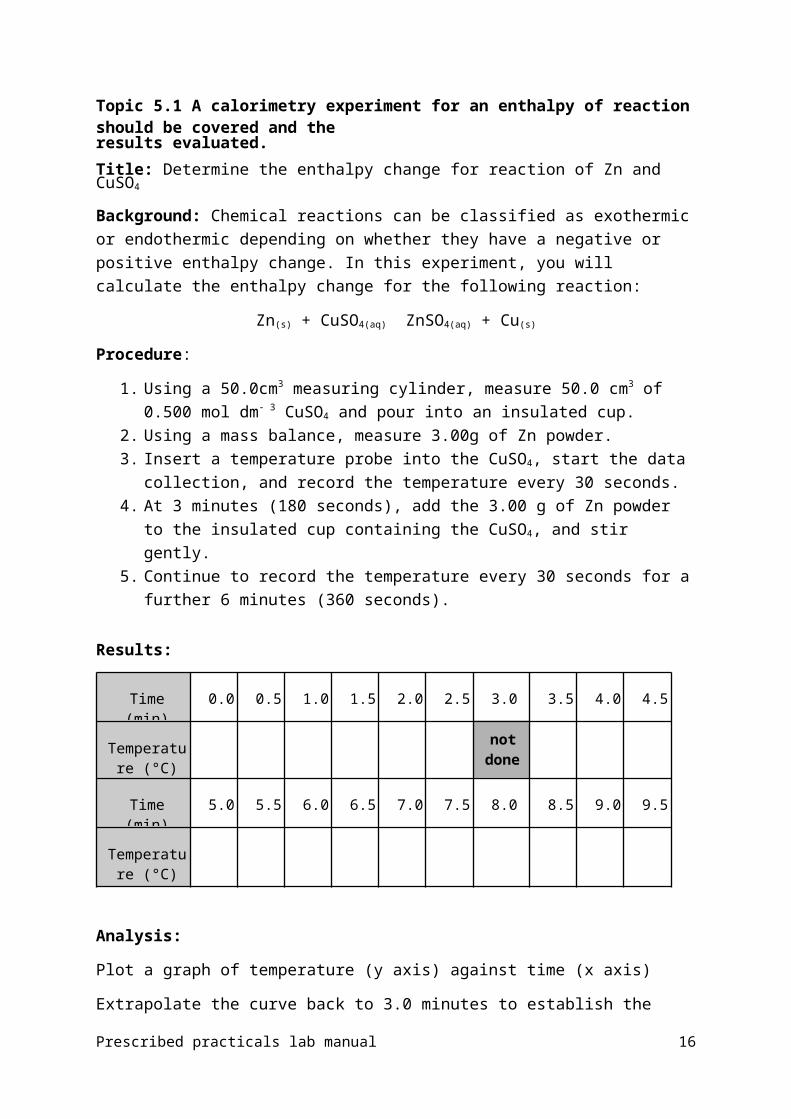
1. Using a 50.0cm3 measuring cylinder, measure 50.0 cm3 of 0.500 mol dm- 3 CuSO4 and pour into an insulated cup.
2. Using a mass balance, measure 3.00g of Zn powder.3. Insert a temperature probe into the CuSO4, start the data collection, and record the
temperature every 30 seconds. 4. At 3 minutes (180 seconds), add the 3.00 g of Zn powder to the insulated cup
containing the CuSO4, and stir gently. 5. Continue to record the temperature every 30 seconds for a further 6 minutes (360
seconds).
Results:
Time (min) 0.0 0.5 1.0 1.5 2.0 2.5 3.0 3.5 4.0 4.5
Temperature (°C)
not done
Time (min) 5.0 5.5 6.0 6.5 7.0 7.5 8.0 8.5 9.0 9.5
Temperature (°C)
Analysis:
Plot a graph of temperature (y axis) against time (x axis)
Extrapolate the curve back to 3.0 minutes to establish the maximum temperature rise as shown in the example below:
Prescribed practicals lab manual 12

Calculations:
1. Calculate the heat (Q) released using the formula:Q = mc∆T
m = mass of solution (g)c = specific heat capacity of water = 4.18 J g-1 oC-1
∆T = change in temperature (oC)
2. Calculate the enthalpy change for the reaction between one mole of Zn and CuSO4(aq)
3. The literature value for the reaction is – 217 kJ mol-1
Calculate the percentage error using the following equation:
% error = experimental value−literature valueliterature value × 100
Prescribed practicals lab manual 13

Title: Calculating the enthalpy change of neutralisation
Background: The enthalpy change of neutralisation (ΔHn) is the enthalpy change when an acid and base react together to form one mole of water under standard conditions (100 kPa and 298 K). In this experiment you will calculate the enthalpy change of neutralisation between a strong acid hydrochloric acid (HCl) and strong base sodium hydroxide (NaOH).
Procedure:
1. Using a measuring cylinder, measure 30 cm3 of 1.00 moldm-3 HCl (hydrochloric acid) and pour into an insulated cup. Record the mass of the solution.
2. Insert a temperature probe into the cup and wait for the temperature to stabilise. Record the initial temperature in a table.
3. Using a measuring cylinder, measure 40 cm3 of 1.00 moldm-3 NaOH (sodium hydroxide). Measure the mass and temperature of the solution and record in a table.
4. Press collect on the data logger and the pour the 25cm3 of 1.00 moldm-3 NaOH into the insulated cup containing 25cm3 of 1.00 moldm-3 HCl
5. Collect the data for 180 seconds and record the maximum temperature reached.
Results:
Reactant mass (±0.01g)
initial temperature
(±0.2 oC)
maximum temperature
(±0.2 oC)
change in temperature (±0.4 oC)
HCl
NaOH
Calculations:
1. Determine the limiting reactant in the reaction
2. Calculate the heat released using Q=mcΔT
3. Divide the heat released by the amount in mol of the limiting reactant.
Enthalpy change of neutralisation = ___________kJ mol-1
Prescribed practicals lab manual 14

Analysis:
1. What assumptions do we usually make when calculating enthalpy changes involving solutions? What assumptions did we make in this experiment?
2. The literature value for the enthalpy change of neutralisation is – 57.0 kJmol-1. Calculate the % error using this literature value.
3. Suggest reasons why the experimental value is different to the literature value and suggest improvements to the experiment.
Prescribed practicals lab manual 15
Topic 6.1 Investigation of rates of reaction experimentally and evaluation of results.
Title: Effect of concentration on the rate of reaction.
Background: Sodium thiosulfate solution and dilute hydrochloric acid are both clear, colourless liquids. They react together according to the equation below:
NaS2O3(aq) + 2HCl(aq) → NaCl(aq) + H2O(l) + SO2(g) + S(s)
The sulfur produced makes the reaction mixture go cloudy. The faster the reaction, the faster the reaction mixture goes cloudy. You will investigate the effect of changing the concentration of sodium thiosulfate on the rate of reaction.
Materials:
0.100 moldm-3 Na2S2O3 10 cm3 measuring cylinder 1.00 moldm-3 HCl thermometer 250 cm3 conical flask stopwatch 50 cm3 measuring cylinder
Procedure:
1. Draw a dark cross on a piece of paper.2. Place a conical flask on top of the cross.
3. Measure 10 cm3 of 0.100 moldm-3 Na2S2O3 and pour it into the conical flask.
4. Measure 40 cm3 of water and put it into the conical flask. Swirl the flask to mix the contents.
5. Measure 10 cm3 of 1.00 mol dm-3 HCl. Pour the acid into the flask, start the stop watch, and swirl the flask.
6. Time how long it takes for the cross to disappear. 7. Wash out the flask thoroughly.8. Repeat the experiment using the other volumes of sodium thiosulfate and water in
the table below. Keep the volume and the concentration of acid the same each time.
Prescribed practicals lab manual 16

Calculations:
Results:
Concentration of Na2S2O3 (mol dm-3)
Time taken for cross to disappear (s)Trial 1 Trial 2 Trial 3 Average (s) 1/time s-1
Analysis:
1) Plot a graph of concentration of Na2S2O3 (x axis) against 1/time (y axis).
Prescribed practicals lab manual 17
Volume of 0.100 moldm-
3 Na2S2O3 (cm3)Volume of
water (cm3)Concentration of
Na2S2O3 (mol dm-3)
50.0 0.00
40.0 10.0
30.0 20.0
20.0 30.0
10.0 40.0

2) From your graph, describe and explain the effect of increasing the concentration of sodium thiosulfate on the rate of reaction.
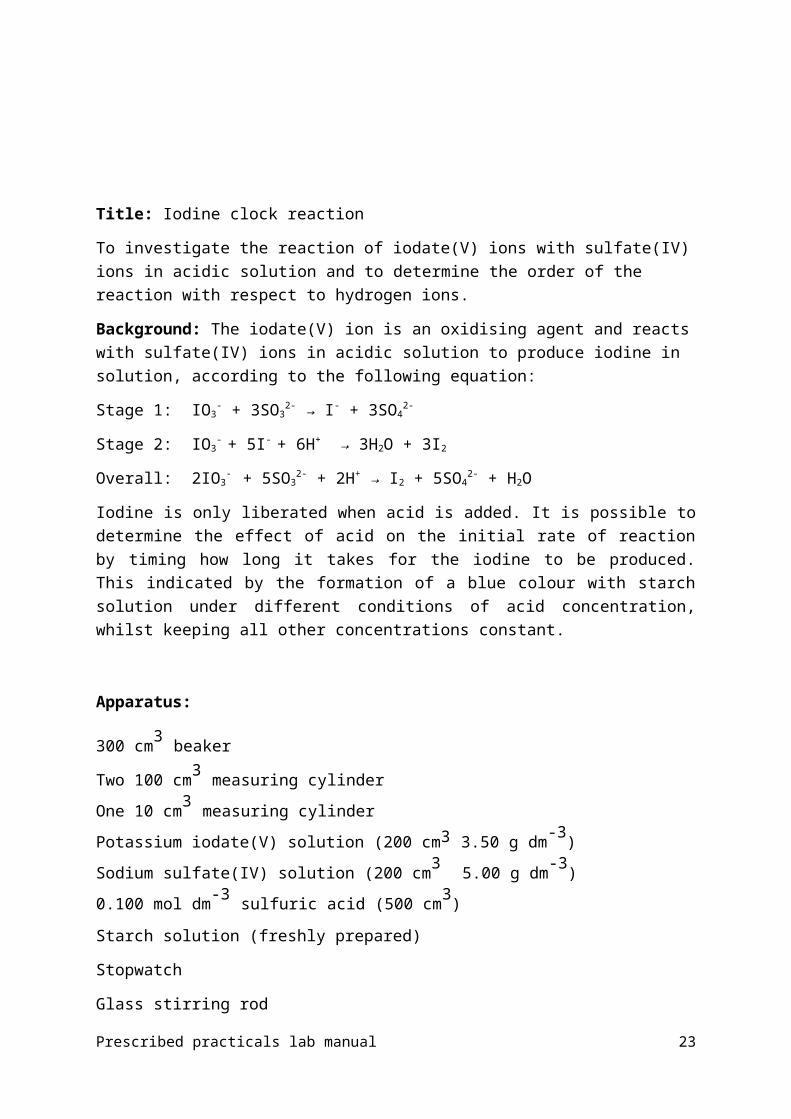
Title: Iodine clock reaction
To investigate the reaction of iodate(V) ions with sulfate(IV) ions in acidic solution and to determine the order of the reaction with respect to hydrogen ions.
Background: The iodate(V) ion is an oxidising agent and reacts with sulfate(IV) ions in acidic solution to produce iodine in solution, according to the following equation:
Stage 1: IO3- + 3SO3
2- → I- + 3SO42-
Stage 2: IO3- + 5I- + 6H+ → 3H2O + 3I2
Overall: 2IO3- + 5SO3
2- + 2H+ → I2 + 5SO42- + H2O
Iodine is only liberated when acid is added. It is possible to determine the effect of acid on the initial rate of reaction by timing how long it takes for the iodine to be produced. This indicated by the formation of a blue colour with starch solution under different conditions of acid concentration, whilst keeping all other concentrations constant.
Apparatus:
300 cm3 beaker
Two 100 cm3 measuring cylinder
One 10 cm3 measuring cylinder
Potassium iodate(V) solution (200 cm3 3.50 g dm-3)
Sodium sulfate(IV) solution (200 cm3 5.00 g dm-3)
0.100 mol dm-3 sulfuric acid (500 cm3)
Starch solution (freshly prepared)
Stopwatch
Glass stirring rod
Prescribed practicals lab manual 18

Procedure:
1. Measure 15 cm3 of the potassium iodate(V) solution into a 100 cm3 measuring cylinder and add 85 cm3 of deionised water to dilute it to 100 cm3.
2. Transfer this solution to a 400 cm3 beaker and add 5 cm3 of starch solution using a 10 cm3 measuring cylinder.
3. In a second 100 cm3 measuring cylinder, take 15 cm3 of sodium sulfate(IV) solution and add 85 cm3 of 0.100 mol dm-3 sulfuric acid.
4. Pour this solution into the 400 cm3 beaker containing the potassium iodate(V) solution and start the stop watch simultaneously. Stir the contents of the beaker with the glass rod.
5. Record in a Table the time taken (t in seconds) for the blue colour to appear.
6. Repeat the experiment using the same volumes of potassium iodate(V) solution, starch solution and sodium sulfate(IV) solution, but vary the concentration of sulfuric acid by changing the volume of sulfuric acid and making the total volume of the acidified sodium sulfate(IV) solution up to 100 cm3 by the addition of deionised water. The necessary volumes are shown in the table below with the initial experiment recorded on the right hand side of the Table.
Experiment 1 2 3 4 5 InitialAcid volume (cm3) 25 35 45 55 70 85Water volume (cm3) 60 50 40 30 15 0Na2S2O3 volume (cm3) 15 15 15 15 15 15
Results:
Experiment Concentration of H2SO4
(moldm-3)Time taken for blue colour to appear (s)
Initial
1
Prescribed practicals lab manual 19

2
3
4
5
Topic 8.3 Students should be familiar with the use of a pH meter and universal indicator.
Title: Reactions of acids and bases
Experiment 1 – Comparing the reaction of magnesium with a weak and strong acid
Cut four 1 cm pieces of Mg ribbon Fill two test tubes with approximately 10cm3 of 1.0 moldm-3 CH3COOH and 1.0
moldm-3 HCl Add two pieces of Mg ribbon to each test tube. Place a boiling tube over the top of the test tube to collect the gas produced.
Reaction Observations
CH3COOH + Mg
HCl + Mg
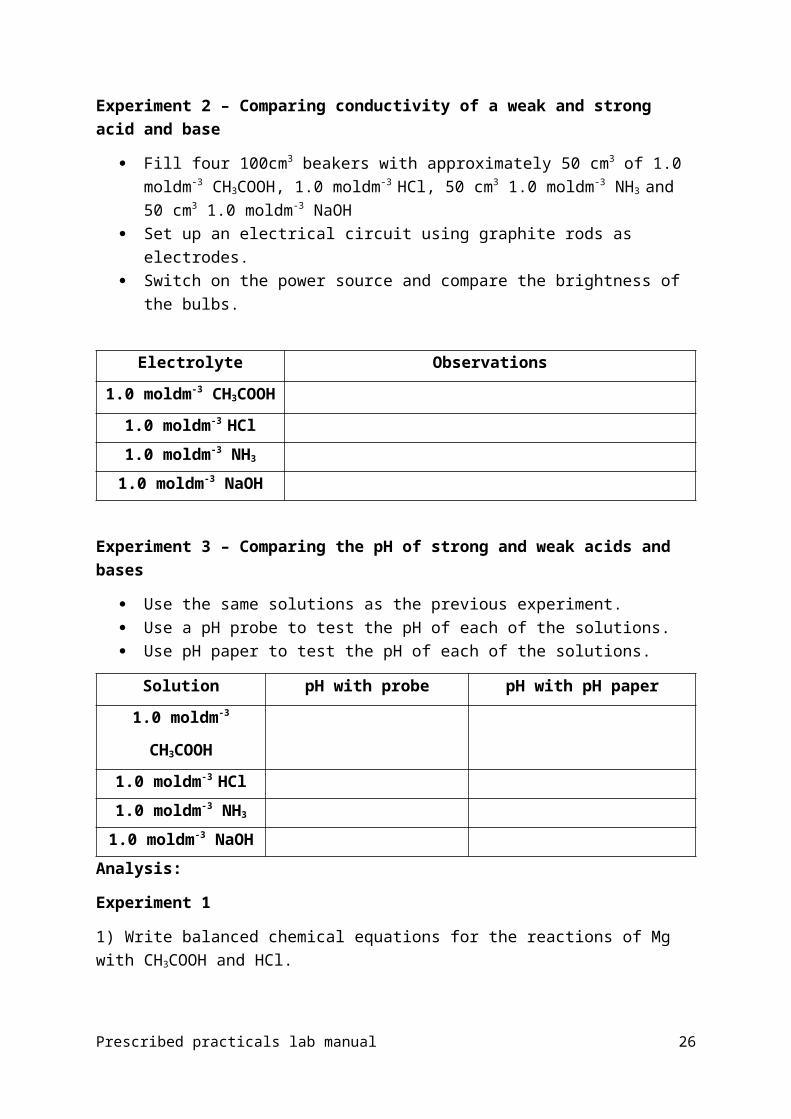
Experiment 2 – Comparing conductivity of a weak and strong acid and base
Fill four 100cm3 beakers with approximately 50 cm3 of 1.0 moldm-3 CH3COOH, 1.0 moldm-3 HCl, 50 cm3 1.0 moldm-3 NH3 and 50 cm3 1.0 moldm-3 NaOH
Set up an electrical circuit using graphite rods as electrodes. Switch on the power source and compare the brightness of the bulbs.
Electrolyte Observations
1.0 moldm-3 CH3COOH
1.0 moldm-3 HCl
1.0 moldm-3 NH3
1.0 moldm-3 NaOH
Prescribed practicals lab manual 20

Experiment 3 – Comparing the pH of strong and weak acids and bases
Use the same solutions as the previous experiment. Use a pH probe to test the pH of each of the solutions. Use pH paper to test the pH of each of the solutions.
Solution pH with probe pH with pH paper
1.0 moldm-3 CH3COOH
1.0 moldm-3 HCl
1.0 moldm-3 NH3
1.0 moldm-3 NaOH
Analysis:
Experiment 1
1) Write balanced chemical equations for the reactions of Mg with CH3COOH and HCl.
2) Why does the strong acid react faster than the weak acid with Mg? (think about the factors that affect the rate of a reaction and the rate of formation of hydrogen gas).
3) Would you expect the same results if a weak and strong base were used? Explain your answer.
Experiment 2
4) What in the solutions allows the current to flow through?
5) Explain the difference in the brightness of the bulbs (why does a strong acid allow more current to flow through than a weak acid?).
Prescribed practicals lab manual 21

Experiment 3
6) Explain the difference in pH between the strong and weak acids and bases.
7) Explain the difference between the strength and concentration of acids and bases.
19.1 Perform lab experiments which could include single replacement reactions in aqueous solutions.
Title: Displacement reactions
Background: Some metals are more reactive than others. The activity series lists metals in order of their reactivity (or strength as reducing agents). More reactive metals are at the top (stronger reducing agents) and less reactive metals are at the bottom (weaker reducing agents). In a displacement reaction, a more reactive metal displaces the ions of a less reactive metal from solution. In this experiment, you will react four metals with the salts of their ions.
The metals are zinc (Zn), lead (Pb), copper (Cu) and aluminium (Al). The metal salts are zinc sulfate, copper sulfate, lead sulfate and magnesium sulfate (all with a concentration of 0.100 moldm-3).
Procedure:
1. Add a few drops of each metal salt to the spotting tile as shown below.2. Add a piece of each metal to the metals salts in the spotting tile. 3. Record your observations in the table below.
Prescribed practicals lab manual 22
Zn Mg Cu Pb
MgSO4
CuSO4
PbSO4
ZnSO4
Results:
Zn Mg Cu Pb
ZnSO4
MgSO4
CuSO4
PbSO4
Analysis:
1) Arrange the metals in order of reactivity (from most reactive to least reactive). Explain your reasoning.
2) Arrange the metals in order of the strength as reducing agents (from strongest to weakest).
Prescribed practicals lab manual 23

3) Write net ionic equations for the reactions that occurred.
9.2 Performance of laboratory experiments involving a typical voltaic cell using two metal/metal–ion half-cells.
Title: Construct a voltaic cell
Background: A voltaic cell is prepared from two half-cells connected together by a salt- bridge. A spontaneous reaction produces an electrical potential (voltage). A voltaic cell is constructed by using two metal electrodes in solutions of their respective salts (the electrolyte component of the cell) with known molar concentrations. In this experiment, you will use a voltmeter to measure the potential of a voltaic cell made with copper and zinc half-cells.
Procedure:
1. Use two 50 cm3 beakers to make the half cells. 2. Measure 20 cm3 of 0.10 mol dm-3 Cu(NO3)2 and 20 cm3 of 0.10 mol dm-3 Zn(NO3)2 in
two 50 cm3 beakers. 3. Polish one Cu and one Zn metal strip for the electrodes. 4. Place the Cu strip in the beaker of Cu(NO3)2 solution and place the Zn strip in the
beaker of Zn(NO3)2 solution. These are the half cells of your Cu-Zn voltaic cell.5. Make a salt bridge by soaking a strip of filter paper in a beaker than contains a small
amount of 1.00 mol dm-3 KNO3 solution. 6. Connect the Cu and Pb half cells with the salt bridge. 7. Connect the wires to the electrodes and use a voltmeter to measure the potential of
the Cu-Zn voltaic cell.
Analysis:
1) Draw a diagram of the voltaic cell below. Show the direction of electron flow.
Prescribed practicals lab manual 24

2) Write half equations that occur at the anode and cathode.
10.1 Construction of 3D models (real or virtual) of organic molecules.
Prescribed practicals lab manual 25
Prescribed practicals lab manual 26