HTML-CSS Animation
6
Page 1 HTML-CSS Animation Written by Sandro Alberti; [email protected] Sandro is a Web designer/developer who enjoys educating others about design, both in theory and practice. INTRODUCTION For many years now, Flash has taken care of the bulk of line-art animations online. These days, however, various HTML5/CSS3 technologies bring these animations directly to the Web page, without needing an external player. Some of this is based on an older technology: SVG (Scalable Vector Graphics). Developed officially in 1999, this is a standard that allows XML/JavaScript files to describe and display vector graphics. With SVG, each drawn shape is rendered at the level of the Document Object Model, which means that it's integrally a part of the Web page (and it takes low-memory to redraw and modify). Also, SVG scene graph enables event handlers to be associated with objects, so, for example, a rectangle could respond to an onClick event. Then in 2004, Apple introduced Canvas, a technology that has now been adopted by HTML5. It is a little bit different than SVG. Canvas is not as integrated in to the Web page object as SVG, and it's more memory-intensive to draw. Functionality (such as clicks) is based on coordinates, instead of drawn elements. SVG could be run inside Canvas, so the distinction gets a bit blurry. But the point is: new technologies continue to point towards an integration of animation elements and the Web page itself. Apart from available (and future) technologies, it's useful to employ HTML-CSS animations today (instead of Flash), because Flash is not supported on all devices (notably Apple mobile devices, which makes up for many Web visitors, in today's market). CONVERT FLASH TO HTML-CSS There are two main converters, used to transform existing Flash animations into HTML-CSS: Adobe Wallaby, and Google Swiffy: http://labs.adobe.com/technologies/wallaby http://swiffy.googlelabs.com These are relatively new, and so you can expect them to be a bit quirky, and they can only handle conversion of the most basic of animations. However, if you stick to the basics, the results can be powerful. Wallaby Adobe has made this product to work hand-in-hand with Flash Professional CS5. You must have access to the original Flash file (FLA, not SWF), and it has to be CS5 (CS4 will not work). What it supports: Timeline animations, button states (normal, hover, active), solid and gradient fills, images, layers (partial mask layers), font embedding (limited), shape tweens. What it doesn't support: Actionscript, 3d transforms, button events, filters, inverse kinematics, audio, video.
-
Upload
sandro-alberti -
Category
Documents
-
view
213 -
download
1
description
Introduction to SVG and Canvas, and the main programs used to convert Flash to HTML-CSS animations: Adobe Wallaby and Google Swiffy. Also includes an overview of Adobe Edge, a great interface that makes it easy to create HTML-CSS animations from scratch (+ a look into hacking the code for interactivity!).
Transcript of HTML-CSS Animation

Page 1
HTML-CSS Animation Written by Sandro Alberti; [email protected] Sandro is a Web designer/developer who enjoys educating others about design, both in theory and practice.
INTRODUCTION For many years now, Flash has taken care of the bulk of line-art animations online. These days, however, various HTML5/CSS3 technologies bring these animations directly to the Web page, without needing an external player. Some of this is based on an older technology: SVG (Scalable Vector Graphics). Developed officially in 1999, this is a standard that allows XML/JavaScript files to describe and display vector graphics. With SVG, each drawn shape is rendered at the level of the Document Object Model, which means that it's integrally a part of the Web page (and it takes low-memory to redraw and modify). Also, SVG scene graph enables event handlers to be associated with objects, so, for example, a rectangle could respond to an onClick
event.
Then in 2004, Apple introduced Canvas, a technology that has now been adopted by HTML5. It is a little bit different than SVG. Canvas is not as integrated in to the Web page object as SVG, and it's more memory-intensive to draw. Functionality (such as clicks) is based on coordinates, instead of drawn elements. SVG could be run inside Canvas, so the distinction gets a bit blurry. But the point is: new technologies continue to point towards an integration of animation elements and the Web page itself. Apart from available (and future) technologies, it's useful to employ HTML-CSS animations today (instead of Flash), because Flash is not supported on all devices (notably Apple mobile devices, which makes up for many Web visitors, in today's market). CONVERT FLASH TO HTML-CSS There are two main converters, used to transform existing Flash animations into HTML-CSS: Adobe Wallaby, and Google Swiffy: http://labs.adobe.com/technologies/wallaby http://swiffy.googlelabs.com These are relatively new, and so you can expect them to be a bit quirky, and they can only handle conversion of the most basic of animations. However, if you stick to the basics, the results can be powerful. Wallaby Adobe has made this product to work hand-in-hand with Flash Professional CS5. You must have access to the original Flash file (FLA, not SWF), and it has to be CS5 (CS4 will not work). What it supports: Timeline animations, button states (normal, hover, active), solid and gradient fills, images, layers (partial mask layers), font embedding (limited), shape tweens. What it doesn't support: Actionscript, 3d transforms, button events, filters, inverse kinematics, audio, video.

Page 2
Swiffy This is Google's answer to Flash conversion. As opposed to Wallaby, which is downloaded to your computer, Swiffy works on the cloud. You upload your any SWF (not just from Flash CS5), and they give you back an HTML that links to JavaScript on their server. Unlike Adobe Wallaby, Google's code is not something you can go into and tweak. However, the Swiffy animation is a bit better than what Wallaby produces (seems to handle mask animations and font embedding a bit better, and Actionscript 2, plus it plays well on Firefox –albeit with font problems–, while Wallaby only really plays at all on Chrome and Safari).
CREATE ORIGINAL HTML-CSS ANIMATIONS Used to be, you needed to spend quite a bit of time coding HTML-CSS animations directly on your Web page. For example, the following code creates a Canvas element on a Web page: <canvas id="example" width="200" height="200"This text is displayed if your browser does not support HTML5 Canvas.
>
</
canvas>
Using JavaScript, you can draw a red rectangle on the Canvas: var example = document.getElementById('example'); var context = example.getContext('2d')context.
; fillStyle = "rgb(255,0,0)"
context.;
fillRect(30, 30, 50, 50)
;
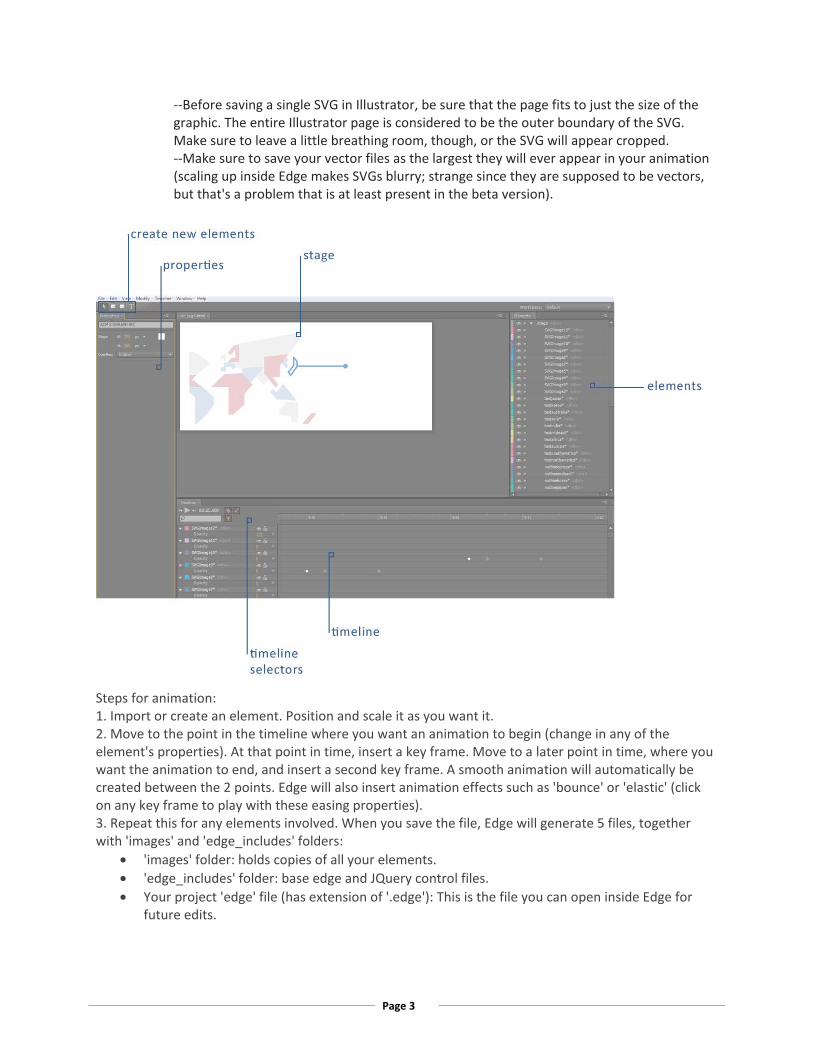
This is pretty cool, and still the most effective way to customize HTML-CSS animations, but for a while designers have been waiting for programs that could just output the code, while working in a WYSIWYG interface, and that day is here, now that Adobe has released Edge (in beta). http://labs.adobe.com/technologies/edge Edge The program runs on an interface similar to Flash. Over time, Adobe might add to it, but at the moment it's fairly basic and straightforward. There are basically 5 zones in the interface.
• The main focus is the stage. That is where the animation plays; the final product. • At the bottom, the timeline shows each frame of time, and offers selectors/controls for making
key frames automatically or manually (frames at the beginning and end of an animation), smooth or sudden animations, and the list of elements that are being animated. There is a 'play' button, to show how the animation looks, 'in action' (although you can also press SPACE BAR for this).
• To the left are the properties of the currently selected element (width, height, XY coordinates, opacity, origin position, rotation, scale, etc).
• To the right is the total list of elements that appear somewhere in the animation (whether animated or not). Tip: if you give them names that make sense, you can later find them again in the code that Edge generates; that helps you control them through JavaScript from outside Edge.
• Finally, at the very top are 4 icons for creating and controlling elements in Edge: Rectangle, Rounded Rectangle, and Text (and the Selector arrow, so you can select and drag elements inside the stage). You can also import pre-made elements (best way to go): SVG vector files or PNG, GIF, JPG graphics. If you have Illustrator, you can just save any vector image as an SVG, to bring into Edge. Three caveats, though:
--Every vector image has to be saved as a separate SVG file.
Page 3
--Before saving a single SVG in Illustrator, be sure that the page fits to just the size of the graphic. The entire Illustrator page is considered to be the outer boundary of the SVG. Make sure to leave a little breathing room, though, or the SVG will appear cropped. --Make sure to save your vector files as the largest they will ever appear in your animation (scaling up inside Edge makes SVGs blurry; strange since they are supposed to be vectors, but that's a problem that is at least present in the beta version).
Steps for animation: 1. Import or create an element. Position and scale it as you want it. 2. Move to the point in the timeline where you want an animation to begin (change in any of the element's properties). At that point in time, insert a key frame. Move to a later point in time, where you want the animation to end, and insert a second key frame. A smooth animation will automatically be created between the 2 points. Edge will also insert animation effects such as 'bounce' or 'elastic' (click on any key frame to play with these easing properties). 3. Repeat this for any elements involved. When you save the file, Edge will generate 5 files, together with 'images' and 'edge_includes' folders:
• 'images' folder: holds copies of all your elements. • 'edge_includes' folder: base edge and JQuery control files. • Your project 'edge' file (has extension of '.edge'): This is the file you can open inside Edge for
future edits.
Page 4
• An HTML file that shows your animation embedded and as it would appear in a Web page. It will have the same name as your .edge file. You can open it with a Web browser (or editing program such as Dreamweaver).
• A CSS file, that styles the HTML file above. • A Javascript file that shows your entire animation in code format (and is what controls the
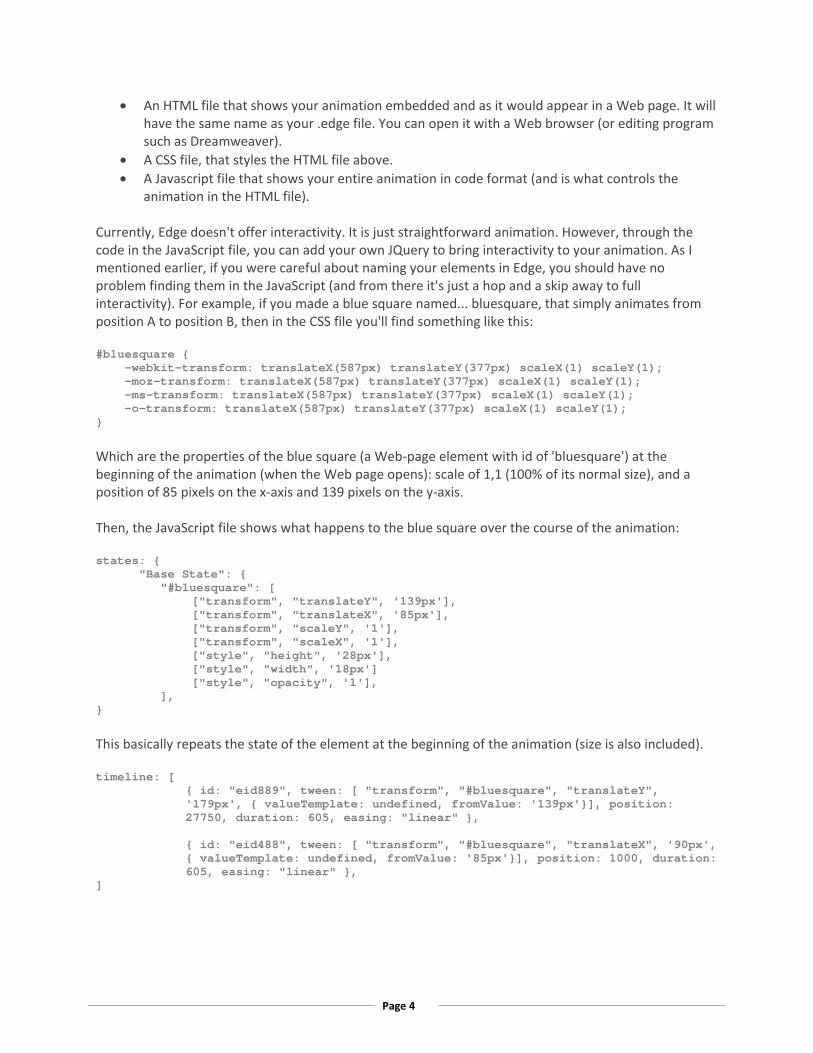
animation in the HTML file). Currently, Edge doesn't offer interactivity. It is just straightforward animation. However, through the code in the JavaScript file, you can add your own JQuery to bring interactivity to your animation. As I mentioned earlier, if you were careful about naming your elements in Edge, you should have no problem finding them in the JavaScript (and from there it's just a hop and a skip away to full interactivity). For example, if you made a blue square named... bluesquare, that simply animates from position A to position B, then in the CSS file you'll find something like this: #bluesquare { -webkit-transform: translateX(587px) translateY(377px) scaleX(1) scaleY(1); -moz-transform: translateX(587px) translateY(377px) scaleX(1) scaleY(1); -ms-transform: translateX(587px) translateY(377px) scaleX(1) scaleY(1); -o-transform: translateX(587px) translateY(377px) scaleX(1) scaleY(1); } Which are the properties of the blue square (a Web-page element with id of 'bluesquare') at the beginning of the animation (when the Web page opens): scale of 1,1 (100% of its normal size), and a position of 85 pixels on the x-axis and 139 pixels on the y-axis. Then, the JavaScript file shows what happens to the blue square over the course of the animation: states: { "Base State": { "#bluesquare": [ ["transform", "translateY", '139px'], ["transform", "translateX", '85px'], ["transform", "scaleY", '1'], ["transform", "scaleX", '1'], ["style", "height", '28px'], ["style", "width", '18px'] ["style", "opacity", '1'], ], } This basically repeats the state of the element at the beginning of the animation (size is also included). timeline: [
{ id: "eid889", tween: [ "transform", "#bluesquare", "translateY", '179px', { valueTemplate: undefined, fromValue: '139px'}], position: 27750, duration: 605, easing: "linear" }, { id: "eid488", tween: [ "transform", "#bluesquare", "translateX", '90px', { valueTemplate: undefined, fromValue: '85px'}], position: 1000, duration: 605, easing: "linear" },
]
Page 5
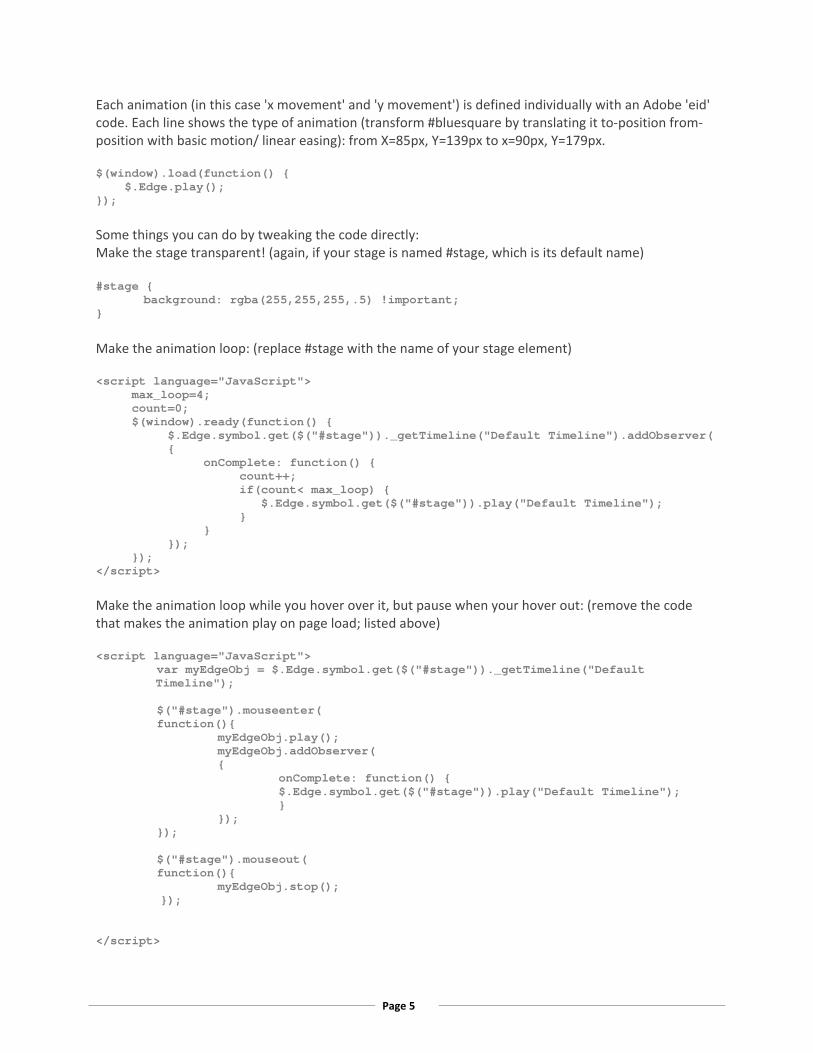
Each animation (in this case 'x movement' and 'y movement') is defined individually with an Adobe 'eid' code. Each line shows the type of animation (transform #bluesquare by translating it to-position from-position with basic motion/ linear easing): from X=85px, Y=139px to x=90px, Y=179px. $(window).load(function() { $.Edge.play(); }); Some things you can do by tweaking the code directly: Make the stage transparent! (again, if your stage is named #stage, which is its default name)
#stage { background: rgba(255,255,255,.5) !important; }
Make the animation loop: (replace #stage with the name of your stage element) <script language="JavaScript"> max_loop=4; count=0; $(window).ready(function() { $.Edge.symbol.get($("#stage"))._getTimeline("Default Timeline").addObserver( { onComplete: function() { count++; if(count< max_loop) { $.Edge.symbol.get($("#stage")).play("Default Timeline"); } } }); }); </script> Make the animation loop while you hover over it, but pause when your hover out: (remove the code that makes the animation play on page load; listed above) <script language="JavaScript">
var myEdgeObj = $.Edge.symbol.get($("#stage"))._getTimeline("Default Timeline");
$("#stage").mouseenter( function(){ myEdgeObj.play();
myEdgeObj.
{ addObserver(
onComplete: function() { $.Edge.symbol.get($("#stage")).play("Default Timeline"); } }); }); $("#stage").mouseout( function(){ myEdgeObj.stop();
});
</script>
Page 6
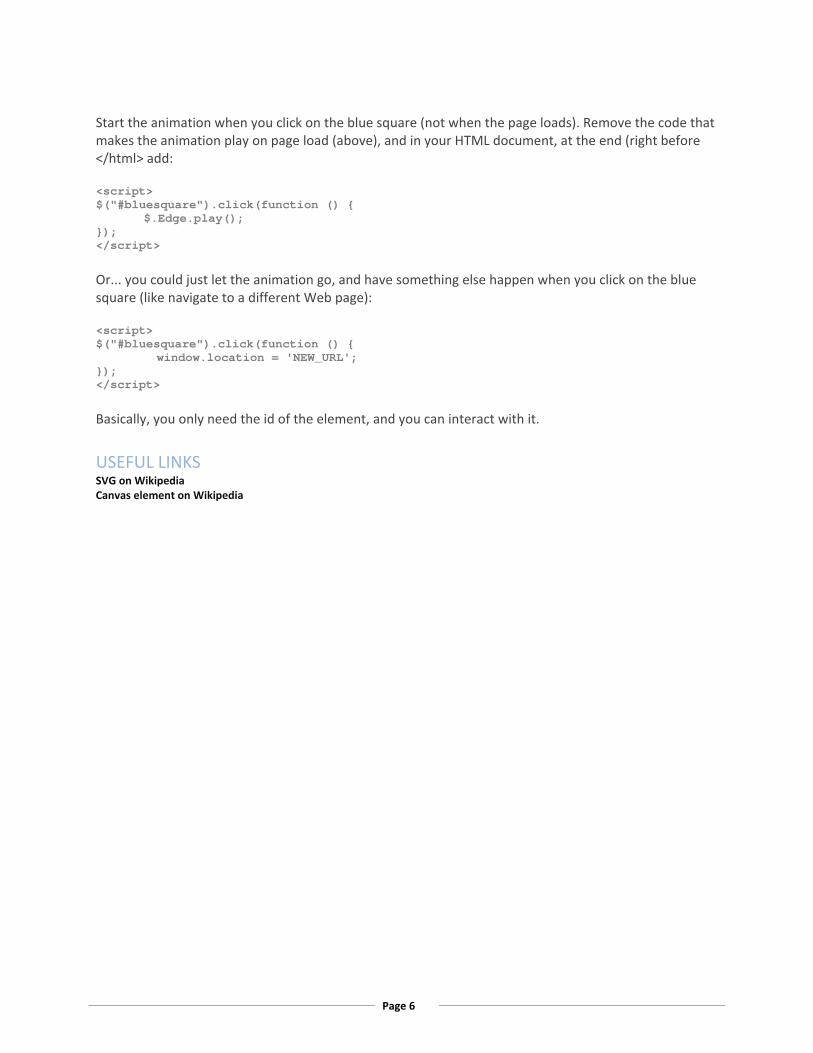
Start the animation when you click on the blue square (not when the page loads). Remove the code that makes the animation play on page load (above), and in your HTML document, at the end (right before </html> add: <script> $("#bluesquare").click(function () { $.Edge.play(); }); </script> Or... you could just let the animation go, and have something else happen when you click on the blue square (like navigate to a different Web page): <script> $("#bluesquare").click(function () { window.location = 'NEW_URL';
}); </script>
Basically, you only need the id of the element, and you can interact with it. USEFUL LINKS SVG on Wikipedia Canvas element on Wikipedia