HTMAT - HeatTech Electric Radiant Floor Heating
15
Page 1 of 15 HeatTech™ Electric Radiant Floor Heating Systems – HTMAT Installation Manual www.HeatTechProducts.com [email protected] toll-free: 800-470-5685 HTMAT (120V & 240V) Electric Radiant Floor Heating Mats Installation Manual Contents Important Safety and Installation Information __________________________________________________ 2 1. Measuring resistance ___________________________________________________________________ 2 2. Compatible Types of Floors & Subfloors _____________________________________________________ 3 3. Product Specifications __________________________________________________________________ 4 4. System Sizing, Layout and Product Selection_________________________________________________ 4 4.1. Calculating the square footage of the heated area _________________________________________ 4 4.2. Layout & Planning __________________________________________________________________ 5 4.3. Product selection___________________________________________________________________ 6 5. Tools and materials required _____________________________________________________________ 7 6. HeatTech mat installation________________________________________________________________ 8 6.1. Prepare the subfloor ________________________________________________________________ 8 6.2. Transfer Layout to Floor _____________________________________________________________ 8 6.3. Electrical Box Installation ____________________________________________________________ 8 6.4. Heating Mats Installation ____________________________________________________________ 8 6.5. Floor Sensor Installation _____________________________________________________________ 9 6.6. Positioning the floor sensor: _________________________________________________________ 10 6.7. Installing the floor sensor: __________________________________________________________ 10 7. Floor Installation _____________________________________________________________________ 10 7.1. Special Considerations:_____________________________________________________________ 10 7.2. Self-Leveling Method (Recommended for All Flooring Types) ________________________________ 11 7.3. Thinset Mortar Method _____________________________________________________________ 11 8. Electrical Connections _________________________________________________________________ 11 9. Troubleshooting ______________________________________________________________________ 12 HeatTech Lifetime Limited Warranty ________________________________________________________ 13
Transcript of HTMAT - HeatTech Electric Radiant Floor Heating

Page 1 of 15
HeatTech™ Electric Radiant Floor Heating Systems – HTMAT Installation Manualwww.HeatTechProducts.com [email protected] toll-free: 800-470-5685
HTMAT (120V & 240V)
Electric Radiant Floor Heating Mats
Installation Manual
ContentsImportant Safety and Installation Information__________________________________________________ 2
1. Measuring resistance ___________________________________________________________________ 2
2. Compatible Types of Floors & Subfloors _____________________________________________________ 3
3. Product Specifications __________________________________________________________________ 4
4. System Sizing, Layout and Product Selection_________________________________________________ 4
4.1. Calculating the square footage of the heated area _________________________________________ 4
4.2. Layout & Planning__________________________________________________________________ 5
4.3. Product selection___________________________________________________________________ 6
5. Tools and materials required _____________________________________________________________ 7
6. HeatTech mat installation________________________________________________________________ 8
6.1. Prepare the subfloor ________________________________________________________________ 8
6.2. Transfer Layout to Floor _____________________________________________________________ 8
6.3. Electrical Box Installation ____________________________________________________________ 8
6.4. Heating Mats Installation ____________________________________________________________ 8
6.5. Floor Sensor Installation _____________________________________________________________ 9
6.6. Positioning the floor sensor: _________________________________________________________ 10
6.7. Installing the floor sensor: __________________________________________________________ 10
7. Floor Installation _____________________________________________________________________ 10
7.1. Special Considerations:_____________________________________________________________ 10
7.2. Self-Leveling Method (Recommended for All Flooring Types) ________________________________ 11
7.3. Thinset Mortar Method _____________________________________________________________ 11
8. Electrical Connections _________________________________________________________________ 11
9. Troubleshooting ______________________________________________________________________ 12
HeatTech Lifetime Limited Warranty ________________________________________________________ 13
Page 2 of 15
HeatTech™ Electric Radiant Floor Heating Systems – HTMAT Installation Manualwww.HeatTechProducts.com [email protected] toll-free: 800-470-5685
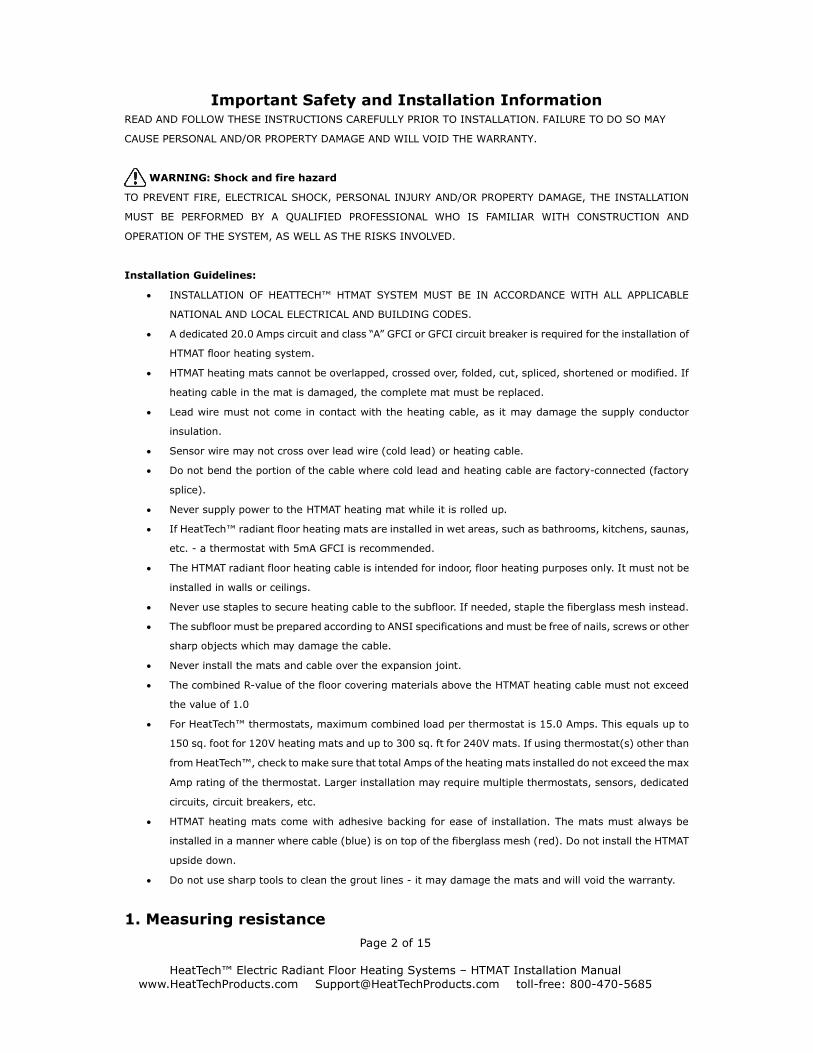
Important Safety and Installation Information READ AND FOLLOW THESE INSTRUCTIONS CAREFULLY PRIOR TO INSTALLATION. FAILURE TO DO SO MAY
CAUSE PERSONAL AND/OR PROPERTY DAMAGE AND WILL VOID THE WARRANTY.
WARNING: Shock and fire hazard
TO PREVENT FIRE, ELECTRICAL SHOCK, PERSONAL INJURY AND/OR PROPERTY DAMAGE, THE INSTALLATION
MUST BE PERFORMED BY A QUALIFIED PROFESSIONAL WHO IS FAMILIAR WITH CONSTRUCTION AND
OPERATION OF THE SYSTEM, AS WELL AS THE RISKS INVOLVED.
Installation Guidelines:
INSTALLATION OF HEATTECH™ HTMAT SYSTEM MUST BE IN ACCORDANCE WITH ALL APPLICABLE
NATIONAL AND LOCAL ELECTRICAL AND BUILDING CODES.
A dedicated 20.0 Amps circuit and class “A” GFCI or GFCI circuit breaker is required for the installation of
HTMAT floor heating system.
HTMAT heating mats cannot be overlapped, crossed over, folded, cut, spliced, shortened or modified. If
heating cable in the mat is damaged, the complete mat must be replaced.
Lead wire must not come in contact with the heating cable, as it may damage the supply conductor
insulation.
Sensor wire may not cross over lead wire (cold lead) or heating cable.
Do not bend the portion of the cable where cold lead and heating cable are factory-connected (factory
splice).
Never supply power to the HTMAT heating mat while it is rolled up.
If HeatTech™ radiant floor heating mats are installed in wet areas, such as bathrooms, kitchens, saunas,
etc. - a thermostat with 5mA GFCI is recommended.
The HTMAT radiant floor heating cable is intended for indoor, floor heating purposes only. It must not be
installed in walls or ceilings.
Never use staples to secure heating cable to the subfloor. If needed, staple the fiberglass mesh instead.
The subfloor must be prepared according to ANSI specifications and must be free of nails, screws or other
sharp objects which may damage the cable.
Never install the mats and cable over the expansion joint.
The combined R-value of the floor covering materials above the HTMAT heating cable must not exceed
the value of 1.0
For HeatTech™ thermostats, maximum combined load per thermostat is 15.0 Amps. This equals up to
150 sq. foot for 120V heating mats and up to 300 sq. ft for 240V mats. If using thermostat(s) other than
from HeatTech™, check to make sure that total Amps of the heating mats installed do not exceed the max
Amp rating of the thermostat. Larger installation may require multiple thermostats, sensors, dedicated
circuits, circuit breakers, etc.
HTMAT heating mats come with adhesive backing for ease of installation. The mats must always be
installed in a manner where cable (blue) is on top of the fiberglass mesh (red). Do not install the HTMAT
upside down.
Do not use sharp tools to clean the grout lines - it may damage the mats and will void the warranty.
1. Measuring resistance

Page 3 of 15
HeatTech™ Electric Radiant Floor Heating Systems – HTMAT Installation Manualwww.HeatTechProducts.com [email protected] toll-free: 800-470-5685
To perform insulation and resistance testing, a digital multimeter (or ohmmeter) with alligator clips (or equivalent
testing leads) is needed.
The resistance and insulation testing of the HTMAT heating mats must be performed and recorded at least four
times:
1. Prior to installation (out of the box).
2. After installation of HTMAT heating mats.
3. After the installation of thin set cement or self-leveling mortar.
4. After installation of finished floor (tile, stone, etc.)
RESISTANCE TESTING - The resistance must be
measured between the two conductors, white and black
(as shown on the image to the right). Compare the
resistance reading to the resistance specified in the
Product Selection “Table 1 or Table 2”. The measured value
should be within ±10% of the data in the table.
INSULATION TESTING - Next, connect the ground wire
to the black lead and both power wires (back and white) to
the red lead of the multimeter (as shown on the image to
the right).
Measure and record the resistance.
Both measurements should read infinity (open circuit).
FLOOR SENSOR TESTING
Additionally, if using floor sensor, test its’ resistance “out of
the box” and prior to installation of finished flooring (as
shown on the image to the right). The readings should be
around 15.0 kOhms at 68F and around 12.0 kOhms at 77F.
If you get different readings from those described above,
stop the installation process and contact Technical Support
for assistance.
2. Compatible Types of Floors & SubfloorsCompatible Subfloor Types:
1. Plywood
2. Cement board
3. Concrete slab (smooth surface)
4. Mortar bed
5. Others (inquire for more info)
Compatible Finished Floor Types:

Page 4 of 15
HeatTech™ Electric Radiant Floor Heating Systems – HTMAT Installation Manualwww.HeatTechProducts.com [email protected] toll-free: 800-470-5685
1. Tile
2. Stone, Marble, Granite
3. Laminate
4. Engineered wood floors
5. Carpet
6. Vinyl, Linoleum
7. Others with “R” value not exceeding 1.0 (inquire for more info)
R-values of seemingly identical flooring materials from different manufacturers may vary greatly, so in order to
determine the combined R-value for specific combination of flooring / subflooring types, it is best to contact the
product manufacturer.
3. Product Specifications
Cable Construction: Twin conductor
Rated Voltage: 120V (for HTMAT-120 series), 240V (for HTMAT-240 series)
Power Output: 12 watts per sq ft ±10%
EMF (electromagnetic field) None (Zero)
Heating Mats Sizes: 20” wide by up to 61ft long (with 10 - 100 sq. ft coverage)
Min. Heating Cable Bending Radius: 1" (25.4mm)
Heating Cable Diameter: 1/8" (3.2mm)
Cold Lead Diameter: 1/6" (4.2mm)
Max. Ambient Temp.: 85ºF (30C)
Min. Installation Temp.: 40ºF (5C)
Cold lead 2-wire, 16 AWG plus ground braid; 10ft (~3m) length
HeatTech™ floor heating mat is comprised of:
Fiberglass mesh (red) – holds the factory pre-aligned heating cable (blue).
Heating cable (blue) – generates heat when energized and is installed under flooring surface along with
the fiberglass mesh and factory splice.
Cold lead (black) – a 10ft long, non-heating portion of the HeatTech™ mat, which carries power to the
heating cable and is connected to the thermostat.
Cold lead and heating cable are factory-connected and represent a small (~4” long), distinctively thicker
portion of the HeatTech™ cable. This section is commonly referred to as “factory splice”.
4. System Sizing, Layout and Product Selection4.1. Calculating the square footage of the heated area
The heated area shall exclude any permanent fixtures such as showers, bathtubs, toilets, vanities or cabinets.
To calculate the square footage of the heated area, multiply length (feet) by width (feet) and record the value.
If the heating area is not rectangular and contains triangles or obstacles, divide it into smaller areas that can be
calculated by multiplying width by length.
Triangles are mostly squares or rectangles split in half, so in order to calculate its’ area, multiply its width by height
and divide by two.

Page 5 of 15
HeatTech™ Electric Radiant Floor Heating Systems – HTMAT Installation Manualwww.HeatTechProducts.com [email protected] toll-free: 800-470-5685
4.2. Layout & Planning
Create a drawing of the heated area with detailed layout
of the mats. To simplify the process, grid paper can be
used, with each sector on the grid paper representing a
3” x 3” square area of the floor (3” is equal to the
distance between the parallel heating cable runs in the
mat).
If the project involves using more than one circuit if the
HTMAT, or a combination of HeatTech™ mats and cable –
plan accordingly.
If HeatTech™ mats will be the sole heating source for the
room, check whether your BTU output from the system meets your requirements. For conversion, use the
following formula: 1 Watt = 3.41 BTUs/hr.
1. Draw all the cabinetry, showers, bathtubs, Jacuzzis, etc. on the layout - HTMAT cable cannot the installed under
these or any solid-surface fixtures. Excessive heat that accumulates under these fixtures may damage the cable.
Recommended clearance is 1-2”.
2. Note the location of the thermostat. A thermostat should be installed at least 4ft away from bathtubs and
shower cabins to avoid being splashed by water. The location of the thermostat must also be adequate to
accommodate the installation of cable cold lead (10ft long) and floor sensor.
3. The heating cable must be positioned about 3” away from the edge of floor drains, 1-4” away from walls and at
least 4” away from the edge of toilet rings (to prevent wax gasket melting). The minimal clearance from heating
vents and other heating appliances is 8”.
4. The clearance from walls should be anywhere from 1 to 4 inches and is determined by the size of the heating
area and length of the cable selected. Adjusting this clearance may help installers to arrange the mats in the most
efficient manner and avoid shortages and excess lengths.
5. It is important to note that during actual installation, there’s a chance that the selected HTMAT size may be
insufficient or excessive. For this specific reason, and especially for larger projects, installers should dedicate a
small area on the floor, where heat output is of low importance. This are could be used either for installation of
excess mat length, or left unheated.

Page 6 of 15
HeatTech™ Electric Radiant Floor Heating Systems – HTMAT Installation Manualwww.HeatTechProducts.com [email protected] toll-free: 800-470-5685
4.3. Product selection
HTMAT heating mats:
Select a heating mat size based on its’ area coverage (as specified in Table 1 & 2), which should correspond to the
calculated heating area and layout design created. For over 100 sq. ft installations, use a combination of mats.
Make sure to properly select the desired voltage.
NOTE: Operating the 240V mats at 208V reduces the power output to approximately 9 watts per sq. ft. (25%
reduction).
In
the example shown above, total calculated heating area is 74 square feet (sq. ft). For 120V installation, the most
appropriate mat size would be HTMAT-120-70 for 70 sq. ft area.
Thermostats & Floor Sensors:
HeatTech™ offers several thermostat models with features such as 5mA GFCI, included floor sensor, 7-day
programmability, and others.
NOTE: The maximum combined load per thermostat is 15.0 Amps. If connecting more than one HTMAT or HTCBL
cold lead, they must be wired to the thermostat in parallel.
A second (backup) floor sensor is not mandatory, but recommended in the unlikely event of failure of the original
one.
NOTE: If using backup sensor, its’ leads must not be connected to the thermostat. Only one sensor can be
connected to a thermostat at any given time.
Table 1 – 120V Product Selection
120V Heated Area Mat Dimensions
Catalog Number sq.ft. m2 in. x ft. m x m
Watts
(12W/sq.ft.)Amps Ohms
HTMAT-120-10 10 0.93 20 x 6.1 0.5 x 1.9 120 1.0 120.0
HTMAT-120-15 15 1.39 20 x 9.1 0.5 x 2.8 180 1.5 80.0
HTMAT-120-20 20 1.86 20 x 12.2 0.5 x 3.7 240 2.0 60.0
HTMAT-120-25 25 2.32 20 x 15.2 0.5 x 4.6 300 2.5 48.0
HTMAT-120-30 30 2.79 20 x 18.3 0.5 x 5.6 360 3.0 40.0

Page 7 of 15
HeatTech™ Electric Radiant Floor Heating Systems – HTMAT Installation Manualwww.HeatTechProducts.com [email protected] toll-free: 800-470-5685
HTMAT-120-35 35 3.25 20 x 21.3 0.5 x 6.5 420 3.5 34.3
HTMAT-120-40 40 3.72 20 x 24.4 0.5 x 7.4 480 4.0 30.0
HTMAT-120-50 50 4.65 20 x 30.5 0.5 x 9.3 600 5.0 24.0
HTMAT-120-60 60 5.57 20 x 36.6 0.5 x 11.1 720 6.0 20.0
HTMAT-120-70 70 6.50 20 x 42.7 0.5 x 13.0 840 7.0 17.1
HTMAT-120-80 80 7.43 20 x 48.8 0.5 x 14.9 960 8.0 15.0
HTMAT-120-90 90 8.36 20 x 54.9 0.5 x 16.7 1080 9.0 13.3
HTMAT-120-100 100 9.29 20 x 61.0 0.5 x 18.6 1200 10.0 12.0
Table 2 – 240V Product Selection
240V Heated Area Mat Dimensions
Catalog Number sq.ft. m2 in. x ft. m x m
Watts
(12W/sq.ft.)Amps Ohms
HTMAT-240-20 20 1.86 20 x 12.2 0.5 x 3.7 240 1.0 240.0
HTMAT-240-30 30 2.79 20 x 18.3 0.5 x 5.6 360 1.5 160.0
HTMAT-240-35 35 3.25 20 x 21.3 0.5 x 6.5 420 1.8 137.1
HTMAT-240-40 40 3.72 20 x 24.4 0.5 x 7.4 480 2.0 120.0
HTMAT-240-50 50 4.65 20 x 30.5 0.5 x 9.3 600 2.5 96.0
HTMAT-240-60 60 5.57 20 x 36.6 0.5 x 11.1 720 3.0 80.0
HTMAT-240-70 70 6.50 20 x 42.7 0.5 x 13.0 840 3.5 68.6
HTMAT-240-80 80 7.43 20 x 48.8 0.5 x 14.9 960 4.0 60.0
HTMAT-240-90 90 8.36 20 x 54.9 0.5 x 16.7 1080 4.5 53.3
HTMAT-240-100 100 9.29 20 x 61.0 0.5 x 18.6 1200 5.0 48.0
5. Tools and materials requiredYou will require the following items to install and test the floor heating system:
Digital multimeter or ohmmeter – to perform resistance and insulation testing of the HeatTech™ floor
heating cable.
HeatTech™ HTMAT heating mat(s) – properly sized and selected.
Scissors – to cut the fiberglass mesh.
Grooving tool or chisel with hammer – to create a groove in the subfloor for the installation of cold lead
and sensor.
Measuring tape – to measure and mark on the subfloor location of mats as well as any fixed fixtures,
obstacles, etc.
Wire strippers – to prepare and connect the cold lead to the thermostat.
Thermostat (as per specifications in this manual) – to set, monitor and efficiently control the flooring
temperature.
Screwdriver – to connect wiring to the thermostat.
Floor sensor (as per specifications in this manual) – required for proper operation of the thermostat.
Backup floor sensor (optional) – for backup purposes in the unlikely event of the original floor sensor
failure.
Other materials required for installation of the selected flooring type.

Page 8 of 15
HeatTech™ Electric Radiant Floor Heating Systems – HTMAT Installation Manualwww.HeatTechProducts.com [email protected] toll-free: 800-470-5685
6. HeatTech mat installationNote: it is highly recommended that the installation of the mats and floor sensor is documented with photos to
note their location for further reference.
6.1. Prepare the subfloor
The subfloor must be dry, smooth and clean prior to
mats installation.
Thoroughly sweep and/or vacuum the floor to remove
any dirt, dust and debris that may damage the cable and
interfere with installation. Make sure there are no nails,
screws and other sharp objects that may damage the
cable.
6.2. Transfer Layout to Floor
Using measuring tape and pencil/marker, draw the outline of the mats layout on the floor, including all obstacles,
cabinetry, fixtures, floor drains, etc. For ease of installation, draw arrows pointing the direction of mat runs across
the floor.
6.3. Electrical Box Installation
Installation of electrical box and conduit pipe must be in accordance with all applicable national and local electrical
codes.
Install an appropriate size electrical box at the desired location of the thermostat and within reach of sensor and
mat’s cold leads (both are 10ft long). A typical location of the thermostat is 4-5ft above the floor for easy of access
and operation. Run a section of conduit pipe from the electrical box to the floor for cold lead installation. Attach the
conduit to the box using appropriate locknut(s) and secure in place. Note that conduit pipe may not be required
by local codes – check with an electrician. A ½” conduit pipe is sufficient for single cold lead installation. Multiple
cold leads may require a larger conduit pipe.
Run appropriate type and size electrical wire (copper) from the power source to the electrical box. Leave excess
wire at the control switch/thermostat box for making connections.
6.4. Heating Mats Installation
1. Start by creating a 3/8” by 3/8” opening in the bottom
of the wall to accommodate the installation and routing
of HTMAT cold lead to the electrical box (as shown on
image to the right). The opening should normally be
positioned vertically below the electrical box. If using
conduit, select the position of the hole accordingly.
2. Next, using a chisel and a hammer or a grooving tool,
create a 3/8” wide by 3/8” deep groove in the subfloor
for routing of the cold lead. The groove must run all the
way to the cavity created in the wall, and must be deep enough to prevent interference of cold lead with flooring
materials above.

Page 9 of 15
HeatTech™ Electric Radiant Floor Heating Systems – HTMAT Installation Manualwww.HeatTechProducts.com [email protected] toll-free: 800-470-5685
IMPORTANT: approximately 4” portion of HTMAT cable contains a factory splice between the heating cable and
cold lead. This portion MUST be installed in the subfloor (3/8” x 3/8” groove) and must never be bent.
3. Perform 1st insulation and resistance tests on the HTMAT cable. Refer to “Measuring Resistance” part of this
manual.
4. Route the cold lead through the 3/8” wall cavity to the electrical box (through the conduit, if present).
5. Using hot glue, secure the factory splice and the subsequent portion of the cold lead (which runs to the opening
in the wall) in the subfloor groove.
6. Start installing the mats according to the layout plan.
Unroll the first few feet of the mat on the floor, position
as needed, and applying palm pressure only, adhere the
heating mat to the subfloor. The mat must be completely
flat. Adhesive backing of the HTMAT allows to install it
over any smooth, clean & dust-free surface. If it is
necessary to re-arrange the mat, it can be moved
several times before it looses its adhesive properties.
NOTE: Do not attempt to staple the cable. If needed, staple the mesh only using approved fasteners.
Do not twist or flip the mat upside down. The adhesive backing of HeatTech™ mats should always be in contact
with the subfloor for proper and secure installation. Avoid walking over the cable - if needed, wear only shoes with
soft soles or cover cable with plywood or cardboard.
7. To make any degree turn, use scissors to cut the
fiberglass mesh between the heating cables. Then rotate
the mat up to 180º degrees until the desired position is
reached. IMPORTANT: DO NOT CUT ANY PORTION
OF THE CABLE.
NOTE: Minimum bending radius of the cable in the mat
is 1”.
If it is necessary to arrange the heating cable in a
non-rectangular area, or along a curved border, the
mesh can be cut as needed to accommodate the
installation, following the procedure described above.
Minimal cable spacing in such instances is 2” (3”
recommended).
7. Once installation is complete, perform 2nd insulation
and resistance tests on the HTMAT heating mat. Refer to
“Measuring Resistance” part of this manual.
6.5. Floor Sensor Installation
The use of floor sensor is highly recommended (required for floor sensing thermostats offered by HeatTech™) and
will allow for faster system response and more precise temperature control.
If using the floor sensor, it can either be installed directly on the subfloor, or in appropriate 3/8” conduit tubing
(with a capped end). If using conduit, create a 3/8” wide by 3/8” deep groove in the subfloor using a chisel and a
hammer or a grooving tool. To secure sensor/conduit to the subfloor, use duct tape, hot glue or strips of
HeatTech™ cable guides. DO NOT use metal staples to secure the floor sensor.

Page 10 of 15
HeatTech™ Electric Radiant Floor Heating Systems – HTMAT Installation Manualwww.HeatTechProducts.com [email protected] toll-free: 800-470-5685
If installing laminate or engineered wood flooring, the sensor must be positioned between underlay and
laminate/engineered wood flooring. Installation of the secondary (backup) floor sensor is also recommended in
the unlikely event of failure of the original sensor. NOTE: only one sensor can be connected to the thermostat at
any given time.
6.6. Positioning the floor sensor
To ensure that sensor lead wires are of sufficient length, the
sensor should be located in close proximity to the thermostat.
Sensor must be installed in a manner that will not subject it to
other sources of heat or cold (heating vents, sunlight,
external walls, draft air etc.)
The sensor must be positioned in the middle of two runs of
heating cable and extended at least 6-12” into the heated
flooring area (12-16” if near exterior wall). See Fig. 2 for
details.
Note that sensor should not touch or overlap with HTMAT cable.
6.7. Installing the floor sensor
First, check the resistance of the sensor. If readings
differ from the factory-specified values, halt the
installation and contact Technical Support for assistance.
Create a 3/8” by 3/8” cavity in the wall and floor (if using
conduit) to route the sensor vertically to the thermostat.
Secure the sensor to the subfloor as described above
and attach the sensor or conduit with such to the stud
with approved fasteners, if needed. Make sure to leave
extra wiring to allow for easy connection of sensor leads
to the thermostat. If using conduit, it is recommended to cap off the end containing sensor to prevent
mortar/cement/debris from entering.
NOTE: DO NOT install the sensor in the same conduit as the HTMAT lead wires.
7. Floor Installation7.1. Special Considerations
1. If Crack Isolation Membrane is used in the project, it must be installed below the HeatTech™ heating mats,
unless directed otherwise by the membrane manufacturer.
2. Use of insulation in subfloor installations is highly recommended to increase the efficiency of the radiant heating
system and reduce heat loss. Wherever possible, install the insulation between the joists, following the
manufacturer’s instructions. NOTE: do not install any type of rigid insulation directly above or below the cement
board.
3. Consult with flooring manufacturer for information on special installation requirements for wood, laminate and
vinyl or linoleum flooring.
4. Minimal installation temperature is 40ºF.
5. Plastic trowels are considered the safest for working with HeatTech™ mats and cable, as they minimize the

Page 11 of 15
HeatTech™ Electric Radiant Floor Heating Systems – HTMAT Installation Manualwww.HeatTechProducts.com [email protected] toll-free: 800-470-5685
chance of damage to the product during installation. A typical 3/8” x 3/8” notch plastic trowel works best. When
spreading cement over the cables, make sure to follow the direction of cable runs.
Consult with building professionals to choose the optimal installation method for your system.
Important: in order for the heating system to function properly, all flooring must be in direct contact with
cement-based material in which the mats/cable is installed.
7.2. Self-Leveling Method (Recommended for All Flooring Types)
This method is recommended for all types of flooring and
especially for larger projects and projects involving the
installation of engineered wood, laminate, floating floors,
vinyl, linoleum and carpet.
1. Install the HeatTech™ system.
2. Follow the manufacturer’s instructions to prepare,
pour and spread the self-leveling cement. The
cable must be fully covered.
3. Perform 3rd resistance and insulation testing as
described in “Measuring Resistance” part of this
manual.
4. Allow for the cement to cure as advised by the manufacturer.
5. Conduct 4th and final resistance and insulation testing.
6. Install the finished floor following the manufacturer’s instructions.
7.3. Thinset Mortar Method
This method is best used for tile, stone and similar floor covering materials.
1. Install the HeatTech™ system.
2. Follow the manufacturer’s instructions to prepare, and spread the thinset. Acrylic or latex modified
thin-set are best for this installation type. The cable must be fully covered.
3. Perform 3rd resistance and insulation testing as described in “Measuring Resistance” part of this manual.
4. Allow for the cement to cure as advised by the manufacturer.
5. Conduct 4th and final resistance and insulation testing.
6. Install the tile, stone or other flooring following the manufacturer’s instructions.
Alternatively, after installing HTMAT system on top of plywood, cement board or concrete slab, a layer of thinset
mortar can be applied over the heating cable followed by immediate installation of the tile/stone, etc. This method,
however, is considered to be difficult and is suitable only for experienced installers. Similar to other methods
described above, resistance testing must be done after the installation of finished flooring and prior to making
electrical connections.
Important: Regardless of the installation method selected, the cement/mortar/grout must be completely cured
prior to making electrical connections and running the radiant floor heating system.
8. Electrical Connections

Page 12 of 15
HeatTech™ Electric Radiant Floor Heating Systems – HTMAT Installation Manualwww.HeatTechProducts.com [email protected] toll-free: 800-470-5685
WARNING: Power supply to the electrical box with thermostat must be turned off prior to making
any electrical connections.
All electrical work must be done by a qualified and licensed electrician in accordance with all applicable national
and local building and electrical codes, including National Electrical Code (NEC). Only UL/ETL Listed and CSA
certified components should be used for the installation.
1. Follow the instructions that come with the thermostat to install it and connect power supply, grounding
wire(s), cold lead(s) and sensor. If using multiple HTMAT heating mats, they must be connected in
parallel (black-to-black, white-to-white, ground-to-ground). The total combined current load must not
exceed 15.0 Amps per thermostat. Minimum copper wire AWG for power supply is 14AWG.
2. Do not remove the label from the HTMAT cable, as it may be required for inspection. Alternatively, retain
the label along with resistance measurements and other system’s product manuals.
3. Mark the appropriate circuit breaker that supplies power to HeatTech™ electric radiant floor heating
system.
4. After all the electrical work is complete, power up and test the system.
9. Troubleshooting
Issue Possible Causes Solutions
No power. Check circuit breaker.
Circuit breaker tripped. Ensure that there are not too many cables or other
appliances connected on the same circuit. The HTMAT
requires a dedicated circuit. See the Product Selection
“Table 1 or Table 2” of this manual for product
specifications.
Ground-fault tripped in the
thermostat.
Refer to Thermostat Installation and Operation Manual.
Thermostat not turned on. Refer to Thermostat Installation and Operation Manual.
Cable not connected to
thermostat.
Refer to Thermostat Installation and Operation Manual.
Floor temperature sensor
not connected.
Refer to Thermostat Installation and Operation Manual.
No heat from floor
Faulty sensor. Use backup sensor instead (if installed) or replace
existing floor sensor.
Floor is warm all the
time or is not warm
enough.
Thermostat is not properly
programmed.
Refer to Thermostat Installation and Operation Manual.
Installation
instructions are not
available.
Download the latest version of HTMAT System
Installation Instructions from
www.HeatTechProducts.com or call 1-800-470-5685

Page 13 of 15
HeatTech™ Electric Radiant Floor Heating Systems – HTMAT Installation Manualwww.HeatTechProducts.com [email protected] toll-free: 800-470-5685

Page 14 of 15
HeatTech™ Electric Radiant Floor Heating Systems – HTMAT Installation Manualwww.HeatTechProducts.com [email protected] toll-free: 800-470-5685
25 Year Limited Warranty
For a period of (25) years from the date of purchase and subject to the conditions, limitations and exclusions in
this warranty, Havaco Corporation (“Manufacturer”) warrants that its HeatTech HTMAT heating mats and HTCBL
heating cable (“Product” or “Products”) will be free from defects in material, design and workmanship.
Manufacturer reserves the right to make changes to the Products design and pricing, as well discontinue them
without obligation to replace or upgrade any existing Products with new ones.
In order for the warranty to apply, Products must be installed by a licensed, qualified professional(s), in
accordance with the latest version of Manufacturer’s Installation Guidelines, in accordance with all applicable local
and national electric and building codes and only for the purposes designated by the Manufacturer. This Warranty
shall apply only to Products that have been properly stored, handled, installed and tested for defects before,
during and after installation.
Manufacturer does not warrant:
Any products other than HTCBL and HTMAT, such as thermostats, sensors, circuit breakers, etc.
Product failures caused by other malfunctioning or defective products from other manufacturers.
Products damaged during installation, including, but not limited to cuts, kinks, scratches, etc.
System or Product failures associated with defective flooring, subflooring or other building materials in
the system.
Damage to Products from using inappropriate, incompatible or worn out tools.
Damaged from exposure to corrosive or otherwise incompatible chemicals.
Products installed in buildings containing structural defect or instability.
Damages from a disaster, such as fire, wind, lightning, flooding, etc.
All reports of Product failure must be accompanied by proof of purchase, original resistance measurement records
and believed reason for failure. Such reports must be submitted to manufacturer along with the defective Product,
at owners’ expense. Upon receipt of the Product(s), within reasonable time period, Manufacturer will conduct
product testing and inspection. If the conditions of this Warranty are met and the Product is proven to be defective,
Manufacturer will provide a replacement Product free of charge. Other allowances, including, but not limited to
freight, Product repair, Product replacement or refund of Products purchase price are exclusively at the option of
Manufacturer and are not covered by this warranty.
MANUFACTURER DOES NOT WARRANT THE FINISHED FLOOR COVERING, ITS’ COST AND THE COSTS
ASSOCIATED WITH REMOVING AND REPLACING IT.
IN ORDERFOR THE WARRANTY TO APPLY, ALL ELECTRICAL CONNECTIONS AND SYSTEM GROUNDING MUST BE
MADE BY A LICENSED ELECTRICIAN.
MANUFACTURER WARRANTS THAT THE HEAT OUTPUT (IN WATTS) OF ITS PRODUCTS IS AS STATED ON PRODUCT
LABELING, OR IN THE ABSENCE OF SUCH, IN INSTALLATION MANUAL. MANUFACTURER DISCLAIMS ALL
WARRANTIES AS TO THE TEMPERATURE LEVEL THAT THE PRODUCT, OR THE SYSTEM IN WHICH IT IS INSTALLED,
MAY PRODUCE.

Page 15 of 15
HeatTech™ Electric Radiant Floor Heating Systems – HTMAT Installation Manualwww.HeatTechProducts.com [email protected] toll-free: 800-470-5685
THIS LIMITED WARRANTY IS AN EXCLUSIVE WARRANTY IN LIEU OF ANY OTHER EXPRESS WARRANTIES. ANY
IMPLIED WARRANTIES (INCLUDING, BUT NOT LIMITED TO ANY IMPLIED WARRANTY OF MERCHANTABILITY OR
FITNESS FOR A PARTICULAR PURPOSE) ARE DISCLAIMED.
MANUFACTURER SHALL NOT BE LIABLE FOR ANY INJURIES, LOSSES OR DAMAGES, WHETHER DIRECT, INDIRECT,
CONSEQUENTIAL OR INCIDENTAL, INCLUDING, BUT NOT LIMITED TO DAMAGES FROM LOST PROFITS OR SALES,
PERSONAL INJURIES, PROPERTY DAMAGE AND OTHER LOSSES ARISING FROM USE OR INABILITY TO USE ITS’
PRODUCTS, AND THE PURCHASER AGREES THAT NO OTHER REMEDY SHALL BE AVAILABLE TO IT.
Some states do not allow the limitation of duration of warranty and exclusion of incidental or consequential
damages. Therefore, such limitations may not apply to you. This warranty gives you specific legal rights and
depending on the state of residence/installation, you may have other legal rights. To the extent allowed by
applicable Laws, Manufacturer disclaims any and all such legal rights.
THIS LIMITED WARRANTY IS AN EXCLUSIVE WARRANTY IN LIEU OF ANY OTHER EXPRESS WARRANTIES. ANY
IMPLIED WARRANTIES (INCLUDING, BUT NOT LIMITED TO ANY IMPLIED WARRANTY OF MERCHANTABILITY OR
FITNESS FOR A PARTICULAR PURPOSE) ARE DISCLAIMED.
Contact Havaco, Corp. at:
PO Box 350068,
Brooklyn, NY 11235
tel: 800-470-5685