How to Use the Filter in a Typical Scenario in After...
10
bcc matchmove With the BCC Matchmove filter, we have added to the compositing style filters in the BCC set. Use the BCC Matchmove filter to lock the movement of one image clip to another image clip using the built-in motion tracking function. One of the great advantages of using the BCC Matchmove filter to composite within your host editing application is that it includes full DVE functions such as tumble, spin, rotate, along with interesting lighting and light wrap compositing features that are normally found only in full compositing applications. SCROLL TO THE BOTTOM FOR COMPLETE PARAMETER LISTING How to Use the Filter in a Typical Scenario in After Effects: We're going to use the BCC Match Move filter to match the crane-up camera movement of one clip to that of a clip which was shot with a locked down camera and generate a seamless composite of the two clips making them appear as though they were shot with the same camera - all right within the Match Move filter. We'll start the project by importing the two clips that we need into a new project within After Effects. let's take a look at the two clips that we are using - one is a crane shot of a street scene taken on Fisherman's Wharf in San Francisco while the other is an underwater scene of a fish swimming near some coral along the California coast. In the crane scene, there is a clock on a post and we are going to comp the fish scene into the clock face. The fish clip has a circular alpha cut-out shape so that only the pixels within the circle are opaque. To start, we create a new comp of 5 seconds duration and drag the fish clip into the comp. Drag the street scene with the clock into the timeline below the fish clip. Let's preview to RAM and study the clip for a moment so that we can successfully apply the filter and comp in the fish. Upon review of the clip, we can see that the letters at the bottom of the clock appear to remain on screen for the duration of the effect,
Transcript of How to Use the Filter in a Typical Scenario in After...

bcc matchmove
With the BCC Matchmove filter, we have added to the compositing style filters in the BCC set. Use the BCC Matchmove filter to lock the movement of one image clip to another image clip using the built-in motion tracking function. One of the great advantages of using the BCC Matchmove filter to composite within your host editing application is that it includes full DVE functions such as tumble, spin, rotate, along with interesting lighting and light wrap compositing features that are normally found only in full compositing applications.
SCROLL TO THE BOTTOM FOR COMPLETE PARAMETER LISTING How to Use the Filter in a Typical Scenario in After Effects:
We're going to use the BCC Match Move filter to match the crane-up camera movement of one clip to that of a clip which was shot with a locked down camera and generate a seamless composite of the two clips making them appear as though they were shot with the same camera - all right within the Match Move filter. We'll start the project by importing the two clips that we need into a new project within After Effects. let's take a look at the two clips that we are using - one is a crane shot of a street scene taken on Fisherman's Wharf in San Francisco while the other is an underwater scene of a fish swimming near some coral along the California coast. In the crane scene, there is a clock on a post and we are going to comp the fish scene into the clock face. The fish clip has a circular alpha cut-out shape so that only the pixels within the circle are opaque.
To start, we create a new comp of 5 seconds duration and drag the fish clip into the comp. Drag the street scene with the clock into the timeline below the fish clip. Let's preview to RAM and study the clip for a moment so that we can successfully apply the filter and comp in the fish. Upon review of the clip, we can see that the letters at the bottom of the clock appear to remain on screen for the duration of the effect,
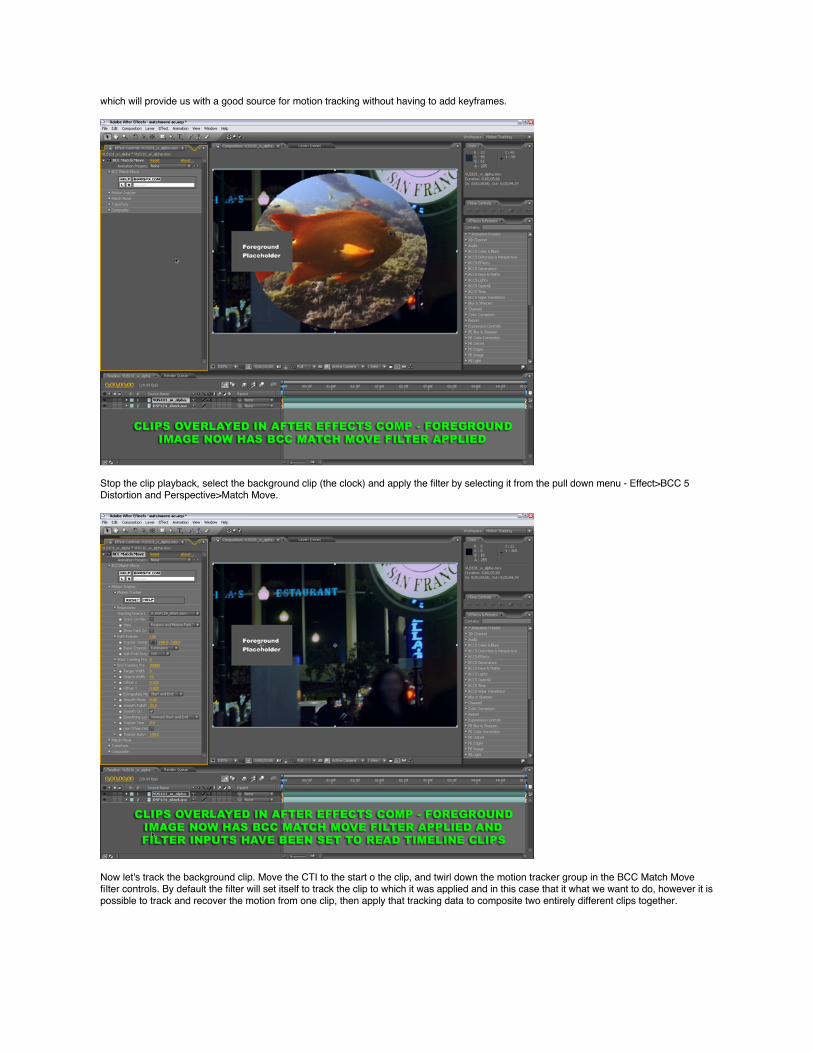
which will provide us with a good source for motion tracking without having to add keyframes.
Stop the clip playback, select the background clip (the clock) and apply the filter by selecting it from the pull down menu - Effect>BCC 5 Distortion and Perspective>Match Move.
Now let's track the background clip. Move the CTI to the start o the clip, and twirl down the motion tracker group in the BCC Match Move filter controls. By default the filter will set itself to track the clip to which it was applied and in this case that it what we want to do, however it is possible to track and recover the motion from one clip, then apply that tracking data to composite two entirely different clips together.

To set-up the tracker, enable the track-on-the-fly feature. Next we need to set the search and target regions in the tracker. Drag the tracker center to the bottom of the letter F on the sign. Then expand the target area (the inner box) to 15 pixels and leave the search at it's default value of 40. Now that the search and target regions have been set, we are ready to track. Just click on the play button in the AE time controls and the filter will analyze / track the feature. Tracking is complete when the clip has played through every frame in the comp. There are indicators at the bottom of the composite window that provide information regarding the integrity of the tracking process - a solid green bar indicates that all frames were tracked, while the color purple is used to indicate a non-tracked frame. A red bar is displayed to indicate the current time. When tracking has completed, you may want to monitor the tracker running through the frames to make sure that the tracker did not drift or move off target. Once satisfied with the tracking data, you can disable the track-on-the-fly feature.
So ... now that we have recovered the camera motion, we need to instruct the filter to use this motion to control the movement of the foreground clip in the composite, which in this case is the fish clip. Twirl down the Match Move parameter group and set the MM foreground to the shot of the fish, which we have already masked and precomped. The fish will move correctly now to match the camera movement

from the background clip, but it is not in the correct position over the clock face.
We'll reposition the fish so that it is more closely aligned with the clock in the background. By using the offset parameters from the motion tracker group, we can change the relative position offset of the foreground clip to the recovered tracker data. Remember that we tracked the letter at the bottom of the clock and now the center of the fish precomp is locked to the letters so we just want to offset the tracker data as a group. We'll set the offset x to 0.050 and the offset y value to -0.330. This places the precomp directly over the clock. But there is perspective distortion in the background shot that we need to apply to the foreground to make a convincing composite. To fix this, we let the filter do the work by using the built-in DVE controls to match the perspective in the background shot.
Let's twirl down the Transform control group. This is where we apply transform operations to the foreground clip. First unlock the scale and set the scale x to 81 percent and the scale y to 98 percent. Observe now that we're getting close to a match. Fine tune the scale parameters so that the clip fits the perspective scale of the clock face. Set the Tumble parameter to - 14 degrees and set the Spin parameter to + 25

degrees. Bingo - the foreground clip now sits right on top of the background clip with matching perspective distortion. Now we'll just go in and blend the edges of the foreground clip so that it looks like the two clips are one shot. The controls for this function are located in the Composite group.
Twirl down the Composite group and then twirl down the Light Wrap group, set the Wrap Lightness value to 50 and set the Wrap Width parameter to a value of 3. We can leave the wrap softness at it's default setting of 10. We'll change the wrap mode from Normal to Add. The edge of the foreground object have now been set to grip the edge of the clock in the background object. To complete the composite we will make a change to the apply mode that the filter is using. We'll set the Apply Mode for the filter to Scale Multiply and we're finished. Let's now preview to RAM to view the final result.
___________________________________________

How to Use the Filter in a Typical Scenario in Avid XPress Pro:
We're going to use the BCC Match Move filter to match the camera pan movement of one clip to that of a clip which was shot with a locked down camera and generate a seamless composite of the two clips making them appear as though they were shot with the same camera - all right within the Match Move filter. We'll start the project by importing the 2 clips that we need into a new project in Avid. Let's take a look at the two clips that we are using - one is a crane shot of a street scene of a clock taken on Fisherman's Wharf in San Francisco while the other is an underwater scene of a fish swimming near some coral along the California coast. In the crane scene, there is a clock on a post and we are going to comp the fish scene into the clock face. The fish clip has a circular alpha cut-out shape so that only the pixels within the circle are opaque.
To start, we create 2 video tracks in the timeline and then we drag foreground clip of the fish into the timeline on video 2 track, and drag the background clip with the clock into the Avid timeline in the video 1 track, directly below the fish track. Let's review the movement of the clip in the clock scene - there is a slow camera crane up that we will capture with the BCC Match Move filter. We'll set the current frame indicator to the start of the clip. Then we add the BCC MatchMove filter by selecting it from the effects bin and dragging it onto the fish clip in the timeline. We then select the clip with the filter, and click the effect mode button to access the filter parameters.
Set the timeline quality to green mode and promote the effect to AVX 2 by clicking on the promote effect button in the Avid controls window. Twirl down the Title Matte group and enable the Apply to Title Matte button.
Now let's track the background clip. Twirl down the motion tracker group in the BCC Match Move filter controls. By default the filter will set itself to track the clip to which it was applied and in this case that is not what we want to do, we want to track and recover the motion from the background clip with the crane and apply that to the fish shot. So, set the To set-up the tracker, enable the track-on-the-fly feature. Now set the Motion Tracking Source layer to First Below. Then enable the track-on-the-fly button. Drag the tracker center so that it is centered over the the bottom of the letter F on the sign. Then expand the target area (the inner box) to 15 pixels and leave the search at it's default value of 40.
Now that the search and target regions have been set, we are ready to track. Just click on the play button in the Avid viewer window and the filter will analyze / track the feature. Tracking is complete when the clip has played through every frame in the comp. There are indicators at the bottom of the composite window that provide information regarding the integrity of the tracking process - a solid green bar indicates that all frames were tracked, while the color purple is used to indicate a non-tracked frame. A red bar is displayed to indicate the current time. When tracking has completed, you may want to monitor the tracker running through the frames to make sure that the tracker did not drift or move off target. Once satisfied with the tracking data, you can disable the track-on-the-fly feature.
So ... now that we have recovered the camera motion, we need to instruct the filter to use this motion to control the movement of the foreground clip in the composite, which in this case is the fish clip. Twirl down the Match Move parameter group and set the MM foreground to the shot of the fish. The fish will move correctly now to match the camera movement from the background clip, but it is not in the correct position over the clock face that we wanted to comp it onto.
Move the CTI to the middle of the clip. We'll reposition the fish so that it is positioned over the clock face. By using the offset parameters from the motion tracker group, we can change the relative position offset of the foreground clip to the recovered tracker data. Go to the Motion Tracker group and set the offset x to +0.020 and the offset y value to -0.354. This places the fish with alpha directly over the clock face. The fish will also move correctly now to match the camera movement from the background. But there is perspective distortion in the background shot that we need to apply to the foreground to make a convincing composite. To fix this, we let the filter do the work by using the built-in DVE controls to match the perspective in the background shot.
Let's twirl down the Transform control group. This is where we apply transform operations to the foreground clip. First unlock the scale and set the scale x to 74 percent and the scale y to 84 percent. Observe now that we're getting close to a match. Set the Tumble parameter to -10 and the Spin parameter to + 34 degrees. Bingo - the foreground clip now sits right on top of the background clip with matching perspective distortion.
Now we'll just go in and blend the edges of the foreground clip so that it looks like the two clips are one shot. The controls for this function are located in the Composite group. Twirl down the Composite group and set the Wrap Softness to 10 and the Wrap Width to 3. Play back the result and observe that the foreground clip is locked to the background clip in a seamless composite.
___________________________________________
How to Use the Filter in a Typical Scenario in Adobe Premiere Pro:
We're going to use the BCC Match Move filter to match the camera pan movement of one clip to that of a clip which was shot with a locked down camera and generate a seamless composite of the two clips making them appear as though they were shot with the same camera - all right within the Match Move filter. We'll start the project by importing the two clips that we need into a new project in Premiere Pro. Let's take

a look at the two clips that we are using - one is a camera pan shot of buildings along the waterfront in San Francisco while the other is an underwater scene of a fish swimming near some coral along the California coast. We're going to comp the fish onto the side of one of the buildings. To start, we drag foreground clip of the fish into the timeline on video 1 track, then drag the background clip of the buildings into the Premiere Pro timeline in the video two track, directly above the fish track. Let's review the movement of the clip in the scene - there is a slow camera pan that we will capture with the BCC Match Move filter. We'll set the current frame indicator to the start of the clip. Then we add the BCC MatchMove filter by selecting it from the effects tab and dragging it onto the clip with the buildings in the timeline. We then select the clip, and click the button to enter into effect mode.
Now let's track the background clip. Twirl down the motion tracker group in the BCC Match Move filter controls. By default the filter will set itself to track the clip to which it was applied and in this case that it what we want to do, however it is possible to track and recover the motion from one clip, then apply that tracking data to composite two entirely different clips together. To set-up the tracker, enable the track-on-the-fly feature. Next we need to set the search and target regions in the tracker. Drag the tracker center to the top left corner of the white building at the far left of the screen. Then contract the target area (the inner box) to 10 pixels and set the search to a value of 34 pixels. Now that the search and target regions have been set, we are ready to track. Just click on the play button in the time controls and the filter will analyze / track the feature. Tracking is complete when the clip has played through every frame in the clip. There are indicators at the bottom of the composite window that provide information regarding the integrity of the tracking process - a solid green bar indicates that all frames were tracked, while the color purple is used to indicate a non-tracked frame. A red bar is displayed to indicate the current time. When tracking has completed, you may want to monitor the tracker running through the frames to make sure that the tracker did not drift or move off target. Once satisfied with the tracking data, you can disable the track-on-the-fly feature.
So ... now that we have recovered the camera motion, we need to instruct the filter to use this motion to control the movement of the foreground clip in the composite, which in this case is the fish clip. Twirl down the Match Move parameter group and set the MM foreground to the shot of the fish. The fish will move correctly now to match the camera movement from the background clip, but it is not in the correct position over the building that we wanted to comp it onto. Move the CTI to the middle of the clip. We'll reposition the fish so that it is positioned over the building that is directly to the right of the spire. By using the offset parameters from the motion tracker group, we can change the relative position offset of the foreground clip to the recovered tracker data. Remember that we tracked the corner of one of the other buildings so we just want to offset the tracker data as a group. We'll set the offset x to -0.172 and the offset y value to -0.211. This places the precomp directly over the building that we are interested in. But there is perspective distortion in the background shot that we need to apply to the foreground to make a convincing composite and we also want to stretch the fish image so that it covers more of the building. To fix this, we let the filter do the work by using the built-in DVE controls to match the perspective in the background shot.
Let's twirl down the Transform control group. This is where we apply transform operations to the foreground clip. First unlock the scale and set the scale x to 13.4 percent and the scale y to 15.8 percent. Observe now that we're getting close to a match. Set the Spin parameter to + 22 degrees. Bingo - the foreground clip now sits right on top of the background clip with matching perspective distortion. Now we'll just go in and blend the edges of the foreground clip so that it looks like the two clips are one shot. The controls for this function are located in the Composite group.
Twirl down the Composite group and enable the lock blend control. Then set a value of 4 in the blend left parameter and observe that the composited clip now fits over the building. Play back the result and observe that the foreground clip is locked to the background clip in a seamless composite.
___________________________________________
How to Use the Filter in a Typical Scenario within Apple Final Cut Pro:
We're going to use the BCC Match Move filter to match the camera pan movement of one clip to that of a clip which was shot with a locked down camera and generate a seamless composite of the two clips making them appear as though they were shot with the same camera - all right within the Match Move filter. We'll start the project by importing the two clips that we need into a new project in FCP. Let's take a look at the two clips that we are using - one is a crane shot of a street scene of a clock taken on Fisherman's Wharf in San Francisco while the other is an underwater scene of a fish swimming near some coral along the California coast. In the crane scene, there is a clock on a post and we are going to comp the fish scene into the clock face. The fish clip has a circular alpha cut-out shape so that only the pixels within the circle are opaque.
To start, we drag the background clip with the clock into the timeline on video 1 track, we don't need to pull the fish clip into the timeline as we can use the filter wells to pull the clip directly from the project window. Let's review the movement of the clip in the scene - there is a slow camera crane up that we will capture with the BCC Match Move filter. We'll set the current frame indicator to the start of the clip. Then we add the BCC MatchMove filter by selecting it from the effects tab and dragging it onto the clock clip in the timeline. We then select double-click the clock clip in the timeline to bring it into the source monitor window, and click the filters tab to access the filter parameters.
Now let's track the background clip. Click on the Hide Motion Tracker button in the filter UI to reveal the motion tracker parameters. By default the filter will set itself to track the clip to which it was applied and in this case that it what we want to do, however it is possible to track and recover the motion from one clip, then apply that tracking data to composite two entirely different clips together. For this exercise, we will drag the clock clip from the project window onto the Tracking Source Layer input well. Next we'll enable the Track On The Fly option by clicking on the button with the same name in the filter UI. Set the tracker target to look at the bottom of the letter F on the clock face by setting the following values in the Tracker Center KF numeric entry boxes: +236, -165. Set the Target Width parameter to a value of 15 and leave the Search Width at it's default value of 40.

Using the right arrow key on the keyboard, step through the timeline frame by frame until you reach the end of the clip. This process tracks the target as it moves across the record monitor and feeds the recovered motion to the filter. There are indicators at the bottom of the composite window that provide information regarding the integrity of the tracking process - a solid green bar indicates that all frames were tracked, while the color purple is used to indicate a non-tracked frame. A red bar is displayed to indicate the current time. When tracking has completed, you may want to monitor the tracker running through the frames to make sure that the tracker did not drift or move off target. Once satisfied with the tracking data, you can disable the track-on-the-fly feature.
So ... now that we have recovered the camera motion, we need to instruct the filter to use this motion to control the movement of the foreground clip in the composite, which in this case is the fish clip. Click on the Hide Motion Tracker to hide the motion tracker parameters and click on the Hide Match Move Controls to reveal the match move parameters. Drag the fish clip from the project window onto the MM foreground image well to set the MM foreground to the shot of the fish. The fish will move correctly now to match the camera movement from the background clip, but it is not in the correct position over the clock face that we wanted to comp it onto.
Move the CTI to the middle of the clip. We'll reposition the fish so that it is positioned over the clock face. The fish will move correctly now to match the camera movement from the background clip, but again it is not in the correct position over the clock face. We'll reposition the fish so that it is more closely aligned with the clock in the background. By using the offset parameters from the motion tracker group, we can change the relative position offset of the foreground clip to the recovered tracker data. Remember that we tracked the letter at the bottom of the clock and now the center of the fish precomp is locked to the letters so we just want to offset the tracker data as a group. We'll set the offset x to 0.050 and the offset y value to -0.330. This places the fish with alpha directly over the clock face. But there is perspective distortion in the background shot that we need to apply to the foreground to make a convincing composite. To fix this, we let the filter do the work by using the built-in DVE controls to match the perspective in the background shot.
Hide the controls for both the Motion Tracker Group and also the Match Move group. Then reveal the parameters from the Transform control group by clicking on the Hide Transform Controls button. This is where we apply transform operations to the foreground clip. First unlock the scale and set the scale x to 74 percent and the scale y to 84 percent. Observe now that we're getting close to a match. Set the Tumble parameter to -11 and the Spin parameter to + 33 degrees. Bingo - the foreground clip now sits right on top of the background clip with matching perspective distortion.
Now we'll just go in and blend the edges of the foreground clip so that it looks like the two clips are one shot. The controls for this function are located in the Composite group. Hide the Transform Controls and reveal the parameters in the Composite group by clicking on the Hide Composite controls and then reveal the Light Wrap controls and set the Wrap Softness to 10 and the Wrap Width to 3. Play back the result and observe that the foreground clip is locked to the background clip in a seamless composite.
___________________________________________
Parameter Descriptions
deep color rendering pop-up - sets the deep color render values when working in higher bit depth (fxplug only)hide motion tracker controls - show/hide toggle for this group (fxplug only)motion tracker group
hide preprocess controls - show/hide toggle for this group (fxplug only)preprocess sub-group
view preprocessed sourceinput black - controls the black levels of the imageinput white - controls the white levels of the imagegamma - controls the image gammablur/sharpen - negative values blur, while positive values sharpen the image
tracking source layer - this pop-up is used to select the layer to tracktrack on the fly - enables motion trackingview - this pop-up contains UI display options for the motion trackershow path over render - displays the motion path over the rendered imagepath frames - sets the amount of frames that are displayed in the motion pathtracker center KF - sets the tracker center pointinput channel - this pop-up is used to set the channel from the media clip to be used for trackingsub-pixel accuracy - this pop-up is used to set the sub-pixel level of the tracker enginestart tracking frame - used to set the first frame of the clip to be trackedend tracking frame - used to set the last frame of the clip to be trackedtarget width - sets the width of the target tracking pointsearch width - sets the width of the search region apply - this pop-up determines how the tracking data is usedoffset X - used to offset the tracking data along the X axisoffset Y - used to offset the tracking data along the Y axisextrapolate motion - this pop-up controls whether the motion is extended automatically and extrapolated beyond the range of the
tracker start and end frames smooth motion - smoothes the recovered motion pathsmooth falloff - smooth on - enables the smoothing functionsmoothing lock - contains options which are used to constrain the smoothing

tracker time offset - moves the recovered tracking data in timeuse offset only - tracker auto-man - this parameter controls how much tracking data is used ... full manual using none of the recovered data and full
auto using all of the tracking datahide match move controls - show/hide toggle for this group (fxplug only)match move group
MM foreground - this pop-up is used to select media from the hostrender - this pop-up is used to render the match move only or the effect over the source mediaopaque source - ignores the media alpha channel and enables faster rendering when enabled
hide transform controls - show/hide toggle for this group (fxplug only)transform group
lock scale to X - scales X and Y together when enabledscale X - sets scale along the X axisscale Y - sets scale along the Y axisposition XY - sets the position of the media on the XY axisposition Z - sets the position of the media on the Z axistumble - sets angle of the media along the Z axisspin - sets the angle of the media along the YZ axisrotate - sets the angle of the media along the XY axisshift - used to offset the resultpivot - used to set the pivot point for the resultmotion blur - enable or disable motion blur with this checkboxhide motion blur controls - show/hide toggle for this group (fxplug only)motion blur sub-group
smoothness pop-up - contains 4 smoothness optionsroughmediumsmoothsmoothest
shutter angle - sets the percieved shutter angle for the motion blur. higher values result in more bluradaptive motion blur - disable for a smoother result
hide composite controls - show/hide toggle for this group (fxplug only)composite group
hide crop and blend controls - show/hide toggle for this group (fxplug only)crop and blend sub-group
crop left - crops the image along the left sidecrop top - crops the image along the topcrop right - crops the image along the right sidecrop bottom - crops the image along the bottomblend corner shape - this pop-up sets either round or square corners for the cropped shapelock blend - locks the blend to the value set in the blend left parameterblend left - blends the image along the left sideblend top - blends the image along the topblend right - blends the image along the right sideblend bottom - blends the image along the bottom
hide border and shadow controls - show/hide toggle for this group (fxplug only)shadow on - enables the drop shadow functionborder and shadow sub-group
border corner shape - this pop-up sets either round or square corners for the borderborder width - sets the width of the borderborder opacity - sets the opacity of the borderborder softness - sets the softness of the borderborder color - sets the color of the bordershadow distance - controls the distance that the shadow is offset from the originalshadow intensity - controls the opacity of the shadowshadow softness - controls the softness of the shadowshadow angle - controls the angle of the shadowshadow color - controls the color of the shadow
light on - enables the light functionhide light controls - show/hide toggle for this group (fxplug only)light sub-group
light type - this pop-up is used to set the type of lightinglight source XY - sets the position of the light source along the XY axislight source Z - sets the position of the light source along the Z axislight target - sets the target for the spotlightlight width - sets width of the spotlightambient intensity - controls the level of ambient lightdiffuse - controls the diffuse light quality of the imagespecular - sets the width of the specular highlightspecular falloff - controls the falloff of the specular highlightsweep angle - sets the angle of the light sweeplight color - used to set the color of the lightpoint light at source - when enabled will aim the light at the image source
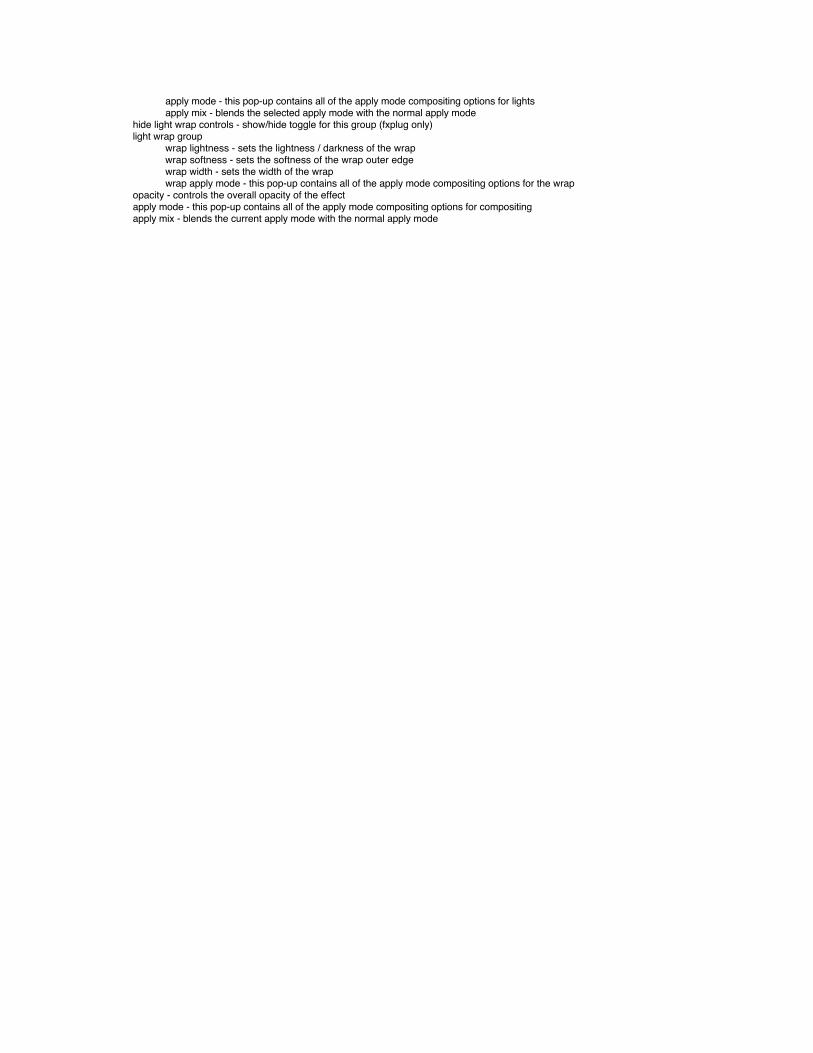
apply mode - this pop-up contains all of the apply mode compositing options for lightsapply mix - blends the selected apply mode with the normal apply mode
hide light wrap controls - show/hide toggle for this group (fxplug only)light wrap group
wrap lightness - sets the lightness / darkness of the wrapwrap softness - sets the softness of the wrap outer edgewrap width - sets the width of the wrapwrap apply mode - this pop-up contains all of the apply mode compositing options for the wrap
opacity - controls the overall opacity of the effectapply mode - this pop-up contains all of the apply mode compositing options for compositingapply mix - blends the current apply mode with the normal apply mode


![Introduction - Microsoftinteroperability.blob.core.windows.net/.../[MS-FSSHTTP]-… · Web viewFile Synchronization via SOAP ... A typical scenario for using this protocol involves](https://static.fdocuments.in/doc/165x107/5a7a51ac7f8b9aec2d8bf04e/introduction-micro-ms-fsshttp-web-viewfile-synchronization-via-soap-a.jpg)
![[PPT]PowerPoint Presentationdfk/agents/CoABS/posters/Mobtie... · Web viewJames Hendler DARPA Filter Scenario * Retrieval Scenario Input Data Streams Text Documents Retrieval API](https://static.fdocuments.in/doc/165x107/5ae380917f8b9a0d7d8dbbb9/pptpowerpoint-dfkagentscoabspostersmobtieweb-viewjames-hendler-darpa-filter.jpg)