how to Use Powtoon
132
Check other tutorials at vatwist.wordpress.com How to use Powtoon
description
tutorial on how to use powtoon
Transcript of how to Use Powtoon

Check other tutorials at vatwist.wordpress.com
How to use Powtoon

Check other tutorials at vatwist.wordpress.com
How to get there
On your browser type www.powtoon.com and hit enter

Check other tutorials at vatwist.wordpress.com
Welcome to Powtoon

Check other tutorials at vatwist.wordpress.com
Getting started Click ‘Start now’

Check other tutorials at vatwist.wordpress.com
Signing up Fill out the fields. Or sign up with one of the social account options
Check other tutorials at vatwist.wordpress.com
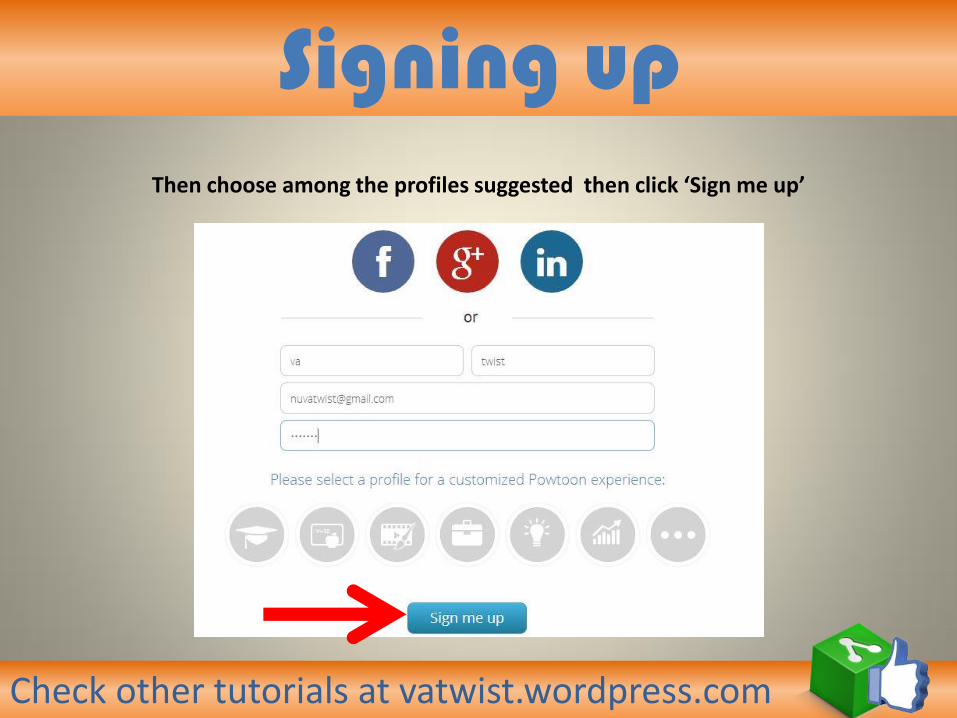
Signing up Then choose among the profiles suggested then click ‘Sign me up’

Check other tutorials at vatwist.wordpress.com
Signing up Signing up through Facebook. Click Facebook icon.

Check other tutorials at vatwist.wordpress.com
Signing up Fill out the text fields. Click ‘log in’.

Check other tutorials at vatwist.wordpress.com
Signing up Click ‘okay’.
Check other tutorials at vatwist.wordpress.com
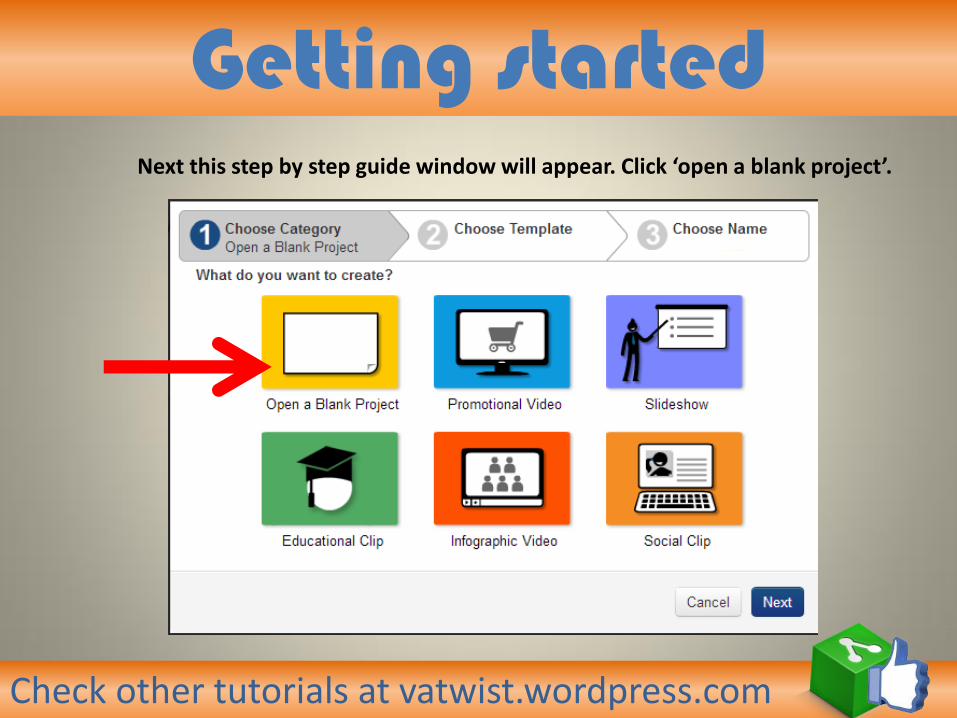
Getting started Next this step by step guide window will appear. Click ‘open a blank project’.

Check other tutorials at vatwist.wordpress.com
Getting started Next just fill out the text fields, click ‘create’.
Check other tutorials at vatwist.wordpress.com
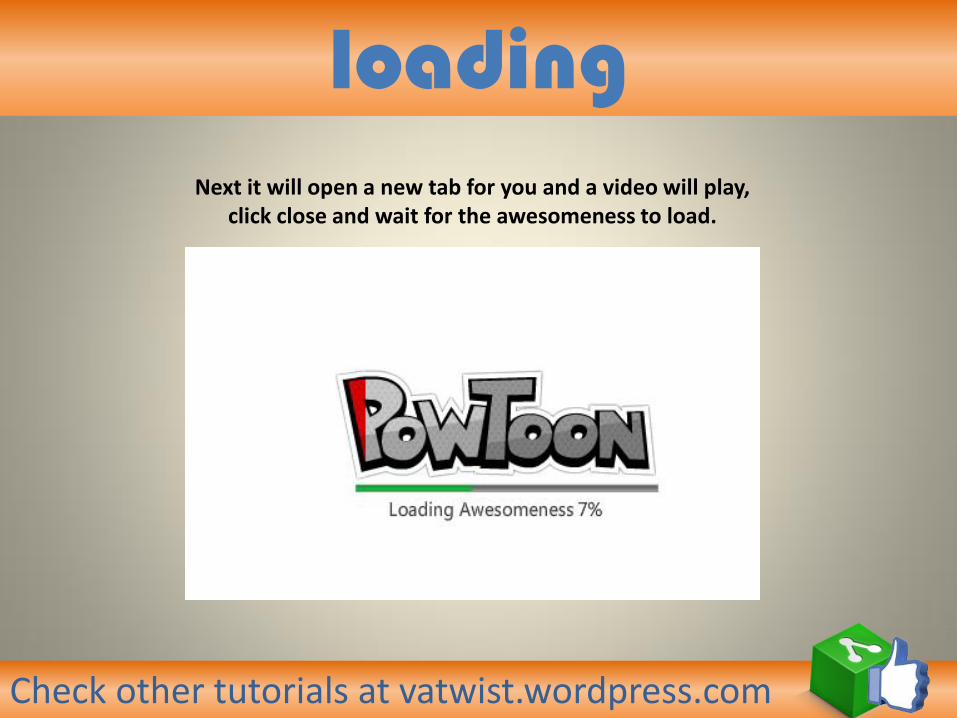
loading Next it will open a new tab for you and a video will play,
click close and wait for the awesomeness to load.
Check other tutorials at vatwist.wordpress.com
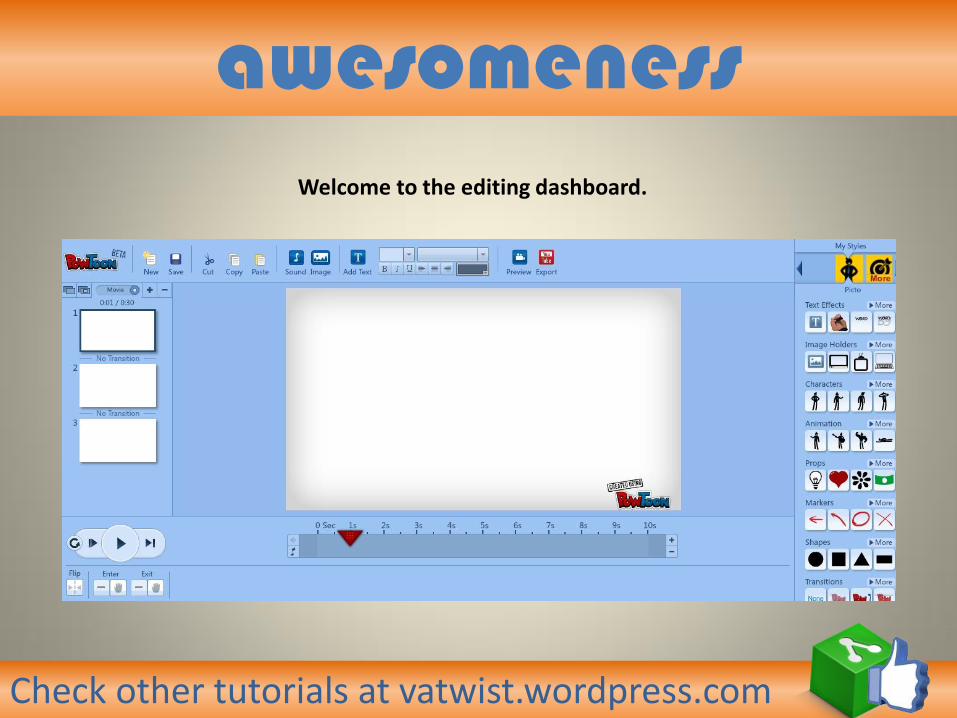
awesomeness Welcome to the editing dashboard.

Check other tutorials at vatwist.wordpress.com
navigation
Tools.

Check other tutorials at vatwist.wordpress.com
navigation
Tools.
New slides and for saving your work
Editing tools
Check other tutorials at vatwist.wordpress.com
navigation
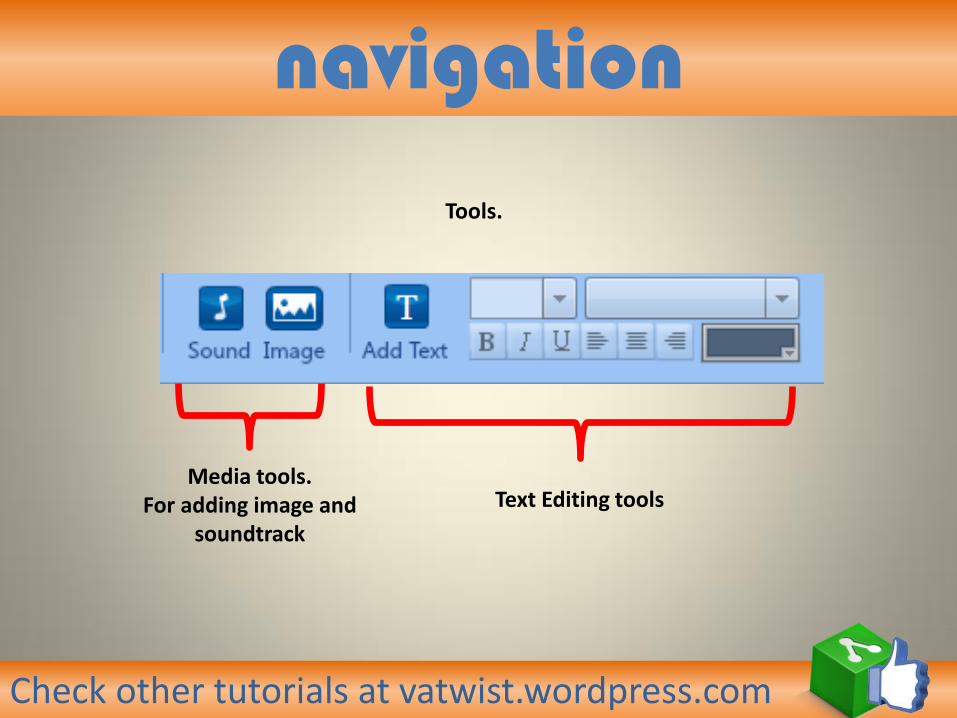
Tools.
Media tools. For adding image and
soundtrack
Text Editing tools

Check other tutorials at vatwist.wordpress.com
navigation
Tools.
Preview and exporting tool

Check other tutorials at vatwist.wordpress.com
navigation
On the left side portion of the
dashboard is the Slide panel.

Check other tutorials at vatwist.wordpress.com
navigation Duplicate slide
Clone objects to slide
Click to switch in between modes (movie or slideshow)
Add slide
Delete slide

Check other tutorials at vatwist.wordpress.com
navigation
Slide panel according to
sequence
Transition display
Time length of the presentation
Time frame of the slide selected

Check other tutorials at vatwist.wordpress.com
navigation
Right side is the object panel
• Text effects • Image holders • Animated characters • Props • Markers • Shapes • Transitions • Backgrounds
Style options

Check other tutorials at vatwist.wordpress.com
navigation At the center is your canvas
timeline

Check other tutorials at vatwist.wordpress.com
navigation Play/pause
Flip object
Play current slide Play current slide from the start
Play all slides from start
Object enter/exit effects tool

Check other tutorials at vatwist.wordpress.com
Create awesomeness Let’s start a project. So what do you have in mind?
Let’s make something about “5 benefits of meditation”.
Let’s start on the title. On the right side choose text effect.
I’ll use hand writing effect, Click on it.

Check other tutorials at vatwist.wordpress.com
Slide 1 A text box automatically appears on the canvas
Also slide one is filled.
Check other tutorials at vatwist.wordpress.com
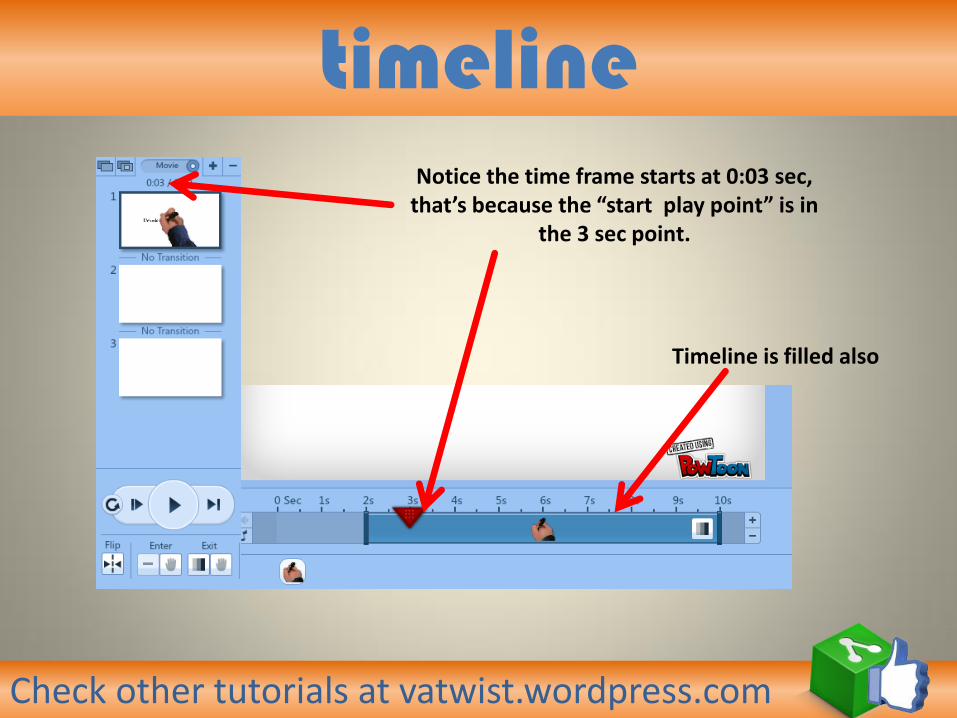
timeline Notice the time frame starts at 0:03 sec,
that’s because the “start play point” is in the 3 sec point.
Timeline is filled also

Check other tutorials at vatwist.wordpress.com
timeline
Timeline is filled from 2s to 10s, meaning
the text effect is visible in the canvas for that span of time
That is the exit effect of the text object
No entry effect but has exit effect (see timeline)

Check other tutorials at vatwist.wordpress.com
Text object Back to our canvas. Let’s enter a title, Click ‘double click to edit text’
Check other tutorials at vatwist.wordpress.com
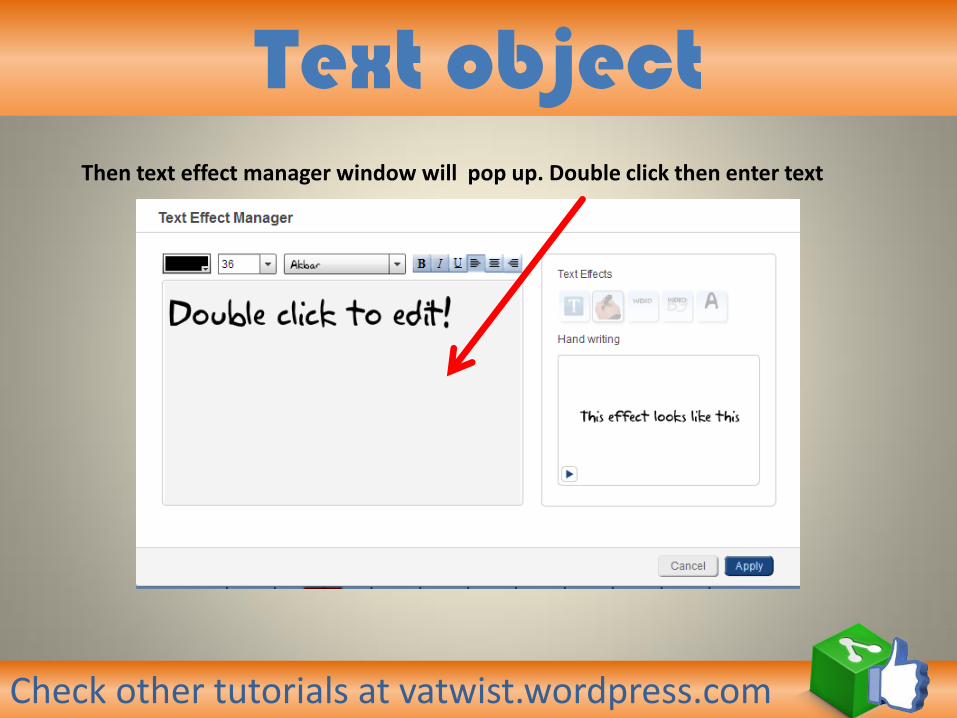
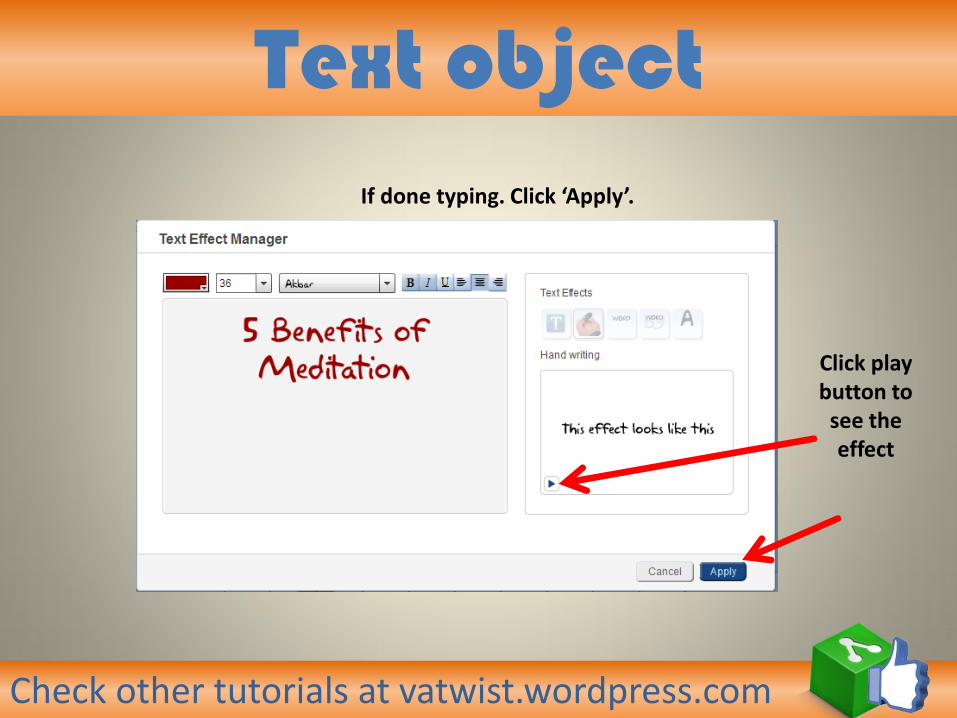
Text object Then text effect manager window will pop up. Double click then enter text
Check other tutorials at vatwist.wordpress.com
Text object If done typing. Click ‘Apply’.
Click play button to
see the effect

Check other tutorials at vatwist.wordpress.com
Text object You can drag objects to proffered placement with in the canvas
Check other tutorials at vatwist.wordpress.com
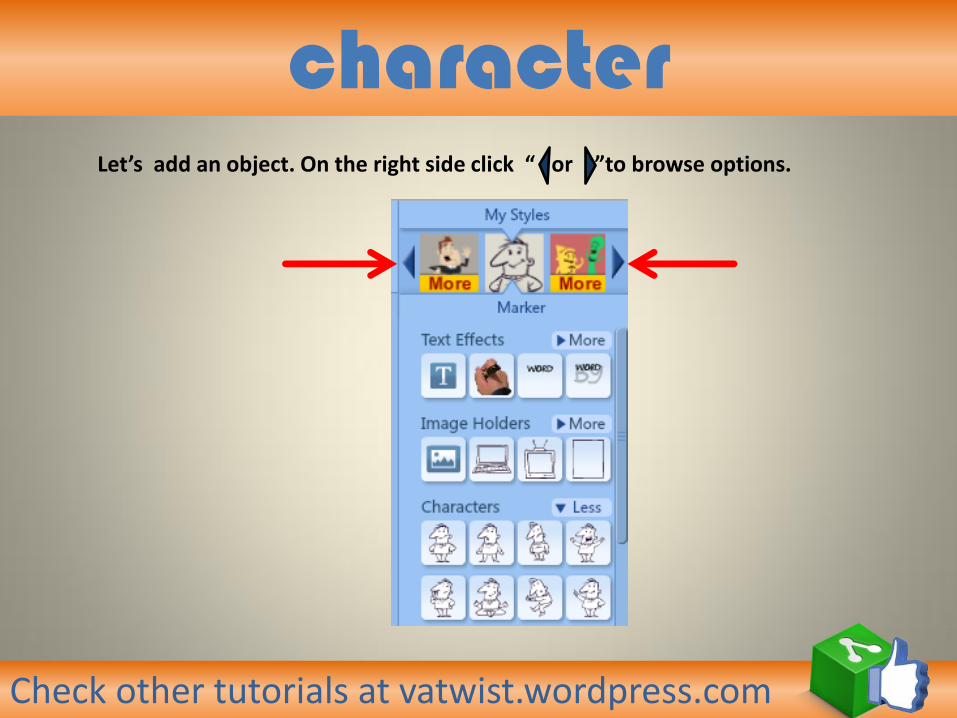
character Let’s add an object. On the right side click “ or ”to browse options.

Check other tutorials at vatwist.wordpress.com
character Choose this character

Check other tutorials at vatwist.wordpress.com
character
Scroll down. Under
‘animation’ characters.
Check other tutorials at vatwist.wordpress.com
character
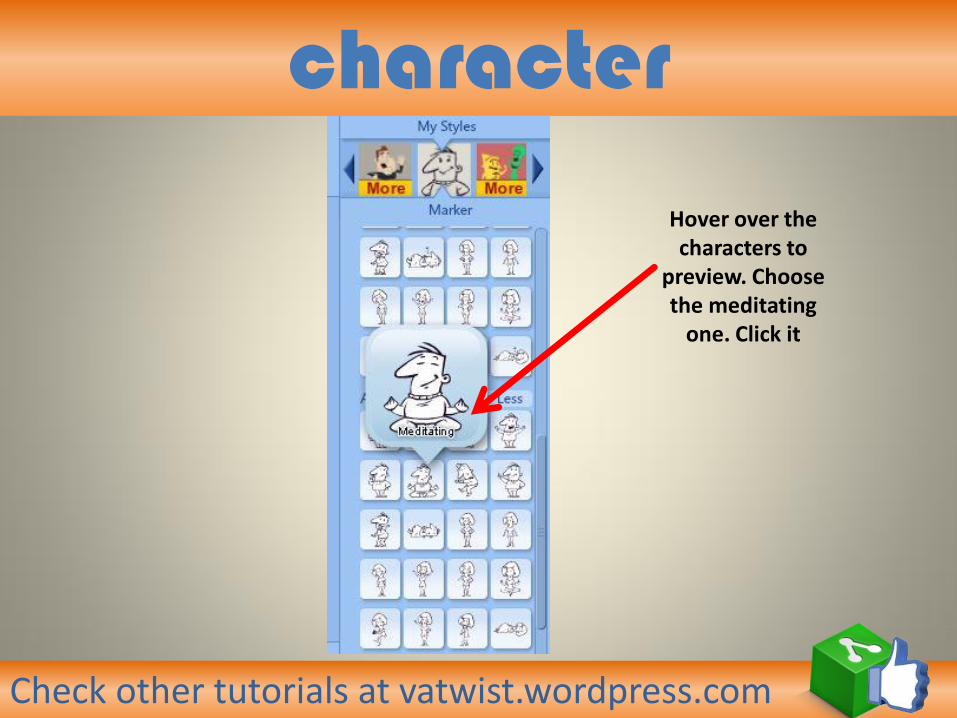
Hover over the characters to
preview. Choose the meditating
one. Click it
Check other tutorials at vatwist.wordpress.com
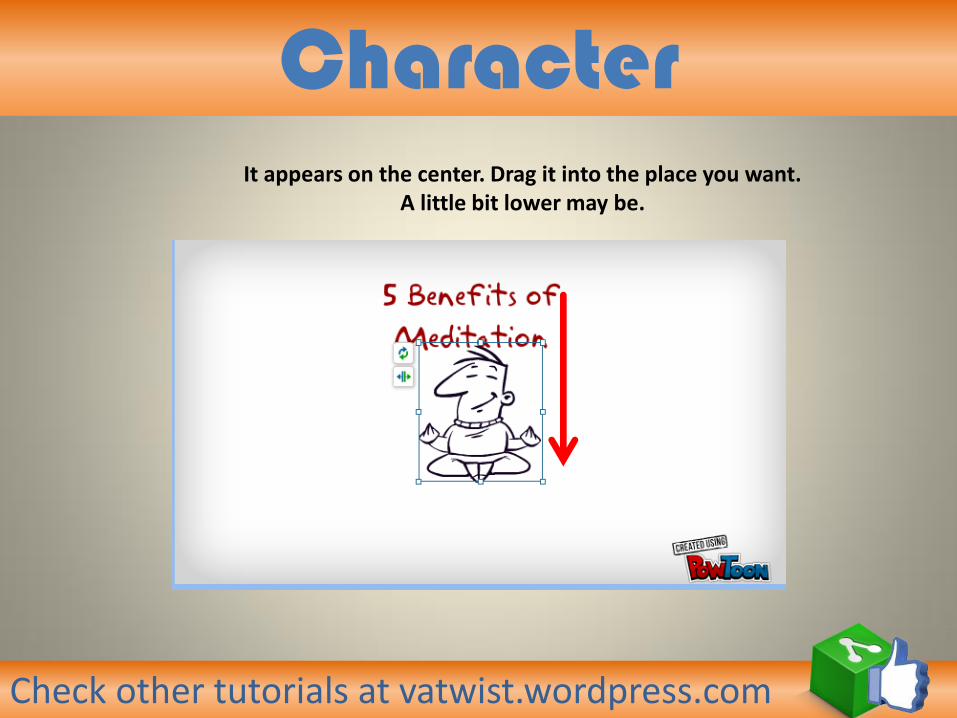
Character It appears on the center. Drag it into the place you want.
A little bit lower may be.
Check other tutorials at vatwist.wordpress.com
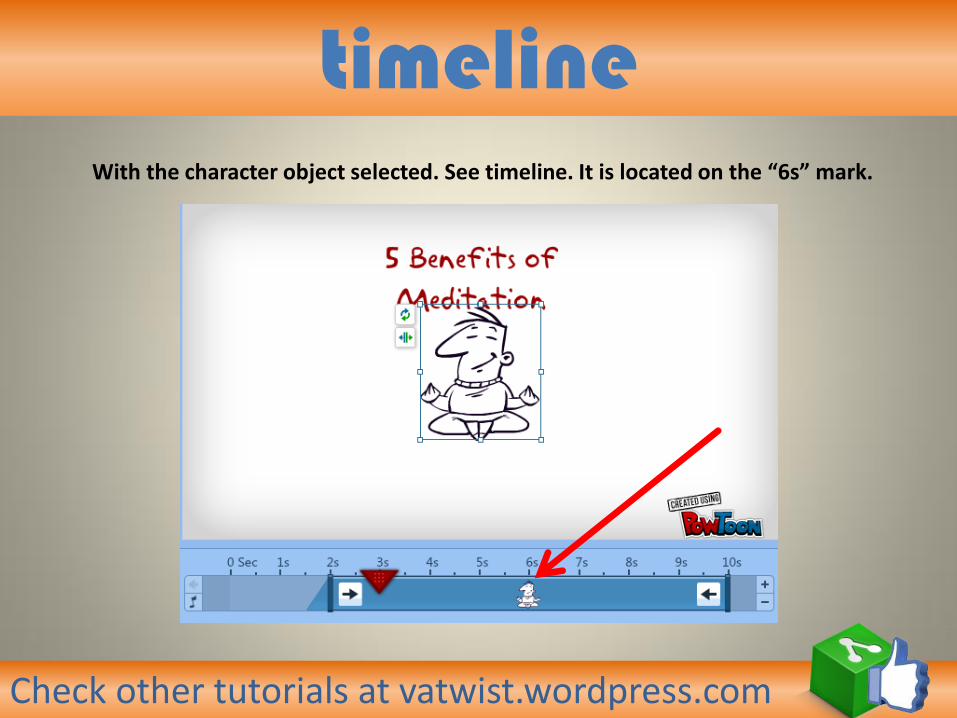
timeline With the character object selected. See timeline. It is located on the “6s” mark.

Check other tutorials at vatwist.wordpress.com
Play starting point
First lets drag the to the “0sec” mark
Check other tutorials at vatwist.wordpress.com
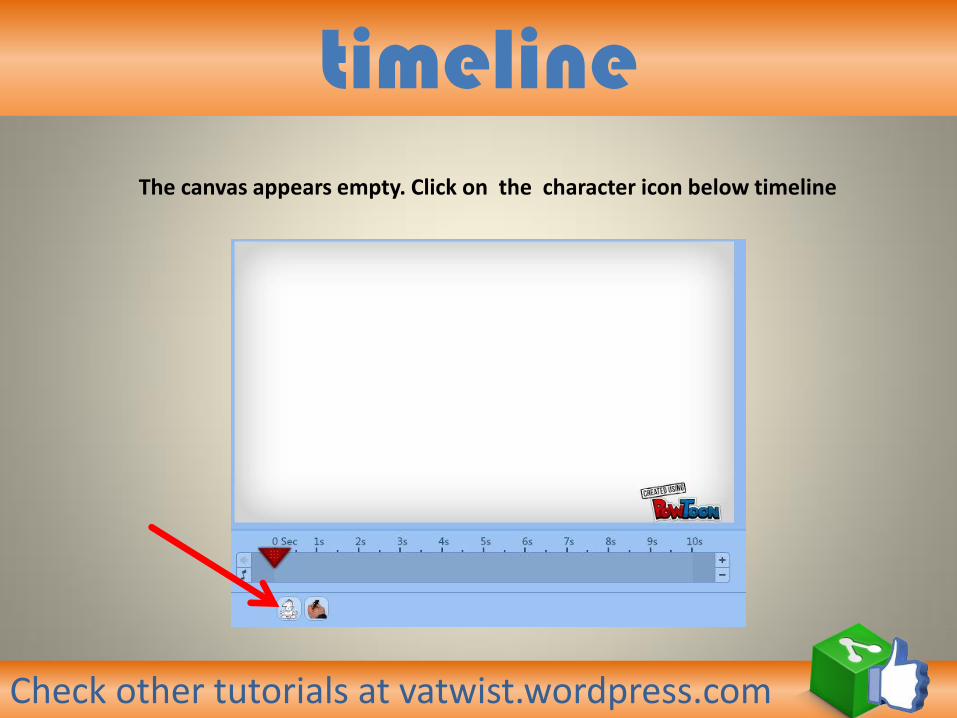
timeline The canvas appears empty. Click on the character icon below timeline

Check other tutorials at vatwist.wordpress.com
timeline This icon appears again, its the start play point, meaning when you hit the play button, animation starts at this point which is
at 2sec point
With character being selected, under 6s mark meaning it will appear on the 6th sec.
Check other tutorials at vatwist.wordpress.com
timeline
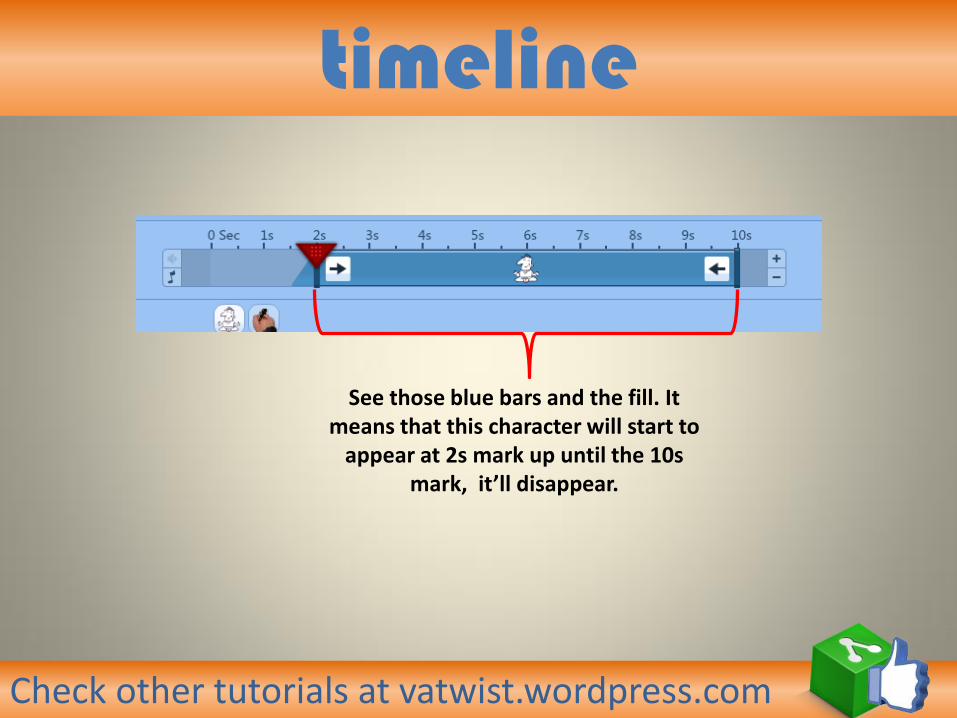
See those blue bars and the fill. It means that this character will start to
appear at 2s mark up until the 10s mark, it’ll disappear.

Check other tutorials at vatwist.wordpress.com
timeline
Now try playing slide one.(put first the in 0sec mark then hit play)
We are done with slide 1. consisting 2 objects only.

Check other tutorials at vatwist.wordpress.com
timeline Noticed that the character appears first before the text object?
even though we placed the text object in the canvas first, also they are on the same 2s mark?
Why is that?

Check other tutorials at vatwist.wordpress.com
timeline Here is why.
That slope filled space there is a fading entry starting at 1.5s. So it appears a fraction of a second earlier than the text object.

Check other tutorials at vatwist.wordpress.com
timelilne
Let’s make their entry more defined. Let’s put the character at 1 sec, fading in at .5sec.
Drag the “ ”

Check other tutorials at vatwist.wordpress.com
timeline
Then let’s make the character exit early also, cut down its appearance until 2s mark fade out at 2.5 sec.
Drag the “ ”

Check other tutorials at vatwist.wordpress.com
entry/exit effect Let’s change the entry and exit effect. While character is
selected. Click icon to make sure.
Then click enter effect icon.
Check other tutorials at vatwist.wordpress.com
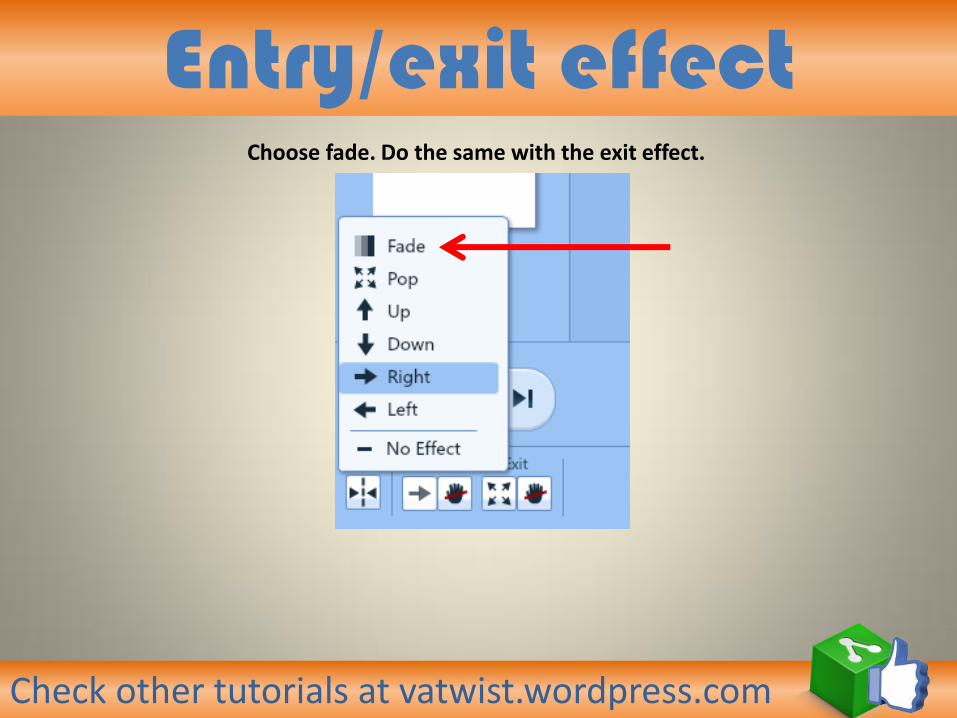
Entry/exit effect Choose fade. Do the same with the exit effect.

Check other tutorials at vatwist.wordpress.com
Entry/exit effect They should be like this.

Check other tutorials at vatwist.wordpress.com
timeline
Let’s put the text object entry 3 sec mark.
Drag the “ ”

Check other tutorials at vatwist.wordpress.com
timeline
Let’s cut the exit up to 5sec mark, fading out at 5.5sec mark.
Drag the “ ”

Check other tutorials at vatwist.wordpress.com
playback
Now, hit play from start.
Check other tutorials at vatwist.wordpress.com
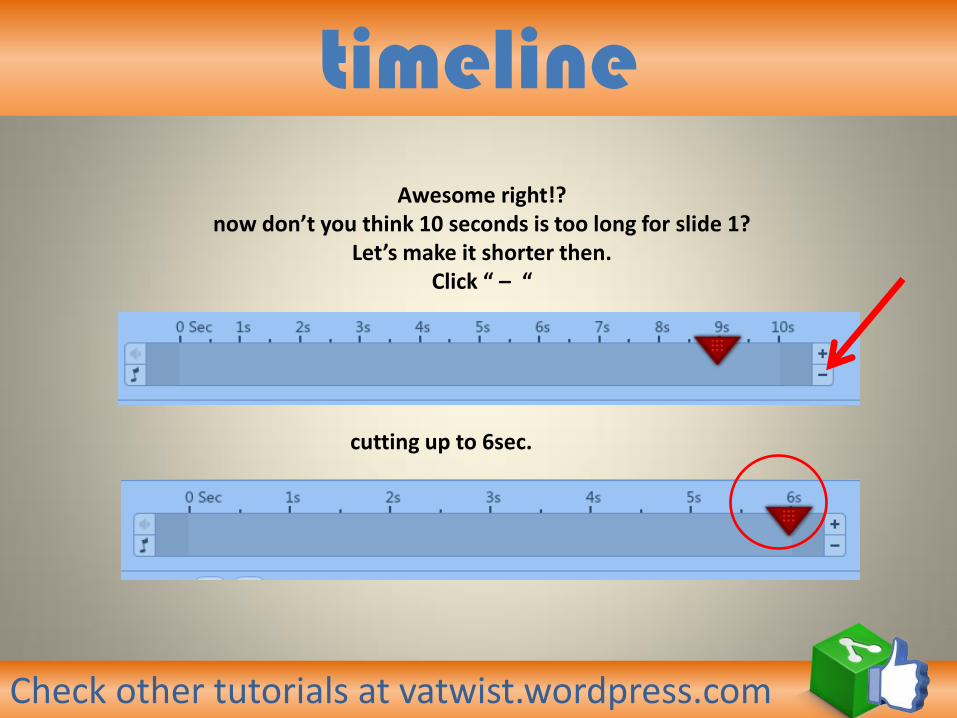
timeline Awesome right!?
now don’t you think 10 seconds is too long for slide 1? Let’s make it shorter then.
Click “ – “
cutting up to 6sec.
Check other tutorials at vatwist.wordpress.com
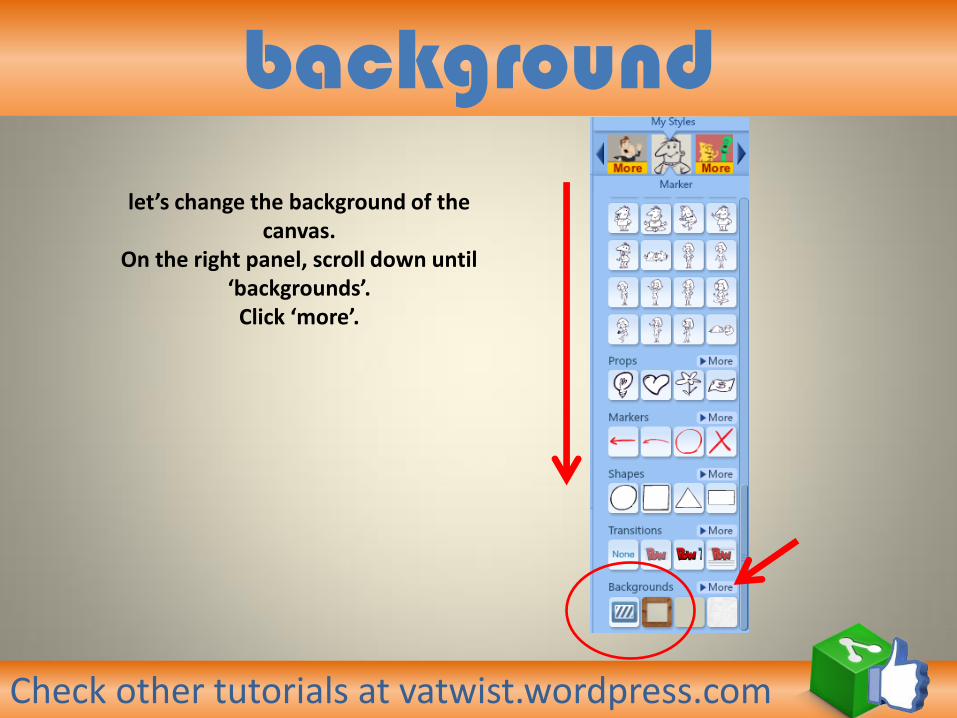
background let’s change the background of the
canvas. On the right panel, scroll down until
‘backgrounds’. Click ‘more’.

Check other tutorials at vatwist.wordpress.com
background
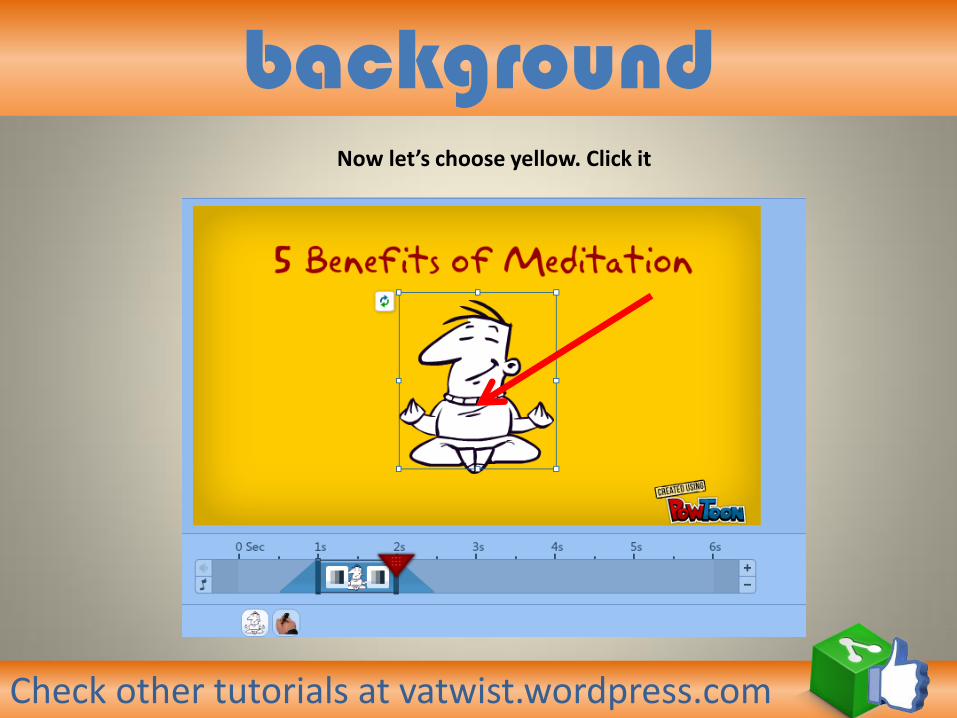
Now let’s choose yellow. Click it
Check other tutorials at vatwist.wordpress.com
background Now let’s choose yellow. Click it

Check other tutorials at vatwist.wordpress.com
transition
Let’s put a transition effect before going to slide 2.
On the right panel. Under ‘transition’ click ‘more’.

Check other tutorials at vatwist.wordpress.com
transition Let’s put a transition effect before going to slide 2.
On the right panel. Under ‘transitions’ click ‘zoom out’.

Check other tutorials at vatwist.wordpress.com
Slide 2
On the left panel. Click on slide 2.

Check other tutorials at vatwist.wordpress.com
background let’s change the background of the
canvas. On the right panel, scroll down until
‘backgrounds’. Click ‘more’.

Check other tutorials at vatwist.wordpress.com
background
Now let’s choose yellow. Click it
Check other tutorials at vatwist.wordpress.com
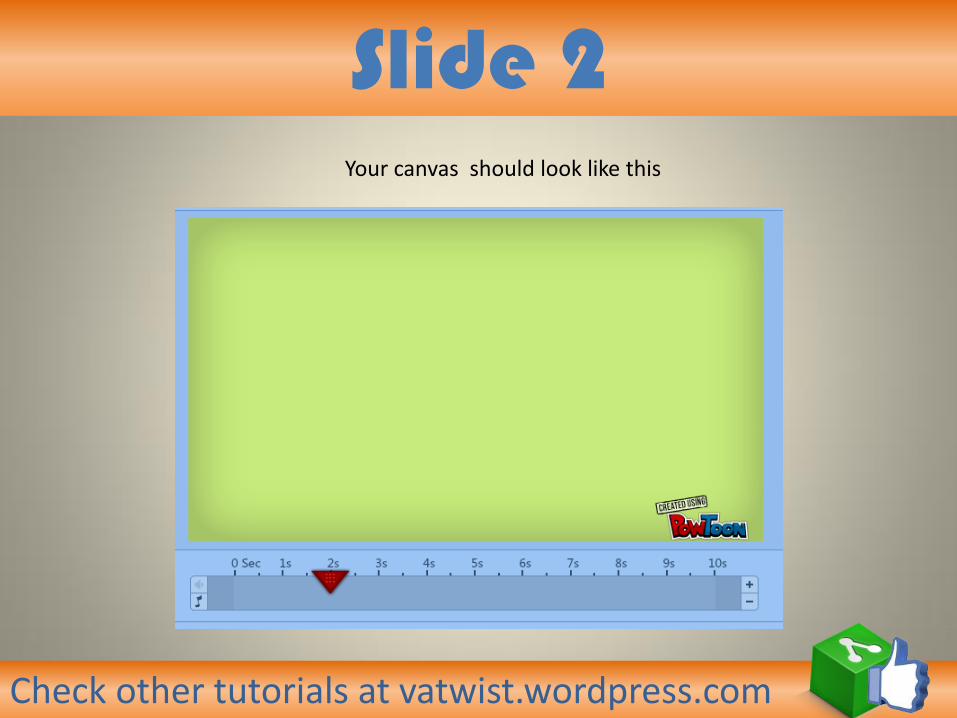
Slide 2 Your canvas should look like this

Check other tutorials at vatwist.wordpress.com
Text effects Let’s put a text object. On the right panel. Under text effect click ‘more’.

Check other tutorials at vatwist.wordpress.com
Text effects
Choose and click ‘Word scaling down’

Check other tutorials at vatwist.wordpress.com
Enter text

Check other tutorials at vatwist.wordpress.com
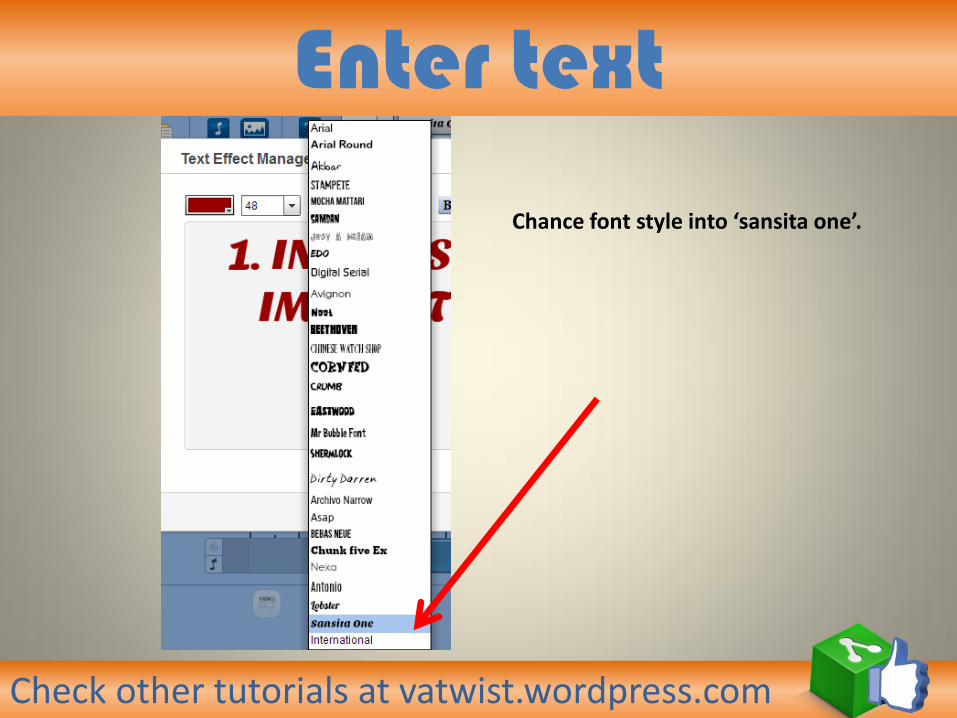
Enter text Type “1. INCREASED IMMUNITY”
Check other tutorials at vatwist.wordpress.com
Enter text
Chance font style into ‘sansita one’.

Check other tutorials at vatwist.wordpress.com
Enter text Click ‘apply’.

Check other tutorials at vatwist.wordpress.com
Enter text Drag into the desired place. At the center of the canvas.

Check other tutorials at vatwist.wordpress.com
Inserting image Now search for an image of your choice regarding immune system.
I’ll use this image. I’ve saved it in my computer.
Check other tutorials at vatwist.wordpress.com
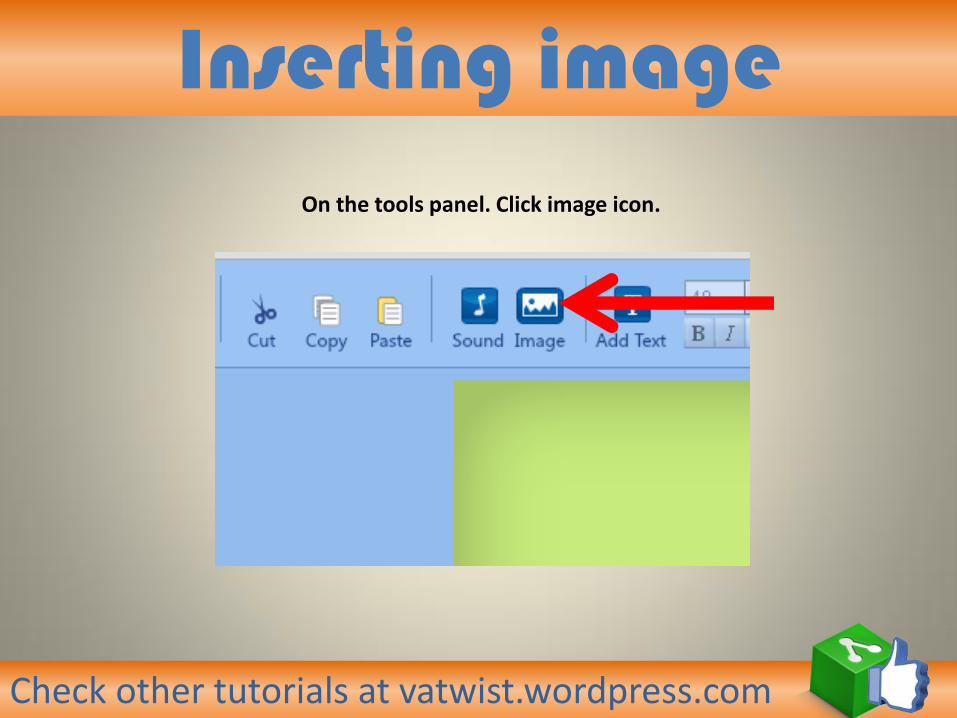
Inserting image On the tools panel. Click image icon.

Check other tutorials at vatwist.wordpress.com
Inserting image Image manager will pop up. Click ‘upload file’

Check other tutorials at vatwist.wordpress.com
Inserting image You can also search images on web to be uploaded. Click ‘web search’

Check other tutorials at vatwist.wordpress.com
Inserting image Click ‘apply’.
Check other tutorials at vatwist.wordpress.com
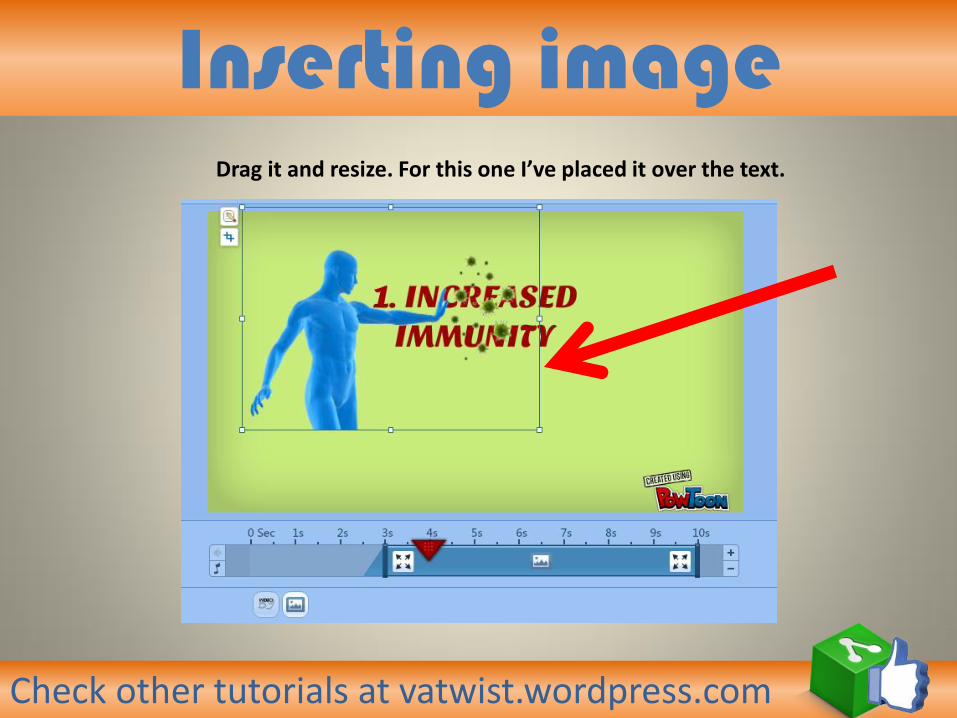
Inserting image Drag it and resize. For this one I’ve placed it over the text.
Check other tutorials at vatwist.wordpress.com
timeline
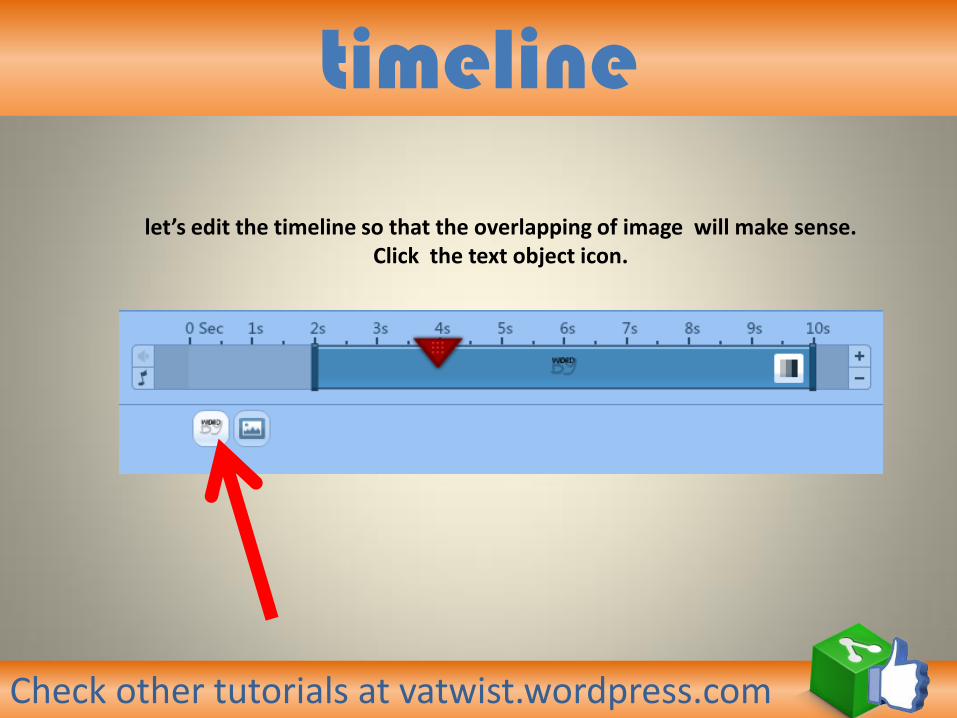
let’s edit the timeline so that the overlapping of image will make sense. Click the text object icon.

Check other tutorials at vatwist.wordpress.com
timeline
Let’s set the entry point of the text object to 0.5sec mark. Drag the “ “
Check other tutorials at vatwist.wordpress.com
timeline
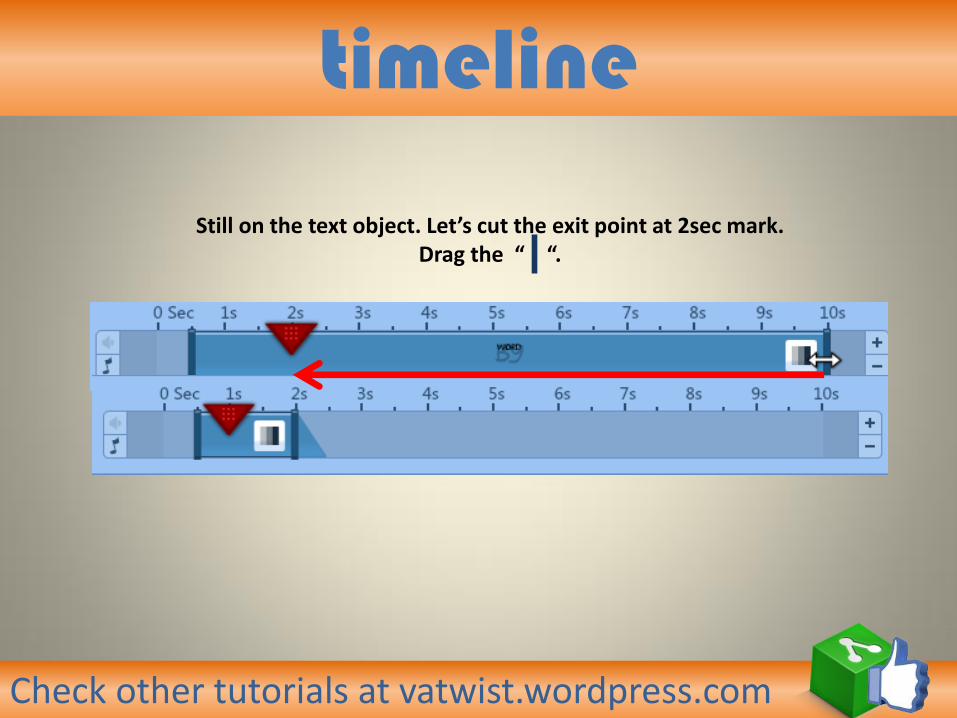
Still on the text object. Let’s cut the exit point at 2sec mark. Drag the “ “.

Check other tutorials at vatwist.wordpress.com
Exit effect Still on the text object. Click icon and select ‘right’

Check other tutorials at vatwist.wordpress.com
timeline
Timeline for the text object should look like this.

Check other tutorials at vatwist.wordpress.com
timeline
Next select the image. Click icon.

Check other tutorials at vatwist.wordpress.com
timeline
Let’s set the entry point to 3sec mark, fading in 1.5 sec. I guess it is set already to that setting
if not, kindly set. It should look like this.

Check other tutorials at vatwist.wordpress.com
Entry effect
Let’s change the entry effect to ‘right’. You can set it also by clicking the icon on the timeline.

Check other tutorials at vatwist.wordpress.com
Entry effect
It should now look like this.

Check other tutorials at vatwist.wordpress.com
timeline
Let’s cut the exit to 3.5 sec mark
Timeline should look like this

Check other tutorials at vatwist.wordpress.com
timeline
Check Change the entry and exit effect Image object’s entry and exit effects should be like this.

Check other tutorials at vatwist.wordpress.com
Text object Let’s put the number 2 benefit. On the right panel under text
effects, click ‘letters bouncing’.
Check other tutorials at vatwist.wordpress.com
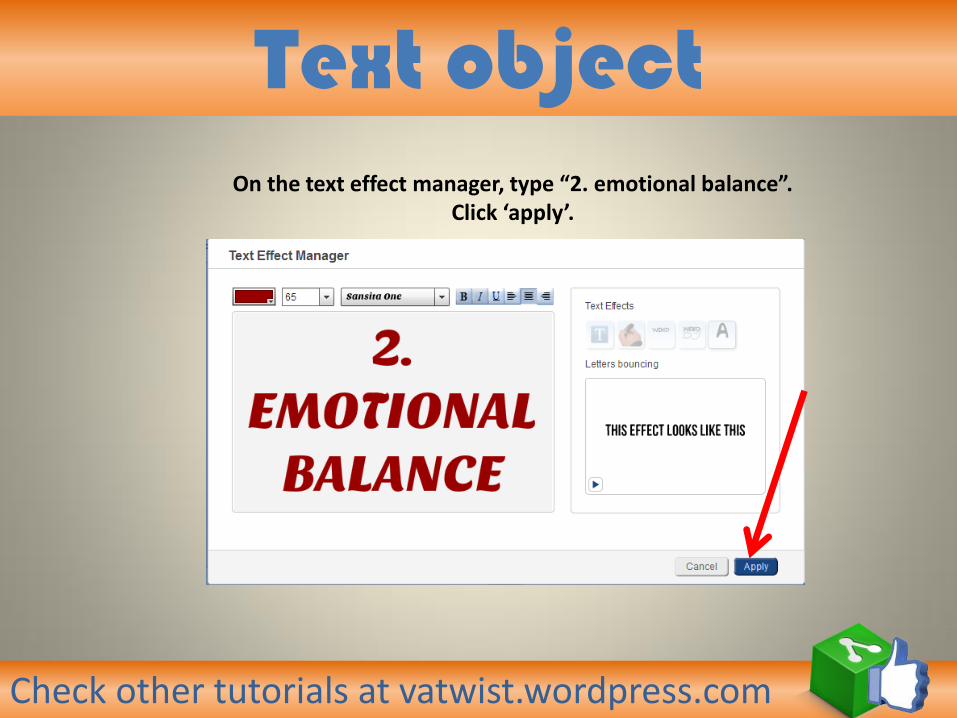
Text object On the text effect manager, type “2. emotional balance”.
Click ‘apply’.
Check other tutorials at vatwist.wordpress.com
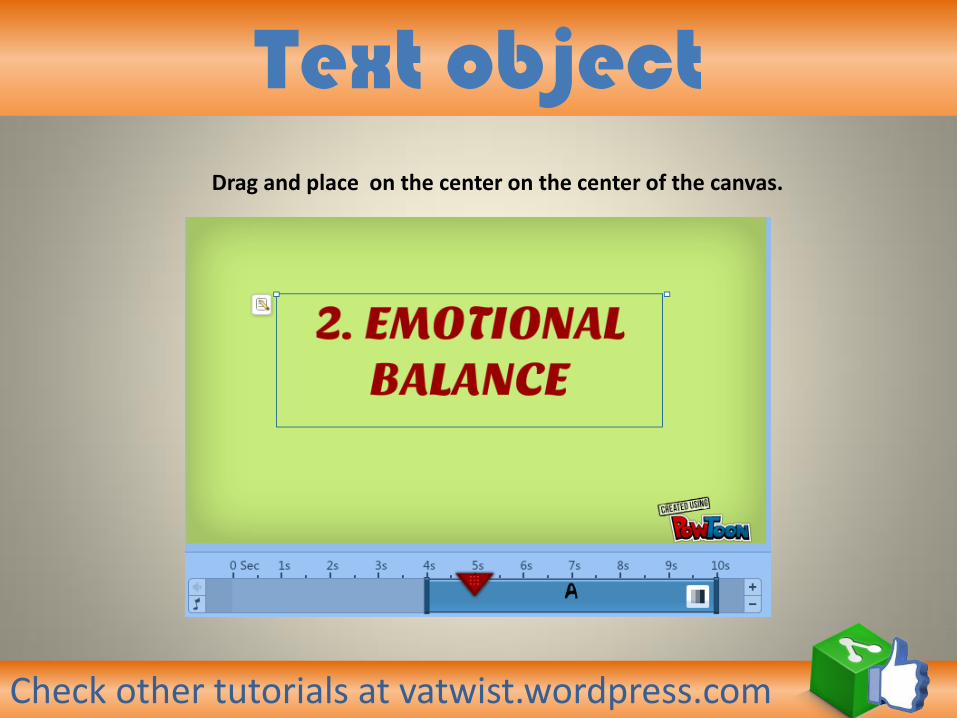
Text object Drag and place on the center on the center of the canvas.

Check other tutorials at vatwist.wordpress.com
Inserting image On the tools panel. Click image icon.

Check other tutorials at vatwist.wordpress.com
Inserting image Image manager will pop up. Click ‘upload file’
Check other tutorials at vatwist.wordpress.com
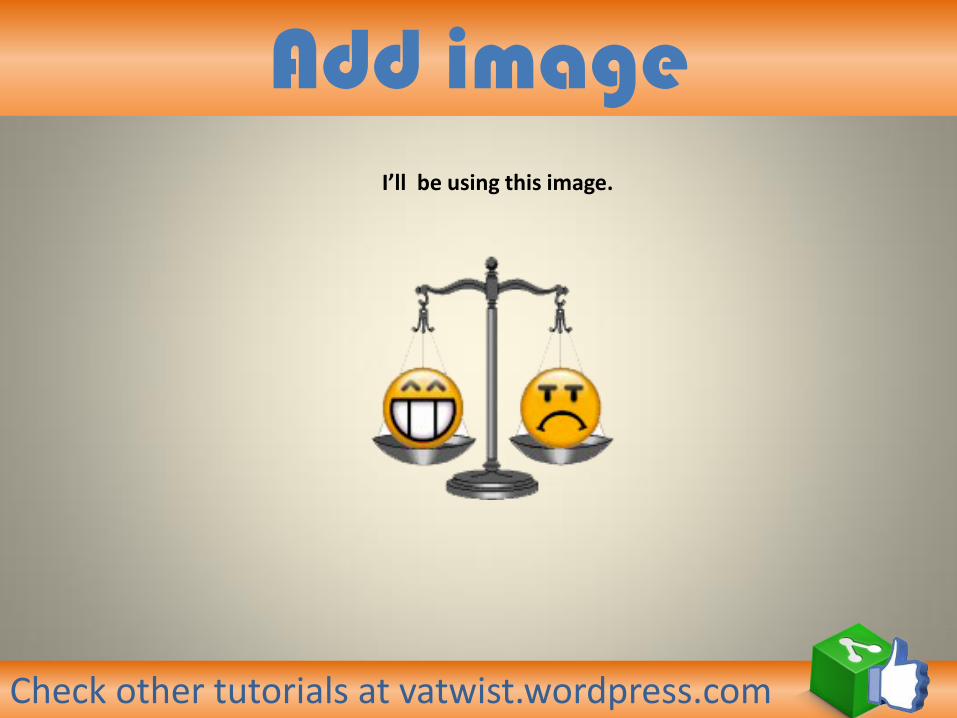
Add image I’ll be using this image.

Check other tutorials at vatwist.wordpress.com
Add image Click apply.
Check other tutorials at vatwist.wordpress.com
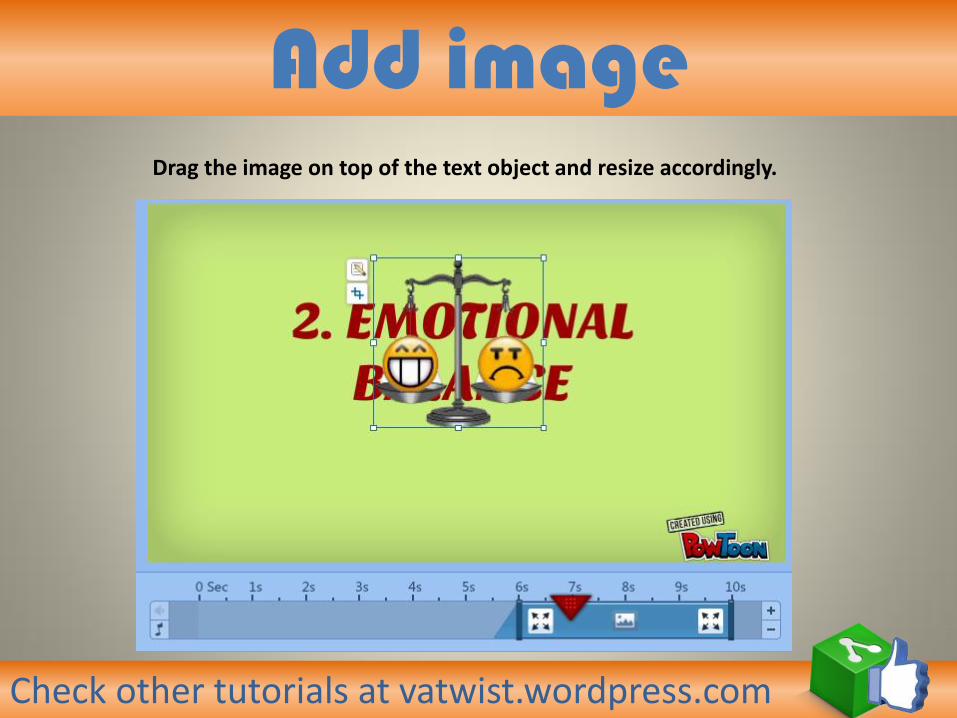
Add image Drag the image on top of the text object and resize accordingly.

Check other tutorials at vatwist.wordpress.com
timeline
By now, you know how to manage the timeline. Click the text object icon of the ‘2.’ item.

Check other tutorials at vatwist.wordpress.com
timeline
Set up the timeline of the text object and follow this settings. Entry point: 4s exit point: 6.5s
exit effect: down
Check other tutorials at vatwist.wordpress.com
timeline
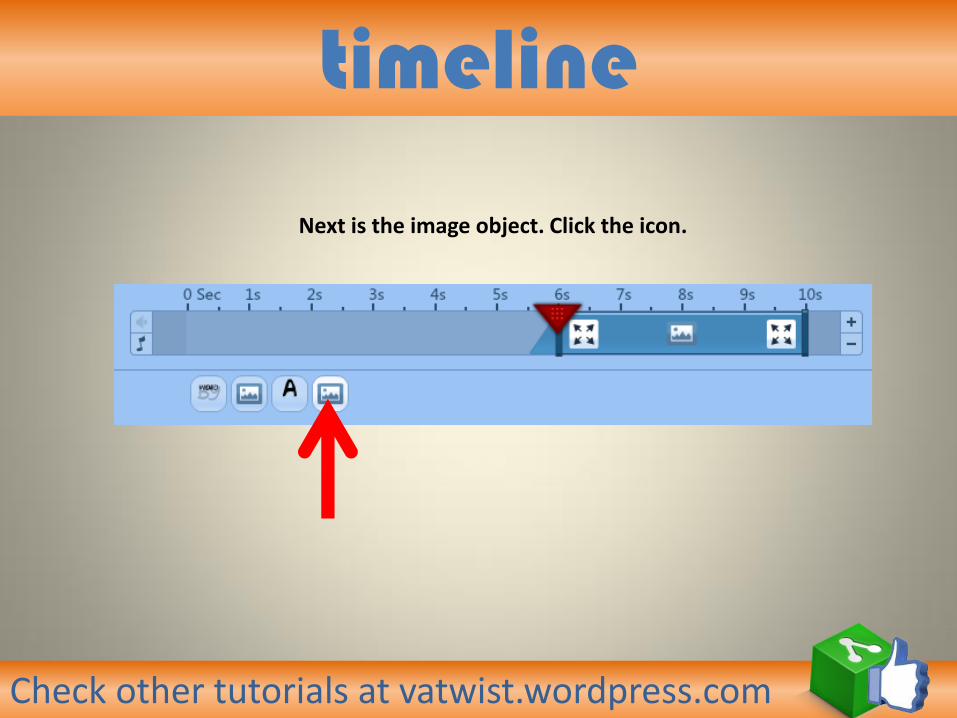
Next is the image object. Click the icon.

Check other tutorials at vatwist.wordpress.com
timeline
Set up the timeline of the image object and follow this settings. Entry point: 7s exit point: 8s
Entry and exit effects:
Check other tutorials at vatwist.wordpress.com
timeline
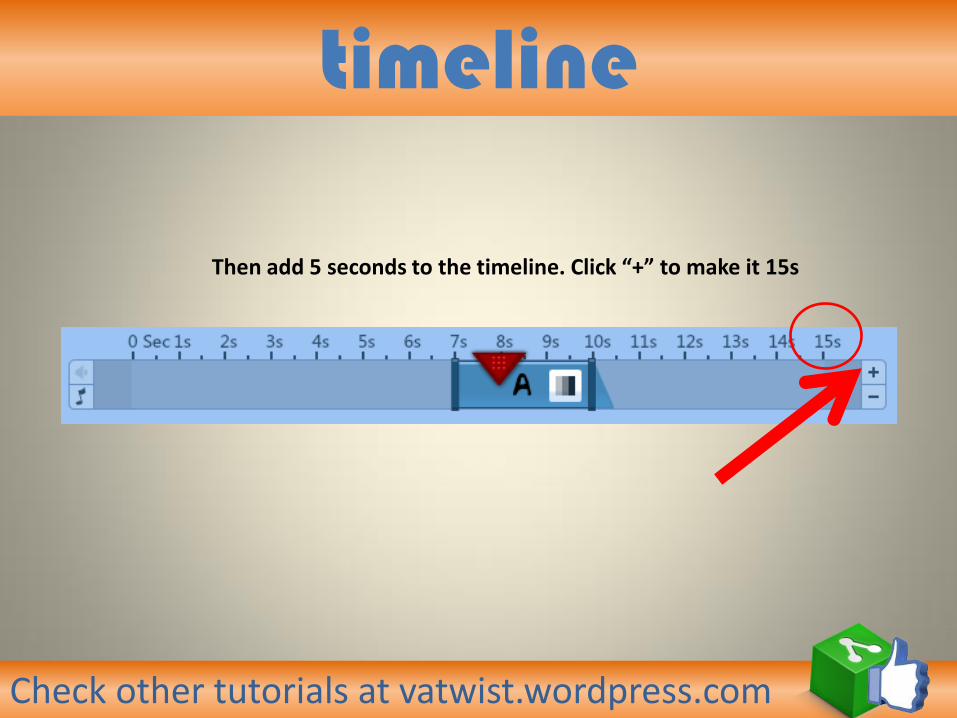
Then add 5 seconds to the timeline. Click “+” to make it 15s

Check other tutorials at vatwist.wordpress.com
Text object Next is the number 3 reason. On the right panel.
Under text effect click ‘letters rolling’.

Check other tutorials at vatwist.wordpress.com
Text object Place it again in the center. Ooops! Looks like I forgot to type “3.”
Click edit icon to go back to text manager and edit.

Check other tutorials at vatwist.wordpress.com
timeline
Let’s first set the timeline setting of the text object. Click the icon.

Check other tutorials at vatwist.wordpress.com
timeline Set up the timeline, following these settings:
Entry point: 8s exit point: 11s
exit effect: down

Check other tutorials at vatwist.wordpress.com
Insert image I’ll be using this image

Check other tutorials at vatwist.wordpress.com
Insert image
Place image at the center over the text. Resize accordingly.

Check other tutorials at vatwist.wordpress.com
timeline
Select the image object. Click the image icon.

Check other tutorials at vatwist.wordpress.com
timeline Let’s set the timeline settings. Follow these settings:
entry point: 11.5 s exit point: 12.5 s
Entry effect: down exit effect: fade

Check other tutorials at vatwist.wordpress.com
Text object
On the right panel. Under
text effects Click ’words fading’.

Check other tutorials at vatwist.wordpress.com
Text object Enter text “4. BETTER MEMORY”

Check other tutorials at vatwist.wordpress.com
timeline
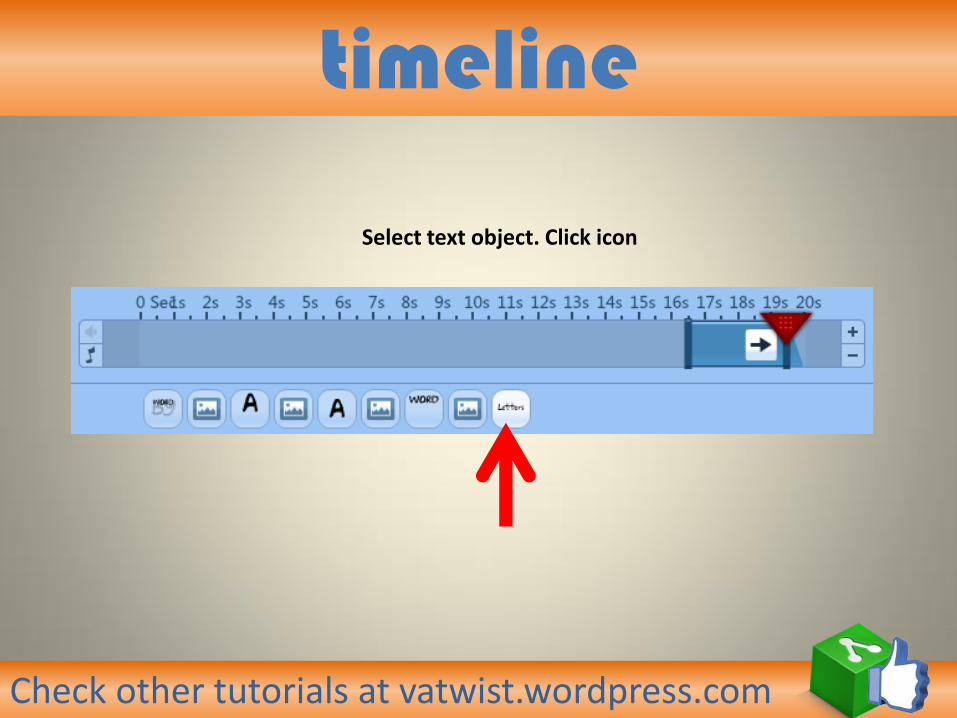
Select text object. Click icon.

Check other tutorials at vatwist.wordpress.com
timeline
Set the timeline settings to: Entry point: 13 s
exit point: 14.5 s
Exit effect: down hand swipe: enable by just clicking on the icon.

Check other tutorials at vatwist.wordpress.com
timeline
Add 5 seconds to the timeline to make it 20 s . Click ‘+’.

Check other tutorials at vatwist.wordpress.com
Insert image I’ll be using this image

Check other tutorials at vatwist.wordpress.com
Insert image Insert and place image. Resize accordingly.

Check other tutorials at vatwist.wordpress.com
timeline
Select the image object. Click image icon.

Check other tutorials at vatwist.wordpress.com
timeline Set the timeline settings to:
Entry point: 15s exit point: 16s
Entry effect: down; swipe hand enabled exit effect: pop

Check other tutorials at vatwist.wordpress.com
Text object On the right panel. Under text effects. Click ‘letters appearing’.

Check other tutorials at vatwist.wordpress.com
Text object Type and enter text “5. MORE CREATIVITY”.
Check other tutorials at vatwist.wordpress.com
timeline
Select text object. Click icon
Check other tutorials at vatwist.wordpress.com
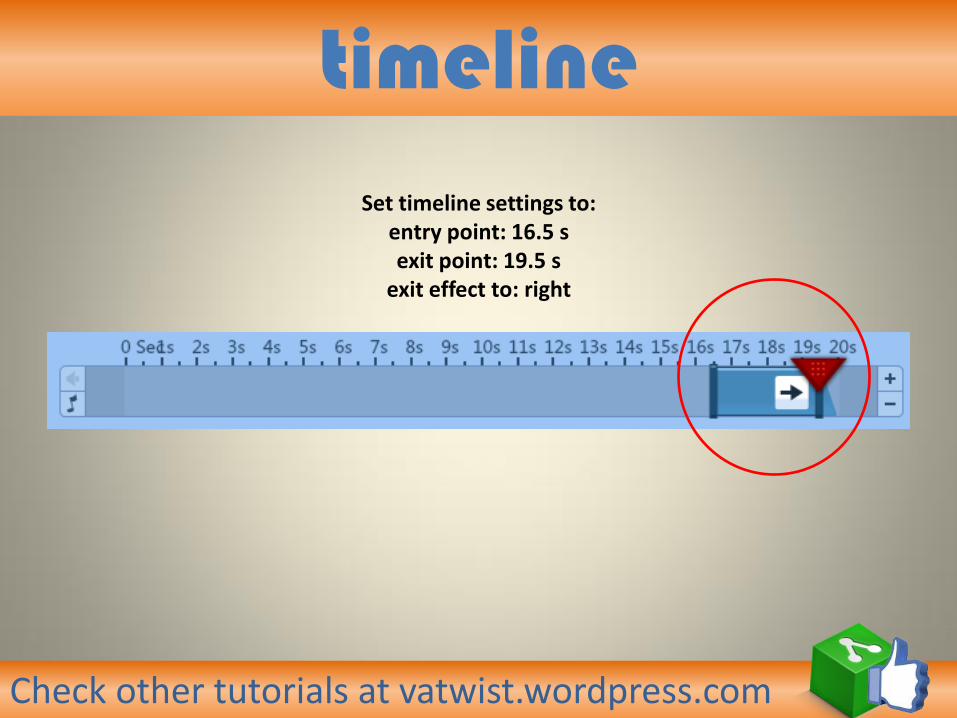
timeline Set timeline settings to:
entry point: 16.5 s exit point: 19.5 s
exit effect to: right

Check other tutorials at vatwist.wordpress.com
transition On the right panel, under transition. Click “roller”

Check other tutorials at vatwist.wordpress.com
3rd slide
On the left panel. Click 3rd slide

Check other tutorials at vatwist.wordpress.com
Background image
Change background. This time a photo upload. Click image icon.

Check other tutorials at vatwist.wordpress.com
Background image I’ll be using this image
Check other tutorials at vatwist.wordpress.com
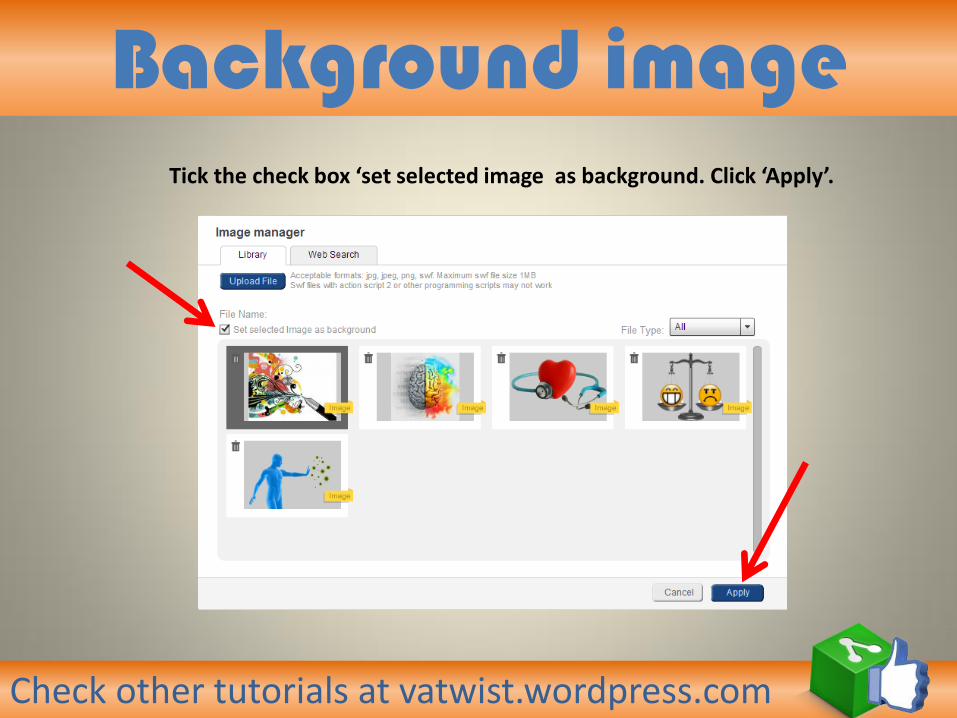
Background image Tick the check box ‘set selected image as background. Click ‘Apply’.

Check other tutorials at vatwist.wordpress.com
Background image
Slide 3 should look like this.
Check other tutorials at vatwist.wordpress.com
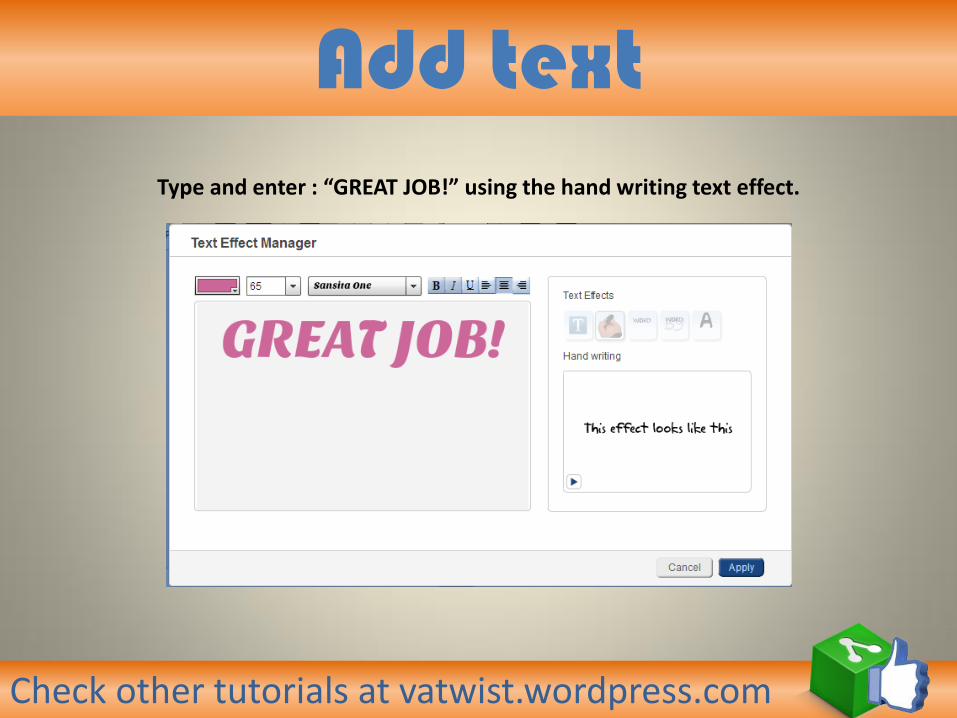
Add text Type and enter : “GREAT JOB!” using the hand writing text effect.

Check other tutorials at vatwist.wordpress.com
Add text Place it on middle right corner.

Check other tutorials at vatwist.wordpress.com
timeline Click on the text icon. Set timeline to:
entry point: 0.5 s exit point: 4s
exit effect: no effect “-”
Also cut down the timeline to 4s. Click ‘-’ to delete second

Check other tutorials at vatwist.wordpress.com
Save
We are done. Click ‘save’ to save work
Check other tutorials at vatwist.wordpress.com
preview
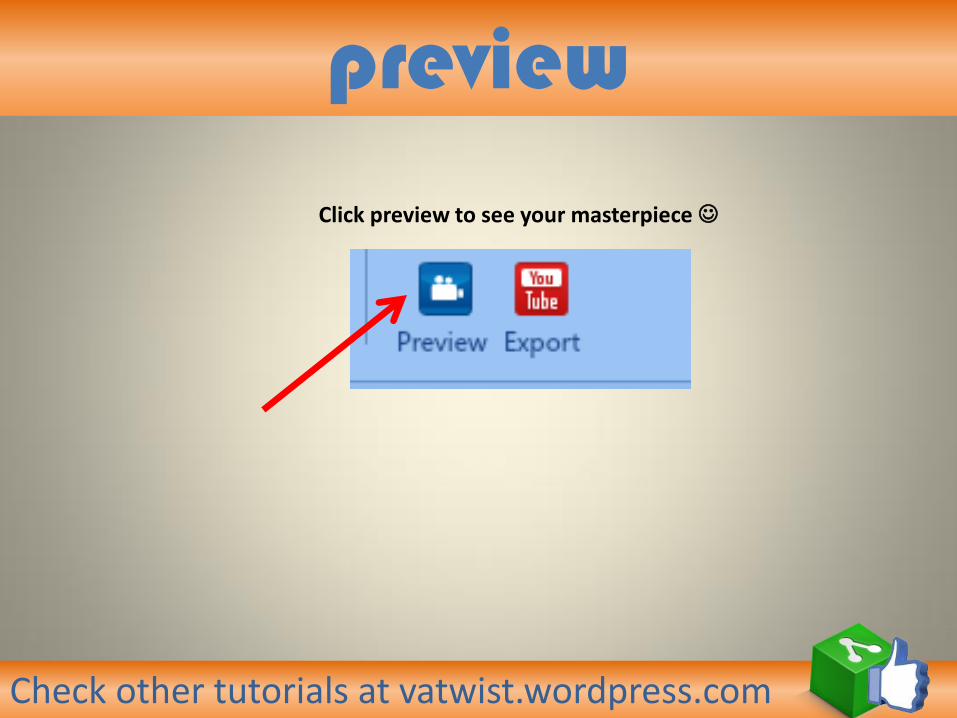
Click preview to see your masterpiece

Check other tutorials at vatwist.wordpress.com
End You are officially awesome!
I hope you had an awesome time creating awesomeness
Stay updated for more awesome tutorials.
Please like and share it.
Thank you.