How to Use Awesome Screenshot
62
HOW TO USE AWESOME SCREENSHOT
-
Upload
charmainne-alonzo -
Category
Education
-
view
43 -
download
5
Transcript of How to Use Awesome Screenshot

HOW TO USE AWESOME
SCREENSHOT

Open Chrome browser

Go to www.chrome.google.com/webstore
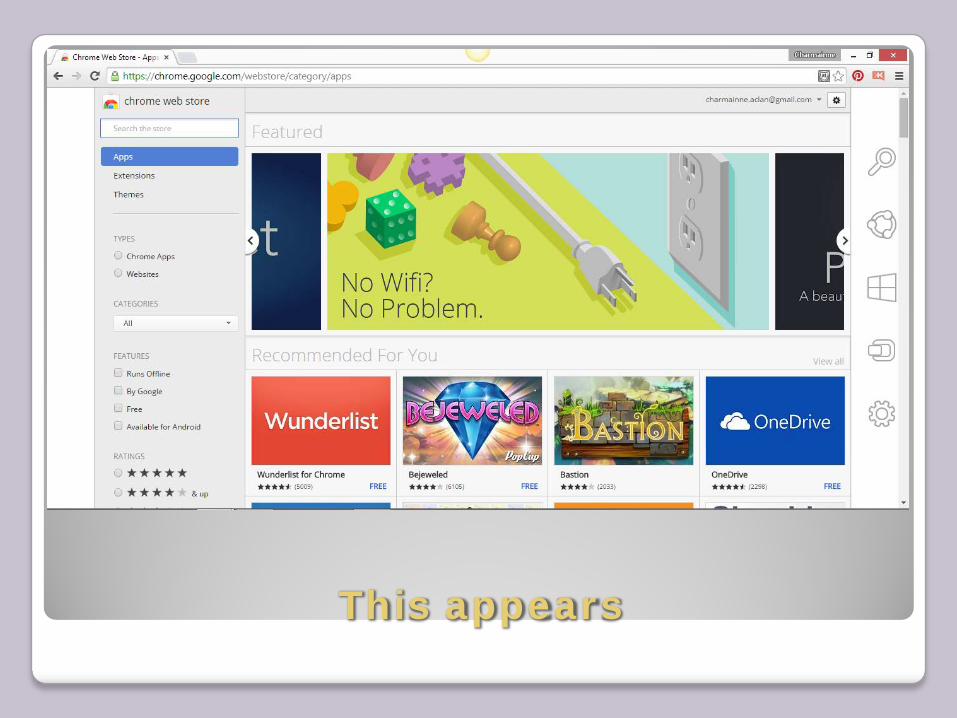
This appears

Go to the search bar

Type in “Awesome Screenshot”

Press “Enter”
enter

This appears

Click “+ FREE” on Awesome Screenshot: Capture & Annotate

To add this extension, click “Add”

Awesome screenshot website opens

You can see the extension added at the upper right of browser

Click the extension icon

This appears

To capture visible part of page
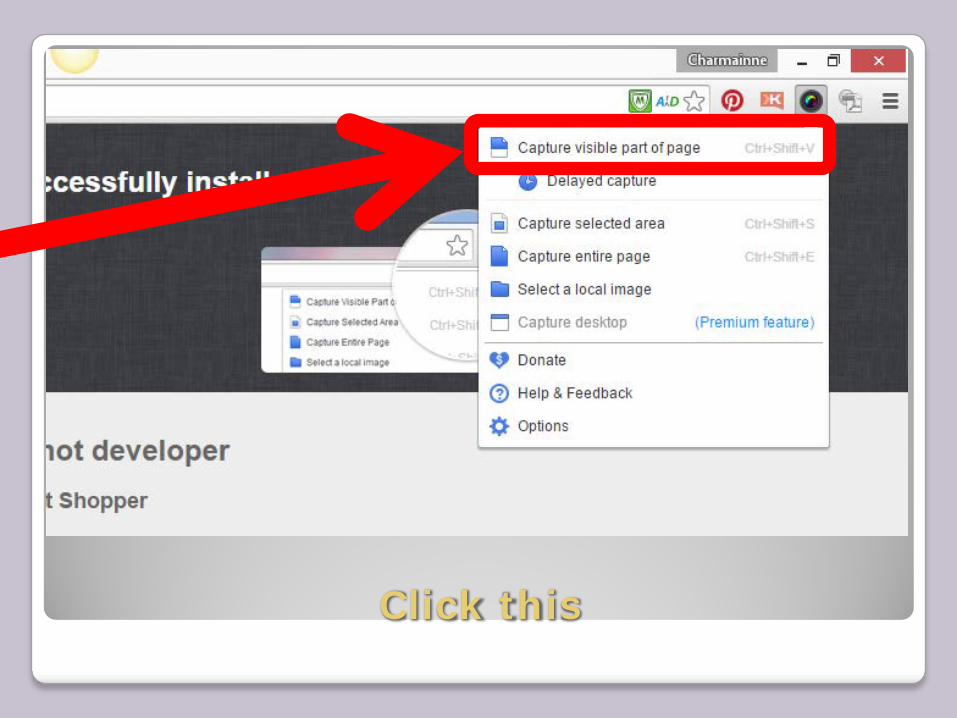
Click this

To capture selected area

Click this

To capture entire page

Click this
To see the screenshot of the entire page
you can scroll from top to bottom

To select image from your computer

Click this

After capturing your desired part of the page

New window appears

You can see a toolbar shows at the top of the page
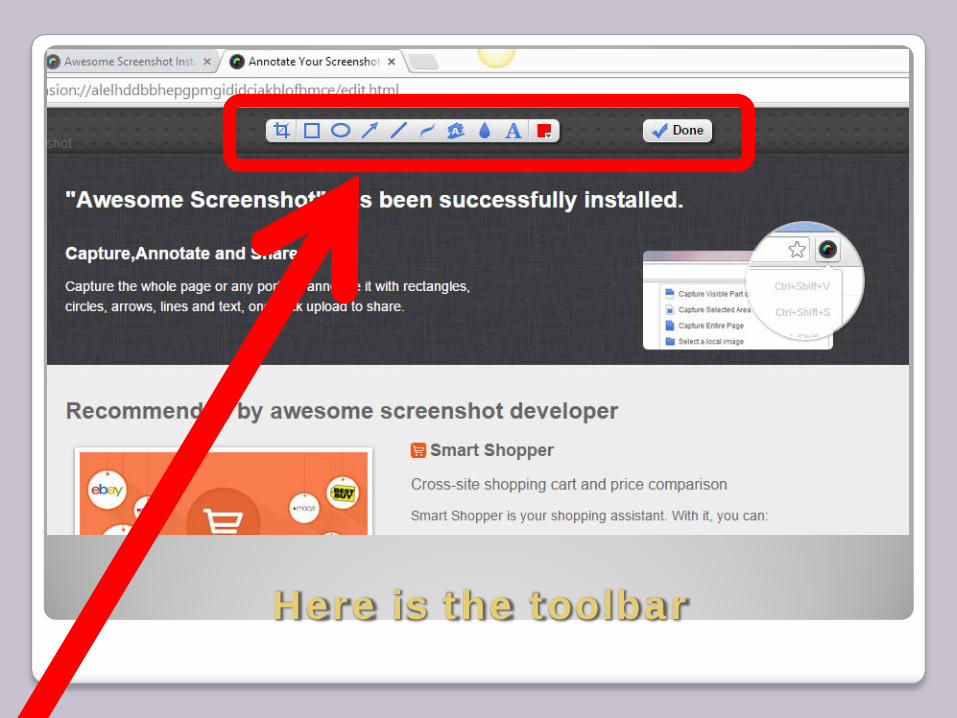
Here is the toolbar

This allows you to crop

Annotate with rectangle
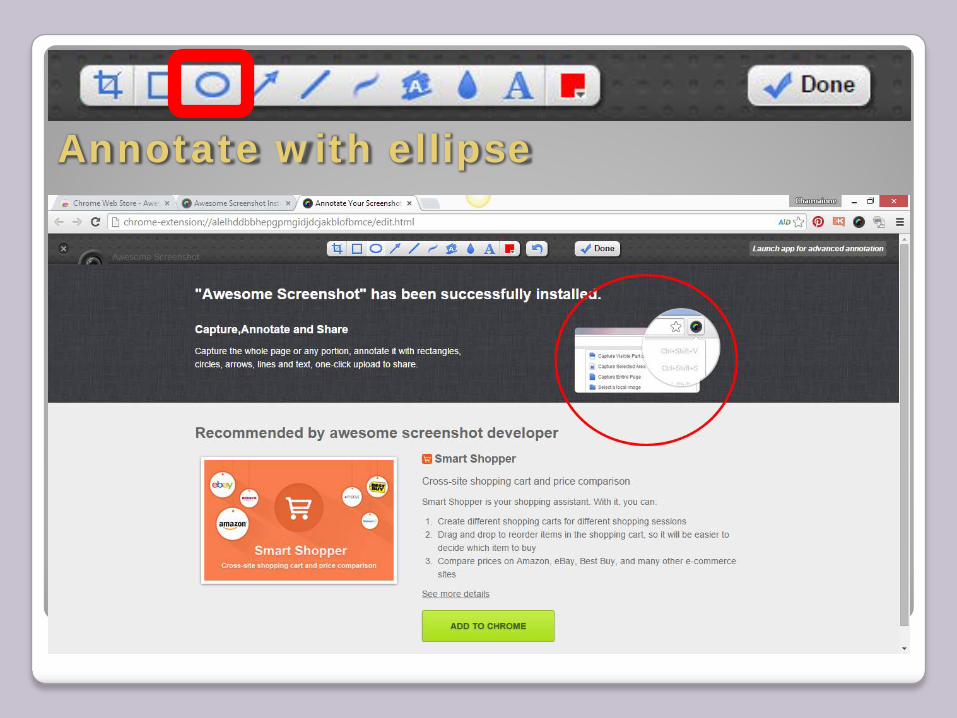
Annotate with ellipse

You can highlight things with arrow

Annotate with straight line

You can use free form line

You can use brush tool to highlight text or image
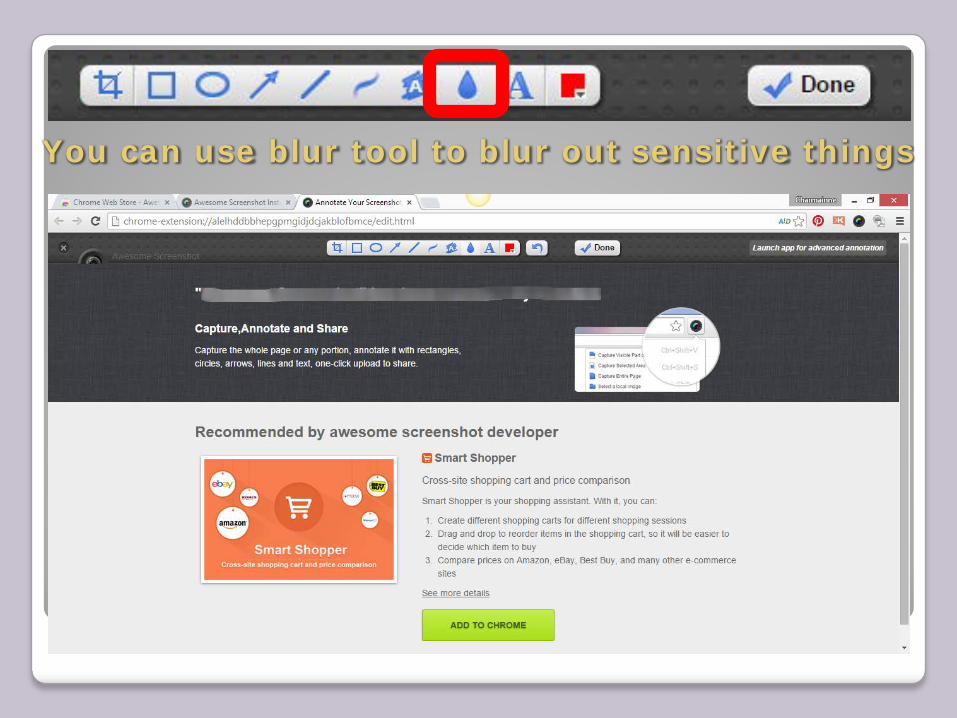
You can use blur tool to blur out sensitive things

You can add text

You can change the color of your annotation

You can change the color of your annotation

If you don’t like any of something that you’ve done

You can click Undo icon
If you you’re done capturing and annotating

Click “Done”

This appears

You can save it online “Temporarily”
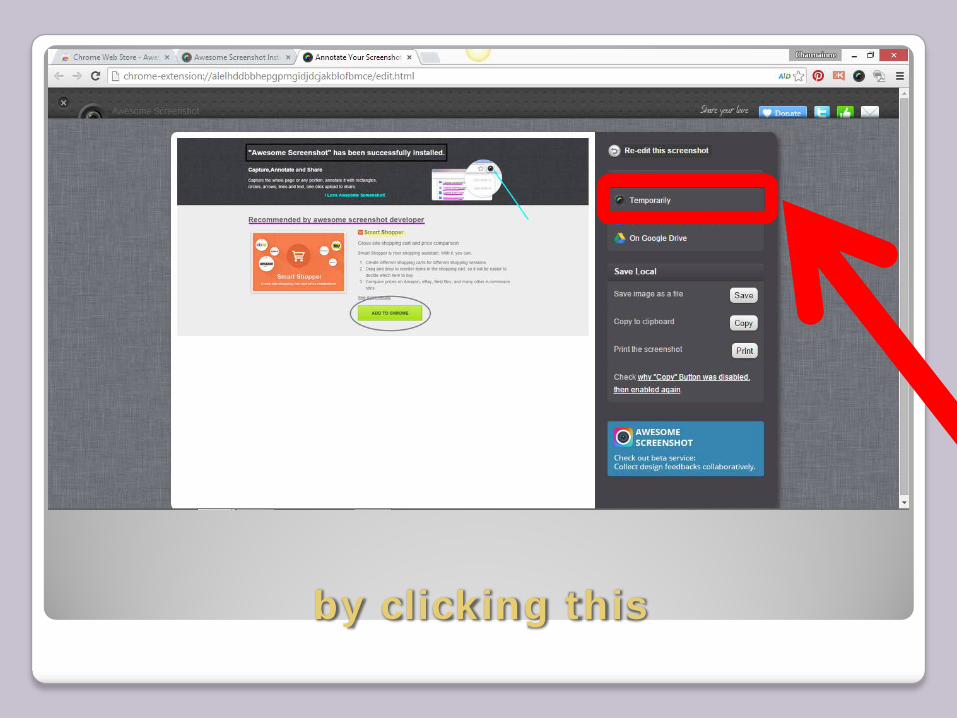
by clicking this

And clicking “Save”

You can save it online “Permanently”
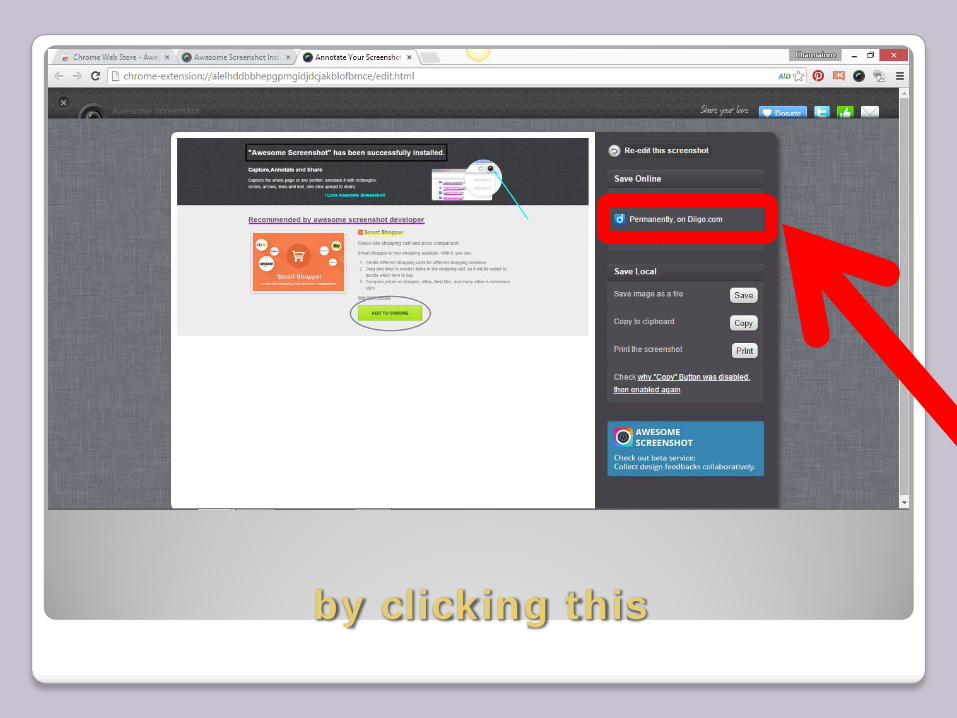
by clicking this
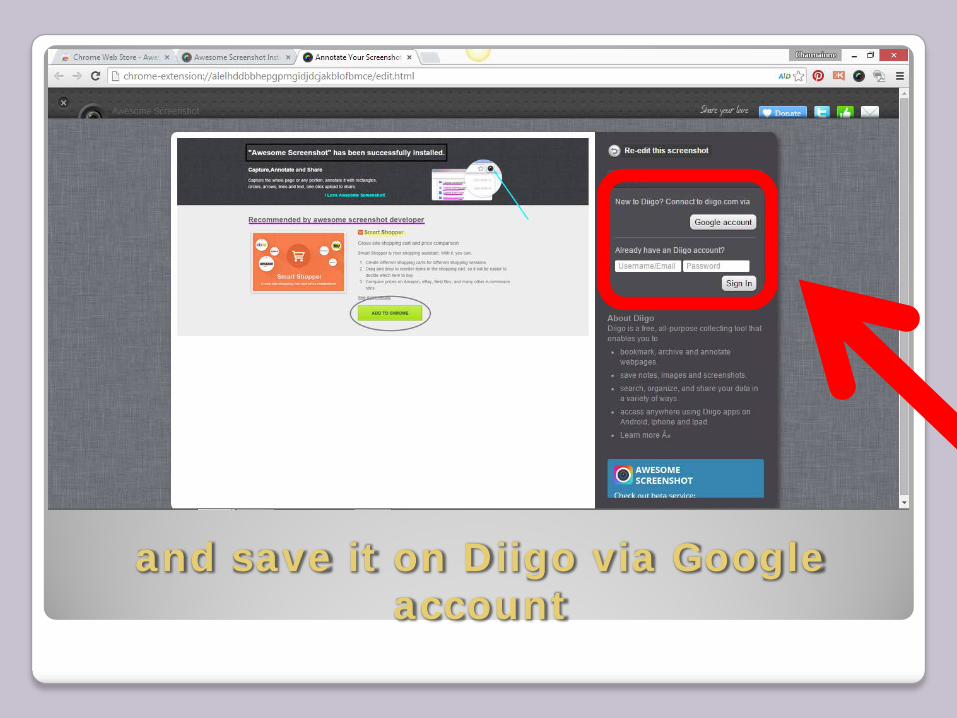
and save it on Diigo via Google account
You can save it on Google Drive

by clicking this

and by connecting on Google drive and saving on it

You can save it on your computer

by clicking “Save”
You can copy to clipboard

by clicking “Copy”

You can print the screenshot

by clicking “Print”

And here is your saved screenshot using Awesome Screenshot


Hope you enjoy the tutorial.
Visit www.GreatVirtualAssistant.wordpress.com
for more tutorials