How to Grow Single Crystals for X-ray Analysis by · PDF fileHow to Grow Single Crystals for...
18
(This is a part of the booklet. If you would like to have a complete booklet, which also includes crystallisation from a drop and by vapour diffusion, please, contact the author on [email protected] ) How to Grow Single Crystals for X-ray Analysis by Solution Crystallisation Olga Chetina Chemistry department, Durham University
-
Upload
hoangthien -
Category
Documents
-
view
219 -
download
1
Transcript of How to Grow Single Crystals for X-ray Analysis by · PDF fileHow to Grow Single Crystals for...

(This is a part of the booklet. If you would like to have a complete booklet, which also includes crystallisation from a drop and by vapour diffusion, please, contact the author on [email protected])
How to Grow Single Crystals for X-ray Analysis by Solution Crystallisation Olga Chetina Chemistry department, Durham University
1
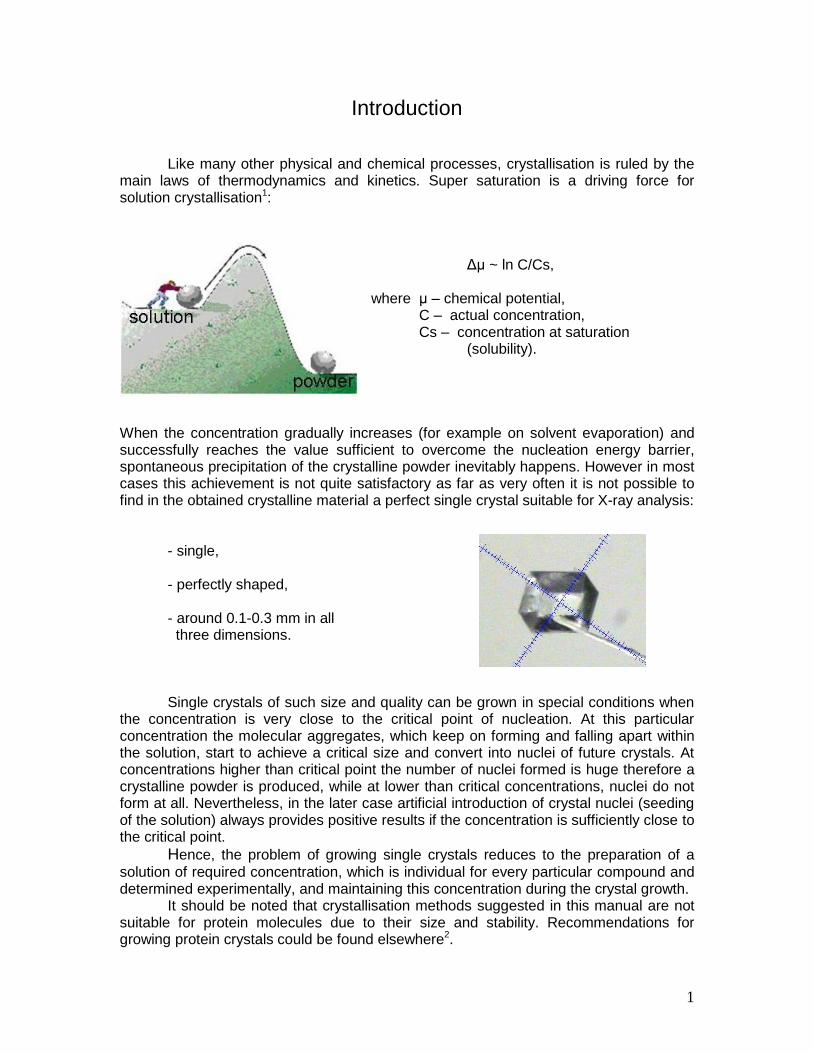
Introduction Like many other physical and chemical processes, crystallisation is ruled by the main laws of thermodynamics and kinetics. Super saturation is a driving force for solution crystallisation1:
Δμ ~ ln C/Cs, where μ – chemical potential, C – actual concentration, Cs – concentration at saturation (solubility).
When the concentration gradually increases (for example on solvent evaporation) and successfully reaches the value sufficient to overcome the nucleation energy barrier, spontaneous precipitation of the crystalline powder inevitably happens. However in most cases this achievement is not quite satisfactory as far as very often it is not possible to find in the obtained crystalline material a perfect single crystal suitable for X-ray analysis: - single, - perfectly shaped,
- around 0.1-0.3 mm in all three dimensions.
Single crystals of such size and quality can be grown in special conditions when the concentration is very close to the critical point of nucleation. At this particular concentration the molecular aggregates, which keep on forming and falling apart within the solution, start to achieve a critical size and convert into nuclei of future crystals. At concentrations higher than critical point the number of nuclei formed is huge therefore a crystalline powder is produced, while at lower than critical concentrations, nuclei do not form at all. Nevertheless, in the later case artificial introduction of crystal nuclei (seeding of the solution) always provides positive results if the concentration is sufficiently close to the critical point.
Hence, the problem of growing single crystals reduces to the preparation of a
solution of required concentration, which is individual for every particular compound and determined experimentally, and maintaining this concentration during the crystal growth. It should be noted that crystallisation methods suggested in this manual are not suitable for protein molecules due to their size and stability. Recommendations for growing protein crystals could be found elsewhere2.

2
Frequently asked questions Practical approach to the problem of growing single crystals usually causes the following questions: 1. What solvent to use? 2. What crystallisation method is the best? 3. What amount of compound is required? 4. What sort of vessel is suitable? The answer to the first question is rather simple and obvious: the most suitable is a solvent, boiling at temperatures within the range of 60-100oC, in which the compound is medium soluble and produces three-dimensional crystals. Since the crystal habit (shape of the crystals) is mostly determined by the nature of the compound and rarely changes depending on the solvent used, the later condition is not essential. In the case of two-dimensional (plate) or one-dimensional (needle) crystals in order to achieve the right size in all three dimensions a larger single crystal has to be grown. Then a carefully cut part of it can be used for X-ray analysis. While choosing a solvent suitable for crystallisation it is recommended to try solvents of different properties: polar and nonpolar, protic and aprotic. The following set of solvents might be recommended to start with: ethanol, acetone, acetonitrile, toluene, water. Sometimes the habit of future single crystals can be determined by placing a drop of the solution on a microscope slide or a watch glass and examination of it under microscope after the solvent evaporation.
All the different sorts of crystallisation methods described in the literature intend to provide the same basic procedure - a very slow approach to the concentration of the solution to reach the critical point of nucleation. However every particular compound usually has some preferable crystallisation methods related to its molecular structure as well as physical and chemical properties. In this manual we recommend the most simple and fast methods of the critical point achievement appropriate for the majority of materials able to crystallise. As far as the size of a single crystal suitable for X-ray analysis should not exceed 0.5 mm, the amount of compound required for growing it may be very small and mostly depends on the solubility of the compound. Various impurities present in the compound may essentially complicate or even prevent crystallisation process. Therefore special
3
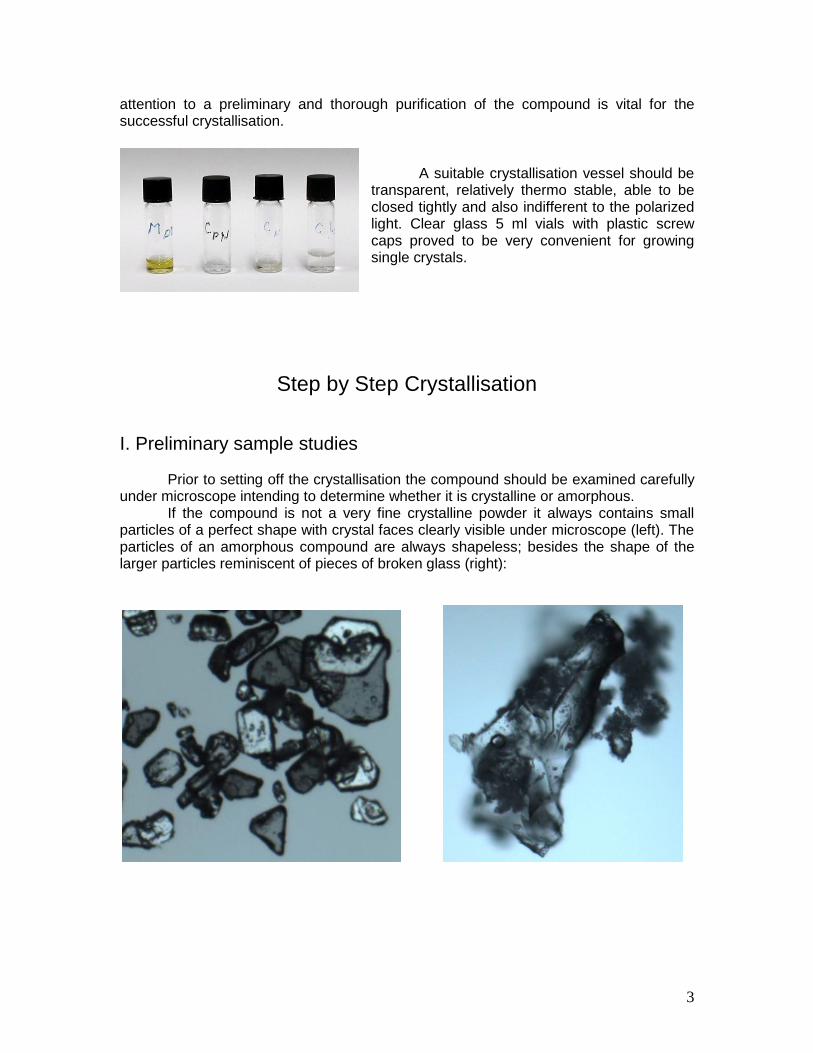
attention to a preliminary and thorough purification of the compound is vital for the successful crystallisation.
A suitable crystallisation vessel should be transparent, relatively thermo stable, able to be closed tightly and also indifferent to the polarized light. Clear glass 5 ml vials with plastic screw caps proved to be very convenient for growing single crystals.
Step by Step Crystallisation
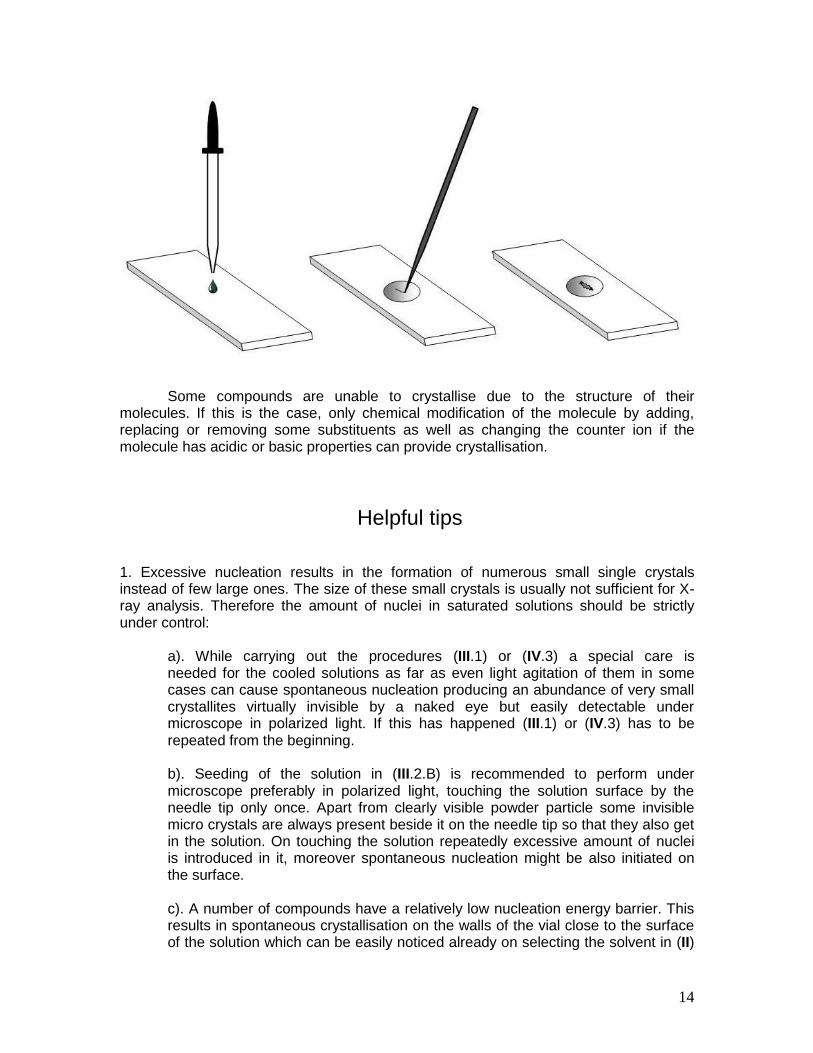
I. Preliminary sample studies Prior to setting off the crystallisation the compound should be examined carefully under microscope intending to determine whether it is crystalline or amorphous. If the compound is not a very fine crystalline powder it always contains small particles of a perfect shape with crystal faces clearly visible under microscope (left). The particles of an amorphous compound are always shapeless; besides the shape of the larger particles reminiscent of pieces of broken glass (right):

4
Moreover the majority of crystals are able to shine in polarised light3, 4. Some crystals the structure of which belongs to the cubic crystal system, for example sodium chloride (right), are indifferent to polarized light similar to amorphous compounds.
In the form of a very fine powder amorphous (right) and crystalline (left) materials look virtually identical in polarized light. However the glowing of a fine amorphous powder provided by the light reflection by its particles completely disappears if soaked by a solvent in which it is moderately soluble.
If the compound is definitely crystalline you may begin to select a suitable solvent according to II. Otherwise it should be preliminary converted into crystalline powder using methods described in V. While choosing the crystallisation method one should take into consideration the thermal stability of the compound. If it is not stable over 50oC the method described in IV is recommended.

5
II. Solvent selection
II.1. Place approximately the same amount of compound in several vials:
II.2. Add different solvents in similar amounts to all the vials and leave them to stay for
several minutes agitating the mixtures from time to time by shaking or stirring:

6
II.3. Potential results:
A
Choose a vial in which the amount of compound has decreased approximately by half (shown in the middle) and go to (III).
B
The compound has dissolved completely in all the vials. Return to (II.2) adding a little bit more of compound in every vial or using another set of solvents.

7
C
The compound has not dissolved visibly in all the vials. Return to (II.2) adding a little bit more of solvent in every vial or using another set of solvents.
D
Choose the vial shown on the left or in the middle and go to (IV) using the solvent of the vial shown on the right as an antisolvent.

8
III. The first method III.1. Heat the vial with a mixture produced in (II.3.A) close to the boiling point using a thermo controlled hot plate or a water bath. Shake up the vial and heat it again to the same temperature. Then close the vial tightly and cool it down to room temperature.
III.2. Potential results:
A
After cooling several very small particles By morning single crystals suitable of the original crystalline powder are seen for X-ray analysis will grow from at the bottom of the vial. Make sure that the these particles. If they are smaller in vial is closed tightly and leave it for a night. size than necessary leave the vial tightly closed for another 2-3 days.

9
B
The compound has dissolved Introduce a small particle of the original completely. crystalline powder in the solution on a needle tip.
Close the vial tightly and leave By morning a single crystal suitable for it for a night. X-ray analysis will grow from this particle. If it is smaller in size than necessary leave the vial tightly closed for another 2-3 days. In some cases the crystals fail to achieve the required size during prolonged standing. If this happens evaporate a small part of the solvent by opening the vial for 1 - 2 hours or add a small amount of original compound. After that return back to (III.1).

10
C
After heating a small amount of original Add a drop of solvent and return crystalline powder has been left at the back to (III.1). bottom of the vial and produced some crystals on cooling.
IV. The second method IV.1. Prepare a solution of the crystalline compound using a solvent in which it is well soluble. Add a drop of solvent in which it is low soluble or insoluble (antisolvent) and shake up the vial.

11
IV.2. Potential results:
A B C
(A) – The solution is absolutely transparent. Add another drop of antisolvent and shake up the vial. Continue until the result B is achieved. (B) – The solution is translucent. Go to (IV.3). (C) – A lot of small crystals appeared making the solution opaque. Add one drop of solvent and shake up the vial. Continue until the result B is achieved. IV.3. Heat the vial with the mixture upto the temperature within 40-50oC using a thermo controlled hot plate or a water bath, close the vial tightly and cool down to room temperature. a). If the solution remains transparent after cooling move on to seeding procedure according to (III.2.B). b). Otherwise add one drop of solvent. If the solution became transparent go to (III.2.B). If the solution is still translucent heat it again and cool down to room temperature according to (IV.3). Repeat the procedure once more if the solution became translucent on cooling.
V. How to deal with amorphous samples The amorphous state is less thermodynamically favourable compared to the crystalline state. Therefore amorphous compounds are produced in the conditions when precipitation is kinetically faster than crystallisation, for example on flash cooling of melt or high oversaturation of the solution on rapid solvent evaporation. If the compound has been obtained in these conditions, it is relatively easy to transform it from amorphous into crystalline state by using common recrystallisation methods and a suitable solvent. However the solvent characteristics in this case are different than those mentioned in (I). In amorphous state the same materials are always more soluble than in crystalline. Consequently any solvent in which the compound is well soluble in amorphous state while in crystalline one it is low soluble or insoluble, might be

12
suitable for crystallisation. In order to choose the right solvent go to (V.1) trying to achieve the result (V.1.1). V.1. Place a small amount of compound in a clear glass vial and soak it by a solvent. Watch under microscope in polarised light what is happening with the compound on solvent addition: a). The compound starts shining. Recrystallise the compound from this solvent and then go to (II). b). The compound does not change. Repeat (V.1) using another solvent. c). The compound dissolves. Repeat (V.1) using another solvent. Crystallisation process can be essentially slowed down in the presence of different sorts of impurities in the material. Therefore if the result (V.1.1) has not been achieved with many solvents try to purify the compound more thoroughly using common purification methods. After that return to (V.1). High nucleation energy barrier may also complicate the crystallisation process and in some cases introduction of additional energy into the system helps to overcome it. So if the result (V.1.1) has not been achieved in (V.1) after additional careful purification of the compound but the results (V.1.2) and (V.1.3) are obtained, go to (V.2). V.2. Dissolve the amorphous compound in a solvent which produces the result (V.1.3) in (V.1), using a flask supplied with a Liebig condenser, and then force it to precipitate by following methods: V.2.1. If the compound is thermally stable prepare its saturated solution at elevated temperature (50-100oC) and then cool it down to room temperature. Make sure that the originally transparent solution becomes opaque on cooling and on further standing the compound precipitates in a form of oil at the bottom and on the walls of the flask. If this does not happen dissolve additional amount of compound at elevated temperature and cool the solution down again.

13
V.2.2. If the compound is unstable over room temperature prepare its saturated solution in solvent (V.1.3) according to (V.1) and add some amount of solvent (V.1.2). Make sure that the originally transparent solution becomes opaque on (V.1.2) solvent addition and on further standing the compound precipitates in a form of oil at the bottom and on the walls of the flask. If this does not happen add some extra amount of solvent (V.1.2).
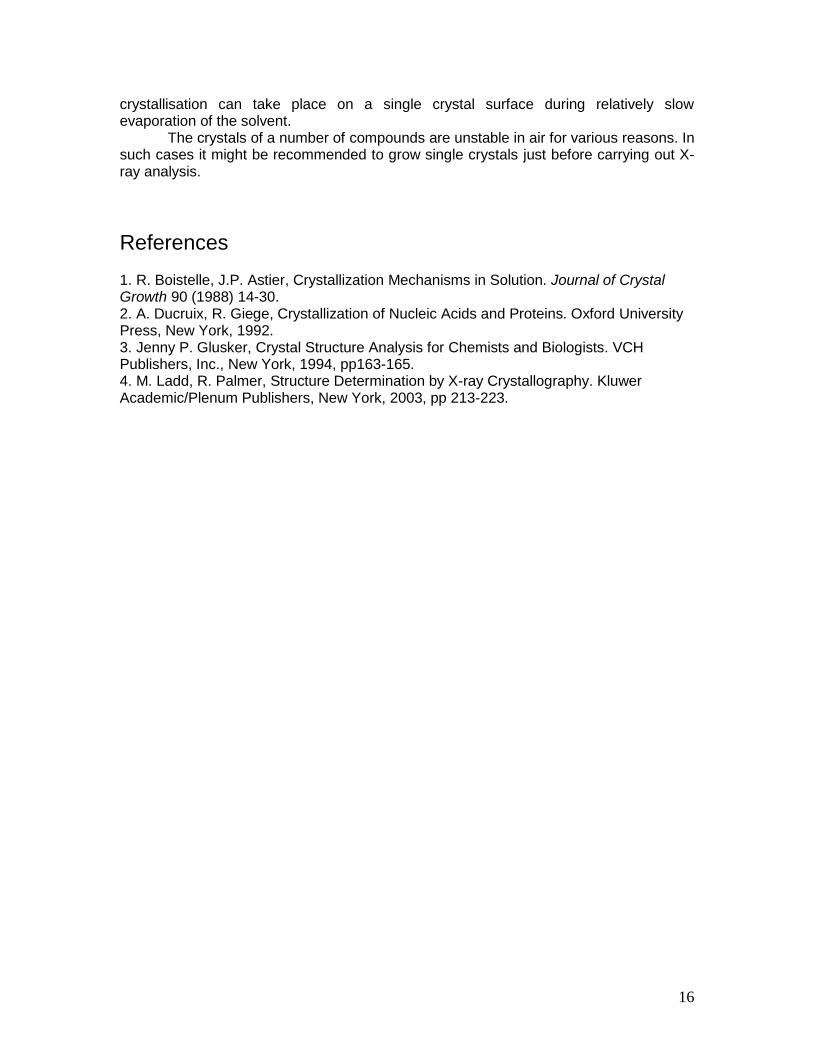
Stir the obtained mixture by a magnetic stirrer on a maximum speed during a day and leave to stay overnight. If the compound has not crystallised repeat the procedure several times. If the crystals have not been obtained go to (V.3). V.3. Place some amount of compound in a mortar and grind it vigorously during several minutes. Return to (III.1) or (IV.1) using the particles of ground compound for seeding according to (III.2.B). Alternatively use these particles to seed the oil obtained in (V.2). If no crystallisation is observed repeat (V.3) increasing the grinding time or adding a drop of solvent. It should be noted that in some cases vigorous grinding might cause a chemical transformation of the compound. If crystallisation has not been achieved go to (V.4). V.4. Place a drop of saturated solution of amorphous compound on a microscope slide or a watch glass. After the complete solvent evaporation the drop will solidify and convert to a transparent glass. Using a needle tip make few scratches on the drop surface and leave it for a long period of time (from one to several weeks). Check the drop condition periodically under microscope in polarized light at high magnification. Hardly visible micro crystals appear by the scratches or at the drop edge. These micro crystals can be used for seeding the saturated solutions according to (III.2.B). However it is much more reliable to produce initially a reasonable amount of crystalline powder by seeding with micro crystals the oil obtained in (V.2).
14
Some compounds are unable to crystallise due to the structure of their molecules. If this is the case, only chemical modification of the molecule by adding, replacing or removing some substituents as well as changing the counter ion if the molecule has acidic or basic properties can provide crystallisation.
Helpful tips 1. Excessive nucleation results in the formation of numerous small single crystals instead of few large ones. The size of these small crystals is usually not sufficient for X-ray analysis. Therefore the amount of nuclei in saturated solutions should be strictly under control: a). While carrying out the procedures (III.1) or (IV.3) a special care is needed for the cooled solutions as far as even light agitation of them in some cases can cause spontaneous nucleation producing an abundance of very small crystallites virtually invisible by a naked eye but easily detectable under microscope in polarized light. If this has happened (III.1) or (IV.3) has to be repeated from the beginning. b). Seeding of the solution in (III.2.B) is recommended to perform under microscope preferably in polarized light, touching the solution surface by the needle tip only once. Apart from clearly visible powder particle some invisible micro crystals are always present beside it on the needle tip so that they also get in the solution. On touching the solution repeatedly excessive amount of nuclei is introduced in it, moreover spontaneous nucleation might be also initiated on the surface. c). A number of compounds have a relatively low nucleation energy barrier. This results in spontaneous crystallisation on the walls of the vial close to the surface of the solution which can be easily noticed already on selecting the solvent in (II)

15
or on heating the solution in (III). In such cases in order to avoid uncontrolled self seeding of the solution from the walls it is recommended to heat it in a flask supplied with a Liebig condenser. 2. The shape of crystals growing on the surface of the solution or on the walls of the vial beside the surface is usually distorted reducing the quality of single crystals obtained. Therefore on seeding the solution in (III.2.B) it is desirable that the powder particle has gone down to the bottom of the vial or has been left in the middle of the surface but not touching the wall.
3. In order to determine how close the concentration of the solution prepared is to the nucleation point it can be recommended to watch under microscope the behaviour of crystals immediately after seeding of the solution according to (III.2.B): a). If the size of the crystals noticeably decreases – the solution is not saturated enough and the crystals are going to dissolve completely on further overnight standing of the solution. b). If the size of the crystals definitely increases – the solution is too oversaturated and on overnight staying many small size crystals are going to grow from it. c). If the size of the crystals visually does not change – it is likely that the right concentration of the solution is achieved and on further staying it is going to produce a desirable result. 4. Freshly grown crystals should not be left in the mother liquor for a long time. Solvent evaporation through the micro cracks in the walls of the vial as well as room temperature fluctuations on storing significantly change the equilibrium state of the solution resulting in recrystallisation and irreversible loss of the quality of single crystals. If the crystals are stable in air they should be taken out of the solution and placed straight away on an absorbent paper to remove the remaining liquid from their surface. The latter is more important in cases of higher boiling solvents because a secondary
16
crystallisation can take place on a single crystal surface during relatively slow evaporation of the solvent. The crystals of a number of compounds are unstable in air for various reasons. In such cases it might be recommended to grow single crystals just before carrying out X-ray analysis.
References
1. R. Boistelle, J.P. Astier, Crystallization Mechanisms in Solution. Journal of Crystal Growth 90 (1988) 14-30. 2. A. Ducruix, R. Giege, Crystallization of Nucleic Acids and Proteins. Oxford University Press, New York, 1992. 3. Jenny P. Glusker, Crystal Structure Analysis for Chemists and Biologists. VCH Publishers, Inc., New York, 1994, pp163-165. 4. M. Ladd, R. Palmer, Structure Determination by X-ray Crystallography. Kluwer Academic/Plenum Publishers, New York, 2003, pp 213-223.

17
Still have problems? Not enough experience? – We can help!
Single crystals growing service for X-ray analysis
We grow single crystals of small molecular compounds and peptides for their crystal structure determination regardless of
inappropriate crystal habit competitive crystallisation small sample size (5 - 10 mg) We also carry out polymorph search using 1 - 3 g of a pure compound and suggest crystallisation conditions for the particular forms. Confidentiality is guaranteed. For further details, please, contact us on [email protected]