How to Cut an Epoxy Resin Countertop -...
7
How to Cut an Epoxy Resin Countertop An epoxy resin countertop is durable and inexpensive. Cutting through this kind of counter is slightly tricky because it is necessary to cut through the resin slowly enough so that you do not crack the remaining resin or damage any other part of the counter. Since resin is so hard, a diamond cutting blade and drill are necessary to cut cleanly through the countertop. Things You'll Need Measuring tape Ruler Drill Eye protection Ear protection Dust mask ¼-inch diamond drill bit 2-inch hole saw Circular saw Diamond saw blade Soft cloths Resin sealer Paintbrush Instructions o 1 Determine where you need to make the cut on the counter. You may have to cut the counter during installation to make it fit in a particular area or you may need to cut out a shape for a sink or stovetop that you will install over the countertop. o 2 Draw the outline of the cut that you intend to make with a pencil. Use a straight ruler to help you draw crisp and steady lines. o 3 Put on ear protection, eye protection and a dust mask. Drill through the corners of the outline with a ¼-inch diamond drill bit. Use the 2-inch hole saw to enlarge the small holes to 2 inches in diameter. o 4 Adjust the saw so that it will make a 1/8-inch deep cut. Saw 1/8 inch deep along the cutting lines on the top of the countertop. Set the blade to saw at ¼ inch. Saw along the cutting lines again. Set the saw to cut 1/8th inch deeper than the ¼ inch measurement. Cut the lines again. Continue to increase the depth of the cut each time by about 1/8 inch until the
Transcript of How to Cut an Epoxy Resin Countertop -...

How to Cut an Epoxy Resin Countertop An epoxy resin countertop is durable and inexpensive. Cutting through this kind of counter is
slightly tricky because it is necessary to cut through the resin slowly enough so that you do not
crack the remaining resin or damage any other part of the counter. Since resin is so hard, a
diamond cutting blade and drill are necessary to cut cleanly through the countertop.
Things You'll Need
Measuring tape
Ruler
Drill
Eye protection
Ear protection
Dust mask
¼-inch diamond drill bit
2-inch hole saw
Circular saw
Diamond saw blade
Soft cloths
Resin sealer
Paintbrush
Instructions
o 1
Determine where you need to make the cut on the counter. You may have to cut the counter during installation to make it fit in a particular area or you may need to cut out a shape for a sink or stovetop that you will install over the countertop.
o 2
Draw the outline of the cut that you intend to make with a pencil. Use a straight ruler to help you draw crisp and steady lines.
o 3
Put on ear protection, eye protection and a dust mask. Drill through the corners of the outline with a ¼-inch diamond drill bit. Use the 2-inch hole saw to enlarge the small holes to 2 inches in diameter.
o 4
Adjust the saw so that it will make a 1/8-inch deep cut. Saw 1/8 inch deep along the cutting lines on the top of the countertop. Set the blade to saw at ¼ inch. Saw along the cutting lines again. Set the saw to cut 1/8th inch deeper than the ¼ inch measurement. Cut the lines again. Continue to increase the depth of the cut each time by about 1/8 inch until the

counter is cut all the way through. Cutting a small amount at a time prevents the counter from cracking.
o 5
Clear away all dust from the area. Use a dry rag first, then wipe away any remaining dust with a damp rag.
o 6
Brush some resin sealer onto the exposed areas of the countertop. This will seal the resin and prevent further damage. Allow the sealer to dry for 24 hours.
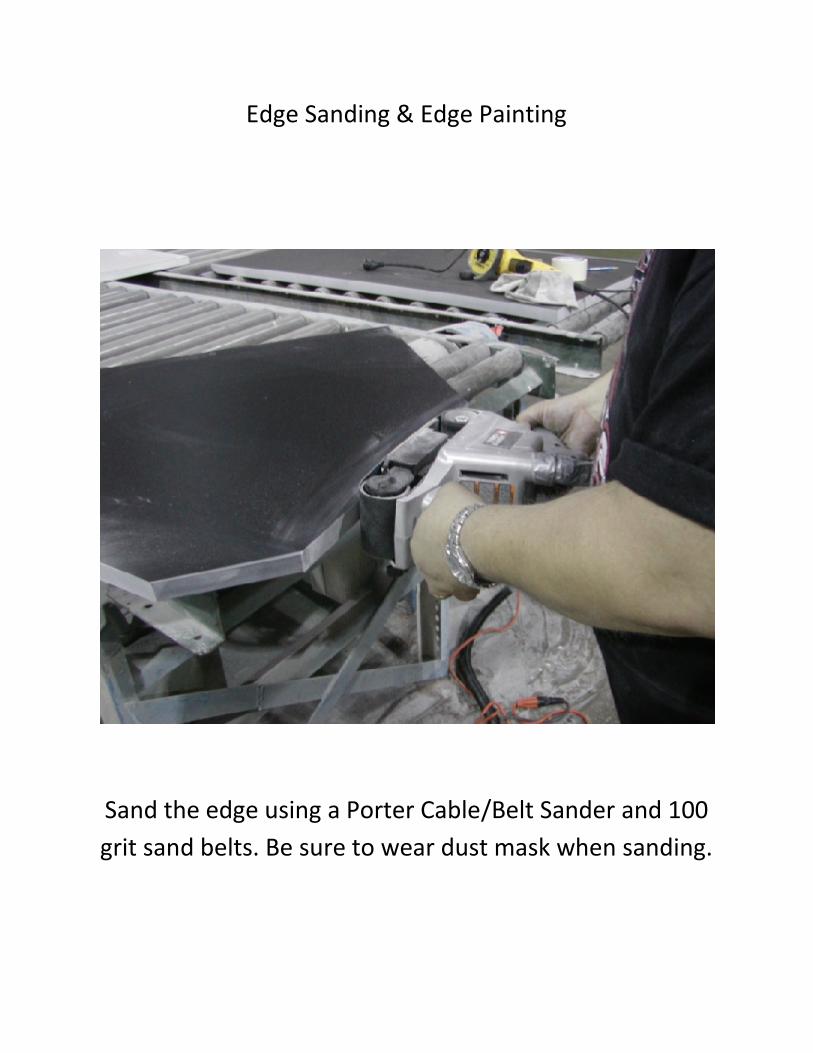
Edge Sanding & Edge Painting
Sand the edge using a Porter Cable/Belt Sander and 100grit sand belts. Be sure to wear dust mask when sanding.

After sanding the edge tilt the sander and break thebottom edge usually 1/8” edge break. Than repeat theprocess on the top edge. Be sure not to apply to muchpressure or the belt may dig into the material.

Than after the edge has been sanded proceed to paintthe edges that have been sanded. Make sure you followEpoxy Edge Paint Mixing Instructions below.

EPOXY EDGE PAINT MIXING INSTRUCTIONS1. Pour the Resin (Part A) into quart mix can2. Pour the Catalyst (Part B) into the quart mix can3. Using empty bottle, add 2 bottles of LACQUER
thinner, purchased locally.4. Add Pigment @ ~ 20% of total mixture and stir.
Example: 20% of 16 oz. ≈ 4 oz. of pigment5. Mix well.NOTE: Add/reduce lacquer thinner to extend/reduce potlife
APPLICATION Using the rags provided, apply mixture to edge to
be painted with one of the rags. Immediately wipe off using a clean, dry rag. Paint only small sections at a time as painting
larger sections may cause the paint to dry prior towiping off the excess.
Do not let the paint drip or set. Edge Paint is “Tack Free” after one hour.No lacquer thinner should be applied by rag or othermeans to edge or cutout before applying the edgepaint as this reduces performance of the epoxy edgepaint

In most cases a small amount of paint will get on thesurface of the counter top after painting the edge. Besure to remove excess paint from top surface usinga rag with lacquer thinner. In doing so be sure not toremove paint from beveled edge.