How to create a webfolio and send it to the gateway
2
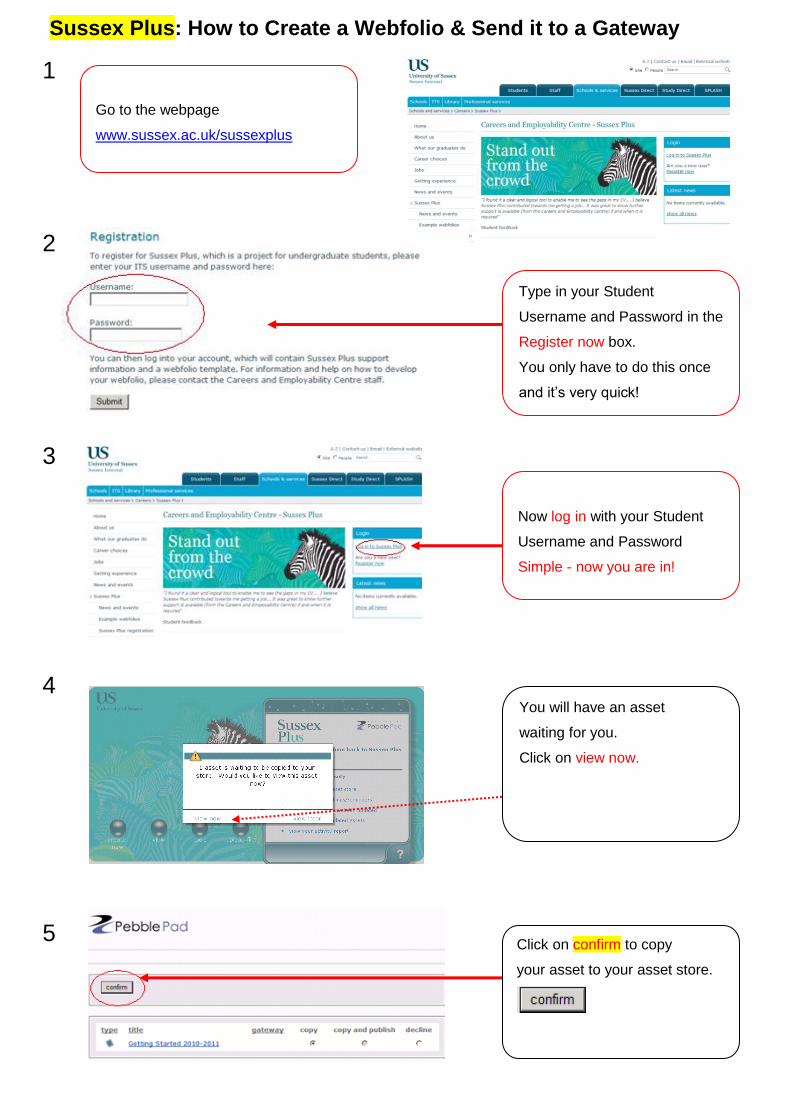
Sussex Plus: How to Create a Webfolio & Send it to a Gateway Go to the webpage www.sussex.ac.uk/sussexplus Type in your Student Username and Password in the Register now box. You only have to do this once and it’s very quick! Now log in with your Student Username and Password Simple - now you are in! You will have an asset waiting for you. Click on view now. Click on confirm to copy your asset to your asset store. 1 2 3 4 5
-
Upload
sussex-careers -
Category
Documents
-
view
213 -
download
0
description
How to create a webfolio and send it to the gateway
Transcript of How to create a webfolio and send it to the gateway
d
Sussex Plus: How to Create a Webfolio & Send it to a Gateway
Go to the webpage
www.sussex.ac.uk/sussexplus
Type in your Student
Username and Password in the
Register now box.
You only have to do this once
and it’s very quick!
Now log in with your Student
Username and Password
Simple - now you are in!
You will have an asset
waiting for you.
Click on view now.
Click on confirm to copy
your asset to your asset store.
1
2
3
4 5
6
7
6
7

Getting Started
Complete the form to
‘Activate my Account’
and then click on
Your Initial Webfolio.
Return to your asset store and
select your asset. Click on
send to from the options and
then click on the gateway
option.
You can now access all the
gateways that you belong to.
If the gateway you want is not
on the list, change the tab to
‘other gateways’.
Click on the gateway for your
group. Your asset will now be
sent to this gateway, from where
you can now receive feedback.
One last thing! Check that your
webfolio or asset has been sent
successfully to the gateway.
Return to your assets store and
select your webfolio. From the
box that appears on the right,
choose the ‘info’ tab rather than
the ‘edit tab’. It should say ‘ this
asset is published to 1 gateway’.
Congratulations! You have sent
your asset to the gateway.
6
7
8
9