HOUR 12 - pearsoncmg.comptgmedia.pearsoncmg.com/images/0672325535/samplechapter/CH12...200 Hour 12...
13
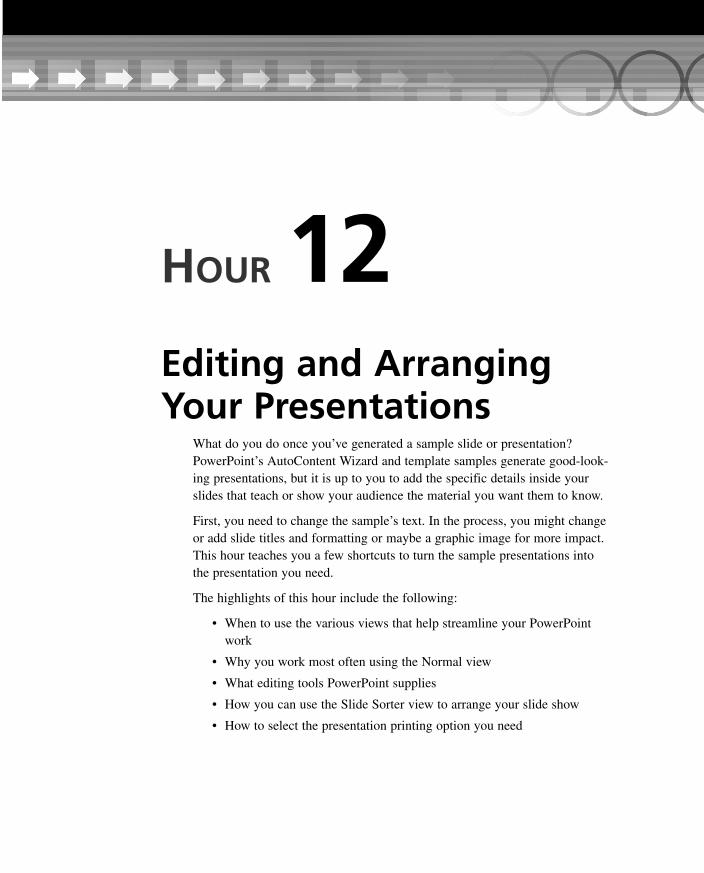
Editing and Arranging Your Presentations What do you do once you’ve generated a sample slide or presentation? PowerPoint’s AutoContent Wizard and template samples generate good-look- ing presentations, but it is up to you to add the specific details inside your slides that teach or show your audience the material you want them to know. First, you need to change the sample’s text. In the process, you might change or add slide titles and formatting or maybe a graphic image for more impact. This hour teaches you a few shortcuts to turn the sample presentations into the presentation you need. The highlights of this hour include the following: • When to use the various views that help streamline your PowerPoint work • Why you work most often using the Normal view • What editing tools PowerPoint supplies • How you can use the Slide Sorter view to arrange your slide show • How to select the presentation printing option you need HOUR 12
Transcript of HOUR 12 - pearsoncmg.comptgmedia.pearsoncmg.com/images/0672325535/samplechapter/CH12...200 Hour 12...
Editing and ArrangingYour Presentations
What do you do once you’ve generated a sample slide or presentation?PowerPoint’s AutoContent Wizard and template samples generate good-look-ing presentations, but it is up to you to add the specific details inside yourslides that teach or show your audience the material you want them to know.
First, you need to change the sample’s text. In the process, you might changeor add slide titles and formatting or maybe a graphic image for more impact.This hour teaches you a few shortcuts to turn the sample presentations intothe presentation you need.
The highlights of this hour include the following:
• When to use the various views that help streamline your PowerPointwork
• Why you work most often using the Normal view
• What editing tools PowerPoint supplies
• How you can use the Slide Sorter view to arrange your slide show
• How to select the presentation printing option you need
HOUR 12
17 5535 ch12 8/21/03 3:24 PM Page 197

Getting Acquainted with PowerPoint’s ViewsAs do all the Office 2003 products, PowerPoint allows you to change the screen’s viewto make certain tasks more manageable. Therefore, you produce presentations morequickly if you master PowerPoint’s views now and learn the advantages and disadvan-tages of each view.
198 Hour 12
When you first start PowerPoint and work on a specific presentation,PowerPoint displays a three-pane view (called the Normal view) with thepresentation’s Slide tab and Outline tab in the left pane, a specific slide’scontent in the top center (called the slide pane), and the notes pane at thebottom of the screen. The notes pane is where you can type notes for thespeaker. (Later in this section, you will read about this notes pane.) The taskpane is technically not considered part of a view because a different taskpane appears depending on what you do within the same view.
You display PowerPoint’s various views from the View buttons in the lower-left of thescreen as well as from the View menu. PowerPoint supports the following views:
• Normal view—The default, three-pane view from which you can manage your pre-sentation’s slide order as well as edit specific slides. In the previous hour’s lesson,you worked only from the Normal view. To the left of the large presentation areareside two tabs, the Slide tab that displays thumbnail images of your presentationand the Outline tab that documents your slides’ content.
The Outline tab area enables you to edit and display all your presentation text inone location rather than one slide at a time. Figure 12.1 shows the Normal viewthat contains a presentation’s Outline view in the left pane of a presentation. Thelarge titles (by the slide icons) start new slides, and the details below the titles pro-vide bulleted text for each slide. You can click and drag the dividing line betweenthe presentation area and the outline to see more or less of either side.
The following list not only describes PowerPoint’s views but also explainshow to use them to convert the template and AutoContent Wizard text to aspecific presentation. As you read this section, pay attention to the informa-tion that teaches how and when to edit text from the AutoContent Wizardand design templates.
17 5535 ch12 8/21/03 3:24 PM Page 198
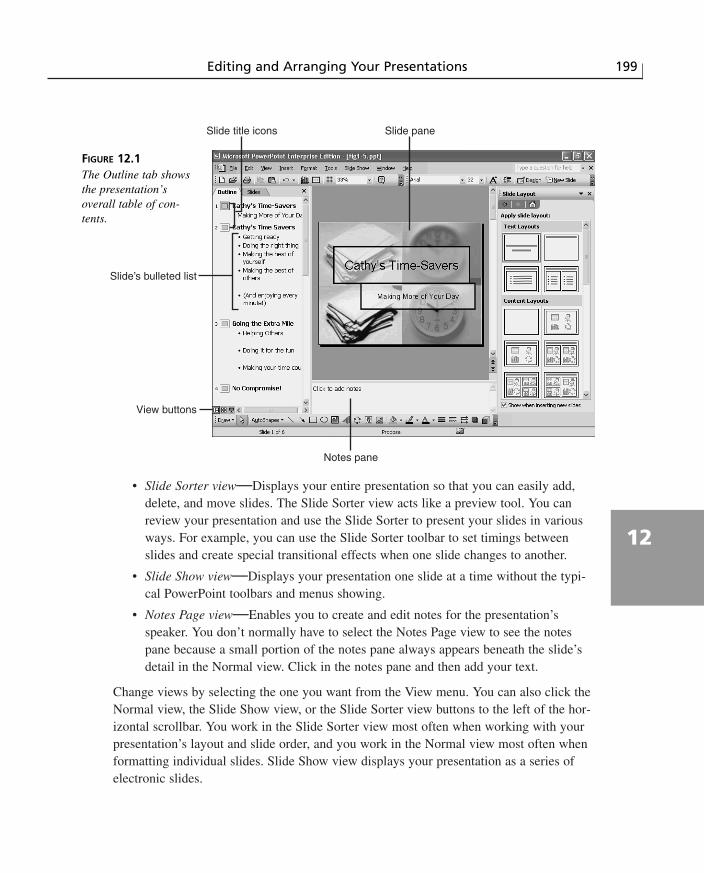
• Slide Sorter view—Displays your entire presentation so that you can easily add,delete, and move slides. The Slide Sorter view acts like a preview tool. You canreview your presentation and use the Slide Sorter to present your slides in variousways. For example, you can use the Slide Sorter toolbar to set timings betweenslides and create special transitional effects when one slide changes to another.
• Slide Show view—Displays your presentation one slide at a time without the typi-cal PowerPoint toolbars and menus showing.
• Notes Page view—Enables you to create and edit notes for the presentation’sspeaker. You don’t normally have to select the Notes Page view to see the notespane because a small portion of the notes pane always appears beneath the slide’sdetail in the Normal view. Click in the notes pane and then add your text.
Change views by selecting the one you want from the View menu. You can also click theNormal view, the Slide Show view, or the Slide Sorter view buttons to the left of the hor-izontal scrollbar. You work in the Slide Sorter view most often when working with yourpresentation’s layout and slide order, and you work in the Normal view most often whenformatting individual slides. Slide Show view displays your presentation as a series ofelectronic slides.
Editing and Arranging Your Presentations 199
12
Notes pane
Slide pane
View buttons
Slide’s bulleted list
Slide title icons
FIGURE 12.1The Outline tab showsthe presentation’soverall table of con-tents.
17 5535 ch12 8/21/03 3:24 PM Page 199
Using the OutlineAn outline helps you organize your presentation and sequence the slides properly.Although PowerPoint makes it easy for you to create the presentation slides themselves,the outline is easier to work with than the full slides, especially when you are still in theprocess of gathering your thoughts on the presentation’s content. If you get in the habitof first working on the presentation’s outline (after the AutoContent Wizard generates thepresentation), you have less editing and slide rearranging to do later in the developmentof your presentation.
After you generate a sample presentation by using the AutoContent Wizard or by creat-ing slides from the design templates, use the outline to work on your presentation’sdetails. You can reorganize your slides and edit text in this mode. Click the topic ordetail you want to change and edit the text. As you enter and change outline text,PowerPoint updates that individual slide in the slide pane so that you also see the resultsof your edit to the outline.
All the familiar copy, cut, and paste features work in the outline. If you drag a title’s iconor a bulleted list’s item down or up the outline area, for example, PowerPoint moves thatitem to its new location. When you drag a title, all the points under the title move with it.This is a good way to reorganize slides. When you drag an individual bulleted item,PowerPoint moves only that item.
Adding and Importing New ItemsTo add items to the text in the Slide tab’s outline, click at the end or beginning of a bul-leted item and press Enter to insert a new entry. If you want to insert a completely newslide, click the New Slide toolbar button, and PowerPoint displays the Slide Layout taskpane from which you can select a design and then enter the text. You can also click at theend of an item and press Enter to enter a new slide.
One of PowerPoint’s most beneficial text features is its capability to read documentsfrom other Office products. If you create a Word document that you want to include on aslide (or series of slides), select Insert, Slides from Outline and select the Office file thatyou want to import to your presentation. The file does not have to be in an outline for-mat. For example, you can insert a Word file that is either a Word document or a Wordoutline file.
As with all Office 2003 products, PowerPoint also recognizes HTML documents so thatyou can import or save Web page content directly within a presentation.
200 Hour 12
17 5535 ch12 8/21/03 3:24 PM Page 200

Promoting and Demoting ElementsFrom the Normal view, click the Outline tab to display the outline. When you selectView, Toolbars, Outlining, the Outlining toolbar appears to the left of the Outline tabarea as Figure 12.2 shows. The Outlining toolbar’s most important buttons might be itspromotion arrows. If you type a detail item that you want to become a new slide’s title,click the left arrow of the Outline toolbar (the Promote button). To convert a title to abulleted item, click the right arrow of the Outline toolbar (the Demote button).
Editing and Arranging Your Presentations 201
12
FIGURE 12.2Buttons on theOutlining toolbarenable you to manipu-late the outline.
Demote
Promote
Working on the SlideWhile in Normal view, you can look at and edit the selected slide in the slide pane. AsFigure 12.3 shows, the slide’s viewing area appears in a full-screen view when you closeboth the left pane and the task pane. You can make edits directly on the slide and see theresults of those edits as you make them. Use the slide pane for viewing changes to yourslide’s design or for inserting graphical elements into the slide.
17 5535 ch12 8/21/03 3:24 PM Page 201

To move from slide to slide while viewing a single slide at a time, perform any of thefollowing:
• Click within the vertical scrollbar area.
• Press the PageUp or PageDown keys.
• Click either the Next Slide or Previous Slide button on the vertical scrollbar.
When you want to edit a text (or graphic) object on an individual slide, click that object.PowerPoint displays the object surrounded by sizing handles. PowerPoint treats a slide’stitle as a single object and the slide’s bulleted set of items as another object. If you’veinserted other elements onto the slide, such as a sound or video clip, you can click onthat object and move, edit, or delete the object as well. Figure 12.4 shows a busy slidewith multiple selections. By holding Ctrl when you click over objects on the slide, youselect each of those objects at the same time so that you can apply the same formattingtask to the selected items. When you want to change the font or screen size of multipleobjects at one time, select them all at once and perform the change only once.
202 Hour 12
FIGURE 12.3By closing the sur-rounding panes, youdevote more screenarea to editing individ-ual slides.
17 5535 ch12 8/21/03 3:24 PM Page 202

To Do: Edit a Slide’s TextTo edit a slide’s text, perform these steps:
1. Click the text you want to edit to display the text’s sizing handles.
2. To move the text, drag one edge of the text’s placeholder in the direction you wantto move the text.
3. To shrink or enlarge the selected text object, drag one of the sizing handles in orout to adjust the object’s size. (PowerPoint does not shrink or enlarge the actualtext inside the placeholder as you resize the sizing box.)
4. After you display the placeholder, click inside the box at the point in which youwant to edit text. PowerPoint inserts the text cursor (also called the insertion point)at the location of your desired edit. Move the mouse pointer out of the way so youcan see the insertion point.
At the insertion point, you can insert or delete text. You can also change the font,color, size, and style of any text that you select using the Formatting toolbar or theFormat, Font menu option. For example, to increase or decrease the font size, usethe Font dialog box and select a different size. Displaying the Formatting toolbar
Editing and Arranging Your Presentations 203
12
FIGURE 12.4Select multiple objectsto apply a uniform editto them at once.
Selected objects
17 5535 ch12 8/21/03 3:24 PM Page 203

makes the most common text formatting tools available, including font, size, bold,and underline.
204 Hour 12
Select any text, and then click the Increase Font Size toolbar button toquickly increase the font size of the selected text. The Increase Font Sizebutton works faster than opening the Font dialog box. (A Decrease FontSize button is also available.) Depending on your screen size and resolution,you might have to click the toolbar’s Toolbar Options button to see theIncrease Font Size and Decrease Font Size buttons.
If graphic images appear on the slide, double-click them to edit the images with thegraphic-editing tools.
If you right-click an object (such as a graphic image) while editing a slideand select the Action Settings option, PowerPoint displays the ActionSettings dialog box, as shown in Figure 12.5. By assigning an Internet hyper-link address, a Windows program, or a sound file to a mouse click or move-ment, PowerPoint connects to that hyperlink location, runs the program, orplays the sound during the presentation. You can provide pushbutton accessto programs and Internet Web pages while delivering your presentation!
FIGURE 12.5Assign events to mouseclicks and movements.
17 5535 ch12 8/21/03 3:24 PM Page 204

Using the Slide Sorter ViewUse the Slide Sorter view to rearrange slides, not to edit text or graphics on individualslides. When you display the Slide Sorter view, PowerPoint presents several of your pre-sentation slides, as shown in Figure 12.6. The Slide Sorter view enables you to quicklyand easily drag and drop slides to reorder your presentation. Although you can rearrangeslides from the outline, the Slide Sorter view lets you see the overall visual results ofyour slide movements.
Editing and Arranging Your Presentations 205
12
FIGURE 12.6Rearrange slides in theSlide Sorter view.
Click to change slide transition
Slide sorter toolbar
Use your mouse to drag slides from one location to another in the presentation.Remember that the Undo command (Ctrl+Z) reverses any action that you accidentallymake. You also can use the Windows Clipboard to copy, cut, and paste, although drag-ging with your mouse is easier. The Clipboard holds up to 24 entries that you can copy,cut, and paste, as with Word and Excel. To delete a slide, click the slide once and pressthe Delete key.
One of the more advanced (but useful) slide-sorter features involves the Slide Sorter tool-bar, which appears at the top of the Slide Sorter view (refer to Figure 12.6). When youclick the Transition button, the Slide Transition task pane appears. These transition
17 5535 ch12 8/21/03 3:24 PM Page 205

effects determine how the slide show feature transitions (dissolves) from one slide to thenext when you display your presentation. The next two lessons discuss PowerPoint’sslide show in more detail. For now, click a Transition button inside the Transition taskpane to see the various ways that PowerPoint can move from one slide to the next.
Using the Notes Page ViewWhen you select View, Notes Page, PowerPoint displays your slide, as shown in Figure 12.7, with a blank area at the bottom of the screen for speaker notes. This NotesPage view contains a slide image and, below it, a notes box for the slide. Therefore, thespeaker’s notes contain the slides that the audience sees as well as notes the speakerwrote to tell the audience about each slide. Your audience does not see the speaker’snotes. You click inside the notes box to type or edit slide notes.
206 Hour 12
FIGURE 12.7Prepare speaker’snotes using the NotesPage view.
Type speaker’s notes here
The Notes Page view is designed to allow printing of the notes for the speaker. However,the speaker can also display the Notes Page view during a presentation to eliminate papershuffling. If the speaker’s computer has two video cards and two monitors, PowerPointcan send the slides to one monitor and the speaker’s slides and note pages to the other.When the speaker moves to the next slide, the speaker’s notes change as well. Whenyou’re ready to return to the Normal view, simply double-click the slide image.
17 5535 ch12 8/21/03 3:24 PM Page 206

Saving and Printing Your WorkBe sure to save your presentation after creating and finalizing it. PowerPoint automati-cally saves your presentation with the .ppt document filename extension unless youoverride the default file type and save your presentation in another format, such as theWeb-based HTML format.
Of course, you also need to print your presentation, either to a color printer or to aprinter that supports transparencies. The File, Print dialog box works somewhat differ-ently in PowerPoint than in Word and Excel to take advantage of the special nature ofpresentations. You can print your entire presentation one slide at a time or elect to printmultiple slides on one page for handouts. In addition, you can print only speaker notesand enclose printed slides in framed borders.
When you display the Print dialog box, shown in Figure 12.8, open the Print What drop-down list to view the selection list.
Editing and Arranging Your Presentations 207
12
When you display the presentation in Notes Page view, you can use thePageUp and PageDown keys to scroll through the slides and see thespeaker’s notes at the bottom of each slide. If the text area is not largeenough to read the notes, expand the viewing area by using the Zoom com-mand in the View menu.
Select yourprinted output
FIGURE 12.8Decide exactly whatyou want to print.
17 5535 ch12 8/21/03 3:24 PM Page 207
The Print Preview feature is new in PowerPoint. You can get an idea of how your presen-tation will look on paper by selecting File, Print Preview. If you have a black-and-whiteprinter or one that is capable of printing multiple shades of gray (called grayscale), theprint preview displays in black-and-white or grayscale. If you have a color printer, theprint preview displays the presentation’s slides in color.
PowerPoint can print your color presentation in grayscale if you don’t have a colorprinter. Select Grayscale from the Print dialog box. In addition, the Print What drop-down list box enables you to print your presentation in any of these styles:
• Slides only for the presentation
• Handouts (which can hold from two to nine slides per page) so that you can givecomprehensive notes to the audience
• Notes for the speaker
• The outline for proofreading purposes
If you want to print the entire presentation, you have to select File, Print and select All inthe Print range section.
SummaryThis hour furthered your PowerPoint knowledge by showing you how to turn a samplepresentation into the presentation you want. The views are more critical in PowerPointpresentation development than in Word or Excel. The different views give you a com-pletely new perspective of the presentation. In addition, you use the different views fordifferent functions, such as editing, rearranging slides, and previewing your presentation.Whereas one view is for the audience, another view exists for the speaker.
As you might expect, you can change PowerPoint slide text easily by using the basictext-editing skills you have already mastered. The views enable you to view your slides,outline, and speaker’s notes in their most usable form.
The next hour demonstrates how to format your slides with more detail, how to test andstart the PowerPoint slide show, and how to spruce up your slides with graphics.
Q&AQ I want to use PowerPoint to present my slides, but I don’t want it controlling
the transition and timing of the slide show. Can I use PowerPoint to displaymy slides manually?
A You learn about the details of the PowerPoint slide show in the next hour, but rest
208 Hour 12
17 5535 ch12 8/21/03 3:24 PM Page 208

assured that it supports manual slide shows in which you control the appearance ofthe next slide. Actually, most presenters want complete control over the timing ofthe slide presentations, and PowerPoint supports such manual transitions. If youwant to use PowerPoint to produce Web-based presentations, you can use the slide-show feature as well.
Q Can I print everything (all views) with a single File, Print command?
A No, you can only print individual slide-show components, such as the speaker’snotes, audience handouts, or slides from the File, Print menu. If you want to printall presentation elements, select File, Print and print a different component eachtime.
Q I’m using a bureau service to turn my presentation into individual color slides.Do I need the PowerPoint slide show?
A You will learn about the slide show in the next hour’s session. PowerPoint createsindividual slides that you can print or display inside PowerPoint, over a Web page,or from any other source that displays PowerPoint presentations. The slide showdoes not have anything to do with the medium on which you present your finalpresentation, however, so you can turn your presentation into slides without usingthe slide show.
Editing and Arranging Your Presentations 209
12
17 5535 ch12 8/21/03 3:24 PM Page 209