Automatic Analysis of Medical Dialogue in the Home Hemodialysis ...

1
Home Hemodialysis A guide for patients and families
This book can help you learn about hemodialysis and how to do your treatments at home.
Home hemodialysis is a safe and effective way to treat your kidney disease. Giving yourself dialysis treatments at home has many benefits:
You can decide when and how to dialyze.
You can be more independent and in control of your life.
You may feel better and have better results. You will learn all about home hemodialysis from the dialysis team. We will help you learn:
• How dialysis works • How to use the dialysis machine • How to respond to alarms and
solve problems as they come up • How to stay safe at home
This training takes about 8 weeks. During your training, we will give you lots of information and support. We welcome your questions at any time. When you are ready to begin treatment at home, we will continue to support you. We will work closely together through home visits, clinic visits, emails and phone calls. Help and support will always be available, day and night.
Training gives you the knowledge, skills and confidence to safely
treat yourself at home, with support from your dialysis team.

2
Why nocturnal home hemodialysis is your best choice
Hemodialysis does the work that your kidneys are no longer able to do. Kidneys normally work 24 hours a day. Although it is not possible have dialysis all the time, we do know that the more dialysis you have, the better you will feel.
Long, slow dialysis treatments at night (nocturnal hemodialysis) gives you more hours of treatment each week, which removes more waste from your blood. How you will benefit
There are no restricted or forbidden foods. You can eat foods such as oranges, bananas, milk, potatoes and cheese - in moderation.
There are no fluid restrictions. If you dialyze 5 or 6 nights a week, there is usually no need to drink less.
There is less need for medication. Slow nocturnal dialysis does a good job of getting rid of phosphate, so you may not need to take phosphate binders. You may need less blood pressure medicine and other medicines.
There are fewer dialysis ‘crashes’ – the periods of low blood pressure, vomiting or passing out that can occur with regular hemodialysis. This makes it very safe to dialyze at home, even when you are by yourself.
It is easier on your heart and your body. Nocturnal dialysis removes fluid very slowly and gently. Your heart can work better. Symptoms such as thirst, dizziness, headache, cramps and tiredness may get better or go away.
Your sleep may return to normal. With nocturnal dialysis, you may sleep more soundly and wake up more refreshed. Snoring and other sleep problems may get better or go away.
Your days are free. With nocturnal dialysis, you start dialysis in the evening before bed and finish when you wake up in the morning.
More proven benefits include: More energy Better appetite More interest in sex
Although each person’s experience is different,
research and our patients tell us that this is the best form
of dialysis we can offer.
Hemodialysis: The more the better!

3
Table of contents Knowing what to expect…………………………………………………......... 4 How kidneys and dialysis work……………………………………………….
14
How to prevent infection…………………………………………………........
25
Recording your vital signs and weight………………………………………...
31
Vascular access………………………………………………………………..
38
Water training…………………………………………………………….........
75
Heparin and the use of coagulation……………………………………………
90
How to prepare and program the machine…………………………………….
102
Dialysis procedures………………………………………………………........
114
How to disconnect and maintain the machine…………………………………
150
How to manage problems, alarms and emergencies…………………………..
161
Complications of hemodialysis………………………………………………..
195
Healthy eating during dialysis……………………………………………........
214
Life with hemodialysis………………………………………………………...
235

4
Chapter 1 Knowing what to expect
Topic Page
• Being accepted to the Home Hemodialysis Program 5
• Home Hemodialysis Program Expectations 6
• Home visits 9
• Training outline 11
• Helpful websites 12
• Telephone contact list 13

5
Being accepted to the Home Hemodialysis Program
Before you start training, you and your dialysis team must decide if the Home Hemodialysis Program is right for you.
Here are the questions we will consider: Are you able to do this?
• You will be considered for training, even if you have physical, visual or hearing problems.
• You may choose a partner (caregiver) to train in your place.
• A nurse can stop the training, if he or she feels that your disability makes it unsafe for you to have home hemodialysis.
Can you understand the training?
• Training is provided in English. If you do not speak English, you must provide an English-speaking interpreter.
• Your interpreter must be present at all training sessions and all hemodialysis treatments in your home.
Do you have health and home insurance?
• You must be covered by the Ontario Health Insurance Plan (OHIP). Your Health Card shows that you are entitled to health services covered by OHIP.
• You must also have home insurance. Is your home suitable?
• The technologist from the dialysis team will check your home to make sure it is suitable to install the dialysis equipment and supplies.
Does your homeowner or landlord agree?
• The owner or landlord of your home must agree to have a dialysis system installed in your home and sign the contract “Authorization for Installation of Dialysis System”.

6
Home Hemodialysis Program Expectations
The average training period is 6 to 8 weeks. Your training may be shorter or longer, depending on your needs.
Training sessions are on Mondays, Wednesdays and Fridays, from 7:30 am to 3:30 pm.
The Home Hemodialysis Unit will keep a spot for you during your training period. Your responsibilities during training
• You must attend each training session. If a caregiver is required, he or she must also attend each training session.
• During training, nurses will check your skills. We must be sure that you can do all the tasks of hemodialysis correctly.
• You and/or your caregiver will complete all tests before “graduating” from training.
• The passing mark is 85%. If your mark is less than 85%, the nurse will teach you all the information again before you rewrite the tests.
• You may need further training if you are not following instructions or doing tasks correctly, or there are concerns about infection or safety.
• Training may be stopped at any time if program expectations are not being met, or you choose to stop training. If training is stopped, we will arrange for you to return to your original Hemodialysis Unit for dialysis treatments.
• When you finish training, the nurse will visit your home to make sure it is organized and safe for dialysis.

7
Your responsibilities after training
Following these steps keeps you safe at home!
1. Fill out your dialysis log (run sheet) for every dialysis treatment.
2. Follow the medical team’s instructions for your dialysis.
3. Follow all instructions in this manual.
4. Order supplies as directed by your nurse. Do not overstock supplies.
• You must be at home when your supplies are delivered.
• Check the expiry date on your supplies. Move the supplies around, so that the oldest supplies are used first.
5. Keep the equipment and dialysis area clean and orderly.
6. Dispose of garbage related to your treatment in the proper way.
7. Use the safety devices provided by the hospital.
8. Report all bad events to the home hemodialysis staff.
9. Keep all appointments at the clinic. Bring your dialysis log and a list of your medicines.
10. Have your blood tests every month.
Call the Home Hemodialysis Unit right after each monthly blood test, so the staff can track your results.
Tell them:
If the blood test was “fasting” (no food or drink for 12 hours before the test)
Your weight before and after dialysis
Your blood pressure before and after dialysis
Number of hours dialyzed
Number of days a week dialyzed
Continued on page 6

8
11. Call the Home Hemodialysis Unit:
416-340-3736
7:30 am to 3:30 pm
• If there are any changes in your treatment: - Heparin - Dry weight - Blood pressure - Medicines
• If you have had medical tests or procedures, visited other doctors or the Emergency Department.
• If you plan to travel or go on vacation.
• If your dialysis equipment needs servicing. Report problems as soon as they come up. Do not wait until Friday, as there may be no chance to arrange dialysis back-up.
• If you have any concerns or questions about your care.
Other responsibilities at home
• During home dialysis, you will use more water and electricity in your home. It is your responsibility to pay these utility bills.
• You must agree to return to the Hemodialysis Unit anytime the dialysis team feels that your safety is at risk.
• Hemodialysis can affect your needs for medicine. Tell your pharmacist and all the doctors that care for you that you are on dialysis.
• If you move within a year of setting up home dialysis, you are responsible for the cost of removing electrical and plumbing equipment from your old home and installing it in your new home.
• Return equipment to the hospital when you stop dialysis.

9
Home visits Members of the dialysis team will visit you at home regularly - twice a year or more often if needed. You will have a home visit when:
• You finish training • Team members feel a visit is needed • You request a visit
What is the purpose of home visits?
Home visits are important to make sure you are receiving the care and support that you need.
Nurses visit to check your health and your dialysis skills. They may ask you to do all or part of your dialysis procedure, to see if you are doing these tasks correctly. Technologists visit to check that your equipment is working properly. They may test, service, install or repair equipment during a visit. What can I expect of staff during a home visit? You can expect staff to:
• Tell you ahead of time when they will visit.
• Reschedule a visit if the weather is bad.
• Ask to see where you do dialysis treatments and where you store the equipment.
• Answer your questions and concerns.
• Arrange back-up at the hospital or with community care if dialysis cannot be done.
• Keep their shoes on during a visit, for safety reasons.
• Take a break outside of your home, when needed.

10
What do staff expect from me? Before a visit:
• Tell staff as soon as possible if you need to change the date or time of a visit.
• Make sure the dialysis area of your home is easy to get to, well lit and free of hazards.
• Report any problems as they come up, do not wait for the next visit.
• Clean and disinfect the dialysis machine. During a visit:
• Have your dialysis log and medicines ready for staff to review.
• Do not smoke during a visit.
• Keep pets behind closed doors.
• Do not expect staff to provide other services, such as preparing meals.

11
Training Outline
Use this checklist to track your progress during training
WK 0
WK 1
WK 2
WK 3
WK 4
WK 5
WK 6
WK 7
WK 8
1 My orientation to the Unit Knowing what to expect 2 How kidneys work and how dialysis
works
3 Handwashing and no touch technique 4 Self-assessment and record keeping 5 How to prepare the machine 6 How to program and connect the
machine
7 How to disconnect and clean up 8 How to care for my access: Cannulation CVC 9 Anticoagulation and use of heparin 10 Dialysis procedures: Disinfection Heparin Bidry change Normal saline bolus/flush Recirculation Blood collection Centrifuge Giving medicines Manual retransfusion
11 How to manage alarms and warnings 12 How to manage complications Low blood pressure Muscle cramps Headache Restless legs Air Embolism Breakdown of red blood cells Bruising Fever and chills Infection Line displacement/dislodgement Poor blood flow Difficulty with cannulation Non adherence complications
13 Water training 14 How to order supplies 15 What to do when travelling 16 Healthy eating during dialysis 17 Demonstrate my care independently 18 Written tests 19 How to install equipment and supplies 20 First home visit

12
Helpful websites
• Ontario Ministry of Health and Long Term Care: Information about health and services www.healthyontario.com www.health.gov.on.ca
• Ontario Health Insurance Plan (OHIP): www.health.gov.on.ca/en/public/programs/ohip/
• Kidney Foundation of Canada www.kidney.ca
• Renal Support Network: Online Health Library for people with kidney disease www.rsnhope.org/ www.ikidney.com
• Consumer health information www.emedicinehealth.com

13
Telephone contact list
Name Phone number Nurses
Home Hemodialysis Unit (7:30 am to 3:30 p.m.)
416-340-3736
Janice Ritchie, Unit Manager 416-340-4800, ext. 2399
Nephrologists
Dr. C. Chan 416-340-3073
Dr. R. Richardson 416-340-3889
Dr. F. Fenton 416-340-4073
Technical help
Charles Estridge, Technical Manager, Renal Engineering
416-340-4800, ext. 3158
Technologist Office 416-340-4288
During the night (4 p.m. to 8 a.m.) and on weekends
416-719-5299 (paging)
Vascular Access Coordinator
Cyndi Bhola 416-340-4800, ext. 3518
Dietitian
Karla Dawdy 416-340-4800, ext. 4625
Social Worker
Michela Verdirame 416-340-4800, ext. 3983
Pharmacy
Toronto General Pharmacy 416-340-4075
Chiropody
Tracey Oliver 416-340-4800, ext. 6007


14
Chapter 2 How kidneys and dialysis work
Topic Page
• What do the kidneys do? 15
• How do you know if kidneys are working well? 18
• What is kidney failure? 18
• What are the symptoms of kidney failure? 19
• How is kidney failure treated? 20
• What is hemodialysis? 20
• What does the dialysis machine do? 22
• What does the dialyzer do? 22

15
What do the kidneys do?
The kidneys:
Remove waste products from your blood
Balance the amount of fluid in your body Balance salts, minerals and electrolytes in your body
Help to control blood pressure Help to make red blood cells
Help to keep bones strong and healthy
Removing waste As blood flows around your body, it carries substances your body needs. It also carries unwanted substances that are left over from breaking down food and other normal body activities. These waste products can be harmful (toxic) if allowed to build-up in your body. When blood enters the kidneys, it goes through millions of tiny filters, called glomeruli. The glomeruli filter out the waste, leaving just the right amount of the substances your body needs.
The filtered blood flows back to your heart. The heart pumps to keep the blood flowing around your body.
The waste leaves your kidneys in the urine. Urine flows down to the bladder where it is stored until you pass urine.
Did you know?
About 190 litres of blood enter the kidneys every day.
Most people pass about 2 litres of urine every day.
Urea and creatinine are common waste products. Having some of these wastes in your blood is normal. Having too much can make you sick.
16
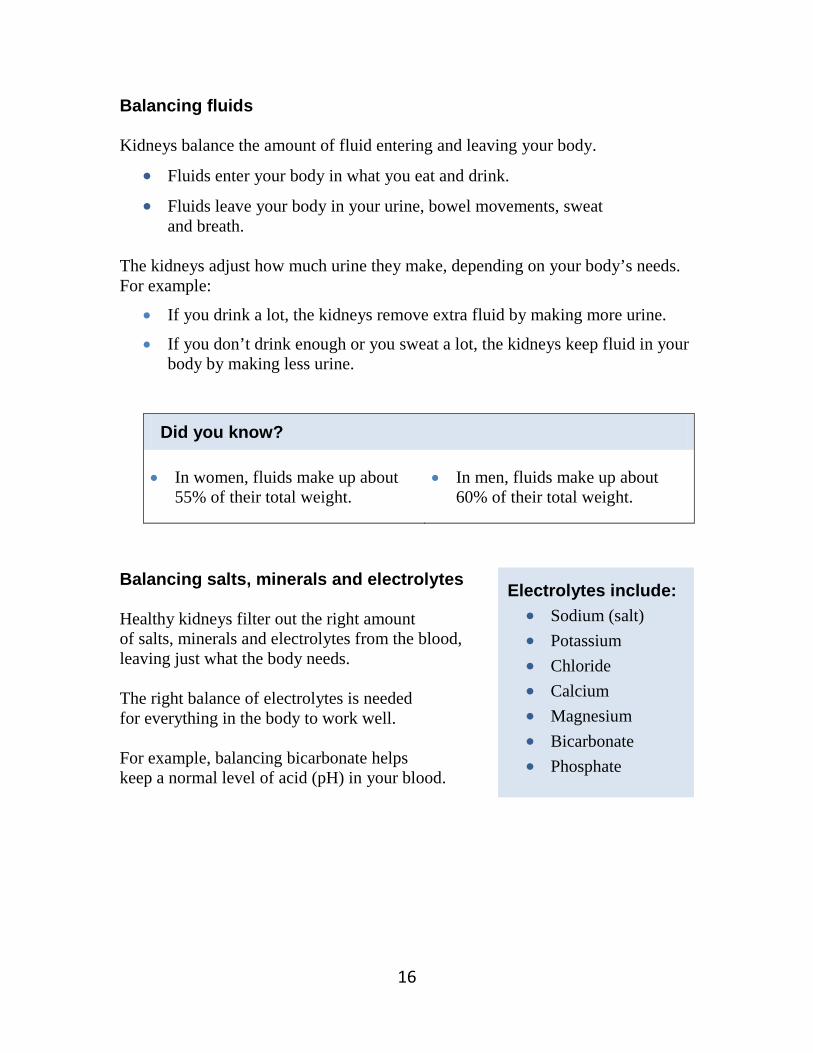
Balancing fluids Kidneys balance the amount of fluid entering and leaving your body.
• Fluids enter your body in what you eat and drink.
• Fluids leave your body in your urine, bowel movements, sweat and breath.
The kidneys adjust how much urine they make, depending on your body’s needs. For example:
• If you drink a lot, the kidneys remove extra fluid by making more urine.
• If you don’t drink enough or you sweat a lot, the kidneys keep fluid in your body by making less urine.
Did you know?
• In women, fluids make up about 55% of their total weight.
• In men, fluids make up about 60% of their total weight.
Balancing salts, minerals and electrolytes Healthy kidneys filter out the right amount of salts, minerals and electrolytes from the blood, leaving just what the body needs. The right balance of electrolytes is needed for everything in the body to work well. For example, balancing bicarbonate helps keep a normal level of acid (pH) in your blood.
Electrolytes include: • Sodium (salt) • Potassium • Chloride • Calcium • Magnesium • Bicarbonate • Phosphate

17
Controlling blood pressure Kidneys make hormones, such as renin and angiotensin, that control:
• How much salt and fluid the body keeps. - If there is too much fluid in the body (overload),
blood pressure goes up. - If there is too little fluid in the body (dehydration),
blood pressure drops.
• How well blood vessels (arteries) expand and contract. - The narrower the arteries, the higher the blood pressure.
Helping make red blood cells Kidneys make a hormone called erythropoietin (EPO). EPO is carried in your blood from the kidneys to the bone marrow. This is the centre of your bones where blood cells are made. EPO helps the bone marrow to make red blood cells, which carry oxygen throughout your body. Helping bones stay strong Kidneys make a form of Vitamin D that helps to control how much calcium goes into bones. Calcium makes your bones strong and healthy. Kidneys also control the amount of phosphate in your blood. Too much phosphate causes calcium to come out of the bones, making them weak.

18
How do you know if kidneys are working well? The most common way to see how well the kidneys are working is to estimate the Glomerular Filtration Rate (GFR). The GFR shows how well the kidneys remove or “clear” a waste product called creatinine. This is why the test is also called the creatinine clearance. The test compares the amount of creatinine in the blood and in a sample of urine collected over 24 hours. What is kidney failure? Kidney failure means the kidneys are not doing their job. If they have stopped working completely, this is called end-stage renal disease. Kidneys may stop working suddenly. This is called acute kidney failure.
• This may happen when blood flow to the kidneys is reduced or blocked, or when the kidney is injured.
• Acute kidney failure may be temporary and get better with treatment. Kidneys may gradually lose their ability to do their job. This is called chronic kidney failure.
• The exact causes of chronic kidney failure are not always known. • We do know that conditions such as diabetes and high blood pressure
increase the risk of kidney failure. Some people are not aware that their kidneys are not working properly. This is because kidneys can adapt. When part of a kidney is not working, the remaining parts work harder to make up for it. Kidney function may be less than 10% before a person begins to feel ill.
Did you know? • About 1 in every
2,000 people has kidney failure.
• ‘Renal’ describes things related to the kidneys
Healthy kidneys have a GFR of about 120 ml/minute.

19
What are the symptoms of kidney failure? When kidneys are no longer working effectively, waste products and fluid build-up in the body, and symptoms start to appear.
Symptoms What may be happening
Feeling sick Loss of appetite Itchy skin
• Your kidneys are not removing waste from your blood.
• There is a build-up of waste products, such as urea and creatinine, in your blood.
Swollen ankles Puffy face
• Your kidneys are not removing extra fluid from your blood.
• Fluid is collecting in your body tissues.
Shortness of breath High blood pressure
• Your kidneys are not removing extra fluid from your blood.
• Fluid is collecting in your lungs, making breathing difficult and straining your heart.
Pale skin Feeling weak, cold and tired
• Your kidneys are not making enough EPO, the hormone that helps the bone marrow make red blood cells.
• You do not have enough red blood cells. This is called anemia.
Weak and painful bones, especially in the back, hips, legs and knees.
• Your kidneys are not making enough hormones and vitamin D to keep bones strong and healthy.
• Your bones are losing calcium and becoming weak. This is called renal bone disease.

20
How is kidney failure treated? When symptoms first appear, changing your diet and taking medicine can help your body stay in balance. As symptoms get worse, diet and medicine are not enough. You need dialysis treatments to do the work your kidneys are no longer able to do. Dialysis uses a machine to remove waste and extra fluid from your blood. What is hemodialysis?
You will have a procedure to create an ‘access’. This is a way for blood to be removed and returned to your body. There are three main types:
• Arteriovenous (AV) fistula This method is most recommended.
• Arteriovenous (AV) graft
• Central venous catheter Hemodialysis has 3 main steps:
1. Blood leaves your body through a needle or tube placed in the access.
2. Blood travels through tubes to the dialyzer, where it is filtered.
3. Cleaned blood travels back to your body through a second needle or tube placed in the access.
Your blood never actually goes into the
dialysis machine.

21
This picture shows how hemodialysis works

22
What does the dialysis machine do? The dialysis machine has a pump to keep blood flowing from your body, to the dialyzer, and back to your body. The dialysis machine has a computer that keeps track of:
• Blood flow • Blood pressure • How much fluid is removed • Other important information
The dialysis machine mixes the fluid that goes into the dialyzer to remove waste and extra fluid from your blood. This is called dialysate, the dialysis solution, or ‘bath’. Your doctor will prescribe a specific mixture of water and electrolytes for your treatments.
The dialysis machine has many safety features to protect you. What does the dialyzer do? The dialyzer does some of the work your kidneys used to do. Some people call it an artificial kidney. The dialyzer
1. Removes waste from your blood
2. Removes extra fluid from your blood
3. Balances electrolytes in your blood Dialyzers come in different sizes with different ‘clearance’. This refers to the rate at which the dialyzer can remove waste. Your doctor will prescribe the dialyzer that is best for you.
Did you know?
• The average person has 4 to 5 litres of blood.
• During dialysis 300 ml (1 ¼ cups) of blood is outside the body at a time.

23
The dialyzer is a plastic tube filled with many tiny filters. It has 2 sections; one for the dialysate and the other for the blood. Between the sections there is a membrane that is ‘semi-permeable”. The membrane does not allow the blood and dialysate to mix, but it has very tiny holes that allow some substances to cross from one section to another. Water and waste can pass through the membrane, but blood cells cannot. How the dialyzer works 1. Removing waste from your blood. Waste is removed through a process called diffusion.
• Diffusion explains what substances do in water. Substances move from areas of high concentration to areas of low concentration, to make the concentration equal.
• In the dialyzer, blood flows by one side of the semi-permeable membrane and dialysate flows by on the other side. The blood has a high concentration of waste, the dialysate is made to have a low concentration of waste.
• Waste moves from the blood to the dialysate, until there is an equal amount on both sides of the membrane.
• The cleansed blood is returned to your body. The dialysate solution with wastes from the blood goes down the drain.
2. Removing extra fluid from your blood Extra fluid is removed through a process called ultrafiltration.
• The pressure in the blood section is higher than the pressure in the dialysate section.
• This pushes extra fluid from the blood through the membrane into the dialysate.

24
3. Balancing electrolytes in your blood Diffusion also balances electrolytes in your blood. For example:
If the amount of potassium is too high in your blood, the dialysate will be made with a low concentration. Potassium will move from the blood into the dialysate.
It takes several hours for the dialyzer to clean the blood. This picture shows how the dialyzer works.

25
Chapter 3 How to prevent infection
Topic Page
• Your risk of infection 26
• Preventing infection 27
• Washing your hands 28
• The ‘No Touch’ technique 30
26
Your risk of infection Kidney disease affects your immune system. This means your body is not able to fight infection as well as it should. If you get an infection, it could last longer than it would in someone with healthy kidneys. Dialysis requires frequent access to your bloodstream. There is always a possibility that germs (such as bacteria or viruses) could get into your blood and cause an infection. For these reasons, you have a greater risk of infection.
As a dialysis patient, you need: Extra safety measures to prevent infections, and
Quick treatment if you get an infection.

27
Preventing infection
Preventing infection is an important responsibility for you and your health care providers.
Working together to prevent infection
Ever
yone
Wash hands often (see instructions on page 4 and 5).
Use the “no touch” technique (see instructions on page 6).
Clean and disinfect equipment and surfaces.
Hos
pita
l st
aff
Follow hospital guidelines for infection control.
Patie
nts
Follow instruction in this manual.
Have a blood test each year to check for viruses that are spread through blood, such as Hepatitis B and C. These viruses can cause serious liver disease.
Get a shot (vaccination) that protects you from Hepatitis B. There is no shot to prevent Hepatitis C.
Tell all your doctors that you are on dialysis.
Take antibiotics before any procedure, such as getting your teeth cleaned, dental work, or a biopsy. When you are scheduled for a procedure, call the Home Hemodialysis Unit for more advice.
* Sterile means completely free of germs

28
Washing your hands 1. Wash your hands
• Handwashing removes dirt and germs that could enter your blood stream or affect your dialysis supplies.
• Start by removing your jewelry. • Use liquid soap and warm water. Soap removes dirt, oils and germs.
Do not use antibacterial or bar soaps. • Scrub hands for 15 seconds (sing the “Happy Birthday” song twice).
Washing your hands is the best way
to prevent infection!

29
2. Use hand rub • Hand rub (sanitizer) contains alcohol, which kills germs and disinfects
your hands.
• Hand rub does not clean dirt from your hands. If your hands are dirty, it is better to wash your hands with soap and warm water.
• Start by removing your jewelry.

30
The “No Touch” technique
“No Touch” technique stops germs from entering your equipment, catheter,
needle insertion site or your blood stream.
1. Always begin with washing your hands for 15 seconds (see page 28 for instructions). Follow by using hand sanitizer (see page 29 for instructions).
2. Use the antiseptics as directed by the dialysis team.
3. Clean medicine vials before using them.
4. Do not touch an area after it is cleaned with antiseptic.
5. Do not lift the needle off the cannulation site* once it is placed on the skin.
6. Do not touch open ends of the catheter.
7. Do not touch open ends of the dialysis lines or dialyzer.
8. Keep needle and syringe sterile. - If you touch the uncapped area of the syringe and needle, it is
contaminated. Dispose of that needle and syringe in your sharps container. Replace it with a sterile needle and syringe. All sharps containers need to be returned to the unit.
*A cannulation site is where you put the needle in to access your blood for hemodialysis.

31
Chapter 4 Recording your vital signs and weight
Topic Page
• Recording your vital signs and weight 32
• Your temperature 32
• Your blood pressure 33
• Your pulse 35
• Your weight 36

32
Recording your vital signs and weight
Check and record your vital signs and weight before (pre) and after (post) each dialysis treatment.
Vital signs include your:
• Temperature • Blood pressure • Pulse
Enter this information in your dialysis log (run sheet). Bring your log with you to all appointments and clinic visits. The dialysis team uses this information to assess your health and response to treatment. Your temperature Check and record your temperature: Before and after dialysis When you feel warm or think you have a fever When you shiver or feel cold
Your temperature varies depending on the time of day, your activity level and the effects of your medicines. Review your log to get to know what is usual for you. Normal temperature = 36° C to 37.5° C A temperature
above normal is a sign of infection.
A low grade fever = 37.6° C to 37.9° C A fever = 38° C or higher
Celsius
36 36.5 37 37.5 38 38.5
Normal Low fever
Fever 96.8 97.7 98.6 99.5 100.4 101.3
Fahrenheit
33
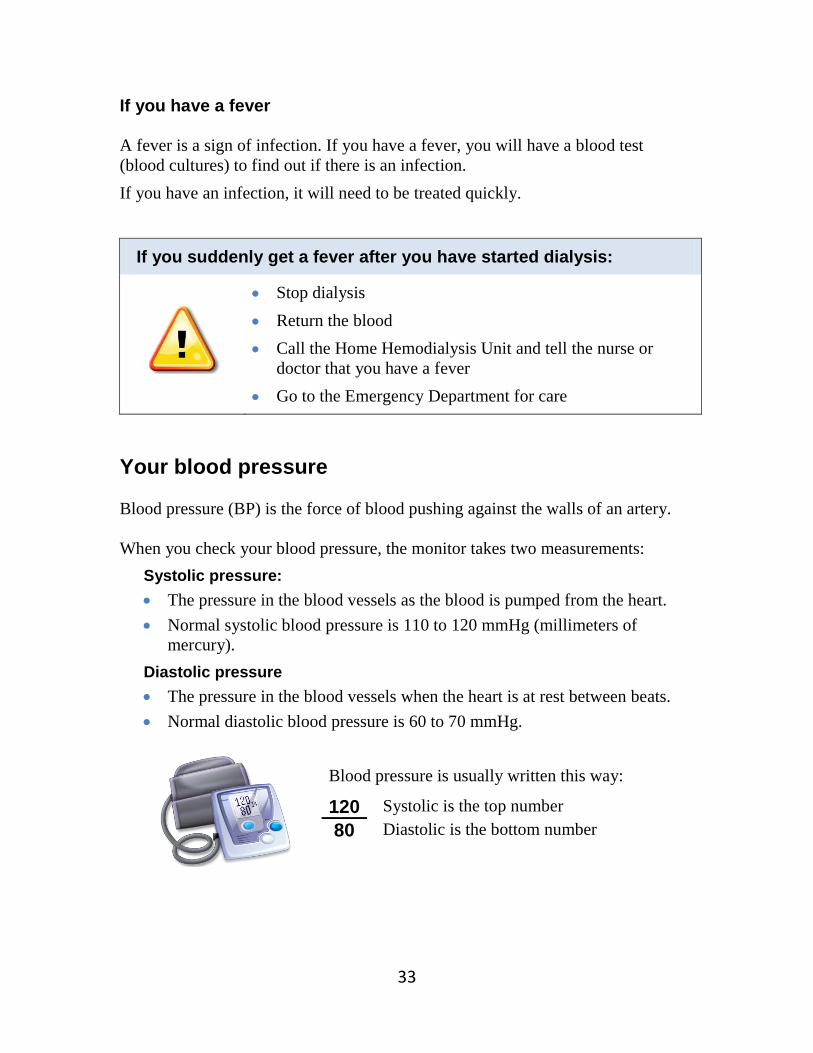
If you have a fever A fever is a sign of infection. If you have a fever, you will have a blood test (blood cultures) to find out if there is an infection. If you have an infection, it will need to be treated quickly.
If you suddenly get a fever after you have started dialysis:
• Stop dialysis • Return the blood • Call the Home Hemodialysis Unit and tell the nurse or
doctor that you have a fever • Go to the Emergency Department for care
Your blood pressure Blood pressure (BP) is the force of blood pushing against the walls of an artery. When you check your blood pressure, the monitor takes two measurements:
Systolic pressure: • The pressure in the blood vessels as the blood is pumped from the heart. • Normal systolic blood pressure is 110 to 120 mmHg (millimeters of
mercury). Diastolic pressure • The pressure in the blood vessels when the heart is at rest between beats. • Normal diastolic blood pressure is 60 to 70 mmHg.
Blood pressure is usually written this way:
120 Systolic is the top number 80 Diastolic is the bottom number
34
Check and record your blood pressure: Right before dialysis
At the start of dialysis
During dialysis: - If you dialyse 4 hours (conventional dialysis) check your BP every hour. - If you dialyse during the night (nocturnal dialysis) you do not need to
check your BP during treatment.
At the end of dialysis, after you have returned your blood and before you disconnect yourself from the machine.
After dialysis
Anytime you have concerns or symptoms such as dizziness, cramping or nausea.
Taking your blood pressure
• You must check your BP while standing, sitting or lying down. Your BP will vary depending on your position. A standing BP is usually lower than a sitting BP.
• It is common for your BP to be high before dialysis. This is due to the extra fluid in your body. After your treatment starts, your BP may drop as about 300 ml of blood is out of your body in the bloodlines and dialyzer.
• Review your log to get to know your usual BP pattern.
Call the Home Hemodialysis Unit:
If your BP suddenly drops.
If your blood pressure is higher or lower than usual.

35
Your pulse Check and record your pulse (heart rate): Before and after dialysis.
Taking your pulse:
• It is normal for your heart to beat slower when you are resting and speed up when you are active.
• Your pulse will be higher if your BP is low or you are dry.
• Some medicines can slow your heart rate.
• Review your records to get to know your usual pulse.
Normal adult pulse = 60 to 80 beats per minute Slow pulse (bradycardia) = Less than 60 beats per minute Fast pulse (tachycardia) = Greater than 100 beats per minute
50 60 70 80 90 100 110
Bradycardia (slow pulse)
Normal adult pulse
Tachycardia (fast pulse)
Call the Home Hemodialysis Unit:
If your pulse rate is higher or lower than usual.

36
Your breathing Breathing problems may be due to having too much fluid in your lungs and other parts of your body. As dialysis removes the extra fluid, your breathing problems should improve.
Call the Home Hemodialysis Unit:
• If you have trouble breathing, shortness of breath at rest or on exertion or coughing.
• If your breathing does not get better as dialysis removes extra fluid.
• If you have trouble breathing when lying flat. Your weight Check and record your weight: Before and after dialysis.
Weighing yourself
• Put the scale on a hard, flat, level surface (not carpet).
• Always weigh yourself without shoes and with about the same amount of clothes on.
• Check the accuracy of your scale regularly. Follow the manufacturer’s instructions to zero the scale. Change the battery regularly, if needed.
Your target weight is what your health care team thinks you should weigh, when all the extra fluid is removed from your body.
Compare your actual weight with your target weight. The difference between your actual weight and target weight is the amount of fluid you need to remove during dialysis.

37
The Home Hemodialysis Unit nurses and doctors will change your target weight when needed.
You may increase your weight by no more than 0.5 kg in an emergency situation. Remember to tell staff about the weight change.
Removing too much fluid (target weight set too low) Weight needs to be increased Signs and symptoms:
Not removing enough fluid (target weight set too high) Weight needs to be lowered Signs and symptoms:
• Low blood pressure • Muscle cramps • Nausea and vomiting • Feeling the urge to have a bowel
movement.
• High blood pressure • Shortness of breath and breathing
problems • Swelling
Problem What to do
Signs of weight gain:
• You have been eating more than usual.
• Your blood pressure is lower than usual, especially after dialysis.
• You have low blood pressure or cramps during dialysis.
• Your heart rate is fast, over 100 beats per minute.
• You feel tired, weak and dizzy
You are too dry
Increase your target weight
Signs of weight loss:
• You have been eating less.
• You have been exercising more.
• Your blood pressure is higher than usual.
• You have problems with breathing.
• You have swelling of ankles, feet etc.
You are too wet
Decrease your target weight


38
Chapter 5 Vascular access
Topic Page
• Vascular access 39
Arteriovenous Access 40
• Caring for an arteriovenous access 40
• Cannulation procedures for AV access - Rope Ladder - Supercath Buttonhole - Dull Bevel Buttonhole
42
• Tips for arteriovenous cannulation 48
• Checking blood flow through an AV access 49
• Managing problems with an AV access 51
Central venous catheter 57
• Caring for a CVC 58
• Changing the CVC dressing 59
• Showering with a CVC 60
• Preparing for hemodialysis through a CVC 61
• Preparing for hemodialysis through a CVC with a Tego connector
63
• Locking a CVC 65
• Locking a CVC with a Tego Connector 67 69 • Managing problems with a CVC

39
Vascular access “Vascular access” means a way to get to your blood. There are three methods of vascular access for hemodialysis.
Method Description
Arteriovenous (AV) fistula
• This method is recommended most often, as it lasts the longest and has the least problems.
• An artery is joined to a vein. This is usually done in the lower or upper part of your arm.
• Pressure from the artery makes the vein get bigger and stronger. This takes about 2 months. Then the AV fistula is ready to use.
Arteriovenous (AV) graft
• This method is chosen when veins are too small or weak to make a fistula.
• An artery in your arm is connected to a vein using a soft tube (graft). The graft may be straight or in a “U” shape (loop graft).
• The graft becomes an “artificial blood vessel”, used to access your blood for hemodialysis.
• If you have a loop AV graft, the Home Hemodialysis nurse will check the direction of blood in the graft. This will show which part of the loop graft is considered arterial or venous.
Central venous catheter (CVC)
• A CVC is a soft, plastic tube inserted into a large vein in your neck. The tip of the catheter rests in the right atrium. This is the upper chamber of the heart where blood returns from the body.
• Much of the catheter is under the skin. The “exit site” is where it comes out of the body.
• The catheter has two ports. One port allows blood to be removed. The second port allows clean, dialyzed blood to return to the body.
• A CVC tends to clot more easily and has a greater chance of getting infected than an AV fistula or graft.
The next section of this guide describes the care and use of your access.

40
Caring for an arteriovenous access AV fistula or AV graft
What to do every day
Exercise To help the AV fistula develop, exercise that arm by squeezing a
sponge ball frequently. No exercise is needed for an AV graft.
Check for the “thrill” You can feel a vibration (buzz or throb) as blood goes through your
access. This is called the “thrill”. Check the thrill several times a day.
If the thrill changes or stops, call the Home Hemodialysis Unit right
away. A blood clot may have formed.
AV fistula
AV graft

41
Listen to the “bruit” (pronounced “bruee”)
When you put your ear to the access, you can hear the sound of blood flowing through the access. This is called the “bruit”.
If the bruit changes or sounds like a whistle, your blood vessels may
be narrowing. This is called stenosis. Call the Home Hemodialysis Unit, as this can reduce or block the flow of blood.
Check for signs of infection
Check for redness, warmth, swelling, pain or discharge.
If you notice any signs of infection, call the Home Hemodialysis Unit
right away. An infection will need to be treated quickly.
Prevent infection
Keep the area around the access clean and dry.
Before using the access, wash your hands and the access area with soap and warm water for 15 seconds. Then clean with antiseptic.
What not to do
Do not wear tight clothing or jewellery that could restrict the flow of blood to the access.
Do not sleep on the AV access arm.
Do not take blood pressure on the AV access arm.
Do not have blood samples taken from the AV access arm, except by a trained dialysis nurse.
Do not use the AV access for giving intravenous medicines, unless directed by your dialysis team.
42
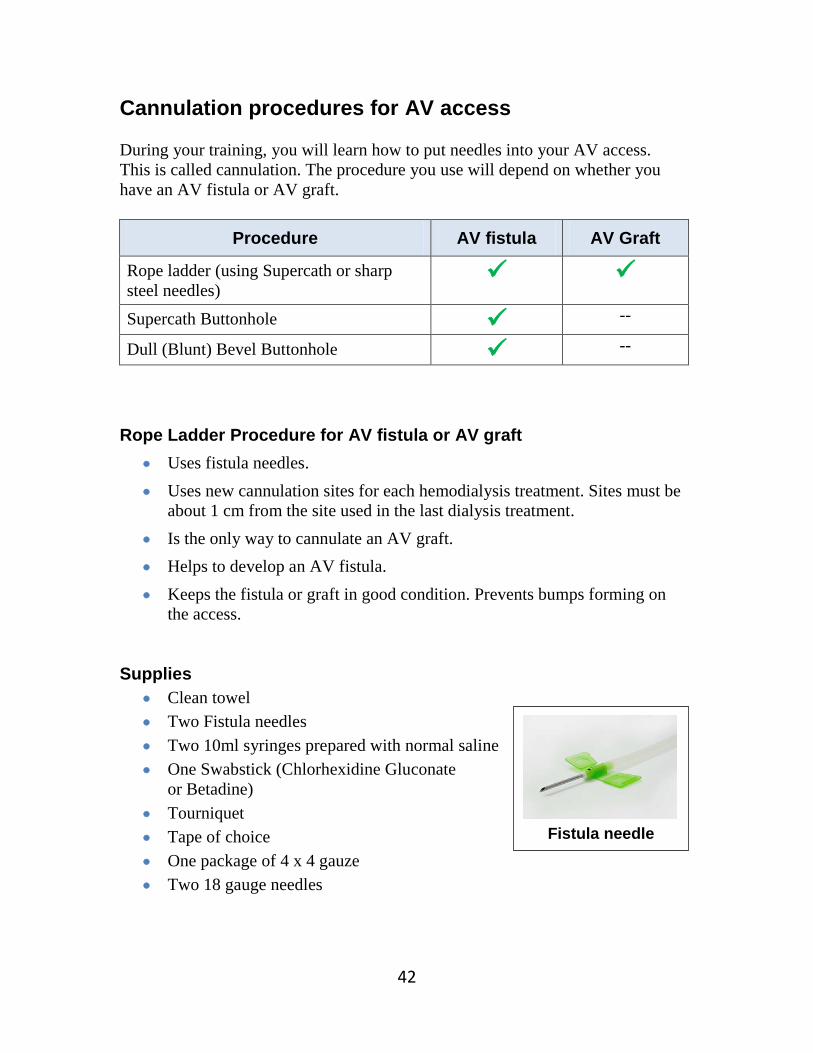
Cannulation procedures for AV access During your training, you will learn how to put needles into your AV access. This is called cannulation. The procedure you use will depend on whether you have an AV fistula or AV graft.
Procedure AV fistula AV Graft
Rope ladder (using Supercath or sharp steel needles)
Supercath Buttonhole --
Dull (Blunt) Bevel Buttonhole --
Rope Ladder Procedure for AV fistula or AV graft
• Uses fistula needles. • Uses new cannulation sites for each hemodialysis treatment. Sites must be
about 1 cm from the site used in the last dialysis treatment. • Is the only way to cannulate an AV graft. • Helps to develop an AV fistula. • Keeps the fistula or graft in good condition. Prevents bumps forming on
the access. Supplies
• Clean towel • Two Fistula needles • Two 10ml syringes prepared with normal saline • One Swabstick (Chlorhexidine Gluconate
or Betadine) • Tourniquet • Tape of choice • One package of 4 x 4 gauze • Two 18 gauge needles
Fistula needle

43
Rope Ladder Procedure
1. Wash your hands and the access area with soap and warm, running water for 15 seconds. Dry with clean towel.
2. Prepare fistula needles. Remove from package. Attach a 10ml syringe filled with normal saline to needles. Prime needles. Leave clamps open. Set aside.
3. Apply tourniquet.
4. Choose the Arterial and Venous cannulation sites and landmark the access.
5. Clean the cannulation sites with the swabstick.
Arterial cannulation:
6. Pinch wings of needle together. Carefully remove tip cover.
7. Put needle into the cannulation site: bevel up, at a 45-degree angle.
8. Push needle in carefully.
9. Tape the fistula needle securely in place.
10. Loosen and/or remove the tourniquet.
11. Check the needle position. First pull back blood into 10ml syringe. Then inject and check return flow. Clamp the needle.
Venous cannulation:
12. Apply tourniquet.
13. Put needle into the venous cannulation site, using steps 6 to 11.
14. Continue with the procedure to start dialysis.

44
Supercath Buttonhole Procedure for AV fistula only
• The buttonhole procedure is also known as “constant site” cannulation. Instead of rotating sites, you choose two sites; one for each needle. You put each needle into the exact same spot, at the same angle, at the same depth for each dialysis treatment.
• After placing the needle in the same site 6 to 10 times, the skin heals to form a tiny tunnel or tract, like the hole in a pierced ear. The opening looks like the hole in a button.
• The first step is removing the scab over the buttonhole from the previous treatment. This lets you see the opening of the buttonhole and prevents germs in the scab from entering your bloodstream.
• Supercath needles can be used to cannulate and dialyse. Supplies
• Clean towel • One package of 4x4 gauze • Two Chlorhexidine Gluconate swabs
or gauze soaked with normal saline • Tourniquet • Three 18 gauge needles • One Swabstick (Chlorhexidine Gluconate
or Betadine) • Two Supercath needles • Three IV 3000 dressing • Two clamps • Two 10ml syringes prepared with normal saline • Two alcohol wipes • Warm compress if needed
Supercath needle

45
Supercath Buttonhole Procedure
1. Wash your hands and the access area with soap and warm, running water for 15 seconds. Dry with clean towel.
2. Soak buttonhole site with a chlorhexidine gluconate swab or gauze soaked with saline for 5 to10 minutes.
3. Remove the scab from the buttonhole sites to be cannulated, using one sterile needle for each site.
Arterial cannulation:
4. Apply tourniquet.
5. Landmark the access and clean area with chlorhexidine gluconate or betadine swabstick.
6. Twist the inner needle of the supercath to break the seal between the needle and the catheter.
7. Insert supercath needle into the buttonhole: bevel up, at a 45-degree angle. When you see blood in the hub of the needle, push the needle into the fistula.
8. Loosen and/or remove the tourniquet.
9. Hold the supercath needle in place with the IV 3000 dressing.
10. Remove the inner needle from the catheter.
11. Clamp the supercath.
12. Remove the cap from the supercath.
13. Attach 10ml syringe prepared with normal saline to supercath.
14. Remove the clamp and pull back on plunger of syringe. (Trap air from supercath into 10ml syringe.)
15. Flush the supercath with the normal saline. Clamp the supercath.
Venous cannulation:
16. Repeat steps 4 to 15 to put the needle into the venous cannulation site.
17. Continue with the procedure to start dialysis.
46
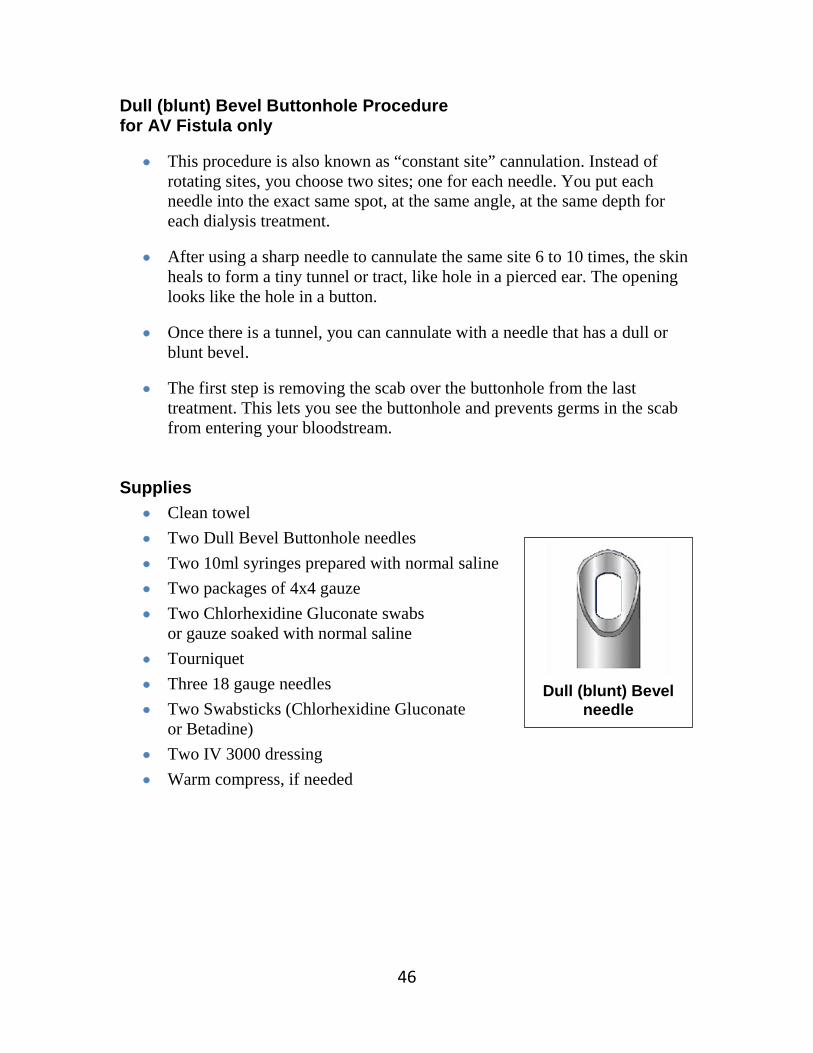
Dull (blunt) Bevel Buttonhole Procedure for AV Fistula only
• This procedure is also known as “constant site” cannulation. Instead of rotating sites, you choose two sites; one for each needle. You put each needle into the exact same spot, at the same angle, at the same depth for each dialysis treatment.
• After using a sharp needle to cannulate the same site 6 to 10 times, the skin heals to form a tiny tunnel or tract, like hole in a pierced ear. The opening looks like the hole in a button.
• Once there is a tunnel, you can cannulate with a needle that has a dull or blunt bevel.
• The first step is removing the scab over the buttonhole from the last treatment. This lets you see the buttonhole and prevents germs in the scab from entering your bloodstream.
Supplies
• Clean towel • Two Dull Bevel Buttonhole needles • Two 10ml syringes prepared with normal saline • Two packages of 4x4 gauze • Two Chlorhexidine Gluconate swabs
or gauze soaked with normal saline • Tourniquet • Three 18 gauge needles • Two Swabsticks (Chlorhexidine Gluconate
or Betadine) • Two IV 3000 dressing • Warm compress, if needed
Dull (blunt) Bevel
needle

47
Dull (Blunt) Bevel Buttonhole Procedure
1. Wash your hands and the access area with soap and warm, running water for 15 seconds. Dry with clean towel.
2. Prepare buttonhole or dull needles. Remove from package. Attach a 10ml syringe filled with normal saline to each needle. Prime needles. Leave clamps open. Set aside.
3. Soak buttonhole sites with a chlorhexidine swab or gauze soaked with saline for 5 to 10 minutes.
Arterial cannulation:
4. Apply tourniquet.
5. Use one sterile 18g needle to remove the scab on the cannulation site.
6. Clean area again with chlorhexidine gluconate or betadine swabstick.
7. Pinch wings of needle together. Carefully remove tip cover.
8. Line up the dull bevel needle over the buttonhole site, with bevel facing up. Insert needle into buttonhole.
9. Move dull bevel needle along tunnel track. If you feel a little resistance, turn the buttonhole needle as you move it forward, using gentle pressure.
10. Loosen and/or remove the tourniquet.
11. Check the position of the needle. First, pull back blood into 10ml syringe. Then flush and check the return flow. Clamp needle.
12. Hold the needle in place with IV 3000 dressing.
Venous cannulation
13. Repeat steps 4 to 12 to put the needle into the venous buttonhole site.
14. Continue with the procedure to start dialysis.
If you are not able to cannulate with a dull bevel needle, you may need to change to a sharp needle.

48
Tips for arteriovenous cannulation
Choosing cannulation sites
• The arterial and venous cannulation sites should be: - At least 5 cm (2 inches) apart from each other - At least 2.5 cm (1 inch) away from the access surgery scar
• New cannulation sites must be about 1 cm (3/8 inch) away from the site used for the last treatment.
Inserting needles
• Hold the needle at a 45-degree angle.
• Put the dialysis needle in bevel up. This makes a clean cut in the skin and the blood vessel. - Bevel sideways leaves a slit. - Bevel down can make the site bleed longer after treatment.
• Do not lift the needle off the cannulation site once it is placed on the skin.
To prevent a serious infection, always follow the steps you have been taught.
49
Checking blood flow through an AV access During home hemodialysis, you will have outpatient tests and procedures to monitor the blood flow through your AV access. This is an important part of your care. The Home Hemodialysis team will schedule your tests and give you further instructions. Transonic flow study
• Checks the amount of blood flowing through your access.
• The transonic monitor lines are connected to the dialysis blood lines to measure blood flow through the access.
• Low blood flow means that your access may be narrowed (stenosed). You will need to have further tests.
• The Transonic Flow Study is done in the Home Hemodialysis Unit. This requires cannulation and connection to the dialysis machine.
Ultrasound
• Ultrasound uses sound waves to check blood flow and detect any narrowing in an AV fistula.
• Doppler ultrasound is used to check blood flow and detect any narrowing in an AV graft.
• Ultrasound is done in the Vascular Department. Fistulogram and angiogram
• A needle is inserted into the fistula or graft.
• Dye is injected through the needle. • The dye lets the doctor see inside
the access on moving x-ray images. The doctor can check for any narrowing (stenosis) or problem areas.
• An angiogram is done in the Radiologist Department by an Interventional Radiologist.
During home hemodialysis, you must have a transonic flow study 2 times a year.
Fistulogram or angiogram are the best ways to detect narrowing in an AV fistula
or AV graft.

50
Angioplasty
• Angioplasty is a procedure to treat narrowing (stenosis). • A thin, flexible tube (catheter) is put into the access. Dye is used to see the
access on moving x-ray images. A tiny balloon is gently inflated to stretch and open up the narrowed area.
Before the procedure • Let the nurse or doctor know if you are allergic to dye, iodine or shellfish.
You will need medicine before the procedure to stop any allergic reaction. • Your heart and BP will be monitored. • A nurse will put in an intravenous (IV) to give you medicine.
After the procedure • You will need someone to take you home. • It is best to dialyze after the procedure. Check with the Home Hemodialysis
team. • You will have a transonic flow study in the Home Hemodialysis Unit
within 2 weeks after the angioplasty to check that blood flow has improved.

51
Managing problems with an AV access
Pain and swelling after access surgery
Description • It is common to have some pain and swelling after surgery. This should get better in 7 to 10 days.
Symptoms • The area around the access area is swollen and painful.
Action • Keep the access area raised to ease pain and reduce swelling.
Failure of fistula to fully develop
Description • Blood vessels can form at the side of the AV fistula and drain blood away from the fistula. This stops it from developing.
• Sometimes a vein is too small and does not develop enough to be cannulated.
Symptoms • The AV fistula is flat.
• You cannot feel the thrill (buzz or throb).
Action • The surgeon may need to tie off the side “branches” of blood vessels.

52
Infection
Description • Infection can happen after access surgery, and later on, around the cannulation sites.
• Infection of the access can lead to a serious blood infection called sepsis.
Symptoms • Fever and chills. • Redness, pain, swelling or discharge at the access incision
or a cannulation site. • Low blood pressure. Feeling unwell.
Action
• After access surgery, check the incision for redness, pain, swelling, or discharge.
• Check your access daily for redness, pain, swelling or discharge.
• Check your temperature before and after dialysis, when you feel warm or think you have a fever, and when you shiver or feel cold.
• Washing your hands is the best way to prevent infection. Follow the steps on page X.
• Always use the ‘no touch technique” described on page X. • Before cannulation, wash your hands and the access area
with soap and warm, running water for 15 seconds. • Follow the cannulation procedure carefully. • Take antibiotics as prescribed, before any surgery or
procedure such as getting your teeth cleaned, dental work, or a biopsy.
If you have signs of infection: • Call the Home Hemodialysis Unit right away. The nurse
will need to check you. Outside of the Unit’s hours, go to the hospital emergency department.
• Take antibiotics as ordered. You will be shown how to give intravenous antibiotics at home.
• Continue to use your access for hemodialysis, unless you are told not to.

53
Aneurysm or pseudoaneurysm (false aneurysm)
Description • Thinning of the skin over the AV fistula or AV graft causes a bulge or bump on the access.
• May be caused by blood leaking outside the fistula, or cannulating in the same area, creating a ‘pin cushion’ effect.
Symptoms • A bulge or bump on the access.
Action • Do not cannulate the areas where these bumps develop.
• Change cannulation sites with each dialysis treatment.
• If you have an AV fistula, using the buttonhole procedure can lessen the problem of aneurysms.
Steal syndrome
Description • The blood supply that should go to your hand goes to the access instead. The access is “stealing” blood away from your hand.
• There is not enough blood flow to your hand.
Symptoms • The wrist and hand of your access arm may be cold, painful, numb or swollen.
Action • Lower your hand to improve the blood flow to that area.
• Wear a woollen glove during dialysis.
• Check with your nurse to see if you can slow down the pump speed.
• Use a warm compress to ease pain.
• If pain continues, you may need surgery to improve the blood flow to your hand or arm.

54
Thrombosis (clotting)
Description A blood clot may form in the access due to: • Narrowing of the blood vessel (stenosis) • Bruising or swelling of the access • Constant low blood pressure • Dehydration
Symptoms • No thrill (buzz or throb) felt over the access.
• Your access arm may be warm, painful and swollen.
Action • Check your access daily. Feel the thrill and listen to the bruit.
• Make sure your target weight is correct, as low blood pressure or dehydration may lead to thrombosis.
If you have signs of thrombosis:
• Call the Home Hemodialysis Unit right away if you notice anything unusual when you check your access or you have difficulty with cannulation.
• A transonic flow study will be done. This test checks blood flow through the access. More information is on page X.
• Thrombosis can be treated in the Radiology Department. You may need angioplasty, a procedure to remove the clot and open up any narrowed areas.
• Go to the hospital emergency department. Your potassium and fluids will be checked as you may need dialysis.
• If you need dialysis, a temporary catheter will be put in and dialysis will be provided.
55
Infiltration or hematoma
Description • The dialysis needle is not in the correct place, causing blood to leak into the tissues around the access.
• This may occur if the needle is inserted at the wrong angle, or if the needle moves during dialysis.
• Infiltration can happen right away or after a few minutes.
Symptoms • The cannulation site is swollen and painful.
• Leaking around the venous needle will trigger the Max venous pressure alarm.
• Leaking around the arterial needle will trigger the Min arterial pressure alarm.
Action If this happens before dialysis:
• Remove the bad needle. Put ice on the swollen area.
• Re-cannulate with a new needle, above the swollen area if possible.
• Start treatment.
If this happens during dialysis:
• Recirculate the blood.
• Flush the good needle with normal saline.
• Cap off the bad needle. Put ice on the swollen area.
• Try to cannulate above the swollen area.
• Restart treatment.
Continued on next page

56
Action If it is not possible to re-cannulate with the bad needle in place:
- Remove the bad needle. - Because Heparin is used during treatment,
removing the needle can cause a lot of bleeding. Put pressure on the area until bleeding stops. Then, put ice on the area.
- Re-cannulate above the swollen area if possible. - Restart dialysis.
If you are not able to re-cannulate:
- Return your blood through the good needle and stop treatment.
- Call the Home Hemodialysis Unit right away. - Put a warm compress on the access the following day.
Stenosis (narrowing of the access)
Description • Narrowing of the access may occur naturally or from repeated cannulation. This can cause increased pressures during hemodialysis treatment.
• A narrowing can cause a sharp rise in venous pressure.
Symptoms • Higher venous pressure.
• Poor arterial flows.
• The thrill is not as strong or is very weak.
• Problems with cannulation.
Action If you have signs of stenosis:
• Call the Home Hemodialysis Unit as soon as possible.
• Your access will need to be checked. This will include a transonic flow study. Read about this test on the next page.
• You may need angioplasty, a procedure to open up the narrowed area. Read about this procedure on the next page.
57
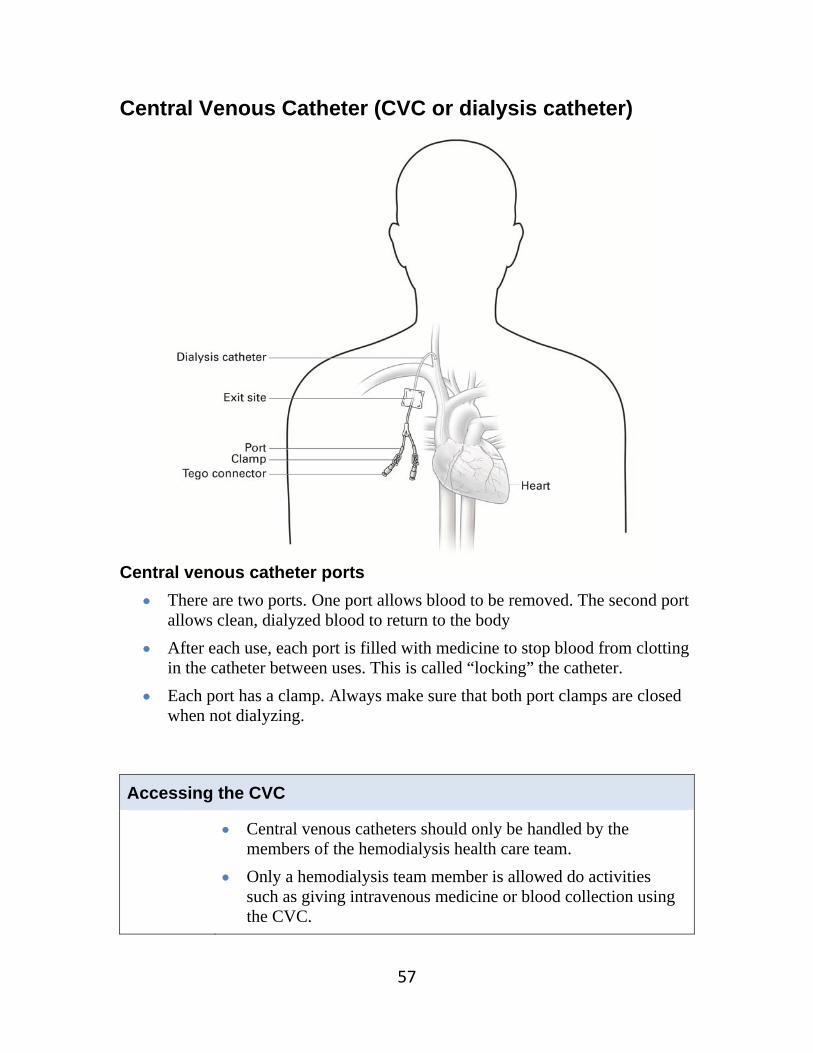
Central Venous Catheter (CVC or dialysis catheter) Central venous catheter ports
There are two ports. One port allows blood to be removed. The second port allows clean, dialyzed blood to return to the body
After each use, each port is filled with medicine to stop blood from clotting in the catheter between uses. This is called “locking” the catheter.
Each port has a clamp. Always make sure that both port clamps are closed when not dialyzing.
Accessing the CVC
Central venous catheters should only be handled by the members of the hemodialysis health care team.
Only a hemodialysis team member is allowed do activities such as giving intravenous medicine or blood collection using the CVC.

58
Caring for a CVC
What to do
Prevent infection • Before any activity involving the CVC, wash your hands with liquid soap
and warm, running water for 15 seconds. • Try not to talk during any activity involving the CVC. Turn away from
the catheter if you have to cough or sneeze. This keeps germs from your nose and mouth away from the catheter.
Check and change the CVC dressing (follow steps on page X) • Check the dressing over the exit site every day. It should be dry and
intact. Make sure it completely covers the exit site. • Change the dressing once a week - before or after hemodialysis
treatment. Never change the dressing during treatment.
• Always change the dressing after a shower, or if the site gets wet or dirty. • You do not usually need to wear a mask when you change the dressing.
Wear a mask if you have a cough or the flu.
Care for the exit site (follow steps on page X) When you change the CVC dressing: • Check the exit site for signs of infection: redness, pain, swelling,
discharge or a bad smell. • Disinfect the exit site and surrounding area with a Chlorhexidine
Gluconate or Betadine swabstick. Let the disinfectant dry on the skin. Do not dry the skin with gauze.
• Put a dab of Polysporin Triple ointment on sterile gauze and place it over the exit site. Cover the gauze with a CVC dressing.
If you have any problems or complications, call the Home Hemodialysis Unit right away.

59
Changing the CVC dressing A clean, dry dressing over the CVC exit site protects it from germs that could cause an infection. Supplies
• Clean towel • Two swabsticks: Chlorhexidine Gluconate
or Betadine • Polysporin Triple ointment • One package 2x2 gauze • One Dressing:
Tegaderm or Mepore or IV 3000
• One package 4x4 gauze Procedure
1. Wash hands with soap and warm, running water for 15 seconds. Dry with clean towel.
2. Carefully remove old dressing. Peel back the edges of the dressing away from the skin towards the exit site.
3. Discard the dressing.
4. Check the CVC exit site for signs of infection: redness, swelling, discharge or bad smell. Call the Home Hemodialysis Unit to report any signs of infection.
5. Note the length of the CVC. Call the Home Hemodialysis Unit to report any change in the length of the catheter.
6. Clean the area with the chlorhexidine gluconate or betadine swabstick. Start at the exit site and use a circular motion to clean around the exit site and surrounding area. Use the swabstick once and then discard.
7. Clean the exit site and surrounding area again, using a new swabstick.
8. Wait for the area to dry.
9. Apply a dab of Polysporin Triple ointment to the centre of a 2x2 gauze. Apply the Polysporin over the CVC exit site. Discard the gauze.
10. Apply the CVC dressing securely, to completely cover the exit site.

60
Showering with a CVC Supplies
• One small, new plastic bag • Waterproof tape
Procedure
1. Put both ports of the CVC into the plastic bag.
2. Use waterproof tape to seal the bag over central venous catheter exit site.
3. Have a shower.
4. After the shower, change the CVC dressing, following the procedure on the previous page.

61
Preparing for hemodialysis through a CVC Supplies
• One Clean towel • Two 18 gauge needles • Two 10ml syringes prepared with normal saline • Two Chlorhexidine Gluconate swabsticks • One package of 4x4 gauze • Two 3ml syringes
Procedure
1. Wash hands with soap and warm, running water for 15 seconds. Dry with clean towel.
2. Connect the 18 gauge needles to the 10cc syringes. Use a swabstick to disinfect the injection port of the normal saline bag. Insert one needle/syringe into the port and fill the syringe with 10cc normal saline from the saline bag. Repeat with the other needle/syringe.
3. Place 4x4 gauze underneath the catheter ports.
4. Ensure the clamps on both ports of the catheter are closed.
Preparing the first port
5. Remove cap from the port.
6. Place the end of the catheter in the chlorhexidine swab package. Rub briskly. Do not touch the end of the port.
7. Attach a 3ml syringe to the end of the port.
8. Open the clamp on the port and withdraw 3ml of blood. Note the ease of the flow. Observe for clots. Do not inject blood back into the catheter.
9. Clamp catheter. Remove and discard the 3ml syringe containing blood.
10. Attach a 10ml syringe filled with saline to the port. Open the clamp on the port. Inject all the normal saline into the port. Close the clamp on the port.
Continued on the next page

62
Preparing the second port
11. Remove cap from the second port and repeat steps 5 to 10.
12. Discard normal saline priming bag and spike.
13. Connect arterial line to arterial port.
14. Start the blood pump speed slowly. Observe the arterial pressure. Continue with the procedure to start dialysis.

63
Preparing for hemodialysis through a CVC with a Tego connector Supplies
• Clean towel • Two 18 gauge needles • Two 10ml syringes prepared with normal saline • Five Chlorhexidine Gluconate swabs • Two 3ml syringes • Two Tego connectors
Procedure Prepare syringes with normal saline
1. Wash hands with soap and warm, running water for 15 seconds. Dry with clean towel.
2. Connect the 18 gauge needles to the 10cc syringes.
3. Clean the injection port of the normal saline bag with a chlorhexidine swab.
4. Insert one needle/syringe into the port and fill the syringe with 10cc normal saline from the saline bag. Repeat with the other needle/syringe.
Prepare catheter for dialysis
1. Wash hands with soap and warm, running water for 15 seconds.
Preparing the first port
2. Ensure the clamps on both ports of the catheter are closed.
3. Clean the silicone seal of Tego connector with a Chlorhexidine swab.
4. Attach 3ml syringe to Tego connector.
5. Open clamp on the port and withdraw 3ml of blood.
6. Clamp catheter. Remove and discard the 3ml syringe containing blood.
7. Attach a 10ml syringe filled with normal saline to port.
8. Open the clamp on the port. Inject the normal saline into the port.
9. Close the clamp on the port.

64
Preparing the second port
10. Repeat steps 2 to 9 for the second port.
11. Ensure arterial line is clamped.
12. Disconnect arterial line from IV spike.
13. Attach arterial line to arterial Tego connector.
14. Open the arterial port clamp.
15. Open the arterial line clamp.
16. Start blood pump flow.
17. Continue with procedure to start dialysis. Change Tego connector every 7 days
1. Wash hands with soap and warm, running water for 15 seconds. Dry with a clean towel.
2. Ensure the clamps on both ports of the catheter are closed.
3. Remove Tego connector from the first port.
4. Clean the open end of arterial catheter with chlorhexidine swab.
5. Attach new Tego connector.
6. Repeat steps 2 to 5 for the second port.

65
Locking a CVC “Locking” a CVC means adding a solution with a medicine to prevent clotting (anti-coagulant). This keeps the catheter open between uses. Your doctor will prescribe the solution you will use: heparin or sodium citrate. Supplies
• Clean towel • Two packages of 4x4 gauze • Two caps • Two Chlorhexidine Gluconate swabs • One syringe prepared with 10ml normal saline • Anticoagulant solution: One Syringe pre-filled with Sodium Citrate 4%
OR Two 3ml syringes prepared with the prescribed volume of
Heparin 1:10,000 units/ml Procedure
1. Wash hands with soap and warm, running water for 15 seconds. Dry with clean towel.
2. Open the packages of 4x4 gauze and caps. Set aside.
3. Place a piece of gauze underneath each catheter port.
4. Ensure the clamps on both ports of the catheter are closed and the blood lines are clamped.
Lock the first port
5. Disconnect arterial bloodline from the catheter.
6. Place the end of the port in the chlorhexidine gluconate swab package. Rub briskly. Do not touch the end of the port.
7. Attach 10ml syringe with normal saline to the port. Open the clamp on the port. Inject the normal saline into the port (flush until clear). Close the clamp on the port. Discard the 10ml syringe.
Continued on next page

66
8. Add Sodium Citrate 4%: Attach the pre-filled Sodium Citrate syringe to the port. Open the clamp on the port. Inject the prescribed amount of sodium citrate into the port. Close the clamp on the port. OR Add heparin: Attach the 3ml syringe prepared with heparin 1:10,000u/ml to the port. Open the clamp on the port. Inject the prescribed amount of heparin into the port. Close the clamp on the port.
Lock the second port
9. Repeat steps 5 to 8 for the second port.

67
Locking a CVC with a Tego Connector Change the Tego connector every 7 days and when the connector looks frayed. Supplies
• Clean towel • Two Chlorhexidine Gluconate swabs • Three 10ml syringes prepared with normal saline • Anticoagulant solution: Two 3ml syringes prepared with the prescribed
volume of Heparin 1:10,000 units/ml OR
One syringe pre-filled with Sodium Citrate 4% Procedure
1. Wash hands with soap and warm, running water for 15 seconds. Dry with clean towel.
2. Ensure the clamps on both ports of the catheter are closed.
3. Ensure the arterial and venous lines are clamped.
4. Disconnect arterial bloodline from the catheter.
Lock the first port
5. Clean the silicone seal of the Tego connector with the chlorhexidine swab.
6. Attach 10ml syringe with normal saline to the port.
7. Open the clamp on the port. Inject the normal saline (flush until clear).
8. Close the clamp on the port.
9. Discard the 10ml syringe.
Continued on next page

68
10. Add Sodium Citrate: Attach the pre-filled Sodium Citrate syringe to the
port. Open the clamp on the port. Inject the prescribed amount of sodium citrate into the port. Close the clamp on the port. OR Add heparin: Attach the 3ml syringe prepared with heparin 1:10,000u/ml to the port. Open the clamp on the port. Inject the prescribed volume of heparin into the port. Close the clamp on the port.
Lock the second port
11. Repeat steps 5 to 10 for the second port.

69
Managing problems with a CVC Thrombosis (clotting)
Description • The most common problem with dialyzing using a CVC. • Clots usually form at the tip of the catheter.
Symptoms • Poor blood flow with bad pressure readings (arterial or venous pressure is greater than 250 mmHg, or pressures are fluctuating - triggering alarms)
Prevention • Flush the CVC by removing 3 ml blood from each port. Then flush each port with 10ml normal saline.
• After dialysis, a heparin or sodium citrate solution is put into each port to prevent clots forming in the catheter. Follow steps to “lock” the CVC on page X, or page X if you have a CVC with a Tego connector.
Action If you have signs of thrombosis:
• Call the Home Hemodialysis Unit as soon as possible.
• The Home Hemodialysis nurse may put alteplase (Cathflo®) into the CVC to help dissolve the clot.
• If the problem is severe, the CVC may need to be changed.
70
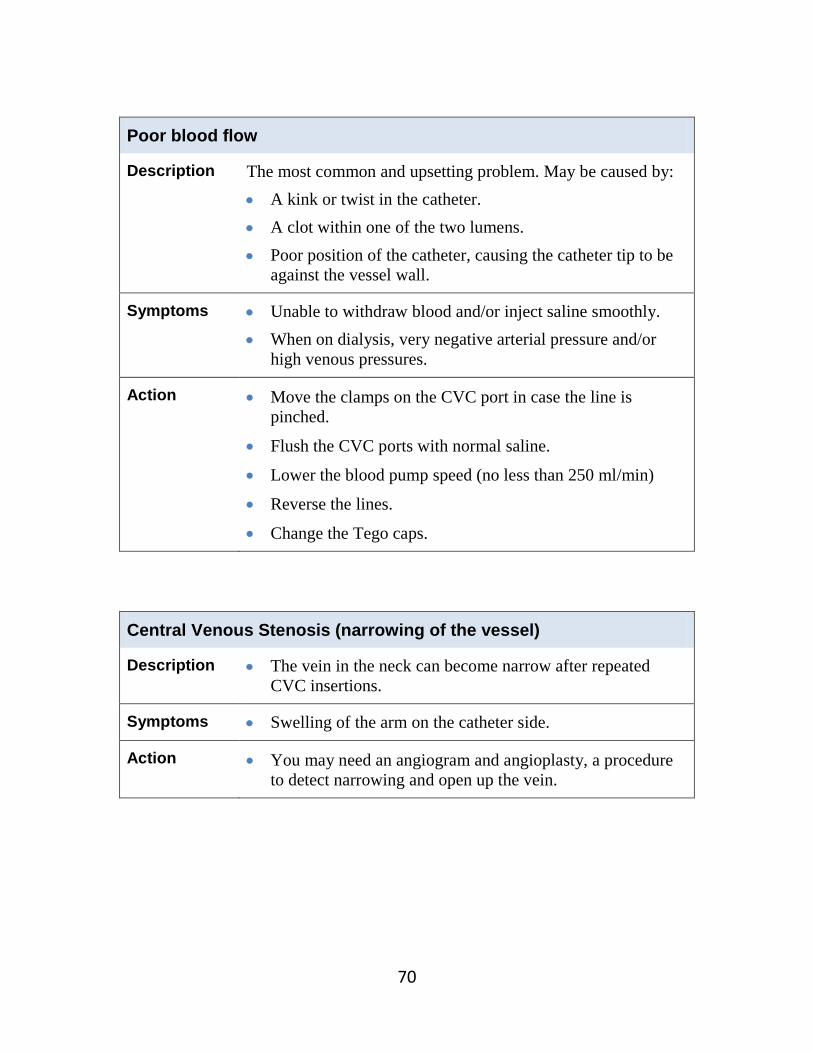
Poor blood flow
Description The most common and upsetting problem. May be caused by: • A kink or twist in the catheter. • A clot within one of the two lumens. • Poor position of the catheter, causing the catheter tip to be
against the vessel wall.
Symptoms • Unable to withdraw blood and/or inject saline smoothly. • When on dialysis, very negative arterial pressure and/or
high venous pressures.
Action • Move the clamps on the CVC port in case the line is pinched.
• Flush the CVC ports with normal saline.
• Lower the blood pump speed (no less than 250 ml/min)
• Reverse the lines.
• Change the Tego caps.
Central Venous Stenosis (narrowing of the vessel)
Description • The vein in the neck can become narrow after repeated CVC insertions.
Symptoms • Swelling of the arm on the catheter side.
Action • You may need an angiogram and angioplasty, a procedure to detect narrowing and open up the vein.
71
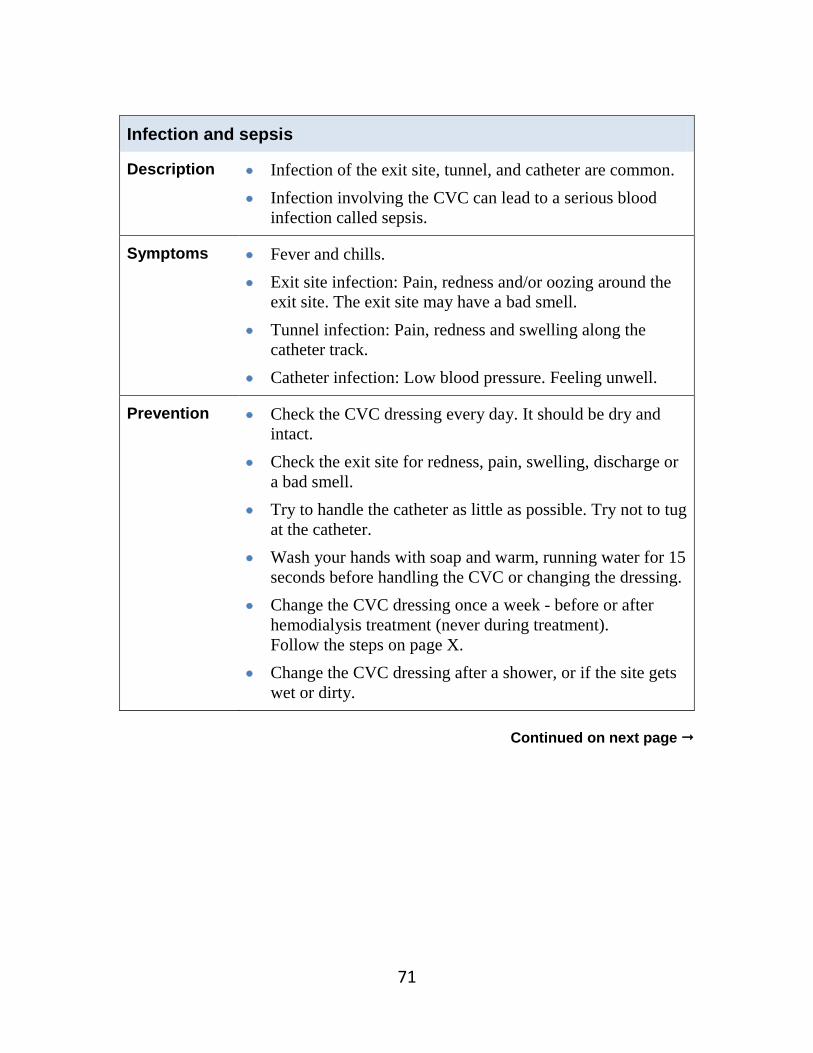
Infection and sepsis
Description • Infection of the exit site, tunnel, and catheter are common. • Infection involving the CVC can lead to a serious blood
infection called sepsis.
Symptoms • Fever and chills. • Exit site infection: Pain, redness and/or oozing around the
exit site. The exit site may have a bad smell. • Tunnel infection: Pain, redness and swelling along the
catheter track. • Catheter infection: Low blood pressure. Feeling unwell.
Prevention • Check the CVC dressing every day. It should be dry and intact.
• Check the exit site for redness, pain, swelling, discharge or a bad smell.
• Try to handle the catheter as little as possible. Try not to tug at the catheter.
• Wash your hands with soap and warm, running water for 15 seconds before handling the CVC or changing the dressing.
• Change the CVC dressing once a week - before or after hemodialysis treatment (never during treatment). Follow the steps on page X.
• Change the CVC dressing after a shower, or if the site gets wet or dirty.
Continued on next page

72
Action If you have signs of infection:
• Go the Home Hemodialysis Unit to be checked. Never ignore symptoms of infection.
• If the exit site looks infected, the nurse will take a sample with a swab to be tested for infection.
• You will have a blood test (blood cultures) to check for infection.
• The doctor will prescribe antibiotics to treat the infection.
• Continue to dialyze using the CVC unless told not to by the Home Hemodialysis team.
• The catheter may have to be removed and a new one put in.
If you develop chills and fever during hemodialysis:
• Stop the treatment.
• Go to the hospital emergency department for immediate medical help.

73
Catheter becomes displaced or dislodged
Description • The CVC is not in the correct position. • The CVC may become dislodged after an infection or if the
sutures are removed too early.
Symptoms • The length of the catheter may be longer than when it was put in.
• Swelling and bloody discharge from the exit site.
Prevention • When the CVC it put in, it is held in place with stitches (sutures). The stitches are removed in 6 to 8 weeks.
• Do not tug on the CVC. • Secure the blood lines during dialysis by taping them down. • Note the length of the catheter outside the exit site.
Check that the length remains the same.
Action If the catheter is dislodged:
• Return the blood (retransfuse), if possible and stop treatment.
• If swelling develops during retransfusion, STOP returning the blood.
• If bleeding or swelling occurs, try to remain flat. Do not remove the catheter.
• Apply firm pressure to the site.
• Tape down the CVC to prevent further movement.
• Call the Home Hemodialysis Unit or go to the hospital emergency room for medical help.
• If you need dialysis, a temporary catheter will be inserted in your groin area. It will be removed after treatment.
• Arrangements will be made to insert a new CVC.
74
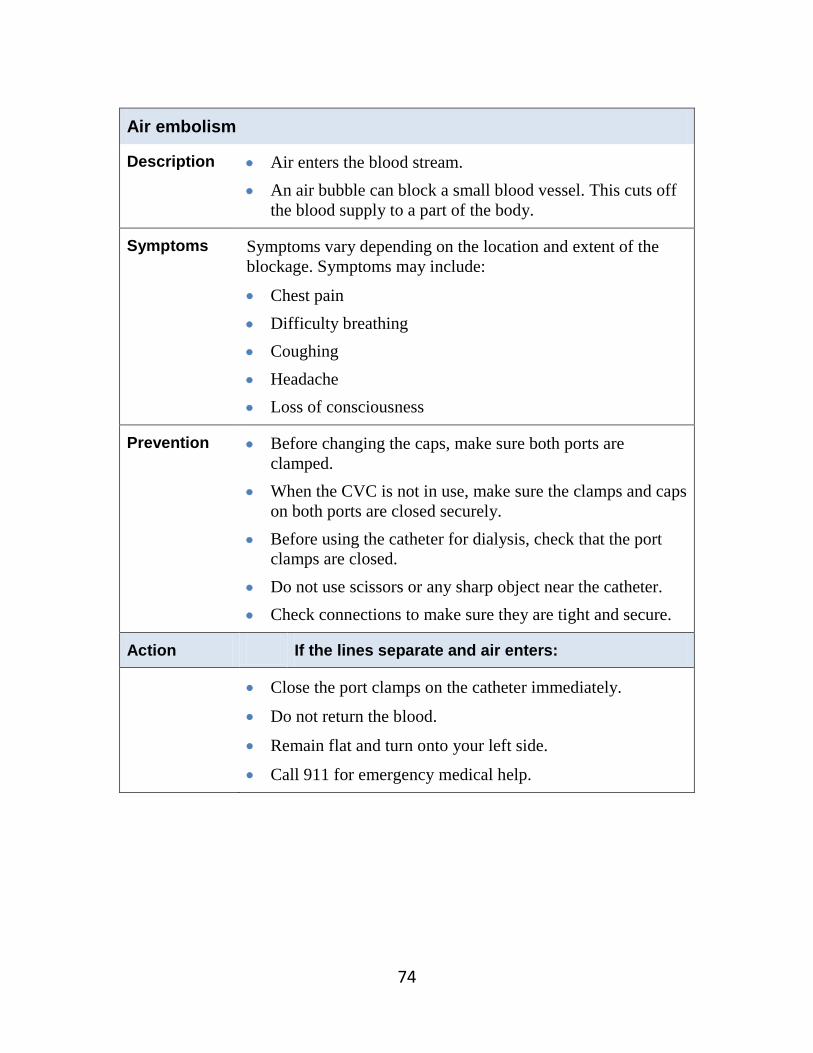
Air embolism
Description • Air enters the blood stream. • An air bubble can block a small blood vessel. This cuts off
the blood supply to a part of the body.
Symptoms Symptoms vary depending on the location and extent of the blockage. Symptoms may include:
• Chest pain • Difficulty breathing • Coughing • Headache • Loss of consciousness
Prevention • Before changing the caps, make sure both ports are clamped.
• When the CVC is not in use, make sure the clamps and caps on both ports are closed securely.
• Before using the catheter for dialysis, check that the port clamps are closed.
• Do not use scissors or any sharp object near the catheter. • Check connections to make sure they are tight and secure.
Action If the lines separate and air enters:
• Close the port clamps on the catheter immediately.
• Do not return the blood.
• Remain flat and turn onto your left side.
• Call 911 for emergency medical help.

75
Chapter 6 Water training
Topic Page
• Water care 76
• The DWA Reverse Osmosis Unit 78
• Procedure: Clean the R/O Unit with Citric Acid 79
• Procedure: Test for chlorine breakthrough from carbon tank 81
• Procedure: Test for bacteria growth using Millipore sampler 82
• Procedure: Change the 1-Micron filter 84
• Before Hemodialysis – Using the DWA R/O Unit 85
• During Dialysis – Using the DWA R/O Unit 86
• After Hemodialysis – Using the DWA R/O Unit 87
• Schedule of tests for the water treatment system 88
• Summary of water care and tests 89

76
Water care
The water in your home is safe to drink, but it is not safe to use for home hemodialysis treatments.
The water used for dialysis must be purified. During dialysis, your blood flows by one side of the membrane in the dialyzer and dialysate flows by on the other side. The dialysate contains water. If the water has impurities (contaminants), they could pass through the membrane and get into your blood. This could cause you serious harm. Dialysis uses such a large amount of water that even tiny amounts of contaminants that are considered safe in drinking water could be dangerous for you. Contaminants in water As rain passes through the air and into the ground, it picks up contaminants. When the water reaches your city reservoir, it is treated with chemicals to keep it clean and clear. As a result, tap water contains very small amounts of bacteria, metals and chemicals. This is considered safe and acceptable for drinking water.
Contaminants Examples Dissolved inorganics (Salts, minerals and electrolytes)
• Aluminum • Arsenic • Barium • Cadmium • Calcium
• Chromium • Copper • Fluoride • Lead
• Magnesium • Mercury • Nitrates • Potassium • Selenium
• Silver • Sodium • Sulfates • Zinc
Dissolved organics • Pesticides and herbicides, chlorine, PCB’s
Bacteria and Pyrogens
• Bacteria and endotoxins (toxic substances released when bacteria die).
Radioactive materials
• Radium, uranium
Suspended particles • Rust • Sand • Plastics • Carbon
Did you know? • The dialyzer is in
contact with over 120 litres of water during each treatment.

77
Controlling bacteria Water for dialysis does not need to be sterile, because the dialyzer membrane is a good barrier against bacteria and endotoxins. However, you do need to control the bacteria in water by regularly disinfecting the water treatment system. Technologists from the dialysis team will schedule and carry out disinfection of the water treatment system (the DWA Reverse Osmosis Unit). It is also important to disinfect the insides of the dialysis machine. Without this cleaning, bacteria can build-up in the machine. With home hemodialysis, disinfection of the dialysis machine is the patient’s responsibility. You will learn how to do this during your training. How water is purified for dialysis
Tap water • Tested by your city to meet standards for drinking
water.
Carbon Tank
• The carbon tank has a charcoal filter that absorbs contaminants from water.
• This process removes chlorine, organic material and odour-producing substances.
Chlorine free water
1-Micron filter
(Sediment filter)
• The 1-Micron filter works like a sieve to remove particles from water.
• This filter must be changed every 8 weeks.
DWA Reverse Osmosis Unit
• This unit has a pump that forces water across a membrane. Pure water can pass through the membrane, but contaminants cannot.
• This process removes up to 99% of impurities, such as electrolytes, bacteria, viruses and pyrogens.
Pure water for dialysis
Contaminants go down the drain

78
The DWA Reverse Osmosis Unit (R/O Unit) Control Panel Display panel upper line
• Shows the current operating mode.
• Standby means the machine is ready for dialysis, cleaning or disinfection.
Display panel lower line
• Shows the function that can be activated.
• Change the function by pushing the selection key. This is called “paging up”.
Selection key • Push this key to “page up” (change the display to the desired selection)
Acknowledge key • Push this key to confirm a selection.
To maintain the R/O Unit, you must learn to:
• Clean the R/O Unit with citric acid
• Test for chlorine breakthrough and arrange for the carbon tank to be exchanged
• Test for bacteria growth using the Millipore Sampler
• Change the 1-Micron filter
Learn these procedures on pages X to X
STANDBY
Select: On
Selection
key
Display panel upper line Display panel Lower line Acknowledge key

79
Procedure: Clean the R/O Unit with Citric Acid
The R/O Unit must be cleaned every 2 weeks.
• This removes calcium deposits that may build-up in the unit. • Use 20% Citric Acid solution to clean the R/O Unit.
Supplies
• Measuring cup • 300 ml of 20% Citric Acid solution • Funnel
Cleaning the R/O Unit
1. Turn on the tap water supplying the R/O Unit. 2. Pour 300 ml of citric acid into the measuring cup. 3. Begin with the Unit on Standby.
4. Press the Selection key until Select: Cleaning is displayed.
5. Press and hold the Acknowledge key firmly for 4 seconds until Cleaning–Injection! is displayed.
STANDBY
Select: On
STANDBY
Select: Cleaning
STANDBY
Select: Cleaning
Cleaning: Injection!
Select: ---------------
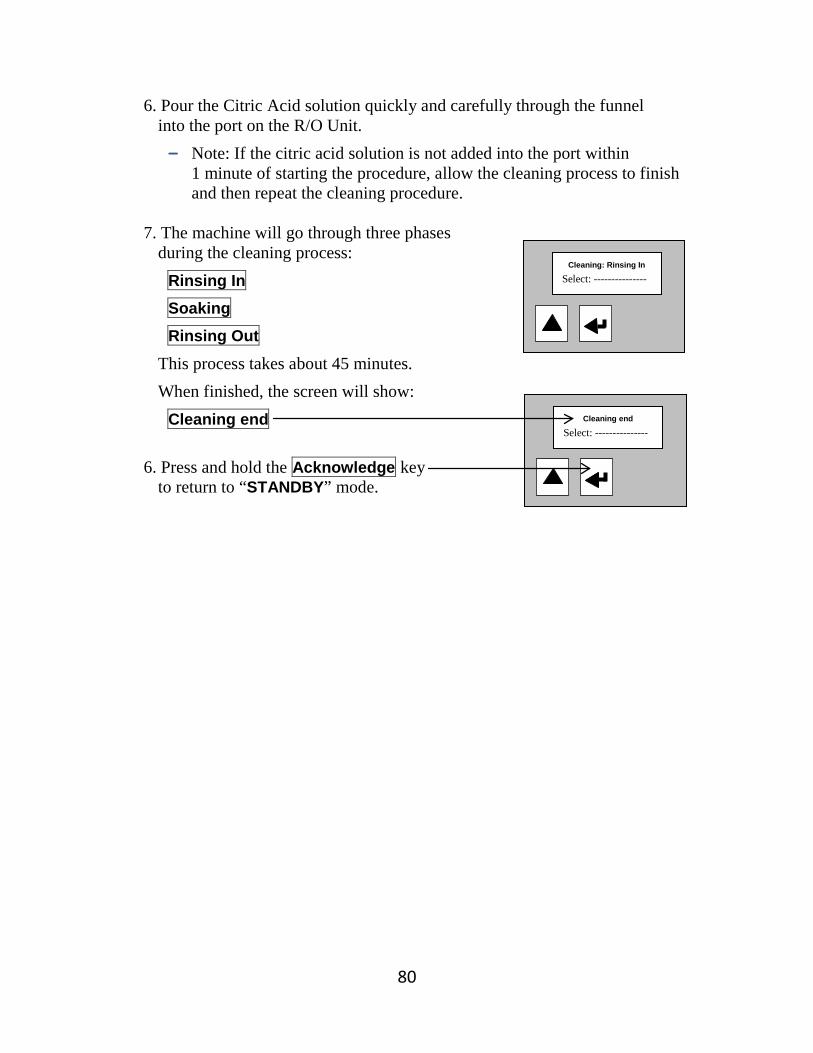
80
6. Pour the Citric Acid solution quickly and carefully through the funnel into the port on the R/O Unit. - Note: If the citric acid solution is not added into the port within
1 minute of starting the procedure, allow the cleaning process to finish and then repeat the cleaning procedure.
7. The machine will go through three phases
during the cleaning process: Rinsing In Soaking Rinsing Out
This process takes about 45 minutes. When finished, the screen will show:
Cleaning end
6. Press and hold the Acknowledge key to return to “STANDBY” mode.
Cleaning: Rinsing In
Select: ---------------
Cleaning end
Select: ---------------

81
Procedure: Test for Chlorine Breakthrough from Carbon Tank
Test for chlorine breakthrough at the end of each dialysis treatment:
• This test checks that the carbon tank is working properly. • The carbon tank is good for about 6 months. • A “positive” chlorine test means the carbon tank is exhausted.
It must be changed before your next dialysis treatment. Supplies
• One test tube • One chlorine powder packet • One sheet white paper • One small container to catch the run off water
Testing for Chlorine Breakthrough
1. Open the valve to the waterspout over the 1-Micron filter. Allow some water to run off. Then rinse the test tube under the spout.
2. Take a 5ml sample of water in the test tube.
3. Add the contents of one chlorine powder packet to the water in the tube. Shake for 15 seconds.
4. Immediately hold the water sample against the white paper and look for pink colour in the water. - Note: If the reading is not taken within the first minute of adding the
chlorine powder packet, the results are not accurate. The longer the sample sits, the pinker the water sample will become.
Record the results: Take action:
Negative The water sample remained clear.
• No action needed.
Positive The water sample turned pink.
• The carbon tank is exhausted. • Arrange to have the carbon tank changed
before your next dialysis treatment.

82
Procedure: Test for Bacteria Growth using Millipore Sampler
Test for bacteria growth every 2 weeks
• This procedure checks the amount of bacteria in the water used for dialysis.
• Collect and test a sample of water from the R/O Unit Product Line. This is called product water.
Supplies
• Alcohol wipe • Pail for product water run off • Millipore Sampler • 18 ml of product water
Testing for bacteria growth
1. The R/O Unit must be ON.
2. Clean the Product Water spout with an alcohol wipe.
3. Open the valve on the Product Water spout. Let about 2 litres of water run into the pail.
4. Remove the red paddle from the clear Millipore case. Be careful not to touch (contaminate) the paddle.
5. Carefully fill the case with Product Water to the upper marking.
6. Insert the paddle into the case with the Product Water.
7. Lay the Millipore sampler with grid facing down on a flat surface. Do not shake the Millipore sampler.
8. Allow 30 seconds for the water to be absorbed.
9. Remove the paddle and shake off the excess water.
10. Empty the case and reinsert the paddle.
11. Place the Millipore sampler, grid side down, in a warm place.
Continued on next page..
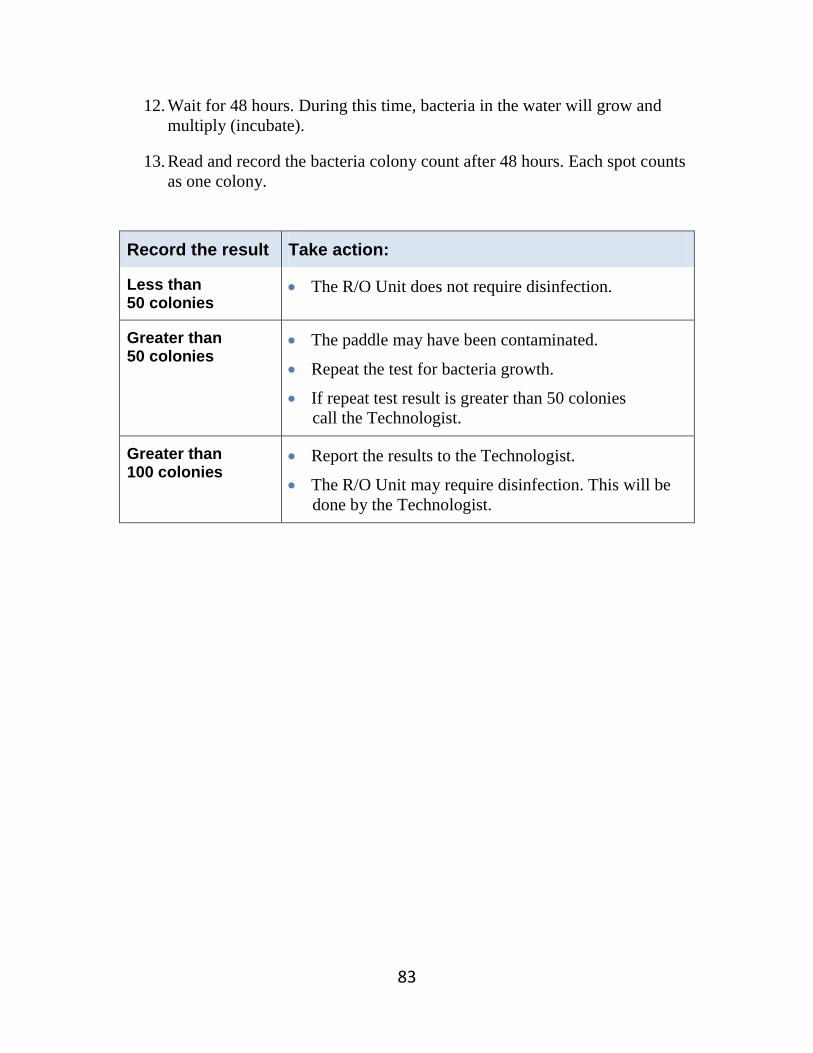
83
12. Wait for 48 hours. During this time, bacteria in the water will grow and multiply (incubate).
13. Read and record the bacteria colony count after 48 hours. Each spot counts as one colony.
Record the result Take action:
Less than 50 colonies
• The R/O Unit does not require disinfection.
Greater than 50 colonies
• The paddle may have been contaminated.
• Repeat the test for bacteria growth.
• If repeat test result is greater than 50 colonies call the Technologist.
Greater than 100 colonies
• Report the results to the Technologist.
• The R/O Unit may require disinfection. This will be done by the Technologist.

84
Procedure: Change the 1-Micron filter
Change the 1-Micron filter every 8 weeks
• The 1-Micron filter (sediment filter) works like a sieve to remove particles from water.
Supplies
• One 1-Micron filter • Wrench • Pail to catch water drips • Rags
Changing the 1-Micron filter
1. Ensure that tap water supplying the R/O Unit is turned OFF.
2. The R/O Unit is in “Standby”.
3. Ensure that the pressure gauges read “0”.
4. Using the wrench, unscrew casing. Remove the 1-Micron Filter. Discard filter.
5. Clean out the filter casing.
6. Insert a new 1-Micron Filter into the casing. Make sure the filter is positioned correctly. Tighten the casing firmly by hand.
7. Turn ON the tap water.
8. Press Acknowledge key to select “ON”. The R/O Unit will begin to rinse.
9. Allow the pressure gauges to rise to maximum pressure.
10. Observe for leaks. If leaks occur, continue to tighten the casing.
11. Turn OFF the water tap.
12. Press Acknowledge key to return to “Standby” mode.

85
Before Hemodialysis – Using the DWA R/O Unit
• Turn on tap water.
• Read and record Pressure IN and Pressure OUT from the pressure gauges.
• Record Delta PSI (Pressure IN – Pressure OUT = Delta PSI).
• Press Acknowledge key for 2 seconds. The R/O Unit is ON.
• Allow the R/O Unit to run for 5 minutes.
• Press the Selection key until Test is displayed.
• Press Acknowledge key.
• Read and record Feed Conductivity “CD Inlet”, range 100 to 400us/cm.
• Press Selection key.
• Read and record Product Conductivity “CD Permeate”, range 1 to 10us/cm
• Press Acknowledge key to return to Main Menu.
• The display will indicate “On”.
• Switch ON the dialysis machine and prepare for dialysis.
ON Select: Off

86
During Hemodialysis – Using the DWA R/O Unit The R/O Unit normally requires no action during dialysis, unless there is an alarm. This chart shows what to do if an alarm occurs.
Message or Fault Alarm
What it means What to do Note
FAULT POWER FAILURE
The power supply to the R/O Unit was interrupted, possibly due to a power outage.
• If power has resumed, press the Acknowledge key.
• Call the technologist on-call.
After pressing the Acknowledge key, the R/O Unit automatically turns back ON.
FAULT SVI TIME OFF
The amount of water supplied to the R/O Unit is too low.
• Check that pressure gauges on the 1 Micron filter are above 30 PSI.
• Call the technologist on-call.
FAULT CDP MAX
The Product Conductivity is too high (e.g.; above 100 us/cm.)
• Call the technologist on-call.
The Product Water conductivity is unsafe for dialysis.
FAULT SYSTEM FAILURE
A fault has occurred with the internal electronics of the R/O Unit.
• Call the technologist on-call.

87
After Hemodialysis – Using the DWA R/O Unit • Disinfect the dialysis machine, then turn off.
• Check for chlorine breakthrough. If chlorine powder test is PINK, it is POSITIVE. Arrange to have the carbon tank changed before your next dialysis treatment.
• Reminder: Every two weeks, check for bacteria using the Millipore sampler.
• Turn off tap water. “ON – NO WATER” will appear on the R/O Unit screen.
• Press Acknowledge key for 2 seconds. The R/O Unit is in Standby.
• Observe the pressure gauges on the 1-Micron Filter drop to zero.
• The display will indicate “Standby”.
• Leave the R/O Unit in Standby mode until the next dialysis session.
If the equipment is not used for more than 3 days, run the R/O Unit for 1 hour, then disinfect the machine.
STANDBY Select: ON

88
Schedule of tests for the water treatment system
How often Procedure When in respect to treatment
Every dialysis treatment Rinse R/O Unit Before and after treatment
Every dialysis treatment CD Inlet Reading (Feed conductivity)
R/O in Test mode, before treatment
Every dialysis treatment CD Permeate Reading (Product conductivity)
R/O in Test mode, before treatment
Every 2 weeks Bacteria growth check (bacteria colony count)
Before or after treatment or on non-dialysis days
Every 2 weeks Citric acid cleaning Before or after treatment or on non-dialysis days
Every 8 weeks, or if the Delta PSI is greater than 10
1-Micron filter change Before or after treatment or on non-dialysis days
Every 6 months or if chlorine breakthrough test is positive
Carbon tank change Before or after treatment or on non-dialysis days
Every 6 months R/O unit disinfection The technologist will make arrangements to disinfect the R/O Unit

89
Summary of water care and tests
Tap water
Carbon Tank
• Every 6 months, call BIOLAB (MAR-COR) to change the carbon tank.
• At the end of each treatment, take sample of
water from spout on 1-Micron filter and test for chlorine breakthrough.
• If chlorine breakthrough test is positive (pink), call BIOLAB (MAR-COR) to replace carbon tank right away.
Pressure IN
Pressure OUT
Sediment filter (1-Micron filter)
• Check Pressure IN. • Check Pressure OUT. • If the difference between Pressure IN and
OUT is less than 10, change the 1-Micron filter every 8 weeks.
• If the difference between Pressure IN and OUT is greater than 10, change the 1-Micron filter immediately.
DWA Reverse Osmosis Unit
• Check that the Feed Conductivity (CD Inlet) is less than 400.
• Check that the Product Conductivity (CP Permeate) is 10 or less.
• Clean the R/O Unit with citric acid every 2 weeks.
Product water • Test for bacteria growth with Millipore
Sampler every 2 weeks. • If bacteria colony count is greater than
50 colonies, call technologist.


90
Chapter 7 Heparin and the use of coagulation
Topic Page
• What is a blood clot? 91
• Preventing blood clots during hemodialysis 91
• Anticoagulation with heparin 92
- Routine (standard) heparin infusion 92 - Tight (reduced dose) heparin infusion 92
• Heparin-free dialysis 94
• Checking for signs of clotting 95
• The causes of clotting 96
Heparin procedures 97 • Routine heparin infusion 97
• Tight heparin dialysis 98
• Heparin-free dialysis 99
• Replacing the heparin syringe during dialysis 100
• What to do if there is air in the heparin line during dialysis 101

91
What is a blood clot? A blood clot is a clump of solid blood. When a blood vessel is damaged, tiny blood cells called platelets respond by clumping together. This starts a chemical reaction that forms a blood clot. The process of liquid blood forming a solid clot is called ‘clotting’. Other names for this are ‘coagulation’ and ‘thrombosis’. Clotting can be helpful or harmful:
• It is a normal response to stop bleeding after a cut or injury. • It can be unhealthy, when it blocks the flow of blood. Clotting can cause a
heart attack or stroke. Preventing blood clots during hemodialysis It is normal for blood to form clots when it leaves your body. However, when blood leaves your body for dialysis, it must continue to flow freely through the blood circuit, without forming clots. Clots can be harmful, as they may slow or block the flow of blood in the blood circuit. A medicine called an anticoagulant is needed with every dialysis treatment, to prevent clots from forming. Heparin is the name of the anticoagulant that is used. It is drawn up in a syringe and attached to the arterial circuit. Anticoagulants:
• Are also known as ‘blood thinners’. • Work by decreasing the blood’s ability to form clots.
Anticoagulants prevent blood clots from forming. They keep your blood flowing freely through the blood circuit.
Did you know? • The ‘circuit’ refers to
the circular route your blood takes - away from your body, through the dialyzer, and back again.

92
Anticoagulation with heparin The most commonly used anticoagulant medicine during dialysis is heparin (heparin sodium). In dialysis, it is given into the blood circuit. Heparin is given in two ways:
Bolus: A single dose, given to boost the amount of heparin in the blood at the start of dialysis.
Continuous infusion: A small amount is slowly and evenly delivered throughout dialysis by a pump set at a specific hourly rate.
The Home Hemodialysis team will prescribe the amount of heparin that best meets your needs. Most patients will have:
Routine (standard) heparin infusion, OR Tight (reduced dose) heparin infusion, if they have
a greater chance of bleeding.
Routine (standard)
Heparin infusion
The Routine dose of heparin is: Bolus: 1000 to 2000 units (1 to 2 ml) Hourly rate: 1000 to 2000 units per hour (1 to 2 ml/hr) The Home Hemodialysis team will prescribe your dose.
The goal is to use just the right amount of heparin to prevent blood clots from forming.
Too little heparin can lead to clotting.
Too much heparin can cause bleeding problems.
Tight (Reduced
dose) heparin infusion
The Tight or reduced dose of heparin is: Bolus: 500 to 1000 units (0.5 to 1 ml) Hourly rate: 500 units per hour (0.5 ml/hr) The Home Hemodialysis team will prescribe your dose.
The goal for patients who are at risk for bleeding is to prevent clotting, but use less heparin.
When using tight heparin, watch the blood circuit closely for signs of clotting.
Flush the system every hour with normal saline.

93
When to stop heparin
• If you have an AV fistula or AV graft, stop the heparin infusion 1 hour before the end of your dialysis treatment (or at the time determined by your nurse).
• If you have a CVC, heparin should continue to the end of dialysis.
Watch for these signs that you may be using too much heparin:
• Unusual bruising or bleeding.
• Blood in your urine.
• Dark or bloody bowel movements.
• Vomit that looks bloody or like coffee grounds.
• Heavy periods (for women).
Call the Home Hemodialysis Unit to report any bleeding problems.
Heparin remains in the body for about 30 to 120 minutes after the medicine has been stopped.

94
Heparin-free dialysis There are times when it is not safe to take anticoagulants. The Home Hemodialysis Team may recommend Heparin-free dialysis if you:
• Are going to have, or have had surgery recently • Are going to have, or have had a minor procedure recently, such as dental
work or a biopsy • Have bleeding problems. • Have active bleeding, such as a new cut.
If you are going to have any procedure done that could result in bleeding, tell the Home Hemodialysis staff
at least 2 days ahead of time.
The goal of heparin-free dialysis to prevent clots by flushing the blood circuit with normal saline many times.
Flush the blood circuit with 200 ml of normal saline every hour.
Flushes can be increased to every 30 minutes, if needed.
Do not forget to include this extra saline when you calculate your total weight loss (ultrafiltration).
Dialysis sessions will be shorter: 3 to 4 hours rather than 7 to 8 hours.
Restarting heparin during dialysis treatment should happen ONLY with the help and permission of the Home Hemodialysis Team.

95
Checking for signs of clotting
The best way to check the blood circuit for clotting is to flush the blood circuit system with 200 ml of normal saline.
Watch for these signs of clotting:
• The blood in the circuit is extremely dark. • There are streaks of dark blood in the dialyzer. • Foaming in the arterial or venous chambers (this can
lead to clotting). • Blood backs up into the transducer lines and transducers. • There are clots at the arterial or venous ends of the
dialyzer. • Arterial and/or venous pressure alarms. Arterial and
venous pressure may change, depending on the location of the clot in the blood circuit.
• Transmembrane pressure (TMP) alarm
Call the Home Hemodialysis team right away:
If you notice clotting in the blood circuit. • An occasional clot in the circuit can be expected. This does
not usually require a change in the dose of heparin. • If clotting happens often, the heparin dose may need to
be changed.
If you have bleeding. • You may need to decrease the hourly rate of heparin
if there is a lot of bleeding from puncture sites or any other area.
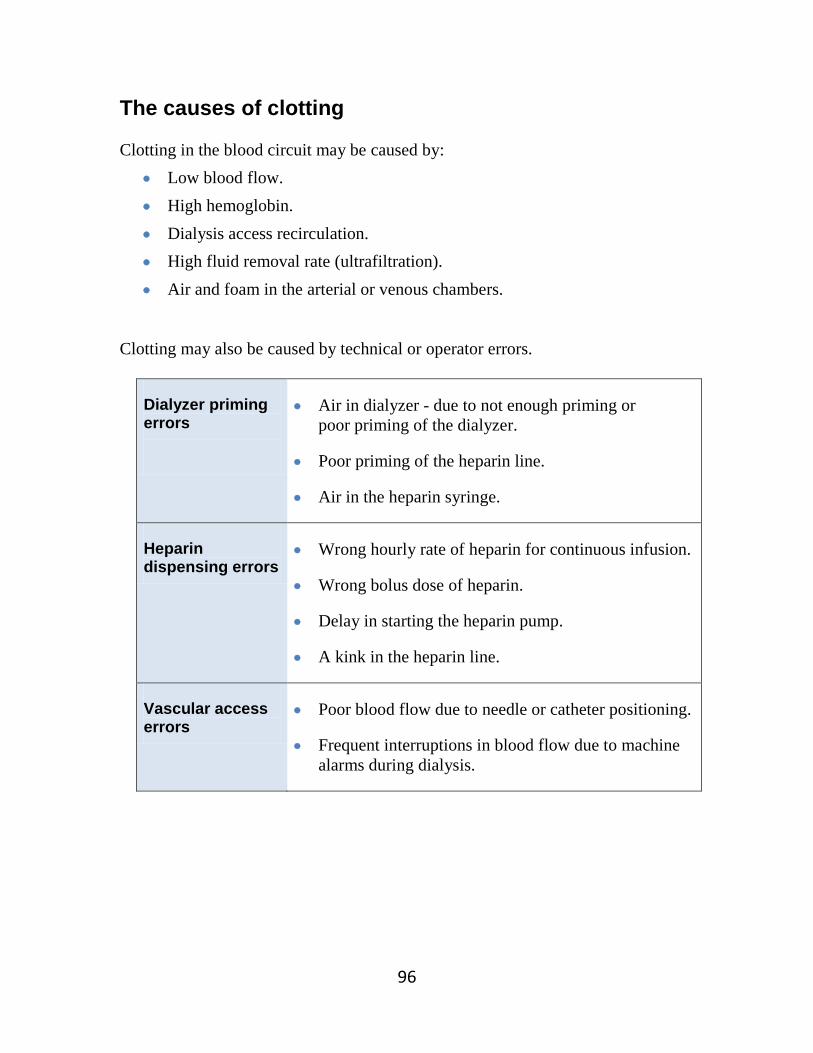
96
The causes of clotting Clotting in the blood circuit may be caused by:
• Low blood flow. • High hemoglobin. • Dialysis access recirculation. • High fluid removal rate (ultrafiltration). • Air and foam in the arterial or venous chambers.
Clotting may also be caused by technical or operator errors.
Dialyzer priming errors
• Air in dialyzer - due to not enough priming or poor priming of the dialyzer.
• Poor priming of the heparin line.
• Air in the heparin syringe.
Heparin dispensing errors
• Wrong hourly rate of heparin for continuous infusion.
• Wrong bolus dose of heparin.
• Delay in starting the heparin pump.
• A kink in the heparin line.
Vascular access errors
• Poor blood flow due to needle or catheter positioning.
• Frequent interruptions in blood flow due to machine alarms during dialysis.

97
Heparin procedures Routine heparin infusion The routine or standard dose of prescribed heparin is:
• Bolus: 1000 to 2000 units (1 to 2 ml) • Hourly rate: 1000 to 2000 units per hour (1 to 2 ml/hr)
The Home Hemodialysis team will prescribe your dose.
The dose can be changed if you notice clotting in the blood circuit. Procedure
1. Press ‘see/mod. parameters’.
2. Press ‘heparin’.
3. Press ‘heparin infusion’. Set the rate using the ‘’ or ‘’ key.
4. Press ‘prestop’. Set the prestop time using the ‘’ or ‘’ key.
5. Press ‘OK’ to confirm.
6. Press ‘heparin on’ key to start the heparin program. Heparin bolus
1. Press ‘see/mod. parameters’.
2. Press ‘heparin’.
3. Press ‘heparin bolus’.
4. Use ‘’ key to set amount for heparin bolus.
5. Press ‘OK’ to confirm selection and return to main screen.
6. Record the bolus in your dialysis log.
The heparin bolus is available only after dialysis has been started and blood
sensed by the Formula.
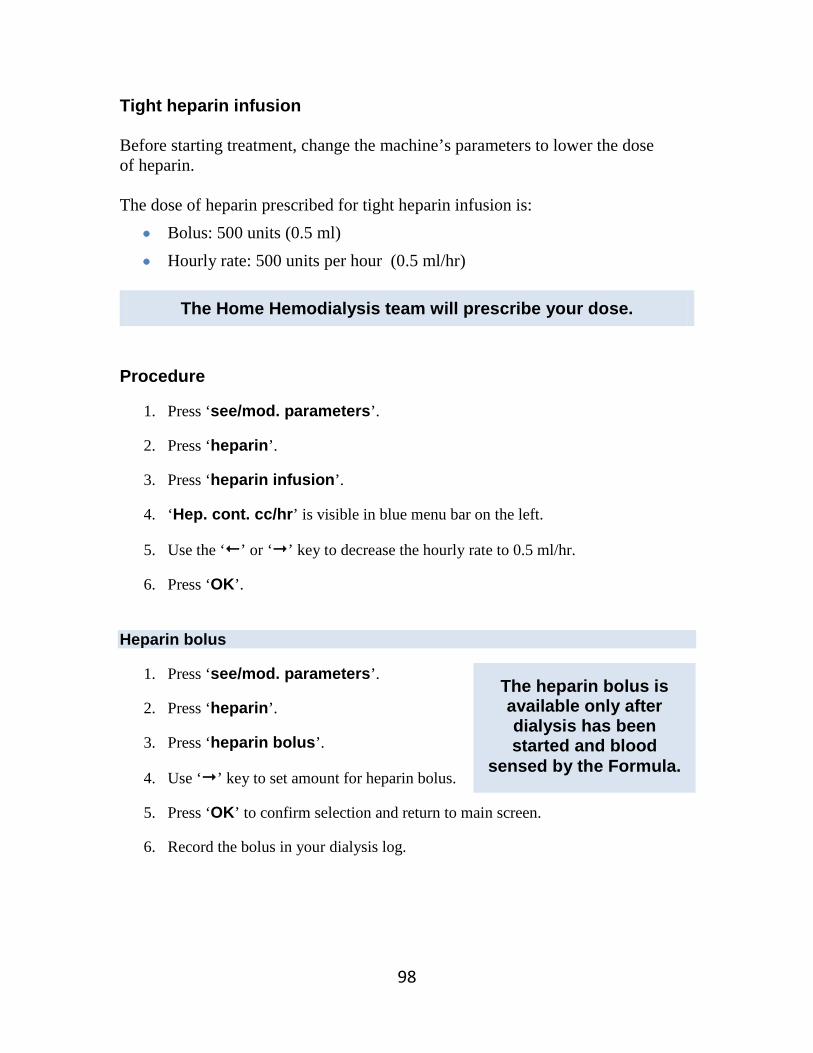
98
Tight heparin infusion Before starting treatment, change the machine’s parameters to lower the dose of heparin. The dose of heparin prescribed for tight heparin infusion is:
• Bolus: 500 units (0.5 ml) • Hourly rate: 500 units per hour (0.5 ml/hr)
The Home Hemodialysis team will prescribe your dose.
Procedure
1. Press ‘see/mod. parameters’.
2. Press ‘heparin’.
3. Press ‘heparin infusion’.
4. ‘Hep. cont. cc/hr’ is visible in blue menu bar on the left.
5. Use the ‘’ or ‘’ key to decrease the hourly rate to 0.5 ml/hr.
6. Press ‘OK’. Heparin bolus
1. Press ‘see/mod. parameters’.
2. Press ‘heparin’.
3. Press ‘heparin bolus’.
4. Use ‘’ key to set amount for heparin bolus.
5. Press ‘OK’ to confirm selection and return to main screen.
6. Record the bolus in your dialysis log.
The heparin bolus is available only after dialysis has been started and blood
sensed by the Formula.

99
Heparin-free dialysis Before starting treatment, change the machine’s parameters to turn off heparin. Procedure
1. Press ‘see/mod. parameters’.
2. Press ‘heparin’.
3. Press ‘heparin infusion’.
4. ‘Hep. cont. cc/hr’ is visible in blue menu bar on the left.
5. Use the ‘’ key to set the ‘Hep. cont. cc/hr’ amount to 0.0 ml.
6. Press ‘OK’ to confirm.
7. The heparin icon and heparin key will no longer be visible as heparin is off.
Important information
• A flush of 200 ml of normal saline is required after every hour.
• When you calculate your total weight loss (ultrafiltration) add in the total amount of saline used in flushes.
For example: If you are doing 3 hours of dialysis, you will need to add an extra 400 ml of saline for flushes.

100
Replacing the heparin syringe during dialysis If you run out of heparin, follow these steps to replace the heparin syringe. Supplies
• Heparin syringe prepared with heparin 1:1,000 u/ml • Clamp
Procedure
1. Press ‘heparin off’ to stop the heparin infusion.
2. Clamp the heparin line.
3. Throw away the empty heparin syringe. Replace it with a new heparin syringe prepared with heparin 1:1000 u/ml.
4. Unclamp the heparin line.
5. Press ‘heparin on’ to restart the heparin infusion.
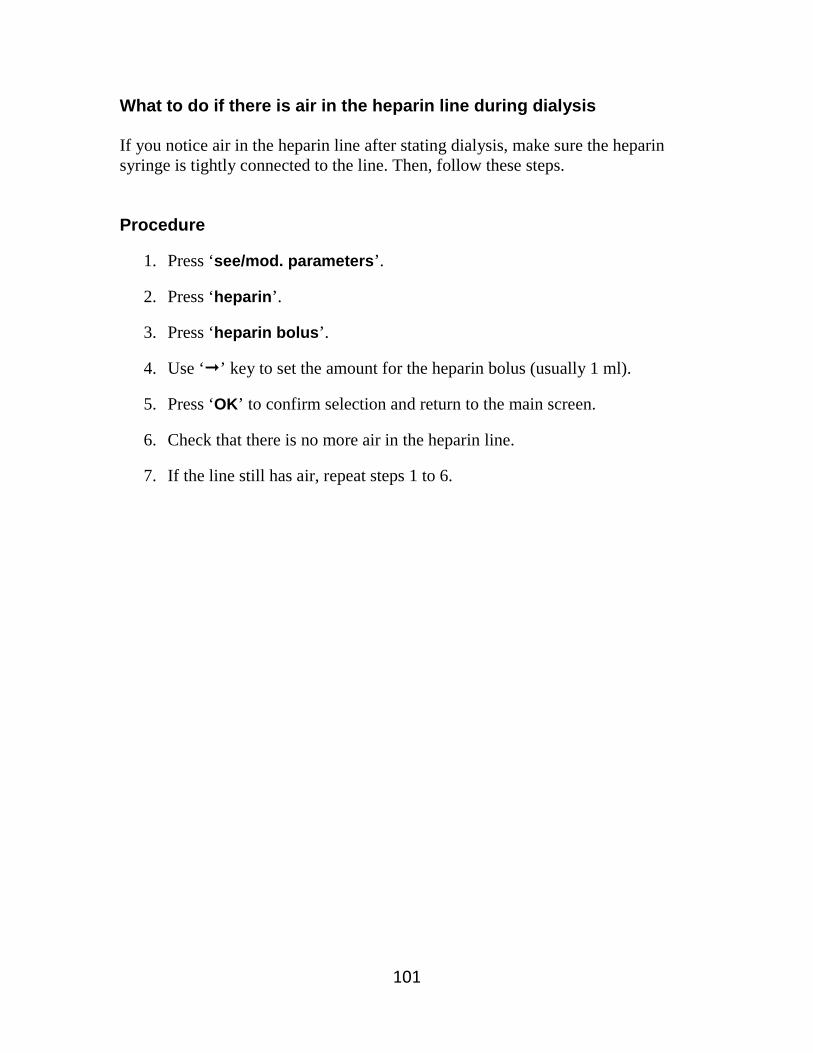
101
What to do if there is air in the heparin line during dialysis If you notice air in the heparin line after stating dialysis, make sure the heparin syringe is tightly connected to the line. Then, follow these steps. Procedure
1. Press ‘see/mod. parameters’.
2. Press ‘heparin’.
3. Press ‘heparin bolus’.
4. Use ‘’ key to set the amount for the heparin bolus (usually 1 ml).
5. Press ‘OK’ to confirm selection and return to the main screen.
6. Check that there is no more air in the heparin line.
7. If the line still has air, repeat steps 1 to 6.


102
Chapter 8 How to prepare and program the machine
Topic Page
• How to set up the machine with bidry cartridge 103
• Programming formula 110
• Measuring your blood pressure (BP) 111
• Starting hemodialysis treatment 114
• Ending dialysis: Returning blood without disconnecting bloodlines – Arterial via gravity
116
• Ending dialysis: Returning blood by connecting arterial bloodline to recirculator
118
• Ending dialysis: BIDRY Cartridge. Returning blood without disconnecting bloodlines – Flush ‘T’-piece
120
• Post dialysis procedures 122

103
How to set up the machine with bidry cartridge This procedure has nine parts
A. Set up bloodlines and dialyzer B. Install arterial bloodline C. Install venous bloodline D. Install concentrates E. Priming the bloodline and dialysate compartment F. Set parameters for dialysis G. Set heparin parameters H. Patient connection I. Set parameters for heparin bolus
Supplies
• One 3ml syringe • Test strip – for disinfectant • Formula arterial and venous bloodlines • Two 1-litre bags of normal saline (0.9% NaCl) • One 20ml Heparin syringe prepared with Heparin 1:1,000u/ml • Dialyzer • Bicarbonate Cartridge • Acid Concentrate
Procedure:
1. Ensure drain and water lines are connected.
2. Ensure water is turned ON. If water is off, there will be a ‘red screen’ alarm.
3. Ensure power is ON using switch at rear panel of machine.
4. Turn ON secondary power switch (on front of panel of machine). This will turn the LED light from orange/yellow to green.
Continued on next page

104
5. ‘Auto test’ will run for a few minutes. This includes a 5 ½ minute rinse.
6. After the rinse is finished, the ‘system ready’ message appears.
7. Use the 3 ml syringe to take a sample of fluid from sample port on the Out Flow (red) dialysate hose. Use the test strip to make sure there is no bleach (disinfectant) in the fluid.
A. Set up dialyzer and heparin syringe:
1. Install dialyzer into holder, blue end up.
2. Hang two 1-litre bags of normal saline on the intravenous (I.V.) pole.
3. Install 20cc heparin syringe prepared with heparin 1:1,000u/ml.
B. Install arterial bloodline:
1. Place expansion chamber in its support, at the top left of the machine.
2. Close medication service port at top of expansion chamber.
3. Insert arterial chamber into arterial blood sensor.
4. Insert arterial line into clip below arterial blood sensor.
5. Open blood pump cover.
6. Position arterial pump segment in the lower guide-set (above red arrow).
7. Press the heparin ‘↑’ arrow key to rotate the pump until the arterial pump segment is inserted.
8. Close pump cover.
9. Clamp medication service port at top of arterial chamber.
10. Close arterial transducer line clamp.
11. Connect the arterial transducer line to transducer monitor (red).
12. Open arterial transducer line clamp.
Continued on next page

105
13. Connect the arterial bloodline to arterial (red) end of dialyzer.
14. Clamp the arterial bloodline ‘T’-piece.
15. Spike arterial line into normal saline bag.
16. Spike I.V. administration line into second bag of normal saline.
17. Open the arterial bloodline ‘T’- piece clamp. Allow saline to back up into I.V. administration line, until the air is displaced and I.V. chamber is half-full.
18. Clamp the arterial bloodline ‘T’-piece.
19. Connect heparin infusion line to heparin syringe.
20. Use heparin ‘↑’ arrow key to deliver 1ml of heparin to prime the heparin infusion line.
C. Install venous bloodline:
1. Hang drainage bag on I.V. pole.
2. Insert venous drip chamber with filter into blood level gauge.
3. Clamp the medication service port at top of venous chamber.
4. Insert venous bloodline into air detector.
5. Connect the venous transducer line to transducer monitor (blue).
6. Clamp the venous bloodline ‘T’-piece, located in the middle of the venous bloodline, opposite the venous specimen port.
7. Connect venous bloodline to venous (blue) end of dialyzer.
8. Leave the venous bloodline out of line clamp.

106
D. Install concentrates:
1. The status bar displays ‘system ready’.
2. Press ‘select dialysis’.
3. The machine’s default setting is ‘double needle’ and ‘bidry + STD A conc’.
4. To confirm selections, press ‘OK’.
5. Install bicarbonate cartridge.
6. Insert red wand into acid concentrate.
7. Connect the red concentrate connector to red wand.
8. Press ‘dialysate preparation’ key.
9. The ‘bidry fill-up’ key will turn blue and automatically start the cartridge filling with water.
10. The message ‘BID + STD A conc. – Prep’ appears in upper left of screen.
11. Wait for dialysate preparation to complete. This takes about 2 minutes.
12. The machine will automatically enter ‘bypass’ mode when dialysate preparation is complete.
13. The ‘bypass’ message appears on bottom left of the screen and the LED light next to the bypass key goes on.
14. Connect both the blue and red dialysate connectors to the dialyzer. E. Priming the bloodlines and dialysate compartment:
1. Use the red blood flow regulator knob to set blood pump speed to 150 ml/min.
2. The priming box will read 25.0 L.
3. Press ‘pump ON’ key.
Continued on next page

107
4. Remove the expansion chamber from its support and turn it upside down. Let the arterial expansion chamber fill halfway with normal saline.
5. When half-full, return expansion chamber to its support.
6. Once the normal saline has reached the venous chamber, use ‘↑’ arrow key on front panel to fill the venous chamber (¾ full).
7. The venous line clamp will automatically open.
8. Insert venous bloodline into venous air detector.
9. Install venous bloodline into venous clamp.
10. Deliver 400ml of normal saline. The priming box will read 24.6 L.
11. Turn dialyzer arterial end up (red up).
12. Press ‘bypass’ key. Dialysate will fill dialysate compartment of the dialyzer, displacing the air that was inside.
13. When the air has been displaced from the dialysate compartment, the Formula will indicate ‘dialyzer rinse off’. Turn the dialyzer venous end up (blue up).
14. ‘Stop priming volume’ is programmed. The blood pump will stop automatically. The priming box will read 24.2 L. The alarm ‘blood pump stopped’ will appear.
15. Close arterial line clamp. F. Set parameters for dialysis (programming the UF):
1. Press ‘see/mod. parameters’.
2. Press ‘dialysate’.
3. Press ‘treatment time’. Enter treatment time using the ‘↑’ or ‘↓’ arrow key.
4. Press ‘weight loss’. Enter the total fluid loss calculated using the ‘↑’ or ‘↓’ arrow key.
Continued on next page

108
5. The machine has default settings for Bicarbonate and Conductivity.
• To change Bicarbonate and conductivity settings: Select each item and use the ‘←’ or ‘→’ arrow key to make changes.
• To change temperature and dialysate flow settings: press ‘other parameters’. Select the item to change, and use the ‘←’ or ‘→’ arrow key to make changes.
6. When all dialysate parameters are set, press ‘OK’ to confirm all entries.
7. When the UF is programmed, the message ‘uf on’ appears.
8. Press ‘uf on’ to activate the UF programme. The UF key turns grey. G. Set heparin parameters:
1. Press ‘see/mod. parameters’.
2. Press ‘heparin’.
3. Press ‘prestop’. Set the prestop time using ‘←’ or ‘→’ arrow key.
4. Press ‘heparin infusion’. Set the rate using ‘←’ or ‘→’ arrow key.
5. Press ‘heparin bolus’. Set the heparin bolus using ‘←’ or ‘→’ arrow key. If ‘heparin bolus’ key is not available at this time, programme the bolus after dialysis has started. See section I.
6. Press ‘OK’ to confirm.
7. Press ‘heparin on’ key to activate the heparin program. H. Complete connection:
1. The Formula is now ready for dialysis. Complete the procedure to be connected with the machine.

109
I. Set parameters for heparin bolus: The heparin bolus may only be available after the venous sensor has detected blood.
1. Press ‘see/mod parameters’.
2. Press ‘heparin’.
3. Press ‘heparin bolus’. Use ‘→’ arrow key to set amount for heparin bolus.
4. Press ‘OK’ to confirm entry and return to main screen.
5. Record bolus in your dialysis log.

110
Programming formula Programming the formula means entering information (parameters) such as the number of hours of dialysis and total weight loss. Other parameters are already programmed, but can be changed if needed. Procedure
1. Select ‘see/mod. parameters’.
2. Select ‘dialysate’.
3. Select ‘treatment time’ and use ‘↑’ or ‘↓’arrow key to make changes.
4. Select ‘weight loss’ and use ‘↑’ arrow key to make changes.
5. Select ‘bic. cond’ and use ‘←’ or ‘→’ arrow key to make changes.
6. Select ‘total cond” and use ‘←’ or ‘→’ arrow key to make changes.
7. Select ‘other parameters’.
8. Select ‘temperature’ and use’ ‘↑’ or ‘↓’ arrow key to make changes.
9. Select ‘flow’ and use ‘←’ or ‘→’ arrow key to make changes.
10. Select ‘OK’ to confirm all entries and return to main page.
11. Select ‘see/mod. parameters’, then ‘Heparin’.
12. Select ‘heparin prestop’ and use ‘←’ or ‘→’arrow key to enter the time to stop the heparin infusion.
13. Select ‘heparin infusion’ and use ‘←’ or ‘→’ arrow key to enter the rate.
14. Select ‘OK’ to confirm entries and return to the main page.
15. Start dialysis treatment following procedure on page X.
16. Select ‘heparin on’ key. This will activate the heparin program when dialysis starts.
17. Select ‘uf on’ key. This will activate the UF program when dialysis starts.
18. To program heparin bolus after dialysis treatment starts, press ‘see/mod. parameters’.
19. Press ‘heparin’.
20. Press ‘heparin bolus’ key, and use ‘→’ arrow to set the amount.
21. Press ‘OK’ to confirm all entries and return to main page.

111
Measuring your blood pressure (BP) Taking an instant (stat) BP
1. Press ‘sphygmo measure’ at the bottom right of the main screen.
2. The Sphygmo box will open on the main screen and display ‘measure in progress’.
3. The measure key will display ‘stop measure’ as the option if you want to stop the BP reading.
4. The BP result will display in the Sphygmo box. Taking a single BP measurement
1. Press ‘sensors’, then ‘sphygmo’, then ‘measure’.
2. The measure key will turn blue indicating it is activated. A box will open on the screen ready to display the BP results. The top of the box will display ‘measure in progress’.
3. The results will show your blood pressure, heart rate and mean arterial pressure (MAP).
4. Your last 3 blood pressure and heart rate results will also be shown in the box; number 1 being the most recent.

112
Programming the machine to take your BP automatically
1. Press ‘sensors’, then ‘sphygmo’ to see the blood pressure menu.
2. Press ‘auto on’. The key will turn blue indicating that you have turned on the automatic BP program. (The option of ‘auto off’ will then be displayed, should you want to turn off the automatic BP program.)
• Confirm the ‘auto on’ command by pressing ‘OK’.
• We also recommend that you continue with steps 3 through 7. Pressing ‘OK’ after step 7 will also confirm that you have turned on the automatic BP program.
• The first BP will be taken at the time interval chosen in step 5.
3. Press ‘see/mod. parameters’. This menu is used to set the upper and lower limits (threshold parameters) for your systolic and diastolic BP.
Systolic BP Upper limit: MAX SYS Threshold 170 mmHg
Lower limit: MIN SYS Threshold 100 mmHg Diastolic BP Upper limit: MAX DIA Threshold 90 mmHg
Lower limit: MIN DIA Threshold 50 mmHg
BP thresholds may vary for each person. The nurse will help you set your BP thresholds.
4. Use the ‘←’ and ‘→’ arrow keys to set your BP thresholds. You can change these numbers at any time during treatment.
• If your BP results are between the upper and lower thresholds, there will be no warnings.
• If your BP results are above the upper threshold or below the lower threshold, the machine will make a warning sound (beep), and an orange warning display at the bottom of the screen will read: ‘SYS OUT OF RANGE’ or ‘DIA OUT OF RANGE’ (depending on whether your systolic or diastolic BP is outside the set limits). You can override this warning.
113
5. Press ‘measure interval’. Use the ‘←’ or ‘→’ arrow keys to set how often you want the machine to measure your BP. This can be as often as every 5 minutes.
• For example: The first BP will be taken 30 minutes after selecting a 30-minute interval for BP measurement.
6. Press ‘warning on’ to activate the BP warning system. A warning you can hear and see will occur if your BP is outside of the thresholds you set. The ‘warning on’ key will turn from blue to turquoise when activated.
If you do not activate the ‘warning on’ function, you will not get a warning if your blood pressure gets too high or too low.
7. Press ‘OK’ to confirm all entries.
8. When automatic BP program is activated, the ‘sphygmo measure’ key on the main screen will display in green.
How to view BP results in a table
1. Press ‘sensors’, ‘sphygmo’, then ‘open table’.
2. A full screen will open and display:
• Time: The actual time the BP was measured.
• T uf: When the BP was measured related to when treatment started, shown in minutes.
• Systolic BP, Diastolic BP, Heart Rate, and Mean Arterial Pressure.
3. To return to the main screen, press ‘OK’.
4. To return to ‘sphygmo’, press ‘return’.

114
Starting hemodialysis treatment Prepare to connect
1. Check and record your vital signs and weight, as described in Chapter 4.
2. Wash hands and access area with soap and warm, running water for 15 seconds. Dry with clean towel.
3. Prepare your access, as described in Chapter 5.
4. Ensure normal saline line connected to T-piece is clamped. Connect
1. Clamp arterial bloodline and arterial access.
2. Disconnect arterial bloodline from normal saline bag.
3. Connect arterial bloodline to arterial access.
4. Open arterial bloodline and arterial access clamps.
5. Turn blood pump rate to 100 – 150ml/min. Press ‘pump on’ key.
6. Blood pump will stop when blood passes arterial blood sensor.
7. Press ‘pump on’ key to restart blood pump.
8. The warning ‘heparin off’ will appear, if the heparin program has not been activated.
9. Press ‘heparin on’ key. When pressed, the key will turn blue.
10. The warning ‘ufr not set’ will appear, if the ultrafiltration rate has not been activated.
11. Press ‘uf on’ key.
12. The blood pump is programmed to stop when blood has reached the venous drip chamber. Dialysis treatment will start 90 seconds after blood has been sensed.
13. Clamp venous bloodline and venous drainage bag. Continued on next page

115
14. Connect venous bloodline to venous access.
15. Open venous bloodline and venous access clamps.
16. Press ‘pump on’ key to restart the blood pump. Adjust the blood pump speed to set the correct blood flow rate.
The start of treatment is delayed for 90 seconds. This gives the blood flow rate and parameters for arterial and venous pressures time to settle.
Program heparin bolus
1. Press ‘see/mod. parameters’.
2. Press ‘heparin’.
3. Press ‘heparin bolus’.
4. Press ‘→’ key to set volume of heparin bolus to be given.
5. Press ‘OK’ to confirm.
6. Check blood pressure using stat blood pressure key ‘sphygmo measure’.
7. Record the bolus in your dialysis log.

116
Ending dialysis There are three ways of ending dialysis, depending on the type of access that you have:
• Returning blood without disconnecting bloodlines: Arterial via gravity • Returning blood by connecting arterial bloodlines to Recirculator • Returning blood without disconnecting bloodlines: Flush ‘T’-piece
The nurse will demonstrate all 3 methods, and pick the method that is right for you.
Ending dialysis: Returning blood without disconnecting bloodlines - Arterial via gravity When dialysis is finished, the alarm ‘End uf’ signals the end of the treatment time. Once ‘rinseback’ has been confirmed, you cannot go back to dialysis mode. Supplies for locking a CVC
• Two Chlorhexidine Gluconate swabs • Two 10ml syringes prepared with normal saline Two 3ml syringes prepared with the prescribed volume Heparin
1:10,000ml OR
Two pre-filled Sodium Citrate 4% syringes Supplies for removal of fistula needle
• Three packages of gauze • Two bandages

117
How to return blood without disconnecting bloodlines: Arterial via gravity
1. Formula will alarm ‘End UF’.
2. Press ‘rinseback’.
3. The screen displays a message: ‘Do you want to start rinseback?’ Press ‘Yes’.
4. The blood pump will automatically stop. The blood pump speed will decrease to half of previous speed.
5. Clamp the arterial bloodline.
6. Unclamp normal saline I.V. administration line. Unclamp the ‘T’-piece.
7. Press ‘blood pump’ key on. Pump speed can be increased up to 250ml/min.
8. Return the blood.
9. When sensor at venous drip chamber detects diluted blood, the pump will stop automatically.
10. Press the ‘blood pump’ key on again. Continue to return the blood until the bloodline is clearer.
11. Press ‘blood pump’ key off.
12. Clamp venous bloodline.
13. Clamp venous access.
14. Unclamp arterial bloodline. Allow saline to clear the arterial bloodline and arterial access.
15. Clamp arterial bloodline.
16. Clamp arterial access.
17. Proceed with post-dialysis procedures (page X): • Access care, post-dialysis assessment and completing your dialysis log. • Discarding dialysis circuit.

118
Ending Dialysis: Returning blood by connecting arterial bloodline to recirculator When dialysis is finished, the alarm ‘End uf’ signals the end of the treatment time. Once ‘rinseback’ has been confirmed, you cannot go back to dialysis mode. Supplies for locking a CVC
• Two Chlorhexidine Gluconate swabs • Two 10ml Syringes prepared with normal saline Two 3ml syringes prepared with the prescribed volume of
Heparin 1:10,000ml OR
Two Pre-filled Sodium Citrate 4% syringes Supplies for removal of fistula needle
• Three packages of gauze • Two bandages
Supplies for returning blood with recirculator
• Recirculator • 10 ml syringe prepared with normal saline
How to return blood by connecting arterial bloodline to recirculator
1. Formula will alarm ‘End UF’.
2. Press ‘rinseback’.
3. The screen displays a message: ‘Do you want to start rinseback?’ Press ‘Yes’.
4. The blood pump will automatically stop. The blood pump speed will decrease to half of previous speed.
5. Clamp normal saline I.V. administration line.
6. Clamp ‘T’-piece. Continued on next page

119
7. Remove normal saline I.V. administration line from ‘T’-piece.
8. Connect normal saline I.V. administration line to recirculator.
9. Clamp the arterial bloodline.
10. Clamp arterial access.
11. Disconnect arterial bloodline from arterial access.
12. Connect arterial bloodline to the recirculator.
13. Unclamp the arterial bloodline.
14. Unclamp the normal saline I.V. administration line.
15. Press ‘blood pump’ key on. Begin returning blood. Pump speed can be increased up to 250ml/min.
16. Connect the syringe prepared with normal saline and flush arterial access. Clamp arterial access.
17. When sensor at venous drip chamber detects diluted blood, the pump will stop automatically.
18. Press ‘blood pump’ key on again. Continue to return blood until bloodline is clearer.
19. Press ‘blood pump’ key off.
20. Clamp venous bloodline.
21. Clamp venous access.
22. Proceed with post-dialysis procedures (see page X): • Access care, post-dialysis assessment and completing your dialysis log. • Discarding dialysis circuit.

120
Ending dialysis: BIDRY Cartridge Returning blood without disconnecting bloodlines- Flush ‘T’-piece When dialysis is finished, the alarm ‘End uf’ signals the end of the treatment time. Once ‘rinseback’ has been confirmed, you cannot go back to dialysis mode. Supplies for locking a CVC
• Two Chlorhexidine Gluconate swabs • Two 10ml Syringes prepared with normal saline Two 3ml syringes prepared with the prescribed volume
Heparin 1:10,000ml OR
Two Pre-filled Sodium Citrate 4% syringes Supplies for removal of fistula needle
• Three packages of gauze • Two bandages
Supplies for returning blood with recirculator
• 10 ml syringe prepared with normal saline How to return blood without disconnecting bloodlines: Flush ‘T’-Piece
1. Formula will alarm ‘End UF’.
2. Press ‘rinseback’.
3. The screen displays a message: ‘Do you want to start rinseback?’ Press ‘Yes’.
4. The blood pump will automatically stop. The blood pump speed will decrease to half of previous speed.
5. Clamp the arterial bloodline.
6. Unclamp normal saline I.V. administration line. Continued on next page

121
7. Unclamp the ‘T’-piece.
8. Press ‘blood pump’ key on. Pump speed can be increased up to 250ml/min.
9. Retransfuse blood.
10. When sensor at venous drip chamber detects diluted blood, the pump will stop automatically.
11. Press the ‘blood pump’ key on again. Continue to retransfuse until the bloodline is clearer.
12. Press ‘blood pump’ key off.
13. Clamp venous bloodline.
14. Clamp venous access.
15. Clamp ‘T’-piece.
16. Clamp I.V. administration line.
17. Disconnect I.V. administration line.
18. Connect syringe containing normal saline to ‘T’-piece.
19. Open ‘T’-piece clamp. Inject normal saline via ‘T’-piece to clear remaining blood in arterial bloodline.
20. Clamp ‘T’-piece.
21. Clamp arterial bloodline.
22. Clamp arterial access.
23. Proceed with post-dialysis procedures (see page X): • Access care, post-dialysis assessment and completing your dialysis log. • Discarding dialysis circuit.
122
Post-dialysis procedures After ending dialysis using one of the 3 methods, continue with these final steps 1. Access care and documentation
1. Proceed with access care as described in Chapter 5.
2. Complete post dialysis assessment and complete your dialysis log. 2. Discard dialysis circuit
1. Secure arterial bloodline to arterial service port.
2. Secure venous bloodline to venous service port.
3. Press ‘dialyzer drain on’.
4. With dialyzer blue end up, disconnect blue dialysate connector from dialyzer and replace on machine. The dialyzer will drain dialysate automatically.
5. When the dialyzer has drained, the ‘dialyzer drain on’ key will reappear. Cap the venous (blue) end of dialyzer.
6. Remove the red connector from the dialyzer and replace on the Formula. Cap the arterial (red) end of dialyzer.
7. To drain the bicarbonate cartridge, press ‘bidry drain on’.
8. Pull the top of the cartridge outward and remove the top cap, leaving the base of the cartridge in place. When cartridge is empty, ‘bidry drain on’ key will reappear.
9. If the cartridge does not fully drain, select ‘bidry drain on’ again. • Note: The dialyzer and cartridge cannot be drained at the same time.
The bicarbonate cartridge will drain faster if the acid wand is left in the acid concentrate container.
10. Remove the bicarbonate cartridge. Continued on next page

123
11. Close the bicarbonate cartridge holder.
12. Reconnect the acid concentrate connector to the machine.
13. Discard dialyzer and bloodlines.
14. Press ‘early disinfect’.
15. A warning will appear ‘Do you want to select disinfection?’. Press ‘Yes’.
16. The Formula will start rinse/self-test for 1½ minutes. • Note: During the first 2 minutes of self-test, the blood pressure
function will be unavailable. For the Formula to rinse/self-test, all transducers must be free of bloodlines and dialysate connectors must be replaced to their housing ports.
17. Disinfect Formula machine with bleach, following the procedure described in Chapter 10.
18. Wipe all surfaces of the Formula machine.


124
Chapter 9 Dialysis procedures
Topic Page
• Blood tests and dialysis 125
• Pre-and Post-dialysis: Taking blood samples from the arterial line 129
• Pre-dialysis: Taking blood samples directly from an AV access 130
• Pre-dialysis: Taking blood samples from a CVC 131
• How to use the centrifuge 132
• Changing the bicarbonate cartridge during hemodialysis 134
• Changing the dialyzer and bloodlines during dialysis: Hemofilter management
136
• Giving a normal saline bolus (flush) 138
• Giving an intravenous (I.V.) antibiotic: By dissolving the medicine in sterile water
139
• Managing events during dialysis 144
• Isolated ultrafiltration: Removal of fluid only (UF only) 146
• Recirculation procedure 148
125
Blood tests and dialysis Blood tests are an important way to tell if your hemodialysis treatments are working well. ‘Blood work’ refers to one or more blood tests. Some blood tests need to be done before and after hemodialysis, to measure the amount of waste products removed during your treatment. This helps the Home Hemodialysis Team decide if your results are good or your treatments need to be adjusted. During your training, you will learn how to:
• Take blood samples from the arterial blood line (the preferred method).
• Take blood samples directly from the AV fistula or CVC (this method is done occasionally, to collect blood samples when you are not connected to the dialysis machine)
If you have nocturnal hemodialysis, you will be given a centrifuge and blood collection tubes. Spinning the blood collection tubes in the centrifuge prepares the blood for processing at the laboratory (lab). The Home Hemodialysis Nurse will tell you:
• The type or colour of blood tubes needed for each blood test.
• Which blood tubes need spinning in the centrifuge.
Deliver all blood samples to the lab as soon as possible. You may use the lab at Toronto General Hospital or a local lab.
If you use a local lab:
• We will give you forms called requisitions, to send along with your blood samples.
• Find out how the laboratory would like you to handle blood samples. Each lab may have different procedures.
• Call the Home Hemodialysis Unit and tell staff each time you send blood samples to your community lab, so they can check for your results.
PRE = Before hemodialysis POST = After hemodialysis

126
You will have a set of routine blood tests every month.
After sending monthly blood samples to the lab, call or email the Home Hemodialysis Unit
so the staff can track your results.
Tell them:
If you sent the blood samples to a local lab
If you were “fasting” (no food or drink) when you collected the blood samples
Your weight before and after dialysis
Your blood pressure before and after dialysis
Number of treatment hours
Number of treatment session a week

127
Common blood tests
Test What the test measures
CBC • This test measures the amount of red and white blood cells that you have.
Electrolytes • These tests measure the amount of electrolytes, such as sodium, potassium, bicarbonate and chloride.
PT and INR Prothrombin Time and International Normalized Ratio
• Measures how long it takes for your blood to form a clot.
• Used to check how well anti-coagulant medicine is working.
Iron saturation and Ferritin
• Measures the amount of iron in your body.
• Iron is needed to make red blood cells.
Intact PTH Parathyroid hormone test
• Measures the amount of parathyroid hormone (PTH).
• PTH helps to control the amount of calcium and phosphorous in your body. This affects your bones and muscles.
Cytotoxic antibodies
• Checks for antibodies in the blood that could affect an upcoming kidney transplant.
Hemoglobin A1C • Shows your average blood glucose levels over the last 2 to 3 months.
• Used to check how well you are managing your diabetes.
Cholesterol • Checks for fats in the blood.
• High levels could increase your risk of heart disease or stroke.
Hepatitis screen • Checks for antibodies that are made when you have a liver infection caused by a hepatitis virus.
HIV screen • Checks for antibodies that are made when you have infections caused by the Human Immunodeficiency Virus (HIV).

128
Schedule for routine blood work (for nocturnal dialysis patients) For the first 4 weeks of home hemodialysis, you will have blood work before (pre) and after (post) each hemodialysis treatment. The chart below shows when other regular blood work is scheduled. The Home Hemodialysis team will tell you when you need other tests.
Blood work Schedule
Every month Pre and Post hemodialysis blood work Iron saturation, Ferritin and Intact PTH
As directed by your Nephrologist PT/INR
Every 3 months (for patients awaiting transplant)
Cytotoxic antibodies
Every 3 months (for patients with diabetes)
Hemoglobin A1C
Every 6 months Fasting Cholesterol (Nothing to eat or drink for 12 to 14 hours before this blood work)
Every year Hepatitis B and C Screening Test HIV Screening Test

129
Pre- and Post-dialysis: Taking blood samples from the arterial line Supplies
• Vacutainer with needle, or 18-gauge needle and syringe • Alcohol wipe • Blood tubes
Pre-dialysis Post-dialysis
1. Start hemodialysis following procedure on page 125.
2. Allow the blood to reach the hemoscan/expansion chamber, and stop the arterial blood pump.
3. Swab the Arterial specimen port with the alcohol wipe. Wait for alcohol to dry.
4. Collect blood samples using vacutainer and blood tubes. • You can also collect blood
samples using 18g needle and syringe. Inject the blood into the blood tubes.
5. Spin blood tubes in the centrifuge as directed.
6. Continue with starting dialysis.
1. Confirm end of treatment.
2. Select ‘Bypass’ and ‘Rinseback’.
3. Reduce arterial pump speed to 50 ml/minute.
4. Wait 15 seconds.
5. Swab the Arterial specimen port with the alcohol wipe. Wait for alcohol to dry.
6. Collect blood samples using vacutainer and blood tubes. • You may collect blood samples
using 18g needle and syringe. Inject blood into the blood tubes.
7. Spin blood tubes in the centrifuge as directed.
8. Proceed with retransfusion following procedure on page 144.

130
Pre-dialysis: Taking blood samples directly from an AV access The nurse will tell you when to take blood samples from your AV access. Supplies
• Vacutainer and needle or 18-gauge needle and syringe • Blood tubes • One 10ml syringe prepared with normal saline • Centrifuge
Procedure
1. Cannulate with no saline in the fistula needle. This is called the dry technique.
2. Connect the vacutainer to the arterial access. If vacutainer is not available, use 18g needle and syringe.
3. Collect blood samples.
4. Attach 10ml syringe prepared with normal saline and flush the access.
5. Spin blood tubes in the centrifuge as directed.
6. Label the tubes ‘Pre’ and add your Name and Date of birth.
7. Start dialysis following procedure on page 125.

131
Pre-dialysis: Taking blood samples directly from a CVC The nurse will tell you when to take blood samples from your AV access. Supplies
• Vacutainer and needle • Blood tubes • One 3ml syringe • One 10ml syringe prepared with normal saline • Centrifuge
Procedure
1. Prepare the CVC as described in ‘Caring for a CVC’ in Chapter 5.
2. Attach 3 ml syringe to one of the ports. Open the clamp on the port. Remove 3mls of blood from the port. Close the clamp on the port. Remove the syringe and set aside.
3. Adapt vacutainer and needle to CVC port.
4. Open the clamp on the port. Collect blood samples. Close the clamp on the port.
5. Attach 10ml syringe prepared with normal saline. Open the clamp on the port and flush the access. Close the clamp on the port.
6. Spin blood tubes in the centrifuge as directed.
7. Label the tubes ‘Pre’ and add your Name and Date of birth.
8. Start dialysis treatment following procedure on page 125.

132
How to use the centrifuge 1. Open cover
• The latches that open the centrifuge are located at the top left and right sides, just below the cover.
• Press both latches at the same time. When the cover pops up, lift it to the full upright position.
2. Load blood tubes
• Always spin 2, 4 or 6 tubes. Do not spin 1 or 5 tubes.
• Load tubes of about equal weight. Load tubes opposite each other, so they will be balanced while spinning.
• Close the cover. Lock both sides securely into the latches. 3. Set timer to start
• The timer is on the lower right side of the centrifuge. Rotate the timer knob clockwise to set the desired time. For best results, spin blood for 30 minutes.
• When the timer is set, the indicator light on the lower left side will go on, and the centrifuge will start spinning.
• When the timer returns to zero, the spinning stops. 4. Unload tubes carefully
• Wait for the spinning to stop completely.
• Before unlatching and opening the cover, always check to see if any blood tubes are leaking or broken.
Safety tips
Keep the centrifuge balanced • Spin an even number of tubes, of equal weight, set evenly
around the centrifuge. Keep the cover closed • Never unlatch the cover while the centrifuge is spinning.
This will shut off the power.
For best results, spin blood for:
30minutes

133
Cleaning the centrifuge
• Before cleaning, unplug the unit from the power source.
• Wipe aluminum shields, rotor and outside of the centrifuge with warm water and mild detergent.
Accessories
• Rubber tube adapters are put in the bottom of the centrifuge.

134
Changing the bicarbonate cartridge during hemodialysis Replace the bicarbonate cartridge when the cartridge is broken, low or empty. Procedure
1. Press ‘see/mod. parameters’.
2. Press ‘dialysate’.
3. Press ‘other parameters’.
4. Press ‘change bidry’.
5. The question ‘Do you want to change bidry?’will appear with the choice of Yes or No.
6. Press ‘Yes’ key.
7. Press ‘bidry change on’ key.
8. The question ‘bidry change completed?’ will appear. Do not press ‘Yes’ until you have placed the new cartridge in the holder.
9. Wait a few seconds or until the bicarbonate level alarms, to make sure the pressure in the cartridge is low. Then change cartridge. Lift the bicarbonate holder cap from the top of the cartridge and remove the old cartridge.
• Note: When you are changing the cartridge, you will not be able to select ‘Bicarbonate drain’. The cartridge will remain full of water when it is removed.
10. Put in the new bicarbonate cartridge. Replace the holder cap on top and push the cartridge back into the bicarbonate holder.
11. Select ‘Yes’ to answer the question ‘bidry change complete?’.
12. The new cartridge will automatically fill with water and the bicarbonate conductivity will stabilize. This takes about 2 minutes. When complete, the alarm will shut off. You can press ‘mute’ if you want to silence the alarm.

135
If the bicarbonate cartridge does NOT fill
1. Press ‘see/mod. parameters’.
2. Press ‘dialysate’.
3. Press ‘other parameters’.
4. Press ‘fill Bidry’.
5. Press ‘OK’ to confirm.

136
Changing the dialyzer and bloodlines during dialysis: Hemofilter management During dialysis treatment, clotting in the dialyzer and/or entire blood circuit may occur. The dialyzer may also need changing if there is a defect. The Formula machine will automatically resume dialysis when both arterial and venous sensors detect blood.
When to take action
If there is a blood leak: • Do not return your blood (per unit protocol).
If there may be clotting in the dialyzer:
• Flush the blood circuit with saline to determine the amount of clotting and return as much blood as possible.
Supplies
• New dialyzer • Arterial and venous bloodlines • Two - 1000ml bags of normal saline (0.9% NaCl) • Heparin syringe prepared with Heparin 1:1,000u/ml • Two - 10ml syringes prepared with normal saline
Procedure
1. Press ‘see/mod. parameters’.
2. Press ‘hemofilter management’.
3. Press ‘change filter’. The question ‘Do you want to change the dialyzer?’ will appear. Press ‘Yes’.
4. The message ‘Filter change’ will appear at the top right of the screen. The blood pump will automatically stop and the Formula machine will automatically go into bypass to stop flow of dialysate (UF rate will drop to 0.1 kg/hr).
Continued on next page

137
5. Disconnect the bloodlines from your access. Flush the access with syringes containing normal saline. Clamp access.
6. Remove dialysate connectors from dialyzer and reconnect to the machine (do this over a container as dialysate will drain from the dialyzer). There will be a ‘dialyzer connector’ warning.
7. Remove the dialyzer and bloodlines and discard them. The air detector is enabled, so there will be an ‘air detected’ warning. Press ‘override’ to cancel this warning.
8. Set up the Formula machine with new dialyzer, bloodlines, saline, and heparin.
9. Connect dialysate connectors to the dialyzer.
10. Open arterial line clamp. Set the blood flow to 100-150ml/min. Prime the bloodlines. Make sure the venous chamber has filled (¾ full). The venous clamp will open automatically. Place venous line in air detector and the venous line clamp. • Note: the blood pump will not stop automatically during priming in this
mode.
11. Press the ‘bypass’ key to take the machine out of bypass mode.
12. Turn the dialyzer arterial end up (red end up) to prime the dialysate compartment. The ‘BLD’ will alarm due to air coming out of the dialyzer.
13. Press ‘override’.
14. When alarms are quiet and the blood circuit is fully prepared, stop the blood pump.
15. Clamp arterial bloodline.
16. Continue to connect to the machine as described in Chapter 8.
17. When the arterial and venous sensors detect blood again, the Formula machine will automatically go into dialysis mode. The message ‘dialysis DN’ will appear in the upper right window.
18. Press the ‘bypass’ key to restart the flow of dialysate to the dialyzer.
19. Record the change of dialyzer and bloodlines in your dialysis log. Change the weight loss target if needed, to account for any extra saline you have given or fluid loss.
20. Call the Home Hemodialysis Unit.

138
Giving a normal saline bolus (flush) Procedure
1. Press ‘min ufr’ if you have any signs of low blood pressure.
2. Make sure the roller clamp on the IV administration line is open. Open the clamp on the normal saline service port.
3. Clamp the arterial line.
4. Allow 200ml of normal saline to go in.
5. Check the blood circuit for clots to see if you can continue with dialysis, or the blood circuit needs to be changed.
6. Adjust the blood pump control knob to open venous and arterial alarm limits. The alarm limits will remain open for 30 seconds. If the alarm limits close before the bolus is given, repeat this step.
You can also adjust arterial and venous alarm limits by:
• Pressing ‘see/mod. parameters’. • Pressing ‘blood recalcul.’ • The alarm limits will remain open for 30 seconds.
7. Open arterial line clamp.
8. Stop infusion by closing the clamp on the normal saline service port.
When to take action
If flush/bolus is given for low blood pressure: • Check your blood pressure. • When your BP is stable, press ‘uf on’ to stop ‘min ufr’.
If flush/bolus is given to check the blood circuit for clots:
• Check if the blood circuit needs to be changed.

139
Giving an intravenous (I.V.) antibiotic: By dissolving the medicine in sterile water
Powdered medicine must be dissolved in sterile water before it can be given through the I.V.
Steps in this procedure:
1. Prepare the I.V administration line. 2. Dissolve the medicine in normal saline. 3. Give the medicine:
A. Through your access OR
B. Through the arterial drip chamber Supplies
• Antibiotic • 100ml or 250ml normal saline bag, as directed by the nurse • 18 gauge needle • 10ml syringe • 10ml vial of sterile water • Alcohol swabs • I.V. administration line

140
Prepare the I.V. administration line
1. Remove blue tab from normal saline bag.
2. Remove I.V. administration line from package.
3. Close roller clamp on the I.V. administration line.
4. Remove spike cap. Insert the spike into the I.V. port of the normal saline bag.
5. Squeeze drip chamber to fill it halfway with saline.
6. Open the roller clamp.
7. Prime the I.V. administration line with normal saline.
8. Close the roller clamp.
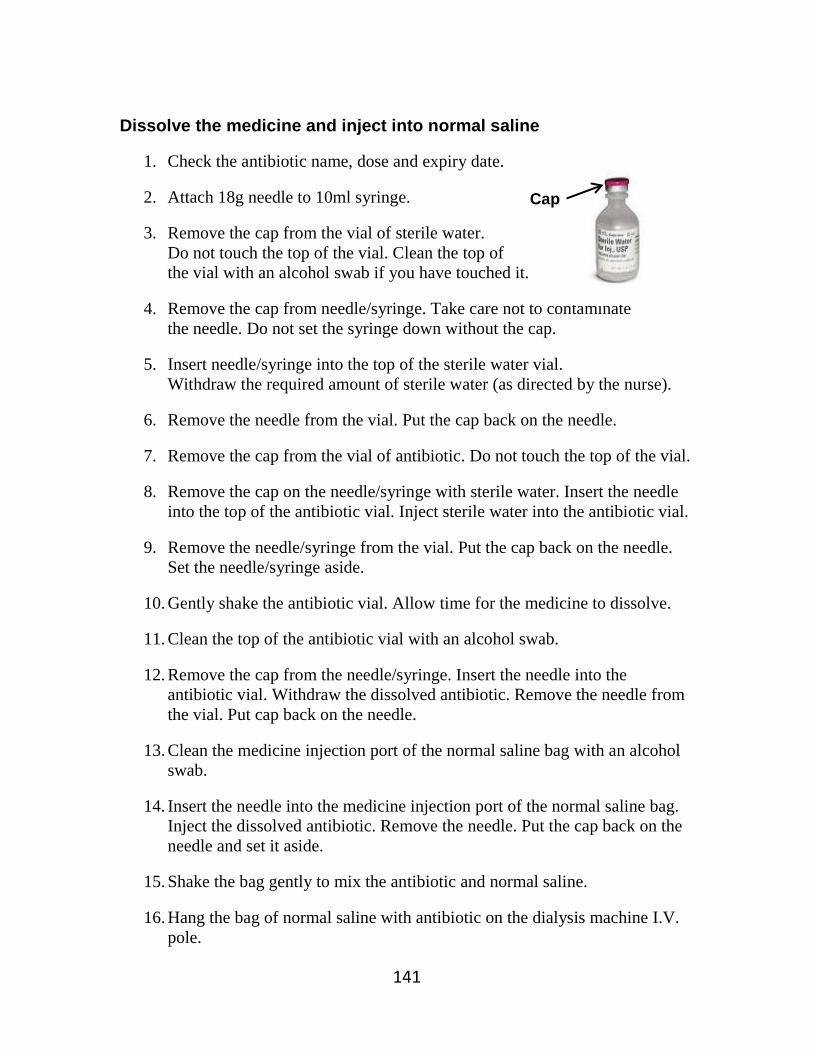
141
Dissolve the medicine and inject into normal saline
1. Check the antibiotic name, dose and expiry date.
2. Attach 18g needle to 10ml syringe.
3. Remove the cap from the vial of sterile water. Do not touch the top of the vial. Clean the top of the vial with an alcohol swab if you have touched it.
4. Remove the cap from needle/syringe. Take care not to contaminate the needle. Do not set the syringe down without the cap.
5. Insert needle/syringe into the top of the sterile water vial. Withdraw the required amount of sterile water (as directed by the nurse).
6. Remove the needle from the vial. Put the cap back on the needle.
7. Remove the cap from the vial of antibiotic. Do not touch the top of the vial.
8. Remove the cap on the needle/syringe with sterile water. Insert the needle into the top of the antibiotic vial. Inject sterile water into the antibiotic vial.
9. Remove the needle/syringe from the vial. Put the cap back on the needle. Set the needle/syringe aside.
10. Gently shake the antibiotic vial. Allow time for the medicine to dissolve.
11. Clean the top of the antibiotic vial with an alcohol swab.
12. Remove the cap from the needle/syringe. Insert the needle into the antibiotic vial. Withdraw the dissolved antibiotic. Remove the needle from the vial. Put cap back on the needle.
13. Clean the medicine injection port of the normal saline bag with an alcohol swab.
14. Insert the needle into the medicine injection port of the normal saline bag. Inject the dissolved antibiotic. Remove the needle. Put the cap back on the needle and set it aside.
15. Shake the bag gently to mix the antibiotic and normal saline.
16. Hang the bag of normal saline with antibiotic on the dialysis machine I.V. pole.
Cap

142
A. Giving the IV antibiotic directly into an AV access
1. Complete all end of treatment procedures, except for access care.
2. Connect the I.V. administration line with antibiotic to your access.
3. Open the clamp on the access.
4. Slowly open the roller clamp on the I.V. administration line.
5. Use the roller clamp to set the rate of infusion.
6. Allow 30 to 60 minutes to complete the infusion, as directed by the nurse.
7. When the infusion is finished, close the roller clamp on the IV tubing.
8. Close the clamp on the access.
9. Disconnect the I.V. administration line from your access.
10. Proceed with procedures for access care.
When to get medical help
Watch for these signs of an adverse reaction:
• Nausea or vomiting • Skin rash or hives • Fever
If you have an adverse reaction, stop the infusion and get emergency medical help.

143
B. Giving the antibiotic through the arterial drip chamber
Give the antibiotic in the last 30 to 60 minutes of a treatment session.
1. Press ‘isolated uf on’.
2. Ensure the arterial chamber service port is clamped.
3. Remove the cap on the arterial chamber service port.
4. Connect the I.V. administration line with antibiotic to the arterial chamber service port.
5. Open the arterial chamber service port clamp.
6. Slowly open the roller clamp on the I.V. administration line.
7. Use the roller clamp to control the rate of infusion.
8. Infuse the medicine, over the time directed by the nurse.
9. When the medicine is finished, close the roller clamp on the I.V. administration line.
10. Close the arterial chamber service port.
11. At the end of your dialysis treatment, the ‘END UF’ alarm will sound.
12. Press ‘rinseback’ and proceed with end of treatment procedures.
When to get medical help
Watch for these signs of an adverse reaction:
• Nausea or vomiting • Skin rash or hives • Fever
If you have an adverse reaction, stop the infusion and get emergency medical help.

144
Managing events during dialysis To change your target fluid loss
1. Press ‘see/mod. parameters’, then ‘dialysate’.
2. Press ‘weight loss’.
3. Use the ‘↑’and ‘↓’ keys to set the correct number.
4. Press ‘OK’ to confirm the change and reset the UF rate. To change all other parameters
1. Press ‘see/mod. parameters’.
2. Press either ‘blood’ or ‘dialysate’.
3. Select the parameter you want to change.
4. Use the ‘↑’, ‘↓’, ‘←’, or ‘→’ key to change the parameter.
5. Press ‘OK’ to confirm the change. To restart power to deal with an alarm
Occasionally, the best way to deal with certain alarms during dialysis is to turn off the power and restart. Simply unplug the machine, then plug it in again. All parameters and information are kept in the machine’s memory.
To restart power in an emergency
If the dialysis machine shuts itself down, there will be a red screen alarm. If you can, record the 6-digit code number displayed in the red box on the main screen.
• Press the power switch (green light) on the front panel of machine. Hold down the button for 10 seconds.
• A blue box will open on the main screen with instructions.
• The machine will restart and resume dialysis. All parameters and information are kept in the machine’s memory.

145
To change arterial and venous pressure limits
Occasionally during a dialysis treatment, your arterial or venous pressure may slowly rise or fall. When these pressures come close to the upper or lower pressure limits, an alarm will occur. You can prevent this by resetting the pressure alarm limits around your current pressures. Turn the blood pump speed knob down, and then back up. This will set new limits around the current pressures.
Weight loss minimum
If you need to stop fluid removal due to low blood pressure, press ‘min ufr’. This will put the UF rate at 0.1 kg/hr. When you want to restart fluid removal, press ‘uf on’. Check that your target (dry) weight is correct.
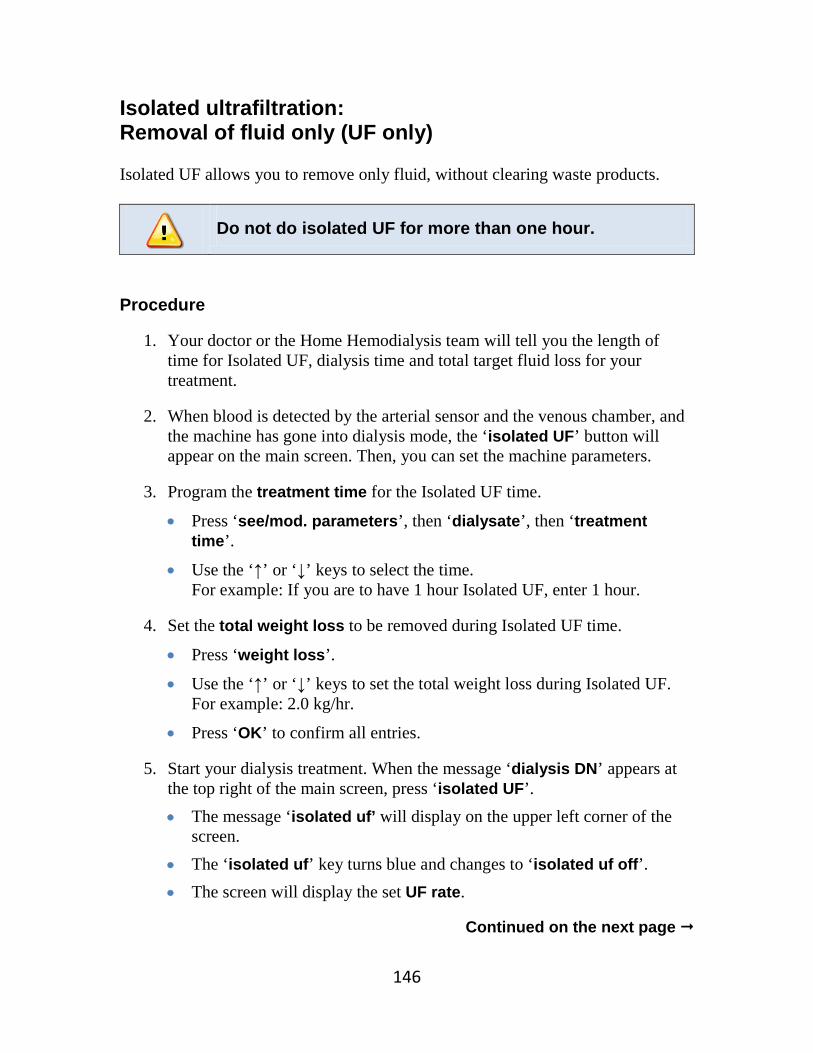
146
Isolated ultrafiltration: Removal of fluid only (UF only) Isolated UF allows you to remove only fluid, without clearing waste products.
Do not do isolated UF for more than one hour.
Procedure
1. Your doctor or the Home Hemodialysis team will tell you the length of time for Isolated UF, dialysis time and total target fluid loss for your treatment.
2. When blood is detected by the arterial sensor and the venous chamber, and the machine has gone into dialysis mode, the ‘isolated UF’ button will appear on the main screen. Then, you can set the machine parameters.
3. Program the treatment time for the Isolated UF time.
• Press ‘see/mod. parameters’, then ‘dialysate’, then ‘treatment time’.
• Use the ‘↑’ or ‘↓’ keys to select the time. For example: If you are to have 1 hour Isolated UF, enter 1 hour.
4. Set the total weight loss to be removed during Isolated UF time.
• Press ‘weight loss’.
• Use the ‘↑’ or ‘↓’ keys to set the total weight loss during Isolated UF. For example: 2.0 kg/hr.
• Press ‘OK’ to confirm all entries.
5. Start your dialysis treatment. When the message ‘dialysis DN’ appears at the top right of the main screen, press ‘isolated UF’. • The message ‘isolated uf’ will display on the upper left corner of the
screen. • The ‘isolated uf’ key turns blue and changes to ‘isolated uf off’. • The screen will display the set UF rate.
Continued on the next page

147
6. At the end of Isolated UF, the machine will beep. The alarm bar at the bottom of the screen will be orange and display “end uf’.
7. The indicator bar for the weight loss will display the amount of fluid that has been removed.
8. Set the total treatment time for dialysis and Isolated UF.
• Press ‘see/mod. parameters’, then ‘dialysate’, then ‘treatment time’.
• Use the ‘↑’ or ‘↓’ keys to set the total treatment time (the remaining dialysis time plus the Isolated UF time). For example: 4 hours in dialysis plus 1 hour Isolated UF = 5 hours treatment time.
9. Set the total weight loss to be removed during the total treatment time (remaining dialysis time and Isolated UF time).
• Press ‘weight loss’.
• Use the ‘↑’ or ‘↓’ keys to set the total weight loss, including the amount removed during Isolated UF. For example: 3 kg in dialysis plus 2 kg removed in Isolated UF = 5 kg.
• Press ‘OK’ to confirm all entries.
10. Press ‘uf on’. The message window on the top right of the screen will now display ‘dialysis DN’.

148
Recirculation procedure During dialysis, there may be times when you need to temporarily disconnect the bloodlines from your access. Until you are ready to reconnect, you must recirculate your blood to keep it moving and prevent clotting. For example, you may need to do this when:
• You need to go to the washroom. • Your CVC needs flushing. • Your fistula needles need adjusting, or you need to re-cannulate.
Supplies
• Recirculator • Two 10ml syringes prepared with normal saline • Two clamps • 4x4 gauze
Procedure to recirculate in bypass mode
1. Flush blood circuit (this is optional) with 200 ml normal saline. Clamp I.V. normal saline administration line.
2. Press ‘bypass’.
3. Press ‘pump off’ key.
4. Clamp access.
5. Clamp arterial and venous bloodlines.
6. Disconnect bloodlines from access.
7. Flush access with syringes prepared with normal saline and clamp the access.
8. Connect bloodlines to recirculator.
9. Press ‘pump on’ key. Set blood flow to 250 - 300ml/min.
10. Recirculate blood for no more than 30 minutes.
You can recirculate blood
for up to:
30minutes

149
Procedure to resume dialysis treatment
1. Press ‘pump off’ key.
2. Clamp arterial and venous bloodlines.
3. Connect arterial bloodline to arterial access. Connect used syringe to recirculator.
4. Connect venous bloodline to venous access. Connect used syringe to recirculator.
5. Throw away the recirculator and syringes.
6. Open all clamps.
7. Press ‘pump on’ key. Set blood flow to desired rate.
8. Press ‘Bypass’ key to switch out of bypass mode.
You can also use this procedure to remove
air and foam from the blood circuit.


150
Chapter 10 How to disconnect and maintain the machine
Topic Page
• Integra machine 151 - Disinfecting the Integra machine with bleach 151 - Disinfecting the Integra machine with citric acid or acetic acid 152
• Formula machine 153 - Disinfecting the Formula machine with bleach 153 - Programming a second disinfection 155 - Disinfecting the Formula machine with citric acid 156
• Managing ultrafilters 157
• Replacing the FORCLEAN ultrafilter 158
• Back-up battery 159

151
Disinfecting the Integra machine with bleach
Disinfect the Integra machine with bleach at the end of every treatment to prevent the growth of bacteria.
Procedure
1. Press ‘DISINFECTION’ F2
2. Press ‘CHEMICAL’ F1
3. Press ‘BLEACH’ F1 or ‘BLEACH OFF’ F3
4. Connect the yellow disinfection connector from the Integra machine to the yellow wand in the bleach jug.
5. Press ‘START’ F1
6. The message ‘WAIT’ will appear, followed by ‘TANK FILLING’.
7. When the disinfection tank is full there will be an alarm ‘DISINF CONNECTOR POSITION’.
8. Return the yellow disinfection connector to the Integra machine.
9. The total disinfection time is 15 minutes. This is followed by an automatic rinse cycle of 14 min.
10. Press ‘BLEACH OFF’. The Integra will automatically switch off. • Note: If you have not selected ‘BLEACH OFF’ the Integra will proceed to
the PHASE SELECTION screen. Then, switch off the Integra.

152
Disinfecting the Integra machine with citric acid or acetic acid
Disinfect the Integra machine with citric acid or acetic acid two times a week to prevent the growth of bacteria.
Procedure
1. Press ‘DISINFECTION’ F2
2. Press ‘CHEMICAL’ F1
3. Press ‘ACETIC’ or ‘CITRIC’ F2
4. Connect the yellow disinfection connector from the Integra machine to the yellow wand in the citric acid jug.
5. Press ‘START’ F1
6. The message ‘WAIT’ will appear, followed by ‘TANK FILLING’.
7. When the disinfection tank is full there will be an alarm ‘DISINF CONNECTOR POSITION’.
8. Return the yellow disinfection connector to the Integra machine.
9. The total disinfection time is 15 minutes. This is followed by an automatic rinse cycle of 14 min.
10. The Integra will proceed to the PHASE SELECTION screen. Then, switch off the Integra.
153
Disinfecting the Formula machine with bleach
Disinfecting the Formula machine with bleach at the end of every treatment to prevent the growth of bacteria.
Supplies
• Disinfectant (bleach) • Disinfection wand
Procedure
1. Press ‘disinfection’ (available in rinse mode).
2. Press ‘manual disinfection’.
3. Press ‘chemical full’.
4. Press ‘User’. The chemical used is BLEACH.
5. Press ‘automatic shut off’ to program the Formula machine to shut off automatically when disinfection is complete. When ‘enabled’ appears in the turquoise display window, press the ‘↑’ or ‘↓’ key. Press ‘OK’ to confirm. • Note: You cannot program the water treatment system to shut off
automatically.
To cancel the automatic shut off:
• You can cancel ‘auto off’ at any time during disinfection, by pressing ‘cancel auto off’, then ‘OK’.
• When disinfection, rinse and self-test is complete, the Formula will remain running in conserving rinse mode (300 ml/min).
6. Place wand in disinfectant. Insert the yellow disinfection connector into the yellow wand.
Continued on the next page
154
7. The message ‘Within few minutes the machine will start the disinfection programmed…’ will be displayed. • Note: The Formula continues rinsing for a few minutes.
If you have not selected ‘auto off’, you can do this after disinfection begins. Press ‘automatic shut off’ then ‘OK’. The message ‘Do you want to start auto off?’ will be displayed. Press ‘YES’ to confirm.
8. The Formula machine will turn off when disinfection is completed.
If the Formula machine fails to disinfect
1. Call technologist. 2. If alarm cannot be resolved over the phone, do ‘heat’
disinfection. 3. The technologist will arrange a service call to your home.

155
Programming a second disinfection You can program a second disinfection, after you have set the first one. The second disinfection will start when the first one has ended.
Procedure
1. Follow the procedure for ‘Disinfecting the Formula machine with Bleach’.
2. Press ‘second disinfection’.
3. Press ‘disinfection type’.
4. Connect the desired disinfectant, as directed by the technologist. • Note: You must wait until the bleach used for the first disinfection
has been used, and the second sector of the disinfection circle on the screen is blue.
5. Select ‘OK’.
6. The second disinfection will start as soon as the one in progress has ended.
You can cancel the second disinfection, if the intake of the bleach has not started. Press ‘cancel 2nd disinf.’ to cancel.

156
Disinfecting the Formula machine with citric acid
Disinfect the Formula machine with citric acid two times a week to prevent the growth of bacteria.
CITRIC ACID disinfection must be followed by
disinfection with BLEACH. Supplies
• 20% Citric Acid Solution • Disinfection wand
Procedure
1. Select ‘disinfection’.
2. Select ‘manual disinfection’.
3. Select ‘chemical heat’.
4. Select ‘OK’ to confirm ‘CITRIC A’.
5. Place yellow wand into the jug of 20% citric acid solution.
6. Insert the yellow disinfection connector into the yellow wand.
7. The Formula machine will begin to fill with citric acid.
8. When the disinfection circle on the screen is blue, disconnect the yellow disinfection connector and return it to its port.
9. Recap the 20% citric acid solution.

157
Managing ultrafilters The Forclean ultrafilter stops bacteria from entering the dialyzer. This special filter is placed at the back of the machine.
The Forclean ultrafilter is used for a limited time. It will tell you when it needs to be replaced.
During dialysis, a dialogue window displays:
1. Time of remaining use (how much time is left on the current ultrafilter).
2. Time since the ‘replace FORCLEAN’ key was last pressed (how much time has elapsed from the last ultrafilter change).
Exam
ple
FORCLEAN Remaining time (hr:min) 03:17 Elapsed time from - replace FORCLEAN: (hr:min)396.43
For your safety, the ultrafilter tells you when to replace it, through a series of warning and alarms.
Timing Message
1. After 380 hours of ultrafilter use
Warning: ‘Replace FORCLEAN’ This warning will remain on the screen until the ultrafilter is replaced.
2. After 400 hours of ultrafilter use
Alarm: ‘Replace FORCLEAN’

158
Replacing the Forclean Ultrafilter
It is best to change the Forclean ultrafilter AFTER dialysis and BEFORE disinfection.
Procedure
1. Turn off the machine using the main switch on the back panel.
2. Remove the protective cover.
3. Detach the elastic clip holding the ultrafilter.
4. Disconnect the three connectors from the ultrafilter and remove it.
5. Mount the new ultrafilter in the fixing clips. Make sure the filter is placed right side up.
6. Reconnect the three connectors to the ultrafilter. Do not to fold or squash the tubes.
7. Tie the elastic clip again.
8. Replace the protective cover.
9. Switch on the machine.
10. Press ‘filter management’.
11. Press ‘replace FORCLEAN’. • The filter priming/spilling sequence will start automatically. • The Formula machine will store a code number to record when the
ultrafilter was replaced. The hour counter will reset, and begin counting the hours until the ultrafilter must be replaced again.
12. Disinfect the Formula machine with bleach before your next dialysis
treatment.

159
Back-up battery The Formula machine has a back-up battery to operate the blood pump for about 20 minutes when there is a power failure.
• This battery only powers the blood circuit: the blood pump, air detector, line clamp, and pressure monitors.
• All treatment parameters will remain programmed. • None of the dialysate related functions will work on back-up battery power.
The back-up battery is tested every time the machine is turned on.
• If a GREEN icon appears, the battery passed the test and is fully charged. • If a RED battery icon appears, the battery test failed. This means the
back-up battery is not charged and the dialysis machine would not be able to operate if there is a power failure.
When there is a power failure, the back-up battery will come on.
• When the back-up battery is working, there is a flashing orange LED light next to the ON button.
• The RED ‘BATTERY’ alarm will appear in the alarm bar at the bottom of the screen. You will hear and see a warning that the back-up battery is on.
• The battery charge is shown in a circle on the left side of the screen. The GREEN section of the circle indicates the battery is charged. The RED section indicates a low battery charge.
When the circle is only coloured in the red section, the machine can only operate for about 2 more minutes, before switching off.
• When power returns, conductivity alarms will result. Press ‘silence’ key to
silence the alarms. The blood pump will continue working and the machine will have kept all treatment parameters in its memory.
The back-up battery can provide power
for about 20 minutes.

160
What to do if power fails for more than a few minutes
Stop your dialysis treatment if you think the power failure will last longer than a few minutes.
Procedure
1. Press ‘rinseback’, then ‘YES’.
2. Turn blood flow down to 100 ml/min.
3. Retransfuse your blood following the procedure on page X.
4. When the bloodlines are clear, turn the pump off.
5. Turn the machine off using the main power switch on the back panel of machine.
6. Disconnect bloodlines from access. Perform post-dialysis access care, as described in Chapter 9.
7. Disinfect the machine with bleach when the power returns.
Lower the pump speed to save the battery’s energy.

161
Chapter 11 How to manage problems, alarms and emergencies
Topic Page
• How to get help 162 Alarms and warnings 163
• Alarms related to vascular access 163
• Alarms and warnings related to the Formula machine 174 Managing problems 190
• Managing problems that may require manual blood transfusion (red screen alarm and dead battery)
190
• Manual blood retransfusion - returning blood by hand 192 Emergencies 194
• What to do if there is a fire 194

162
How to get help
The Home Hemodialysis Unit
Phone number: 416-340-3736
Hours: 7:30 to 3:30 pm
Outside of these hours, go to the nearest hospital emergency room.
For medical emergencies, call 911.
Home Hemodialysis Technologists
Phone number: 416-340-4288
After hours, page the technologist on-call.

163
Alarms related to vascular access This chart tells you how to respond to these alarms related to vascular access:
• Arterial pressure too low • Arterial pressure too high • Venous pressure too low • Venous pressure too high • Arterial line separation – Arteriovenous access • Arterial line separation – CVC • Venous line separation – Arteriovenous access • Venous line separation – CVC
Minimum Pa: Arterial pressure is very negative Machine effect Possible causes Actions
• Written and sound alarm.
• Dialyzer in bypass.
• Venous clamp closes.
• Dialysis time and fluid removal stops.
Poor arterial needle position
• Try to reposition the needle. Re-cannulate.
• If you are unable to re-cannulate, stop treatment and call the Unit.
Arterial needle infiltration • Needle is
outside the AV fistula or AV graft
If this occurs before hemodialysis: 1. Remove the needle. 2. Put ice on the affected area. 3. Re-cannulate new site.
If this occurs during hemodialysis: 1. Recirculate blood. 2. Flush the good needle. 3. Put ice on the affected area. 4. Re-cannulate new site. 5. Restart treatment. 6. Call the Unit to report the problem. 7. If you are unable to re-cannulate,
stop treatment. 8. Return blood through the good
needle.
In this section of the guide, the Home Hemodialysis Unit
is called “the Unit”.

164
Minimum Pa: Arterial pressure is very negative (continued) Machine effect Possible causes Actions
• Written and sound alarm.
• Dialyzer in bypass.
• Venous clamp closes.
• Dialysis time and fluid removal stops.
Vessel spasm (twitching)
• Put a warm compress on the access. • Reduce the blood speed. • Allow spasm to settle before
increasing the blood pump.
Stenosis • Narrowing of
AV fistula or AV graft
• Check and record arterial and venous pressure.
• Call the Unit to report changes in arterial or venous pressure.
• Flow through the access will be checked with a transonic flow study.
• Fistulogram and angioplasty may be needed to detect and treat stenosis.
• Transonic flow study will be repeated to recheck flow through the access.
Thrombosis • Clotting in
AV fistula or AV graft
• Check for the bruit. • Call Unit to report changes in bruit. • If there is clotting, angioplasty will
be done to remove the clot. • A transonic flow study will be done
after angioplasty to recheck flow through the access.
CVC Tego connector
Change Tego connector if: • Arterial flow is poor. • Tego device looks worn or frayed.
CVC arterial port: • Partially
blocked • Clotted • Poor out flow • Incorrect
catheter position
• Reduce pump speed (no less than 250 ml/min).
• Flush the port with normal saline. • Reverse the lines. • Change your position. • Unit nurse may give alteplase
(Cathflo®). • CVC may need to be removed and
replaced with a new CVC.

165
Minimum Pa: Arterial pressure is very negative (continued) Machine effect Possible causes Actions
• Written and sound alarm.
• Dialyzer in bypass.
• Venous clamp closes.
• Dialysis time and fluid removal stops.
CVC leaking • Catheter may
be dislodged
• Do not return the blood. • Apply pressure. • Tape down the CVC. • Go to the hospital emergency room.
Low blood pressure (BP)
• Check BP. • Give normal saline. • Check if target weight needs to be
increased. • If BP remains low, stop treatment
and call the Unit to report the problem.
Blocked arterial line
• Remove any blockages. • Check for clamps, kinks and clots.

166
Maximum Pa: Arterial pressure is less negative or even positive Machine effect Possible causes Action
• Written and sound alarm.
• Dialyzer in bypass.
• Venous clamp closes.
• Dialysis time and fluid removal stops.
Normal saline is running (infusing)
• Stop infusion of normal saline.
Arterial Transducer is not connected
• Ensure Arterial Transducer is connected properly.
Arterial Transducer is wet
Remove water from Arterial Transducer line: 1. Draw up air into a 10 ml syringe. 2. Clamp Arterial Transducer. 3. Remove Arterial Transducer from
the machine. 4. Attach syringe to Arterial
Transducer. 5. Open Arterial Transducer clamp. 6. Inject air into Arterial Transducer
until line is clear of saline. 7. Clamp Arterial Transducer line.
Discard 10ml syringe. 8. Attach Arterial Transducer to the
machine. 9. Open Arterial Transducer clamp.
Arterial Transducer is incorrectly attached to Venous Transducer monitor
• Ensure Arterial Transducer is attached correctly to arterial transducer monitor.
Blood pump segment is not positioned correctly (reversed)
• Ensure the blood pump segment is put in correctly.
Pump speed too slow
• Check that the prescribed blood flow has been achieved.

167
Minimum Pv: Venous pressure is too low Machine effect Possible causes Actions
• Written and sound alarm.
• Blood pump stops.
• Dialyzer in bypass.
• Venous clamp closes.
• Dialysis time and fluid removal stops.
Venous Transducer is wet
Remove water from Venous Transducer line: 1. Clamp Venous Transducer. 2. Remove Venous Transducer from
the machine. 3. Draw up air into a 10ml syringe. 4. Attach syringe to Venous
Transducer. 5. Open Venous Transducer clamp. 6. Inject air into Venous Transducer
until line is clear of saline. 7. Clamp Venous Transducer line.
Discard 10ml syringe. 8. Attach Venous Transducer to the
machine. 9. Open Venous Transducer clamp.
Venous Transducer is incorrectly attached to the Arterial Transducer (Note: venous pressure may also become negative)
• Ensure Venous Transducer is attached to Venous Transducer monitor correctly.
Blood pump flow. • Ensure the blood flow is set at the desired flow rate.
Normal saline infusing
• Stop infusions of normal saline, if it is no longer needed.
Dialyzer clotting (Note: there may be changes in TMP)
• Change dialyzer and bloodlines. • Follow the steps in the Hemofilter
management procedure on page X. • Call the Unit to report the problem.
Arterial and Expansion chamber clotting
• Change dialyzer and bloodlines. • Follow the steps in the Hemofilter
management procedure on page X. • Call the Unit to report the problem.
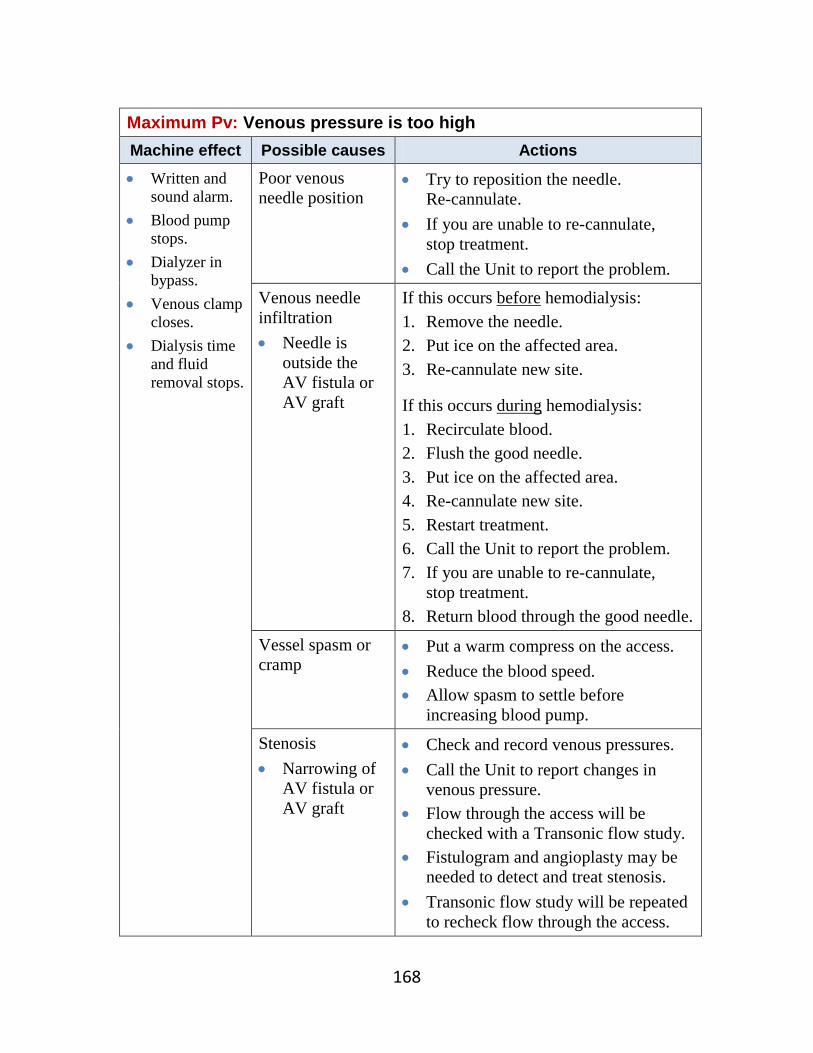
168
Maximum Pv: Venous pressure is too high Machine effect Possible causes Actions
• Written and sound alarm.
• Blood pump stops.
• Dialyzer in bypass.
• Venous clamp closes.
• Dialysis time and fluid removal stops.
Poor venous needle position
• Try to reposition the needle. Re-cannulate.
• If you are unable to re-cannulate, stop treatment.
• Call the Unit to report the problem.
Venous needle infiltration • Needle is
outside the AV fistula or AV graft
If this occurs before hemodialysis: 1. Remove the needle. 2. Put ice on the affected area. 3. Re-cannulate new site.
If this occurs during hemodialysis: 1. Recirculate blood. 2. Flush the good needle. 3. Put ice on the affected area. 4. Re-cannulate new site. 5. Restart treatment. 6. Call the Unit to report the problem. 7. If you are unable to re-cannulate,
stop treatment. 8. Return blood through the good needle.
Vessel spasm or cramp
• Put a warm compress on the access. • Reduce the blood speed. • Allow spasm to settle before
increasing blood pump.
Stenosis • Narrowing of
AV fistula or AV graft
• Check and record venous pressures. • Call the Unit to report changes in
venous pressure. • Flow through the access will be
checked with a Transonic flow study. • Fistulogram and angioplasty may be
needed to detect and treat stenosis. • Transonic flow study will be repeated
to recheck flow through the access.

169
Maximum Pv: Venous pressure is too high (continued) Machine effect Possible causes Actions • Written and
sound alarm. • Blood pump
stops. • Dialyzer in
bypass. • Venous clamp
closes. • Dialysis time
and fluid removal stops.
Thrombosis • Clotting in • AV fistula or
AV graft
• Check the thrill and bruit of your access.
• Call the Unit to report changes in thrill or bruit.
• If there is clotting, an angioplasty procedure will be done to remove the clot.
• A transonic flow study will be done after angioplasty to recheck flow through the access.
CVC Tego connector
Change Tego connector if: • Venous return pressures are high • Tego connector looks worn or frayed
CVC venous port: • Partially
blocked • Clotted • Poor return
flow • Incorrect
catheter position
• Reduce pump speed. Move the clamps on the ports to prevent kinking of the line.
• Flush the port with normal saline. • Reverse the lines. • Change your position. • Unit nurse may give alteplase
(Cathflo®). • CVC may need to be removed and
replaced with a new CVC.
CVC swelling or infiltration • Catheter may
be dislodged
• Do not return the blood. • Apply pressure. • Tape down the CVC. • Go to the hospital emergency room.

170
Maximum Pv: Venous pressure is too high (continued) Machine effect Possible causes Actions
• Written and sound alarm.
• Blood pump stops.
• Dialyzer in bypass.
• Venous clamp closes.
• Dialysis time and fluid removal stops.
Blocked venous line
• Remove any blockages. • Check for clamps, kinks and clots.
Venous chamber clotting
• Change dialyzer and bloodlines. • Follow the steps in the Hemofilter
management procedure on page X. • For further treatment, check if you
need to increase heparin infusion. • Call the Unit to report the problem.
Arterial Line Separation – Arteriovenous Access
Possible causes Actions Arterial line separation from arterial needle
Alarm 1. Blood level
Air detected
• Close all clamps - access clamps as well as line clamps.
• Do not return the blood. • Stop treatment. • Apply pressure on the arterial needle site
until bleeding stops. • Call the Unit to report the problem. • In future, make sure you tape connections
correctly. • Make sure you use the wet detector device.

171
Arterial Line Separation - CVC Possible causes Actions
Arterial line separation from arterial port of CVC
Alarm 1. Blood level
Air detected
A. Disconnection from Tego connector • Close all clamps - access clamps as well as
line clamps. • Stop treatment. • Call the Unit to report the problem. • In future, make sure connect the lines
properly to the Tego connector. • Make sure you use the wet detector device.
B. Direct disconnection from CVC
If there is a line separation, you may get an air embolism and lose a lot of blood. This can be fatal.
• Close all clamps - access clamps as well as line clamps.
• Do not return your blood. • Stay flat. Turn on your left side. • Call 911. • Make sure you use the wet detector device.

172
Venous Line Separation – Arteriovenous Access Possible causes Actions
Venous line separation from venous needle No Alarm
Small blood loss 1. Close all clamps- access clamps as well as
line clamps. 2. Return blood through the good needle. 3. Stop treatment. 4. Call the Unit to report the problem. 5. Make sure you follow the correct taping
procedure. 6. Make sure you use the wet detector device. Large blood loss With a large blood loss, you may not be able to manage the line separation. If you can: 1. Close all clamps - access clamps as well as
line clamps. 2. Do not return the blood. 3. Stay flat. 4. Call 911. 5. Make sure you use the wet detector device.
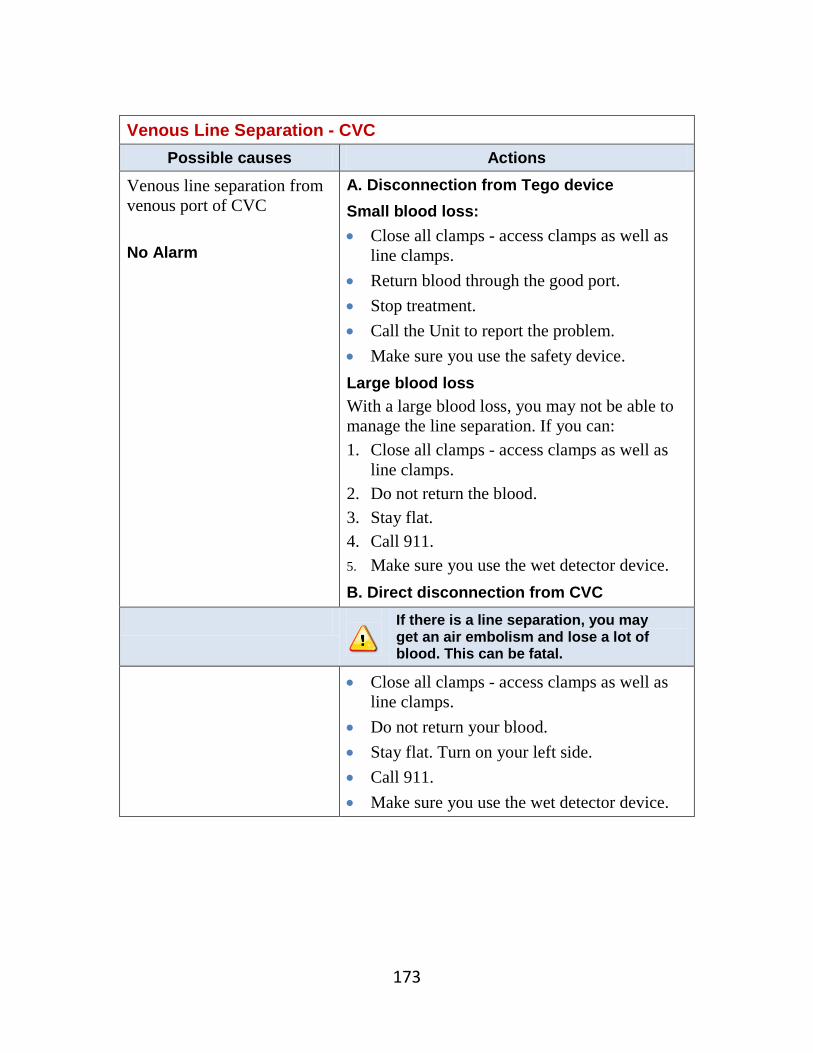
173
Venous Line Separation - CVC
Possible causes Actions Venous line separation from venous port of CVC No Alarm
A. Disconnection from Tego device Small blood loss: • Close all clamps - access clamps as well as
line clamps. • Return blood through the good port. • Stop treatment. • Call the Unit to report the problem. • Make sure you use the safety device. Large blood loss With a large blood loss, you may not be able to manage the line separation. If you can: 1. Close all clamps - access clamps as well as
line clamps. 2. Do not return the blood. 3. Stay flat. 4. Call 911. 5. Make sure you use the wet detector device.
B. Direct disconnection from CVC
If there is a line separation, you may get an air embolism and lose a lot of blood. This can be fatal.
• Close all clamps - access clamps as well as line clamps.
• Do not return your blood. • Stay flat. Turn on your left side. • Call 911. • Make sure you use the wet detector device.

174
Alarms and warnings related to the Formula machine Alarms and warnings related to the Formula machine appear on the bar at the bottom of the screen. The colour of the bar tells you what is happening.
GREY bar There are no problems.
RED bar There is an alarm.
PINK bar There is a warning or reminder.
YELLOW bar The alarm has been overridden.
When there is an alarm or warning:
• The name of the alarm or warning will be written on the bottom of the screen.
• Each alarm and warning has a sound and a written message. The sound tells you the importance of the alarm.
• Alarms on the right side refer to blood. Alarms on the left side refer to dialysate.
On the next few pages, alarms and warning are listed in alphabetical order with instructions for what to do.
How to override or silence an alarm During dialysis, you can override an alarm or warning for 2 minutes, while you try to solve the problem or while the machine resets.
• If the LED light next to the ‘override’ key is flashing, you can override the alarm by pressing the ‘override’ key.
• If the ‘override’ key is lit but not flashing, the machine is running to retest the alarm.

175
Alarms related to machine error RED SCREEN
Machine effect Possible causes Actions
• Large red screen at top and smaller blue screen below.
• Constant sound alarm.
• Blood pump stops.
1. Water is off when machine is turned on.
2. Venous line clamp has been opened by hand after the override key has been pressed.
3. Blood pump has been forced by hand while it is off.
4. Internal machine problem.
5. The machine has detected a dangerous condition.
1. Turn on water, press power switch at front of machine and hold for 10 seconds.
2. Emergency restart. 3. Write down error code and
call the technologist if machine does not restart.
YELLOW SCREEN - LEVEL ERROR 1
Machine effect Possible causes Actions
• Yellow on right half of screen means alarm relates to the blood.
• Yellow on left half of screen means alarm relates to the dialysate.
1. Blood or dialysate tests have failed.
1. If alarm relates to blood, press ‘retry blood tests’. Make sure transducers are removed from the machine.
2. If alarm relates to dialysate, press ‘retry hydraulic tests’.

176
Other alarms related to the formula machine AIR DETECTED
Machine effect Possible causes Actions
• Written and sound alarm.
• Blood pump stops.
• Venous clamp closed.
• Dialyzer is in bypass.
• Dialysis time and fluid removal stopped.
• May cause ‘Venous Pressure Out-of-Range’ alarm.
1. The venous line is not placed properly in air detector.
2. Air has been seen due to bloodline leak, foaming in dialyzer, line separation, arterial needle falling out or loose bloodline connection.
1. Do not remove line from line clamp.
2. Check for air above the venous clamp.
3. Make sure the venous chamber has no air bubbles, by tapping the chamber .
4. If no air, remove and put line back in the air detector.
5. Check for leaks or disconnection of bloodlines.
6. If air is in the whole circuit, disconnect bloodlines and recirculate blood to remove air. • If you are unable to do
this, stop dialysis. Do not return the blood.
7. If ‘Venous Pressure Out-of-Range’ alarm is seen, raise venous blood level by pressing ‘↑’ level key to lower the venous pressure. This will then allow you to override.
8. Press ‘override’ to reset.

177
ART. PUMP COVER
Machine effect Possible causes Actions
• Written and sound alarm.
• Blood pump stops.
• Venous clamp closes.
• Dialyzer in bypass.
• Dialysis time and fluid removal stopped.
1. The arterial pump cover is open or not closed properly.
1. Close the pump cover.
ARTERIAL PUMP REVOLUTION
Machine effect Possible causes Actions
• Written and sound alarm.
• Blood pump stops.
• Venous clamp closes.
• Dialyzer in bypass.
• Dialysis time and fluid removal stopped.
1. The arterial pump speed is not the same as set.
1. Check that the pump segment is placed properly.
2. Press ‘override’ to reset. 3. If unable to resolve, call the
technologist.

178
BICARB. CONDUCTIVITY
Machine effect Possible causes Actions
• Written and sound alarm.
• Dialyzer in bypass.
• Dialysis time and fluid removal stopped.
1. Bicarbonate conductivity is not correct.
2. The bicarbonate cartridge (bicart) is not placed properly.
3. The bicart is damaged or empty.
4. The machine is in the preparation stage.
5. Air in the bicart lines. 6. Machine broken.
1. Check for air. 2. Check to see if bicart is in
place correctly. 3. Check to see if connector is
tight. 4. Press ‘bidrychange’ (see
procedure on page X) and follow steps to fill bicart and remove air.
5. If unable to resolve, call the technologist.
BIDRY NOT FILLED
Machine effect Possible causes Actions
• Written and sound alarm.
• Dialyzer in bypass.
• Dialysis time and fluid removal stopped.
1. The bicarbonate cartridge (Bicart) is not placed correctly.
2. Bicart is broken.
1. Check that bicart is placed correctly.
2. Press ‘bidry change’ and follow steps to fill bicart.
3. If bicart is broken, press ‘bidrychange’ and follow steps to change bicart.
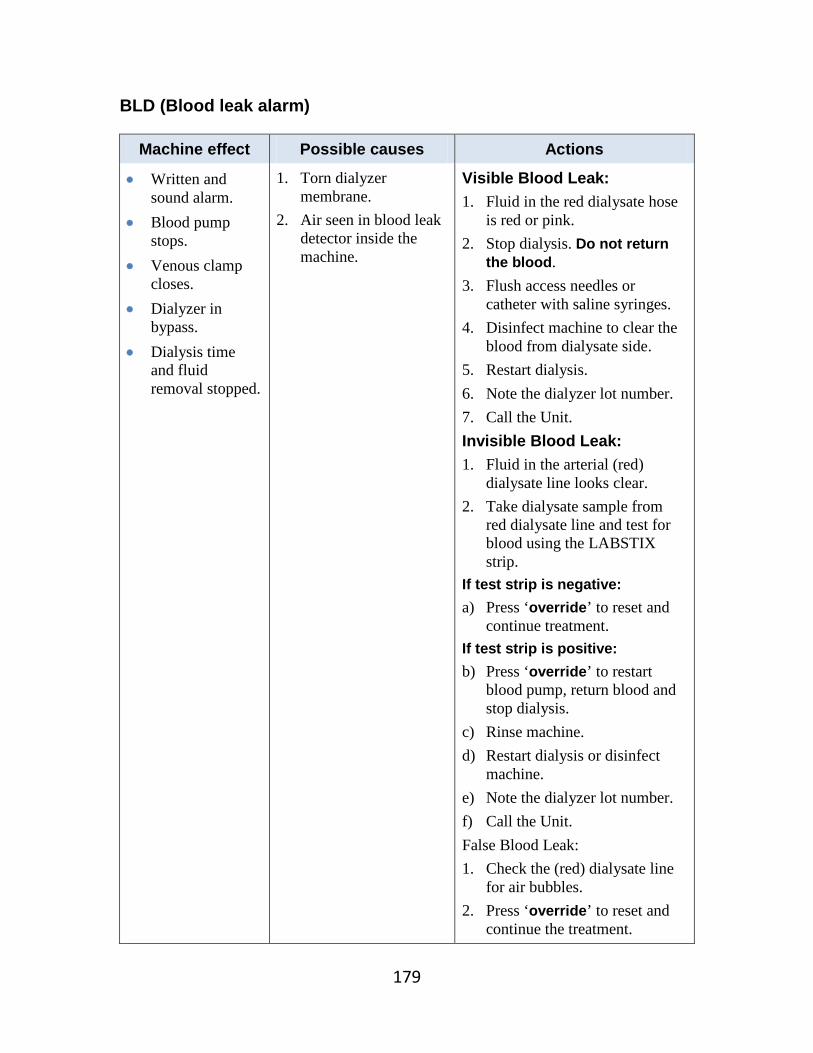
179
BLD (Blood leak alarm)
Machine effect Possible causes Actions
• Written and sound alarm.
• Blood pump stops.
• Venous clamp closes.
• Dialyzer in bypass.
• Dialysis time and fluid removal stopped.
1. Torn dialyzer membrane.
2. Air seen in blood leak detector inside the machine.
Visible Blood Leak: 1. Fluid in the red dialysate hose
is red or pink. 2. Stop dialysis. Do not return
the blood. 3. Flush access needles or
catheter with saline syringes. 4. Disinfect machine to clear the
blood from dialysate side. 5. Restart dialysis. 6. Note the dialyzer lot number. 7. Call the Unit. Invisible Blood Leak: 1. Fluid in the arterial (red)
dialysate line looks clear. 2. Take dialysate sample from
red dialysate line and test for blood using the LABSTIX strip.
If test strip is negative: a) Press ‘override’ to reset and
continue treatment. If test strip is positive: b) Press ‘override’ to restart
blood pump, return blood and stop dialysis.
c) Rinse machine. d) Restart dialysis or disinfect
machine. e) Note the dialyzer lot number. f) Call the Unit. False Blood Leak: 1. Check the (red) dialysate line
for air bubbles. 2. Press ‘override’ to reset and
continue the treatment.

180
BLOOD LEVEL
Machine effect Possible causes Actions • Written and
sound alarm. • Blood pump
stops. • Dialyzer in
bypass. • Venous clamp
closes. • Dialysis time
and fluid removal stopped.
1. Blood has not been seen in the venous chamber at the start of dialysis.
2. Level in venous chamber is low.
3. Foam in the venous chamber.
1. Continue the start-up procedure by turning on the blood pump.
2. Raise level in venous chamber.
3. Remove foam from chamber. 4. Press ‘override’.
CLAMP OPEN
Machine effect Possible causes Actions
• Constant visual signal.
1. The line clamp has been opened during an alarm.
1. Release the line clamp.
CONCENTRATE CONNECTORS
Machine effect Possible causes Actions
• Written and sound alarm.
• Dialyzer in bypass.
1. The concentrate connectors are not in the right position.
1. Check the connectors are in the right position.
CONCENTRATE ERROR
Machine effect Possible causes Actions
• Written and sound alarm.
• Dialyzer in bypass.
1. Wrong concentrate. 2. Connectors have been
reversed. 3. Water inlet flow is
incorrect. 4. Machine is not working.
1. Check the concentrate is correct.
2. Check position of connectors.
3. Call the technologist.

181
DIALYZER CONNECTORS
Machine effect Possible causes Actions
• Written and sound alarm.
• Dialyzer in bypass.
1. The dialysate lines are not in the proper position, depending on the machine mode.
1. Check the connectors are in the right position.
DISINFECTANT CONNECTORS
Machine effect Possible causes Actions
• Written and sound alarm.
• Dialyzer in bypass.
• Dialysis or disinfection time interrupted.
1. The disinfectant connector is not in the right position.
1. Correct the position of the connector.
DISINFECTION
Machine effect Possible causes Actions
• Written and sound alarm.
• Disinfection time stops.
1. Machine has not seen the disinfectant.
2. The disinfectant used is not the one selected on machine.
3. The right temperature for heat disinfect has not been reached.
1. Check that disinfectant used is the same as that selected.
2. Check that the concentration of the disinfectant is correct.
3. Repeat another disinfection cycle.
4. Call the technologist.
HEPARIN RUN OUT
Machine effect Possible causes Actions
• Written and sound alarm.
1. The heparin syringe is empty.
1. Check syringe for air. 2. Refill heparin syringe
(see procedure on page X).

182
HYDRAULIC
Machine effect Possible causes Actions
• Written and sound alarm.
• Dialyzer in bypass.
• Dialysis, rinsing or disinfection time stops.
High pressure in hydraulic circuit due to: 1. Blocked drain line. 2. Blocked dialysate lines. 3. Forclean ultrafilter
wrongly installed. 4. The bicarbonate
cartridge (bicart) is not installed properly.
5. Not following the correct steps during rinseback.
6. Clogged hydraulic from additives in acid bath.
1. Press ‘override’ to reset. 2. Check drain line and remove
blockage. 3. Check dialysate lines and
remove blockage. 4. Check position of Forclean
ultrafilter. 5. Make sure the bicart is
correctly in place. 6. Call the technologist. 7. If additives (such as calcium)
added to acid bath, shake well to prevent clogging in hydraulic circuit.
NO WATER
Machine effect Possible causes Actions
• Written and sound alarm.
• Dialyzer in bypass.
• Dialysis, rinsing or disinfection time stops.
1. No water supply to machine inlet.
2. Incoming water pressure too low.
1. Check that water is on. 2. Check for blockage of
incoming water line. 3. Check incoming pressure. 4. If unable to resolve, call the
technologist.

183
POWER FAILURE
Machine effect Possible causes Actions
• Constant sound alarm.
• Back-up battery comes on.
• The blood pump will continue to work, but no fluid removal or dialysis occurs on back-up battery power.
• Power outage. • If back-up battery icon is GREEN, there is back-up power for 20 minutes.
• If back-up battery icon is RED, there is no back-up power. Switch the machine off at the back panel, then switch it on again. Turn on the soft power key on the front panel to reboot. The icon should now be GREEN. If not, call the technologist.
• If back-up battery runs out, return blood by hand following procedure on page X.
• The machine can be disinfected when power returns.
PUMP OFF
Machine effect Possible causes Actions
• Written and sound alarm.
• Blood pump stops.
• Dialyzer in bypass.
• Venous clamp closes.
• Dialysis time stops.
1. The ‘pump off’ key has been pressed.
2. During priming of the machine, the priming volume has been reached.
3. ‘Rinseback’ has been selected.
1. Press ‘pump on’ key, if appropriate.

184
REVERSE ULTRAFILTRATION
Machine effect Possible causes Actions
• Written and sound alarm.
• Dialyzer in bypass.
• Dialysis time and fluid removal stops.
More positive pressure on dialysate side than on blood side due to: 1. Type of dialyzer. 2. Low fluid removal rate. 3. Low venous pressure. 4. Torn dialyzer
membrane. 5. Blocked drain or
dialysate lines.
1. Check with Unit staff if you need to change the type of dialyzer you are using.
2. Increase blood pump speed to create more pressure.
3. Remove any blockage from drain or dialysate lines.
4. If unable to resolve, stop dialysis.
TEMPERATURE (less than 34° C or greater than 40° C)
Machine effect Possible causes Actions
• Written and sound alarm.
• Dialyzer in bypass.
• Dialysis time and fluid removal stops.
1. Water coming into the machine is too hot or too cold.
2. Machine is not working correctly.
1. Try turning temperature of machine up or down.
2. If alarm continues, call the technologist and stop dialysis.
TMP (minimum transmembrane pressure)
Machine effect Possible causes Actions
• Written and sound alarm.
• Dialyzer in bypass.
• Dialysis time and fluid removal stops.
1. Low fluid removal rate. 2. Low venous pressure. 3. Torn dialyzer
membrane. 4. Blocked drain or
dialysate lines.
1. Increase blood pump speed. 2. Check for blockage in drain
or dialysate lines. 3. Call the technologist. 4. If unable to resolve, stop
dialysis.

185
TMP (maximum transmembrane pressure)
Machine effect Possible causes Actions
• Written and sound alarm.
• Dialyzer in bypass.
• Dialysis time and fluid removal stops.
High amount of pressure in the dialyzer due to: 1. Pump speed too high. 2. Blocked venous line. 3. Clotted dialyzer. 4. Clotted venous access. 5. High fluid removal rate.
1. Lower pump speed. 2. Check for blocked venous
line. 3. Check for clotted dialyzer
or access. 4. Check if the dialyzer you
are using is the correct one for you.
TOTAL CONDUCTIVITY (minimum)
Machine effect Possible causes Actions
• Written and sound alarm.
• Dialyzer in bypass.
• Dialysis time and fluid removal stops.
1. Acid concentrate jug is empty.
2. Concentrate line is kinked or not connected properly.
3. Air in concentrate line. 4. Wrong concentrate
solution has been used. 5. Machine is in
preparation phase.
1. Check for empty jug. 2. Check for kinks or poor
connection. 3. Check for air. 4. Check that correct
concentrate solution has been used.
TOTAL CONDUCTIVITY (maximum)
Machine effect Possible causes Actions
• Written and sound alarm.
• Dialyzer in bypass.
• Dialysis time and fluid removal stops.
1. Wrong concentrate solution has been used.
2. Machine is not working correctly.
1. Check that correct concentrate solution has been used.
2. If unable to resolve, call the technologist and stop dialysis.

186
UF Pressure
Machine effect Possible causes Actions
• Written and sound alarm.
• Dialyzer in bypass.
• Dialysis time and fluid removal stops.
The pressure in the dialyzer hose (dialyzer outlet pressure) is too high or too low due to: 1. The dialyzer used
cannot handle the fluid removal that is set.
2. Blocked dialysate lines.
1. Check for blocked dialysate lines.
WRONG ART LINE
Machine effect Possible causes Actions
• Written and sound alarm.
• Blood pump stops.
• Venous clamp closes.
• Dialyzer in bypass.
• Dialysis time and fluid removal stops.
1. The arterial line has not been placed correctly in the sensor holder.
1. Place line correctly.

187
Warnings
Warning Machine effect
Possible causes Actions
ARTERIAL PRESSURE
• Written and sound alarm.
There is no arterial pressure reading due to the transducer line being clamped, or clotted.
Open or close transducer line clamp as appropriate.
BACK FILTRATION
• Written and sound alarm.
The TMP value is greater than the limit set (see TMP alarm).
See TMP alarm.
BLOOD DETECTED
• Written and sound alarm.
1. Blood has been seen at the arterial sensor, but dialysate has not yet been prepared.
2. Blood has been seen at the arterial sensor, but the dialysate lines have not yet been connected to the dialyzer.
1. Start preparation of dialysate.
2. Connect dialysate lines to dialyzer and prime.
BYPASS • Sound alarm • Dialyzer in
bypass. • Dialysis time
and fluid removal stops.
The ‘bypass’ key has been pressed.
Press ‘bypass’ key to remove the bypass alarm.
DISINFECTANT NOT INTAKEN
• Written and sound alarm.
In chemical full disinfect: 1. Disinfectant
container is empty. 2. Air or kinking in
tube. 3. Disinfectant tube is
blocked. 4. Machine is not
working correctly. 5. Wand in jug is
cracked.
1. Check container is full.
2. Check tube for air or blockage.
3. Check the wand in the jug.
4. If unable to resolve, call the technologist.

188
Warning Machine effect
Possible causes Actions
END UF • Written and sound alarm.
• Dialyzer in bypass.
• Dialysis time stops.
Dialysis has ended. 1. Stop dialysis. 2. Reset a new
program.
FLOW SET TO ZERO
• Written and sound alarm.
The blood pump is on, but the flow is set to zero.
Set flow rate to proper speed.
HEPARIN OFF • Written and sound alarm.
The heparin has been turned off.
Turn the heparin back on.
INADEQUATE FLOW
• Written and sound alarm.
Blood pump is stopping and starting.
Lower the blood rate flow.
MINIMAL UF • Sound alarm. Fluid removal has been stopped.
If you need to, turn UF back on.
MODIFY ARTERIAL FLOW
• Written and sound alarm.
The blood flow has been changed when overriding the alarm.
Reset the blood flow to the correct speed and override this warning.
NO HEPARIN SETTING
• Written and sound alarm.
The heparin program has not been set.
Set heparin program.
PUMP REVOLUTIONS
• Written and sound alarm.
The concentrate pumps are locked.
Call the technologist.
REPLACE FORCLEAN
• Sound alarm. The Forclean ultrafilter needs to be changed.
Change the Forclean ultrafilter.
REPLACE MULTIPURE
• Sound alarm. The Multipure filter needs to be changed.
Change the Multipure filter.
SYSTEM READY
• Written and sound alarm.
Machine testing and rinsing is completed and is ready for use.
Press ‘override’ to silence the alarm . Machine will continue to rinse.
TESTING TEMP. INSUF.
• Written and sound alarm.
The right temperature for testing has not been reached.
Call the technologist.

189
Warning Machine effect
Possible causes Actions
UF NOT ACTIVATED
• Sound alarm. The fluid removal program has been set, but not turned on.
Press ‘UF on’ key.
UF NOT PROGRAMMED
• Sound alarm. The fluid removal program has not been set.
Set fluid removal rate and press ‘UF on’ key.
WATER UNSUITABLE
• Written and sound alarm.
1. The inlet water conductivity is higher than allowed.
2. Dialysate is left inside the rinsing machine.
1. Check the water treatment system.
2. Wait for rinsing to end. The warning goes off automatically.
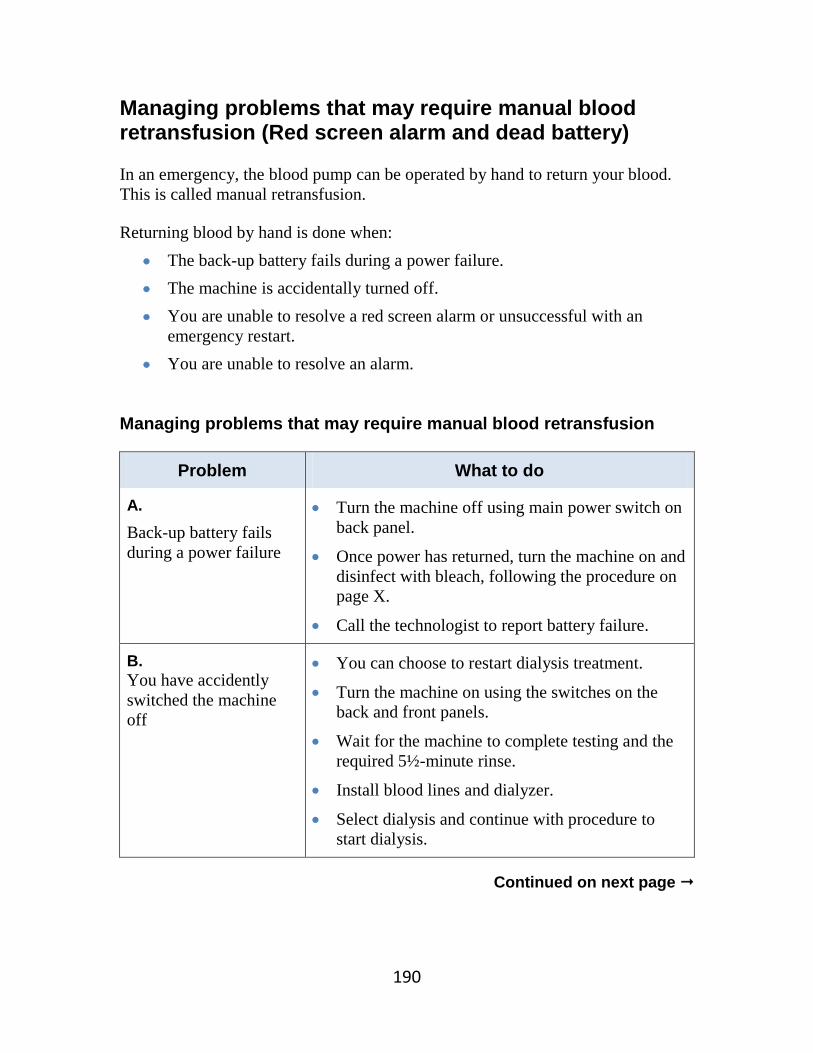
190
Managing problems that may require manual blood retransfusion (Red screen alarm and dead battery) In an emergency, the blood pump can be operated by hand to return your blood. This is called manual retransfusion. Returning blood by hand is done when:
• The back-up battery fails during a power failure. • The machine is accidentally turned off. • You are unable to resolve a red screen alarm or unsuccessful with an
emergency restart. • You are unable to resolve an alarm.
Managing problems that may require manual blood retransfusion
Problem What to do
A. Back-up battery fails during a power failure
• Turn the machine off using main power switch on back panel.
• Once power has returned, turn the machine on and disinfect with bleach, following the procedure on page X.
• Call the technologist to report battery failure.
B. You have accidently switched the machine off
• You can choose to restart dialysis treatment.
• Turn the machine on using the switches on the back and front panels.
• Wait for the machine to complete testing and the required 5½-minute rinse.
• Install blood lines and dialyzer.
• Select dialysis and continue with procedure to start dialysis.
Continued on next page

191
Managing problems that may require manual retransfusion, continued…
Problem What to do
C. Unable to resolve a red screen alarm or unsuccessful with emergency restart
• Turn the machine off using the main power switch on the back panel.
• Turn the machine back on using the main power switch on the back panel.
• Disinfect machine with bleach, following the procedure on page X.
• Call the technologist to report the red screen alarm and arrange for a service call.
D. Unable to resolve alarms
• Call the technologist to report the alarm.
• You can restart dialysis treatment if the technologist agrees.
• If the alarm cannot be resolved, the technologist will arrange for a service call.
If you are unable to solve problems A to D, manual blood retransfusion is required. Follow the procedure on the next page.

192
Manual blood retransfusion: Returning blood by hand Supplies Prepare supplies for end of treatment.
Depending on your type of access you may need: clamps, gauze, medicines, ointments, and syringes with saline. OR
Prepare supplies to restart treatment. Procedure
1. Remove the venous line from the venous metal clamp.
2. Clamp the arterial blood line.
3. Open the ‘T’-piece clamp. Make sure the roller clamp on the I.V. administration line is open.
4. Open blood pump cover.
5. Pull out the handle from the pump.
6. Turn the handle to return the blood by hand. Stop when the dialyzer and venous bloodline are clear.
When to take action:
Check the venous chamber for air. • Stop returning the blood if there is a risk of air
embolism.
Check the blood lines for signs of clotting. • Look for darkened blood within the lines, and blood
backing up into the chambers and transducer lines. • Stop returning the blood if there is clotting.
Continued on next page

193
7. Clamp the venous blood line.
8. Clamp the venous access.
9. Open the arterial blood line clamp.
10. Normal saline will flow back into the arterial blood line. The saline clears the blood from the arterial blood line and arterial access.
11. When the arterial blood line is clear, clamp the arterial blood line.
12. Clamp the arterial access.
13. Continue with post-dialysis procedures as described in Chapter 9.

194
What to do if there is a fire
Keep an emergency kit in your dialysis area at all times.
Your emergency kit should contain:
• Two syringes with 10 ml of normal saline.
• Two clamps
• Scissors
• Recirculator
Plan an emergency exit from your home Identify an emergency exit route and a meeting area outside your home. Make sure every family member knows this plan.
If there is a fire:
Emergency Exit Your life is in immediate danger.
1. Stop blood pump. 2. Clamp patient access. Do not return blood. 3. Clamp arterial and venous bloodlines. 4. Cut bloodlines below the bloodline clamps. 5. Leave the home. 6. When you reach safety, call 911.
OR
Urgent Exit The situation is dangerous and you must hurry.
1. Return the blood if possible. Disconnect bloodline from access.
2. Connect 10 ml syringes to patient access. 3. Flush access. 4. Clamp access. 5. Leave the home. 6. When you reach safety, call 911.

195
Chapter 12 Complications from kidney failure
and hemodialysis
Topic Page
• Medical complications 196
• Other complications 204
• High blood pressure (hypertension) 208
• Anemia 210
• Renal osteodystrophy 212

196
Complications of kidney failure and hemodialysis This chapter describes problems related to kidney failure and dialysis, and how to prevent or manage them. If you are unsure of a problem or what to do, do not hesitate to call the staff at the Home Hemodialysis Unit.
Home Hemodialysis
Unit 416-340-3736
Call the Home Hemodialysis Unit:
To report health problems and all bad events.
To get advice when you are concerned.
Problems may arise related to your health or related to the dialysis machine.
Medical complications Other complications
• Low and/or high blood pressure • Muscle cramps • Nausea and vomiting • Headache • Itching • Fever and chills • Irregular heart beat • Dialyzer related complications • Sleeplessness and restlessness • High or low potassium • Pulmonary edema • Complications of not having
enough dialysis • Restless leg syndrome
• Air embolism • Hemolysis • Blood leak • Conductivity problems

197
Medical complications Low blood pressure (hypotension)
Signs and symptoms Possible causes Action and prevention
• Sudden or gradual drop in blood pressure
• Dizziness • Nausea • Vomiting • Sweating • Cramping of hands,
arms or legs • Stomach
(abdominal) cramps • Headache • Feeling unwell • Arterial pressure
alarms • Unresponsiveness • Urge to have a
bowel movement
• Target or dry weight is set too low.
• Too much fluid gain between dialysis sessions, leading to removing too much fluid.
• The fluid removal (ultrafiltration) rate is set too high. The body cannot keep pace with the fluid removal rate.
• Ultrafiltration rate (water removal) is too high for the length of dialysis.
• Effects of high blood pressure medication.
1. Go to minimum UF and/or lower the ultrafiltration rate until blood pressure comes up.
2. Give 200 ml of normal saline bolus.
3. Lie flat to allow blood flow to your brain. This increases blood pressure.
4. Reduce the total amount of fluid to be removed.
5. Stop dialysis treatment if your blood pressure stays very low
6. Raise target or dry weight and tell the staff as soon as possible.
7. Avoid eating large meals during dialysis.
8. Call the Home Hemodialysis Unit.
Ultrafiltration: • The process of removing water from the blood
during hemodialysis. Ultrafiltration rate:
• The amount of water removed per hour.

198
High blood pressure during dialysis (intradialytic hypertension)
Signs and symptoms Possible causes Action and prevention
• Rise in blood pressure during the last part of dialysis or after the treatment
• Pre-existing high blood pressure.
• Fluid overload. • Stopping of blood
pressure medications. • Changes in blood
volume activates the blood pressure hormone system (renin-angiotensin).
• Exact reason may be unknown.
• Low salt diet. • Increase the dialysis
session (hours) with a lower hourly fluid removal rate.
• More frequent dialysis sessions.
• Lower your target weight (consult the Home Hemodialysis team first).
Muscle cramps
Signs and symptoms Possible causes Action and prevention
• Painful muscle spasms
• Low blood pressure during dialysis
• High hourly fluid removal rate.
• Low blood level of sodium, potassium, calcium and magnesium.
• See actions for low blood pressure.
• Reduce fluid intake between dialysis treatments.
• Avoid large amounts of fluid removal during dialysis (no more than 3 - 3.5 litres over 7 - 8 hours.)
• Apply heat to affected area.
• Massage affected area. • Stretch your legs. • Reassess the need to
raise the target or dry weight.
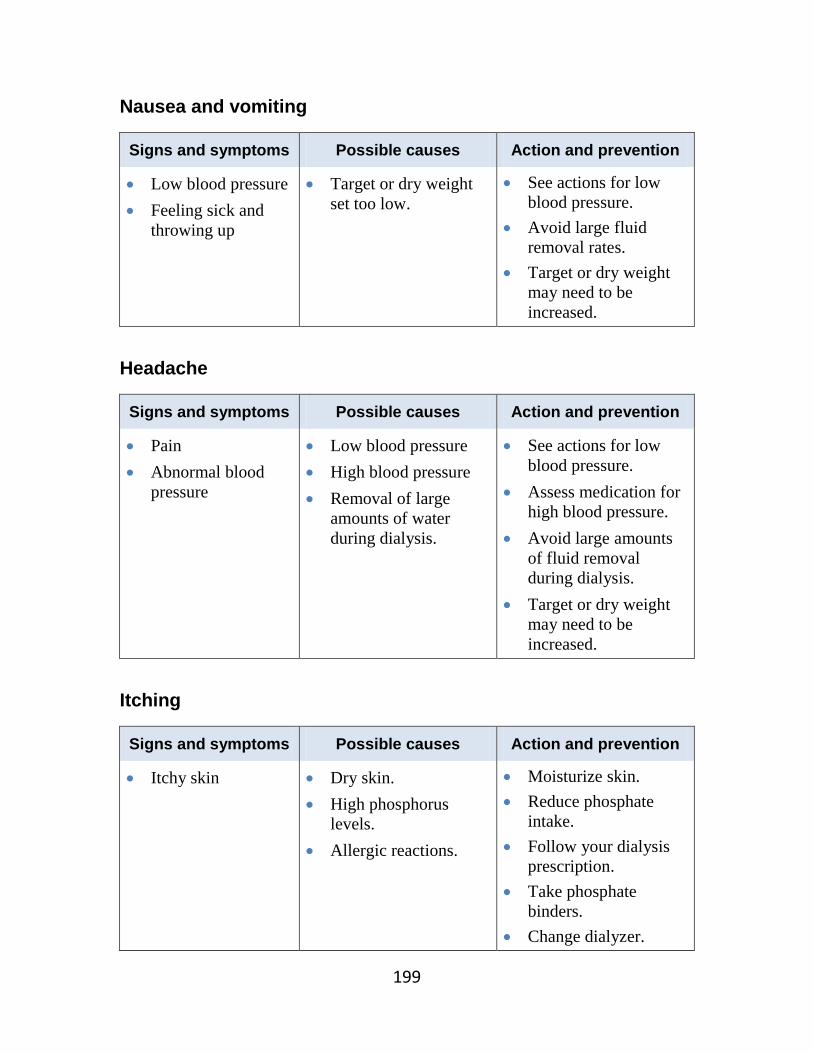
199
Nausea and vomiting
Signs and symptoms Possible causes Action and prevention
• Low blood pressure • Feeling sick and
throwing up
• Target or dry weight set too low.
• See actions for low blood pressure.
• Avoid large fluid removal rates.
• Target or dry weight may need to be increased.
Headache
Signs and symptoms Possible causes Action and prevention
• Pain • Abnormal blood
pressure
• Low blood pressure • High blood pressure • Removal of large
amounts of water during dialysis.
• See actions for low blood pressure.
• Assess medication for high blood pressure.
• Avoid large amounts of fluid removal during dialysis.
• Target or dry weight may need to be increased.
Itching
Signs and symptoms Possible causes Action and prevention
• Itchy skin • Dry skin. • High phosphorus
levels. • Allergic reactions.
• Moisturize skin. • Reduce phosphate
intake. • Follow your dialysis
prescription. • Take phosphate
binders. • Change dialyzer.

200
Fever and chills
Signs and symptoms Possible causes Action and prevention
• Temperature above 37.5 C (99.5° F)
• Feeling cold, shivering
• Low blood pressure.
• Blood infection. • Other infection not
related to dialysis (such as influenza or pneumonia).
• Water contaminates.
1. Stop the dialysis treatment.
2. Go to the Home Hemodialysis Unit.
3. If Home Hemodialysis Unit is closed, go to the emergency room or call 911 for emergency medical help.
Irregular heartbeat (cardiac arrhythmia)
Signs and symptoms Possible causes Action and prevention
• Chest pain or discomfort
• Heart beats fast or feels ‘funny’ (palpitations )
• Blood test results show potassium imbalance
• Dizziness • Sudden death
• Heart disease. • Imbalance of
potassium. • Low blood pressure.
• Irregular heart beat can be dangerous.
• Do not ignore signs and symptoms. If on dialysis: stop dialysis, return blood, call 911 and go to the emergency room.
• Follow your dialysis prescription.
• Do not eat foods high in potassium between treatments.
• Call Home Hemodialysis Unit.

201
Dialyzer related reactions
Signs and symptoms Possible causes Action and prevention
Anaphylactic (life threatening): • Short of breath • Chest pain • Throat tightness • Cardiac arrest
• Occur within the first few minutes of dialysis.
• Call 911 for emergency medical help or go to the emergency room.
• Dialyzer will need to be changed.
• Do not return your blood.
Mild Reaction: • Chest and back pain • Low blood pressure • Flushing of the face • Itching • Sneezing • Watery eyes • Cough • Stomach pain • Cramps • Diarrhea
• Usually occur within first hour of dialysis. However, can occur even after years of exposure.
• If the reaction is severe, return your blood and stop dialysis.
• Call the Home Hemodialysis Unit.
Sleeplessness and restlessness
Signs and symptoms Possible causes Action and prevention
• Tiredness • Sleeplessness • Tingling, burning
feeling of feet • Weakness of legs
and arms • Anxiety • Depression
• May be related to high urea levels.
• Sleep apnea. • Restless leg syndrome. • Exact cause may be
unknown.
• Dialyze as prescribed. • More dialysis may
prevent condition from getting worse.
• Your doctor may prescribe medication.
• You may need to have a sleep apnea study.
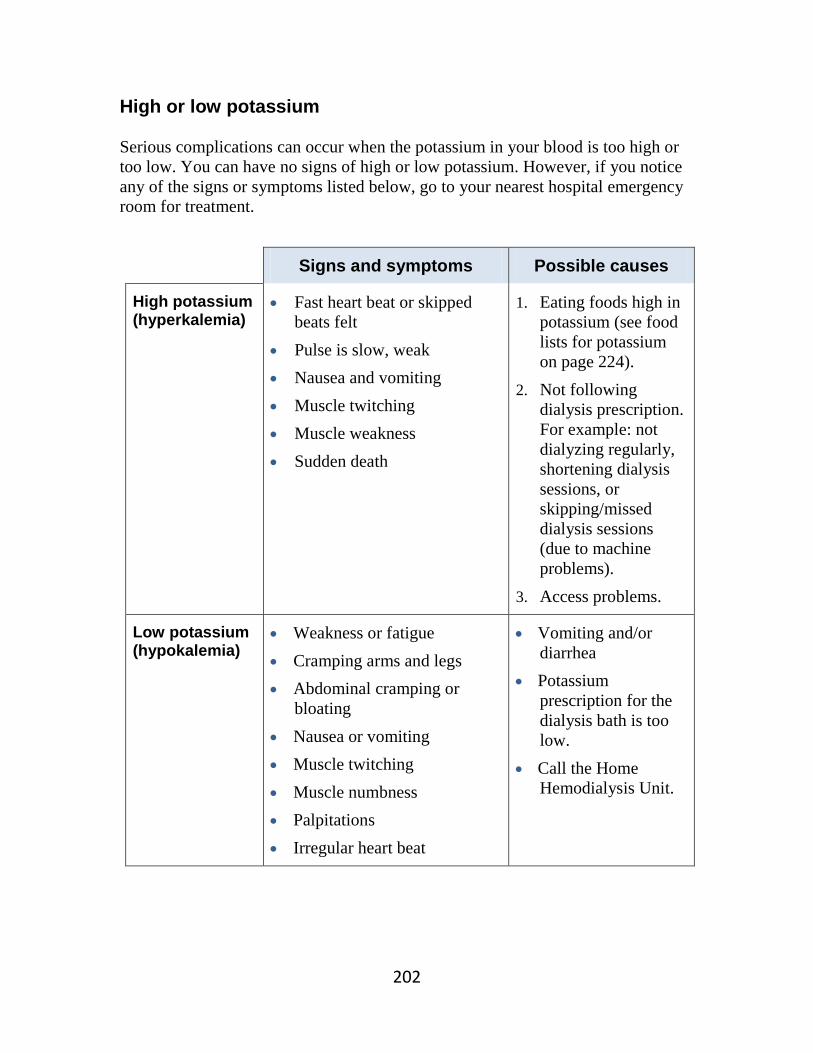
202
High or low potassium Serious complications can occur when the potassium in your blood is too high or too low. You can have no signs of high or low potassium. However, if you notice any of the signs or symptoms listed below, go to your nearest hospital emergency room for treatment.
Signs and symptoms Possible causes
High potassium (hyperkalemia)
• Fast heart beat or skipped beats felt
• Pulse is slow, weak • Nausea and vomiting • Muscle twitching • Muscle weakness • Sudden death
1. Eating foods high in potassium (see food lists for potassium on page 224).
2. Not following dialysis prescription. For example: not dialyzing regularly, shortening dialysis sessions, or skipping/missed dialysis sessions (due to machine problems).
3. Access problems.
Low potassium (hypokalemia)
• Weakness or fatigue • Cramping arms and legs • Abdominal cramping or
bloating • Nausea or vomiting • Muscle twitching • Muscle numbness • Palpitations • Irregular heart beat
• Vomiting and/or diarrhea
• Potassium prescription for the dialysis bath is too low.
• Call the Home Hemodialysis Unit.

203
Pulmonary edema Pulmonary edema is the accumulation of fluid in lung tissue. You may hear this called ‘water in the lungs’.
Signs and symptoms Possible causes Action and prevention
• Difficulty breathing • Shortness of breath • Shortness of breath
that is worse lying down
• Fast breathing • Restless • Wheezing • Cough • Pink-stained
sputum • Bubbling sounds
when breathing • Swelling of the
hands, ankles or feet
• Target weight needs to be decreased.
• Decrease target weight by 0.5 kg.
• Tell Home Hemodialysis staff, you will need a target weight assessment
• Not following dialysis prescription (for example; skipping dialysis).
• Missing dialysis treatments can lead to a dangerous build-up of fluid in your lungs.
• Intake of fluid and salt is too high.
• Speak with the dietitian and reduce salt and water intake.
• Machine problems. For example: machine not removing enough fluid.
• If your machine has removed greater or less than 0.5 kg of your programmed weight loss, call the Technologist to check the machine.
• Heart failure. When your heart is not pumping efficiently, fluid builds up in your lungs.
• Call the Home Hemodialysis team if you have signs and symptoms of pulmonary edema. You may need medication and more frequent dialysis.

204
Other complications of not having enough dialysis
• No appetite, malnutrition.
• Increased chance of infection.
• Impotence in men.
• Irregular periods in women.
• Difficulty concentrating or staying on task.
• Tiredness and sleep problems.
• Urine smell on breath and given off as body odour.
• Depression.
• Hyperparathyroidism: - A condition in which the parathyroid glands make too much parathyroid
hormone (PTH). PTH controls the amount of calcium in the blood and within the bones.
• Heart failure: - A condition in which your heart is not able to pump enough blood to
meet the body’s needs.
• Calciphylaxis: - A rare and serious condition in which calcium and phosphate build up in
small blood vessels. It causes the skin to die, creating sores that do not heal. This condition can be very painful.
• Restless leg syndrome (described on the next page).

205
Restless leg syndrome Restless leg syndrome is a medical condition in which you have uncomfortable feelings in your legs and an overwhelming urge to move them. These feelings cannot be explained by other condition, such as leg cramps, leg position, swelling or arthritis.
Signs and symptoms Possible causes Action and prevention
• An overwhelming urge to move your legs
• Uncomfortable feelings in your legs that may: - Begin or get worse at
rest, when you are sitting or lying down.
- Begin or get worse in the evening or night.
- Be relieved by movement, such as walking or stretching.
- Be distressing and interfere with your sleep.
• Not enough dialysis.
• Exact cause may be unknown.
• Increase dialysis sessions.
• May need medications.
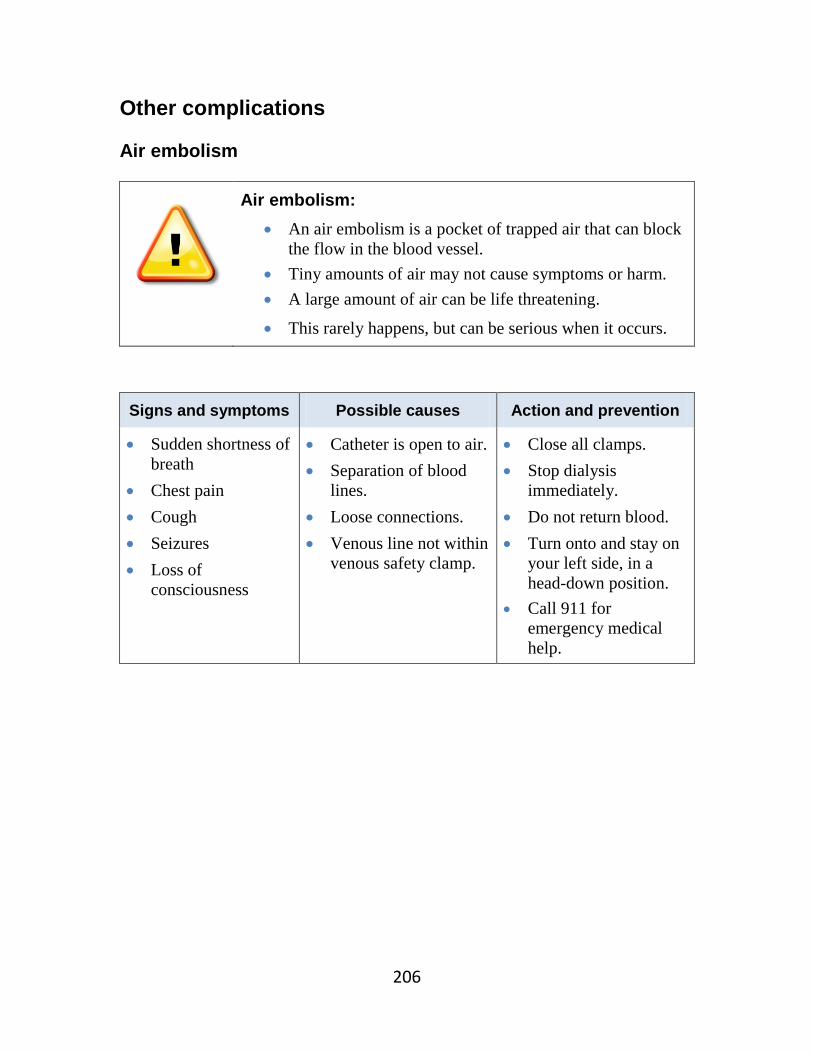
206
Other complications Air embolism
Air embolism: • An air embolism is a pocket of trapped air that can block
the flow in the blood vessel. • Tiny amounts of air may not cause symptoms or harm. • A large amount of air can be life threatening.
• This rarely happens, but can be serious when it occurs.
Signs and symptoms Possible causes Action and prevention
• Sudden shortness of breath
• Chest pain • Cough • Seizures • Loss of
consciousness
• Catheter is open to air. • Separation of blood
lines. • Loose connections. • Venous line not within
venous safety clamp.
• Close all clamps. • Stop dialysis
immediately. • Do not return blood. • Turn onto and stay on
your left side, in a head-down position.
• Call 911 for emergency medical help.
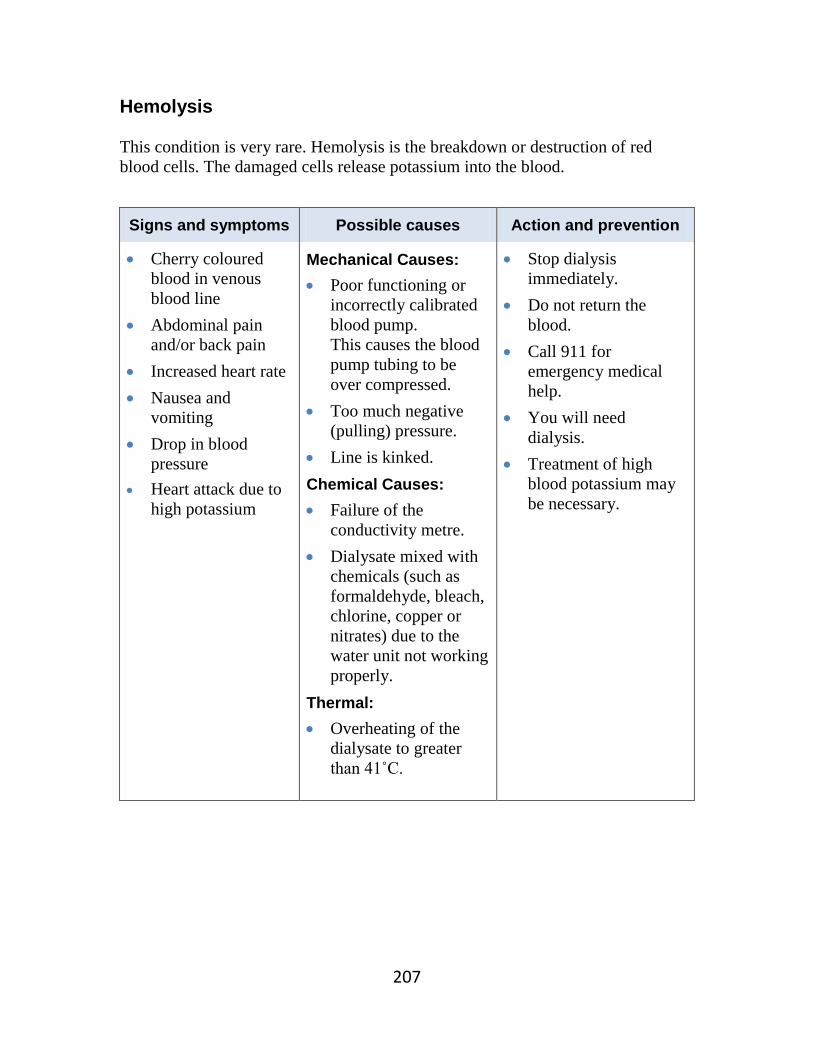
207
Hemolysis This condition is very rare. Hemolysis is the breakdown or destruction of red blood cells. The damaged cells release potassium into the blood.
Signs and symptoms Possible causes Action and prevention
• Cherry coloured blood in venous blood line
• Abdominal pain and/or back pain
• Increased heart rate • Nausea and
vomiting • Drop in blood
pressure • Heart attack due to
high potassium
Mechanical Causes: • Poor functioning or
incorrectly calibrated blood pump. This causes the blood pump tubing to be over compressed.
• Too much negative (pulling) pressure.
• Line is kinked. Chemical Causes: • Failure of the
conductivity metre. • Dialysate mixed with
chemicals (such as formaldehyde, bleach, chlorine, copper or nitrates) due to the water unit not working properly.
Thermal: • Overheating of the
dialysate to greater than 41˚C.
• Stop dialysis immediately.
• Do not return the blood.
• Call 911 for emergency medical help.
• You will need dialysis.
• Treatment of high blood potassium may be necessary.

208
High blood pressure (hypertension) Most people who begin dialysis can have high blood pressure. High blood pressure may be caused by:
• Excess fluid in the body • Kidney failure • Suddenly stopping your blood pressure medicine • Sleep apnea • The effects of medicines such as non-steroidal
anti-inflammatory medicines (such as ibuprofen), steroids, and cough syrups
Signs and symptoms
• When your blood pressure is high you may not have any symptoms at all. • You may have dizziness, a headache, nausea or vomiting.
If untreated, high blood pressure is dangerous. It can lead to complications such as heart failure,
heart attack and stroke.
Read Chapter 4 to learn about
blood pressure.

209
Treating high blood pressure
The goal of treatment is to prevent damage to your heart and blood vessels.
1. Blood pressure medicines (anti-hypertensives) Your doctor may prescribe one or more medicines to lower your blood pressure. For each of your medicines, make sure you know:
• The name of the medicine • How much to take • How often to take it • What side effects to watch for • If you need to avoid any foods when taking the medication
2. Controlling sodium and fluid As well as taking medicines, treating high blood pressure includes these important steps: Eating less salt
• Read chapter 13 to learn about a low salt diet.
Removing extra fluid by ultrafiltration
• Ultrafiltration is the process of removing excess body fluid from the blood during hemodialysis.
Maintaining your target weight
• Try to keep your fluid intake between treatments to 1 to 1.5 litres a day. 3. Lifestyle changes In addition to other treatments, these changes in your daily life can help lower your blood pressure:
• Regular physical activity • Maintaining a healthy weight • Not smoking or quitting smoking
The Home Hemodialysis team will help you learn about your medicines.

210
Anemia Anemia means your blood has fewer red blood cells than normal.
• The hemoglobin in red blood cells carries oxygen to all the cells in your body. Oxygen helps the cells use energy from food.
• A low amount of red blood cells means less oxygen is carried to the cells, and less energy is available.
• Anemia can cause tiredness, shortness of breath and poor appetite. Anemia is a common problem for people with kidney failure.
• Unhealthy kidneys do not make enough erythropoietin (EPO). This hormone helps your bone marrow make red blood cells.
• Anemia in hemodialysis patients is mainly caused by a lack of erythropoietin (EPO), but it may be caused by a lack of iron in the blood (iron deficiency).
Treating anemia
1. Increasing iron • If you have anemia from iron deficiency, your doctor may prescribe
iron pills (supplements) and/or intravenous injections of iron.
2. Increasing the number of red blood cells • If your anemia is caused by a lack of erythropoietin, your doctor may
prescribe a medicine to increase the production of red blood cells.
• Your doctor may prescribe Eprex® (epotin alfa) or Aranesp® (darbepoietin alfa). These medicines are made to work like erythropoietin.

211
Information about Eprex® and Aranesp®
Giving this medicine
• Eprex and Aranesp are supplied in pre-filled syringes. • These medicines are injected into the bloodline injection
port (red port) during hemodialysis.
Storing the medicine
• Store Eprex and Aranesp in the refrigerator.
Blood tests You will need these blood tests once a month: • Complete blood count (CBC) to check the level of your
hemoglobin. • Ferritin and Iron saturation to check the level of iron.
Side effects • High blood pressure

212
Renal osteodystrophy Healthy, strong bones depend on a balance of calcium, phosphorus, calcitriol and parathyroid hormone. Kidney failure affects the levels of these substances in your blood. If your levels are abnormal, over time you may develop a bone disease called renal osteodystrophy. It can take years before symptoms appear.
Understanding the balance for bone health
Calcium
• A mineral that builds and strengthen bones. Calcium is found in many foods, especially milk and milk products.
Phosphorus
• A mineral that your body needs, along with calcium, to make healthy bones. Phosphorus and calcium must be balanced in your body.
• Phosphorus is found in many foods, especially meats, poultry, milk and milk products.
• When your kidneys cannot remove extra phosphorus, it can build-up in your body. Too much phosphorus upsets the balance, causing calcium to become too low. Hemodialysis treatments help remove extra phosphorus from your blood.
Parathyroid hormone
• When calcium is low, the parathyroid glands in your neck respond by releasing parathyroid hormone (PTH).
• PTH pulls calcium from the bones into the blood. Too much PTH will remove too much calcium and weaken your bones.
Calcitriol (Activated Vitamin D)
• Healthy kidneys make an activated form of Vitamin D (a special kind of Vitamin D) called calcitriol. Calcitriol helps bones absorb calcium from the blood.
• Calcitriol and PTH work together to keep a healthy balance of calcium going into and out of the bones.
• If your kidneys do not make enough calcitriol, your body cannot absorb calcium from foods and it will be removed from your bones.

213
How is renal osteodystrophy diagnosed? To check your bone health, you will have regular blood tests to measure calcium, phosphorus and PTH levels. How can renal osteodystrophy be prevented or treated? Healthy eating • Read chapter 13 to learn how to eat less phosphorus.
• The dietitian can help you plan a diet that gives you enough calcium, but is low in phosphorus.
Taking phosphate binders
• Your doctor may prescribe a phosphate binder, such as calcium carbonate.
• For phosphate binders to work properly, they need to be taken during your meal or snack (as prescribed by your doctor).
• Phosphate binders bind some of the phosphorus from the food in your stomach, so that it doesn’t get absorbed in the blood.
Dialysis treatments • Follow your dialysis prescription carefully. • This helps restore the balance of calcium and
phosphorus in your blood.
Medicines
Your doctor may prescribe:
• Rocaltrol®, a Calcitriol pill.
• Longer and more frequent dialysis treatments, so that phosphorus is removed more efficiently.
• A medicine called Sensipar® (Cinacalet) that blocks the release of PTH.
What are the signs and symptoms of renal osteodystrophy? There may be no signs or symptoms. However, as long as your blood has too much phosphorus, calcium is removed from your bones. If this continues for years, your bones will become soft and weak, and may break easily. You may develop bone and joint pain. High phosphorus can cause severe itching. Calcium and phosphorus may also build-up in the soft tissues of your body, hardening blood vessels and your heart.


214
Chapter 13 Healthy eating for dialysis
Topic Page
• A plan for healthy eating 215
• Nutrition 215
• Tips for eating a low sodium diet 218
• Tips for eating a low potassium diet 221
• Food lists for potassium 223
• Protein 228
• Food lists for phosphorus 230
• Fluids 233

215
A plan for healthy eating The Registered Dietitian on the Home Hemodialysis team will help you make a plan for healthy eating. To ensure the plan meets your needs, you and the dietitian will need to discuss:
• Your health and any conditions such as high blood pressure or diabetes. • Your hemodialysis treatments and lab results. • Your appetite and food preferences. • How food is bought and prepared in your home.
Nutrition When your kidneys are not working well, they are unable to remove the wastes that are made by your body. These wastes can build up in your blood and make you feel sick. Dialysis helps to remove the wastes that build up inside you. The type of diet you should follow depends on how much dialysis you get each week. You also may need to follow a special diet for other reasons such as diabetes or other health problems. Hemodialysis can only replace part of what your kidneys do. Making good food choices will help keep you healthy. You may need to eat less or more foods that have:
• Sodium • Potassium • Phosphorous • Fluid
Phosphorus and potassium are minerals in your body that we measure in your blood. When you dialyze more often, your levels may become too low. If you eat too much or have less dialysis, your levels may be too high. Your blood levels help to decide what kind of diet you should follow. If there is more than one day until your next dialysis session, you may need to be more careful with your food choices. Refer to the food lists in the manual for tips

216
on what foods to eat. Ask your dietitian if you are not sure what kind of diet you should follow. Protein Dialysis removes protein from the blood. You need to eat a diet high in protein to replace the protein lost from dialysis. Your body uses protein for many reasons:
• Help build and repair body tissues • Provides energy • Fight infection • Heal wounds
Choose high quality protein, such as:
• Lean meat • Fish • Chicken • Egg whites • Milk and Milk products
Sodium Salt in your diet is a major source of sodium. Too much salt causes your body to hold on to fluid. Beware of “hidden” sodium which may be in prepared (boxed or canned) foods. Read labels to help you make good choices. As sodium and fluid builds up in your body it causes:
• Swelling (edema) • Blood pressure problems (too high or low) • Problems breathing • Extra work for the heart
Tips to reduce salt:
• Use less salt when making meals • Eat less high salt foods • Eat more fresh foods • Eat at home more often

217
Fluid Fluid includes more than just what you drink. Fluid is ‘hidden’ in some foods you eat, such as soups, ice cream, fruits. Keep track of the fluid you eat and drink each day. Potassium Potassium is a mineral which helps your nerves and muscles work well. A normal level of potassium in the blood keeps your heart and muscles working well. If you have too much or too little potassium in your blood it can cause:
• Nausea • Weakness • Twitching or tingling • Changes in your heart beat or heart attack • Death
Phosphorus (Phosphate) and Calcium Phosphorus and calcium are minerals that help build strong bones. High phosphate and calcium levels may cause calcium to build up in your blood vessels, lungs, eyes, and heart. You need to keep calcium and phosphate at the right level. Your doctor may prescribe a phosphate binder to take with meals and snacks. This helps to take out some of the phosphorus in your food. You also may need to take a phosphorus or calcium supplement if your levels are too low. Vitamin and Mineral Supplements People on dialysis lose some vitamin and minerals during dialysis. You also get vitamins and minerals from the food you eat. Sometimes they cannot be replaced by diet. All dialysis patients should take a special multi-vitamin such as Replavite®. Some vitamins and minerals build up in your body when your kidneys are not working. Do not take any vitamin, mineral or herbal supplements without discussing it with your doctor or renal pharmacist.
If you have questions about your diet, contact your dietitian.

218
Tips for eating a low sodium diet
Salt is also known as sodium chloride. Sodium is a mineral that impacts your health.
To help lower salt in your diet:
1. Eat a variety of foods each day for a balanced diet.
2. Buy fresh foods when you shop because they are often lower in sodium. For example: buy fresh meats, poultry (i.e. chicken or turkey), fish, fresh or frozen fruits and vegetables.
3. Do not add salt to your food during cooking or at the table. Use herbs and spices to make your food taste better.
4. Do not drink water treated by a water softener. If you have a water softener, it should not supply your drinking water.
5. Avoid salty, ready-to-eat foods, snacks, and fast foods. These foods have a lot of added salt.
6. Read the labels on packaged foods to find foods lower in sodium. Note: Food labels may use the symbol “Na” instead of the word “sodium.
7. Do not use a salt substitute. Some salt substitutes are known to have potassium (K+) in them, which may be harmful.
Take the salt shaker off your table. Do not add salt to your food.

219
Salt
Try a blend of herbs and spices. Use a spice mix such as “Mrs. Dash™,” or McCormick’s “No Salt Added™.”
Replace garlic salt, onion salt and celery salt with the fresh product or powder.
Do not use: sea salt, salt substitutes such as “No Salt™,” “Half Salt™,” “Nu-Salt™,” MSG, brine.
Avoid any foods that have been pickled, processed, cured, smoked, or salted such as:
- Bacon, corned beef, salami, smoked meat, sausage, ham, hot dogs, bologna and other luncheon meats, sardines, herring, anchovies, salt fish.
- If Kosher meats are used, soak them in water and do not use kosher salt when making meals.
- Processed cheese, cheese slices, cheese spreads.
- Dried soup mixes, canned soups, restaurant soup and bouillon cubes, powders, and liquids.
- Pickles, sauerkraut, olives, vegetable juice.
- Salted snack food (examples: salted crackers, pretzels, potato chips)
- Convenience items (examples: TV dinners, prepackaged noodles, rice and casserole mixes such as Hamburger Helper)
- Ketchup, prepared mustard, relish, chili sauce, worcestershire sauce, asian sauces (examples: soya, hoisin, black bean), packaged gravies and bases.

220
Making your food taste great without salt!
Try one of these spices instead of salt
• All fresh herbs • Allspice • Basil • Bay leaves • Black pepper • Cayenne pepper • Celery powder • Chili powder • Chives • Cinnamon • Cloves • Cocoa powder • Cumin • Curry • Dill • Dry mustard • Flavoured extracts
(vanilla or almond)
• Garlic powder • Ginger • Green peppers • Lemongrass • Lemon juice • Marjoram • Mint Nutmeg • Onion powder • Oregano • Paprika • Pimento • Red pepper • Rosemary • Saffron • Sage • Savory • Thyme • Vinegar

221
Tips for eating a low potassium diet
Eat foods from the ‘low’ list. Do not eat foods from the ‘high’ list.
Milk products
• Have only 1 to 2 servings “milk and dairy products” each day.
• 1 serving = ½ cup
Fruits and vegetables
• Have only 6 servings each day of juices, fruits and vegetables.
• Look at the list for serving sizes for each food. • Measure vegetables raw before cooking. • Use 125 ml (½ cup) serving if there is no serving
size listed. • Double boil vegetables to remove extra
potassium.
Grain products
• If you have diabetes, speak to your dietitian about the grain products you can eat.
Protein foods
• Your dietitian will talk to you about how much protein you should eat.
• Tell your dietitian if you do not eat meat, chicken, turkey or fish.
Contact your dietitian if you have questions about your diet.

222
Did you know? • The process of leaching and double boiling will help pull potassium out of
SOME high potassium vegetables. • It is important to remember that these methods will not pull all of the
potassium out of the vegetable. • Ask your dietitian about the amount of leached vegetables that you can
include in your diet.
How to double-boil potatoes:
1. Peel, cut into small pieces, cover with a large amount of cold water. 2. Bring slowly to a boil; boil 10 minutes; throw out water. 3. Cover with more cold water, bring slowly to boil, cook until done. 4. Throw out water.
To leach potatoes, sweet potatoes, carrots, beets and rutabagas:
1. Peel and place the vegetable in cold water so they won’t darken. 2. Slice vegetable 1/8 inch thick. 3. Rinse in warm water for a few seconds. 4. Soak for a minimum of 2 hours in warm water. Use 10 times the amount of
water to the amount of vegetables. If soaking longer, change the water every 4 hours.
5. Rinse under warm water again for a few seconds. 6. Cook vegetable with 5 times the amount of water to the amount of vegetable.
To leach squash, cauliflower and frozen greens
1. Allow frozen vegetable to thaw at room temperature and drain. 2. Rinse fresh or frozen vegetables under warm water for a few seconds. 3. Soak for a minimum of 2 hours in warm water. Use 10 times the amount of
water to the amount of vegetables. If soaking longer, change the water every 4 hours.
4. Rinse under warm water again for a few seconds. 5. Cook the usual way, but with 5 times the amount of water to the amount of
vegetable. Adapted from: www.davita.com References:
• Bowes & Church Food Values of Portions Commonly Used, 17th Ed., Pennington, JA, Lippincott, 1998.
• Diet Guide for Patients with Kidney Disease, Renal Interest Group-Kansas City Dietetic Association, 1990

223
Food lists for potassium Grain Products
Low potassium High potassium
Breads bagel, plain bread sticks (3) egg bread English muffin French/Vienna hamburger bun
hot dog bun Italian Kaiser Bun White bread or roll Pita (white)
cornbread cracked wheat English muffin (whole wheat) oatmeal bread pumpernickel
raisin bread rye bread whole wheat bread or roll pita (whole wheat)
Cereals (cold)
Alphabits Apple Jacks Captain Crunch Corn Bran* (1/2 cup) Corn Flakes (all types) Corn Pops Crispix Froot Loops Frosted Flakes
Honey Nut Chex Kix Puffed Rice Rice Chex Rice Krispies (all types) Special K Team Trix
100% Bran All Bran Bran Buds Bran Flakes Cheerios (all types) Fibre One Frosted Mini Wheats Fruit & Fibre Golden Grahams Granola Grape Nuts (all types) Honeycomb
Just Right Life Cereal Lucky Charms Muesli Muffets Puffed Wheat Raisin Bran Shredded Wheat Shreddies Sugar Smacks Weetabix Wheat Chex Wheaties
Cereals (hot)
corn grits cornmeal cream of rice
cream of wheat Farina
oatmeal Maltex Red River
Crackers cream crackers Gerber Zwieback graham crackers matzo cracker Melba toast (white)
rice cake (white) soda crackers taco/tortilla shell tortilla chips (10) water crackers
Any crackers made from whole wheat or grains, or dark rye.
Grains egg noodles rice noodles soba noodles
white pasta white rice
brown rice wild rice whole wheat pasta

224
Grain products, continued Low potassium High potassium
Desserts and baked goods
angel food cake Arrowroot blueberry muffin chocolate chip cookies oatmeal cookies pound cake
shortbread Social Teas (4) sponge cake sugar cookies Vanilla Wafers white cake yellow cake
danish doughnuts date square fruitcake gingerbread
gingersnap granola bar peanut butter cookie
Any baked goods made from whole wheat or grains, carrot or chocolate.
Other couscous (1/3 cup) white flour
barley buckwheat bulgur nuts or seeds, any type
pancake or waffle mix wheat germ whole wheat flour

225
Fruits
Low potassium High potassium apple (1) apple rings (5) applesauce blackberries blueberries boysenberries canned fruit (all types) casaba melon cherries (up to10) clementine (1) crabapple cranberries currants fruit cocktail gooseberries GRAPEFRUIT* (½ max) grapes (20) kumquats (5)
lemon (1) lime (2) loganberries lychees (10) mandarin orange mango (½ max) peach (1) pear (1) persimmon (2) pineapple plum (1) raspberries rhubarb sapodilla (½ max) strawberries tangelo (1) tangerine (1) watermelon
apricots banana breadfruit cantaloupe coconut dates dried fruit, all types durian elderberries figs guava honeydew melon jackfruit, fresh
kiwi nectarine orange papaya passionfruit pomegranate pomelo (pummelo) prickly pear prunes sapote soursop STARFRUIT* tamarind
* Warnings about fruit
Grapefruit can interfere with certain medications. • Ask your doctor or dietitian if you should avoid grapefruit.
Star fruit (carambola) is harmful to people with kidney problems. You should not eat starfruit.
• Starfruit contains oxalic acid and certain toxins that build up in your body.
• Star fruit may cause a mild to severe toxic reaction, including hiccups, vomiting, asthenia, mental confusion, seizures, coma and death.

226
Vegetables
Low potassium High potassium alfalfa sprouts asparagus (6) bamboo shoots, canned bean sprouts beet greens, raw beets, canned burdock root broccoli cabbage carrots, baby (8) cauliflower celery chayote collard or collard greens corn cress, raw cucumber eggplant endive (1) escarole fennel fungi, dried
green beans green peas kale leeks lettuce (all types) mushrooms, white mustard greens okra onion (all types) peppers radish sauerkraut shitake mushrooms snow peas (10) spaghetti squash spinach, raw swiss chard, raw turnip or turnip greens watercress wax (yellow) beans zucchini
acorn squash artichoke avocado baked beans bamboo shoots, fresh beans (adzuki, black, kidney, lima, mung, navy, pinto, and white) beet greens, cooked beets, fresh/boiled bok choy breadfruit broadbeans brussel sprouts butternut squash carrot, regular cassava celeriac chickpeas chicory greens cress, cooked dandelion greens dock or sorrel dried mushrooms fiddleheads french fries green banana
kohlrabi lentils lotus root parsnips plantain portabella mushroom POTATO** potato chips pumpkin rapini, cooked rutabaga soybeans spinach, cooked split peas stewed tomato succotash sui choy sweet potato swiss chard, cooked taro tempeh tofu tomato tomato paste tomato sauce water chestnuts yam
**Double-boil potatoes to remove potassium

227
Fruit and vegetable juices
Low potassium High potassium apple juice apricot nectar blackberry juice cranberry juice grape juice guava nectar lemon juice
lime juice papaya nectar peach nectar pear nectar pineapple juice Ribena juice
carrot juice coconut juice or water grapefruit juice guava juice orange juice passionfruit juice
pomegranate juice prune juice tangerine juice tomato juice V8 juice, any type vegetable juice
Additional items
Low potassium High potassium
• herbs and spices, or herb mix (example: Mrs. Dash)
• butter, margarine, oil, mayonnaise, non-dairy creamer
• sugar, sugar substitute, honey, jam, jelly, corn or pancake syrup
• regular or decaf coffee and tea
• lemonade, Kool-Aid, fruit punch, drink crystals
• soft drinks (non-colas)
• Limit dairy (milk, yogurt, pudding, ice cream) to less than 1 cup daily to reduce potassium in your diet.
• salt substitutes (examples: No Salt, Nu Salt)
• brown sugar, molasses, maple sugar or syrup
• specialty coffees (cappuccino, espresso, turkish)
• colas
• cocoa (Ovaltine, Postum)
• Chocolate (all types)
• Dairy products – milk, yogurt, pudding, ice cream.
1 serving juice = ½ cup (125 ml)

228
Protein These foods are recommended:
• Lean meat (beef, pork, lamb, rabbit, venison) • Poultry (chicken or turkey) • Ricotta or cottage cheese, hard cheese • Fresh or frozen fish, canned tuna or salmon (bones removed)
These foods can be eaten in limited amounts:
• Whole eggs - no more than 2 or 3 a week. • Low-fat, natural cheese - no more than 3 ounces (90g) a week if your
phosphate level is high. Examples of natural cheese are brick, cheddar, colby, mozzarella, emmenthal, farmers, cheshire, and lappi.
These foods are not recommended:
• Meat that is marbled or streaked with fat. • Chicken wings. • Animal livers or other organ meats. • Processed, smoked, pickled or salted meats or fish. Examples: ham, smoked
meat, corned beef, pickled herring, salt cod. • Full-fat cheese, processed cheese, salt-free cheese.

229
Examples of protein portions
Quantity Protein food and size
1 ounce (28 grams)
• 1 large egg or 2 large egg whites • 1 chicken drumstick or 1 small loin lamb chop or 1 slice
cooked meat (4” x 2” x 1/4") • 1 inch cube (30g) low fat natural cheese • ¼ cup (50 ml) cottage cheese, or ricotta cheese, or grated
cheese • 4 medium-size shrimp • ¼ cup (50 ml) cooked ground meat
• ½ cup (125 ml) cooked dried beans, split peas or lentils *
• ¼ cup (50 ml) nuts, seeds * • 2 tbsp (30 ml) peanut butter
2 ounces (56 grams)
• ½ cup (125 ml) canned fish • 1 chicken thigh or 1 small pork chop • 100 ml (100g) tofu
3 ounces (84 grams)
• 1 medium chicken leg or 1 medium chicken breast (4 oz raw) • 1 hamburger patty • 1 piece cooked fish (3” x 2” x 1”) • 1 piece of meat about the size of a deck of cards
* These protein foods are high in potassium and phosphorus.
A 3-ounce portion of meat
Is about the size
of a deck of cards

230
Food lists for phosphorus
Grain Products
Low phosphorus High phosphorus
Breads plain bagels brioche challah cracked wheat croissant crumpets English muffin French
Italian kaiser roll matzoh raisin bread taco shell white bread white pita
whole grain bran cornbread dark rye multigrain
pumpernickel whole wheat scone tortilla
Cereals Applejacks Captain Crunch Corn Bran Corn Chex Corn Flakes cornmeal cream of rice cream of wheat Crispix
Froot Loops grits Honeycomb puffed rice Rice Chex rice flakes Rice Krispies Trix
whole grain Alpha-bits bran bulger Cheerios Granola Grape Nuts Life
Mueslix oatmeal puffed wheat Raisin Bran Shredded Wheat Special K Wheetabix
Crackers Melba toast rusks unsalted soda crackers made with white flour
rye and whole grain crackers (example: Triscuit)
Grains white pasta white rice
brown rice barley buckwheat
bulgur wild rice
Desserts and baked goods
angel food cake arrowroot fruit pies pound cake puff pastry
shortbread Social Tea sponge cake yeast donuts
Pies or pastries made with nuts, chocolate, cream or custard, and cake donuts. All store-bought cookies except those listed on the LOW side.
Tea biscuits, cake, muffins, pancakes and waffles made with Baking Powder Substitute.
Tea biscuits, cake, muffins, pancakes and waffles made with Baking Powder.
How to make Baking Powder Substitute: • Mix ½ tsp of cream of tartar with ¼ tsp baking soda. • Use this mixture to replace 1 tsp baking powder in any recipe.
Serving size is ½ cup (125 ml) unless otherwise noted

231
Milk and dairy products When substituting milk for another dairy product, keep in mind that portion sizes may differ due to phosphorus content.
Low phosphorus High phosphorus
Some non-dairy creamers • Coffee Rich
Unenriched rice milk • Rice Dream Original
Almond milk
• Almond Breeze Original Limit milk, yogurt, ice cream, pudding to less than 1 cup daily for less phosphorus in the diet.
Milk, chocolate milk
Processed cheese: • single slices • Velveeta • cheese spread • macaroni & cheese dinner
Cream, custard, ice cream, and anything made with milk such as pudding, cream soup, yogurt.
Fish, poultry, meat, eggs
Low phosphorus High phosphorus • meat, fish, and poultry (such as
chicken and turkey) • low sodium cold cuts
(roast beef, turkey, chicken) • natural head cheese • heart, spleen, lungs • shrimp, lobster, crab • tofu • cottage cheese • eggs (egg whites) • Limit cheese to 28 gram (1 oz)
3 times per week on a low phosphorus diet.
• caviar, fish roe • oyster, clams, mussels, scallops • bones from canned sardines or salmon • liver, brain, kidney, pancreas • all dried beans, peas and lentils
(fresh or canned) • nuts, nut butter, seeds • cheese

232
Fruits and vegetables
Low phosphorus High phosphorus • Most fruits and vegetables. • Corn, raw mushrooms, green peas
and potato/French fries must be limited to ½ cup no more than 3 times per week.
If dietary potassium needs to be restricted, refer to your potassium list for the allowed fruits and vegetables.
Additional items
Low phosphorus High phosphorus
Some soft drinks
(gingerale, Sprite, 7-Up)
Postum Ovaltine malted milk Myelo
Horlicks chocolate cola products beer
Beware of hidden phosphate. Foods may have phosphate addititives. These words on food labels mean phosphate has been added. Phosphoric Acid Sodium Polyphosphate Pyrophosphate Sodium Tripolyphosphate Polyphosphate Tricalcium Phosphate Hexametaphosphate Trisodium Phosphate Dicalcium Phosphate Sodium Phosphate Monocalcium Phosphate Tetrasodium Phosphate Aluminum Phosphate

233
Fluids
Use up to ________ millilitres (ml) of fluid per day 1 cup = 8 fluid ounces = 250 mL
Fluid includes anything that is a liquid. Some examples of fluid are:
• Water • Tea or Coffee • Milk, Cream • Juices and Fruit Drinks • Soda Pop • Soup • Jello
• Ice cream, Sherbet • Popsicle • Ice Cube • Alcoholic drinks • Liquid Nutrition Supplements
(Ensure®, Boost®)
Helpful tip:
• With a measuring cup, measure the amount of fluid held by your drinking glasses, tea or coffee, and soup bowl.
• Knowing how much liquid they hold will help you to plan how much fluid you can drink for the day.

234
Tips to help control how much fluid you drink and your thirst How to limit the fluid you drink:
• Plan ahead to spread out the fluid you drink over the day (i.e. skip tea at lunch to save fluid for punch at a party).
• If possible, swallow your pills with soft food, like applesauce. Save your fluid for something you enjoy. Check with your doctor or pharmacist about which pills can be taken with meals.
• Use a small cup and glass. Learn to sip fluids slowly. • Measure out part of your fluid each day and store it in a cup in the freezer.
Most people find ice more pleasing than the same amount of water, since it stays in the mouth longer.
• Be sure you know how much fluid is in one ice cube. Try melting one cube and measure how much fluid it contains.
• Freeze some of your fruit juice or soda pop in an ice cube tray. Use the cubes as part of your daily fluid amount.
• Drink your liquid very hot or cold. This may help with thirst. • Post some paper on the fridge or have paper where you sit. Measure what
you drink and mark down the amount on the paper. How to feel less thirsty:
• Brush teeth more often or rinse your mouth with water, but do not swallow it. (Be sure not to over-brush!)
• Keep your mouth cool and fresh by rinsing with cold mouthwash. Avoid mouthwash with alcohol that can dry out your mouth.
• Lemon wedges, hard sour candies, chewing gum, breath mints or breath spray may help to keep your mouth from drying out.
• Add lemon or lime to your water or ice. The sour taste will help you feel less thirsty.
• Eat fruits and vegetables ice cold. Frozen grapes or strawberries are very nice.
• Try licking a lemon or a lime. • Use a humidifier to moisten the air. This will help your mouth feel less dry.

235
Chapter 14 Living with home hemodialysis
Topic Page
• Getting supplies for home hemodialysis 236
• Tax information 237
• Planning a vacation 238
• Maintaining home equipment during vacation 242
• Requesting a second machine to use during vacation 243
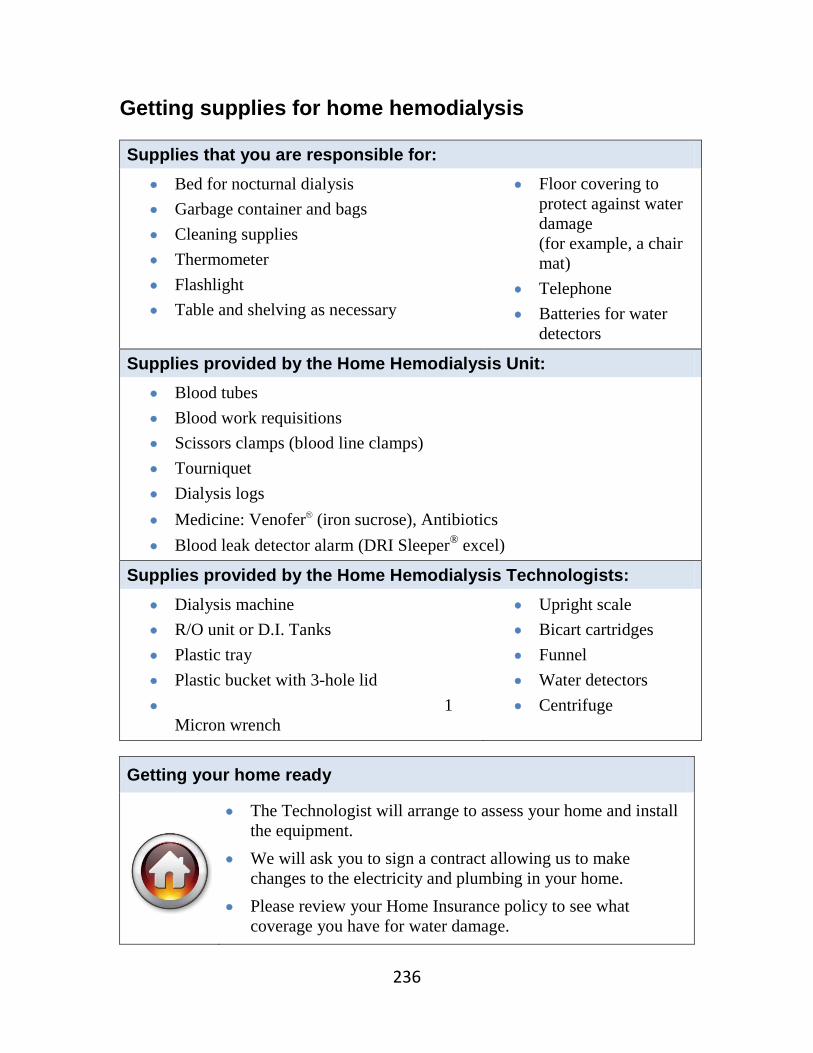
236
Getting supplies for home hemodialysis Supplies that you are responsible for:
• Bed for nocturnal dialysis • Garbage container and bags • Cleaning supplies • Thermometer • Flashlight • Table and shelving as necessary
• Floor covering to protect against water damage (for example, a chair mat)
• Telephone • Batteries for water
detectors
Supplies provided by the Home Hemodialysis Unit: • Blood tubes • Blood work requisitions • Scissors clamps (blood line clamps) • Tourniquet • Dialysis logs • Medicine: Venofer® (iron sucrose), Antibiotics • Blood leak detector alarm (DRI Sleeper® excel)
Supplies provided by the Home Hemodialysis Technologists: • Dialysis machine • R/O unit or D.I. Tanks • Plastic tray • Plastic bucket with 3-hole lid • 1
Micron wrench
• Upright scale • Bicart cartridges • Funnel • Water detectors • Centrifuge
Getting your home ready
• The Technologist will arrange to assess your home and install the equipment.
• We will ask you to sign a contract allowing us to make changes to the electricity and plumbing in your home.
• Please review your Home Insurance policy to see what coverage you have for water damage.
237
Tax information
As a home dialysis patient, you can deduct medical expenses related to your treatment.
Remember to keep all your receipts! Medical expense and disability tax credit
• A non-refundable tax credit that you can claim for medical and related expenses.
• For more information, go to the Canada Revenue Agency website www.cra-arc.gc.ca or speak with your Social Worker.
Transportation and meals
• You can deduct the cost of travelling to and from medical visits and treatments, including meals.
Home improvement
• You can deduct the cost of changes to your home required for dialysis.
• For example: If you live in a 6-room house and 1 room is used for dialysis, you can deduct 1/6 of your expenses such as rent, hydro and water.

238
Planning a vacation When you are comfortable with home hemodialysis, you may be ready to plan a vacation. Whether you travel in Ontario or to another country, there are dialysis centres where you can receive treatment. This will need careful planning, so it is best to start early. The Holiday Dialysis Unit If you are planning to travel, contact the Holiday Dialysis Unit a few months ahead of time to begin making the arrangements. The Holiday Dialysis Unit will send you a travel package, requesting information about your travel plans and medical history. The travel package – part one The first part of the travel package asks for information about:
• Travel dates • Your dialysis schedule • Method of payment • Contact information • Where you will be staying • Next of kin
You are responsible for completing the first part of the travel package and sending it to the Holiday Dialysis Unit.

239
The travel package – part two The second part of the travel package asks for information about your medical history. This includes:
• Doctor’s orders for dialysis
• Doctor’s progress notes and summary
• Most recent history and physical exam
• List of health concerns
• Access history
• Current list of medicines
• Hemodialysis logs
• Chest x-ray within the last year or TB test within the last 30 to 90 days (depending on the centre)
• Electrocardiogram (ECG)
• Results of blood tests within 2 to 3 weeks of travel (depending on the centre):
- Hepatitis antibody screening (HbsAg) - Hepatitis antigen screening (HbsAb) - Hepatitis C screening - MRSA - VRE
• Copies of all insurance cards if traveling in Canada
The staff of the Home Hemodialysis Unit will arrange to send these documents to the Holiday Dialysis Unit.
The travel package may take up to 1 month to organize. The time it takes will depend on whether the information is available in your medical record. You may need to have blood tests or other tests done to complete the package. When it is ready, the Home Hemodialysis staff will send it to the Holiday Dialysis Unit.

240
Getting reimbursed for dialysis expenses When you are on vacation, keep all medical receipts and records of dialysis treatment. Ontario Health Insurance (OHIP) will pay a portion of the charges. 1. Fill out the ‘Out of Province/ Country Claims Submission’ form
• Go to the Ontario Ministry of Health and Long-term Care website www.health.gov.on.ca
• Select ‘Forms and Applications’, then “Ontario Health Insurance’, then ‘Out of Province, Out of Country Claim Submission’.
• Fill it in and print a copy. 2. Submit these documents to the nearest OHIP office within 12 months of
receiving treatment: • Your completed ‘Out of Province/ Country Claims Submission’ Form. • Your original bills, listing the services provided by the dialysis unit at your
destination. • Your original receipt of payment.
For more information
• Call Service Ontario INFO line at 1-866-532-3161, or
• Go to the Ontario Ministry of Health and Long-Term Care website: www.health.gov.on.ca/en/public/programs/ohip/ 1. Click on “Forms and Applications”, 2. Click on “Out of Province, Out of Country Claim Submission”

241
Vaccinations Some destinations require vaccinations. It is up to you to make sure your vaccinations are up to date. To find out what vaccinations are required at your travel destination:
• Check with the Centers for Disease Control (CDC): www.cdc.gov/travel 1-800-CDC-INFO (1-800-232-4636)
OR • Make an appointment with the Toronto Travel Clinic:
www.torontotravelclinic.com 123 Edward Street, Suite 505 416-730-5700
The Toronto Travel Clinic can help you prepare for a healthy and safe trip to any destination.
Finding a dialysis unit near your destination
1. Check these websites: www.globaldialysis.com Dialysis centres around the world www.eneph.com
Go to ‘The List’ for dialysis centres around the world.
www.dialysisfinder.com Dialysis centres in the United States www.islanddialysis.com Dialysis centres in the Caribbean www.dialysisatsea.com Dialysis centres onboard cruise ships.
2. Call the Kidney Foundation of Canada at 1-800-387-4474
3. Check the Global Dialysis Directory, available in the Home Hemodialysis Unit.

242
Looking for a vacation close to home?
The Lions Club has a dialysis camp in Dorset, Ontario. Cottages are available to dialysis patients. The Toronto General Hospital has 1 week at the camp every summer.
If you wish to attend the dialysis camp, please let the staff of the Home Hemodialysis Unit know.
For more information, go to www.lionscampdorset.on.ca Maintaining home equipment during a vacation Before you go on vacation, tell the Home Hemodialysis Unit and the Technicians.
Dialysis machine • Disinfect the machine before you leave for vacation. • Disinfect the machine when you return from vacation or before your next
dialysis treatment.
Reverse Osmosis Unit (R/O Unit)
• If you are away less than 1 week, the R/O Unit is to be flushed every 2 days. If you cannot make arrangements to have the R/O Unit flushed every 2 days, you must do a longer rinse (2 hours) before the next treatment session.
• If you are away for more than 2 weeks, the R/O Unit will be removed from your home and returned to the hospital. Tell the Technician the date of your return. The R/O Unit will be put back in your home as soon as you return from vacation.
The same maintenance of the dialysis machine and R/O Unit is required if you are admitted to hospital.

243
Requesting a second machine to use during vacation If you own a cottage or second home in Ontario, you may be able to borrow a second hemodialysis machine to use when you are on vacation. If you plan to rent or lease a cottage, your request for a second machine will be considered if you have written permission from the owner to install a dialysis machine in the cottage. A second machine will not be provided for a mobile home or vehicle. The Home Hemodialysis Unit has 4 machines (3 Integra machines and 1 Belco machine) available for patients to borrow. The machines are loaned on a first-come, first-served basis. You may borrow a second machine for 4 weeks, provided there are no other requests at the same time. This may be extended up to 8 weeks. The time will be confirmed in writing before the machine is installed and before your vacation.
Submit your written request for a second machine to the technical program manager 3 months before your vacation.
You are responsible for the following expenses:
• The cost of installing and removing the machine, including electrical and plumbing expenses, water testing and any renovations.
• Staff costs related to visiting the cottage, such as mileage. The Home Hemodialysis Program will pay for 1 visit during a 4-week loan for ‘trouble shooting’.
• Delivery costs if you order supplies to be delivered to your cottage. You may prefer to transfer your dialysis supplies from your main residence to the cottage.

244
We will give you an estimate of all expenses. You must pay this amount before your vacation.
After the second machine is removed, we will give you the actual expense bill. Depending on the difference between the estimate and actual amounts, you will pay the balance, or we will give you a rebate.
Conditions:
• You will be asked to sign a written contract for the second machine. • The University Health Network and the Home Hemodialysis Program can
cancel this contract if there are issues relating to safety, negligence, or your health.
• If you have to go into the hospital, you must tell the Home Hemodialysis Unit as soon as possible.
• You must call the Home Hemodialysis Unit 2 weeks in advance, to confirm the removal of the second machine.