High Resolution Planetary Imaging Workflow - UPV/EHU · Some Useful Accessories Barlow Increases...
42
High Resolution Planetary Imaging Workflow
Transcript of High Resolution Planetary Imaging Workflow - UPV/EHU · Some Useful Accessories Barlow Increases...

High Resolution Planetary Imaging Workflow

Fighting the Atmosphere
• Getting out of the Atmosphere
• Adaptive Optics• Lucky Imaging• Lucky Imaging
Feeling LuckyLucky Imaging is the process of capturing planets using a CCD video camera. A software to sort out the quality of the images. This takes images. This takes allows one to take advantage of the fleeting good seeing.

Amateurs doing Lucky ImagingDevelopment of inexpensive video capture devices.
The advances of computer hardware and interface.
The development of processing and control software. (ieRegistax and Firecapture)
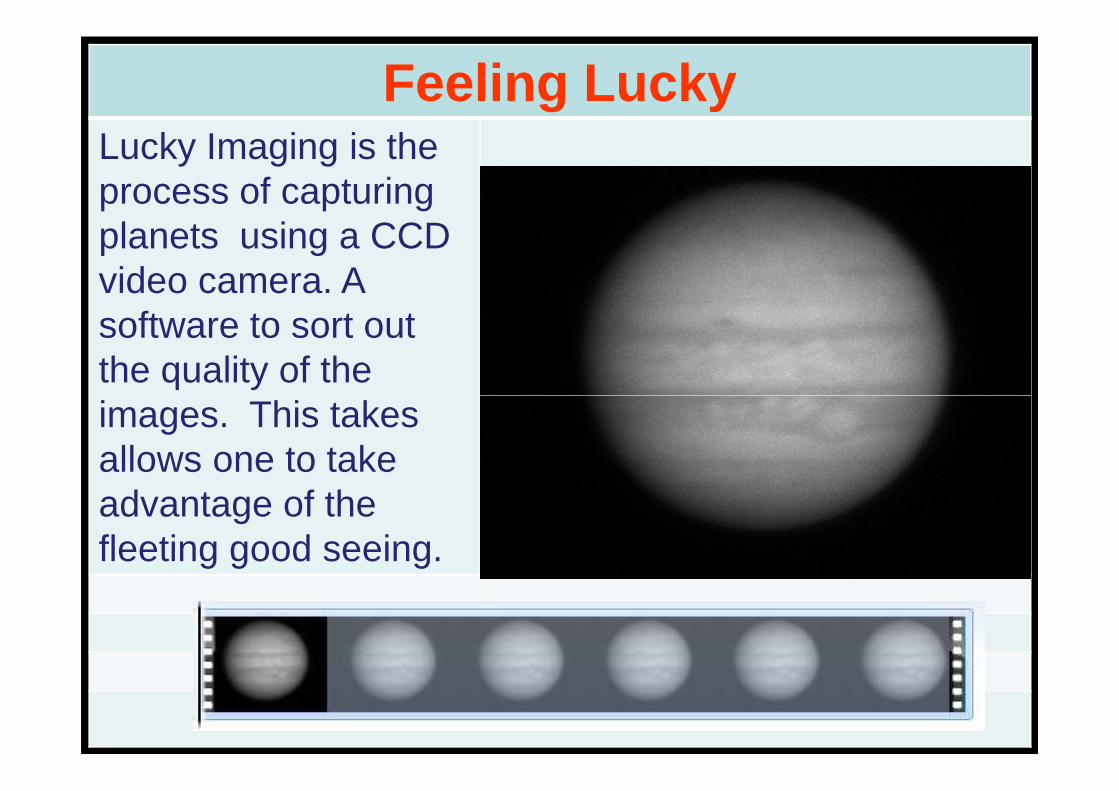
SUMMARYChoosing the Right EquipmentImaging Workflow
a. Preparationa. Preparation
b. Image Capture
c. Image Processing
d. Post Processing
e. Archiving

The Telescope: Aperture Rules!
The bigger the aperture, the higher the resolution.

The Camera
Webcam High Speed Industrial Camera
Pro: Cheap and Simple to use. Pro: Can do high frame rate with no compression. Low noise circuit. Flexible imaging capabilities.
Cons: Noisy Interface and Slow Frame Rate.
Cons: Expensive and requires a fast computer to run.Rate. computer to run.

Monochrome or Color
Color CCD Monochrome CCD
Pro: Simple to Setup and Fast Processing. Very inexpensive setup.
Pro: Very Sensitive CCD, better image quality, no problem with AtmosphericDispersion.
Cons: Less sensitive CCD due to BayerLayers. Needs to compensate for
Cons: Expensive and Complicated Setup.Layers. Needs to compensate for Atmospheric Dispersion.

ATMOSPHERIC DISPERSION CORRECTOR
If you are using a color camera, an ADC is a necessary accessory.

Camera Interface:
USB 2.0 480Mbps. Does not require an external power source. Standard with all recent PCs.
Firewire A 400Mbps. Some PCs might require an adapter and a power source.
Firewire B 800Mbps. Most PCs might require an adapter and a power source.
USB 3.0 4Gbps. This is the fastest interface available. Not yet as common as most PCs but will be in a few years time.

Some Useful AccessoriesBarlow Increases the image scale of the object imaged
Motorized Filter Wheels Allows vibration free changing of filters.
Filters:
RGB Filters To make colored image from monochrome camera.
UV, IR and Methane BandFilters
Special Filters to reveal atmospheric details on gas planets.
Flip Mirror Time saver in centering an object to the CCD camera.
Motorized Focuser Allows vibration free and fine focusingMotorized Focuser Allows vibration free and fine focusing
Vibration Suppression Pads Reduces high frequency vibration when imaging on hard surfaces

Preparations before Imaging

Location, Location, Location
• Best place to do planetary imaging is at the area close to the equator (where planets are higher), and close to the sea.
• Stay away from heat sources (ie., air conditioning system, chimneys, hot conditioning system, chimneys, hot asphalt, etc.)
• The three most important thing in getting quality planetary image are: seeing, seeing and seeing!
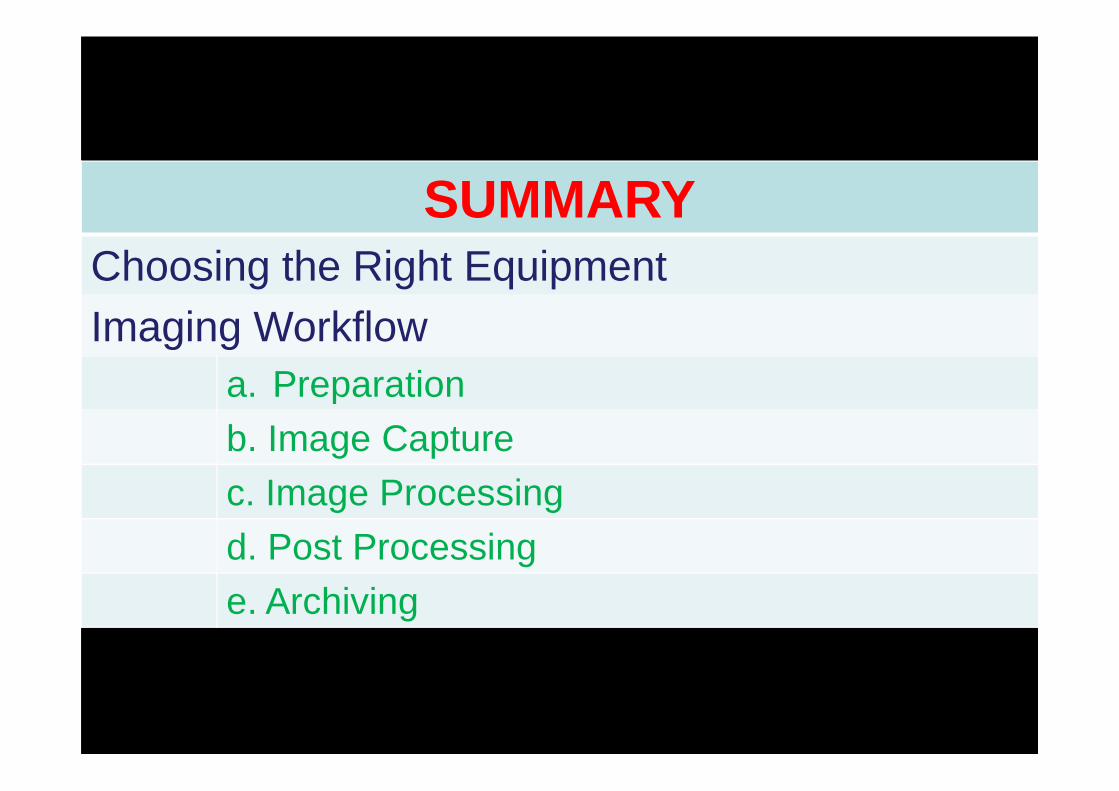
COOL YOUR OTA
1. Keep your OTA indoors.
2. Use a cooling fan to reduce tube currents. The bigger currents. The bigger the OTA the longer it requires to cool.

LOCK THE MIRROR
Lock the mirror after focusing to prevent focus shift!!

Fine Collimate the OTA1. During a night of good seeing, rough collimate your OTAvisually. Attach your imaging setup to the OTA.
2. Pick a bright STAR that is at least 70deg above the horizon.
3. Center the star with yourcapture software. Choose the RED filter when using a RED filter when using a monochrome camera.
4. Make the star out of focus by turning the focuser in.
5. Adjust the collimation screws to make sure that the rings are center.
6. Make sure that you have your screen in front facing you when you collimate. The star will get out of the FOV when you move the collimating screws.

Plan your imaging with WinJupos
Use the Ephemerides function of Winjupos.
Check which side of the planet will be visible in your planned observing time.
Check the position of the moons of the planets to check for transits or eclipses.
If you do not plan, you might miss exciting events!!
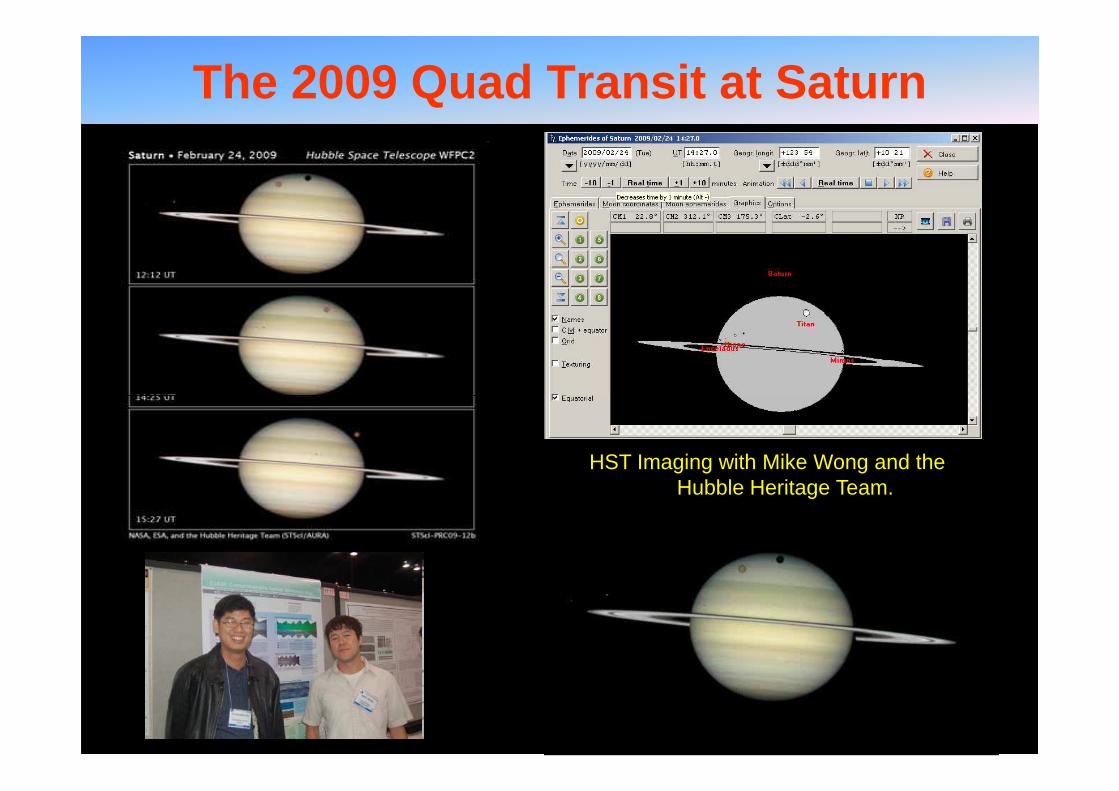
The 2009 Quad Transit at Saturn
HST Imaging with Mike Wong and the Hubble Heritage Team.

IMAGE CAPTURE

FireCapture
Currently, one of the best capture software.
It supports a variety of cameras.
Feature rich. It can control the mount, filter wheel and focuser using ASCOM.
It’s Free!!

FireCapture Controls
Use Gain and Exposure time to increase brightness.
Set Exposure time limit with the limit function.
Set ROI to reduce file size,increase frame rate and for faster increase frame rate and for faster processing.

Important Setup
Use Winjupos Filename overide!

Filter Wheel Automation

Firecapture Autoguide
Autoguide feature is used to keep the planet centered on the FOV.
It is compatible to all ASCOM compatible mounts.
When using autoguide make sure the planet’s orientation is sure the planet’s orientation is parallel to the motion of the mount.
Make sure that orientation of the green control arrows match the motion of the mount. Flip E-W or N-S to achieve this.

Capture SecretsFind the sweet spot of your imaging system. Have a capture routine for each target object.
Use the fastest frame rate possible.
Understand the gain limits of your camera.
Turn off Gamma!!Turn off Gamma!!
Spend time to focus the telescope.
Final Image Quality Depends on your capture quality. So be patient!

Jupiter
Keep histogram level around 80-90% on all channels.
Keep total integration time below 2 minutes.
Use focal length of around 30X of your aperture 5 micron pixel your aperture 5 micron pixel cameras and 20X the aperture for 3.75 micron cameras.
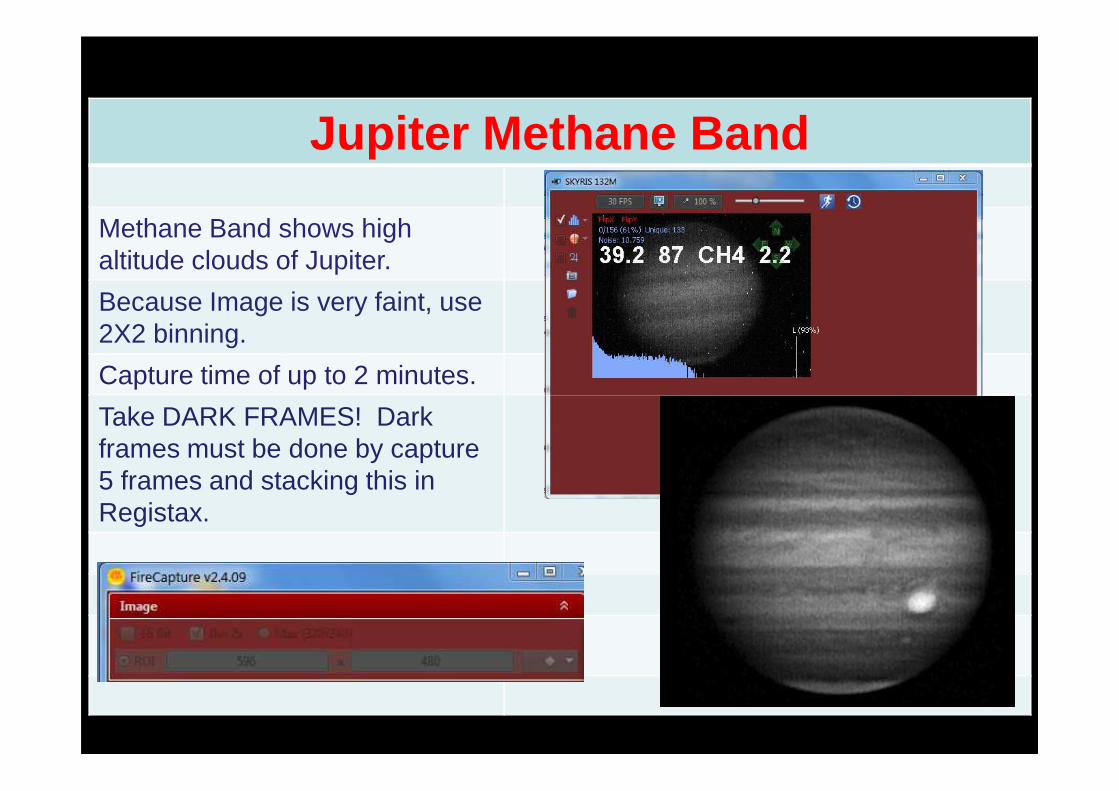
Jupiter Methane Band
Methane Band shows highaltitude clouds of Jupiter.
Because Image is very faint, use2X2 binning.
Capture time of up to 2 minutes.
Take DARK FRAMES! Dark frames must be done by capture 5 frames and stacking this in Registax.

Saturn
Saturn has very low surface brightness.
Use 100% gain and variable frame rate.
Use 50% histogram level for red and green and 30% for blue.
Use Winjupos Derotation so that the final image will be smooth.
Keep total integration time to around 3 minutes.

Mars
Use focal length around 50X the aperture for 5 micron pixel cameras and 30X the aperture for 3.75 micron cameras.
Keep histogram level of the Red Channel at around 80-90%. Keep Green at around 90%. Keep Green at around 60-70% and Blue around 30-40%.
Total integration time can be as long as 4 minutes.
UV-IR should be blocked to get true colors. Make sure your blue channel has no IR leakage.

IMAGE PROCESSING

AutoStakkert!!
Pro: AutoStakkert is easier to use and better results vsRegistax. Process the image faster and automatically aligns the image.
Con: Few controls. Not very intuitive to use.

Registax
This is the software that revolutionized Planetary Imaging. It has an excellent sharpening wavelet tool.

Making Things Bigger
Resampling can be use to increase image size.
AutoStakkert Registax1.5X Drizzle 1.5X Mitchell
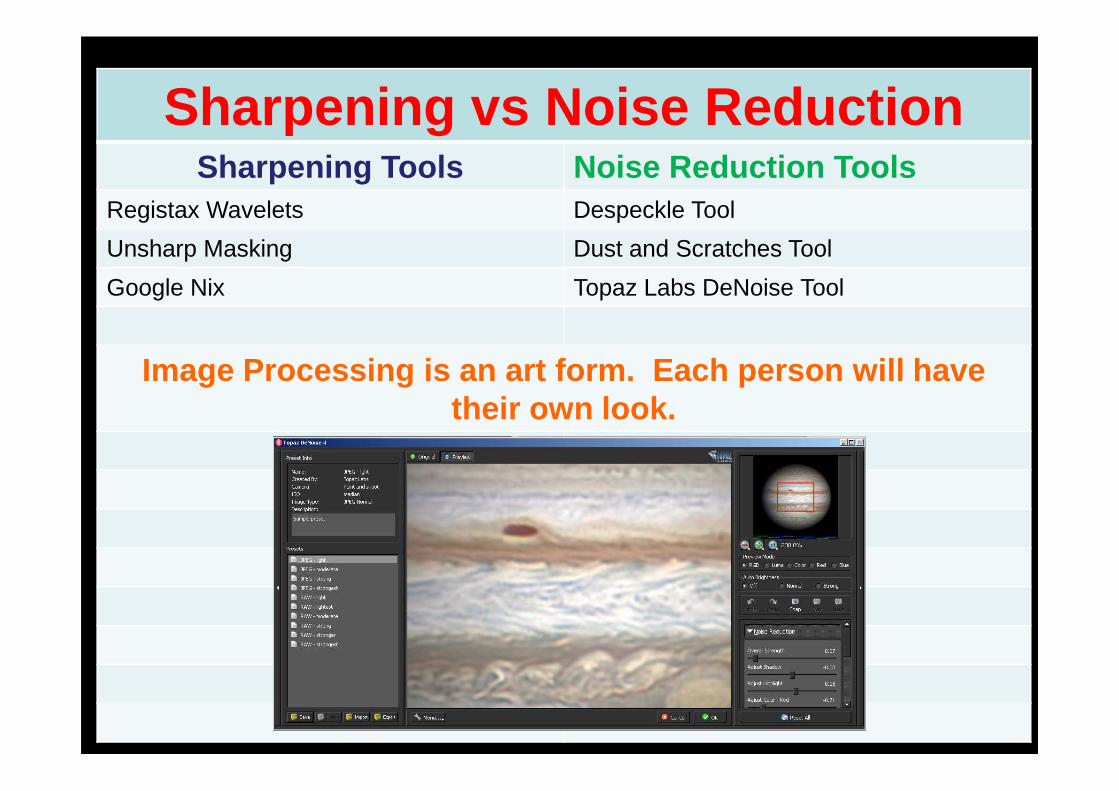
Sharpening vs Noise ReductionSharpening Tools Noise Reduction Tools
Registax Wavelets Despeckle Tool
Unsharp Masking Dust and Scratches Tool
Google Nix Topaz Labs DeNoise Tool
Image Processing is an art form. Each person will have their own look.their own look.

WinJupos DeRotation: The Next Revolution in Planetary Imaging
WinJupos DeRotation module allows imagers to go past the time limits set my the rotation of the planets.

1. Image Measurementa. Capture multiple image sequence for a span of 15-20 min.
-Use Page Up and Down to increase or decrease the size of the outline.
b.Open Image in Image measurement window. Input the date and time the image was taken.
c. Press F11 to automatically adjust the outline.
d. The outline has to be adjusted by:-Use the Arrow Keys to go move the outline.-N to rotate the outline clockwise and P to rate it counterclockwise.
e. Save the measurement in .ims file.
f. Repeat with all images.
rate it counterclockwise.

2. De-Rotationa. The der-otation module can be found under the tools menu.
b. Press Edit and Add each of the IMAGE MEASUREMENT FILES you want to stack.
c. Choose the output file type and image orientation you want your final image to look.
d. Press COMPILE IMAGE.

Single vs Derotated
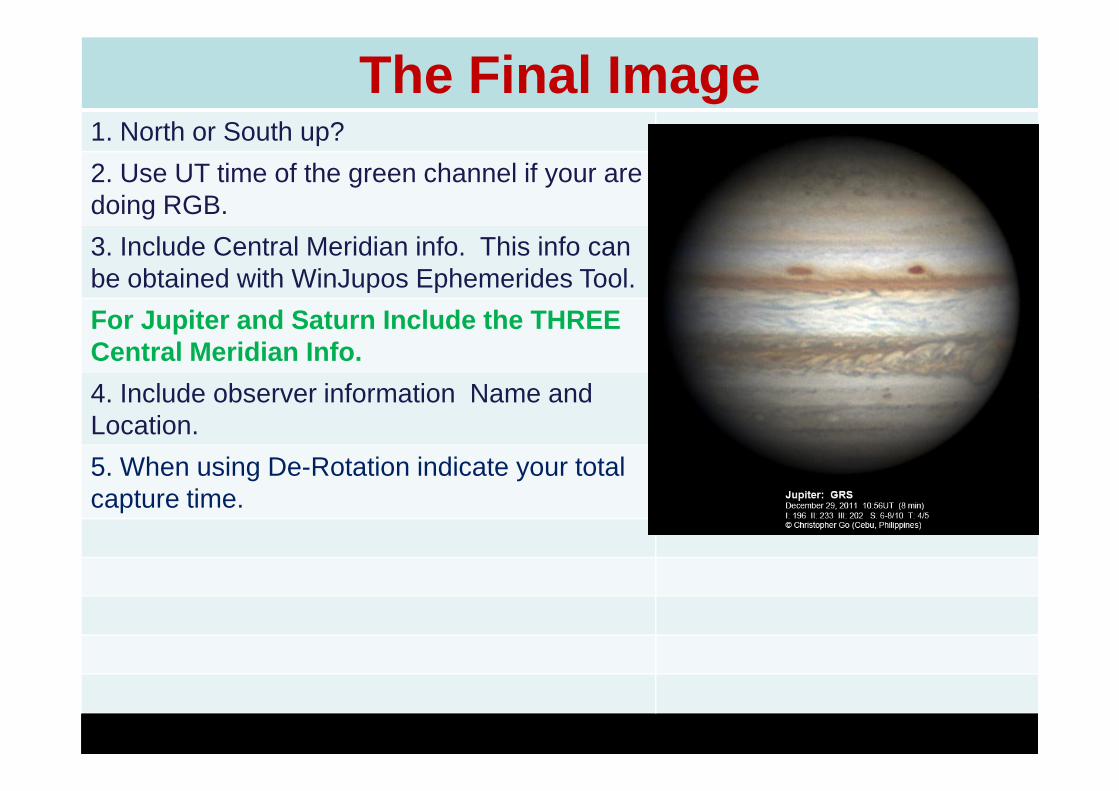
The Final Image1. North or South up?
2. Use UT time of the green channel if your are doing RGB.
3. Include Central Meridian info. This info can be obtained with WinJupos Ephemerides Tool.
For Jupiter and Saturn Include the THREE Central Meridian Info.
4. Include observer information Name and 4. Include observer information Name and Location.
5. When using De-Rotation indicate your total capture time.

Post Processing/ArchivingReview all Jupiter and Saturn videos for possible impacts. Play video with a media player or scan videos using Registax.
Archive your data! Use compression to reduce data volume.
Burn compressed archives on Blue-Ray Discs or store on removable hard drives.

Software Info
Capture SoftwareFireCapture http://firecapture.wonderplanets.de/
Stacking SoftwareRegistax http://www.astronomie.be/registax/
AutoStakkert 2.0 http://www.autostakkert.com/AutoStakkert 2.0 http://www.autostakkert.com/
Winjupos http://www.grischa-hahn.homepage.t-online.de/astro/winjupos/index.htm
Impact Detection SoftwareJID http://www.pvol.ehu.es/software/

Where to Submit Your ImagesJoin the ALPO Mailing List
ALPO Jupiter http://tech.groups.yahoo.com/group/ALPO_Jupiter/
ALPO Mars http://tech.groups.yahoo.com/group/marsobservers/
ALPO Mercury http://tech.groups.yahoo.com/group/ALPO_Mercury_Discussion/
ALPO Saturn http://tech.groups.yahoo.com/group/Saturn-ALPO/
ALPO Venus http://tech.groups.yahoo.com/group/Venus-ALPO/ALPO Venus http://tech.groups.yahoo.com/group/Venus-ALPO/
ALPO Japan http://alpo-j.asahikawa-med.ac.jp/indexE.htm
International Outer Planets Watch (IOPW)
http://www.ehu.es/iopw/