HG556a INSTALLATION GUIDE AND USER MANUALsetuprouter.com/router/vodafone/hg556a/manual-891.pdf · z...
42
User Manual 1 HG556a INSTALLATION GUIDE AND USER MANUAL
-
Upload
truongdang -
Category
Documents
-
view
233 -
download
1
Transcript of HG556a INSTALLATION GUIDE AND USER MANUALsetuprouter.com/router/vodafone/hg556a/manual-891.pdf · z...
User Manual 1
HG556a INSTALLATION GUIDE
AND USER MANUAL

User Manual 2
Contents
1 INTRODUCTION ...............................................................................3
1.1 Contents in the Package.......................................................................................................................................................... 3 1.2 The Front Panel of the HG556a.............................................................................................................................................. 4 1.3 The Rear and Side Panels of the HG556a............................................................................................................................... 5 1.4 Description of the Indicators on the Front and Rear Panels.................................................................................................... 6
2 Installation Guide................................................................................7
2.1 Inserting the Vodafone Internet Key....................................................................................................................................... 7 2.2 Supplying Power to the HG556a ............................................................................................................................................ 8 2.3 Connecting the PC to the HG556a.......................................................................................................................................... 9 2.4 Connecting the HG556a to the Fixed Network..................................................................................................................... 10 2.5 Connecting telephones to the HG556a ................................................................................................................................. 10 2.6 Connecting the PC to the HG556a Through Wi-Fi............................................................................................................... 12
3 User Manual........................................................................................13
3.1 Introduction .......................................................................................................................................................................... 13 3.2 Features of the HG556a........................................................................................................................................................ 13 3.3 Requirements of PC Configuration....................................................................................................................................... 14 3.4 Management of the HG556a................................................................................................................................................. 15
3.4.1 Home Gateway Page ................................................................................................................................................ 15 3.4.2 Wi-Fi ........................................................................................................................................................................ 16 3.4.3 HSPA........................................................................................................................................................................ 19 3.4.4 Voice ........................................................................................................................................................................ 21 3.4.5 Advanced.................................................................................................................................................................. 24 3.4.6 Firewall .................................................................................................................................................................... 28 3.4.7 Diagnostics ............................................................................................................................................................... 34
3.5 Troubleshooting.................................................................................................................................................................... 36 3.6 Safety Precautions ................................................................................................................................................................ 37
3.6.1 RF Exposure ............................................................................................................................................................. 37 3.6.2 Product Handling...................................................................................................................................................... 37 3.6.3 Electrical Safety ....................................................................................................................................................... 38 3.6.4 Interference............................................................................................................................................................... 38 3.6.5 Explosive Environments........................................................................................................................................... 38
3.7 Glossary................................................................................................................................................................................ 39
User Manual 3
INTRODUCTION
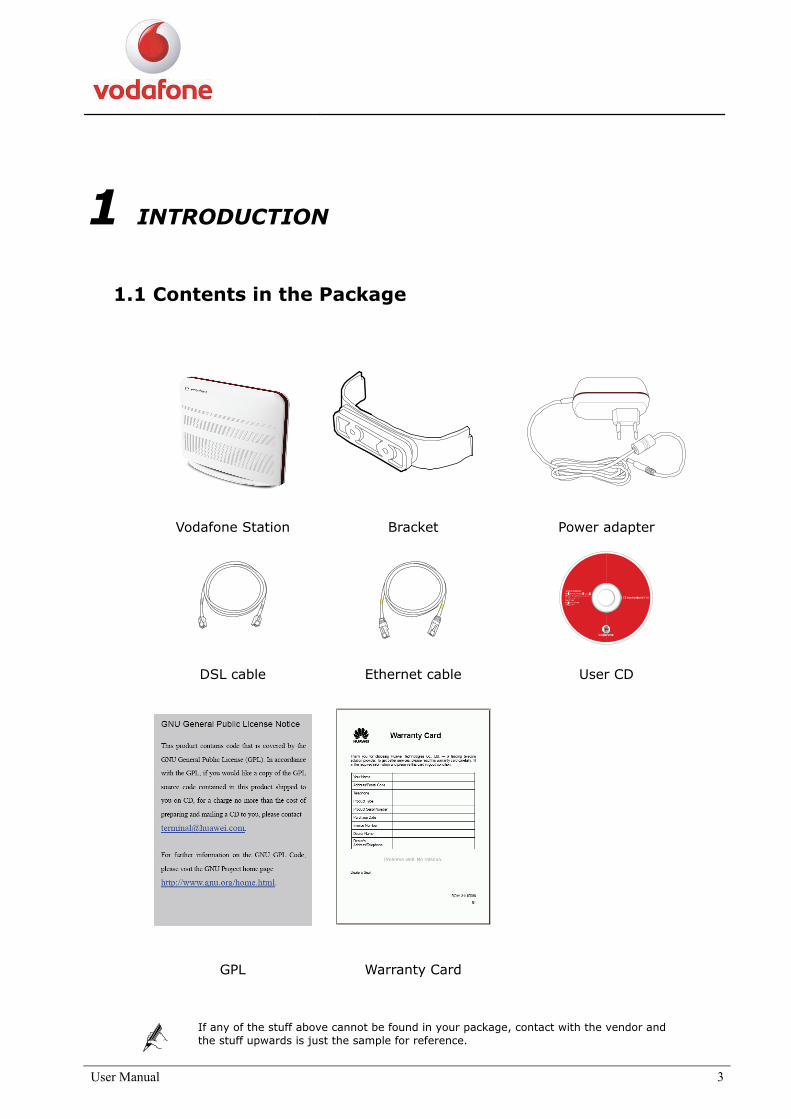
1.1 Contents in the Package
1
Vodafone Station Bracket Power adapter
CD AutoinstallanteV.1.0
DSL cable Ethernet cable User CD
GPL Warranty Card
If any of the stuff above cannot be found in your package, contact with the vendor and the stuff upwards is just the sample for reference.

User Manual 4
1.2 The Front Panel of the HG556a
Figure 1-1 Indicators on the front panel of the HG556a
User Manual 5
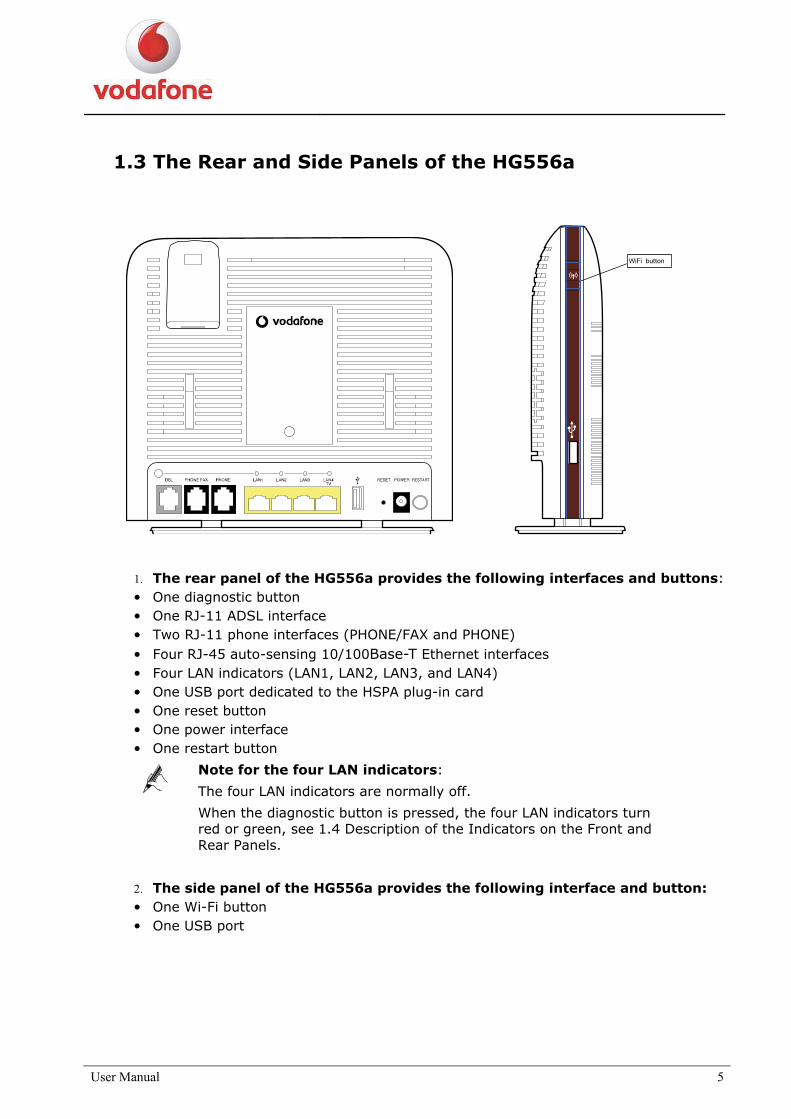
1.3 The Rear and Side Panels of the HG556a
WiFi button
1. The rear panel of the HG556a provides the following interfaces and buttons: One diagnostic button One RJ-11 ADSL interface Two RJ-11 phone interfaces (PHONE/FAX and PHONE) Four RJ-45 auto-sensing 10/100Base-T Ethernet interfaces Four LAN indicators (LAN1, LAN2, LAN3, and LAN4) One USB port dedicated to the HSPA plug-in card One reset button One power interface One restart button
Note for the four LAN indicators:
The four LAN indicators are normally off.
When the diagnostic button is pressed, the four LAN indicators turn red or green, see 1.4 Description of the Indicators on the Front and Rear Panels.
2. The side panel of the HG556a provides the following interface and button:
One Wi-Fi button One USB port
User Manual 6
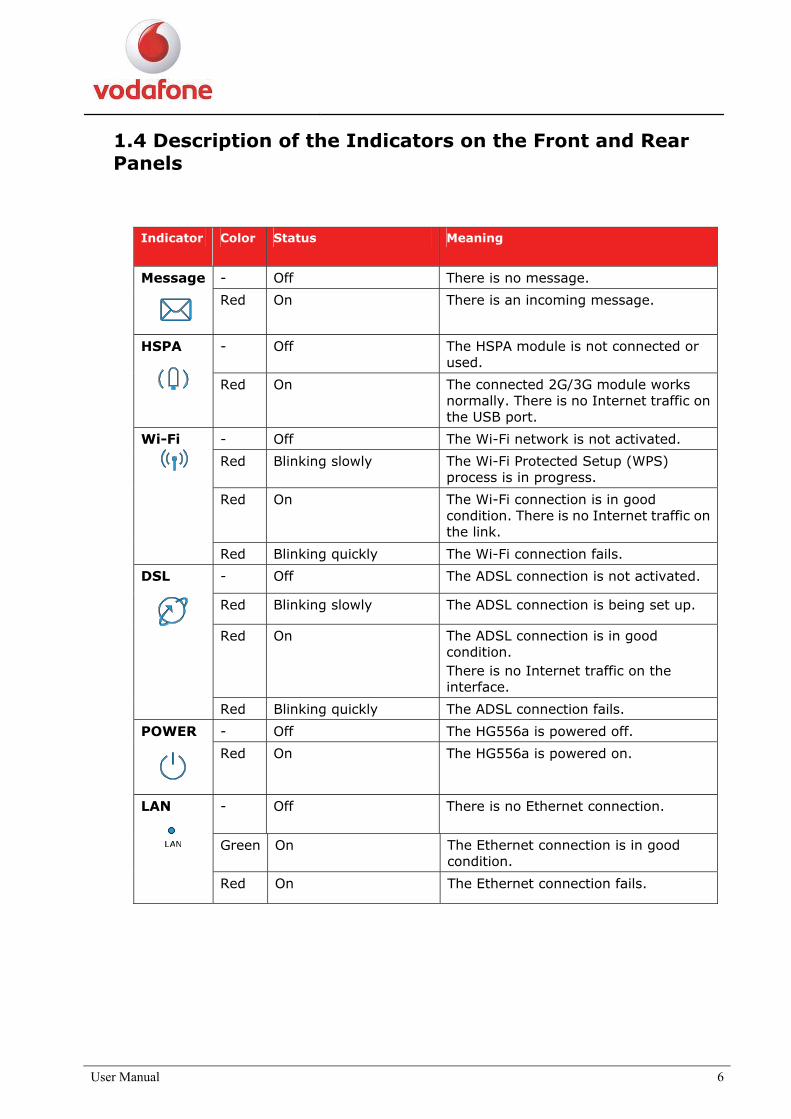
1.4 Description of the Indicators on the Front and Rear Panels
Indicator Color Status Meaning
- Off There is no message. Message
Red On There is an incoming message.
- Off The HSPA module is not connected or used.
HSPA
Red On The connected 2G/3G module works normally. There is no Internet traffic on the USB port.
- Off The Wi-Fi network is not activated.
Red Blinking slowly The Wi-Fi Protected Setup (WPS) process is in progress.
Red On The Wi-Fi connection is in good condition. There is no Internet traffic on the link.
Wi-Fi
Red Blinking quickly The Wi-Fi connection fails.
- Off The ADSL connection is not activated.
Red Blinking slowly The ADSL connection is being set up.
Red On The ADSL connection is in good condition. There is no Internet traffic on the interface.
DSL
Red Blinking quickly The ADSL connection fails.
- Off The HG556a is powered off. POWER
Red On The HG556a is powered on.
- Off There is no Ethernet connection.
Green On The Ethernet connection is in good condition.
LAN
Red On The Ethernet connection fails.

User Manual 7
Installation Guide
This chapter describes the procedure for installing the HG556a.
2.1 Inserting the Vodafone Internet Key
afone Internet Key.
3. Reinsert the
2
1. Remove the SIM card holder from the Vod2. Insert the SIM card into the card holder.
SIM card holder into the Vodafone Internet Key.
4. he back of the Vodafone Station and insert the Vodafone Internet
Remove the lid on tKey into the slot.
The Vodafone Internet Key upwards is just the sample for reference, you can choose other kind of Internet Key and use the same way to install.
User Manual 8
2.2 Supplying Power to the HG556a
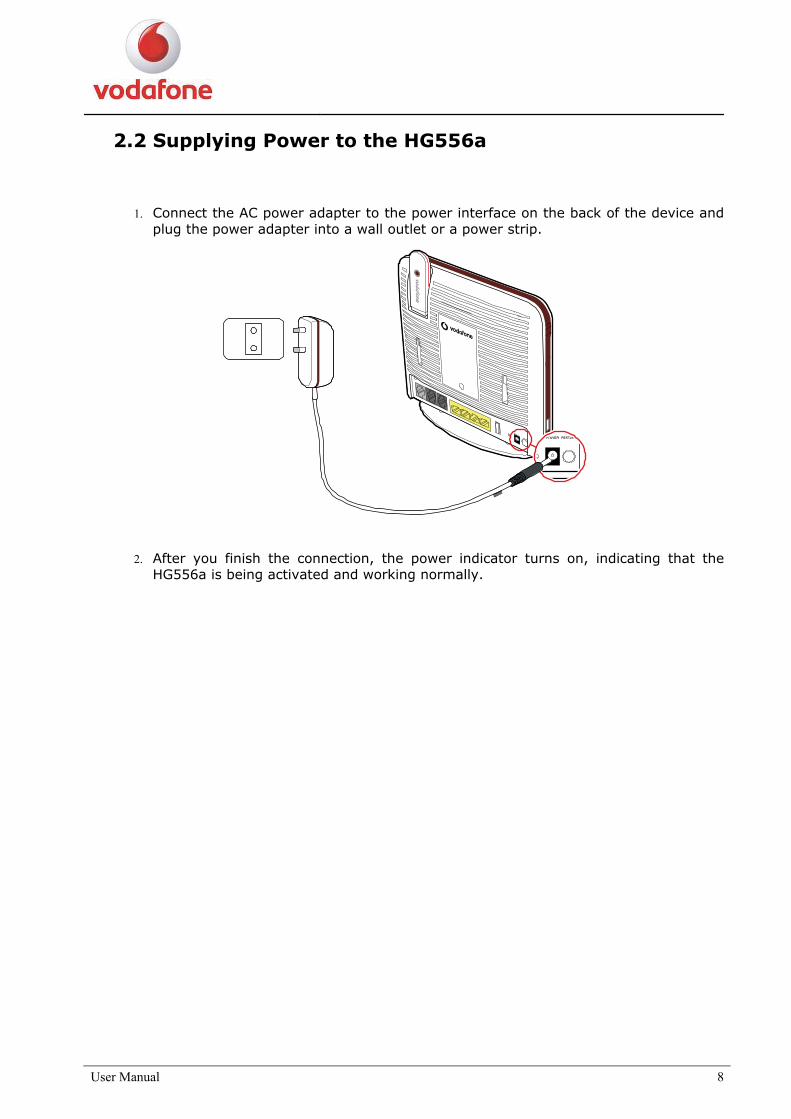
1. Connect the AC power adapter to the power interface on the back of the device and plug the power adapter into a wall outlet or a power strip.
POWER
2. After you finish the connection, the power indicator turns on, indicating that the HG556a is being activated and working normally.
User Manual 9
2.3 Connecting the PC to the HG556a
LAN
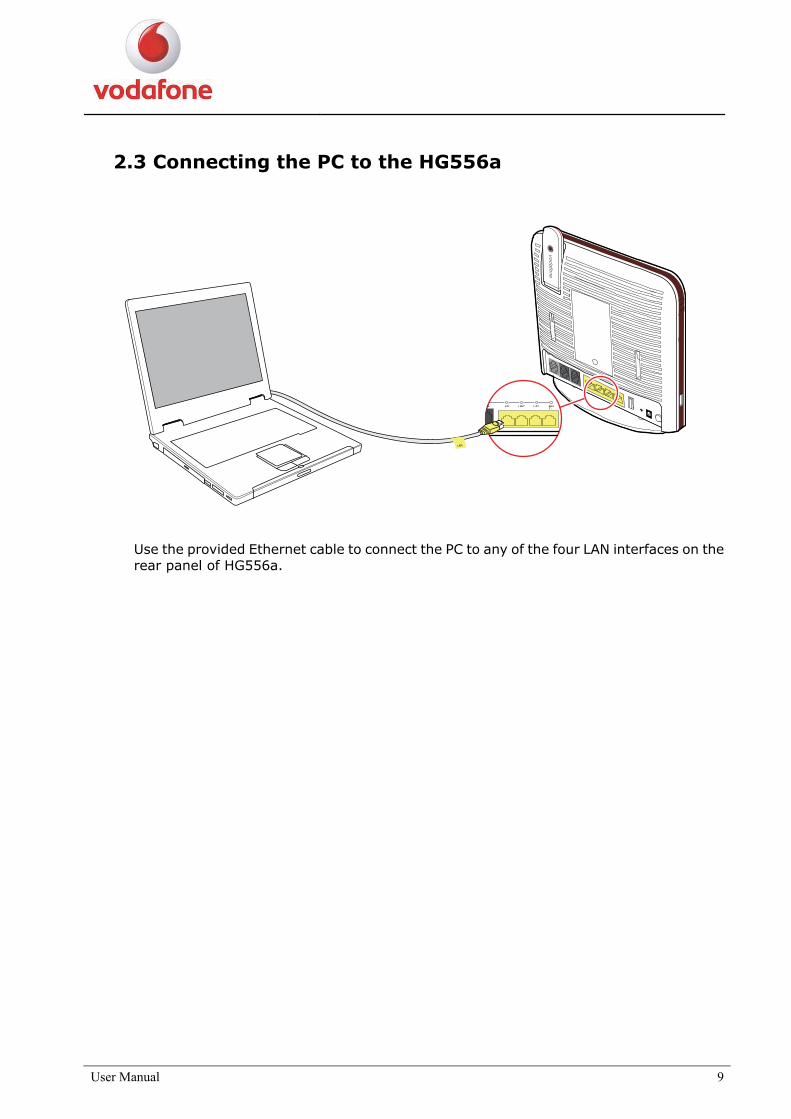
Use the provided Ethernet cable to connect the PC to any of the four LAN interfaces on the rear panel of HG556a.
User Manual 10
2.4 Connecting the HG556a to the Fixed Network
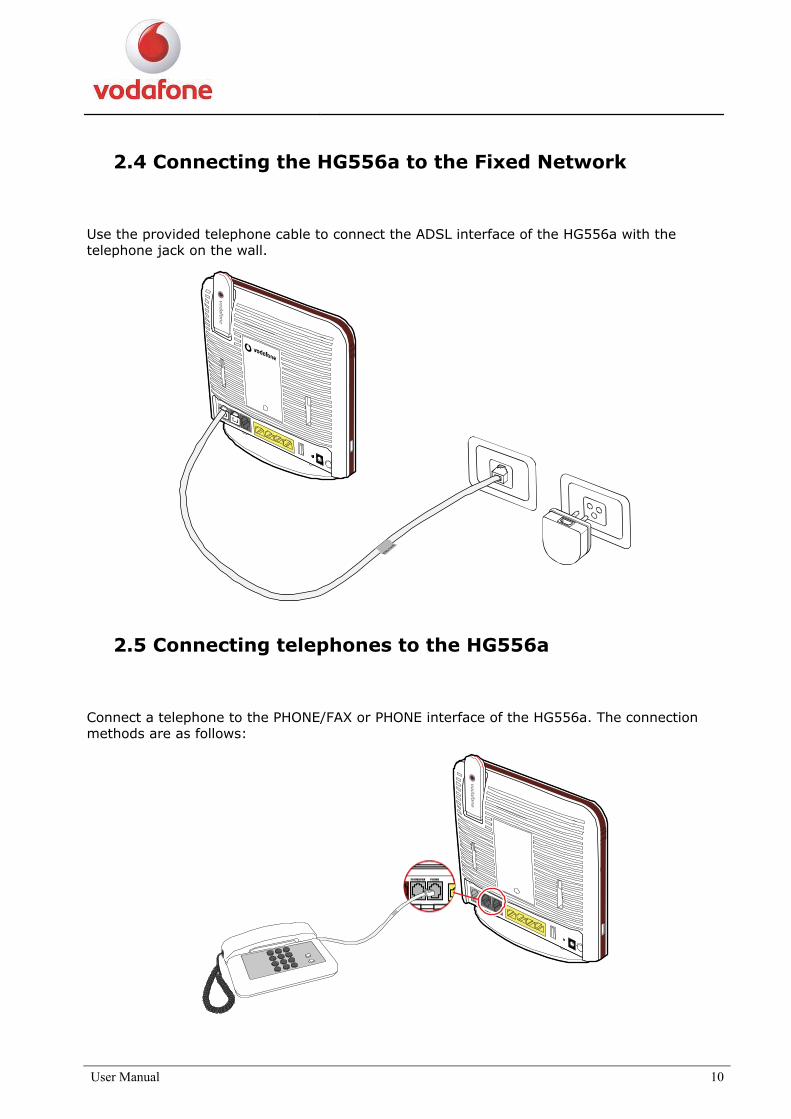
Use the provided telephone cable to connect the ADSL interface of the HG556a with the telephone jack on the wall.
2.5 Connecting telephones to the HG556a
Connect a telephone to the PHONE/FAX or PHONE interface of the HG556a. The connection methods are as follows:
User Manual 11
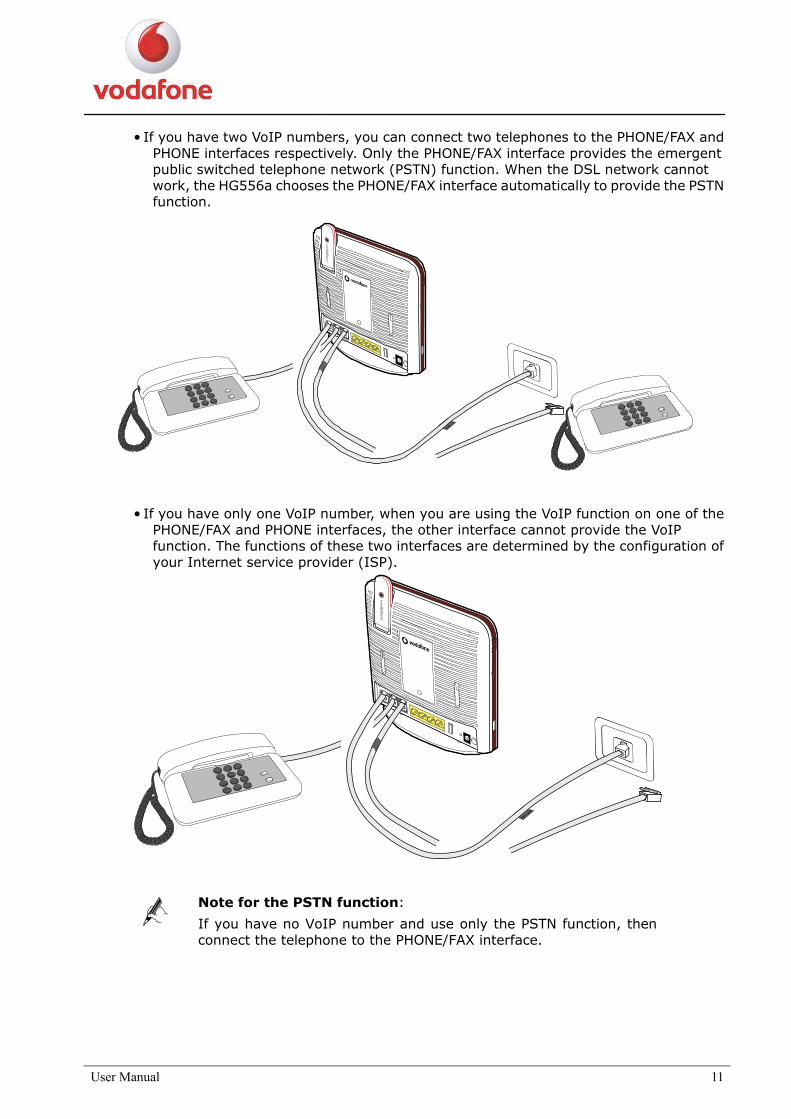
If you have two VoIP numbers, you can connect two telephones to the PHONE/FAX and PHONE interfaces respectively. Only the PHONE/FAX interface provides the emergent public switched telephone network (PSTN) function. When the DSL network cannot work, the HG556a chooses the PHONE/FAX interface automatically to provide the PSTN function.
If you have only one VoIP number, when you are using the VoIP function on one of the PHONE/FAX and PHONE interfaces, the other interface cannot provide the VoIP function. The functions of these two interfaces are determined by the configuration of your Internet service provider (ISP).
Note for the PSTN function:
If you have no VoIP number and use only the PSTN function, then connect the telephone to the PHONE/FAX interface.
User Manual 12
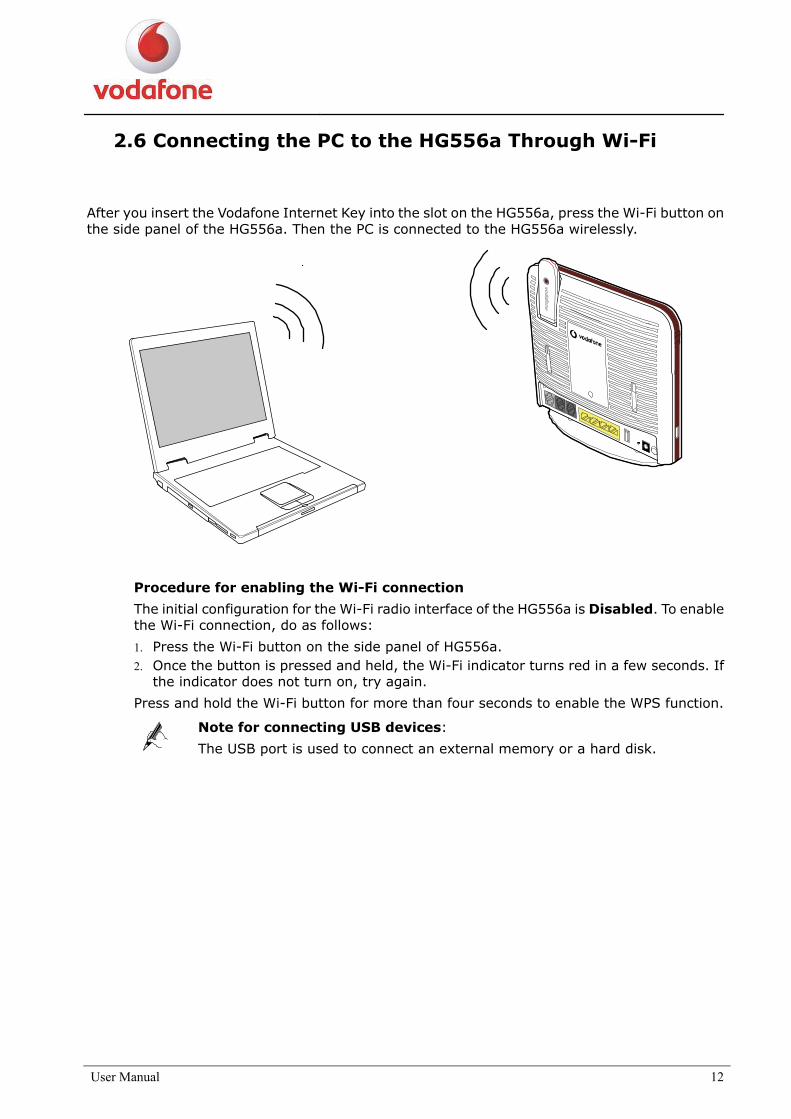
2.6 Connecting the PC to the HG556a Through Wi-Fi
After you insert the Vodafone Internet Key into the slot on the HG556a, press the Wi-Fi button on the side panel of the HG556a. Then the PC is connected to the HG556a wirelessly.
Procedure for enabling the Wi-Fi connection
The initial configuration for the Wi-Fi radio interface of the HG556a is Disabled. To enable the Wi-Fi connection, do as follows:
1. Press the Wi-Fi button on the side panel of HG556a. 2. Once the button is pressed and held, the Wi-Fi indicator turns red in a few seconds. If
the indicator does not turn on, try again.
Press and hold the Wi-Fi button for more than four seconds to enable the WPS function.
Note for connecting USB devices:
The USB port is used to connect an external memory or a hard disk.

User Manual 13
User Manual
3.1 Introduction
instructions that must be followed to protect the HG556a and the safety of the operator.
3.2 Features of the HG556a
e HG556a are as follows:
, G.992.3 ADSL2 (G.dmt.bis), and G.992.5 ADSL2+
Supports manual configuration of VPI/VCI parameters
L2+ uplink and USB port uplink rage device
Supports USB printer
g Ethernet interfaces
Supports test of the Ethernet with the diagnostic button
g, and 802.11n
y authorization
3
This manual provides instructions on how to use the product properly. It also provides
The main features of th
1. ADSL2+ interface Supports ITU G.992.1 (G.dmt)
Annex A (G.dmt.bitplus) Supports Annex L (RE ADSL)
Supports ANSI T1.413 Issue 2
Supports the configuration of eight VPI/VCIs
2.Supports USB 2.0 host port
USB ports
Supports HUAWEI HSPA USB interface link driver
Supports mutual data backup of ADS Supports USB mass sto
3.Provides four 10/100 M auto-sensin
Ethernet interfaces
Supports Ethernet switch function Supports 802.3u
4.Supports 802.11b, 802.11
Wi-Fi interface
Supports 32 connections
Supports SSID hiding Supports channel selection Supports Open System/Shared Ke Supports WPS

User Manual 14
SK/WPA2-PSK Supports WMM
Supports the emergent Foreign Exchange Office (FXO) function
3.3 Requirements of PC Configuration
nts of PC configuration for displaying the management Web pages of the HG556a are:
Supports WEP/TKIP/AES Supports WPA-P
5. POTS interfaces
Provides two plain old telephone service (POTS) interfaces
The requireme
Microsoft® Windows Apple® Mac
Operating system E /Vista
Windows®98SE/M
Windows® 2000/XP
Mac OS® 10.1
RAM 32 MB 64 MB 128 MB
Free disk space 40 MB 10 MB
CD-driver/DVD-driver Provided
Display 800 x 600 pixel, 256 color
Ethernet 10/100Base-T n Required for Ethernet connectio
Wi-Fi 802.11b/g Required for Wi-Fi connection
Browser 0, 6.0, 7.0Internet Explorer® 5. Mozilla© Firefox 1.0
xplorer® 5.0,
Apple Safari® 1.0
Internet E6.0, 7.0
User Manual 15
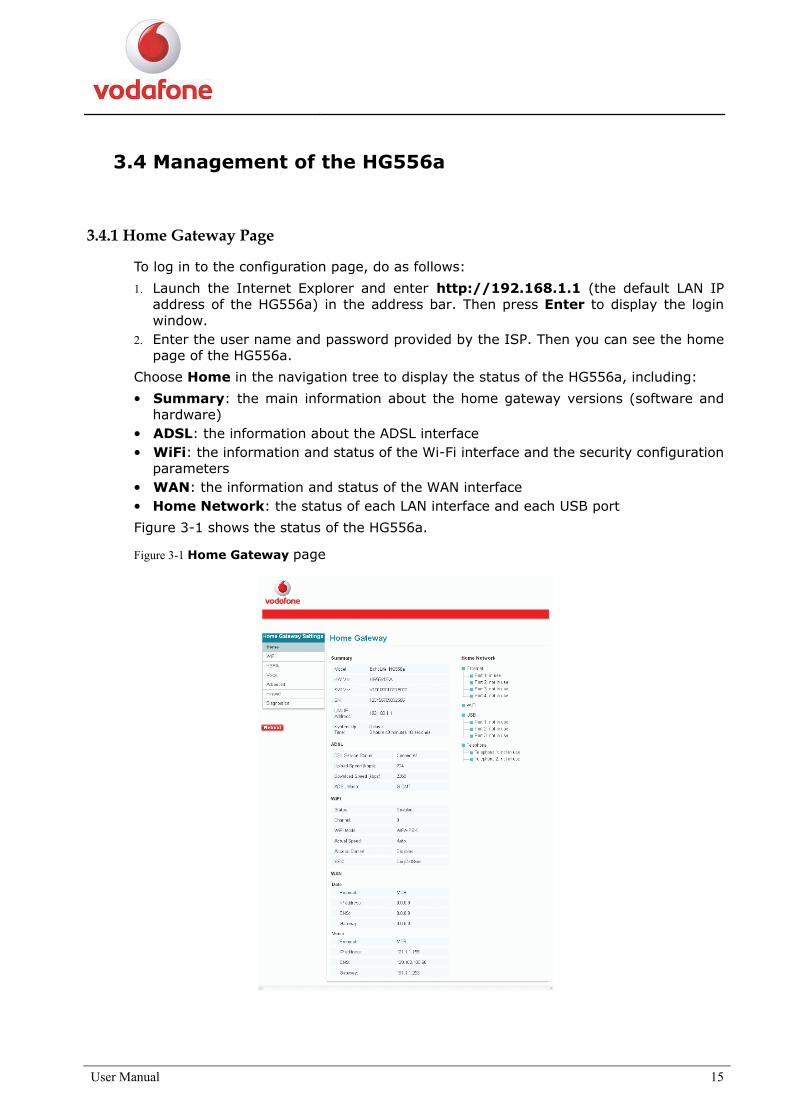
3.4 Management of the HG556a
3.4.1 Home Gateway Page
To log in to the configuration page, do as follows:
1. Launch the Internet Explorer and enter http://192.168.1.1 (the default LAN IP address of the HG556a) in the address bar. Then press Enter to display the login window.
2. Enter the user name and password provided by the ISP. Then you can see the home page of the HG556a.
Choose Home in the navigation tree to display the status of the HG556a, including:
Summary: the main information about the home gateway versions (software and hardware)
ADSL: the information about the ADSL interface WiFi: the information and status of the Wi-Fi interface and the security configuration
parameters WAN: the information and status of the WAN interface Home Network: the status of each LAN interface and each USB port
Figure 3-1 shows the status of the HG556a.
Figure 3-1 Home Gateway page

User Manual 16
3.4.2 Wi-Fi
Basic
This page allows you to enable or disable Wi-Fi on the Vodafone Station and to hide or show the wireless network.
Choose WiFi > Basic in the navigation tree to display the Basic page.
Figure 3-2 shows the Basic page.
Figure 3-2 Basic page
Table 3-1 lists the parameters for the basic settings.
Table 3-1 Parameters for the basic settings
Item Description
Enable WiFi To enable or disable the Wi-Fi function.
Hide Access Point It is used to hide or display the AP. If the AP is hidden, the HG556a does not carry the SSID information when broadcasting beacon packets and probe response packets. When the wireless client connects to the HG556a, the SSID needs to be entered manually.
SSID The name of the WLAN. It identifies the different networks. Wireless clients must have the same SSID as that of the AP to communicate with each other.
Channel Select a proper channel from the list that conforms to the network settings.
NOTE
WLAN = Wireless Local Area Network SSID = Service Set Identifier AP = Access Point
Click Save to save the settings.
User Manual 17
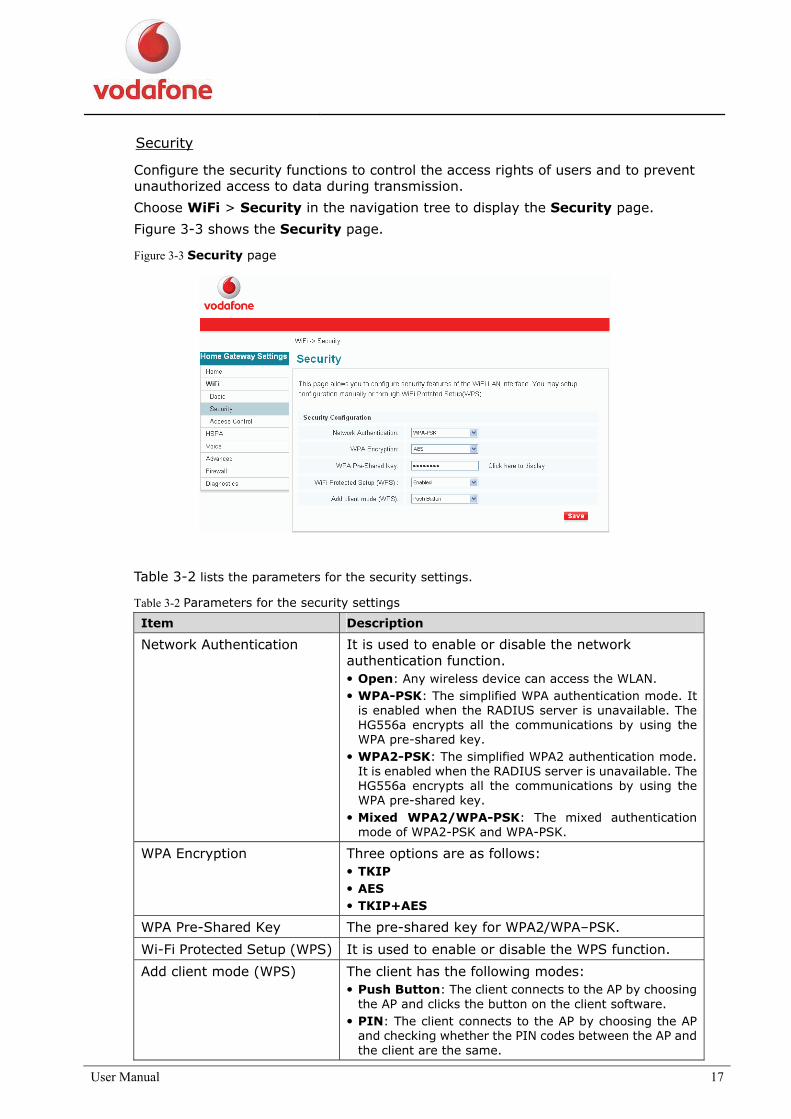
Security
Configure the security functions to control the access rights of users and to prevent unauthorized access to data during transmission.
Choose WiFi > Security in the navigation tree to display the Security page.
Figure 3-3 shows the Security page.
Figure 3-3 Security page
Table 3-2 lists the parameters for the security settings.
Table 3-2 Parameters for the security settings
Item Description
Network Authentication It is used to enable or disable the network authentication function.
Open: Any wireless device can access the WLAN. WPA-PSK: The simplified WPA authentication mode. It is enabled when the RADIUS server is unavailable. The HG556a encrypts all the communications by using the WPA pre-shared key.
WPA2-PSK: The simplified WPA2 authentication mode. It is enabled when the RADIUS server is unavailable. The HG556a encrypts all the communications by using the WPA pre-shared key.
Mixed WPA2/WPA-PSK: The mixed authentication mode of WPA2-PSK and WPA-PSK.
WPA Encryption Three options are as follows: TKIP AES TKIP+AES
WPA Pre-Shared Key The pre-shared key for WPA2/WPA–PSK.
Wi-Fi Protected Setup (WPS) It is used to enable or disable the WPS function.
Add client mode (WPS) The client has the following modes: Push Button: The client connects to the AP by choosing the AP and clicks the button on the client software.
PIN: The client connects to the AP by choosing the AP and checking whether the PIN codes between the AP and the client are the same.

User Manual 18
Access Control
Choose WiFi > Access Control in the navigation tree to display the Access Control page.
Figure 3-4 shows the Access Control page.
Figure 3-4 Access Control Page
Table 3-3 lists the parameters for access control.
Table 3-3 Parameters for access control
Item Description
Configure Restriction The access rule for MAC addresses. Three options are available:
Deactivate: The MAC filter is deactivated. Allow: The wireless network adapter can set up a connection with the HG556a only when the MAC address of the wireless network adapter matches the values in the MAC address list.
Reject: When the MAC address of the wireless network adapter matches the values in the MAC address list, the wireless network adapter cannot set up a connection with the HG556a.
Active Filters It is used to enable or disable the MAC filter function.
MAC Address The MAC addresses of the wireless client that allows or rejects access to the HG556a in the address fields. The MAC address is in six hexadecimal character pairs.
Add New Filters Add a Wi-Fi MAC address filter.
Click Save to save the settings.

User Manual 19
3.4.3 HSPA
Status
Choose HSPA > Status in the navigation tree to display the Status page.
This page allows you to understand the information about HSPA status.
Figure 3-5 shows the Status page.
Figure 3-5 Status page
Configuration
Choose HSPA > Configuration in the navigation tree to display the Configuration page.
Figure 3-6 shows the Configuration page.
Figure 3-6 Configuration page
User Manual 20
Table 3-4 lists the parameters for configuration.
Table 3-4 Parameters for configuration
Item Description
APN Name Provides routing information for SGSN and GGSN, which identifies the external service requested by a user of the GPRS service and the Operator ID which specifies routing information.
User Name The user name to access the service.
Password The password to access the service.
Athentication The three authentication modes of dial-up: AUTO, CHAP, PAP.
Network Type Three types of network: 3G preferred, 2G only, 3G only.
NOTE APN = Access Point Name
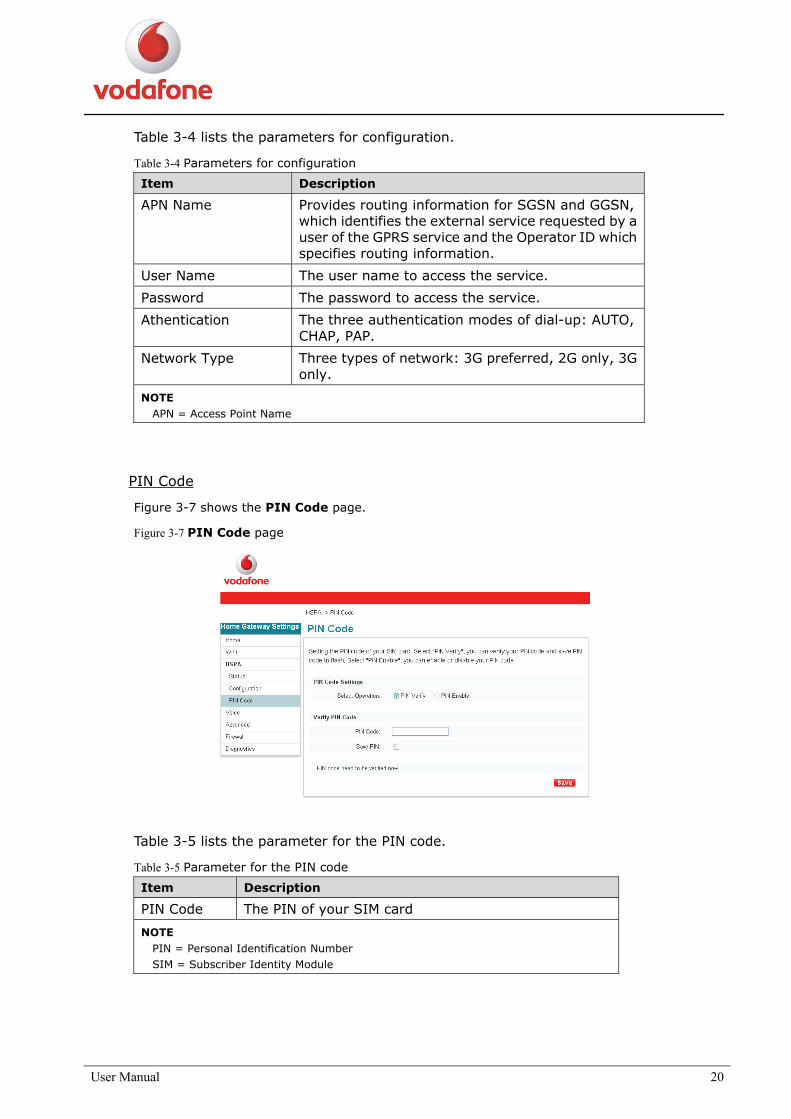
PIN Code
Figure 3-7 shows the PIN Code page.
Figure 3-7 PIN Code page
Table 3-5 lists the parameter for the PIN code.
Table 3-5 Parameter for the PIN code
Item Description
PIN Code The PIN of your SIM card
NOTE
PIN = Personal Identification Number SIM = Subscriber Identity Module

User Manual 21
3.4.4 Voice
Phone
Figure 3-8 shows the Phone page.
Figure 3-8 Phone page

User Manual 22
Speed Dial
Choose Voice > Speed Dial in the navigation tree to display the Speed Dial page.
Figure 3-9 shows the Speed Dial page.
Figure 3-9 Speed Dial page
Table 3-6 lists the parameters for speed dialing.
Table 3-6 Parameters for speed dialing
Item Description
Sequence The sequence of a speed dial number Select #01–#10
Number The self-defined speed dial number
Destination The callee number

User Manual 23
Prefix
Choose Voice > Prefix to display the Prefix page.
Figure 3-10 shows the Prefix page.
Figure 3-10 Prefix page
Table 3-7 lists the parameters for prefix.
Table 3-7 Parameters for prefix
Item Description
Sequence The sequence of a prefixed number. Select #01-#10.
Append Prefix Append prefix when dialling number.
Number The self-defined prefixed number.
User Manual 24
3.4.5 Advanced
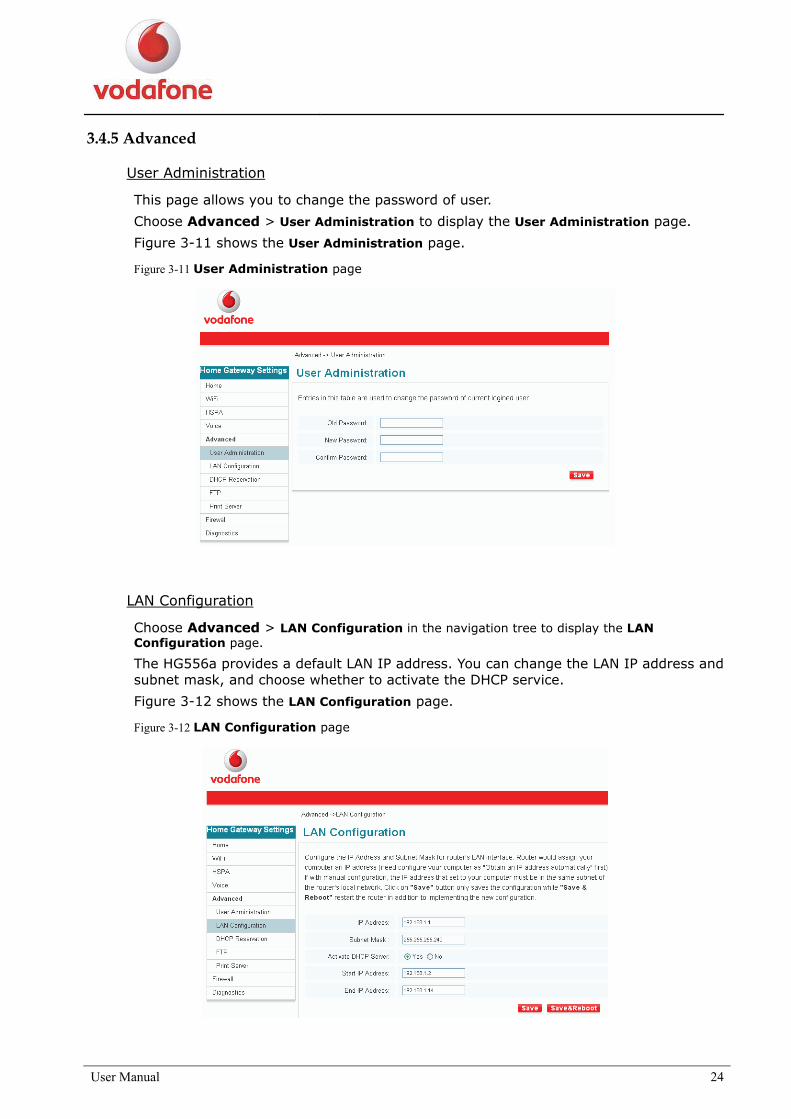
User Administration
This page allows you to change the password of user.
Choose Advanced > User Administration to display the User Administration page.
Figure 3-11 shows the User Administration page.
Figure 3-11 User Administration page
LAN Configuration
Choose Advanced > LAN Configuration in the navigation tree to display the LAN Configuration page.
The HG556a provides a default LAN IP address. You can change the LAN IP address and subnet mask, and choose whether to activate the DHCP service.
Figure 3-12 shows the LAN Configuration page.
Figure 3-12 LAN Configuration page
User Manual 25
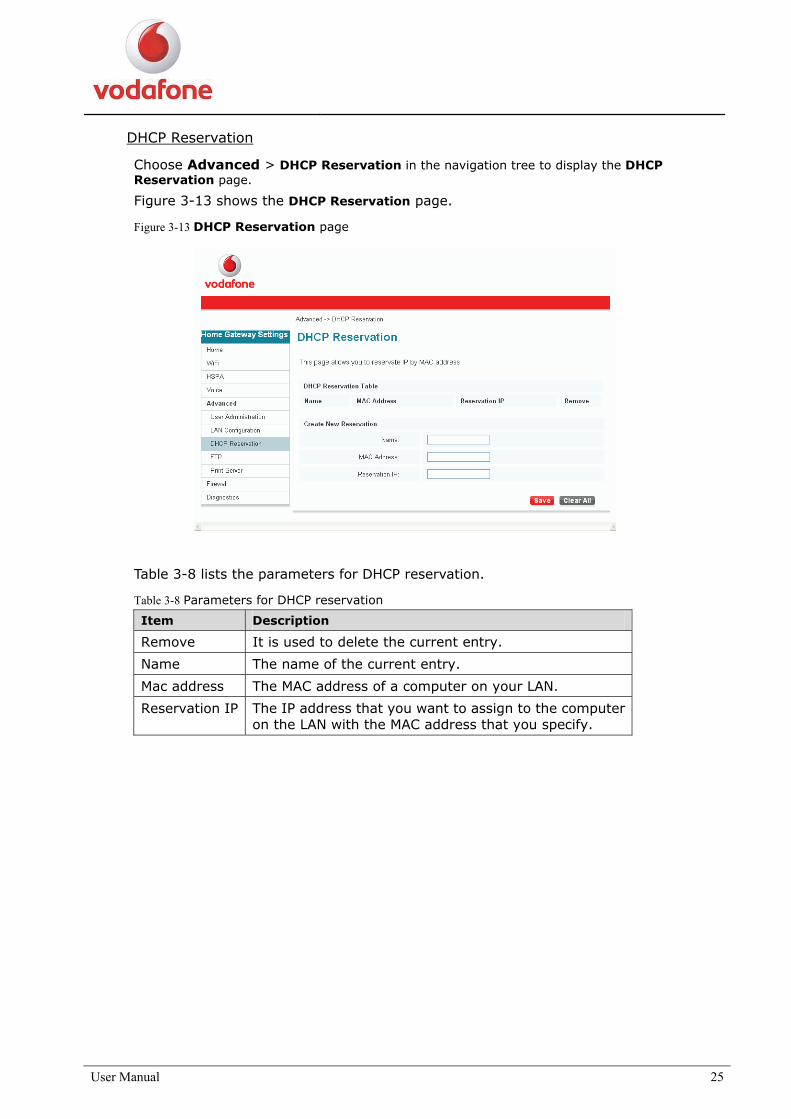
DHCP Reservation
Choose Advanced > DHCP Reservation in the navigation tree to display the DHCP Reservation page.
Figure 3-13 shows the DHCP Reservation page.
Figure 3-13 DHCP Reservation page
Table 3-8 lists the parameters for DHCP reservation.
Table 3-8 Parameters for DHCP reservation
Item Description
Remove It is used to delete the current entry.
Name The name of the current entry.
Mac address The MAC address of a computer on your LAN.
Reservation IP The IP address that you want to assign to the computer on the LAN with the MAC address that you specify.
User Manual 26
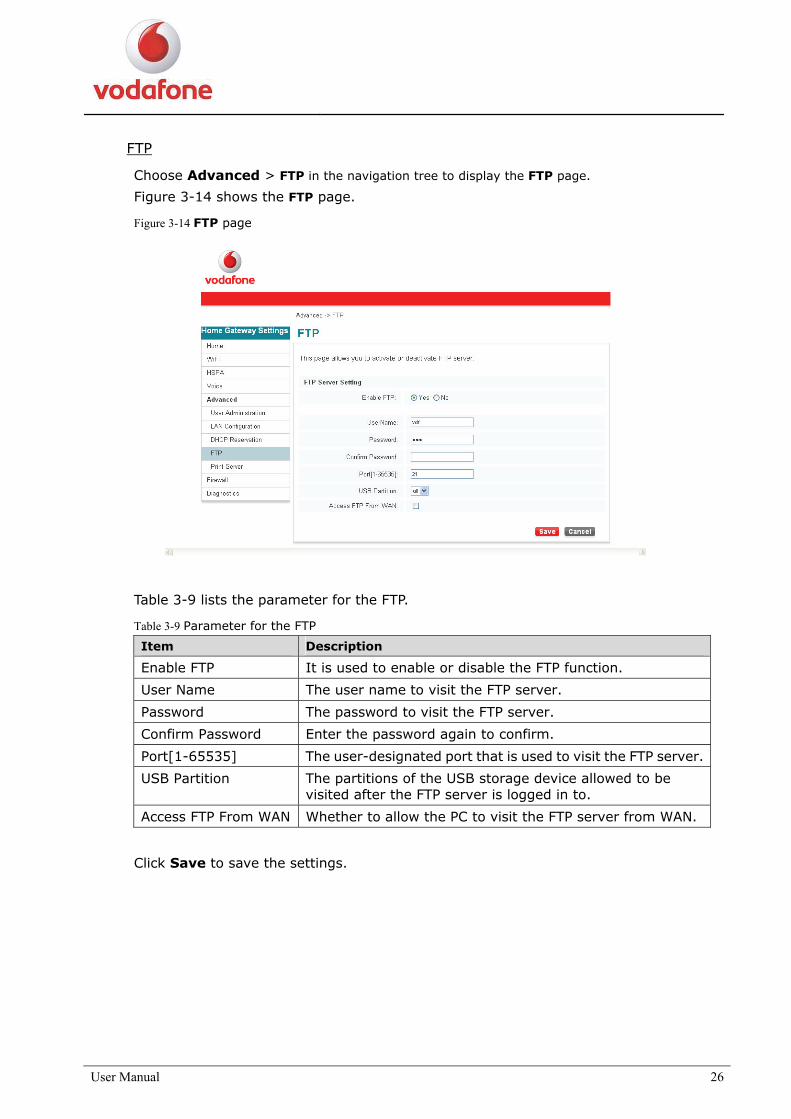
FTP
Choose Advanced > FTP in the navigation tree to display the FTP page.
Figure 3-14 shows the FTP page.
Figure 3-14 FTP page
Table 3-9 lists the parameter for the FTP.
Table 3-9 Parameter for the FTP
Item Description
Enable FTP It is used to enable or disable the FTP function.
User Name The user name to visit the FTP server.
Password The password to visit the FTP server.
Confirm Password Enter the password again to confirm.
Port[1-65535] The user-designated port that is used to visit the FTP server.
USB Partition The partitions of the USB storage device allowed to be visited after the FTP server is logged in to.
Access FTP From WAN Whether to allow the PC to visit the FTP server from WAN.
Click Save to save the settings.
User Manual 27
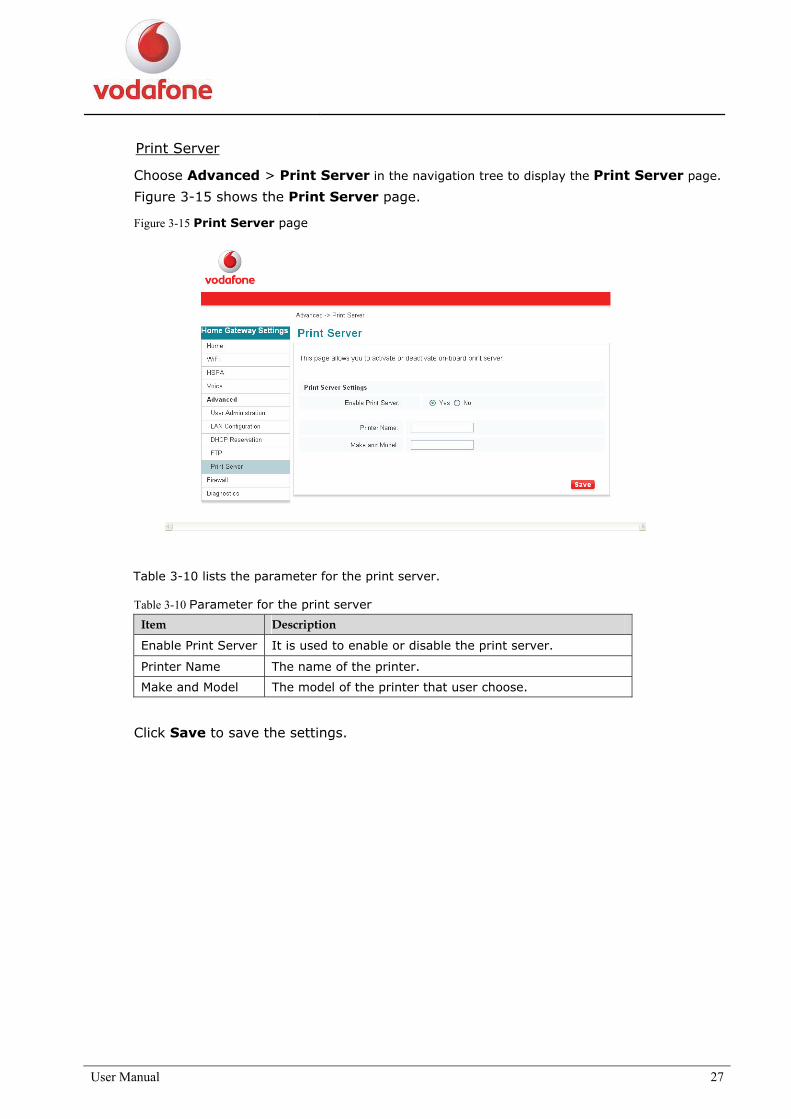
Print Server
Choose Advanced > Print Server in the navigation tree to display the Print Server page.
Figure 3-15 shows the Print Server page.
Figure 3-15 Print Server page
Table 3-10 lists the parameter for the print server.
Table 3-10 Parameter for the print server
Item Description
Enable Print Server It is used to enable or disable the print server.
Printer Name The name of the printer.
Make and Model The model of the printer that user choose.
Click Save to save the settings.

User Manual 28
3.4.6 Firewall
Port Forwarding
Choose Firewall > Port Forwarding in the navigation tree to display the Port Forwarding page.
Figure 3-16 shows the Port Forwarding page.
Figure 3-16 Port Forwarding page
Table 3-11 lists the parameters for port forwarding.
Table 3-11 Parameters for port forwarding
Item Description
Services The type of service,application and game.
Please Select One The name of service, application or game.
Custom Service The server name that user-defined.
Local IP Address The internal IP address of the server.
External Port Start The first port number of the external ports.
External Port End The last port number of the external ports.
Protocol The protocol used for forwarding ports.
Internal Port Start The first port number of the internal ports.
Internal Port End The last port number of the internal ports.
User Manual 29
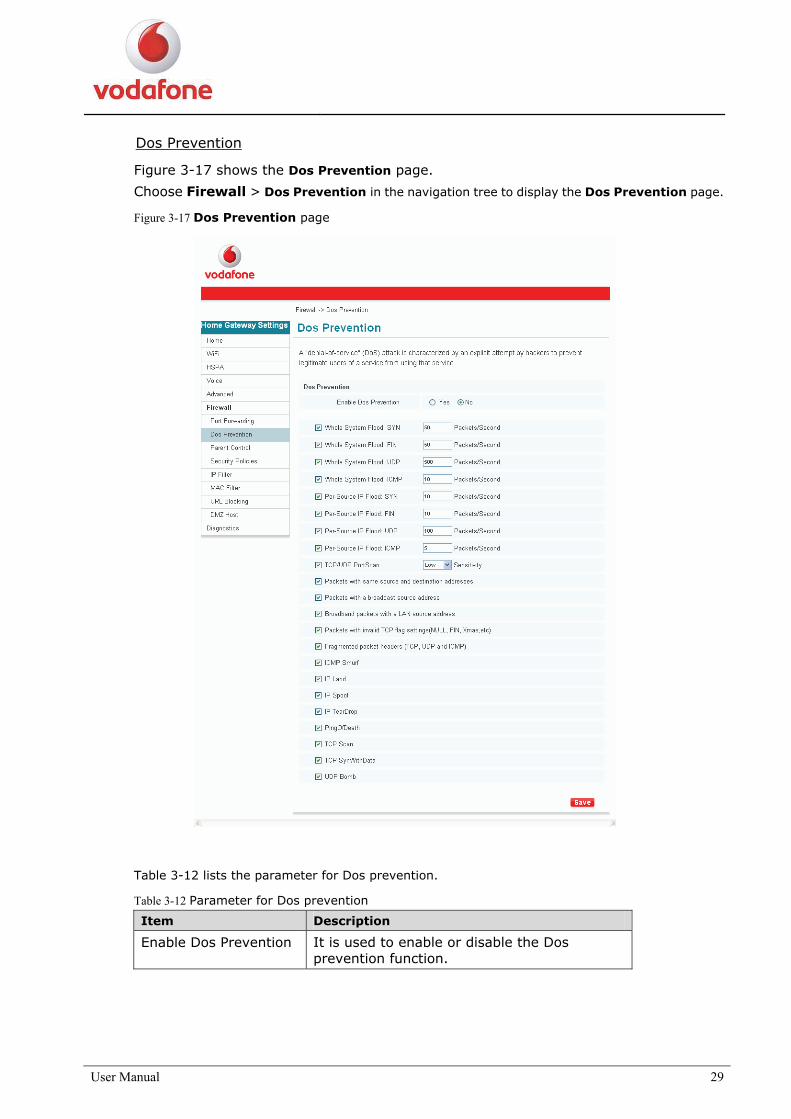
Dos Prevention
Figure 3-17 shows the Dos Prevention page.
Choose Firewall > Dos Prevention in the navigation tree to display the Dos Prevention page.
Figure 3-17 Dos Prevention page
Table 3-12 lists the parameter for Dos prevention.
Table 3-12 Parameter for Dos prevention
Item Description
Enable Dos Prevention It is used to enable or disable the Dos prevention function.
User Manual 30
Parent Control
By using the parent control function, you can control the time of Internet surfing for the children. See the following Parent Control page for reference.
Figure 3-18 shows the Parent Control page.
Figure 3-18 Parent Control page
Table 3-13 lists the parameters for parent control.
Table 3-13 Parameters for parent control
Item Description
Rule Name The name of the rule.
Select Days The weekday(s) to apply the rule.
Browser's MAC Address The MAC address of the device on which the browser is running. The device is allowed to connect to the network during only a limited period.
Other MAC Address The MAC address of the device on the LAN, to restrict the period during which it only can connect to the router.
Start Blocking Time (hh:mm) The start time in hh:mm format for applying the rule.
End Blocking Time (hh:mm) The end time in hh:mm format for applying the rule.
User Manual 31
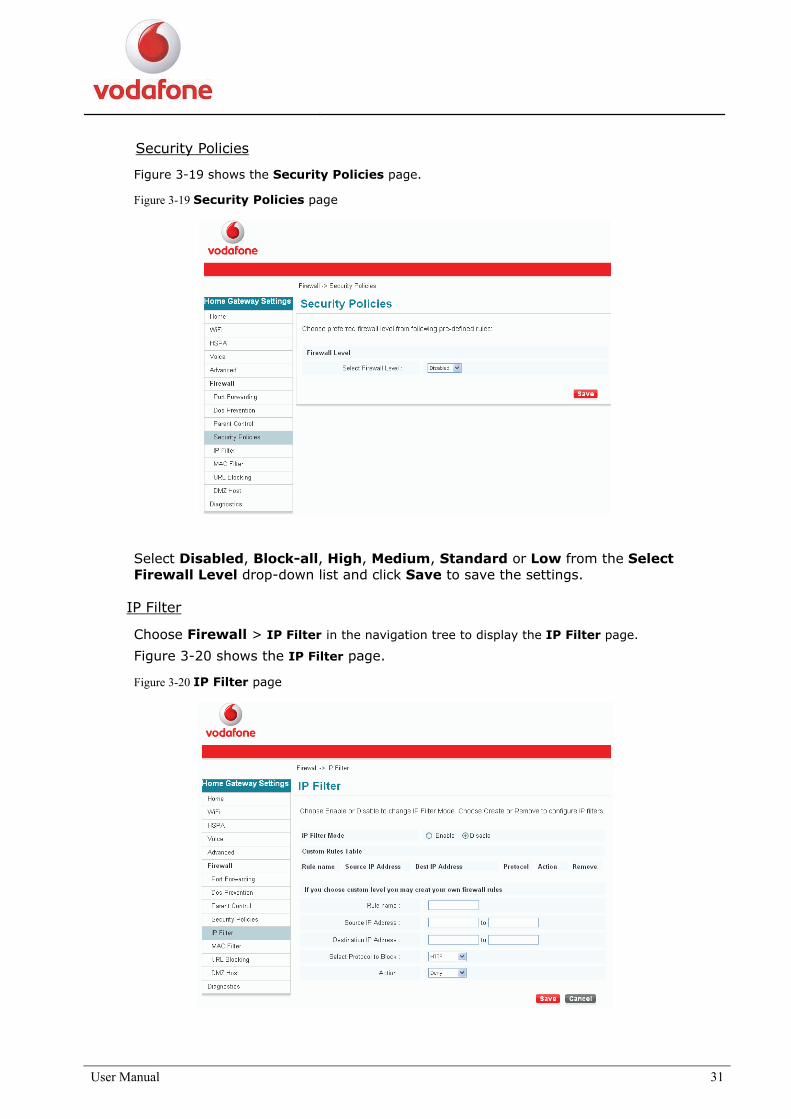
Security Policies
Figure 3-19 shows the Security Policies page.
Figure 3-19 Security Policies page
Select Disabled, Block-all, High, Medium, Standard or Low from the Select Firewall Level drop-down list and click Save to save the settings.
IP Filter
Choose Firewall > IP Filter in the navigation tree to display the IP Filter page.
Figure 3-20 shows the IP Filter page.
Figure 3-20 IP Filter page
User Manual 32
Table 3-14 lists the parameters for the IP filter.
Table 3-14 Parameters for the IP filter
Item Description
IP Filter Mode Select Enable or Disable to enable or disable the IP filter.
Rule Name The name of the rule.
Source IP Address The IP address that allows or rejects access to the Internet or the destination address.
Destination IP Address The IP address that allows or rejects the source IP address to have access to visit.
Select Protocol to Block The IP protocol that defines your customized service.
Action It is used to select whether the firewall allows or rejects the network access.
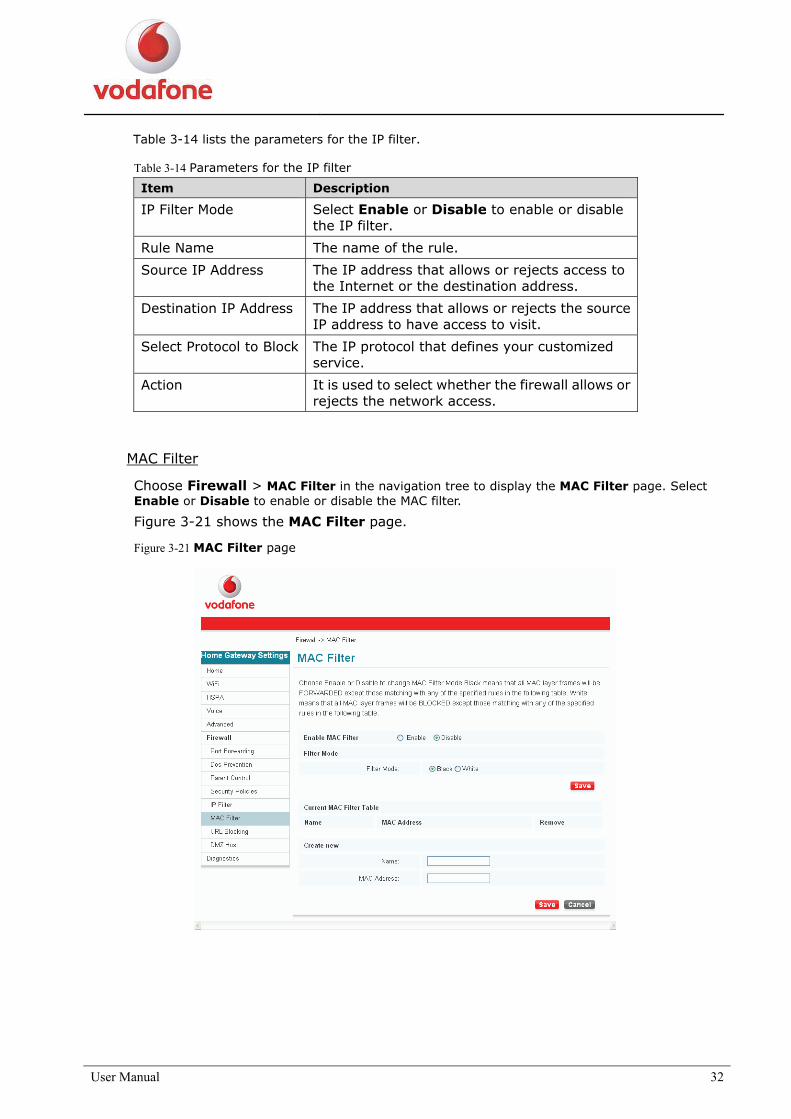
MAC Filter
Choose Firewall > MAC Filter in the navigation tree to display the MAC Filter page. Select Enable or Disable to enable or disable the MAC filter.
Figure 3-21 shows the MAC Filter page.
Figure 3-21 MAC Filter page
User Manual 33
Table 3-15 lists the parameters for the MAC filter.
Table 3-15 Parameters for the MAC filter
Item Description
Filter Mode The two optional modes are as follows: Black indicates that all MAC layer frames will be FORWARDED except those matching with any of the specified rules in the following table. White indicates that all MAC layer frames will be BLOCKED except those matching with any of the specified rules in the following table.
Name The name of the filter.
MAC address The MAC address of the client that allows or rejects access to the network in the address fields. The MAC address is in six hexadecimal character pairs.
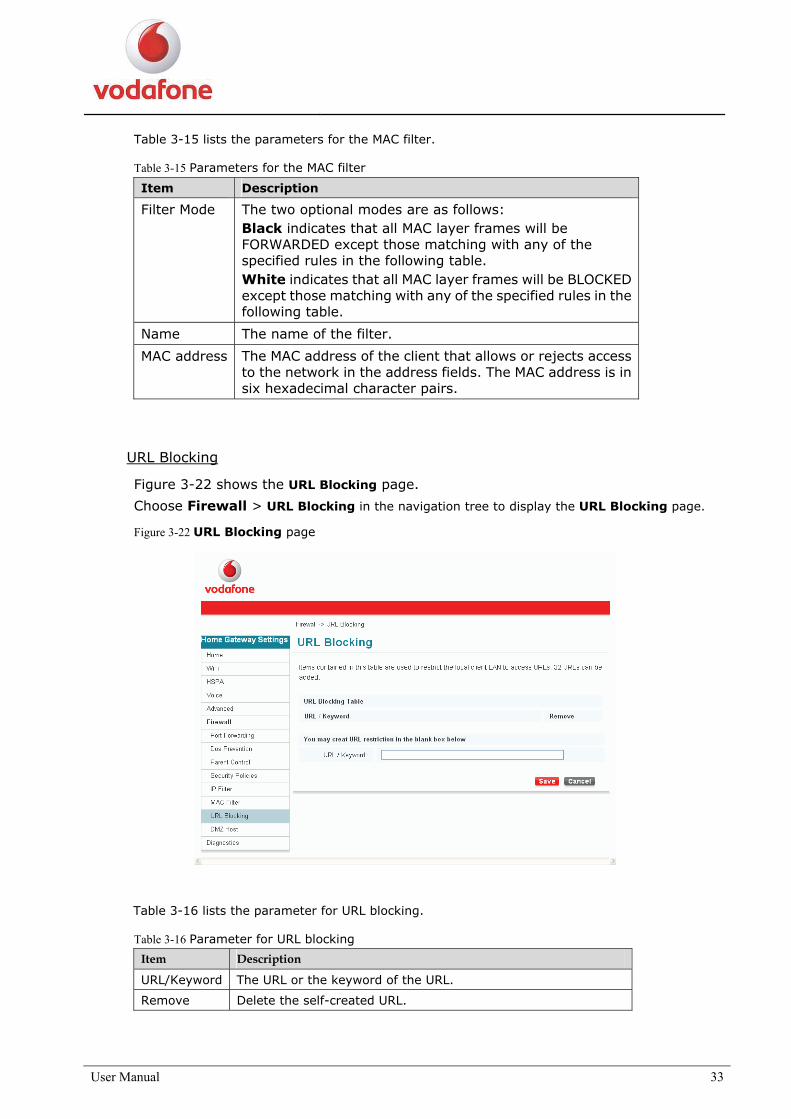
URL Blocking
Figure 3-22 shows the URL Blocking page.
Choose Firewall > URL Blocking in the navigation tree to display the URL Blocking page.
Figure 3-22 URL Blocking page
Table 3-16 lists the parameter for URL blocking.
Table 3-16 Parameter for URL blocking
Item Description
URL/Keyword The URL or the keyword of the URL.
Remove Delete the self-created URL.
User Manual 34
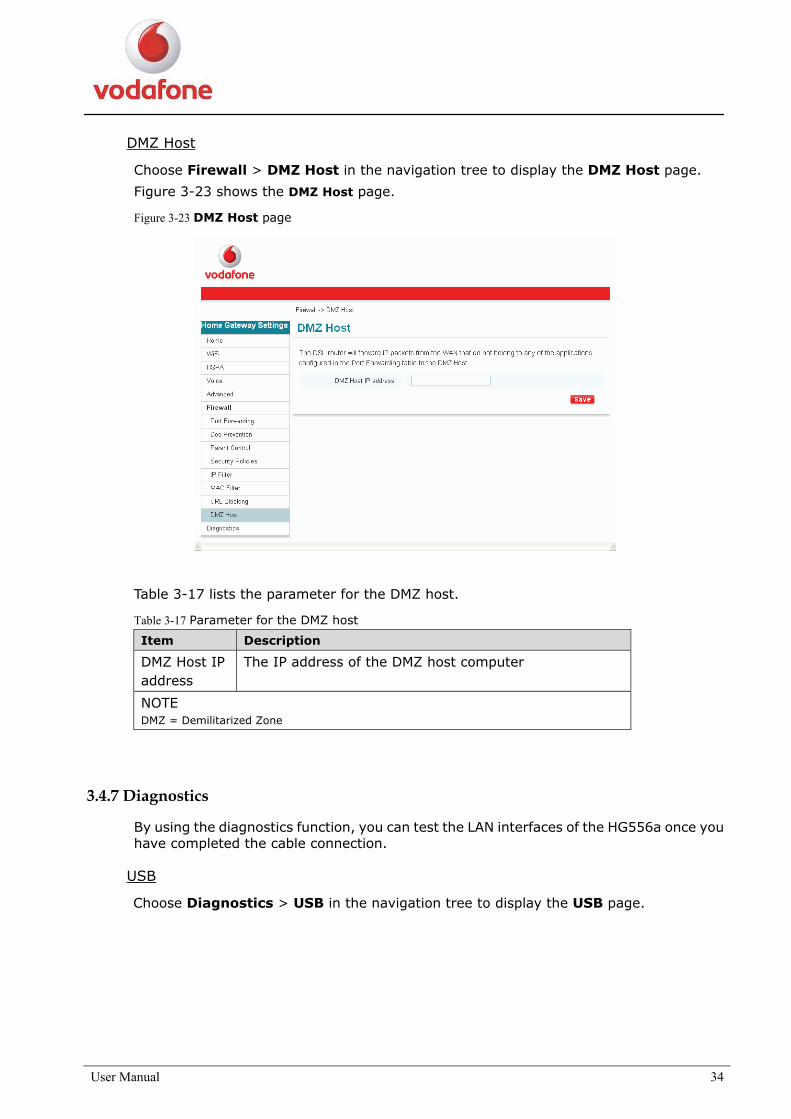
DMZ Host
Choose Firewall > DMZ Host in the navigation tree to display the DMZ Host page.
Figure 3-23 shows the DMZ Host page.
Figure 3-23 DMZ Host page
Table 3-17 lists the parameter for the DMZ host.
Table 3-17 Parameter for the DMZ host
Item Description
DMZ Host IP address
The IP address of the DMZ host computer
NOTE DMZ = Demilitarized Zone
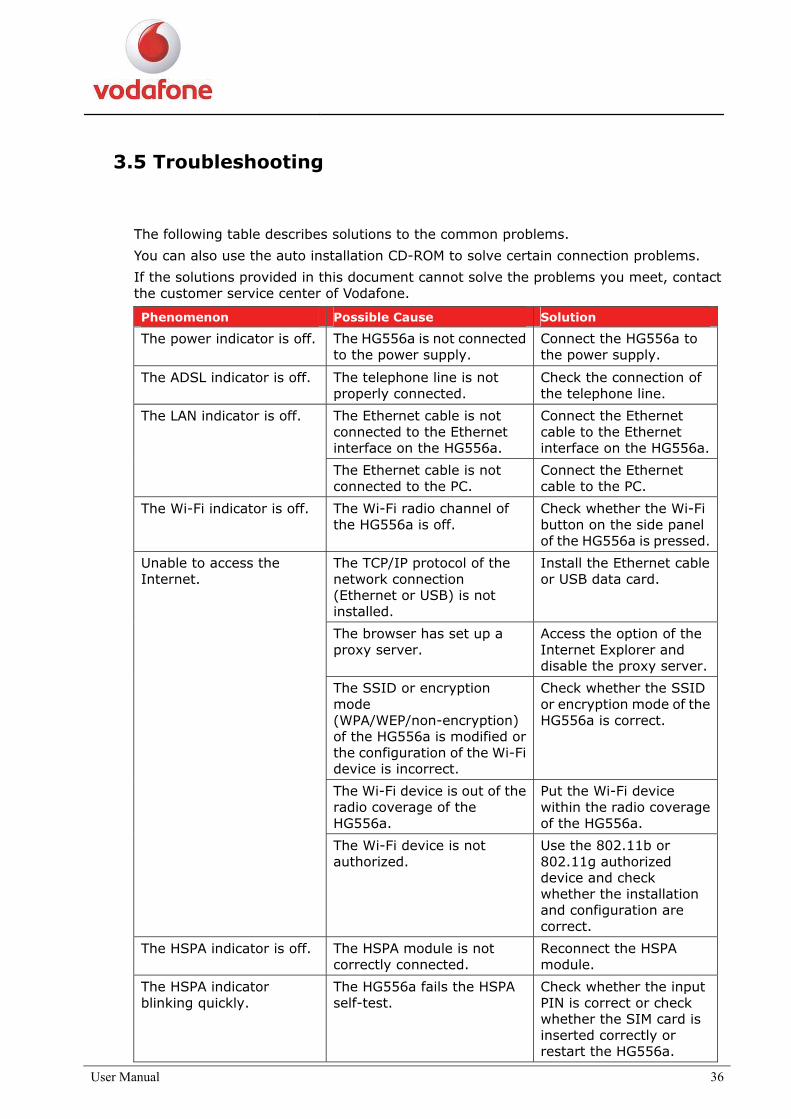
3.4.7 Diagnostics
By using the diagnostics function, you can test the LAN interfaces of the HG556a once you have completed the cable connection.
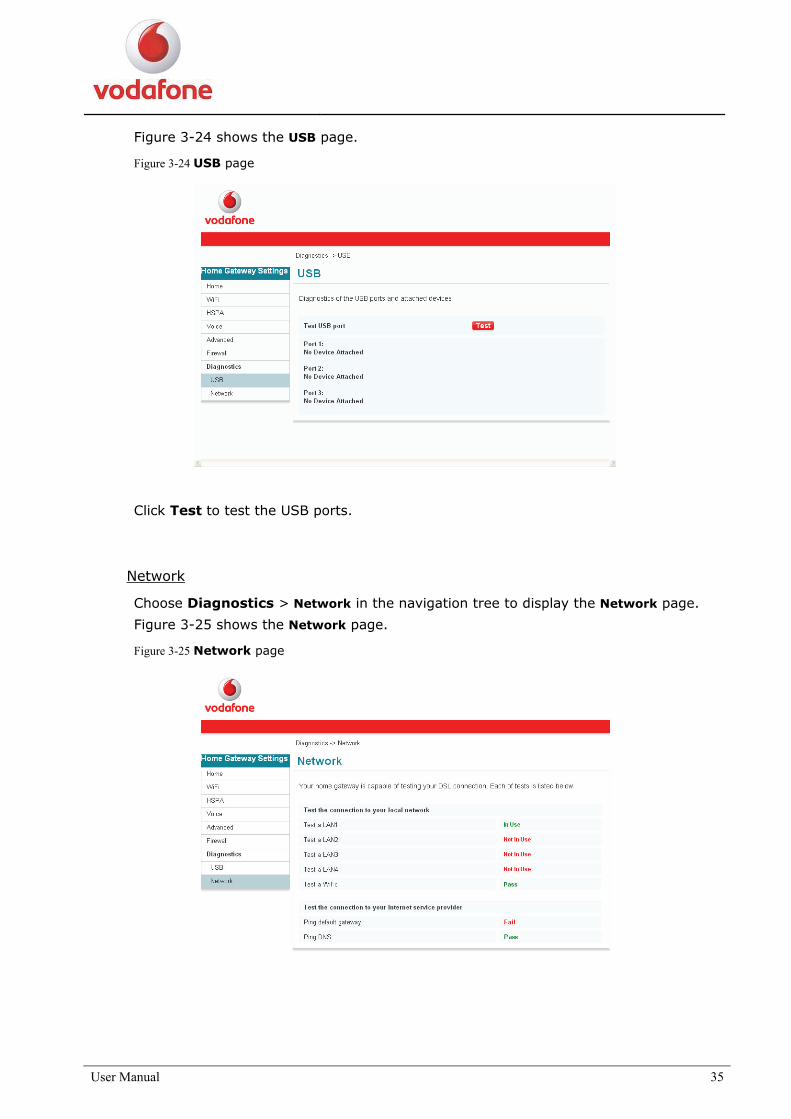
USB
Choose Diagnostics > USB in the navigation tree to display the USB page.
User Manual 35
Figure 3-24 shows the USB page.
Figure 3-24 USB page
Click Test to test the USB ports.
Network
Choose Diagnostics > Network in the navigation tree to display the Network page.
Figure 3-25 shows the Network page.
Figure 3-25 Network page
User Manual 36
3.5 Troubleshooting
The following table describes solutions to the common problems.
You can also use the auto installation CD-ROM to solve certain connection problems.
If the solutions provided in this document cannot solve the problems you meet, contact the customer service center of Vodafone.
Phenomenon Possible Cause Solution
The power indicator is off. The HG556a is not connected to the power supply.
Connect the HG556a to the power supply.
The ADSL indicator is off. The telephone line is not properly connected.
Check the connection of the telephone line.
The Ethernet cable is not connected to the Ethernet interface on the HG556a.
Connect the Ethernet cable to the Ethernet interface on the HG556a.
The LAN indicator is off.
The Ethernet cable is not connected to the PC.
Connect the Ethernet cable to the PC.
The Wi-Fi indicator is off. The Wi-Fi radio channel of the HG556a is off.
Check whether the Wi-Fi button on the side panel of the HG556a is pressed.
The TCP/IP protocol of the network connection (Ethernet or USB) is not installed.
Install the Ethernet cable or USB data card.
The browser has set up a proxy server.
Access the option of the Internet Explorer and disable the proxy server.
The SSID or encryption mode (WPA/WEP/non-encryption) of the HG556a is modified or the configuration of the Wi-Fi device is incorrect.
Check whether the SSID or encryption mode of the HG556a is correct.
The Wi-Fi device is out of the radio coverage of the HG556a.
Put the Wi-Fi device within the radio coverage of the HG556a.
Unable to access the Internet.
The Wi-Fi device is not authorized.
Use the 802.11b or 802.11g authorized device and check whether the installation and configuration are correct.
The HSPA indicator is off. The HSPA module is not correctly connected.
Reconnect the HSPA module.
The HSPA indicator blinking quickly.
The HG556a fails the HSPA self-test.
Check whether the input PIN is correct or check whether the SIM card is inserted correctly or restart the HG556a.
User Manual 37
3.6 Safety Precautions
3.6.1 RF Exposure
The device contains a transmitter and a receiver. When it is on, it receives and transmits RF energy. When you communicate with your device, the system handling the connection controls the power level at which your device transmits. Huawei declares that the device is in compliance with EN50385.
Body Worn Operation
Important safety information regarding radio frequency (RF) radiation exposure
Failure to observe these instructions could lead to higher RF exposure than the specified limit.
Regulatory Information
The following approvals and notices apply in specific regions as noted.
CE Approval (European Union)
The device is approved to be used in the member states of the EU. Huawei declares that the device complies with the essential requirements and other relevant provisions of the Radio and Telecommunications Terminal Equipment Directive 1999/5/EC (R&TTE Directive).
3.6.2 Product Handling
You are responsible for how you use your device and the related consequences.
You must always switch off the device wherever the use of a wireless device is prohibited. Use of your device is subject to safety measures designed to protect users and their environment.
Before you install and use the device, read these safety precautions carefully and observe them during operation.
Handle the device and accessories carefully and keep it in a clean and dust-free place. Place the device at a well-ventilated and dry place. Keep the device away from equipment with strong magnetic field or electromagnetic
field, such as a microwave oven, a refrigerator, or a mobile phone. Do not expose the device or its accessories to open flames or lit tobacco products. Do not expose the device or its accessories to liquid, moisture, or high humidity. Do not drop, throw, or try to bend the device or its accessories. Do not use harsh chemicals, cleaning solvents, or aerosols to clean the device or its
accessories. Do not paint the device or its accessories. Do not attempt to disassemble the device or its accessories. Only the authorized
personnel have the authority to disassemble the device. Do not expose the device or its accessories to extreme temperatures, minimum 0 and
maximum 40 degrees Celsius. Abide by the local regulations when disposing the electronic products.

User Manual 38
Safety Precautions for Children
Do not let children play with the device and its accessories. Otherwise, they may get hurt or may accidentally damage the device.
The device contains small parts with sharp edges that may cause an injury.
Device Heating
Your device may get heated during charging and normal use.
WEEE Approval
The device is approved to be used in the member states of the EU. Huawei declares that the device complies with the essential requirements and other relevant provisions of the Waste Electrical and Electronic Equipment Directive 2002/96/EC (WEEE Directive).
3.6.3 Electrical Safety
Accessories
Use accessories that are approved.
Do not connect the device with incompatible products or accessories.
Faulty and Damaged Products
Do not attempt to disassemble the device or its accessories.
Only qualified personnel can service or repair the device or its accessories.
If the device or its accessories are damp, punctured, or subjected to a severe fall, do not use it until you get an approval from the authorized service center.
3.6.4 Interference
Be careful when using the device in close proximity to personal medical devices, such as pacemakers and hearing aids.
Pacemakers
Pacemaker manufacturers recommend that a minimum separation of 15 cm be maintained between a device and a pacemaker to avoid potential interference with the pacemaker.
Medical Devices
Please consult your doctor and the device manufacturer to determine if the operation of the device may interfere with the operation of your medical device.
3.6.5 Explosive Environments
Blasting Areas
Turn off your device or wireless device in areas prone to explosions or in areas posted turn off "two-way radios" or "electronic devices" to avoid interfering with the explosions.
Lightning
Turn off your device and disconnect it from your computer during lightning weather.

User Manual 39
3.7 Glossary
ADSL
Asymmetric Digital Subscriber Line
ADSL is a technology for transmitting digital information at a high bandwidth on existing phone lines to homes and businesses. Unlike regular dial-up phone service, ADSL provides continuously-available, "always on" connection. ADSL is asymmetric in that it uses most of the channel to transmit downstream to the user and only a small part to receive information from the user. ADSL simultaneously accommodates analog (voice) information on the same line. ADSL is generally offered at downstream data rates from 512 kbit/s to about 6 Mbit/s.
ADSL2+
Asymmetric Digital Subscriber Line 2+
ADSL2plus doubles the bandwidth used for downstream data transmission, effectively doubling the maximum downstream data rates, and achieving rates of 20 Mbit/s on phone lines as long at 5,000 feet. ADSL2plus solutions will most commonly be multimode, interoperating with ADSL and ADSL2, as well as with ADSL2plus chipsets.
Browser
A computer program that allows users to view information from the Internet. To use a browser, you type in the URL of a website, and the browser then connects your computer to the website, and shows the information there on your screen.
Client
On a local area network or the Internet, a computer that accesses shared network resources provided by another computer (called a server).
DHCP
Dynamic Host Configuration Protocol
DHCP is a client-server networking protocol. Most organizations use DHCP. A DHCP server provides configuration parameters specific to the DHCP client host requesting, generally, information required by the host to participate on the Internet network. DHCP also provides a mechanism for allocation of IP addresses to hosts.
DNS
Domain Name System
A hierarchical way of tracking domain names and their addresses, devised in the mid-1980s. The DNS database does not rely on one file or even one server, but rather is distributed over several key computers across the Internet to prevent catastrophic failure if one or a few computers go down. DNS is a TCP/IP service that belongs to the Application layer of the OSI model.
Ethernet
A local area network (LAN) architecture developed by Xerox Corporation in cooperation with DEC and Intel in 1976. Ethernet uses a bus or star topology and supports data
User Manual 40
transfer rates of 10 Mbit/s. The Ethernet specification served as the basis for the IEEE 802.3 standard, which specifies the physical and lower software layers. Ethernet uses the CSMA/CD access method to handle simultaneous demands. It is one of the most widely implemented LAN standards.
IEEE
Institute of Electrical and Electronics Engineers (IEEE) is a standards organization for computer and electronic devices. Its senior members are IEEE fellows.
Internet
Largest global internet work, connecting tens of thousands of networks worldwide and having a "culture" that focuses on research and standardization based on real-life use. Many leading-edge network technologies come from the Internet community.
The most important using for Internet is: The email The World Wide Web (WWW) The transfer of data The forum of discussion To transfer data of peer-to-peer Chat The content of audio/video streaming
IP
Internet Protocol
The set of standards responsible for ensuring that data packets transmitted over the Internet are routed to their intended destinations.
IP address
An IP address is the logical address of a network adapter. The IP address uniquely identifies computers on a network. An IP address can be private, for use on a LAN, or public, for use on the Internet or other WAN.
kbit/s
Kilobit per second
A unit used to express the speed of a network.
LAN
Local Area Network
A computer network covering a small local area, like a home, office, or small group of buildings such as a home, office, or college. Current LANs are most likely to be based on switched Ethernet or Wi-Fi technology running at 10, 100 or 1,000 Mbit/s (1,000 Mbit/s is also known as 1 Gbit/s).
MAC address
It is a hardware address that uniquely identifies each node of a network.
User Manual 41
Mbit/s
Megabit per second
A unit used to express the speed of a network.
NAPT
Network Address Port Translation
NAPT enables a local area network (LAN) to use one set of IP addresses for internal traffic and a second set of addresses for external traffic.
PPPoE
Point-to-Point Protocol over Ethernet
PPPoE is a network protocol for encapsulating PPP frames in Ethernet frames. It is used mainly with DSL services. It offers standard PPP features such as authentication, encryption, and compression.
Protocol
On the Internet, "protocol" usually refers to a set of rules that define an exact format for communication between systems.
Server
A computer or program that responds to commands from a client. For example, a file server may contain an archive of data or program files. When a client submits a request for a file, the server transfers a copy of the file to the client.
Subnet mask
The technique used by the IP protocol to determine which network segment packets are destined for. The subnet mask is a binary pattern that is stored in the client machine, server or router, and is matched with the IP address.
TCP
Transmission Control Protocol
The reliable transport protocol within the TCP/IP protocol suite. TCP ensures that all data arrive accurately and 100% intact at the other end. TCP's unreliable counterpart is UDP, which is used for streaming media, VoIP and videoconferencing.
TCP/IP
A suite of communications protocols used to connect hosts on the Internet. TCP/IP uses several protocols, the two main ones being TCP and IP.
UDP
User Datagram Protocol
One of the TCP/IP suite of protocols for data transfer, which allows an application program on one machine to send a datagram to an application program on another machine.
URL
Universal Resource Locator
User Manual 42
The global address of documents and other resources on the World Wide Web.
USB
Universal Serial Bus
USB is a serial protocol and physical link, which transmits all data differentially on a single pair of wires. Another pair provides power to downstream peripherals.
Virtual server
A virtual server allows you to direct incoming traffic from the Internet (identified by protocol and external port) to an internal server with a private IP address on the LAN.
WAN
Wide Area Network
WAN usually refers to a network which covers a large geographical area, and uses communications circuits to connect the intermediate nodes. A major factor impacting WAN design and performance is a requirement that they lease communications circuits from telephone companies or other communications carriers.
Wi-Fi
Wireless Fidelity
A wireless data networking protocol generally used to connect PCs to a network. Also known as 802.11b and WLAN (Wireless LAN), it is the most common means of wireless networking and operates at 2.4 GHz.
WPA-PSK
Wi-Fi Protected Access-Pre Shared Key
WPA is an industry standard based on a subset of an early draft of 802.11i. WPA replaces WEP's keying mechanism with a more robust system, called Temporal Key Integrity Protocol (although TKIP is still based on RC4 encryption). (See full description of TKIP). WPA adds a strong message integrity check and allows for authentication using 802.1X.
WEP
Wired Equivalent Privacy
Part of the IEEE 802.11 standard (ratified in September 1999), and is a scheme used to secure wireless networks (Wi-Fi). Because a wireless network broadcasts messages using radio, it is particularly susceptible to eavesdropping; WEP was designed to provide comparable confidentiality to a traditional wired network, hence the name.
Issue: 01(2009-03-16)
Part Number: 202089